Part 1: Introduction
Part 2: The right equipment
Part 3: The happy photo shoot
Part 4: From baby bump to teenager
Part 5: Taking photos indoors
Part 6: Outdoor photos
Part 7: Family life
Part 8: Tips and tricks (I)
Part 9: Tips and tricks (II)
Part 10: Archiving, editing and presenting children's photos
Archiving photos safely
Image editing with Photoshop (by Leonie Ebbert)
Color saturation
Light and shadow
Removing skin blemishes
Spice up backgrounds
Color corrections
Lighten or darken areas
Area repair brush tool
Present children's photos
Thank you cards
Collages
Text: Jens Brüggemann
Photos: Jens Brüggemann (147), Leonie Ebbert (44), Elli Bezensek (61), Radmila Kerl (26), Ramona Prosch (5) and Kay Johannsen (4)
Sketches: Jens Brüggemann (27)
Part 10: Archiving, editing and presenting children's photos
However, taking the photos alone is not enough, because they still need to be archived, edited and presented.
Archiving photos safely
In the past, when people still took photos on film, they had practical folders where they could easily and quickly file the developed films in chronological order. Even years (or even decades) later, you could be sure that you could access the negatives in consistent quality (as long as the folders were not exposed to light, dust or moisture).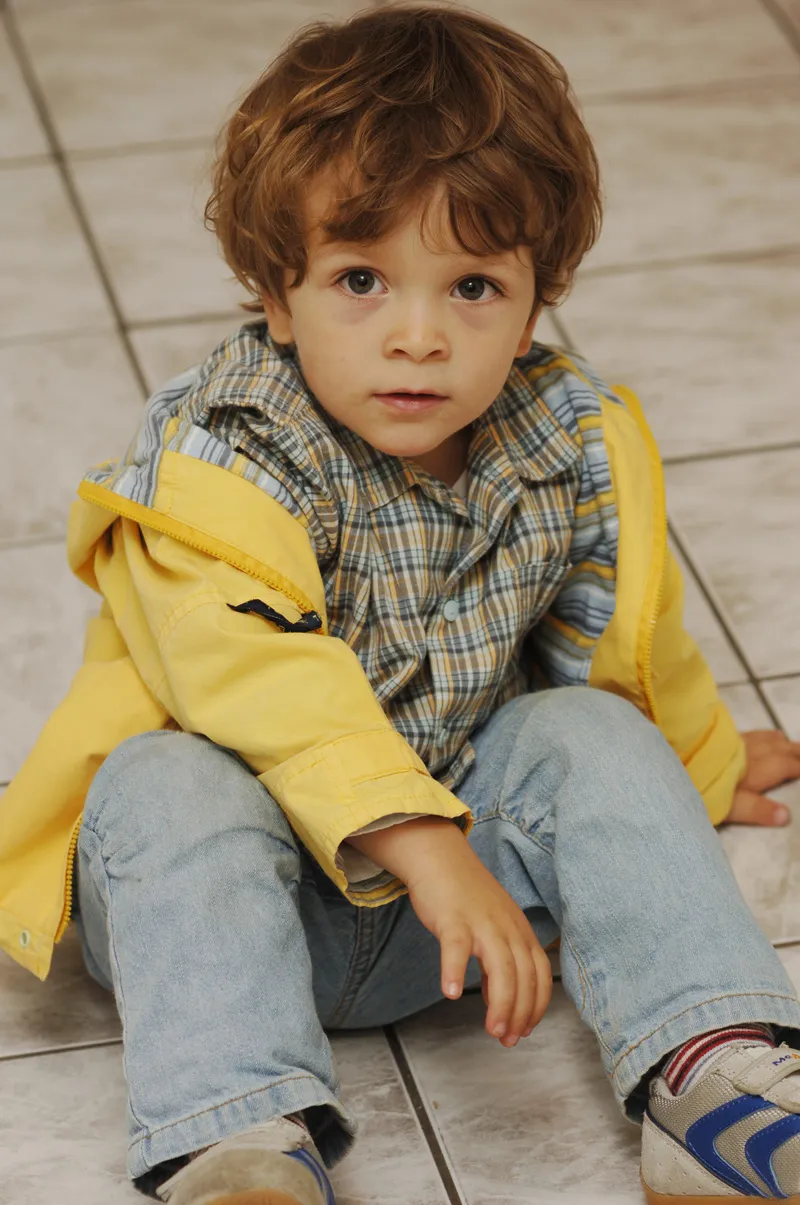
(Photo: Jens Brüggemann)
Today, you should give more thought to the storage of your digital "treasures"! It would be a great pity if individual photos or even entire shoot results were lost!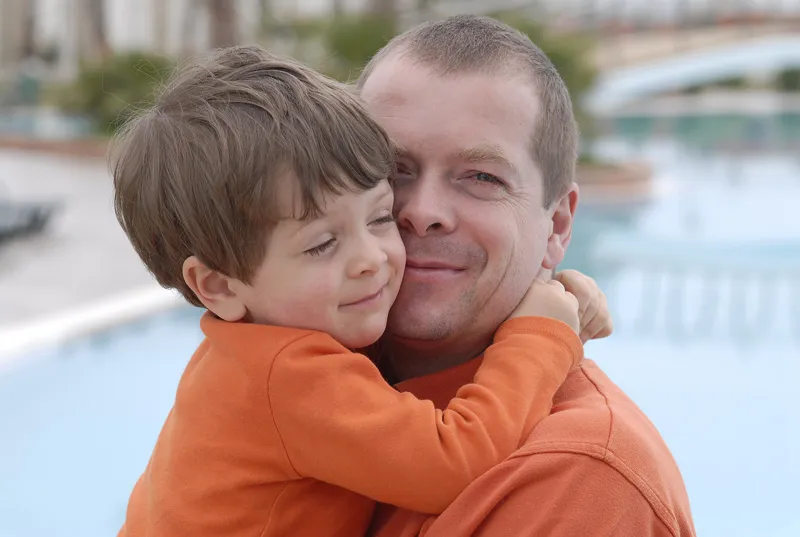
(Photo: Jens Brüggemann)
If we store the shootings exclusively on an (external) hard disk, as most people do, it can happen that the data is all lost if the hard disk is damaged. It is therefore better to save all the photos on at least two different hard disks, which are then stored in different locations.
This avoids the risk of losing valuable photos in the event of a fire. In addition, the hard disks should be put into operation from time to time and copied to a new hard disk so that the mechanical parts do not become dusty and remain functional/mobile.
RAID systems are generally very suitable for data backup, but have the disadvantage of being very expensive. There is also the risk of theft or loss through fire, so that even when using RAID systems, two systems would have to be operated in parallel at two different locations, which would lead to exorbitantly high costs.
Sometimes horror scenarios are outlined that there could be electrostatic "interference", which could result in the loss of all data on hard disks and comparable storage media . If you want to rule this out, the only option is to store at least your most important photos on gold CDs or gold DVDs.
These have been specially designed for long-term storage (the "archive stability" according to the manufacturer is approx. 100 years for DVDs and approx. 200 years for CDs) of important data (with the help of a special coating). Due to their storage capacity, however, these media are only suitable for the most important photos. The cost is approx. 2 euros for a gold DVD with a storage capacity of 4.7 GB or approx. 1.20 euros for a gold CD with 700 MB.
In summary, I suggest simply storing the photos on the relatively inexpensive external hard disks, whereby at least two different hard disks should be "mirrored" and then stored in different places for better security against theft and fire. And so that not all photos are stored exclusively digitally, I also recommend having photo books printed of the most beautiful motifs. This way you can look at your favorite children's photos undisturbed and reminisce even in the event of a total power failure ...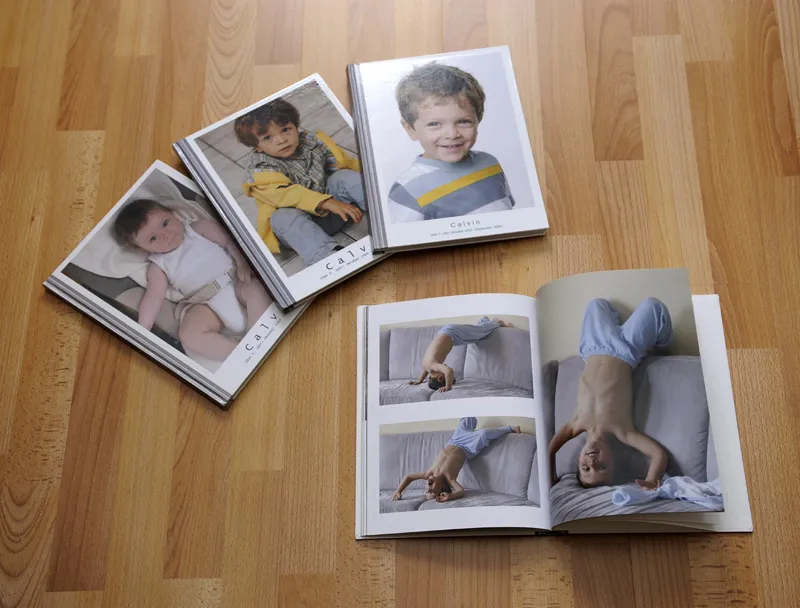
(Photo: Jens Brüggemann)
To conclude this tutorial series, here are a few tips from my assistant Leonie on the subject of image editing and presenting children's photos:
Image editing with Photoshop (by Leonie Ebbert)
Individual editing is very important to me in my work as a photographer. But you shouldn't be able to see that anything has been changed. Less is sometimes more!
Color saturation
For example, I like to take the color saturation out of some of my children's photos (see second photo).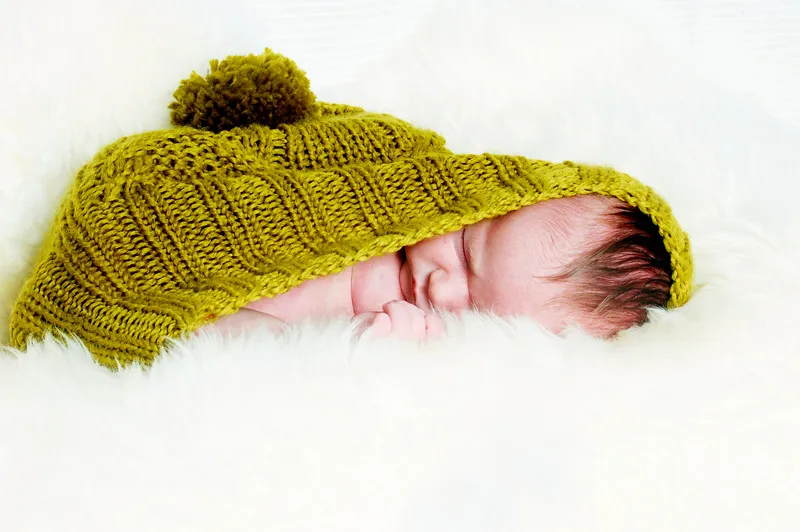
(Photo: Leonie Ebbert)
To my taste, this makes the edited photo look a little more "classy".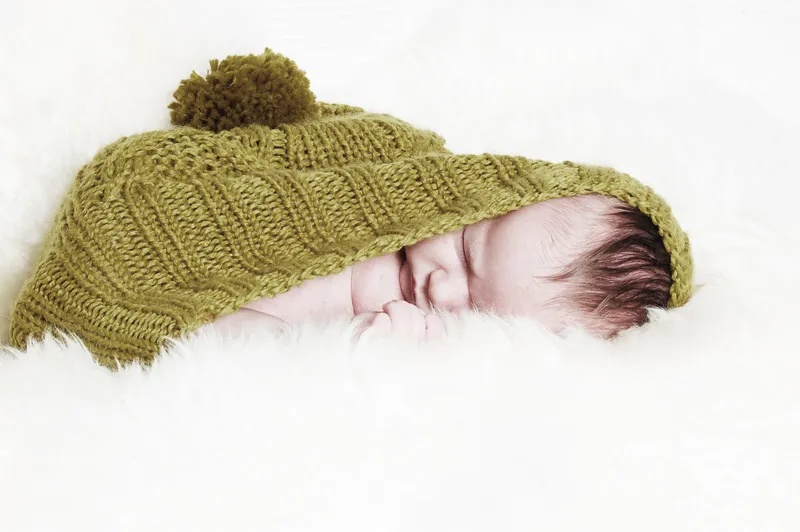
(Photo: Leonie Ebbert)
This is a nice alternative to the normal colors and also to black and white.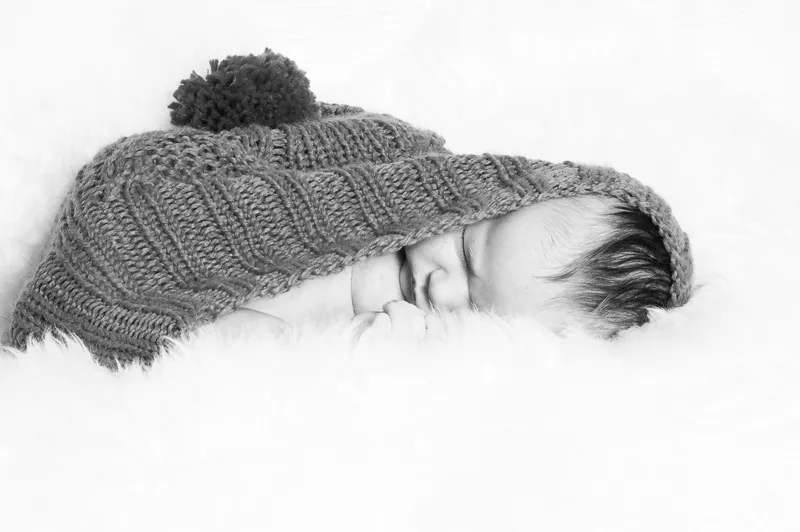
(Photo: Leonie Ebbert)
Light and shadow
I achieve the perfect effect in a picture using the gradation curves or brightness/contrast functions. It sometimes happens that I have shot a great picture in terms of expression and composition, but the light is not one hundred percent right. To optimize the image, I maximize or minimize the amount of light in the image.
Removing skin blemishes
Newborns often have so-called newborn acne on their face. These are small pimples that appear more frequently on the face after birth. In such unique photos, however, the baby's skin should look as soft and delicate as possible; this is what many parents want. Just as the skin of a newborn baby is expected to be. Only then does the delicate and fragile little creature really come into its own.
There are two ways to remove spots: the copy stamp and the touch-up tool. Both tools can recognize the normal skin texture and can therefore be moved over the face like a make-up brush to "paint over" any blemishes that do not match the skin texture.
However, for the majority of the pictures, I mainly remove the parents' skin imperfections if they were also photographed, as they want to look as good as possible in the photos. So if the make-up couldn't cover everything up, I simply use Photoshop to help.
But it's not just pimples that fall victim to the touch-up tools. Every bump and scratch can be replaced with clean, soft skin if desired.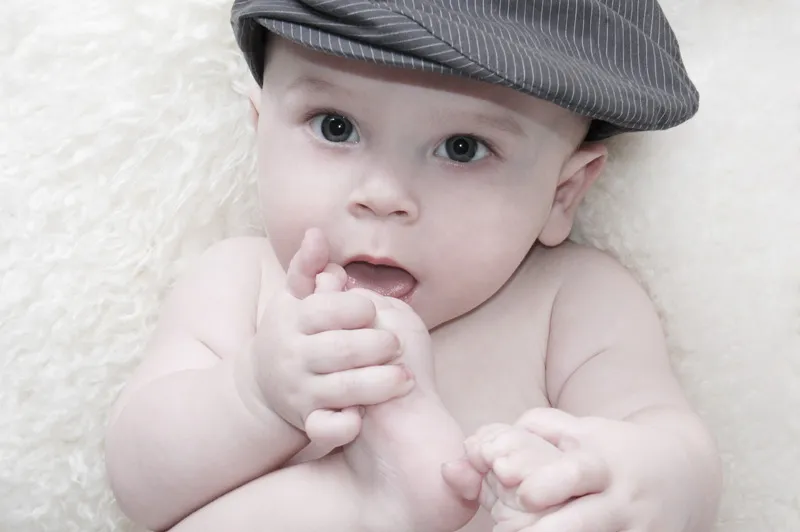
(Photo: Leonie Ebbert)
Spice up backgrounds
An uneven background can distract from the children, who should actually be the center of attention, so it is necessary to replace it with a flat, even background. As you can clearly see in the comparison of the sample images, there are three different objects (window, curtain and porcelain figurine) in the original that are causing unrest.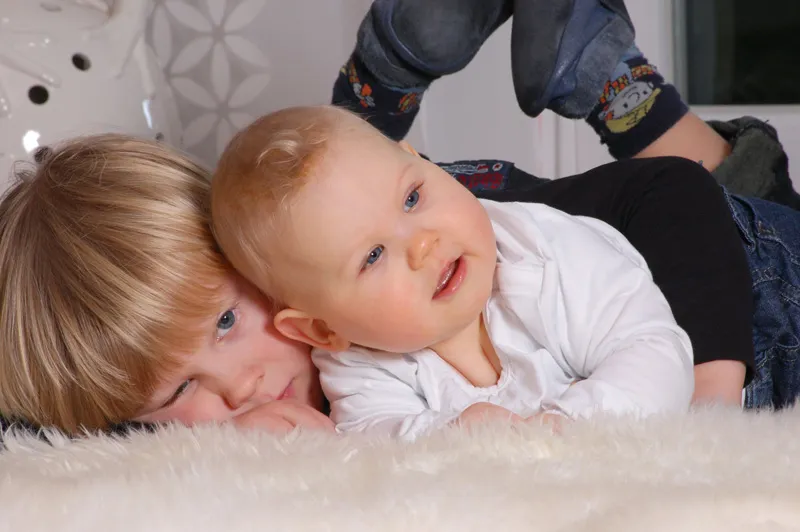
(Photo: Leonie Ebbert)
I use the copy stamp and the touch-up tool to transform the background into a flat, white surface.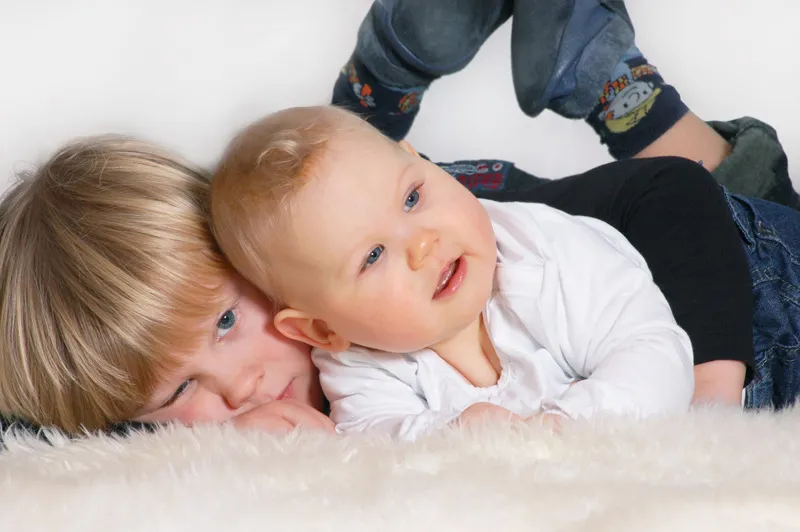
(Photo: Leonie Ebbert)
Color corrections
In some pictures, the color behavior does not correspond to reality. For example, too much red (caused by the color cast of a ceiling lamp that has not been switched off) makes it look as if the baby has been lying in the sun for too long. This means that the rosy skin color appears red or pink.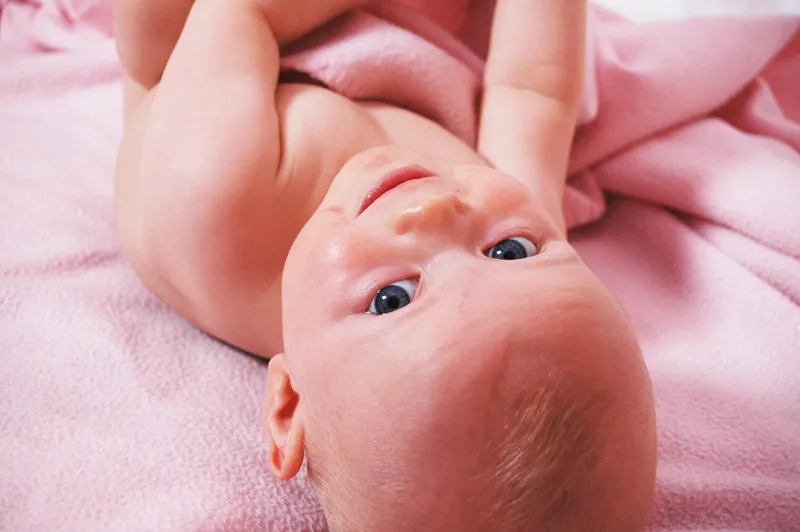
(Photo: Leonie Ebbert)
But with Photoshop, I manage to remove the red cast from the images in such cases and thus restore the naturalness of the image.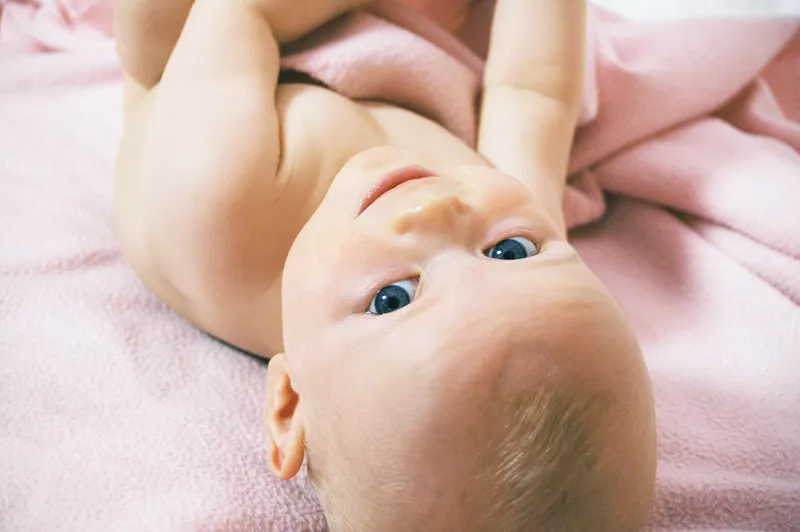
(Photo: Leonie Ebbert)
With the color balance function in Photoshop, it is possible to make color corrections. To eliminate the aforementioned red cast, red components are removed (this means adding a higher proportion of cyan).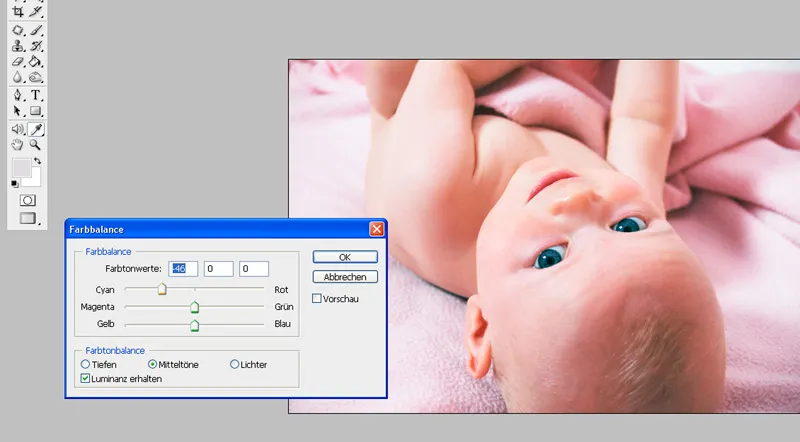
(Photo: Leonie Ebbert)
Another color correction option is very special: In this example image, you can see a pink basket and a green plastic ball on the left.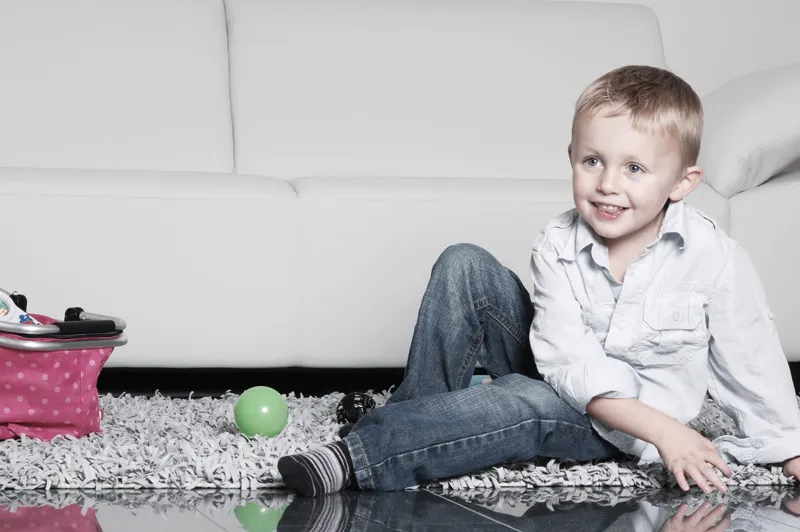
(Photo: Leonie Ebbert)
Since these colored objects did not fit into the uniform color concept, I used the brush tool (make sure to paint the object in question exactly!) to color them a matching blue color. Open a new layer and paint over the desired object in the desired color using the normal brush tool. Then switch from Normal to Hue in the layer window.
(Photo: Leonie Ebbert)
The blue color covers the object, but without destroying all contours and structures. The newly painted object thus fits perfectly into the intended color concept.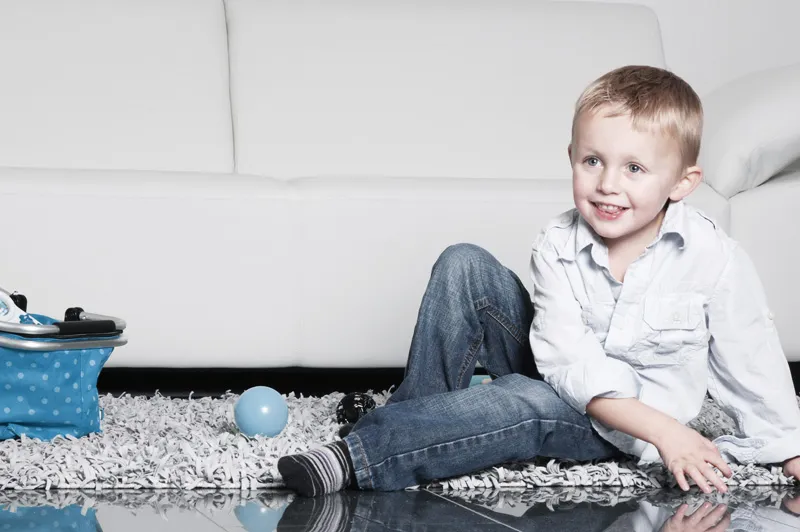
(Photo: Leonie Ebbert)
Lighten or darken in places
In this example picture, you can still see the shadows of the couch. To remove these without having a blotchy surface afterwards, we use the dodge tool. It is used to simply lighten dark areas. However, there is one more point to bear in mind so that you do not unintentionally lighten areas that should not be touched. In this example image, you need to lighten some areas in an area that is actually light.
To do this, set the area to highlights so that the program notices that it is not the dark jeans or the head that should be brightened, but only the white, bright area. If you leave the area on Shadows or Midtones, the contours of the baby may disappear. You would no longer be able to see any real sharpness.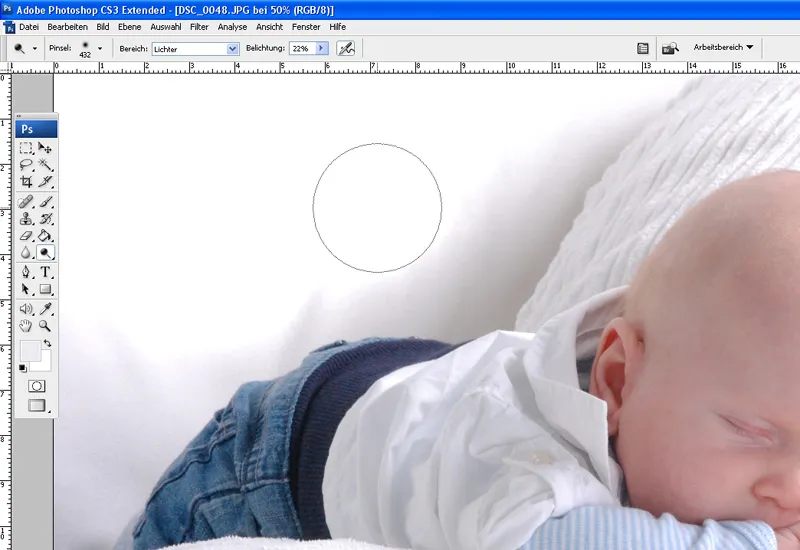
(Photo: Leonie Ebbert)
The result of the brightener compared to Before...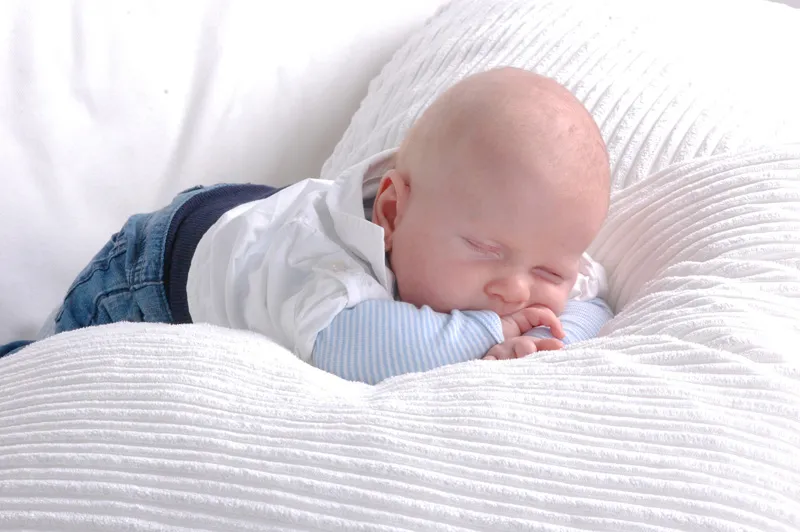
(Photo: Leonie Ebbert)
... to after clearly recognizable: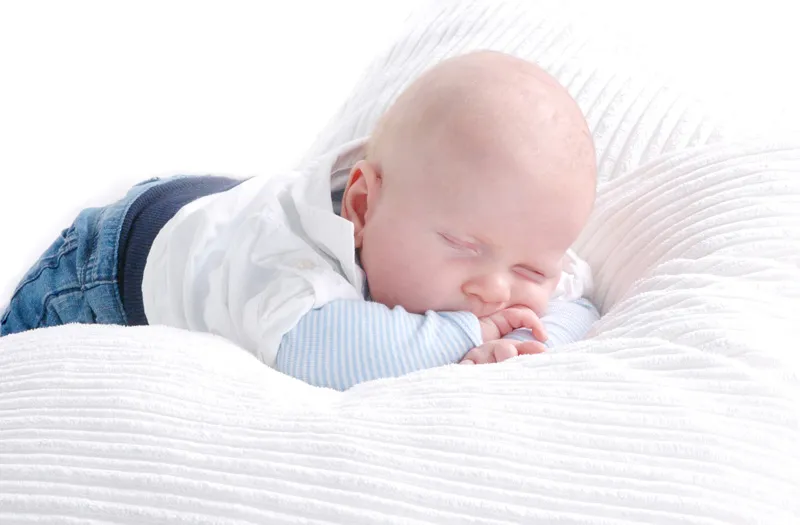
(Photo: Leonie Ebbert)
Area repair brush tool
This tool has the same background in image editing as the copy stamp and the touch-up tool.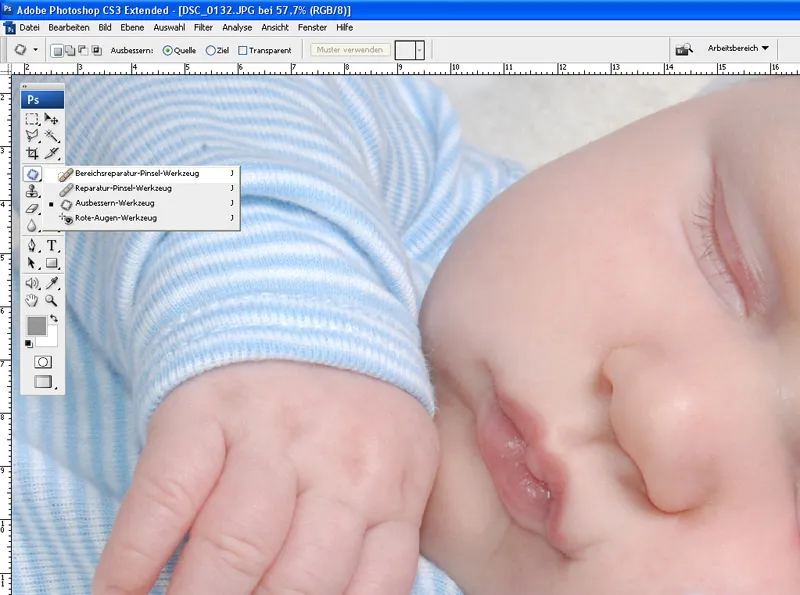
(Photo: Leonie Ebbert)
This tool can be used quickly and easily for small spots. It looks similar to the brush tool and can be set to any brush size. If you now stroke over a pimple with the tip of the brush, this area automatically adapts to the surrounding skin structure. However, you must be careful if you want to remove a pimple directly next to the eye, for example. It could then happen that the brush tool takes a part of the eye to touch up the area. I therefore recommend using the touch-up tool in such critical cases.
Presenting children's photos
There are now virtually unlimited ways to present your best children's photos: Printed on canvas, behind acrylic, on coffee mugs or mousepads, on shopping and laptop bags, postcards, calendars and photo books, invitation and thank you cards and much more. The two most frequently chosen forms of presentation are presented below.
Thank you cards
Of course, the whole family and circle of friends want to know about the birth of a new baby. Photoshop with its many functions can also be used for this purpose.
With thank you cards, the main thing is to select a beautiful picture or several beautiful pictures and set them in the desired format. First of all, the format of the card must be defined: Under File, select the New function and specify the height and width of the card.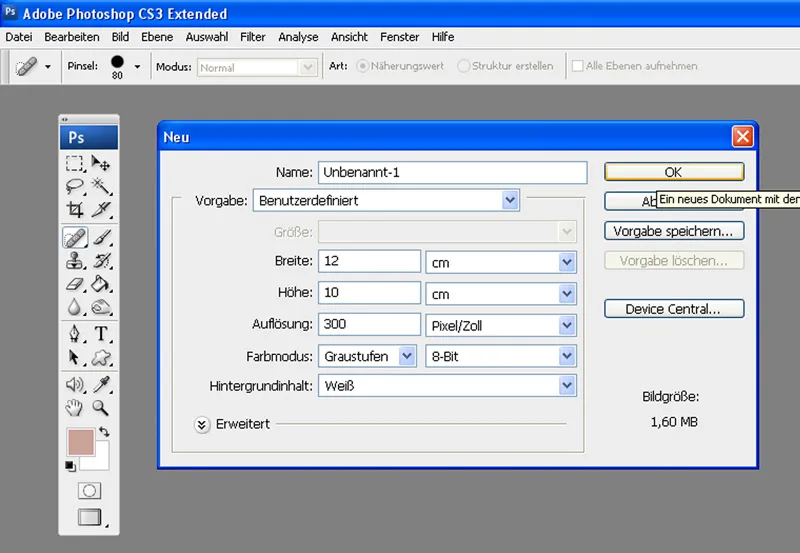
(Screenshot: Leonie Ebbert)
Once this is done, the desired images are dragged into the program and then into the prepared format.
You will quickly notice that the image(s) do not fit the format in terms of size. This means that they need to be adjusted. Select the first image and press the Ctrl+T keys in combination. Now you have the option of using the Shift key to drag the corners so that the image is reduced or enlarged.
Depending on the color of the image, the color scheme of the map is also defined. For example, you can use the pipette to select any color from the image.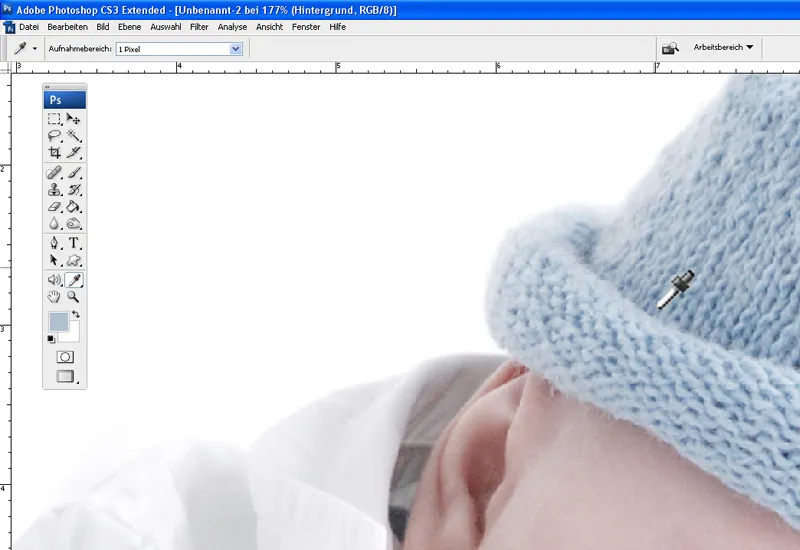
(Photo: Leonie Ebbert)
Now use the paint bucket to color the original white background with the selected color. Creative brush elements can now be used to give the card a special touch. So that grandma, grandpa and co. can find out the name and all the important dates as tastefully as possible, you now need to add the name, date of birth, height and weight to the card. To do this, open a text box, choose a nice, suitable font and type away diligently...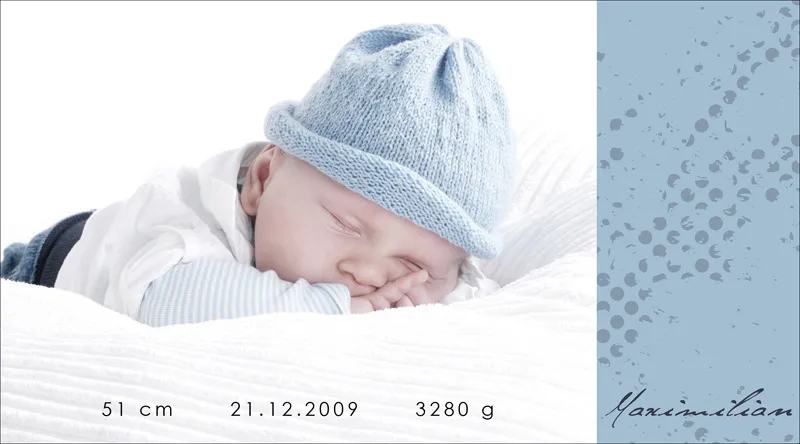
(Photo: Leonie Ebbert)
The finished "product" can look like this, for example:
(Photo: Leonie Ebbert)
Collages
A collage consists of several pictures, preferably taken from a series or that fit together thematically (for example, only photos of the kids playing soccer). Collages are made to either give as gifts to friends and relatives or to frame for your own four walls.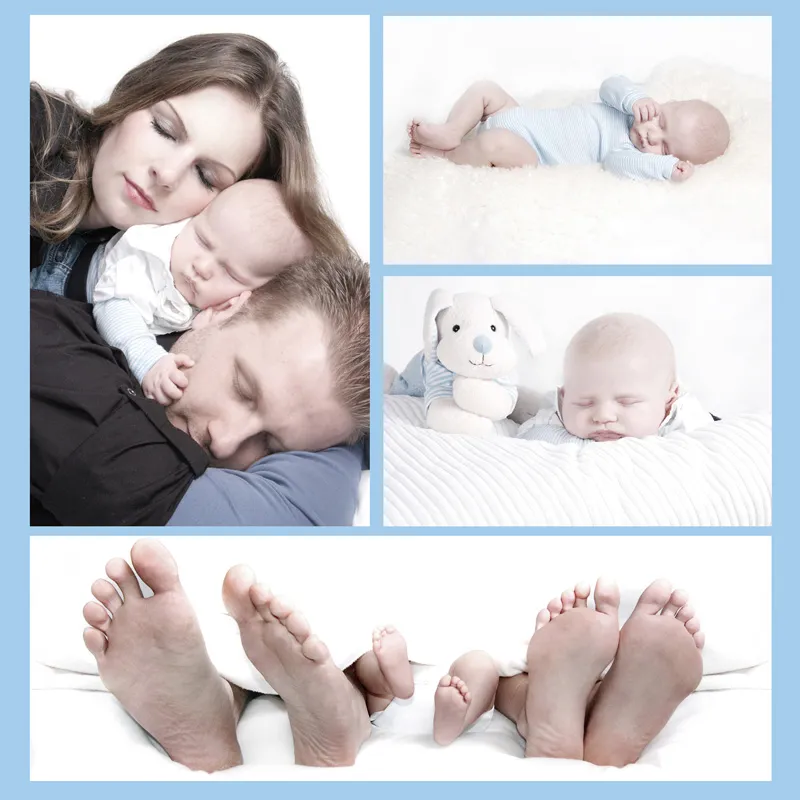
(Photo: Leonie Ebbert)
Collages allow you to showcase the pictures much more beautifully than is possible with a single picture.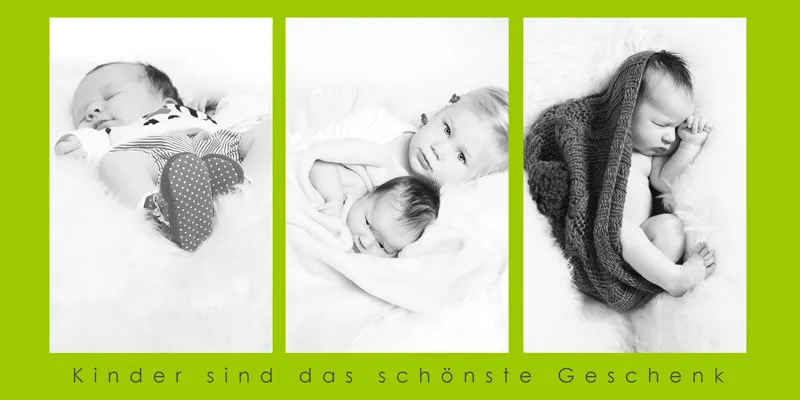
(Photo: Leonie Ebbert)
The process for creating a digital collage is the same as for a thank you card. The difference is that you don't necessarily have to add text elements.
It's so easy to present your selected children's photos even more beautifully!
We wish you lots of fun and success
with your children's photography
Jens Brüggemann & Team!
