The polygon pen is actually quite an intuitive tool. However, you can only really make the most of its possibilities if you know how it works in which mode and with which additional button.
In this tutorial, we will go through the various editing modes step by step and take a look at the functions offered by the polygon pen. Incidentally, the polygon pen replaces the former polygon create tool; we can find it in the Mesh>Create menu.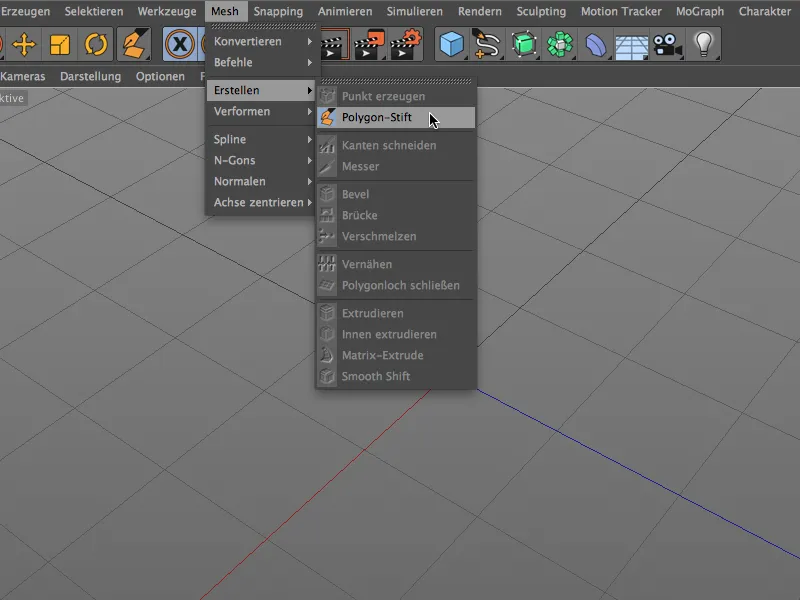
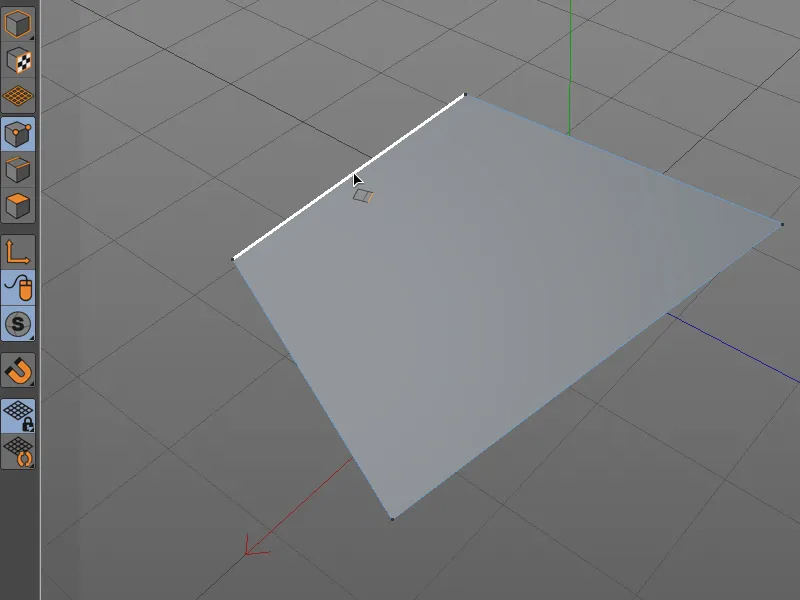
Let's start with a note on how the polygon pen works. Since version 16, the so-called tweak mode (mouse icon) in the editing modes palette allows us to automatically recognize, select and immediately edit the elements (points, edges or polygons ) located under the mouse pointer without having to select them directly.
This tweak mode is essential for working with the polygon pen, so it is always active within the tool, even if we have actually deactivated it in the palette. If you switch from the polygon pen to another tool, the editing mode we have specified applies again.
Creating and editing points
Let's start by creating polygons with points. With point edit mode activated, we can draw polygons freely by setting points in the editor view with a mouse click, as we are used to with the polygon tool. As soon as we click on the starting point, the polygon is closed.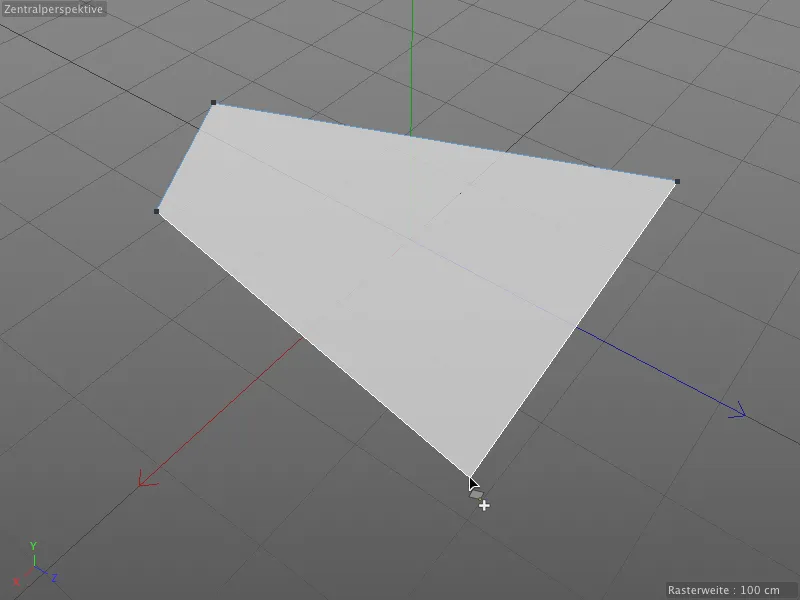
As Cinema 4D can also process N-gons, i.e. polygons with more than four sides, we have the option Create N-gons in the settings dialog of the polygon pen. This allows us to determine whether an N-gon is created when more than four points are set or whether an automatic subdivision is created.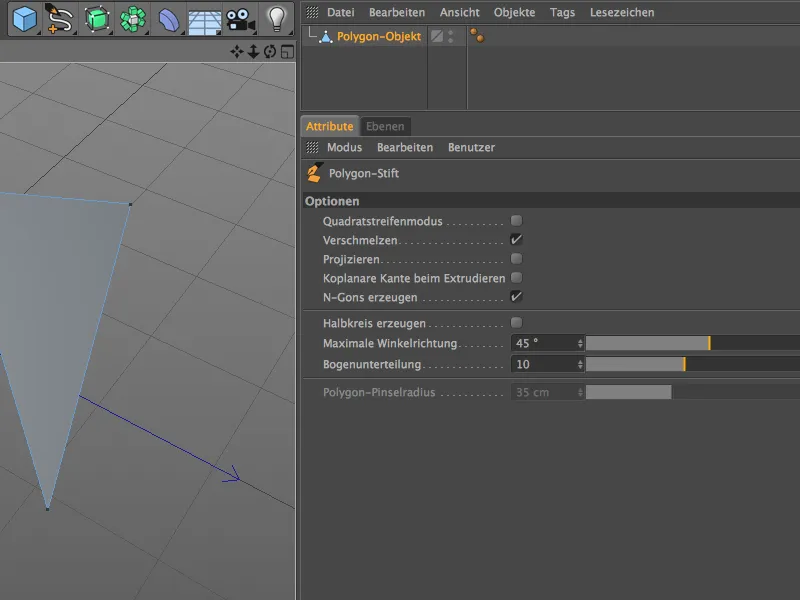
Of course, working with N-gons is very convenient and tidy, but you should bear in mind that they are still divided internally into triangles and quadrilaterals. Whenever possible, four-sided polygons should be used.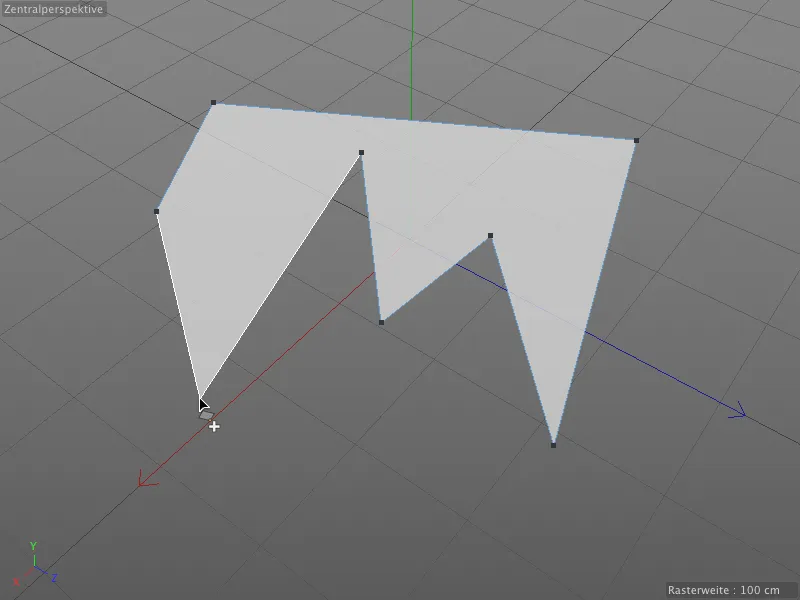
Thanks to the automatic tweak mode of the polygon pen, it is sufficient to move the mouse pointer over the desired element to select it. It can then be edited immediately by holding down the mouse button.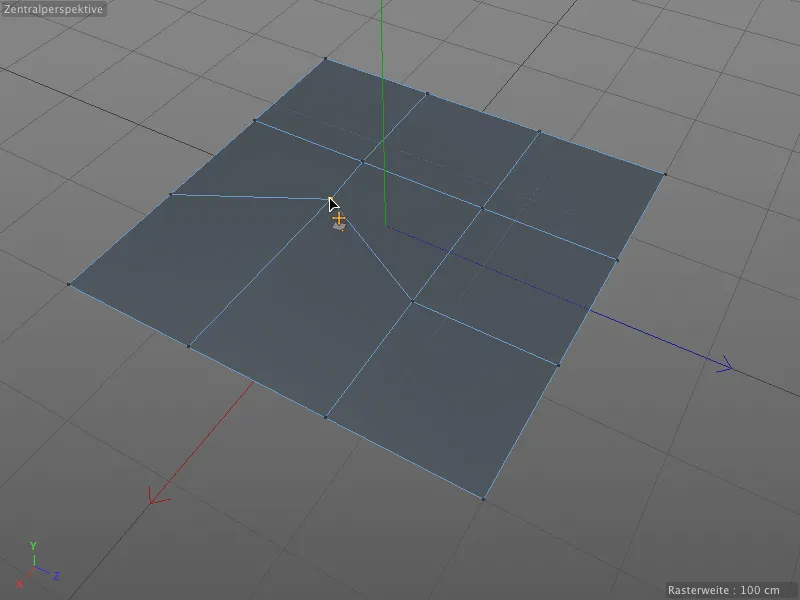
The polygon pen also offers automatic snapping during editing. When moving one point to another, the selected point snaps to another as soon as it comes very close to it.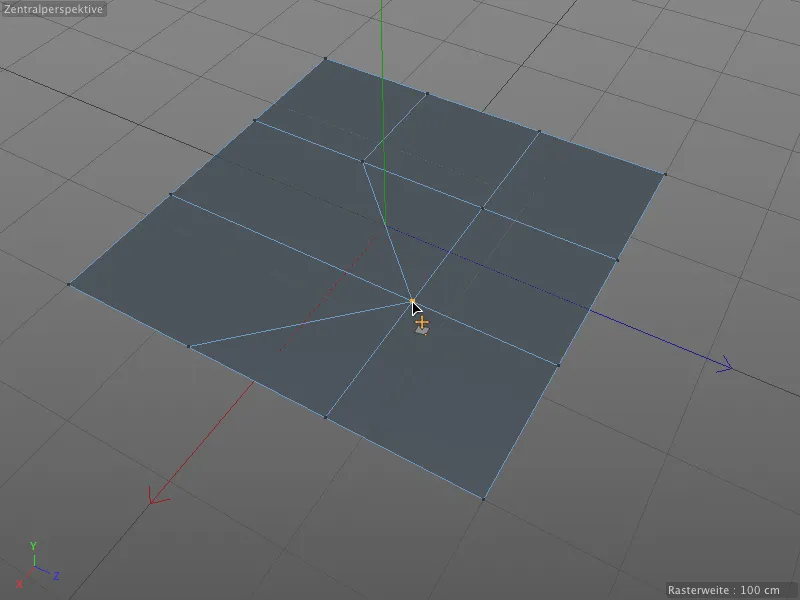
In this way, polygons can be restructured and recombined very quickly without having to delete points and reconnect the polygons.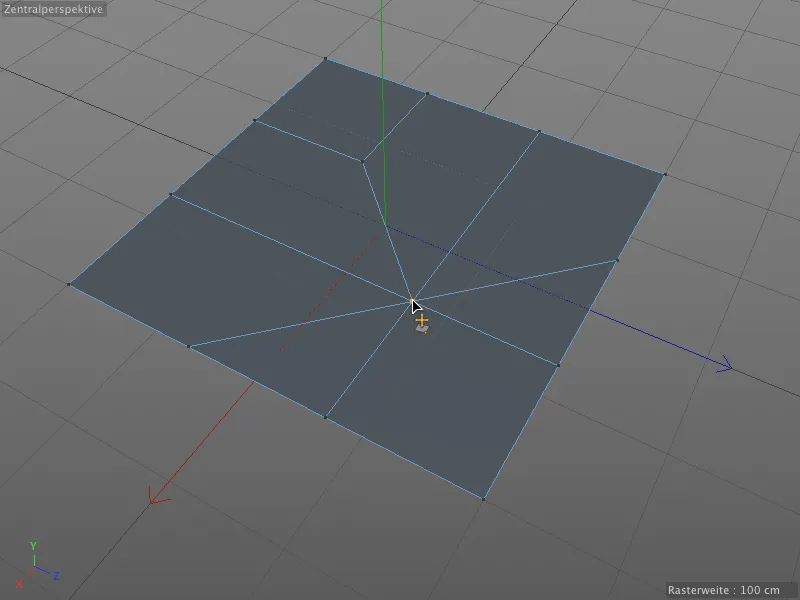
The option Merge in the settings dialog of the polygon pen is responsible for snapping and merging points (and edges). If this option is deactivated, points are simply moved in space.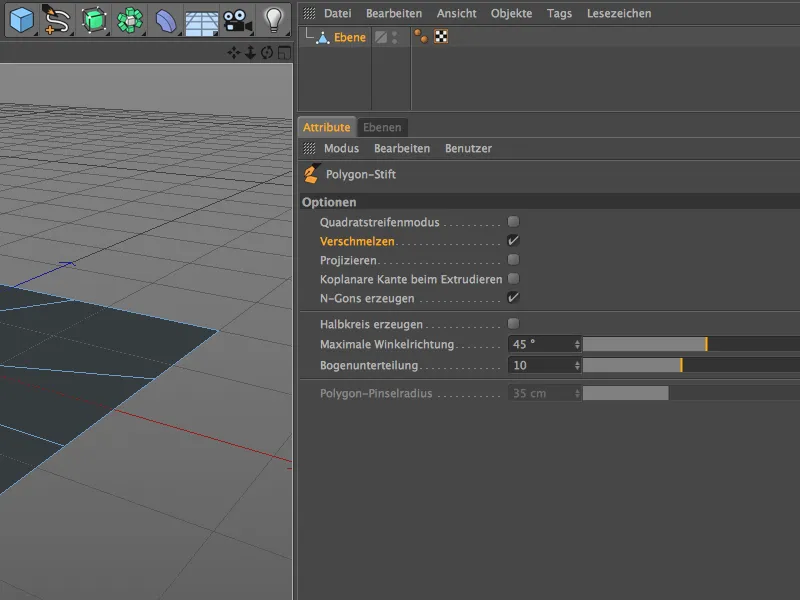
So far, we have learned how to create and edit points with the polygon pen without adding a button.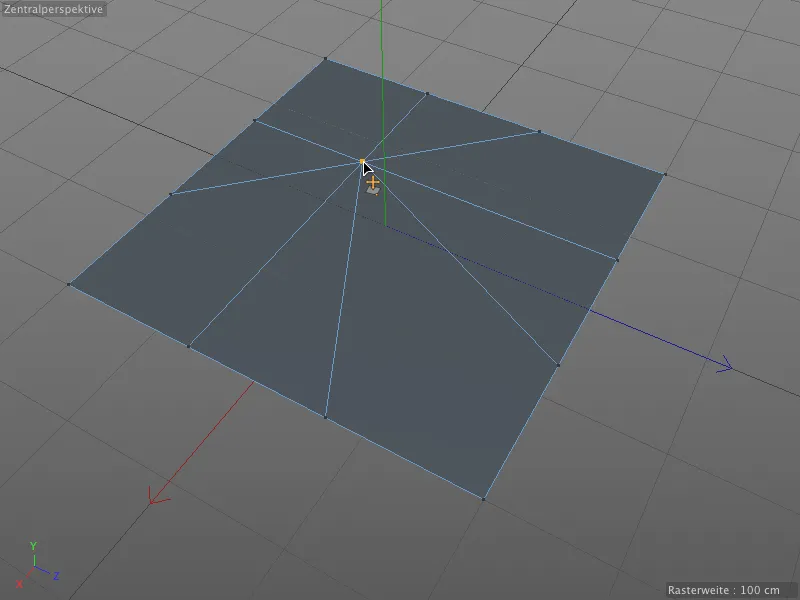
The function of the polygon pen changes if we also hold down the Ctrl key and click on a point (or an edge or a polygon): The point (or edge or polygon ) is then deleted.
If the clicked point is free, as on all outer edges of our example layer, the polygon is closed via the neighboring points (can be seen on the left and right). If, on the other hand, the clicked point is inside, ...
... the polygons adjacent to the point are combined. In this case, because the Create N-gons option is active, they are combined into one N-gon.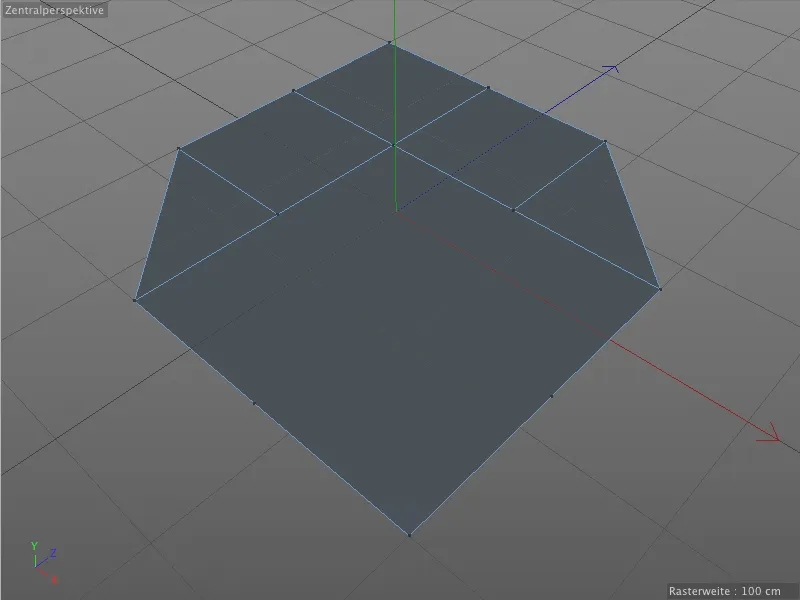
If, on the other hand, we hold down the Ctrl key and drag a point, we create new polygons from the extruded new point and the other adjacent points using the polygon pen.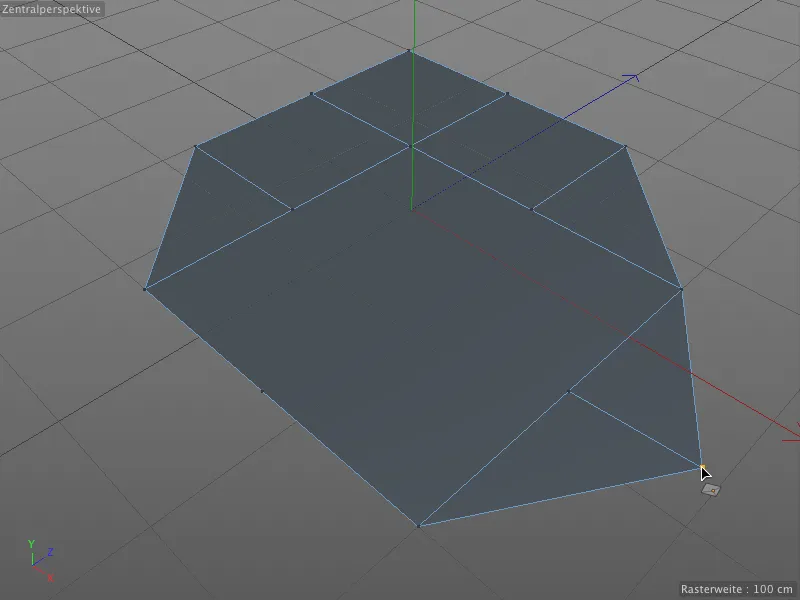
We can insert new points by clicking on an edge with the polygon pen. With the Shift key held down, we only need to click with our mouse pointer on the point of the edge where the new point is to divide the edge.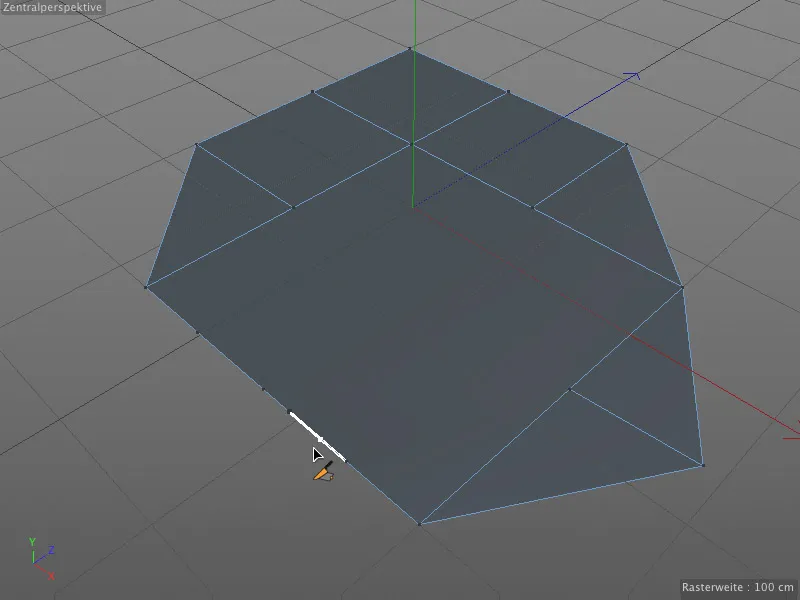
If we do not hold down the Shift key, the polygon pen works in a similar way to the knife tool. After clicking on a point, simply move the mouse pointer to another point to create a connection and divide the polygon.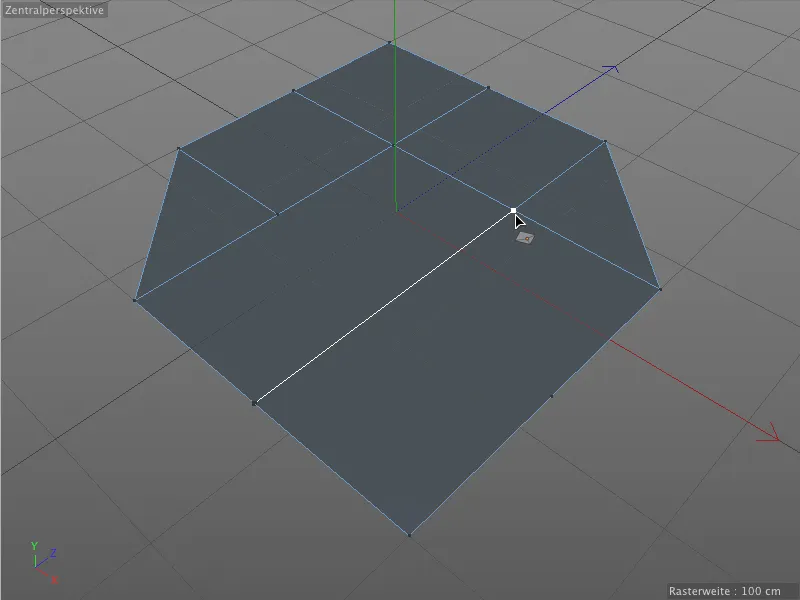
Thanks to snapping, this works perfectly with existing points. But simply clicking on an edge also creates a new point from which a cut to another edge can be made.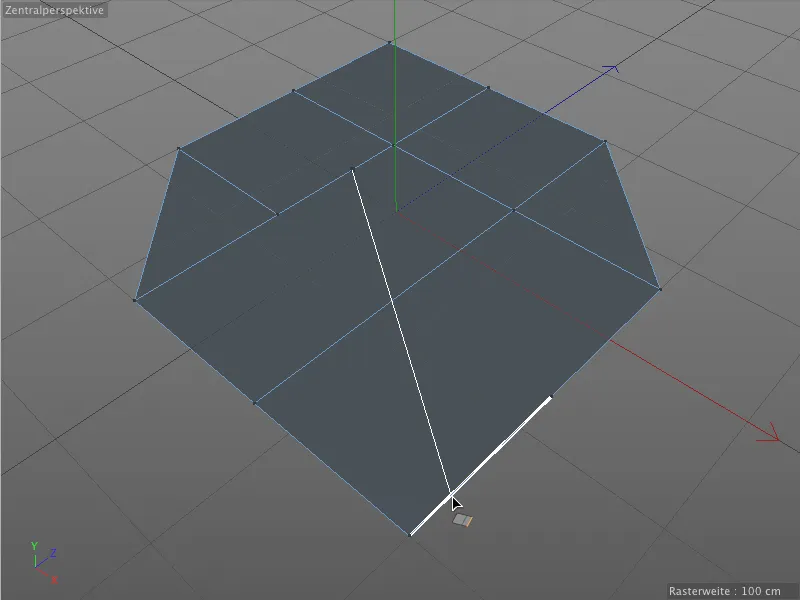
Creating and editing edges
Polygons can also be created directly by drawing edges. In edge editing mode, we set the end points of the edges by clicking with the polygon pen.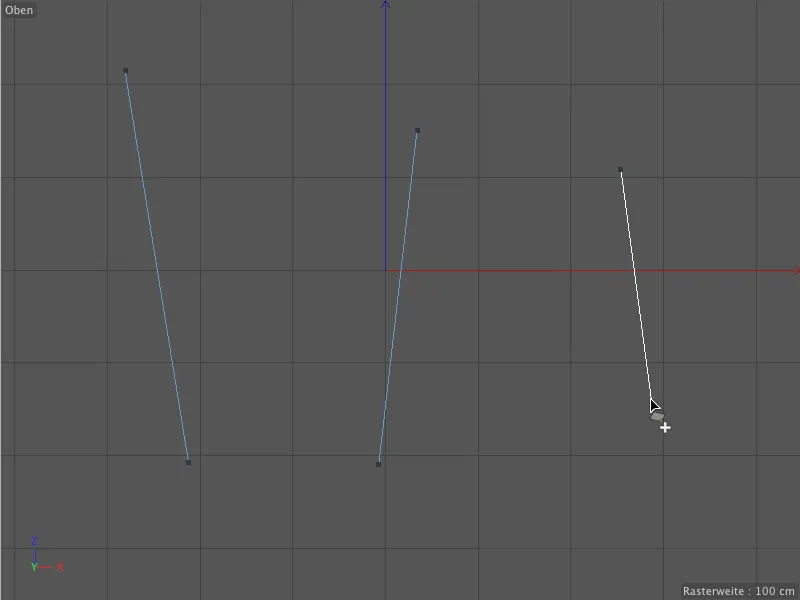
Corner points for polygons are created at the intersection points of the edges, and as soon as we close a frame with an edge, ...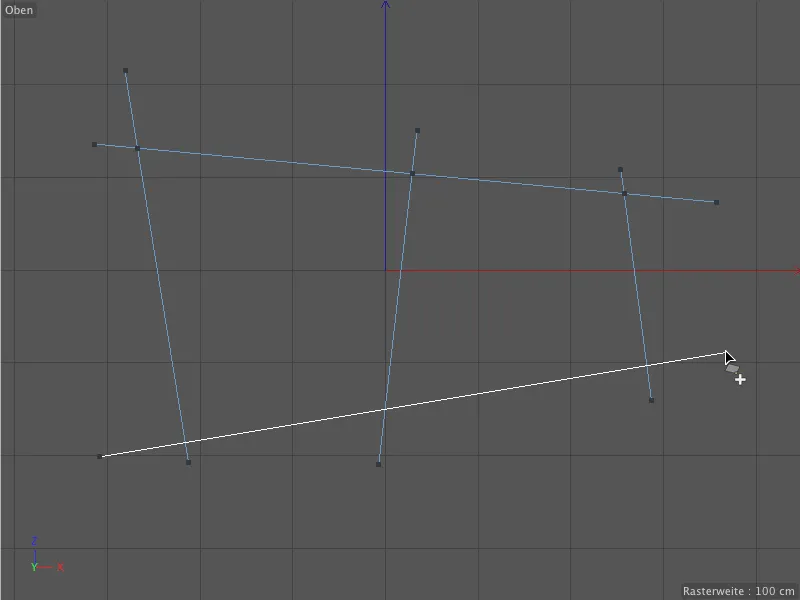
... the corresponding polygons are created. As you can see, the edge lines are still protruding at the moment because the work with the polygon pen may not even be finished yet.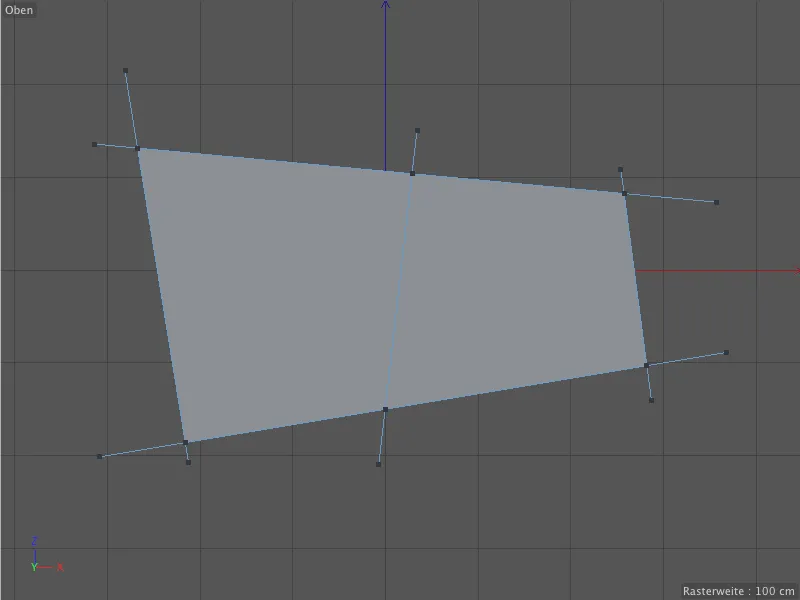
However, as soon as we switch to a different editing mode or end the drawing by pressing the Esc key, the protrusions disappear.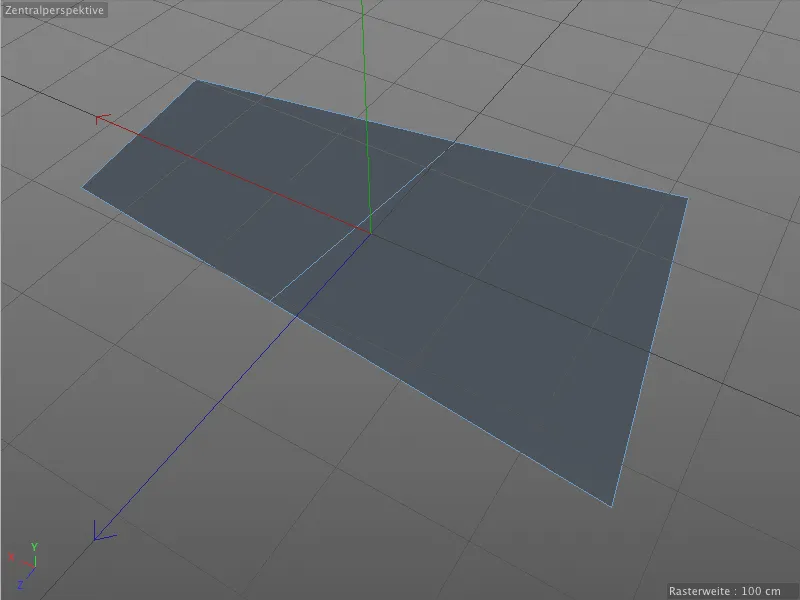
Now we come to the first special feature when creating polygons using edges. In the settings dialog of the polygon pen, we can activate a so-called square strip mode.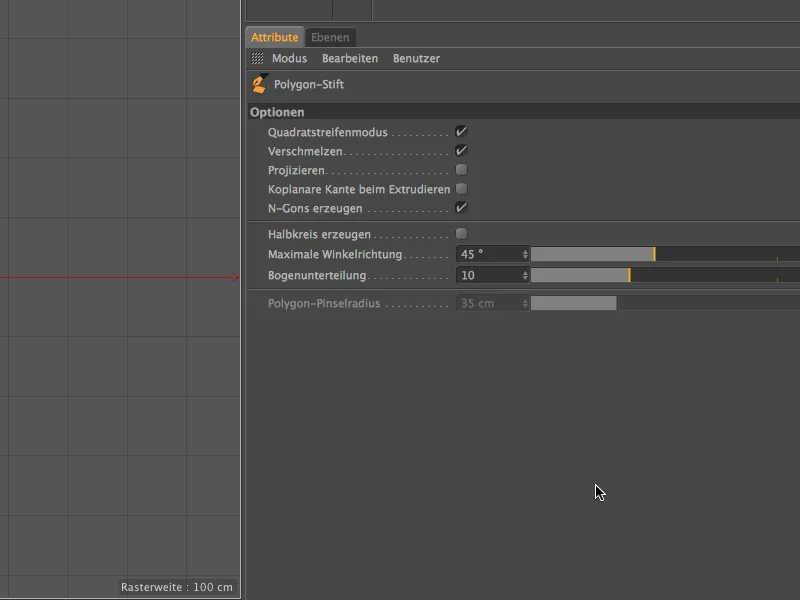
If we now want to create polygons by drawing edges in an editor view, ...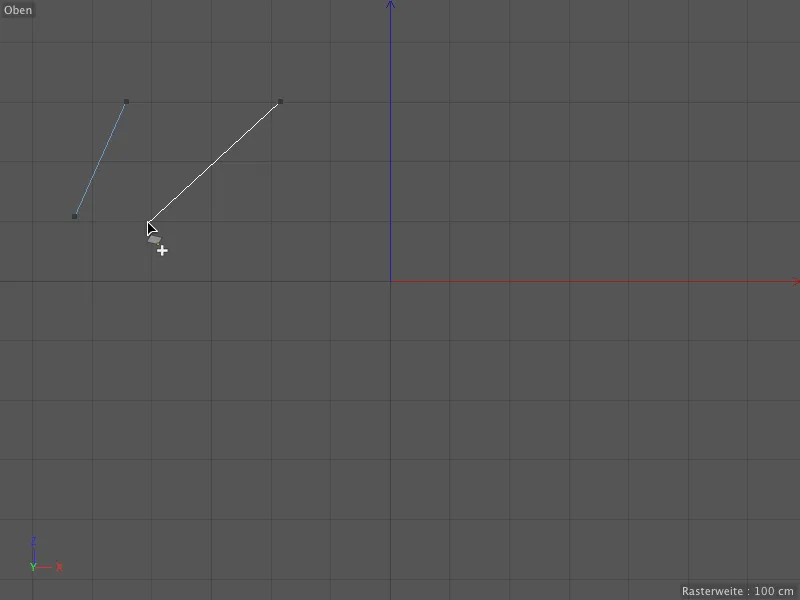
... a four-sided polygon is immediately formed from the four end points of the drawn edges. We can also continue drawing ...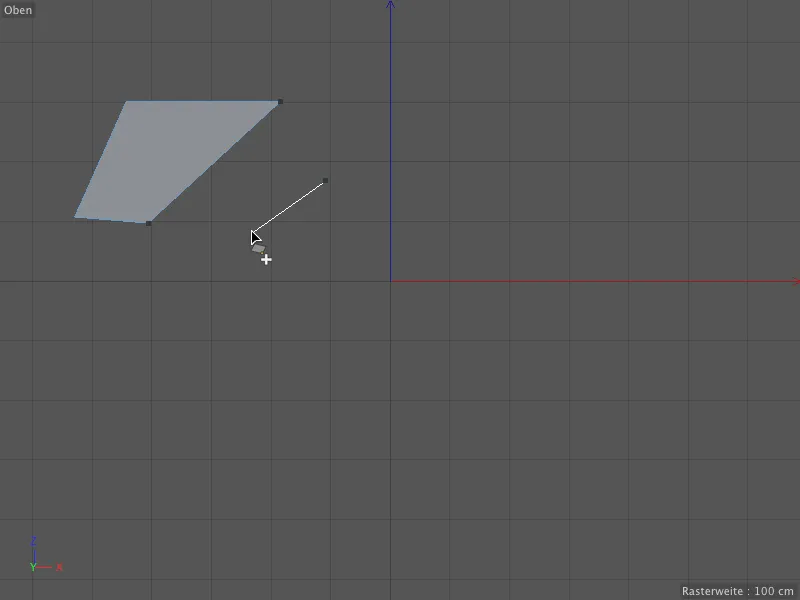
... and in this way, using the aforementioned square strip mode, create any polygon shape by setting edge lines. Thanks to the aforementioned tweak mode, we can edit existing edges immediately without changing tools by placing the mouse pointer on the edge in question and moving it by holding down the mouse button.
As in point editing mode, the behavior of the polygon pen changes as soon as we also hold down a key. By holding down the Ctrlkey, we can extrude a new edge (and therefore a new polygon) from an existing edge...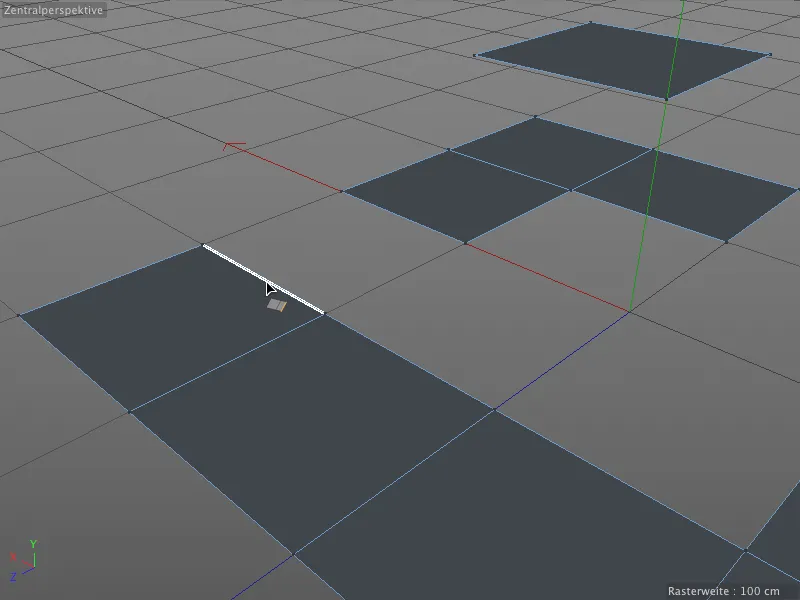
... and, thanks to the snapping or merging option, we can automatically dock it to other polygon edges, for example to fill gaps.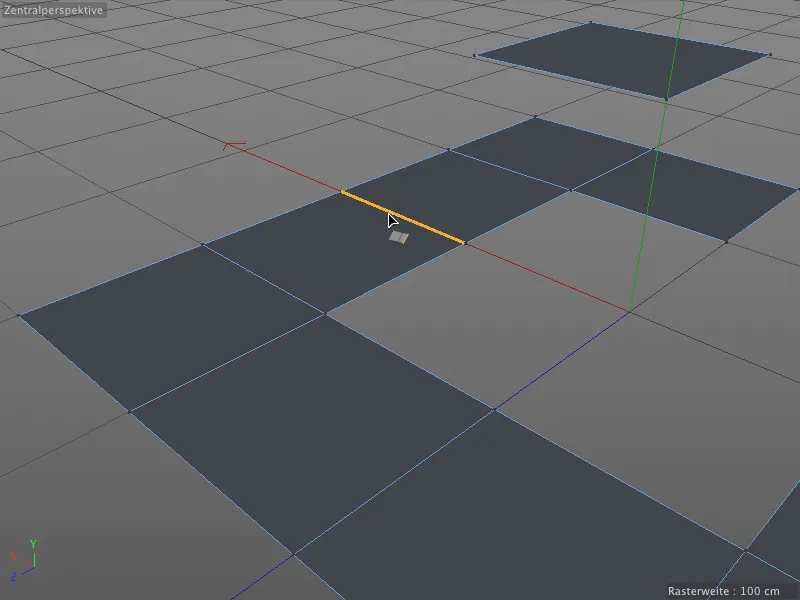
It doesn't matter whether the source and target edges are on the same plane. All you need to do is hold down the Ctrl key and grab the edge in question ...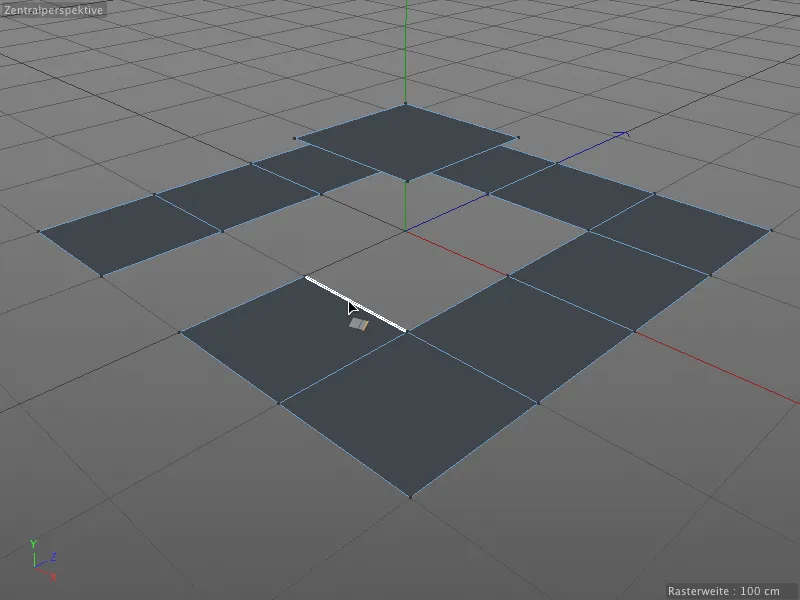
... and drag it to the target edge. As with merging points, all targets are automatically recognized and snapped to the edges.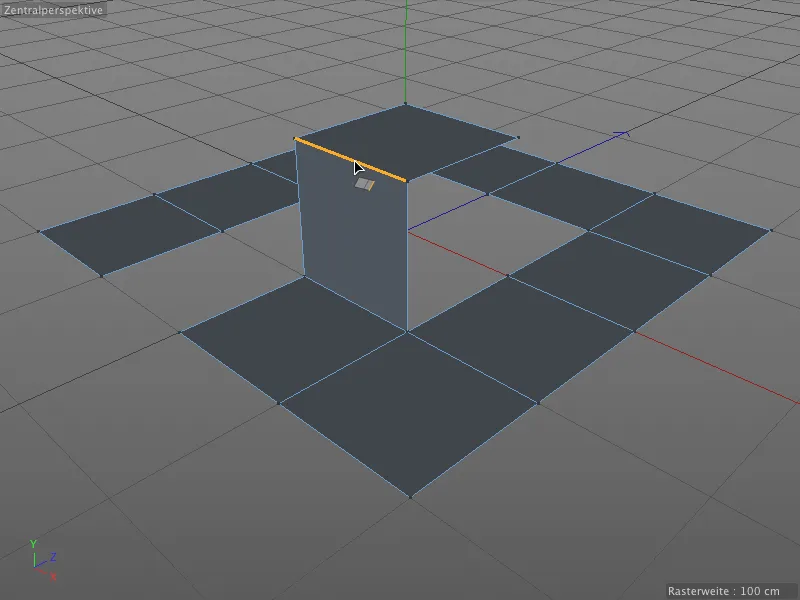
Of course, this also works for slopes ...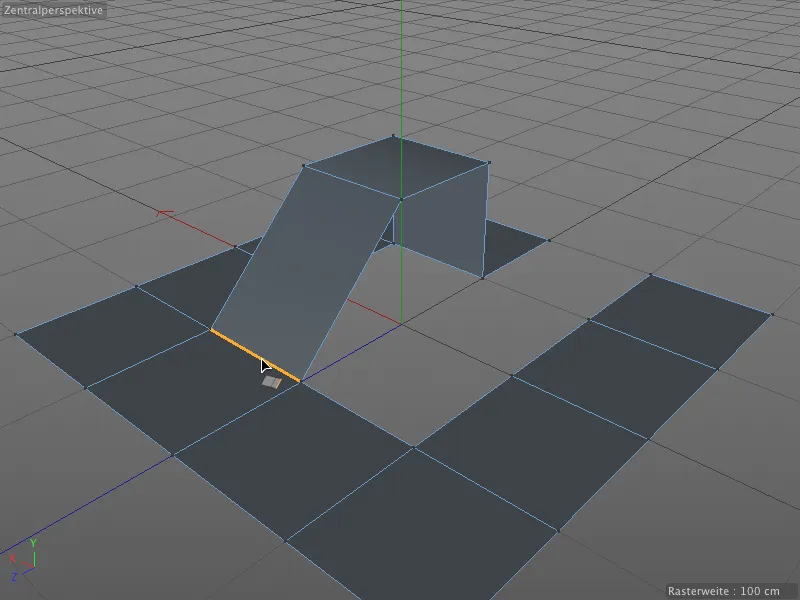
... and for edges that have different lengths. Once again, the polygon pen does most of the work for us. Simply move the edge by holding down the Ctrl key...
... and snap it to the automatically found target edge and adjust it. A new polygon is created between the source and target edges of different lengths.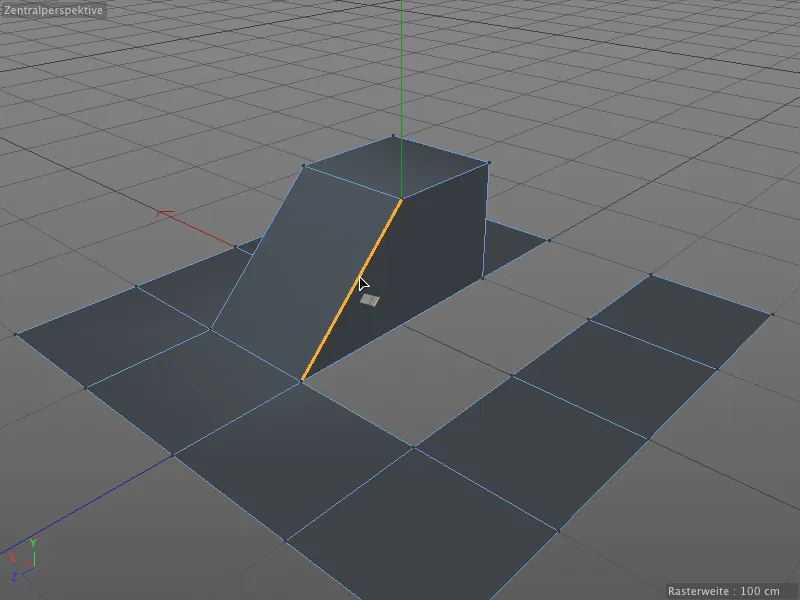
If we press the Shift key after creating and moving a new edge, we can rotate the edge by moving the mouse horizontally.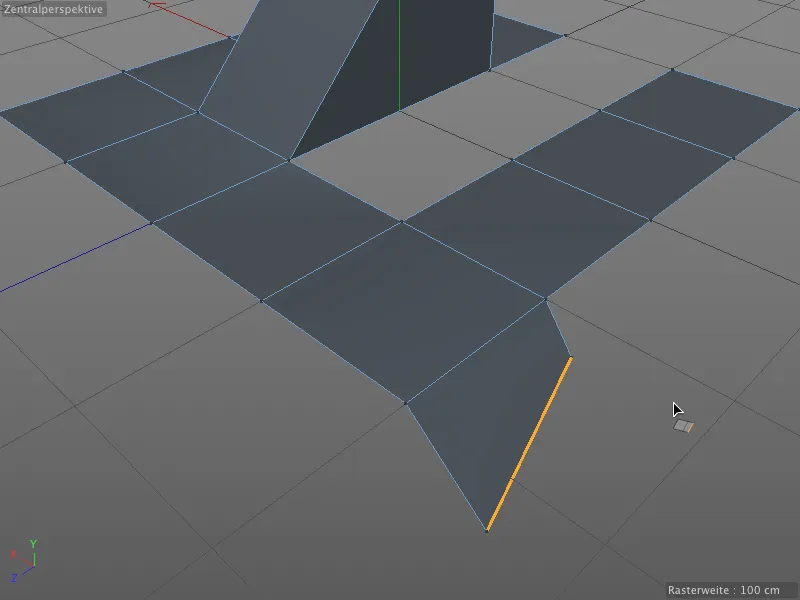
With the polygon pen, edges can not only be extruded or divided by setting a point, we can also divide the edges evenly interactively. This requires a three-button mouse. To do this, we simply place the mouse pointer over the edge to be divided and hold down the middle mouse button.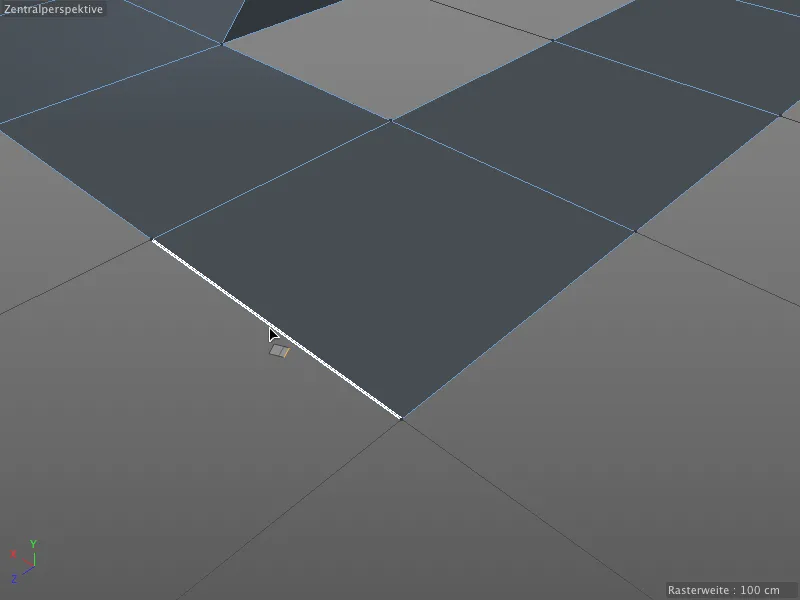
If we now perform a horizontal mouse movement, we divide the selected edge evenly. A small HUD display even shows us the number of points inserted.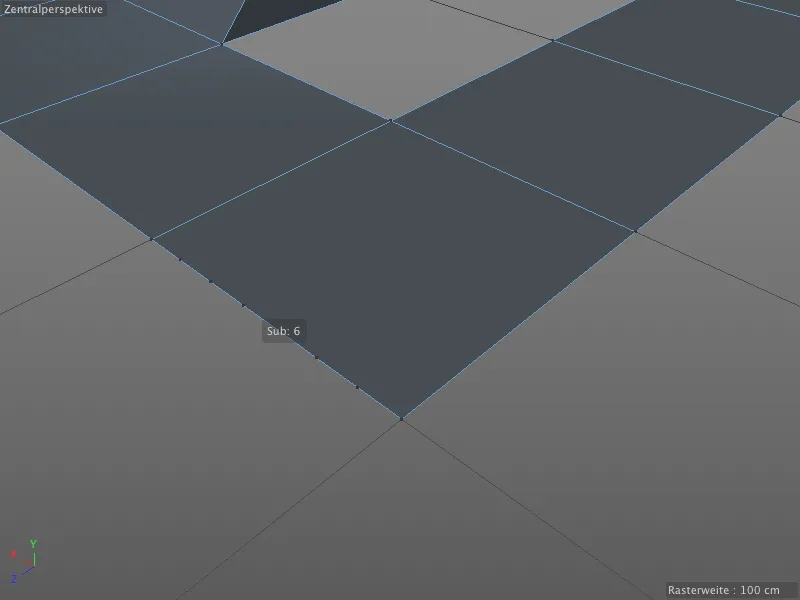
I would like to go into one last additional key combination, then we will also have become familiar with all the edge editing optionswith the polygon pen.
If we hold down both the Shift and Ctrl keys and drag an edge, we form an arc from the edge.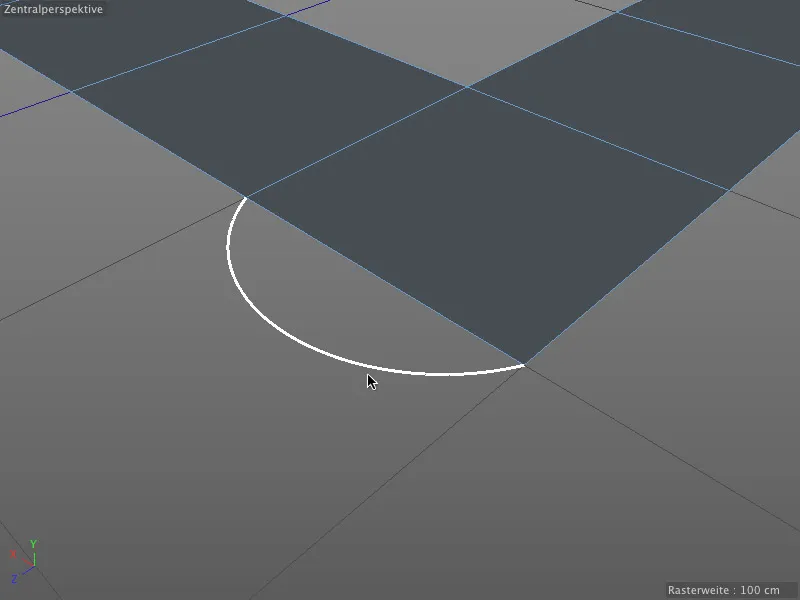
This arc can also be subdivided interactively using a button procedure that takes a little getting used to. To do this, as soon as we have found the desired arc radius, we press and hold the left mouse button. Then we also press the middle mouse button. If we now move the mouse horizontally, a small HUD element is displayed again, showing us the current number of subdivisions.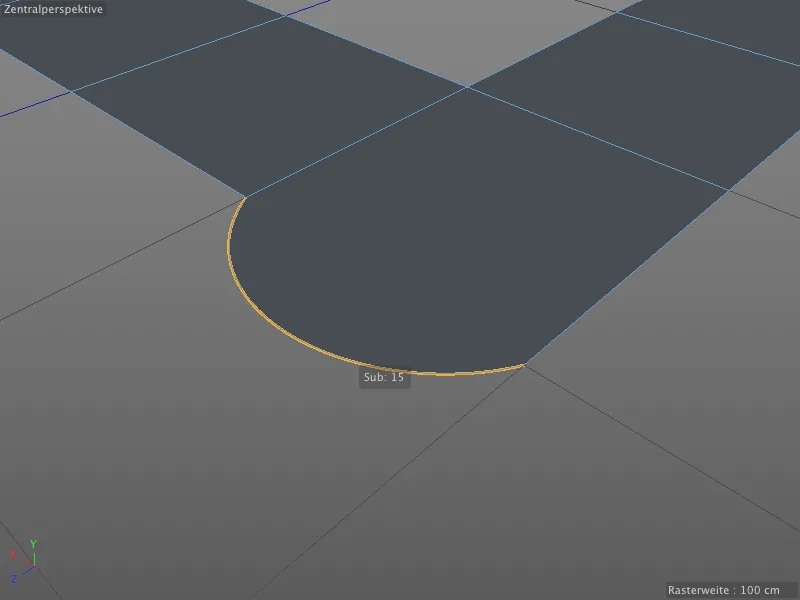
If this finger acrobatics is too complicated for you, simply set the desired arc subdivision in the settings dialog of the polygon pen beforehand and then form the arc using the Shift and Ctrl keys.
If you do not want to model the arcs freely but want to form semicircles, activate the Create semicircle option in the same settings dialog.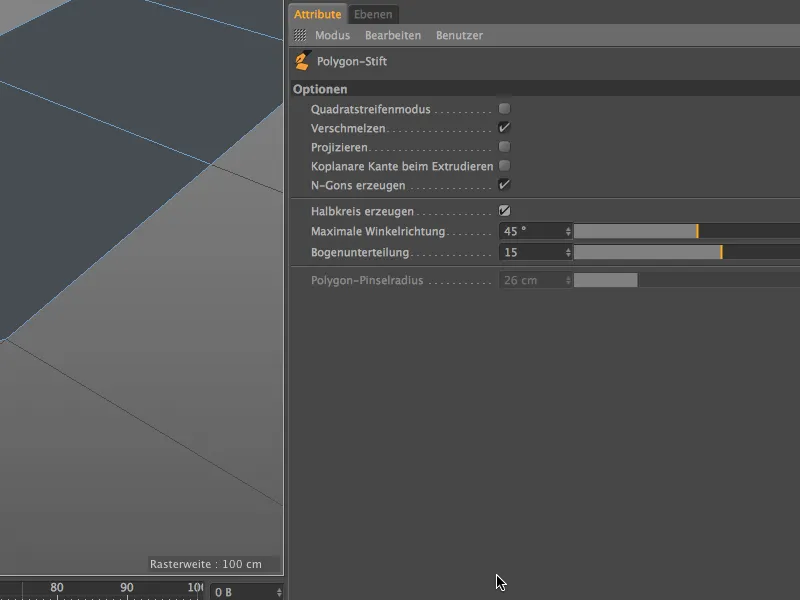
Now semicircles are always created between the end points of the edges, which is extremely helpful for precise, technical modeling.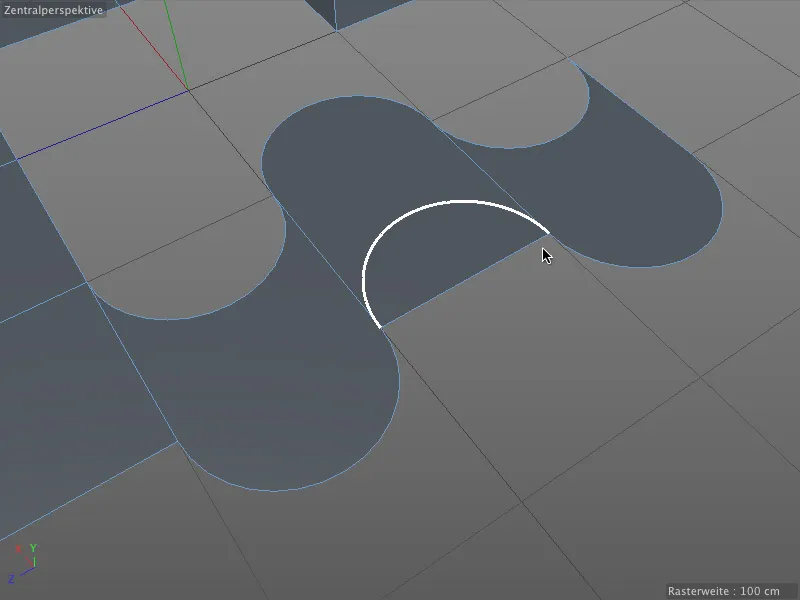
Creating and editing polygons
The polygon pen wouldn't be called a polygon pen if we couldn't use it to draw polygons directly. In this case, it is necessary to switch to polygon editing mode.
If, for example, we want to add further polygons to an existing polygon using the polygon pen, we place the mouse pointer on the desired connecting edge and hold down the Shift key.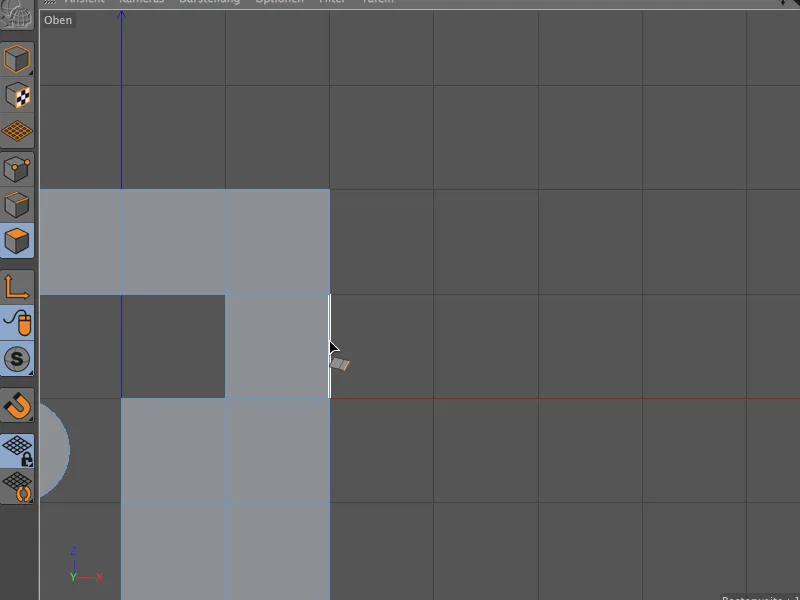
By holding down the mouse button and dragging, we can now generate and connect a path of four-sided polygons from the starting edge.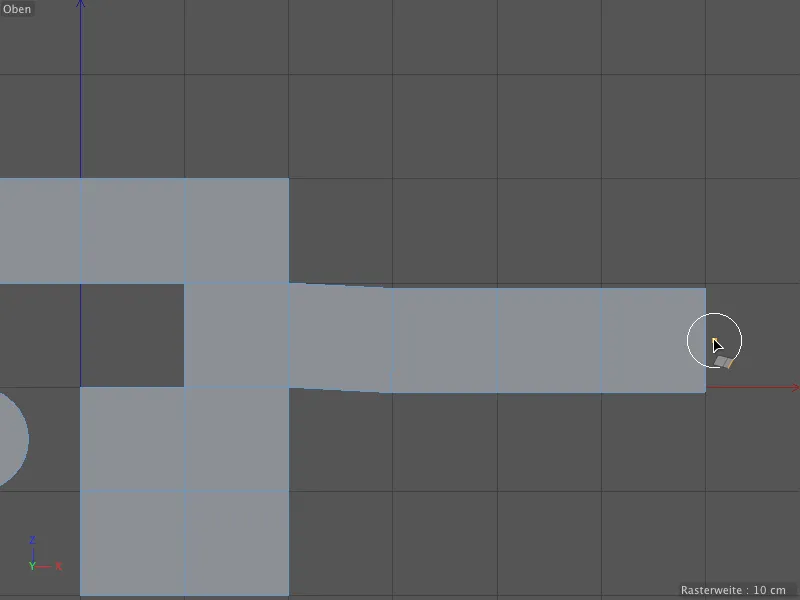
In the same way, polygon paths can of course be immediately added to the polygons and edges that have just been generated.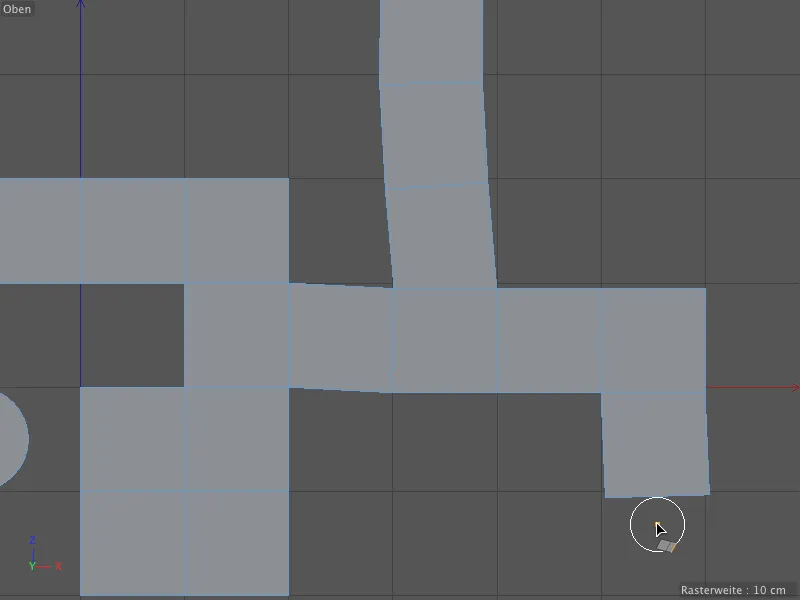
Tweak mode comes into play again when editing polygons. To select a polygon, simply hover over it with the mouse pointer and click to move it.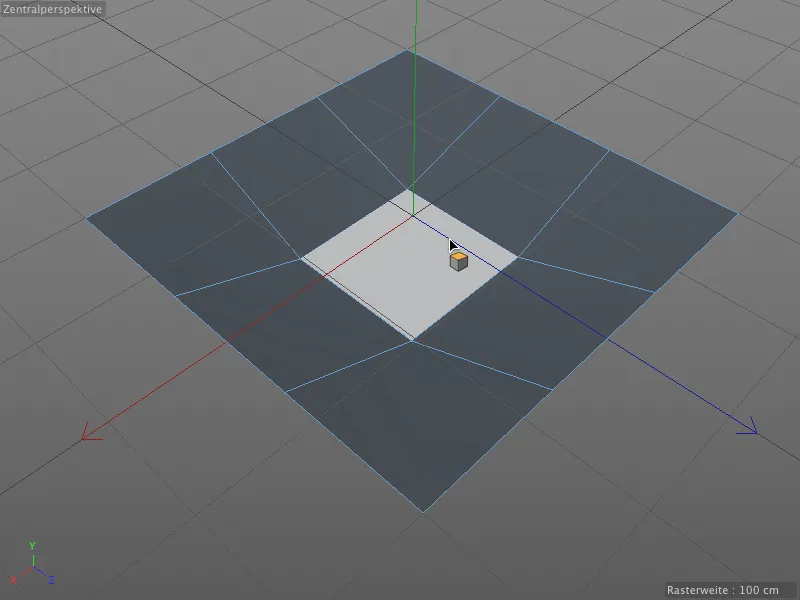
In the case of points and edges, we have already learned that clicking while holding down the Ctrl key deletes the automatically selected element under the mouse pointer. Of course, this also works in polygon editing mode.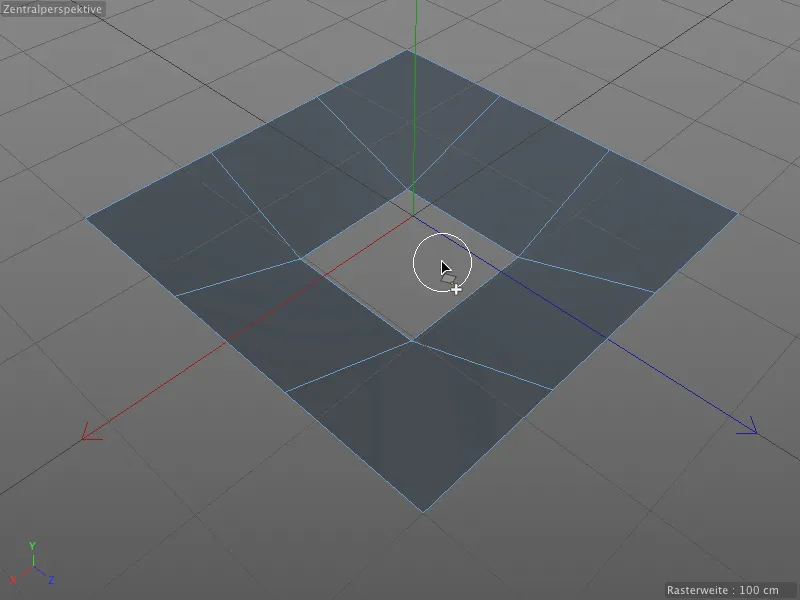
The logic of the additional keys therefore continues when editing polygons. For the extrusion of elements, we are familiar with dragging by holding down the Ctrl key...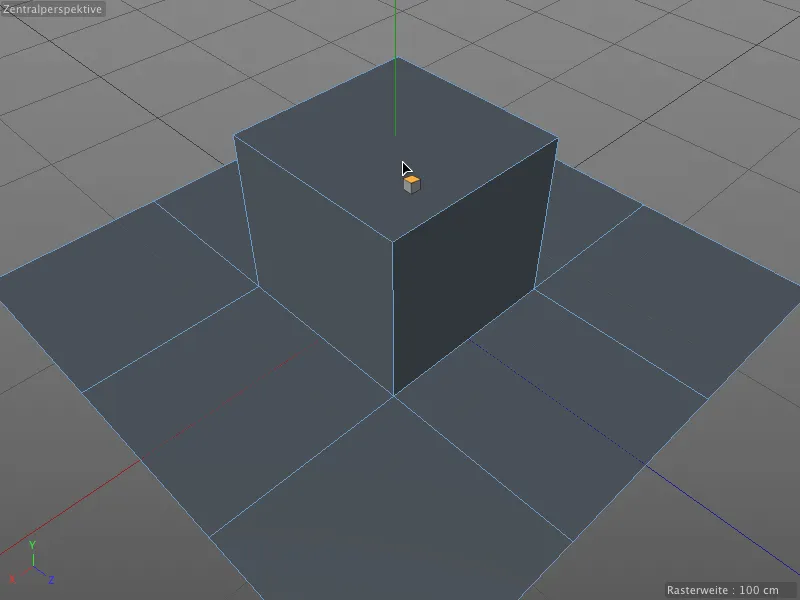
... and as with the editing of edges, we can rotate the extruded polygon by adding the Shift key via a horizontal mouse movement.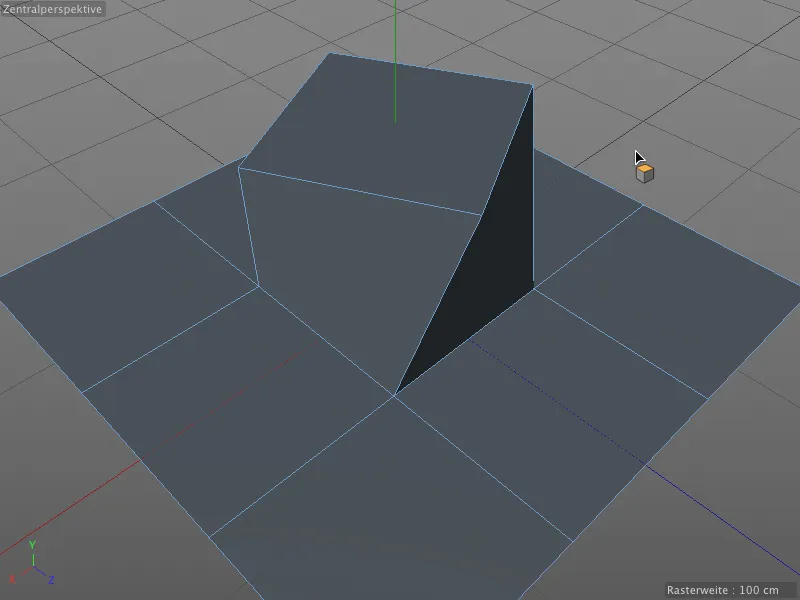
As you can see, the polygon pen even saves you having to switch to the extrude tool. At this point, it is worth taking another look at the settings dialog of the polygon pen.
There we find the option Coplanar edge when extruding. Let's first take a look at what happens when extruding without this option.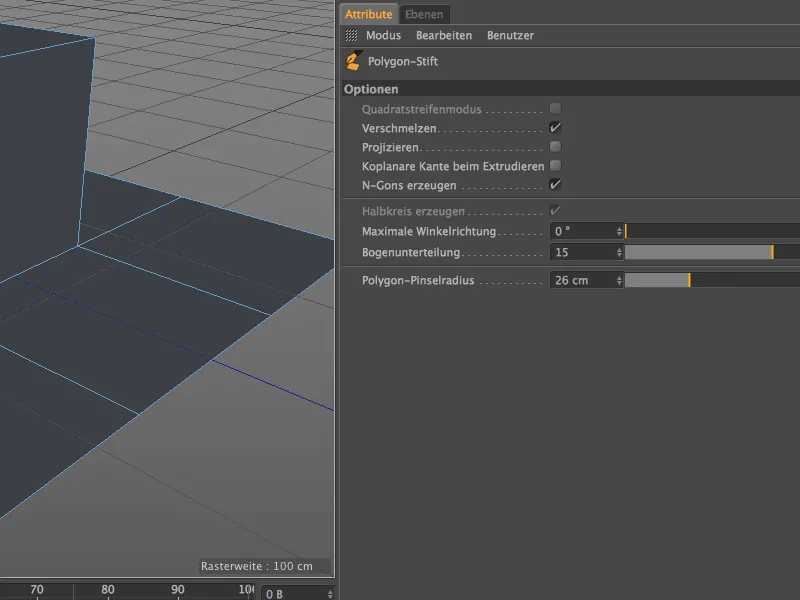
In this example, there is already an initial extrusion from the plane. If we now carry out another extrusion with the polygon pen, ...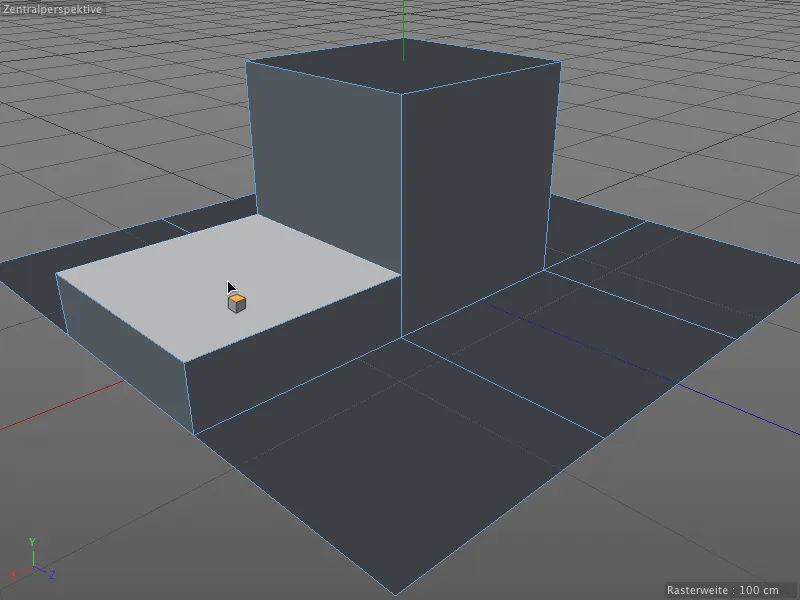
... the polygon is simply moved upwards, the previous polygon edgesof the first extrusion are no longer present.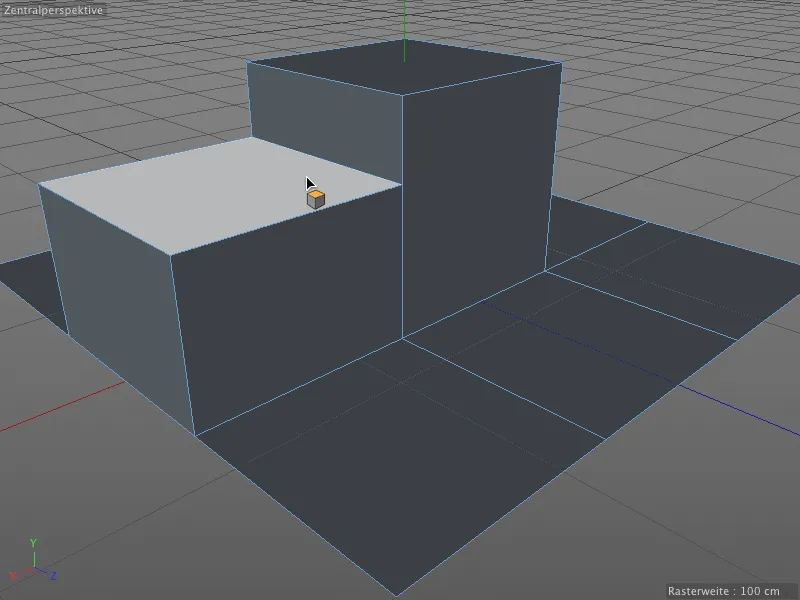
Now we perform the same action again at a different position, but this time with the Coplanar edge when extruding option activated.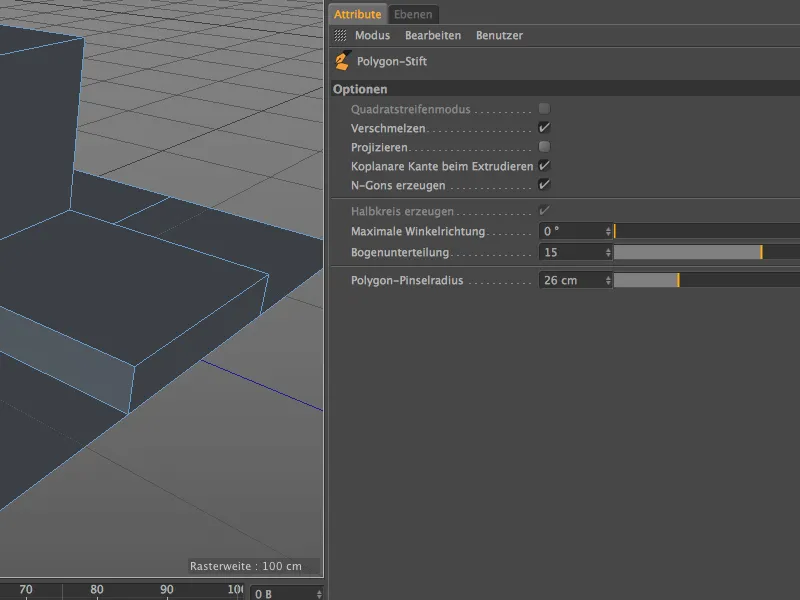
Now every edge of an extrusion step is retained in a subsequent extrusion. We can use the option in the settings dialog to achieve this familiar behavior of the Extrude tool, if desired.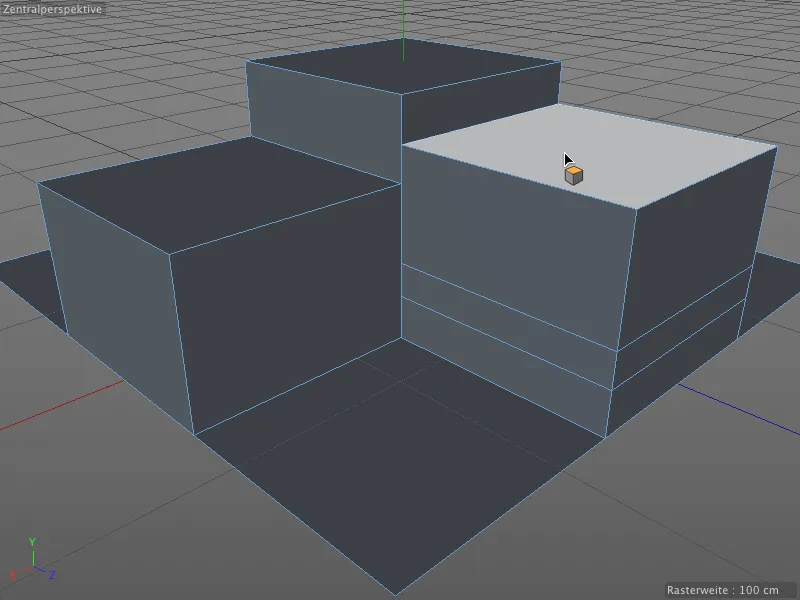
Free painting of polygons
Of course, it is also possible to paint freely in the editor with the polygon pen. To do this, only the polygon editing mode must be active and no existing object or element must be under the mouse pointer.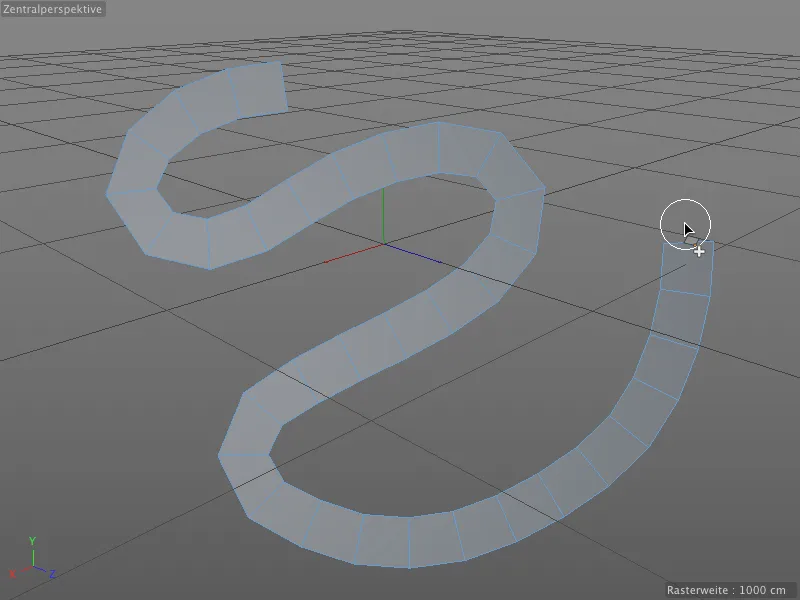
The size of the polygons depends on the size of the brush, whose tool tip we see as a white outline in the editor. In the settings dialog of the polygon pen, we find the appropriate parameter in the polygon brush radius.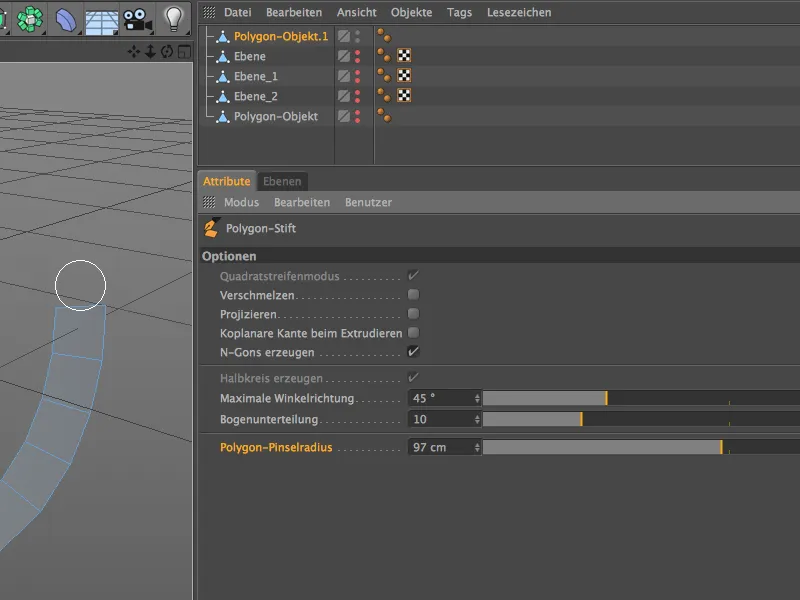
The paint function for polygons is particularly useful in conjunction with the Project option. If this setting is activated, we automatically paint with the brush on all polygon objects under the tool tip.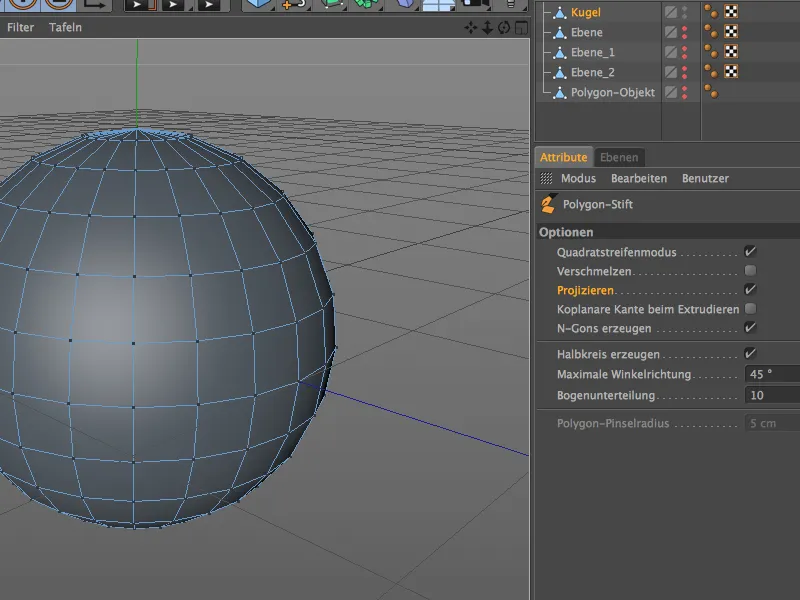
If we now paint with the polygon pen in the editor view, the generated polygons are automatically placed on the underlying polygon object as well as possible.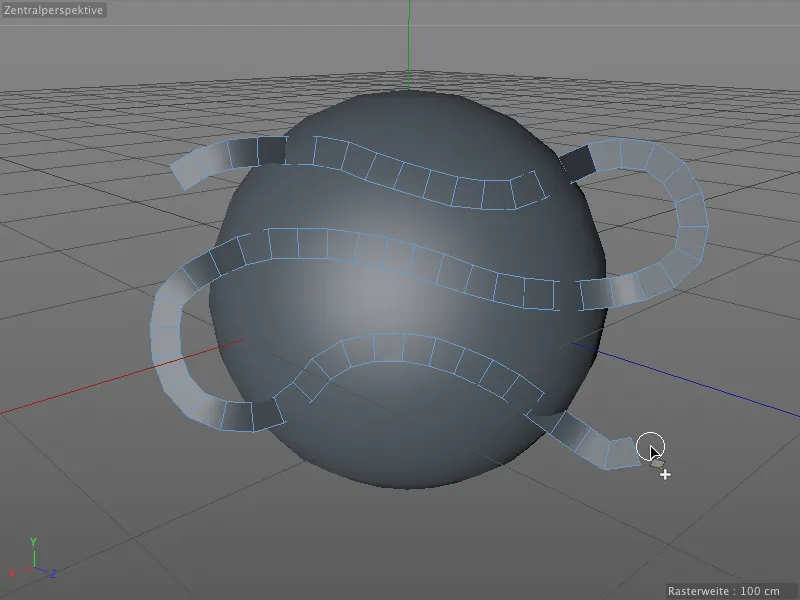
Depending on the size of the brush, the corner points of the polygons may or may not be in a favorable position, which can lead to distortions in the latter case. Thanks to the polygon pen including tweak mode, we only have to move the mouse pointer to the affected areas and can make the necessary adjustments without changing tools.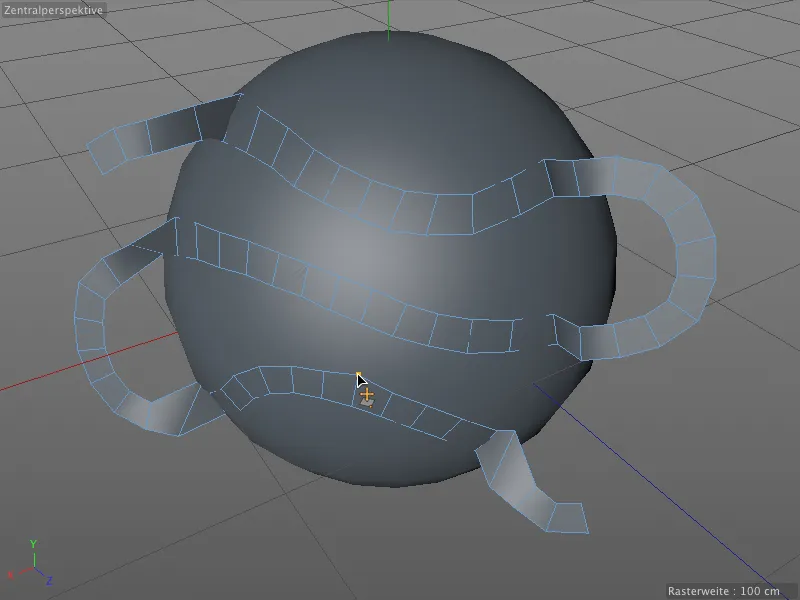
This projecting functionality is particularly valuable when optimizing an existing polygon mesh. With the polygon pen, the new polygons are quickly applied to the existing geometry and adapted to the intended use.


