Introduction
Before I concentrated on photographing pets, I was only active with my camera on vacation trips and quarterly visits to the zoo. When the first telephoto lens came into the house, I naturally visited a local zoo almost every week. I was able to gain a lot of experience here and even today a visit to the zoo at the weekend (in good weather with very fit animals) is a real highlight for me. Especially when something spectacular happens. For example, I once photographed two bears frolicking in the water or howling wolves. These were truly breathtaking spectacles. In this tutorial, I would like to give you a few tips on where you can practise to your heart's content or how you can organize a photo shoot with a dog or a horse.
As always, it's also a question of taste, I can only offer suggestions and perhaps a few useful tips. As usual, I welcome criticism and am very curious to see how the individual tutorials are received by readers. Have fun reading!
Here is the outline:
- The right equipment
- Camera settings
- Light and backlighting
- A visit to the zoo
- Finding spectacular animal motifs
- Nature's Best - the right background
1. the right equipment for outdoor shooting
Lenses
Unfortunately, I have found that you need very good lenses for outdoor wildlife photography. You can't really get very far with standard focal lengths, in the truest sense of the word. Animals in motion are often far away. You need to be flexible at work, especially with shy animals. You are probably best off with a lens up to 300 mm. I have swapped my old lens (70-300 mm) for a much faster one in the 70-200 mm focal length range. Now I'm looking around again for a lens with a higher focal length. Or would I prefer a teleconverter? Yes, photography is an expensive hobby and somehow the photographer is always looking at the next camera with one eye and ogling, first tentatively, then more vigorously. A little flirtation can quickly mutate into a financial disaster! I would like to go into the subject of equipment in detail in Tutorial 2. Nevertheless, I would like to say once again: always weigh up carefully what you really need. It's no use buying a very fast lens for 1000 euros if your camera is no good. And vice versa ... If you mainly take photos at the zoo and don't like creepy-crawlies and tripods, you don't need a macro lens.
For animal photography, I can recommend the following lenses, of which those with long focal lengths are usually suitable for outdoor use, i.e. the telephoto lens.
If you only have enough money for one lens:
-Standard lens (focal lengths around 28-100 mm)
If you have enough money for several lenses:
-Standard lens (focal lengths around 18-70 mm)
-telephoto lens (focal lengths around 70-200 or 300 mm)
-possibly a good macro lens (fixed focal length)
Well, and beyond that you can of course let off steam as much as you like. Whether you want to go further into the distance with a teleconverter, a lens with a focal length of 400 mm or more, several fixed focal lengths ... the list is long. Very long!
Important: Always pay attention to the speed of your lens. Of course, lenses with large Blenders are expensive! This means that you will have to start "small" at the beginning. As I have of course not tested all lenses myself, I can only give recommendations for lenses that I have already used. You can easily start with two lenses that will accompany you for a long time, if not always satisfy you! These are a standard lens (often included with the purchase of the camera) and a telephoto lens. There are some important things to look out for when buying a lens, but as always in life, it comes down to the durability of your wallet. As opinions on the various lens manufacturers differ widely, I cannot make any general statements here either. So far I have only worked with Nikon and Sigma lenses. Clearly, the better the lens, the more expensive it is. Nevertheless, there are a few things you should consider when buying a lens. In order not to go beyond the scope of this article, I would like to put you off until Tutorial 2 (Equipment). Here I will go into detail about the particularly important factors to consider when buying a lens. In general, you can get telephoto lenses that are initially very suitable for wildlife photography from as little as 150 euros (e.g. Sigma). However, if you want a fast lens (f2.8) that covers a focal length of 300 mm, you will quickly be looking at a few thousand euros! But with time comes money. Or what was that? But take courage. Here are a few photos I took with a D40, which today costs only 300 euros (including standard lens) (sometimes a telephoto lens 70-300 mm for 150 euros was also used).
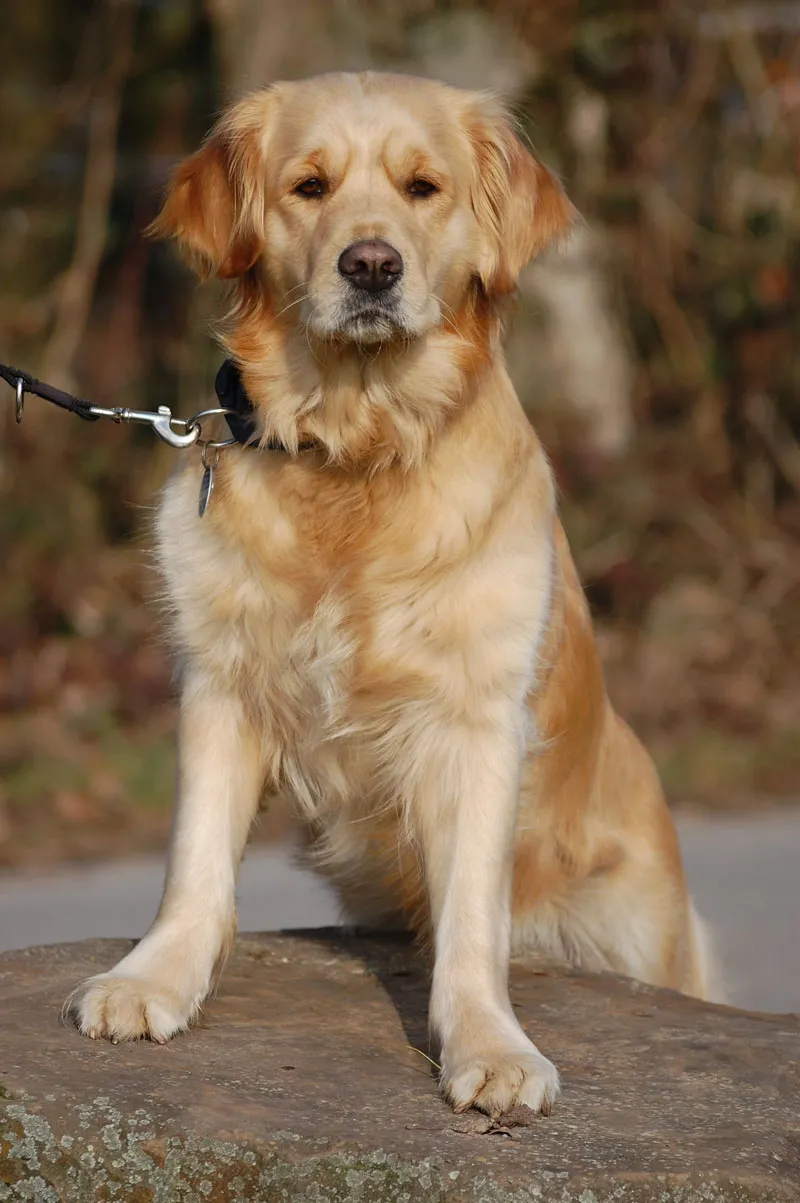
The pretty Bijou on a beautiful spring walk
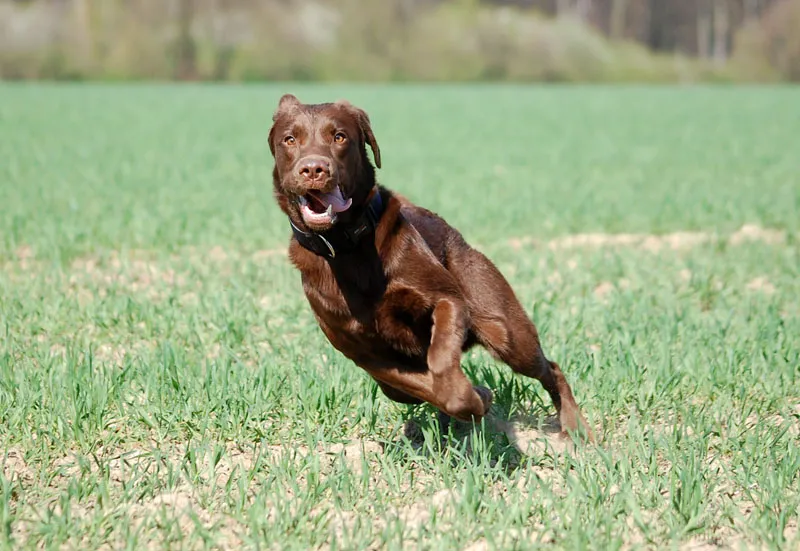
Merlin flying over the field. I think the great Sigma 70-300 mm lens did a great job!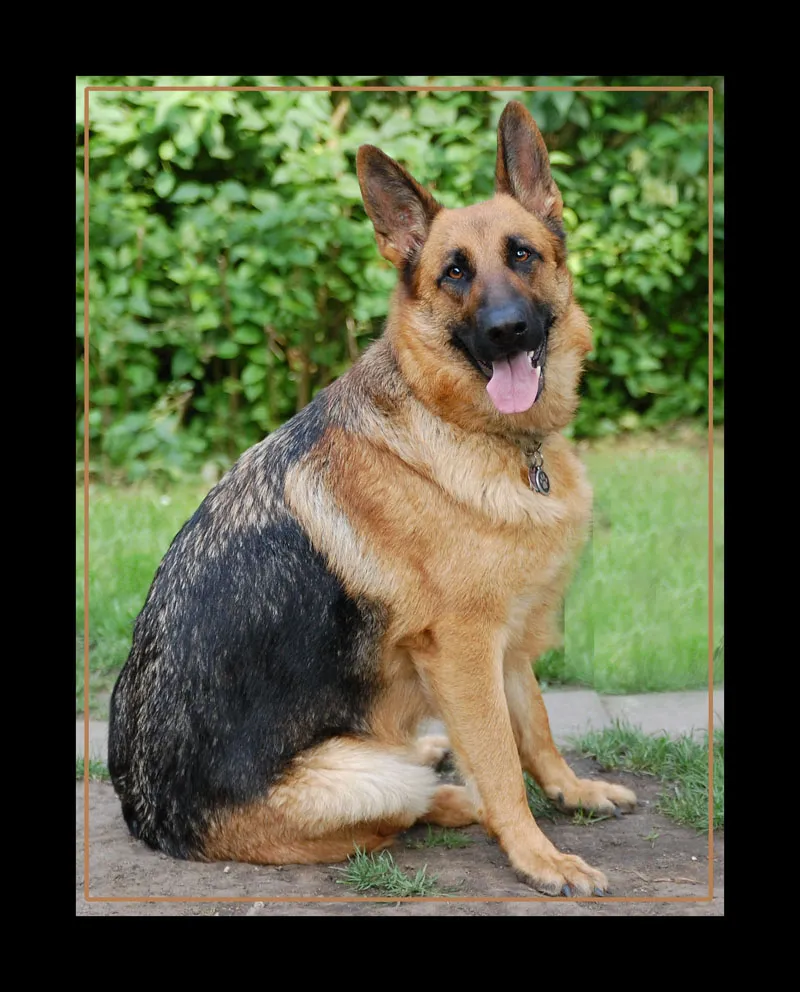
Other equipment
You should have the following things with you:
-A backpack or a well-fastened bag. This will allow you to climb and be active and mobile without worrying about your camera or lenses!
-A tripod if necessary
Depending on the scope of the shots:
-a spare battery
-Spare memory cards
For pet shoots:
-Something to rustle or similar to "get" the attention or even the horse's ears
-For dogs: Toys (e.g. for throwing)
For motivation:
-Treats!
You often need more storage space for outdoor shots, as you will not take quite as many pictures in the studio as outdoors. A large memory card is usually sufficient in the studio, but if you take photos with the quick release, 1,000 photos are quickly taken! Depending on the resolution of your pictures, I recommend two memory cards (between 8 and 16 GB).
I also very often use a polarization filter (polarizing filter) for outdoor shots. The colors appear more saturated and contrasty.
Clothing
It is very important to wear weatherproof clothing that is appropriate for the surroundings when you are taking photos outdoors. Don't say: "That goes without saying." I can tell you from experience: I've also been overdressed a few times in jeans and sneakers! In bad weather, think about where you might have to follow your four-legged subject: Mud, puddles, streams ... Just to name a few. Another example: first the wet horse meadow, then a nice sandy paddock = a breaded photographer! It doesn't always have to be rubber boots, but you should have some to hand if you need them.
2. camera settings for outdoor photography
The camera settings naturally depend on many factors: color of the background, color of the subject, still or moving subject, desired depth of field, lighting conditions, etc.
As already described in one or two tutorials, I shoot with a D90 (I've already looked at the D700!). Outdoors, I shoot with a Sigma lens, specifically the 70-200mm F2.8 EX DG Makro HSM II.
You will develop your very own style of shooting and exposure, working shutter speed and Blender, the individual programs on your camera and autofocus will take a lot of trial and error. No matter how much you read. You try this and that, adjust this or that and at some point you will have your own style for taking good photos. There is no patent remedy. You can only learn from others and familiarize yourself with SLR photography.
The fully automatic mode (Auto)
As a beginner, you can use your camera's auto mode for outdoor shots. Pay attention to what it does to your pictures. As a rule, the camera controls everything itself here (exposure time, aperture, often also the flash and ISO sensitivity). You can usually define many settings via the camera menu. On some SLRs, the auto mode is also called iA or iAuto, where the i stands for intelligent. This means that the fully automatic mode also includes additional functions such as contrast compensation or automatic scene recognition. You will soon realize how tied you are to it, how inflexible ... There will always be moments when you get annoyed because the auto mode simply does everything differently than you would like. The focus is wrong, the Blender is too small etc. etc. Nevertheless, you can take your newly purchased SLR for a walk with a dog without any problems and then enjoy great photos afterwards. Just the right thing to start with!
Most cameras also have very interesting camera settings (portrait photography, sports mode, night shots, etc.), which will also help you get started if you wish. I used to shoot a lot in sports mode when I was taking pictures of animals outdoors, but this has now been replaced by aperture priority. However, some camera models only have the "normal" automatic or manual modes. In detail:
P (program automatic)
In this mode, both Blender and exposure time are set automatically. You choose whether you prefer a closed aperture/long exposure time or an open aperture/short exposure time.
A (Aperture priority)
The A stands for Aperture = Blender. Here you only select the aperture size. The shutter speed is adjusted automatically.
S (Shutter priority)
S stands for shutter. The exposure time is set by you and the aperture is adjusted accordingly by the camera.
M (Manual)
In manual mode, both the Blender and the exposure time are set by you.
With many cameras, the photographer can also save their "favorite settings" and call them up quickly.
In order to decide which setting is suitable for which moment, you need to go into a little more detail about the functions of an SLR (if you don't already know). The most important points for outdoor photography are:
Focus/exposure speed/blender/exposure compensation/ISO
Focus
When photographing animals outdoors, there are several ways to control the focus. You can let your camera take care of everything, you can focus on a center focus point on the off chance, or you can control it completely manually. I use the latter, whereby I usually have it centered. I only change it in individual cases, for example when taking portraits. I move the focus to the eyes if no special effect is desired. In many program modes, you can set how you want to control the focus in the menu. For distant subjects, it is of course advantageous to set it in the middle, as the subject will be completely in focus anyway. Simply keep the focus on the animal and follow it. It also depends on how many focus points the camera has. My old D40 only had three. I also used to have no idea how to adjust the focus. Many beginners don't know that. How could they! And you are very limited without the maneuverability you control. Just read about it in the operating instructions for your camera. With Nikon, you usually have to press the shutter release button and select the focus points with the control pad. The focus is crucial, as the right sharpness makes your picture a top or flop.
Exposure times
The right combination of exposure time and Blender is always important. The same exposure can be achieved with different combinations of shutter speed and Blender. Shorter exposure times and large Blenders freeze animals in motion and blur the background. Long exposure times and small Blenders, on the other hand, bring details in the background into focus and blur the animal in motion. If you choose high exposure times (which I never actually use in animal photography), a waterfall, for example, becomes a beautiful blur of water. If, on the other hand, you photograph it with short exposure times, you will be able to see almost every drop of water.
Aperture
You can use the aperture size to control the depth of field. You can simply remember the following rule:
-large aperture = small aperture value (e.g. 2.8) = shallow depth of field
-small aperture = large Blender value (e.g. 16) = large depth of field
If we take this information for our automatic aperture priority, select the smallest possible aperture for animals in motion, depending on the lighting conditions. If you have glorious sunshine, I usually choose 4-6.5. If the light is a little poorer, I go to 2.8. However, many telephoto lenses also have small apertures larger than 4, so just take the smallest one available to you.
Exposure compensation with the camera ...
In the studio we don't have to worry about this, but in different lighting conditions outdoors we will have to. Exposure is a science in itself ... Some photographers control the exposure using exposure compensation and leave the ISO at 200, for example. Others, however, set a fixed exposure compensation and control the rest with Blender and ISO. At some point, almost everyone knows exactly how to overexpose or underexpose for which situation and no longer needs to look at the monitor. I can't do that and you probably can't either. If you are a professional, you don't need to read this part of the workshop. If you do, I'm very happy about it and hope to get a few tips from you!
However, if you are already a little more familiar with SLR photography, it is important to perfect your pictures. Soon you will be using the automatic aperture priority mode or you simply want to experiment and set your camera's dial to "M". Because these two things are extremely important, I have planned a separate tutorial entitled "Main problems with light & sharpness" - here is a detailed description of these points.
My pictures were constantly overexposed. I had enormous difficulties with taking photos and was very unhappy with the pictures. The photos looked grayish, colorless, dull, contrast and exposure often had to be corrected via Photoshop. Extremely annoying, and above all, every photographer wants to see their "raw" images as beautiful and not just after post-processing. I always edit photos via Photoshop, and why not! Nevertheless, it should be the exception and you should be able to take beautiful and correct photos without these modern-day helpers. To do this, you need to know how it works.
So go outside in good sunlight and take a photo of an object that you like. It's best to do this when there are no clouds in the sky so that you really have the same lighting conditions. Then test the camera's exposure compensation. Set the exposure to -1, 0, +1 and see what happens. Here is a sample image: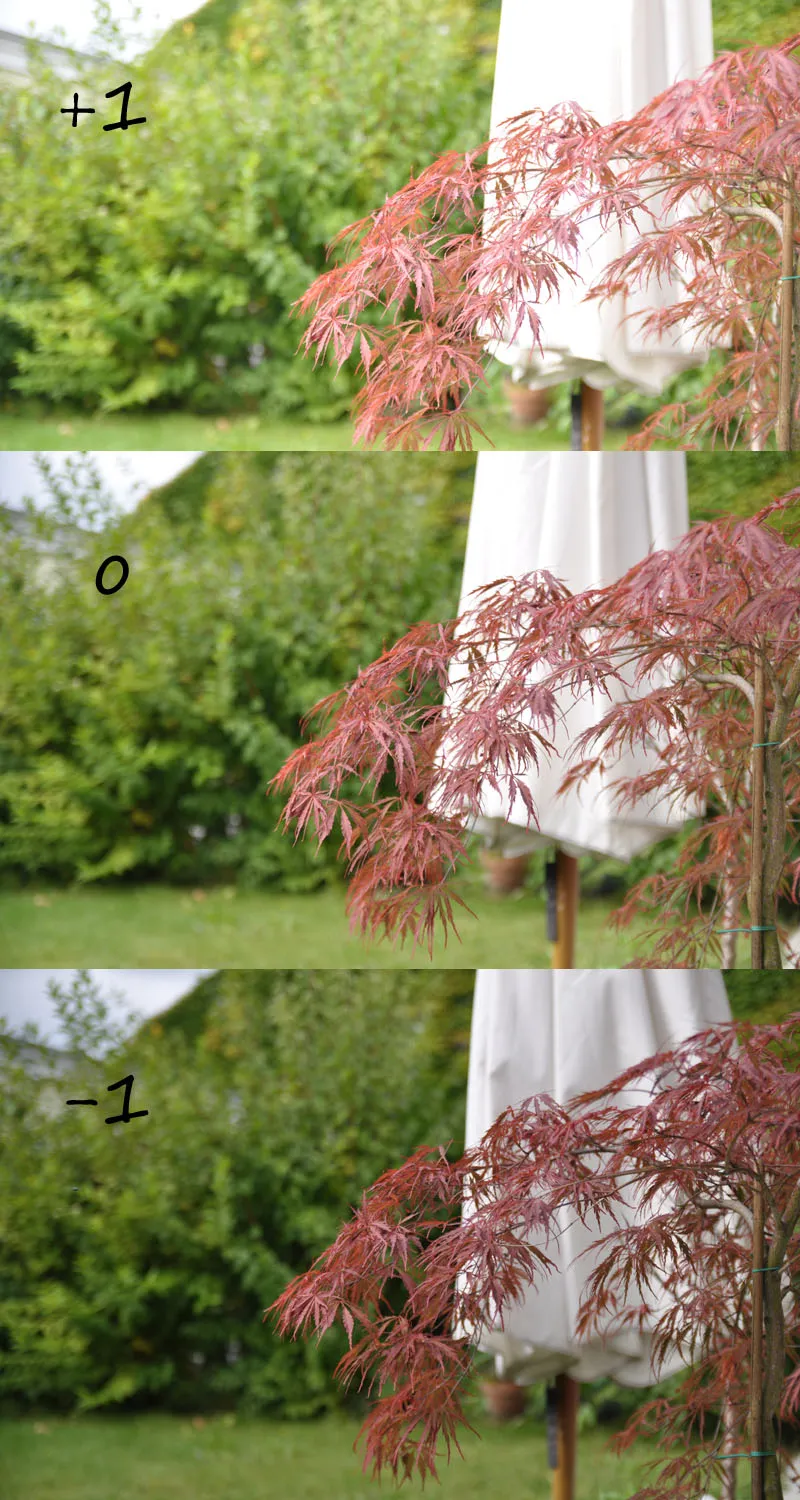
In the meantime, I have switched to almost always setting the exposure to -0.5 or -1. I solve the rest via the aperture size.
Exposure compensation with an image editing program ...
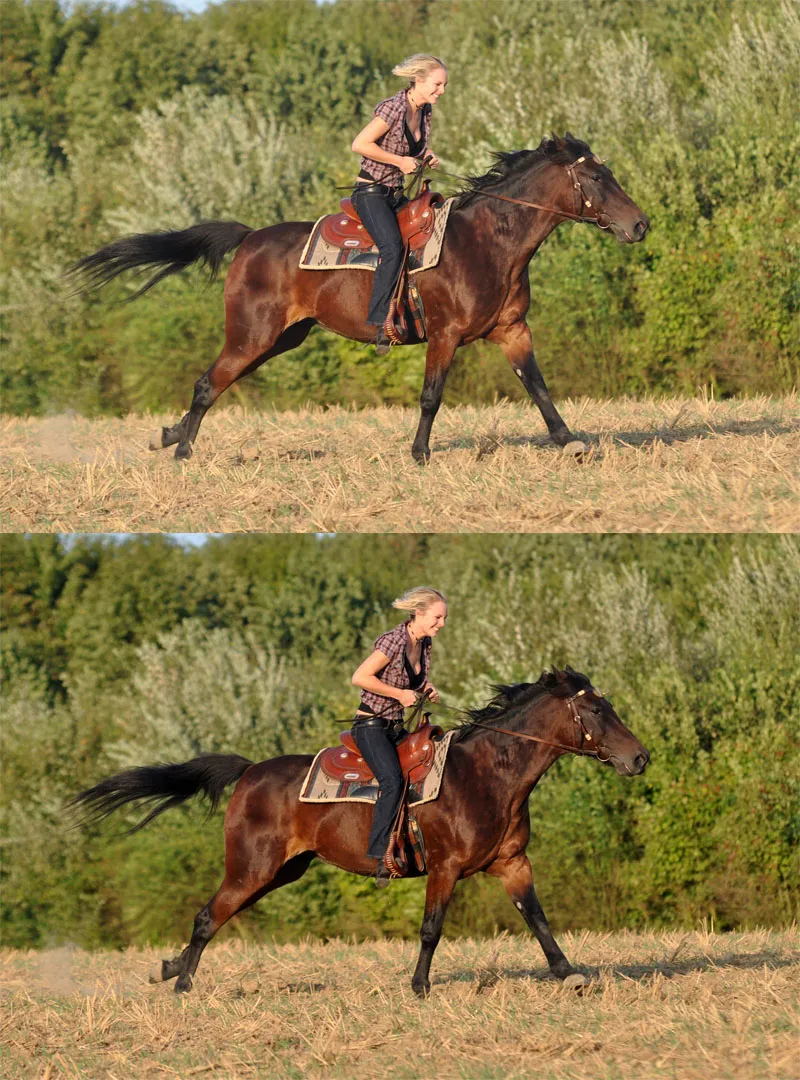
Almost all image editing programs have various exposure corrections. There are several ways to rework your image if you have exposed it incorrectly. In Photoshop, for example, you can use the "Auto Contrast" function - I like to use it for black dogs in particular. I rarely use the auto color correction function. In general, of course, the best way to control the image is manually, i.e. using the brightness/contrast slider or the "Exposure" option (see also the image editing tutorial). Many photographers recommend that beginners shoot in RAW format if they have exposure problems. There are much more versatile post-processing options here. I have never used this format myself. But it is certainly a good alternative. Unfortunately, I can't say much about it. Here are a few examples of how incorrectly exposed photos were embellished with exposure and contrast via Photoshop: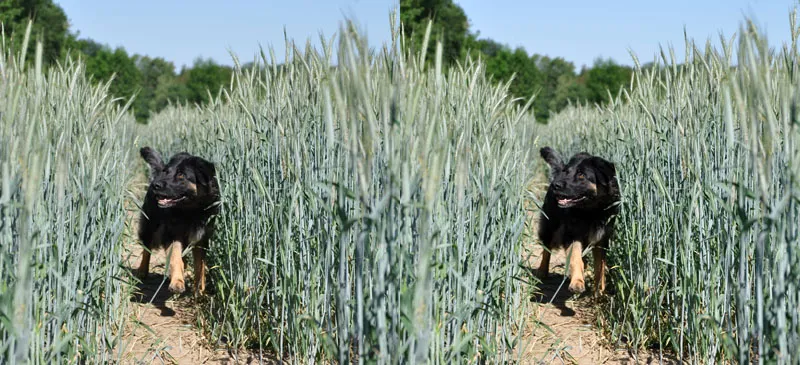

ISO
ISO sensitivity is another way of changing the exposure of your images. You can set this manually or leave the choice to the camera via auto mode. In general, you should know what the ISO sensitivity means and what it does to your pictures. As a rule of thumb: the higher the ISO sensitivity, the less light is required for a satisfactory exposure result and the shorter exposure times or smaller apertures can be used. I usually shoot with ISO values between 200 and 400. Of course, the white balance also plays an important role in perfect photography. Cameras now have a very wide range of preset settings to choose from. The white balance ensures that the colors are not distorted due to given light sources. For example, there are adjustable color temperatures for white light, daylight, direct sunlight, shadows, flash light, cloudy skies, etc.
3. light and backlight
Time and season
As already described in other tutorials, there are certain times of day (depending on the season, of course) that are more or less suitable for photography. Last but not least, it also depends on the weather and the color of the dog you are photographing, as well as the background you have chosen. In any case, as described above, you will have to adjust the exposure to the respective subject.
If you are photographing in strong sunlight, you should use exposure compensation. The photos will almost always be overexposed. If you are unsure, feel free to select -1. Images can be corrected better if they are underexposed. Control the rest with the Blender, the light gives you enough freedom. This is more difficult with overexposed images. So it's better to choose a setting in which the photo is perhaps a little too dark; it's better than overexposing it. I'm one of those people who simply don't take this tip to heart and constantly overexpose the photos ... I always end up getting really annoyed about it, but I always get it wrong anyway.
To explain once again: your SLR calculates an exposure tailored to the situation. This is displayed in the camera's light meter. However, if you want to deliberately deviate from this, which is advisable for many shots, you can make a targeted exposure correction. Correction = The image will be brighter or darker than the camera's automatic exposure settings.
Examples:
If you photograph a black horse in front of a very dark background (woods, black wall), the camera will select a long exposure time. We will then have an undesirable effect, our subject will appear gray. We therefore select a shorter exposure time and the image becomes darker, e.g. -1 or -2.
For example, if you photograph a white dog in a snow-covered landscape, the camera calculates a darker exposure than we would want. The image would appear gray. We should therefore select a longer exposure than the camera suggests, e.g. + 1 or + 2.
In the months of April to September, I take photos, if possible, at times up to 11:00 a.m. or from 3:00 p.m. onwards. These are the best times. In the months of May to mid-August, the evening hours are of course wonderful for taking photos. This gives the photo a certain flair. Beautiful ... In winter it's a little different; depending on how the sun is shining, you can also have good luck with your photos all day long. You are also much more limited in terms of time, as it gets dark so early. When the sky is cloudy, the photos don't look as beautiful as if they've been kissed by the sun. They usually look like they are covered in a veil of glare, colorless, dull ... boring. But every now and then you can tease something out of the shot with a color effect (e.g. black and white), perhaps with a black frame around it. And that's it. A dull autumn mood can also give the photo a wonderful atmosphere. Especially if you reduce the color saturation a little. Please refer to the image editing tutorial for samples.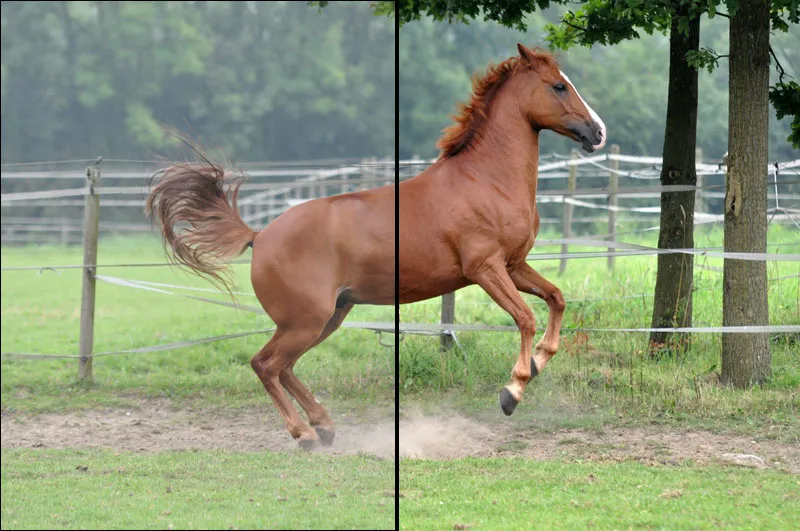
This picture of Dancer was taken in the morning. It was very cloudy and hazy (left = unedited; right = contrast and brightness changed via Photoshop).
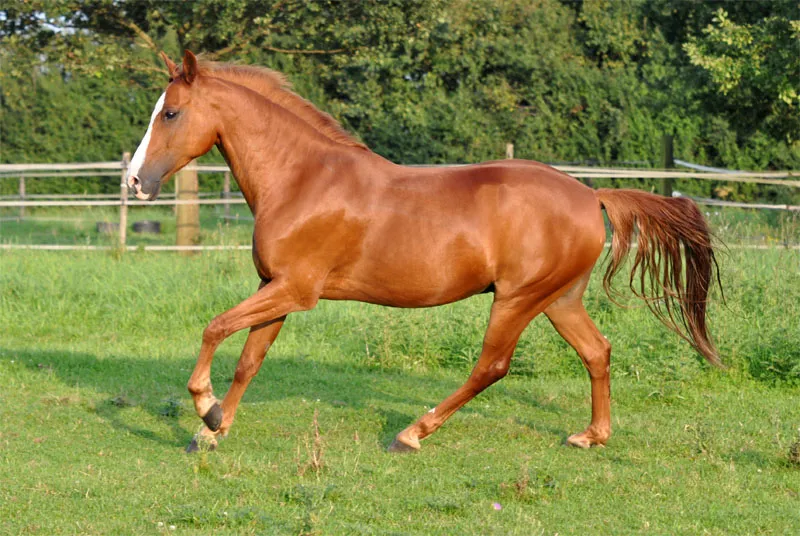
This picture of Dancer was taken late in the evening in glorious sunshine.
The sun behind you
You should ALWAYS have the sun behind you. Of course, there are also beautiful effects and especially a horse silhouette in the setting sun, but if these are not desired, as a photographer you will always be on the safe side if the sun shines exactly on your back. I always work with the lens hood, you should too, but it doesn't prevent a negative effect if the sun doesn't hit the subject ideally. Here you can see an example: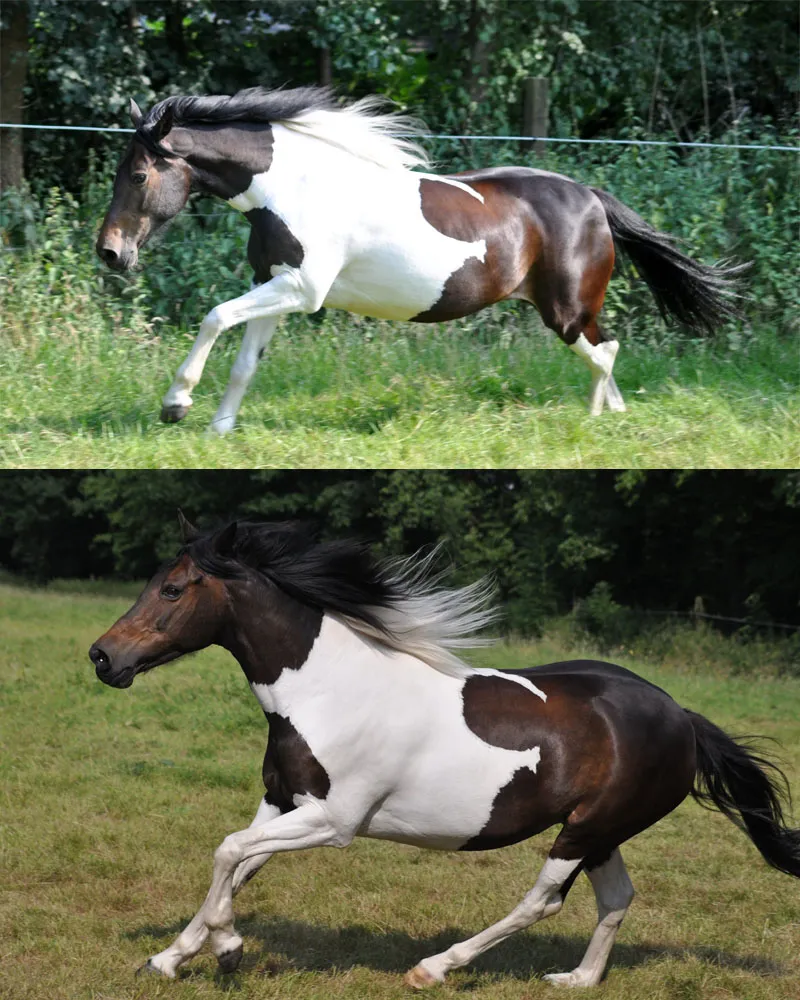
The pretty mare Shatou went full throttle during our shoot. Above you can see a shot in which the sun was to the right of both of us.
In the second shot, she was already a little further away and I had the sun behind me. Perfect light for the shot. Unfortunately, it was too close and a part of the tail is cut off ... You can clearly see what the light does to the subject.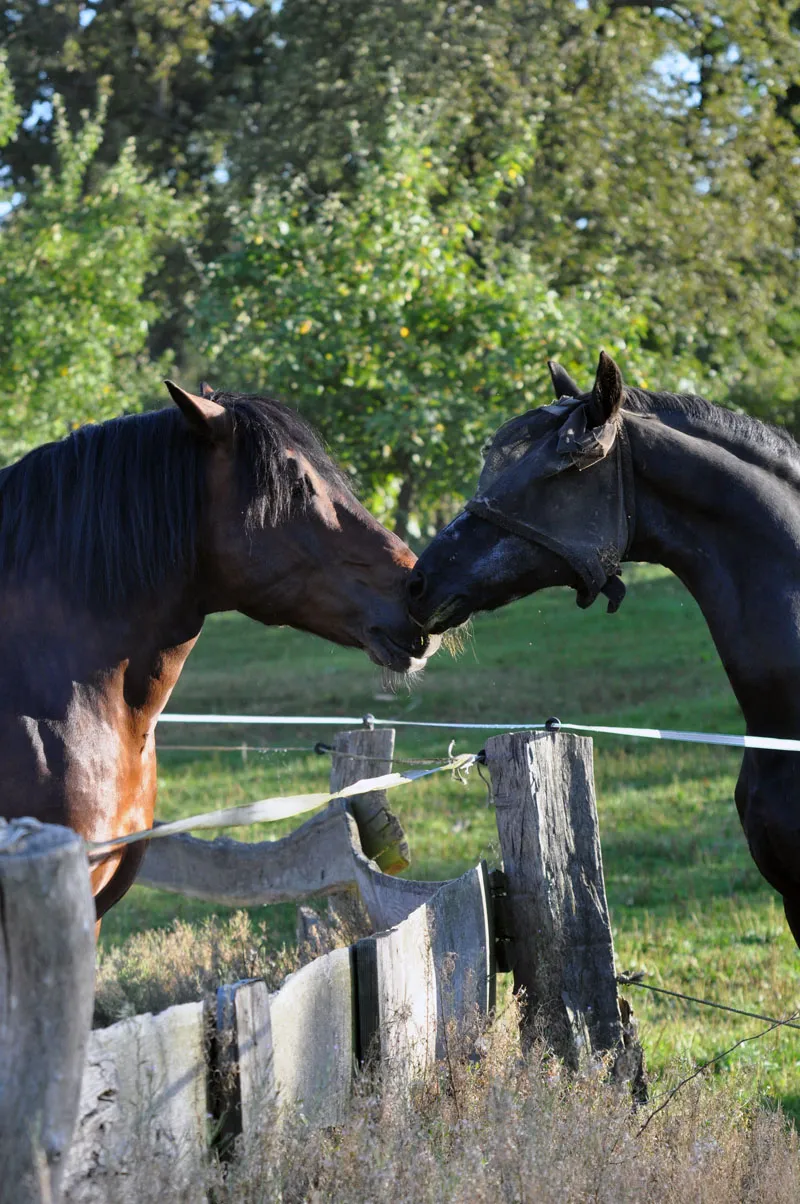
The stallion on the right has the sun behind him, so the shot is dark and shadowy. The stallion on the left, Alex, has a beautiful coat color that may not come across. If you are photographing against the light during a sunset, you should apply an exposure compensation of approx. +2, otherwise the subject will appear too dark.
Black/white subjects
Photographing black animals is always very difficult! Either you have a black spot - whether outdoors or in the studio - because you have let too little light into the picture, or you have a gray dog that reflects the light at all corners and edges. Both very unattractive, both undesirable. You often have to play with your exposures and adjust them again and again to suit the situation. A sure instinct is required here. Photographing black animals is always a tricky business!
It is also not easy with white animals. If you photograph a light-colored dog in green grass, for example, the camera may overexpose the dog, but the rest is beautifully presented. In the studio, you also have to be very careful here and darken the image with your settings. Always select a shorter exposure time here and always check the images in your camera's menu to make sure they are correctly exposed. Again, it's better to be too dark than too light!
4. a visit to the zoo
Especially with a new lens or just for practice purposes, I like to hang out in zoological gardens when the weather is nice. While I'm running around with a camera in front of my head, telling myself what's wrong with the light and why Mr. Lion won't even move in my direction, my companion is usually left with nothing but boredom. I admit that he probably thinks I'm completely bonkers. He gets embarrassed at the latest when I start lying on the ground, leaning over barriers or squeezing through fences. "But then he's closer," I say back in offense every time, but it doesn't help. He shakes his head and moves on to the next enclosure.
As my boyfriend is just as obsessed and enthusiastic about animals as I am, a visit to the zoo was always something spectacular. We sometimes drive very long distances to do this. However, since I've had the appropriate equipment, this has increased my enjoyment of zoo visits even more, but his less so. "Look here, darling." - "I can't right now!" I whisper back, waiting for the right moment to catch the seal with its head out of the water. "Why don't you come here?" - "Just a minute!" The seal remains at the diving station, then just shows me its dorsal fin, waving it as if to mock me. "Well, now you've missed it, there was just a baby seal giving its mom a kiss!" - I can hear the smile in my companion's voice. Argh! As I rush in his direction with the camera, I see the clumsy little seal pup jump into the water. Great!
Of course, it's not always like this and we both still have a lot of fun visiting the zoo! For animal photographers, of course, this is a real paradise. But you need a lot more patience here than on other occasions! "You want to photograph a tiger? Great! Here's one. Somewhere in this huge, jungle-like overgrown enclosure of around 10,000 square meters. Maybe one day it will appear in front of this small, five-meter window and you'll catch it in a place that isn't all scratched up and dirty. Oh, in case I haven't mentioned it yet, our zoo only has 1 of these extremely rare specimens ..." Hmpf. Let's wait and see then. So I admit, in addition to patience, you often need a little bit of luck or more.
Thanks to today's - well-stocked - zoological gardens, visitors are spoiled for choice with their cameras. I usually photograph all the animals that prove to be grateful models. No matter whether they are striped, dangerous, small or large. I too am always waiting for a fabulous moment that I can capture in a picture without realizing afterwards that it is out of focus or incorrectly exposed. So it is always just as exciting to view the treasures on the PC and count the yield.
I would simply like to recommend the zoological garden as an excursion destination to practice and enjoy. Here you can try things out to your heart's content. Although it is difficult to get the models to perform certain actions, I think you will always come back with some great shots and be able to photograph animals in motion as well as in quieter poses. You will be able to try out lighting conditions, Blenders, exposure and focus and, if you wish, even view your pictures on the Internet afterwards and, above all, have them rated both positively and negatively. In turn, you may receive one or two tips on how you can improve.
Practice makes perfect! In addition to dogs, cats, mice and horses, we should not forget our wildlife representatives and simply go on a photo safari!
IMPORTANT! When publishing pictures, please note that you should obtain permission from the zoo. You are usually allowed to publish the photos on the Internet for private purposes, stating the zoo where they were taken, but not for commercial purposes. Which is understandable. I have obtained permission from the zoos for photos I have published. They usually respond very quickly and in an extremely friendly and positive manner to e-mail inquiries. If you plan to sell some of the pictures, you have to ask the zoo for permission. In many cases, a contractually agreed one-off fee is payable to the zoo. As far as I know, this is within a very fair range. I think it is just as fair to support the zoological gardens in this way and to ask for permission before publishing the pictures privately. As photographers, you also offer us such a great variety of unique images. Again and again I read in forums that pictures from zoological gardens are edited so that the zoo does not "recognize" its animals. The photos are then sold for profit without involving the zoo. Why is this done? I don't understand it. A zoo has so much to offer everyone, we should promote this and not try to make a profit from it for our own benefit. In principle, we are only betraying one person, namely the animals. That is my statement on my own behalf. For your safety and information, as many people don't know about this, I would like to pass it on to you and wish you lots of fun on your next visit to the zoo.
.webp?tutkfid=68355)
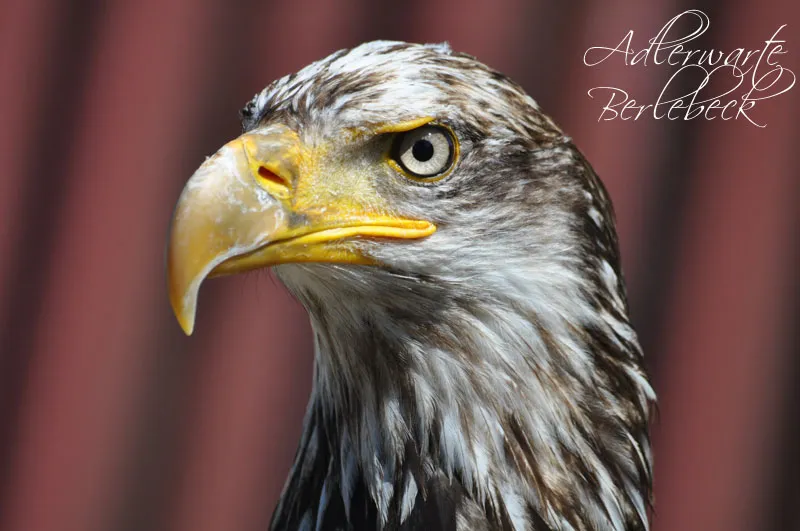
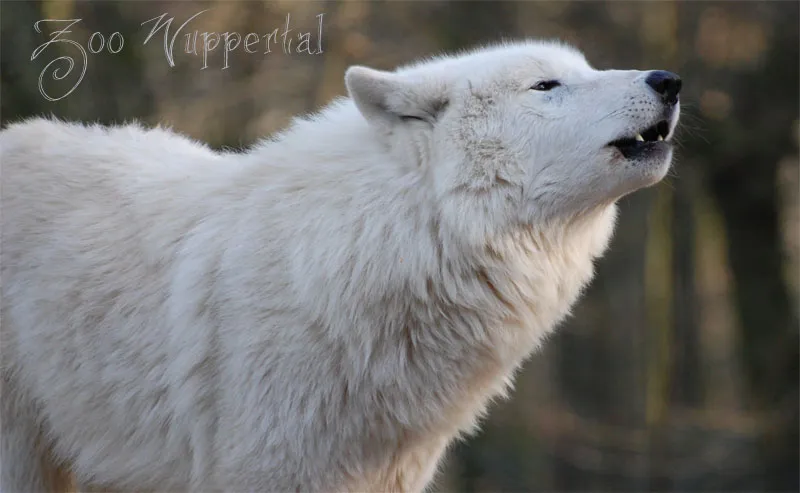
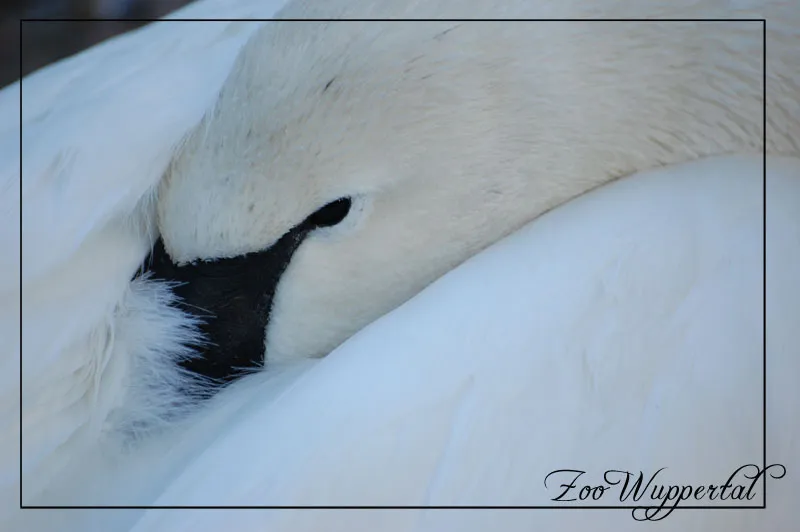
5. find spectacular animal motifs
You don't have your own four-legged friends and want to find exciting animal motifs? No problem! If zoos are not your thing or you have already experimented more than enough with your camera there, I recommend a few other things where you can improve your skills a little. And even if that's no longer necessary, you can still take wonderful pictures of animals. Of course, I'm wondering which animals you would like to photograph or what type of photography you have in mind. So I'll just give you a few suggestions for every taste:
Dogs
Dog schools & dog places
All you need to do here is contact me. As a photographer, you are usually a welcome guest, especially if you provide a few pictures free of charge. To find suitable dog schools or dog parks, simply talk to a few friends who have a dog or do a bit of searching on the Internet. There is an incredible amount to photograph on these occasions. From agility training to cute puppies at puppy school to professional guard dog training. Here are a few useful links to help you in your search:
http://www.hundeschule.net
http://www.snautz.de
http://www.hundund.de
Dog events
There are so many events for man's best friend every month that you probably won't know where to go first. Why not try a great dog event? There are often larger events such as Dog Day (see link list below) or
http://www.dog-day.de
http://www.dhd24.com/archiv/2009/15/5320/1/Tiermarkt/4160/Hunde-Termine--Ausstellungen.html
Dog meetings
Dog forums are the best way to do this. Use them to make contacts, simply ask if there is interest in a dog meeting in your area where you can take a few photos or if there is a walk or dog swim planned that you can come to anyway. However, you should explicitly declare this as free and non-commercial. This is not allowed in most forums and is especially frowned upon by newcomers.
http://www.dogforum.de
http://www.dogginator.de/forum
http://www.hundeforum.net
http://www.polar-chat.de
Dog sports
Of course, there are also dog sports on a large scale. Whether it's complex courses, Frisbee sports or even dog racing. Of course, such events are always great fun for photographers.
Horses
Horse shows
Horse shows are held throughout the year. Regardless of whether a particular breed of horse is being presented (e.g. Shire Horse Show or similar) or a stallion award ceremony is taking place. Of course, there are also horse auctions or sales presentations with foals that are presented.
Horse shows
The choice here is huge. Whether vaulting, western riding, dressage or show jumping. As a photographer, you have something to see almost everywhere. Events such as a rodeo or cow driving are of course also very unusual.
Horse racing
These events are certainly also great for taking photos. I have not yet captured a race in a picture.
Cats
Cat shows
You can photograph beautiful pedigree cats at cat shows. Unfortunately, they are usually in a cage or on the arm of an owner or Richter. Nevertheless, it is a great experience that you should have seen at least once.
Cat breeders
As it is otherwise difficult to photograph cats and they are usually shy or difficult to photograph in the wild, just ask a breeder in your area if you can take some photos.
6 Nature's Best - the right background
As the choice of background always plays a very important role when photographing animals, you should practise a little in this area sooner rather than later. It often happens that you unexpectedly find a model or perhaps even plan a shoot and the animal owner says: "You know better than me where we can take photos." Then you definitely need to have an answer ready, namely some suggestions! I myself know how difficult that is, especially if you don't know the area and have no idea where a suitable field or location might be. Especially as the pet owner may not know whether a place that could be considered as a background is even acceptable in terms of light for you as a photographer. An example: I was at a shoot and made some suggestions as usual, it was in summer: a nice field, an open meadow with woods in the background, a nice forest clearing, perhaps with a stream or a few large stones, tree trunks etc. - As the dog (Samy has already been introduced) is a real water rat, we also wanted to go to a real pond or similar later on where he could swim. So we went to various places, it was too dark in the forest. We weren't allowed in the meadow because of the hay that had been mown there, and the light wasn't right at the canal. If you don't take photos regularly, you just don't know. That's why you try to explain as best you can to the person who knows the location which places are suitable and what is important for your work. Not least because otherwise the shoot will consist of driving and walking and both animal and two-legged friend will be stressed. Your memory card, on the other hand, will still be very empty! This is unnecessary frustration.
So even on a walk without a camera, always pay attention to what really presents itself as a motif and for which color of animal. See your surroundings more and more through the eyes of a photographer who is on patrol with an animal in search of a suitable background. That sounds funny? In the same way, every time I stand in front of a field or a forest in ideal lighting conditions, I get extremely annoyed that I don't have both a camera and the right subject. If you take a lot of photos, you will soon develop this view anyway. Whether you want to or not. Isn't that the beauty of this hobby?
But I'm getting off topic again! So let's keep in mind that it's not just about a great background, but also about the right lighting conditions. So if you choose a great backdrop, you also need to make sure that you have the sun behind you if possible and that your subject is brightly lit. If you are photographing a rider in a field or meadow, for example, you need to explain to him how he and his horse should best move. Stand with your back to the sun and let him ride towards you or from right to left at the desired distance. It is important that you inform him of the best distance to you. The rider probably doesn't have an eye for this, and is probably busy with other things (spurring or braking the horse, sitting well and, most importantly (!!!!), not forgetting to smile). After each "photo series", check your menu to see if the photos are to your liking. If the subject is too close, you are probably cutting something off too often (tail, ears, etc.). If it is still too far away despite the high focal length, the image section will not look as nice. So you have to try to let the horse run at a distance that is completely covered by your focal length. So if you have a 70-200 mm lens, use a high focal length at a greater distance and then let it "run along" when the subject is closer.
Of course, there are also things that should never be in the picture at all and that you should avoid at all costs. Avoid cars, ugly buildings or people in the background. Make sure that no electricity pylons, traffic signs or even garbage cans or the like are in the picture. The photographer is often so focused on the subject that they lose sight of the background. It would be a shame if you had to be annoyed afterwards.
If you photograph light-colored animals in front of a blue sky, it may later appear as if they blend seamlessly into one another. I think that's a bit unattractive:
Apart from the fact that this picture is a bad example for several reasons, let's just take one of them as a cautionary example: pale and background blur almost seamlessly. But as I said, this is just one of many things that are not ideal in this shot. It works perfectly as a how-not-to-do-it shot for the problem described above.
Personally, I prefer to photograph my subject in front of a forest. The forest blurs into a green-black that acts as a wonderful background. Especially with light-colored animals. Here I have photographed a black dog in front of a dark background on a road. The picture is not really an eye-catcher, even the frame and lettering are of no use: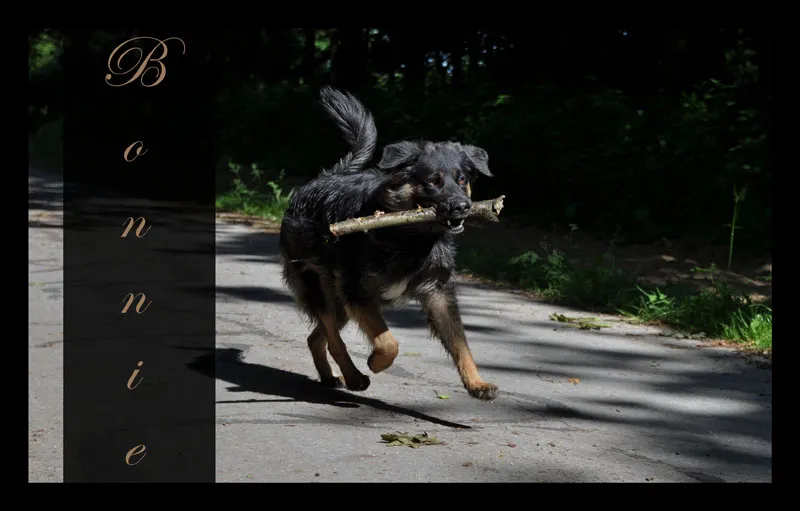
As I did in the tutorial with Bello on dog photography, I would like to show you a few more nice examples of what backgrounds might be suitable using photos. Otherwise, the internet is full of ideas and you will also discover new motifs for yourself.
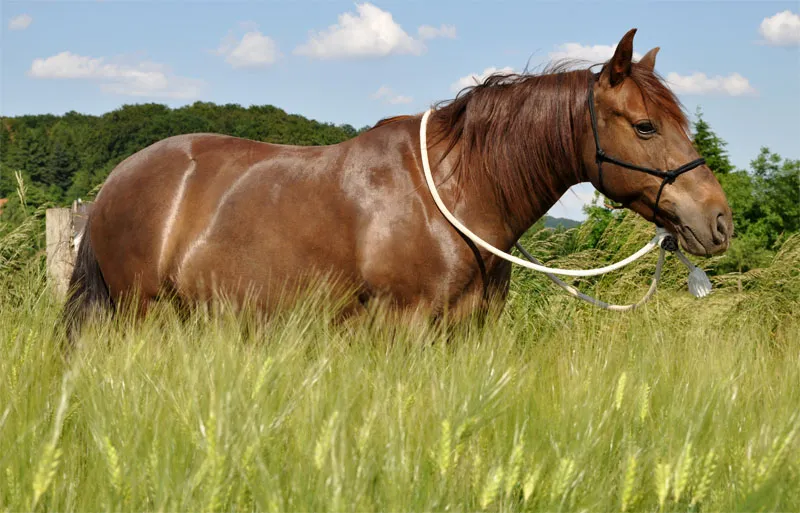
For this picture with the mare Edita, I walked into the cornfield and snapped the horse above the stalks. The owner and rope were later retouched using a Photoshop stamp (see image editing tutorial).
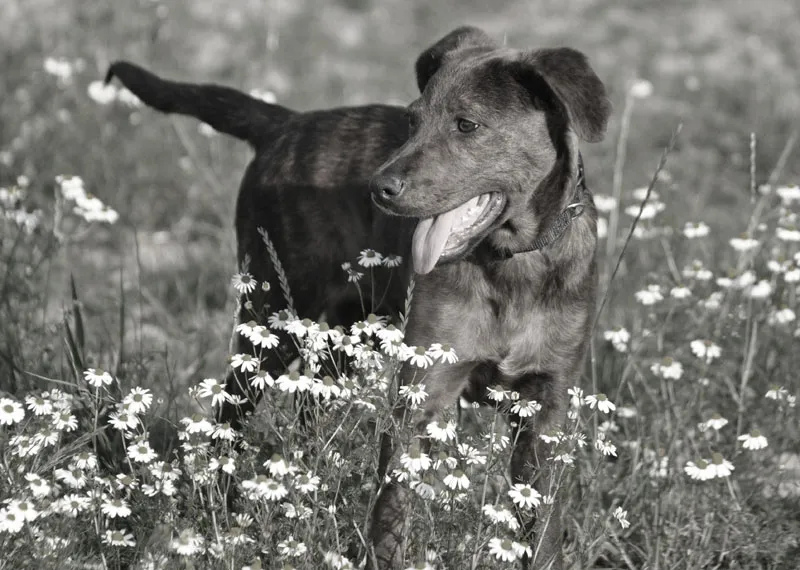
Diego in the flower meadow - photographed slightly from above, as the background wasn't very nice.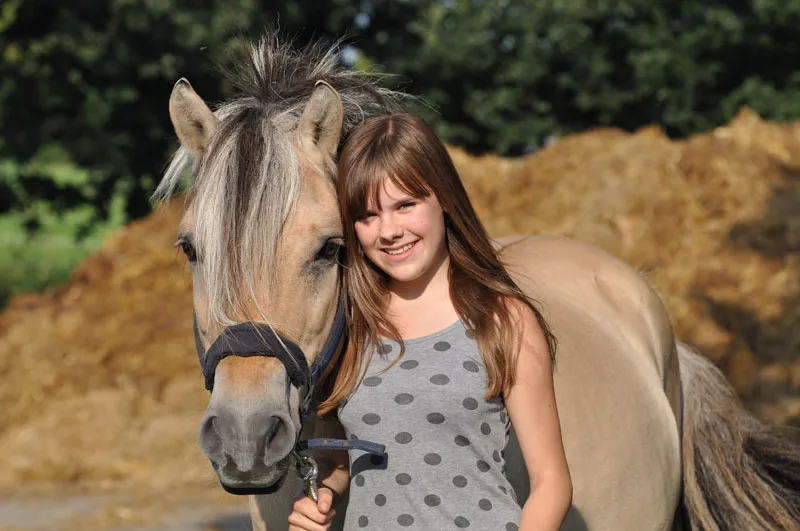
Here I was so distracted by my two very charming models that I didn't pay any attention to the background. That's right, it's a pile of dung. As we all know, taste is debatable. I like it!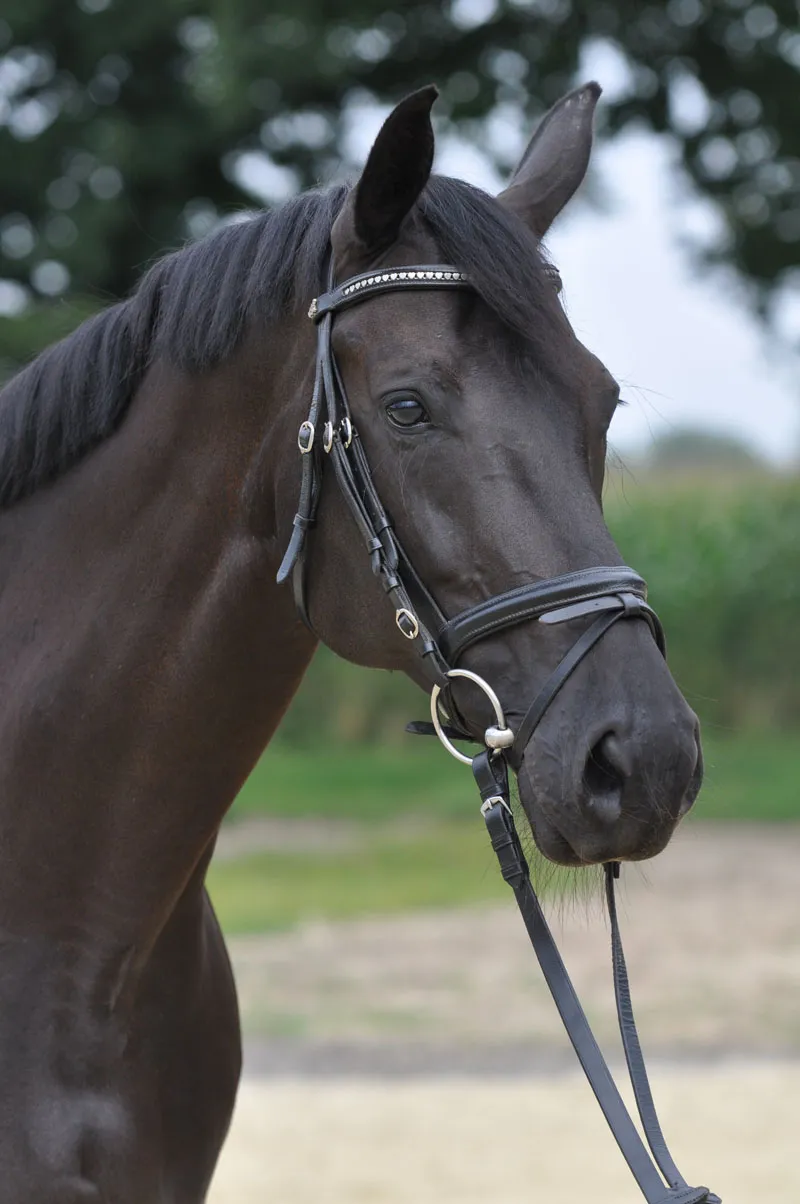
We used a riding arena for the photo with gelding Fruchtzwerg. Soft colors and a background against which the black horse, which is very difficult to photograph, can stand out well. I can never really get to grips with black. But that is also one of the challenges photographers have to face.
I hope this tutorial has given you a few ideas. Further information on equipment, image processing and camera settings will follow with the missing tutorials. You are of course welcome to contact me with any further questions or suggestions.
Until the next tutorial!
Nicole Schick
www.tierfotografie-mit-herz.de
