I worked a little on the curves and timing and moved a few things around. You can see what the curves and the x position look like now.
I added a keyframe in the x position and flattened the curve at the end so that it doesn't jump so much and the ball rolls out nicely.
I really like the tiny last jump because you hardly notice it, you just feel it.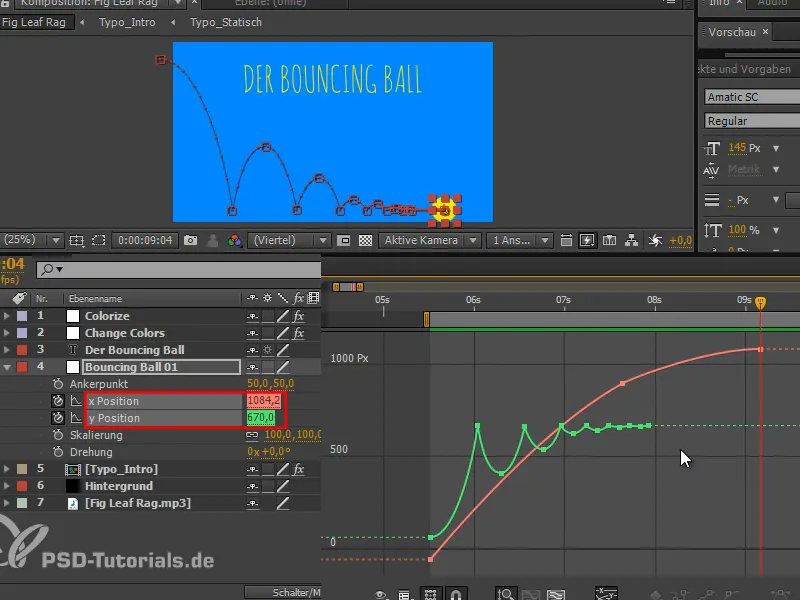
We still have the problem that the ball is very stiff. That's why I'm going to squash and stretch.
The idea is that the external force changes the shape, but the volume remains the same: When it hits the ground, the whole thing should compress, then it should stretch into the air and compress again when it hits the ground.
Step 1
First we have to take care of the anchor point of the plane.
At the moment it is exactly in the middle of the ball. This means that when we scale, we scale from the center. However, we have already set all the poses so that they lie perfectly on the bottom line. We want to keep that, but if I scale and make the ball bigger, then it no longer fits with the baseline. If I make it wider and narrower, it no longer hits the ground and I have to move it further down.
You can also remove the link to see this better..webp?tutkfid=68375)
I would therefore prefer to have the anchor on the bottom of the object.
We used a color area of 100x100 pixels for the creation. If we enter the value "100" instead of 50 for anchor point y, then the anchor point is exactly on the lower surface of the ball.
It should stay that way..webp?tutkfid=68376)
Step 2
However, we still need to move the movement path by 50 pixels. This is best done in the keyframe view.
Go through the timeline while holding down the Shift key, then briefly click on each frame. Go exactly to one frame and leave it there.
Then select the y position itself so that all keyframes of the y position are selected and drag the slider to "720".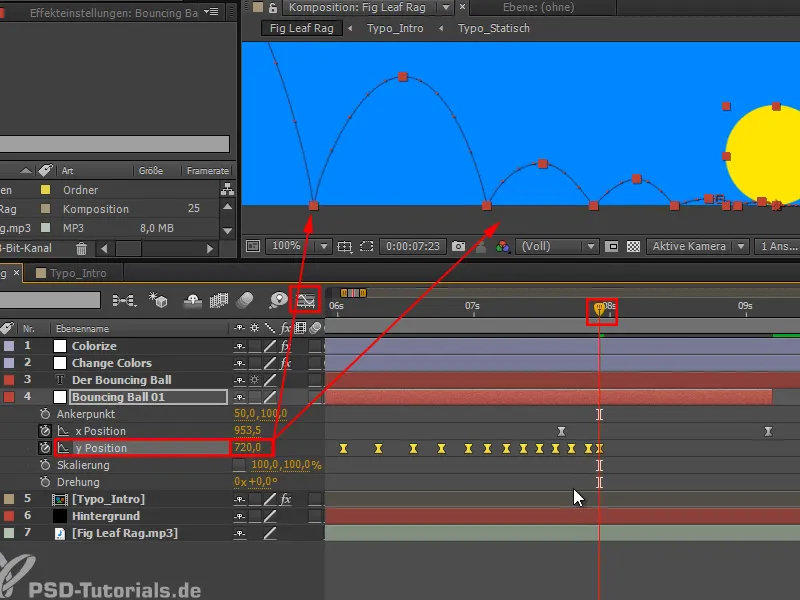
We have now moved everything down by exactly 50 pixels. Our animation is still the same, but the anchor point is now at the bottom. This means that if we squash and stretch now, the point will remain at the bottom.
Step 3
The most important aspect of squashing and stretching is that the volume remains the same. If I make the ball flatter, it must also become wider and vice versa. If I pull it higher, it must become narrower so that the volume remains the same.
This is not so easy to do by hand with the percentages, so there is an expression for this, which I would like to explain briefly here.
If we imagine the ball as a square, as it actually is, because our ball is originally a colored surface, then we have one side a and another side a that is exactly the same size.
Now we squash and stretch the ball in some way, then the red area b/c must be the same size as the red area a/a.
Let's put this into an equation: a * a = b * c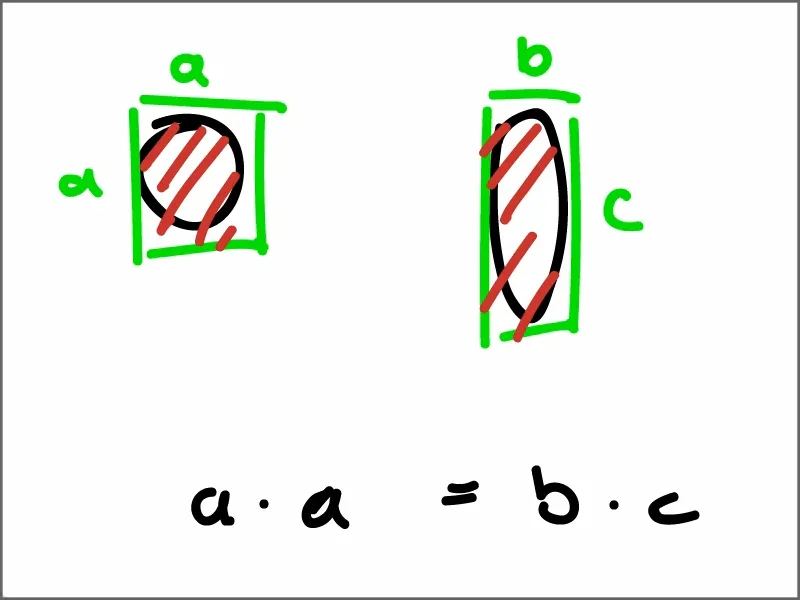
We know that a has the value 100.
The current x-value is b and the current y-value is c.
We influence one of them, let's take the x-value, then it says 10,000 = x * y
If x can remain unknown, then let's convert to y.
y = 10,000 / x. This is what I call the squash and stretch formula and it is included in the scaling as an expression.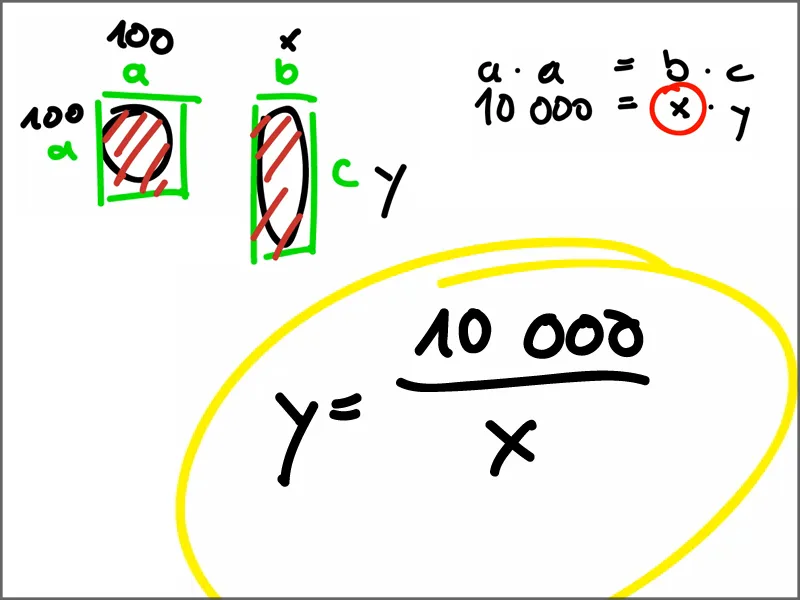
Step 4
We go to the scaling with the Alt key.
"x = value". Value always gives me the current value. It has 2 slots, 2 arguments.
I want the first argument, which I specify with square brackets and zero. The 1 would be the second.
And "y = 10,000/x".
And then at the end we put "y,x" in square brackets. This is the notation in which we get this back into the two values of the scaling.
We confirm this and nothing happens at first ...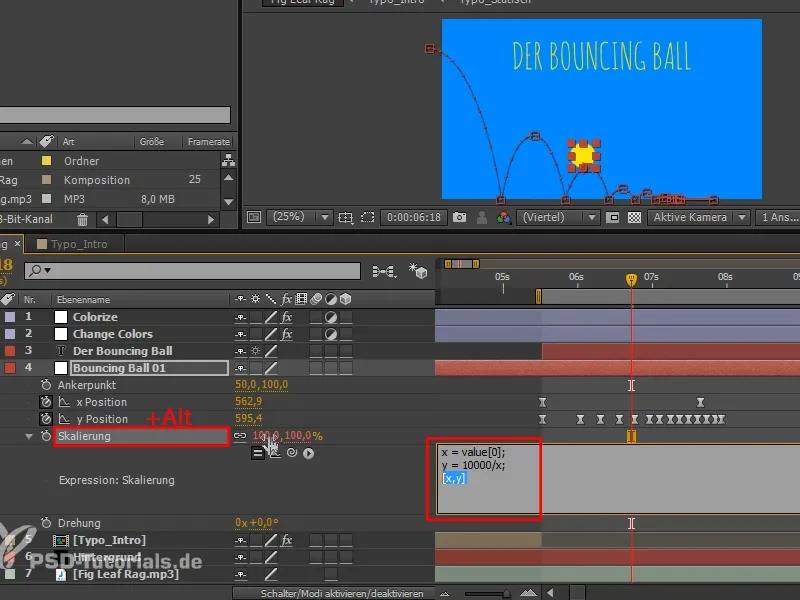
Step 5
... but as soon as we move x, we have fantastic squash and stretch, where the volume always remains the same.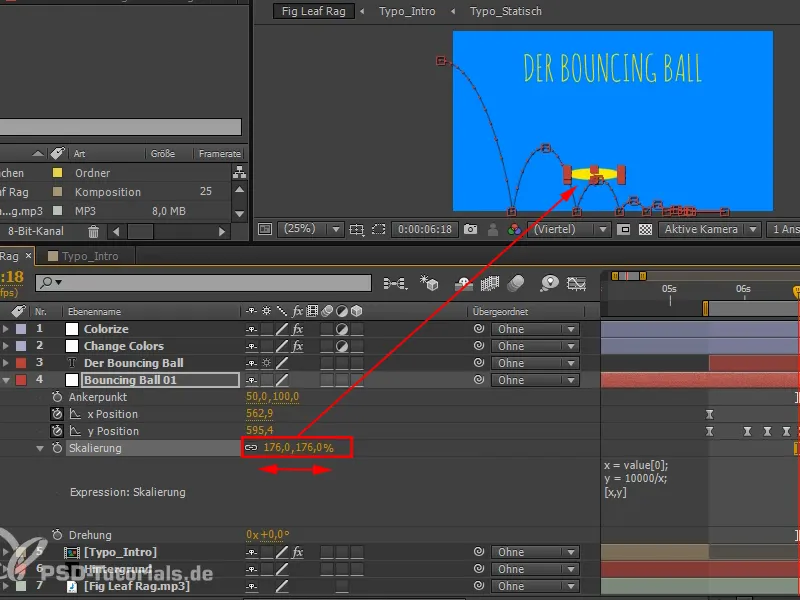
Step 6
Let's think about how squash and stretch works.
When the ball is at the top, there is a balance of forces. This means that we can set a keyframe at all these points, because no force other than our own is acting there. These are 100% keyframes.
For the very small jumps, it is not so easy to see which points are the right ones in the normal view. You can simply switch to the other view, where the points stand out more clearly from each other so that no mistakes are made.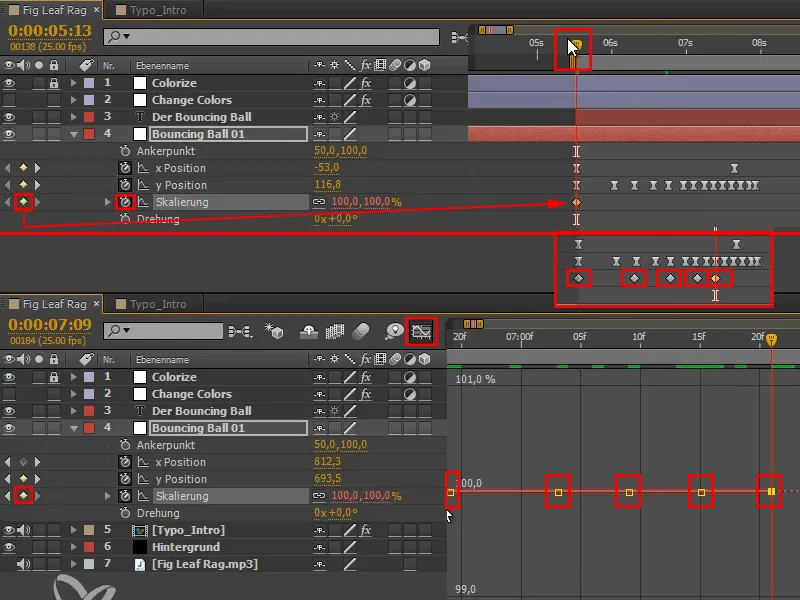
Step 7
Now you might say that the ball is at its fastest halfway down - but no. It is fastest just before it hits the ground. The frame before the ball hits the ground. The ball doesn't know that it's about to hit the ground, and it's not afraid of the ground, but is suddenly hurled onto the ground. And that is exactly the force that acts on it.
Squash and stretch are animated in such a way that the ball is at its longest one frame before it hits the floor. Then we stretch it out ...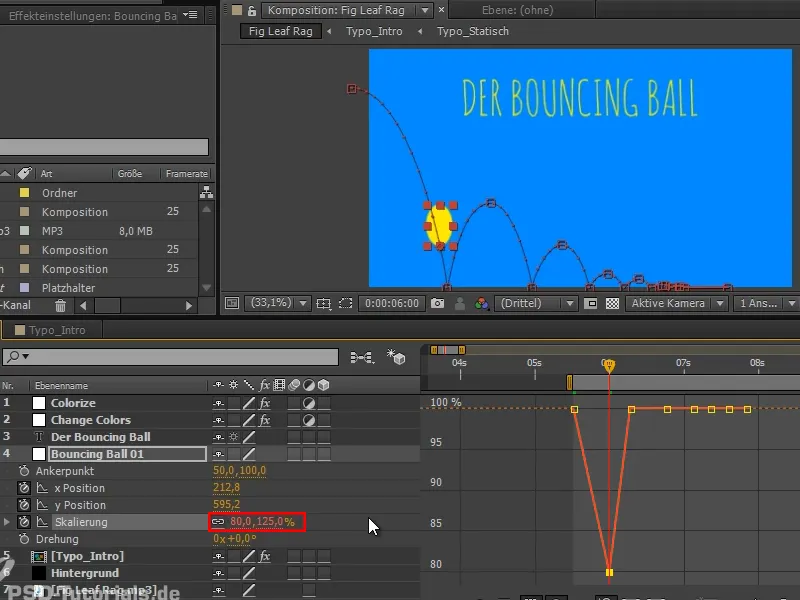
... and at the point where it hits the ground it is flattened, so we stretch it out.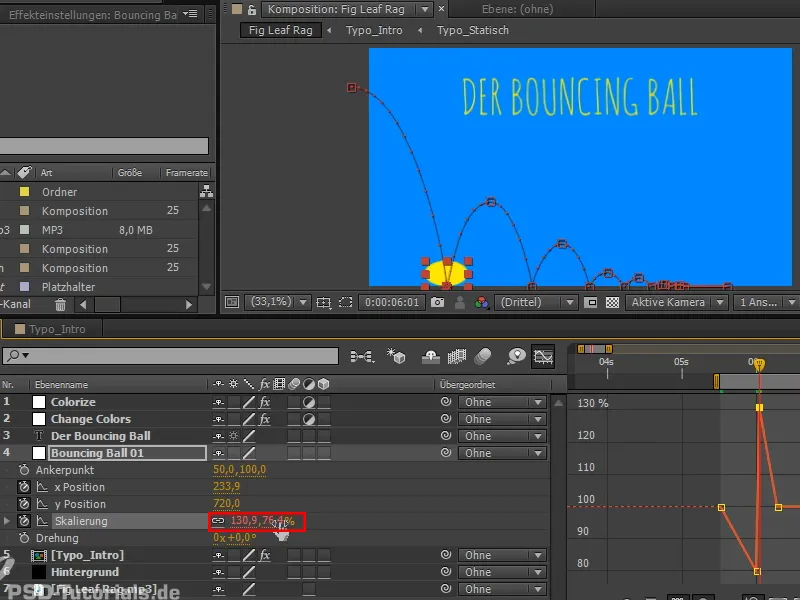
This is how we get the nice crisp in the animation: the "hard against soft", flattened at the bottom, straight again at the top.
Step 8
One frame before the ball hits the ground the next time, we stretch it again and squash it again at the bottom. We continue in this way, whereby the distances naturally become smaller and smaller. The weaker the ball bounces, the less it stretches and squashes, of course, because less force is exerted on it. At some point, this can be neglected.
We can already see the pattern emerging.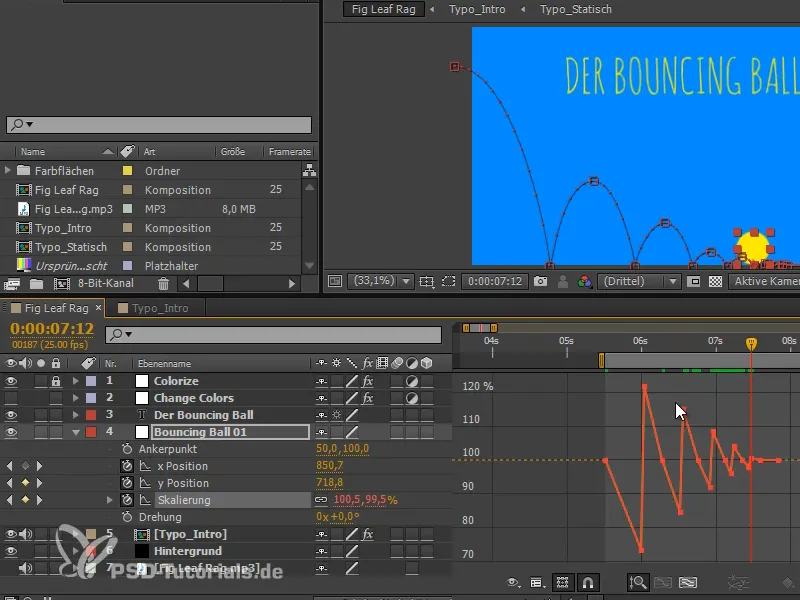
Step 9
This looks quite good, but something is still wrong: the ball would not stretch straight, but along the path. But at the moment it's still moving straight up and down - and that's not quite right again.
I'm going to make some easy easy keyframesfirst, which will give us a better distribution in the spacing. We'll also get some nicer accents at the turning points thanks to the flatter sections, which means there's a bit of acceleration or deceleration at these points when it comes to squash and stretch, and we'll have a bit more moments in the air where it's not affected by any force. I like that very much.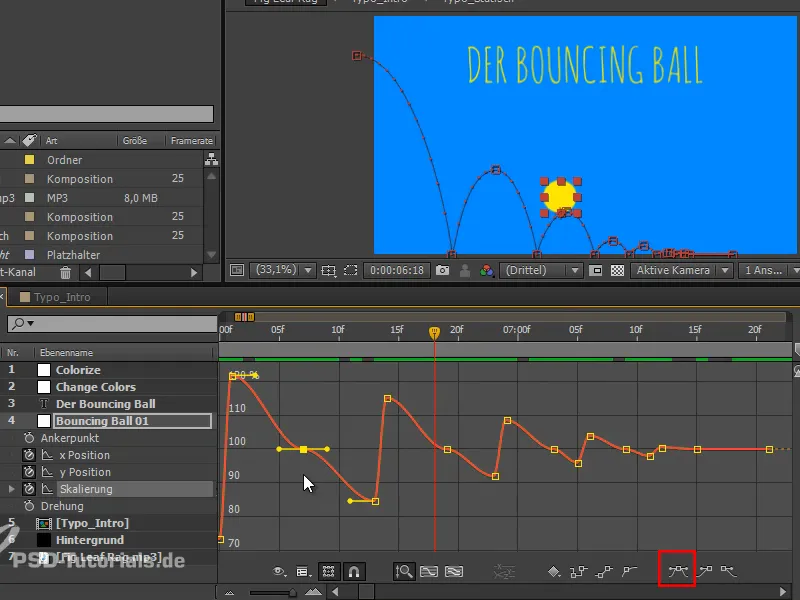
Step 10
Now comes the turn, the last thing we need to animate with the bouncing ball, and it's also very simple:
I press Shift and add the scaling. We basically take the timing from the scaling and rotate the whole thing in the direction so that we really move towards the part.
At the turning points at the top and bottom, the rotation is set to zero.
In between, we set the values alternately in the positive and negative range at half height, depending on the direction in which we want the rotation to go..webp?tutkfid=68387)
Step 11
Again, we set this to Easy Ease and thus avoid small sugars.
After a little fine-tuning, the whole thing looks like this: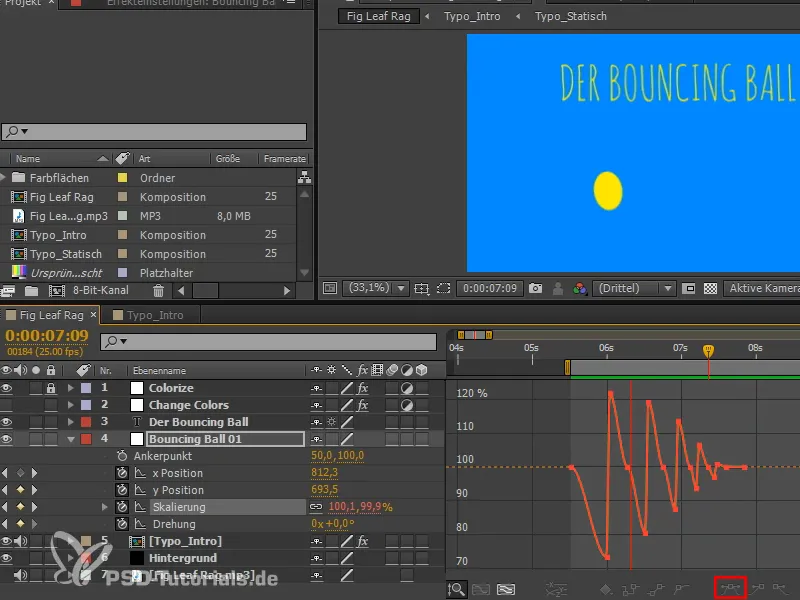
We now have almost all the things together that belong to a bouncing ball: We have the classic movement of the ball, but also its squash and stretch and its spin.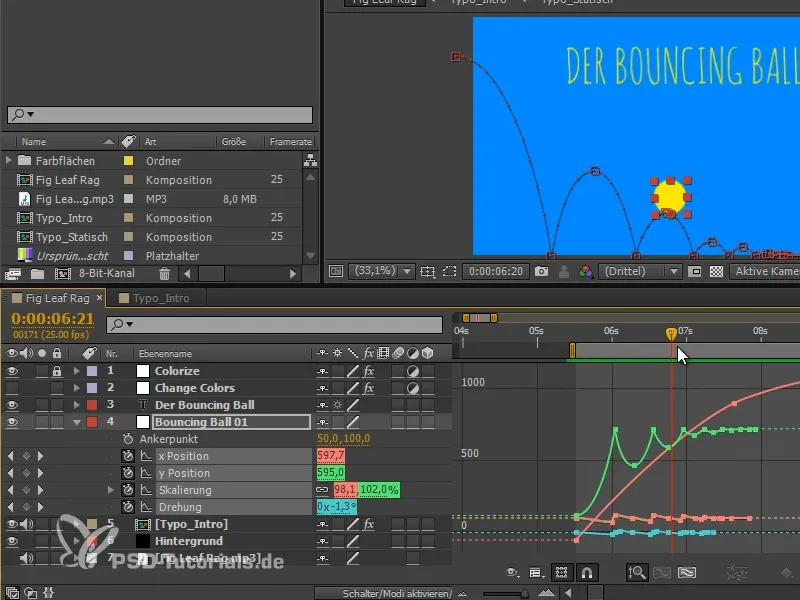
The last thing missing is the bursting of the ball, because then the ball comes again and its movement path is shown. The analysis part of the bouncing ball, so to speak.
This will be the subject of the next part of the tutorial series "Animation in After Effects: Bouncing Ball - Bursting".
