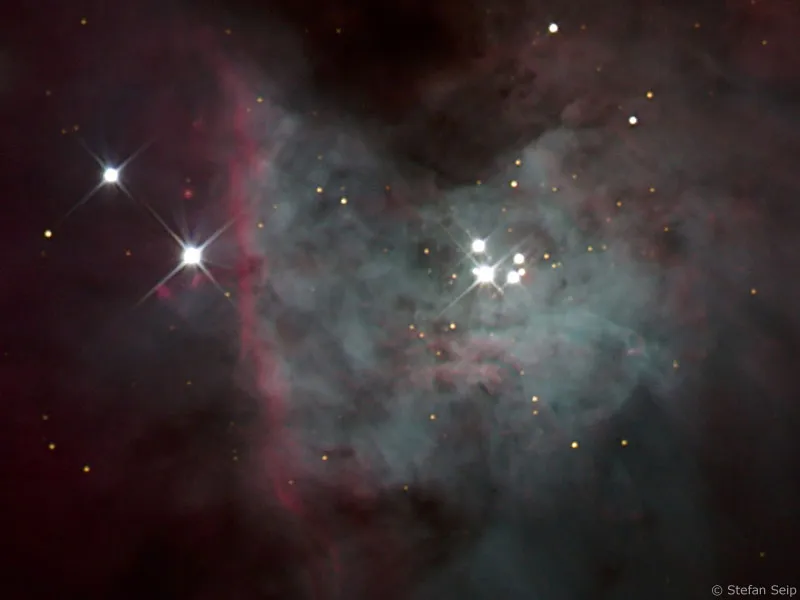
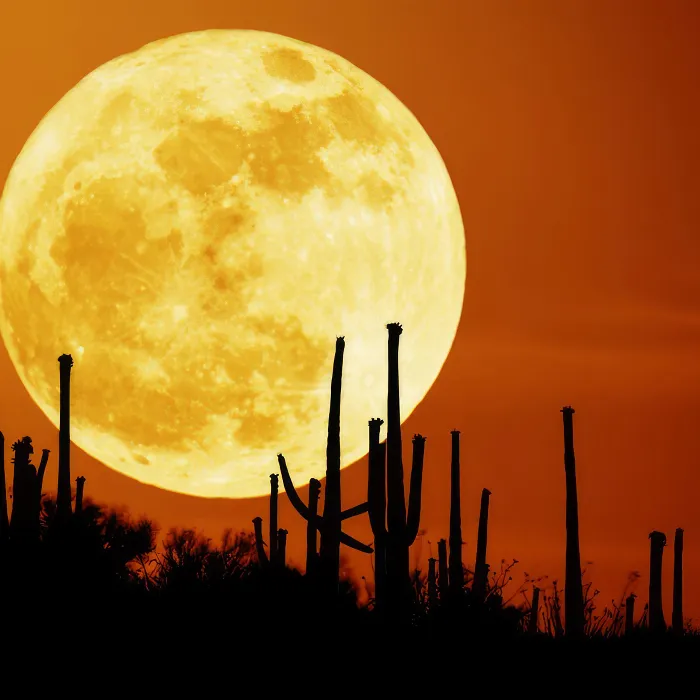
If long and very long focal lengths are required, it is often better to connect an astronomical telescope to the camera instead of a photographic lens.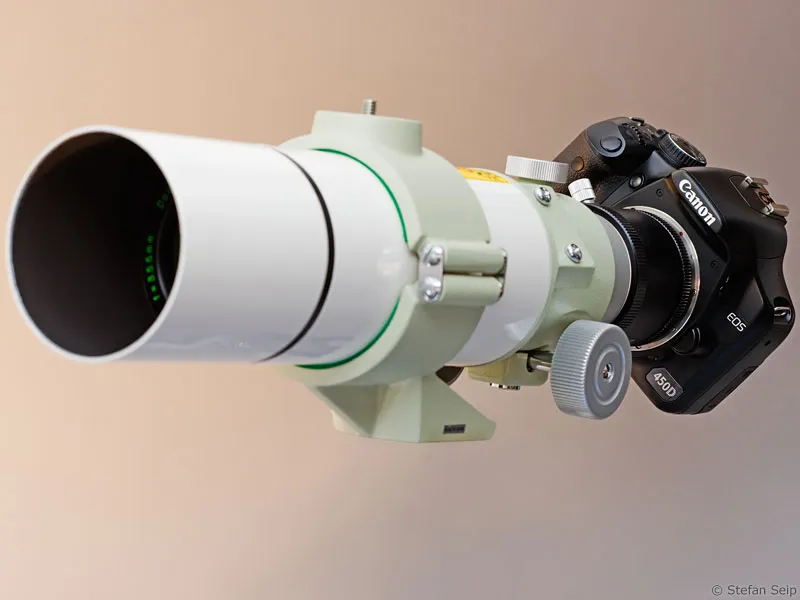
Part 11: Using the telescope as a lens
Astrophotographers are insatiable when it comes to the urge for long focal lengths. The reason for this is easy to find: Many objects in the night sky appear very small or even tiny to us due to their great distance. If you want to take detailed, full-frame pictures of them, there is no getting around long focal lengths with correspondingly small picture angles.
All manufacturers of system cameras meet the demand for long focal lengths with their range of telephoto lenses. The range extends up to 600 millimetres in some cases, and even 800 millimetre lenses can be found in the range of accessories for digital SLR cameras. In principle, you could do a lot with these "super telephoto lenses" in astronomy, especially as the lens speeds of 1:4.0 and 1:5.6 are sensationally good for lenses of this focal length. If, yes, if it weren't for their exorbitantly high purchase price, which in extreme cases can amount to a high four-digit or even five-digit euro sum.
Of course, these telephoto lenses are not specifically designed for astrophotographers, but are mainly sought after in the fields of sports, wildlife and reportage photography. In return for the high price, excellent image quality is offered even with the aperture fully open.
However, it would not be fair to reduce such a super telephoto lens to its lens system. To satisfy the demands of the clientele, they are equipped with an autofocus system, an adjustable Blender, elaborate correction for "close-up" shots and often an image stabilizer. These are all things that are important and useful for classic photography, but are of no significance in astrophotography, although they do of course add to the cost.
The many lenses that are necessary to construct a universally usable telephoto lens also contribute to the high price: It is not uncommon for up to 18 lenses to be combined in such a lens.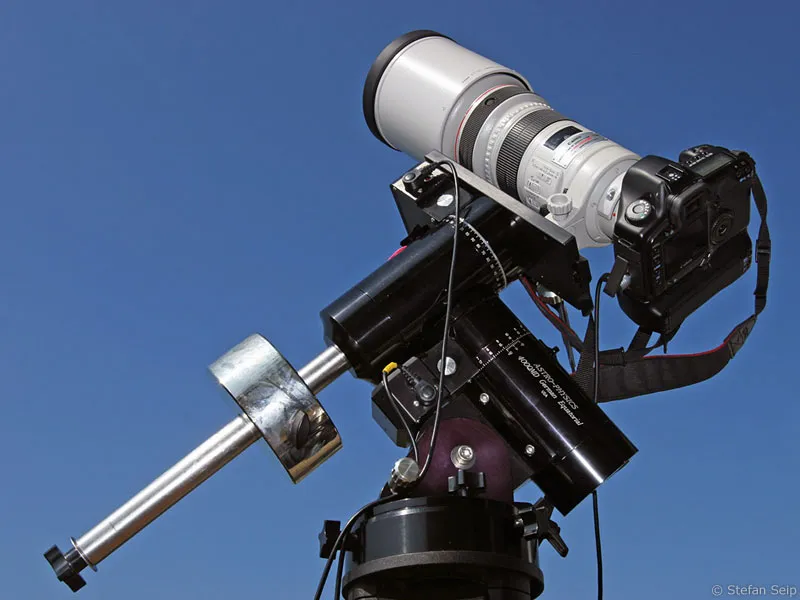
A telephoto lens for astrophotography.
If you want to do astrophotography anyway, you can also use an astronomical telescope instead of the expensive telephoto lenses to take pictures with long focal lengths. At this point, however, I would like to temper expectations: even an astronomical telescope with a high photographic imaging performance is not available at a discount price.
But since a telescope contains significantly fewer lenses (or mirrors instead of lenses), offers neither autofocus nor an image stabilizer, and doesn't even have an aperture, the prices are significantly lower than a full-fledged photographic lens. And there is practically no upper limit to the focal length; even focal lengths beyond 800 millimetres can be covered by affordable amateur telescopes. "Commercial" amateur telescopes are available with focal lengths of up to around 4000 millimetres at a focal ratio (aperture) of 1:10.
Let's summarize the difference between telephoto lenses and telescopes in a table:
| Photo telephoto lens | Telescope | |
| Focal length | Up to approx. 800mm | From 400 to approx. 4000mm |
| Adjustable focal length (zoom) | Some models | No |
| Autofocus (AF) | Yes | No |
| Camera manufacturer-specific connection (bayonet) | Yes | No |
| Image stabilizer (IS) | Some models | No |
| Adjustable Blender | Yes | No |
| Lens construction | Yes (approx. 9 - 18 lenses) | Yes (2 - 4 lenses) |
| Construction with mirrors | Yes (but then without AF/IS,Blender) | Yes |
| Construction length corresponds approximately to the focal length | No (construction length sometimes considerably shorter than the focal length) | For refracting telescopes: Yes |
| Focal length extension | Yes (teleconverter) | Yes (Barlow lenses) |
| Focal length reduction | No | Yes (Shapley lenses) |
| Typical imaging strengths | Sharpness and illumination right into the corners of the image | Maximum image contrast in the center of the image |
| Freehand use possible | Conditional | No |
| Intended base | Photo tripod | Astronomical mount |
| Type of mounting on the base | Tripod thread | Tripod thread (small telescopes), dovetail bar, tube clamps |
| Reference | Specialist photo shop | Specialist astronomy retailers |
What do the numbers on the telescopes mean?
The characteristic values of photographic lenses are focal length and speed, i.e. the largest adjustable aperture. Anyone who takes photographs seriously is familiar with these figures.
Astronomers are more interested in the aperture, i.e. the diameter of the entrance pupil (front lens or primary mirror) and, to the confusion of many, also state this in inches (abbreviation "). The focal length, on the other hand, is not so important to them.
If, for example, a telescope is offered as follows: 8" Schmidt-Cassegrain, F/10, this means in plain language:
The telescope is a reflector telescope of the "Schmidt-Cassegrain" design. Its aperture is 8 inches. 8 inches correspond to around 200 millimeters (1 inch = 25.4 millimeters). The focal ratio (i.e. the Blender) is 1:10, from which the focal length must be calculated: 10 * 200mm = 2000 millimeters!
Sometimes only the aperture and the focal length are given. For example, the mount of an (old) telescope reads: D 75 mm F 1200 mm. This means that the free diameter of the front lens is 75 millimeters and the focal length is 1200 millimeters. The Blender is then calculated as 1:16 (1200 : 75).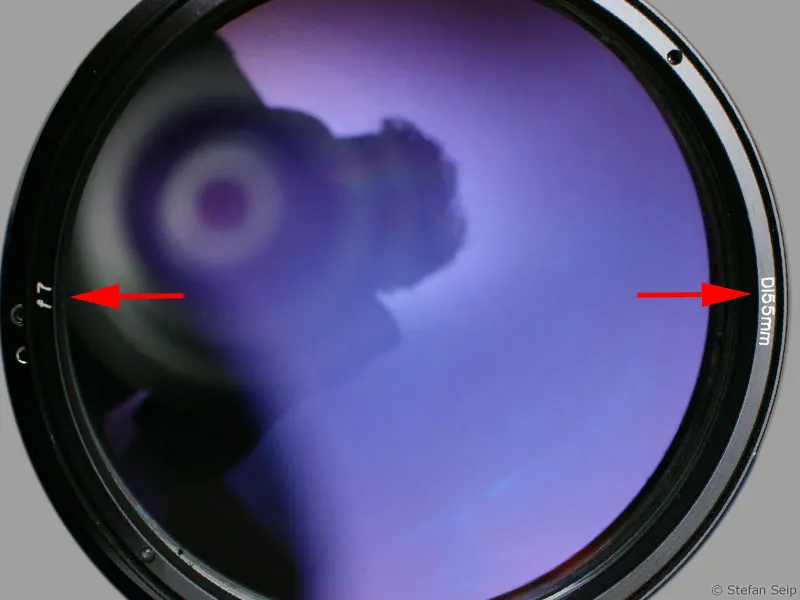
This telescope is labeled "D155mm" and "f 7" (arrows) on the lens mount. The diameter is therefore 155 millimetres, the focal ratio (aperture) is 1:7 and the focal length is calculated as 1085 millimetres by multiplication.
Imaging errors
Most amateur telescopes are primarily intended for visual observation. If they are used for photography, the following problems can occur:
Vignetting - dark image corners caused by the image circle illuminated by a telescope being smaller than the diagonal of the sensor format. Not many telescopes are able to illuminate a sensor in 35 mm format ("full format" 24 x 36 millimeters) in sufficiently good quality. For smaller sensors ("crop", APS-C format), the selection of usable telescopes is significantly larger.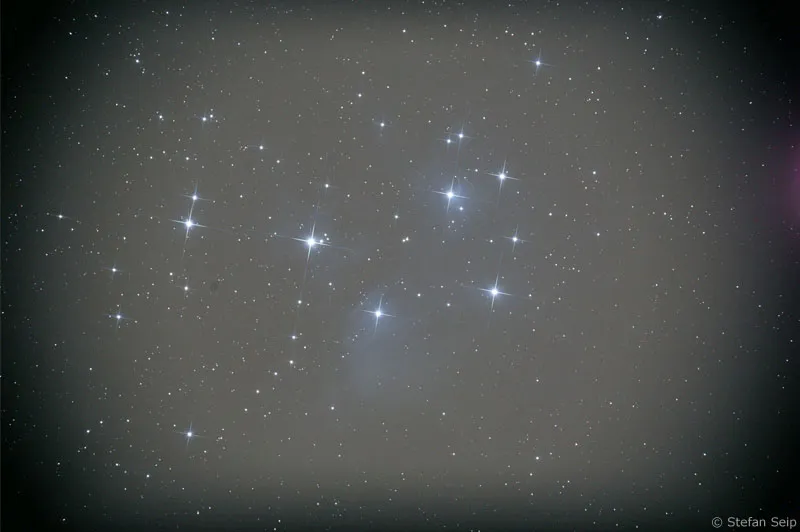
This image of the Pleiades was taken after a full-frame camera was connected to a telescope. Obviously, the telescope is not able to fully illuminate the sensor, as the strong vignetting proves.
Image field curvature - if the "focal plane" is not a plane but a hollow sphere, the telescope suffers from image field curvature. The larger the image sensor used, the more noticeable this weakness will be in the form of blurred star images at the edge of the image field when focusing precisely on the center of the image.
So-called "field flattening lenses", usually a two-lens system, provide a remedy to flatten the "curved" image field and thus achieve sharpness across the entire image field. Field flattening lenses must be matched to the respective telescope optics, i.e. strictly speaking, there should be a suitably calculated field flattening lens for every type of telescope with field curvature, which is not the case in practice.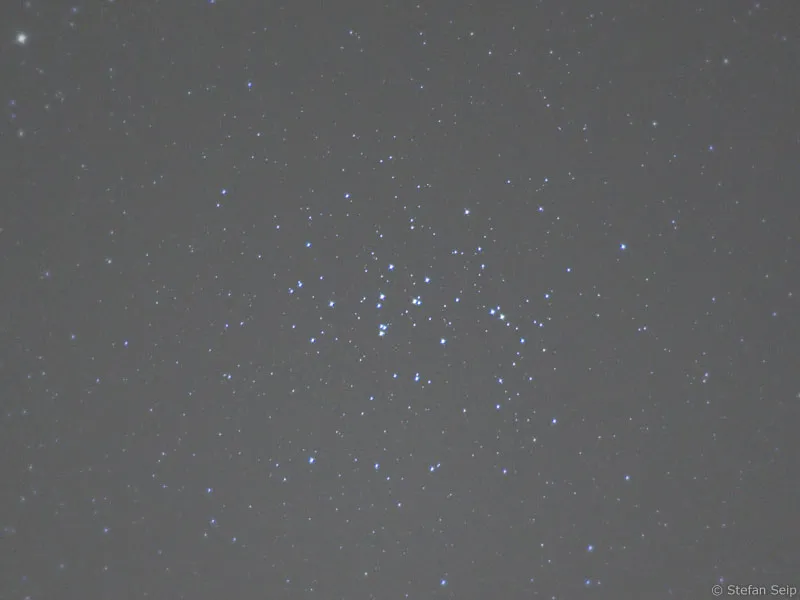
Field curvature causes the stars at the edges to become blurred when focusing on the center of the image. If you were to focus on stars at the edge of the image field, the center of the image would be blurred.
Blurring in the corners of the image - when focusing on the center of the image, not only can blurring occur in the peripheral image areas due to image field curvature (see above), but also other serious image errors, which are referred to as "aberrations" (imaging errors). It is predominantly "coma" that worsens the star image in the image corners.
Newtonian reflector telescopes, for example, suffer from coma off the optical axis due to the system. Within certain limits, the use of a lens system ("coma corrector") can greatly improve the image quality towards the edge.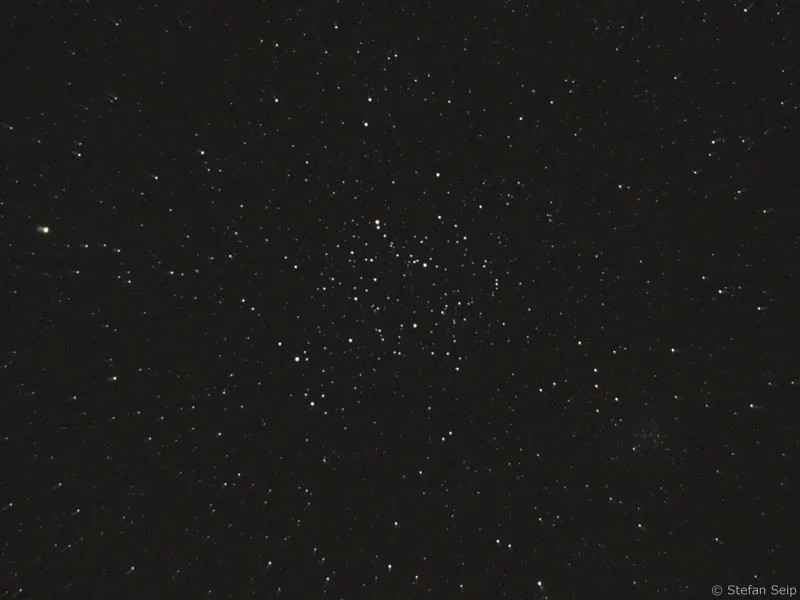
If stars look like small comets with tails towards the edge, the imaging error "coma" is at play.
Position of the focal plane - with some telescopes, it may not be possible to obtain a sharp image of a distant subject with an SLR camera connected. This applies in particular to Newtonian reflector telescopes. In such cases, the only way to bring the camera into focus is to replace the focuser with a flatter model.
Are telescopes a substitute for lenses?
When reading through the possible imaging errors described, this question may be asked again. Therefore a short summary:
- Astronomical telescopes are not lenses; most are good for visual observation, but only recommended to a limited extent for photography. A discussion of which telescopes cut a good figure when used for astrophotography with a camera attached can be found in tutorial number 13 of the "Astrophotography and Sky Photography" series ("Which telescopes are suitable for astrophotography").
- With many types of telescopes, it must be expected that imaging errors will occur at the edges of the image, which cannot always be eliminated by a corrective lens system. Some telescope optics have problems illuminating the sensor of a digital SLR camera right into the corners of the image. This even applies to crop cameras with a sensor measuring around 14 x 22 millimetres, but even more so to full-frame cameras (sensor size 24 x 36 millimetres). If you want to use a full-frame camera with a telescope, you therefore have to fall back on the few telescope models that can produce a usable image over the entire surface of the sensor.
- For focal lengths above 500 millimetres, however, there is no alternative to a telescope, at least when you consider the cost of super telephoto lenses.
Extending the focal length
So-called "Barlow lenses" are available to extend the focal length of a telescope. They work like a teleconverter for photographic lenses and are mounted between the telescope and the camera. Depending on the model, you can achieve extension factors of 1.5x to 5x.
Typical is the 2x extension factor, which doubles the effective focal length of the telescope, but reduces the focal ratio by two full f-stops. This means that a telescope with a focal length of 800 millimetres and an aperture of 1:4.0 becomes a telescope with a focal length of 1600 millimetres at an aperture of 1:8. The exposure time must therefore be quadrupled! A Barlow lens with an extension factor of 1.5x would turn the aforementioned telescope into a system with a focal length of 1200 millimeters at (approximately) f/5.6, i.e. the exposure time would have to be doubled compared to use without a teleconverter.
A positive side-effect of the Barlow lens is that the camera only captures the center of the image, and imaging errors in the peripheral areas lie outside the image field and thus disappear.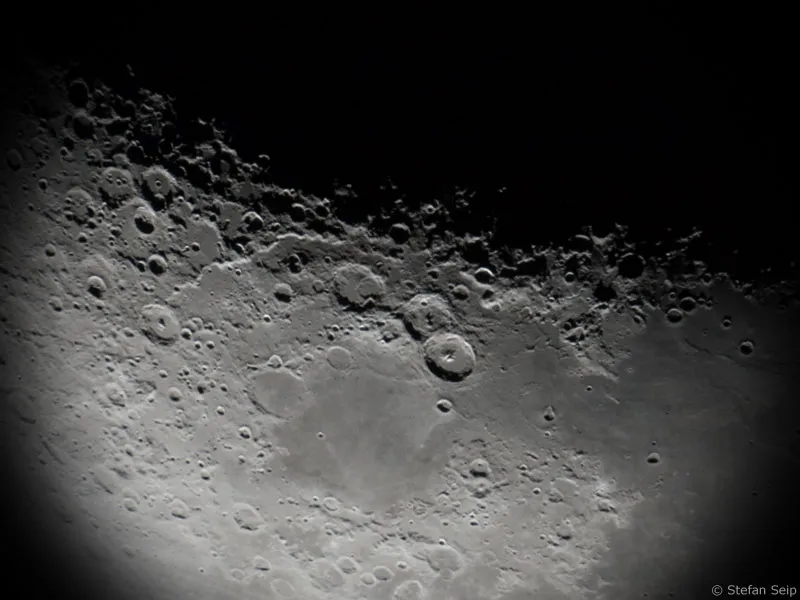
Image of the moon with a full-frame camera on a telescope with a long focal length. The telescope does not fully illuminate the sensor; vignetting is the result.
The same camera on the same telescope produces a perfect image after the focal length has been extended using a Barlow lens. Extending the focal length resulted in a larger image of the craters: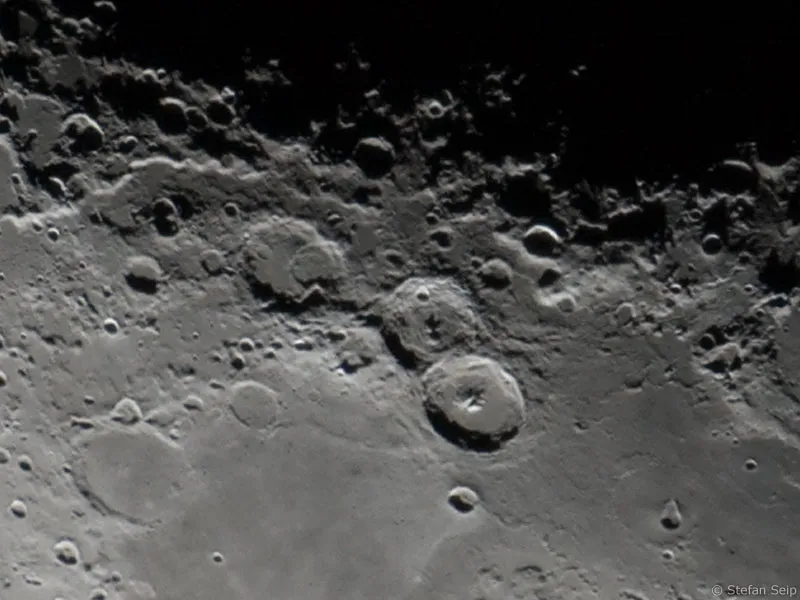
Focal length reduction
The opposite of the Barlow lens also exists, namely a lens system for reducing the effective focal length. It is called a "Shapley lens", "focal reducer" or simply "reducer" and is also attached between the telescope and the camera. There are various models with factors between 0.8 and 0.33.
The focal ratio (Blender) is changed by the same factor as the focal length, i.e. the use of a Shapley lens results in a higher light intensity and thus a reduction in the necessary exposure time.
Some Shapley lenses also fulfill the function of a field flattening lens, i.e. they turn a curved focus "plane" into a flat surface. Of course, this only works with telescopes for which these Shapley lenses have been developed and not universally on all telescopes.
The problem with the use of Shapley lenses is that the image projected onto the chip must become smaller, which means that marginal areas that were previously outside the field of view become visible on the image. Any image weaknesses outside the center of the image will therefore be more pronounced.
Another image of the moon, taken with a full-frame camera using a telescope with a long focal length. The illumination of the sensor is insufficient (black image corners).
The same camera on the same telescope after the focal length was reduced using a Shapley lens. The image size of the craters decreased, the vignetting increased! This combination is therefore useless: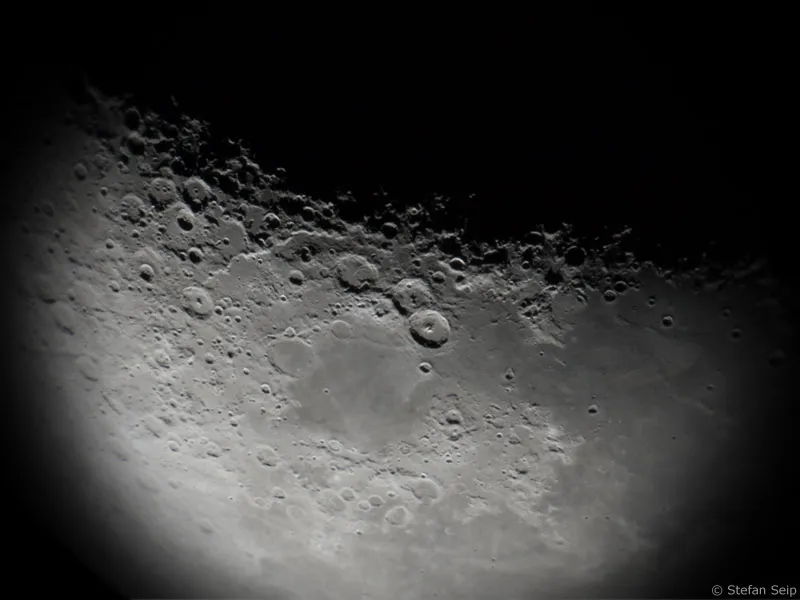
Connecting the camera
To connect a digital single-lens reflex camera (DSLR) to a telescope, the telescope must have a focuser with a diameter of 2 inches (= 5.08 centimeters). Smaller diameters, such as the 1.25-inch connection that is still common with entry-level telescopes, are not suitable because the aperture is not sufficient to illuminate a DSLR sensor and would cause severe vignetting. At best, the entire image field could be illuminated with a Barlow lens.
However, most commercially available telescopes have the necessary 2-inch connection, into which a 2-inch eyepiece is inserted for visual observation. This eyepiece is not used for photography. Instead of the eyepiece, the camera is inserted into the focuser. This means that the image sensor is positioned in the focal plane of the telescope, hence the term "focal photography".
Two mechanical parts without optical components are required:
T2 adapter - It has a bayonet connection on one side, suitable for the camera used, and a standardized "T-thread" on the other side. T2 adapters are available for all common camera bayonets, e.g. for Canon EOS, Nikon F, Pentax K etc. It is therefore important to purchase a T2 adapter that is suitable for your own camera.
Link to a supplier of T2 adapters for different camera systems:
http://www.baader-planetarium.de/sektion/s17a/s17a.htm#t2
2-inch sleeve - This sleeve has a diameter of 2 inches and a "T-thread" on the back so that it can be screwed into the T2 adapter.
Link to a supplier of a 2-inch sleeve (referred to there as a "plug-in connection"):
http://www.baader-planetarium.de/sektion/s08/s08.htm#+16
Users of full-frame cameras should consider a different solution, because a standard T2 adapter has such a small aperture (diameter 38 millimeters) that it can cause vignetting. The solution is a special part (for Canon EOS) that replaces the T2 adapter and 2-inch sleeve and offers a larger aperture (47 millimeters).
Link to the supplier of the "Adapter from 2 inch to Canon EOS" for full-frame cameras:
http://www.teleskop-express.de/shop/product_info.php/info/p260_Adapter-von-2--auf-EOS-Bajonett---volle-EOS-Oeffnung-.html
On the left is the T2 adapter with Canon EOS bayonet, in the middle the 2-inch sleeve: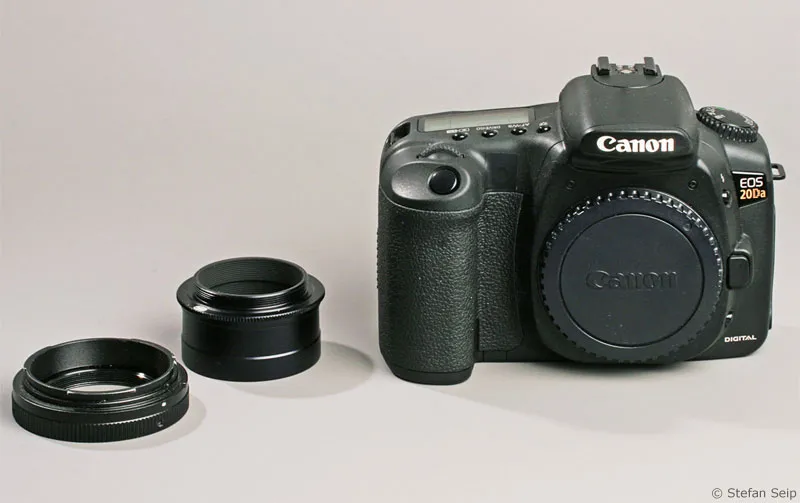
Digital SLR camera with mounted T2 adapter and screwed-in 2-inch sleeve. Neither part contains any lenses: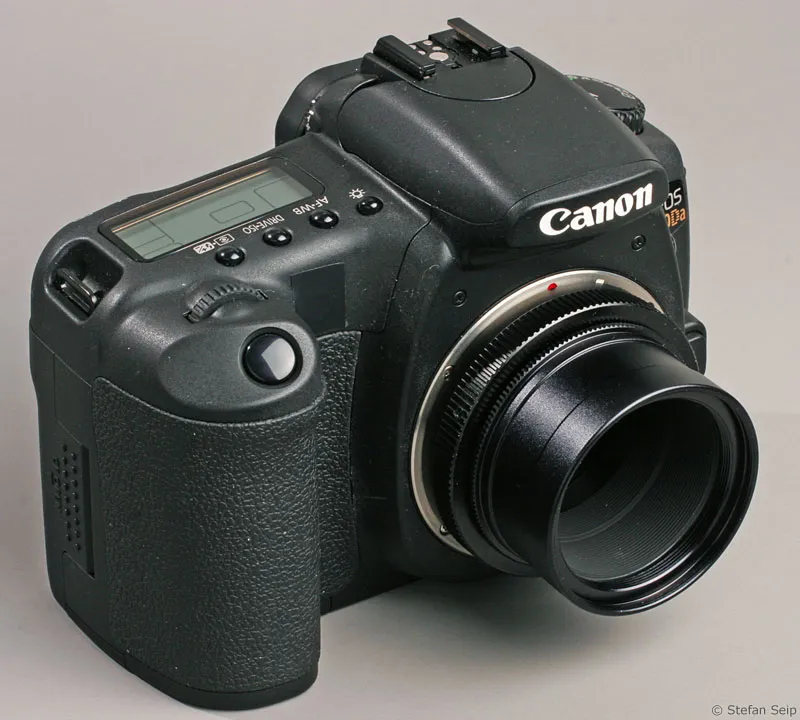
The 2-inch sleeve is inserted into the focuser of the telescope instead of an eyepiece: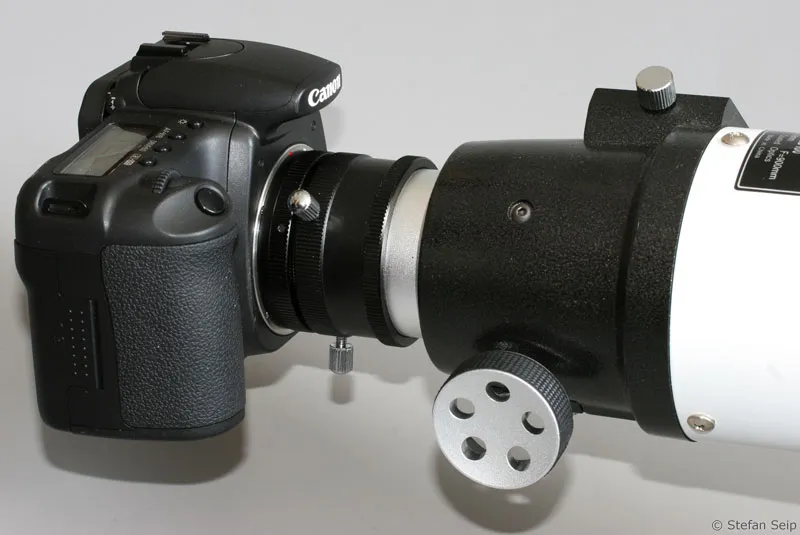
Extension sleeve - With refracting telescopes (refractors), it can happen that the focuser cannot be extended far enough to reach the focal plane. It is then necessary to use one or more 2-inch extension tubes.
Focus
As the autofocus function is not available with telescopes, the best focus point must be found manually. This is not as easy as it may sound, as the focusing screens of modern SLR cameras are not designed for this. This means that looking through the camera's viewfinder and visually assessing the focus in the viewfinder is not sufficient.
Basically, focusing is done using the telescope's focus knob, which changes the length of the focuser on some telescopes and moves the primary mirror axially within the telescope on others.
The longer the effective focal length and the faster the optics (i.e. the smaller the aperture value or the denominator of the focal ratio), the less leeway there is for focusing. Changes in temperature can cause the focus position to change. Once the focus has been set, it should therefore be checked several times during the course of a night of observation and corrected if necessary.
1. camera without live view
Cameras without a live view function are at a disadvantage. In the simplest case, focus on a bright star in the viewfinder as sharply as possible. Then take test shots with a relatively short exposure time in which the star must not be overexposed. Check the result of your shots by looking back on the camera display, always using the maximum magnification to display a section of the image.
Slowly adjusting the focus while repeatedly checking the image will then gradually lead you to the point of best possible focus. Exceeding the best focus point several times and then correcting in the opposite direction has proven to be a good way of getting a feel for where the optimum lies; you circle the best focus point, so to speak.
If the camera is connected to a laptop, it is advisable to use software to make this work easier for you. The "ImagesPlus" software is a great help when focusing, especially for astrophotography. The ImagesPlus camera control module is sold for around 70 US dollars on the http://www.mlunsold.com website. A demo version can be requested from the author of the software.
Focusing on a star with "ImagesPlus":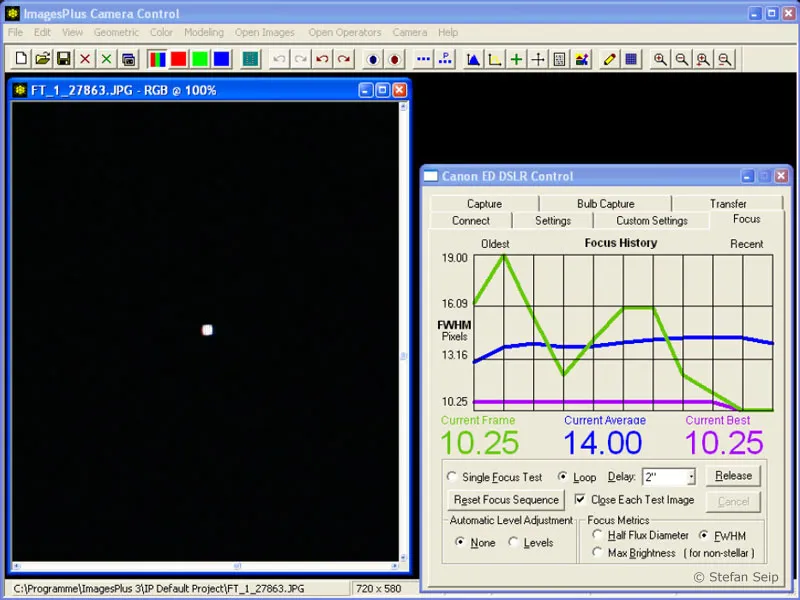
Not specifically for astro use, but still a good focusing aid is the "DSLR Remote" software, which is able to display one image after the next at high magnification, allowing reliable assessment of the sharpness of an imaged star. This software costs around 95 US dollars and can be obtained from the website http://www.breezesys.com/DSLRRemotePro/index.htm. A version that runs for 15 days can be downloaded there. Both software packages are in English.
Focusing on a star with "DLSR Remote":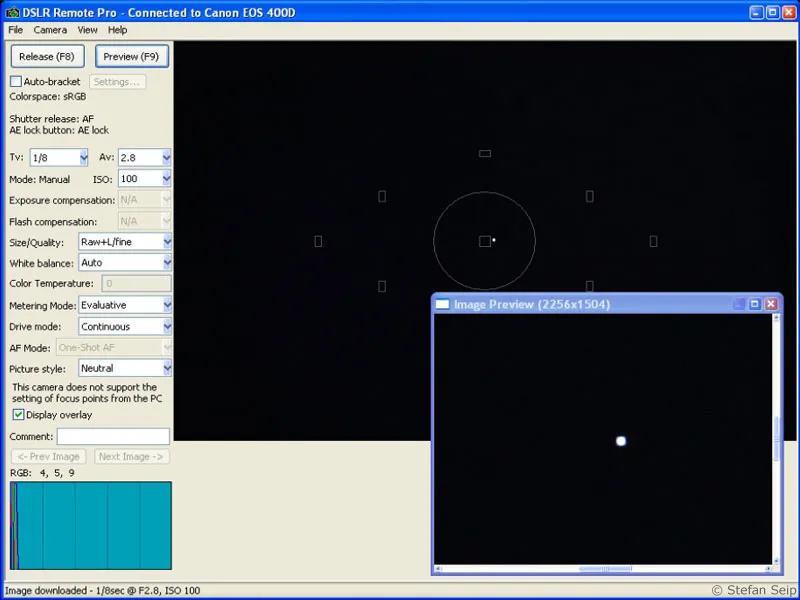
2nd camera with live view
The Live View function makes focusing almost child's play. A bright star is placed approximately in the center of the field of view and the focus is roughly set in the viewfinder. The Live View function is then activated and the star is viewed at maximum magnification on the camera display. The optimum focus is found very quickly and reliably by pressing the focus button on the telescope.
It is even more convenient if the live image can be viewed on the monitor of a connected laptop. Canon EOS cameras with Live View (from Canon EOS 1000D, 450D, 40D, 5D Mark II, 1D Mark III, 1Ds Mark III) include the necessary software and connection cable with the camera.
This type of focusing works excellently on stars up to about the third magnitude class, on the moon, the sun (with protective filter!) and on the bright planets.
Live view on the moon with a Canon EOS 450D. The Live View function is a tremendous help for focusing the camera on the telescope: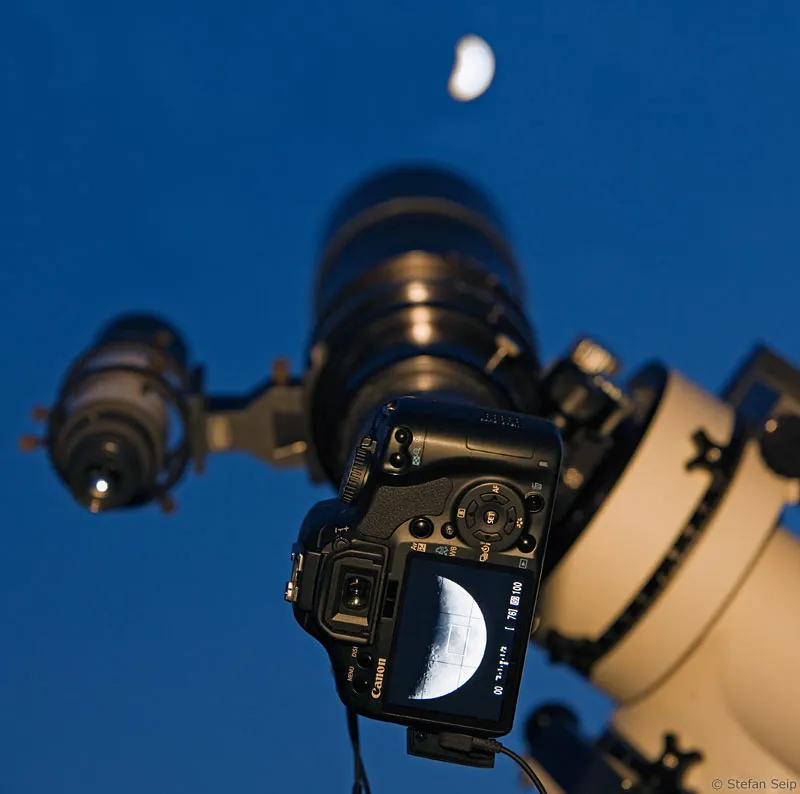
Live view on the screen of a laptop: focusing couldn't be easier, faster or more precise: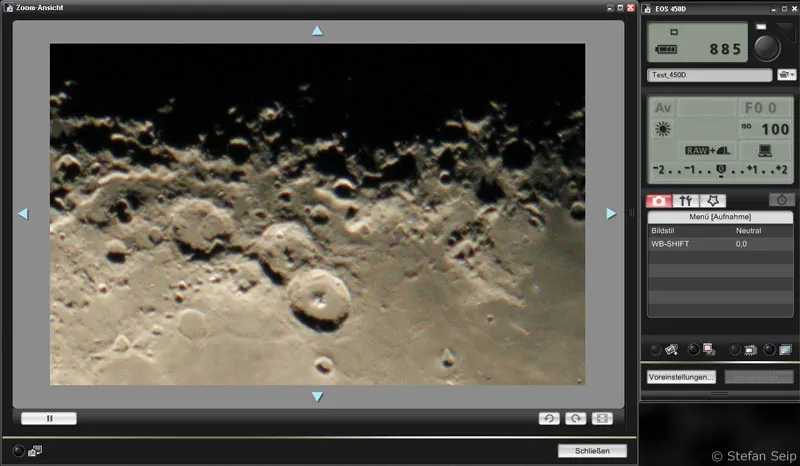
Risk of camera shake!
The use of long focal lengths harbors a great risk of camera shake. Despite perfect focusing, this can result in blurred photos. The problem is caused by the mirror and the camera's shutter release shortly before or during the exposure.
Depending on how stable the combination of mount and tripod supporting the telescope is, the slightest shocks of this kind are sometimes enough to impair the sharpness.
- Mirror bounce - The consequences of the mirror swinging upwards quickly before the shutter is released can be avoided if the "mirror lock" on the camera is switched on. The first press of the shutter release button will only cause the mirror to swing upwards. Then wait a few seconds until the resulting vibrations have subsided and release the shutter a second time to start the exposure.
Of course, a cable or remote release is used for this, otherwise touching the release button on the camera would again cause camera shake.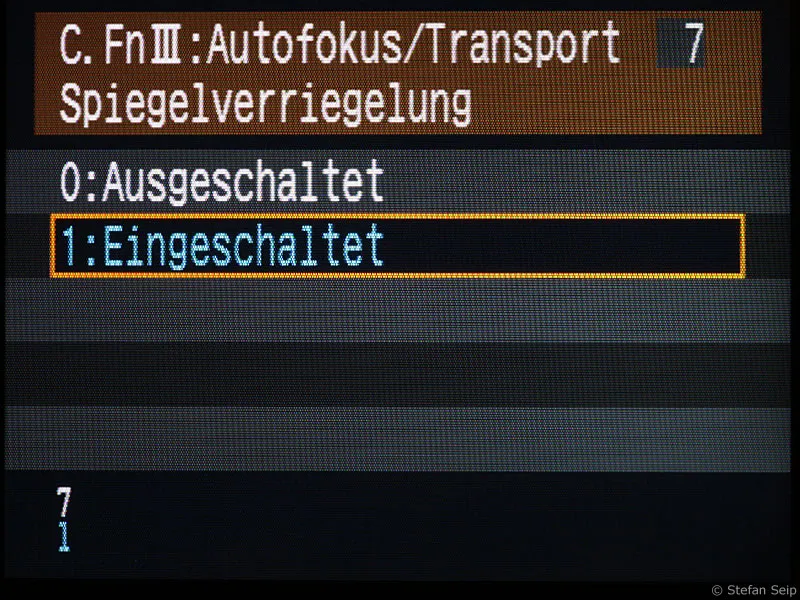
Activated mirror lock in the menu of a Canon EOS 40D.
- Shutter movement - This cannot be avoided, as the shutter controls the exposure. I have been able to prove several times that the movements of the shutter can actually lead to blurred images under certain circumstances. Only a more stable mount can actually help. Depending on the camera model, you can alternatively try to trigger the camera while the Live View function is switched on. In this case, the shutter may be much "softer".
Example shots
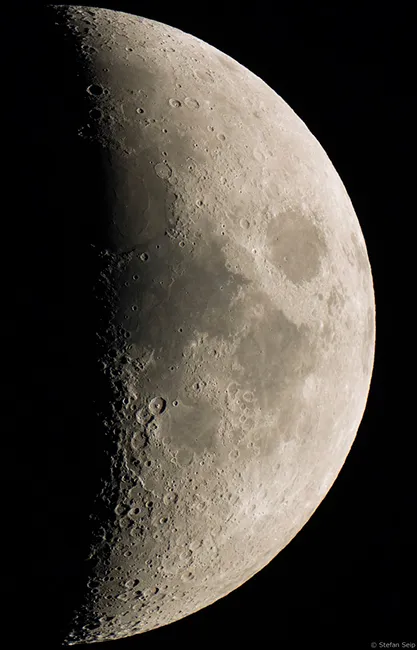
This image of the moon is almost uncropped and was photographed with a focal length of 3700 millimeters and a full-frame DSLR (Canon EOS 5D Mark II). The telescope used was a Maksutov-Cassegrain reflector telescope with a focal ratio of 1:14.6 and an exposure time of 1/30 second at ISO 400.
Section of the previous image in full size. It gives an idea of the wealth of detail that can be captured of the moon with a sharp lens at a long focal length. This type of moon photography is one of the rare opportunities in the field of astrophotography to be able to profit from a large number of megapixels.
A slightly enlarged image of the sun, taken through a special H-alpha filter that makes the sun's chromosphere visible. The focal length was 2270 millimeters.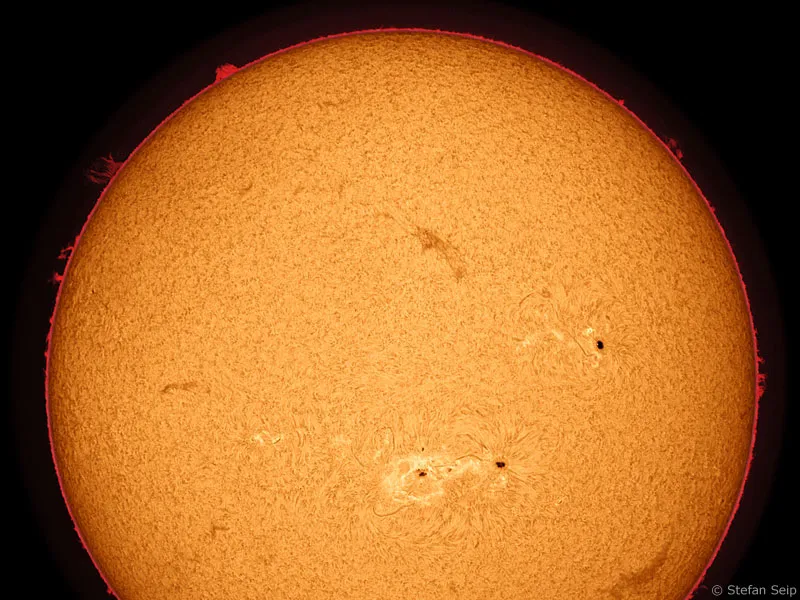
Double stars are a grateful subject for photographs taken through the telescope without tracking control. Here, an exposure time of only 30 seconds at ISO 800 and a focal length of 2800 millimetres was used to resolve the double star Mizar (red arrow) in the drawbar of the Big Dipper. Together with Alkor (right), it again forms a pair that is barely recognizable as a double star to the naked eye.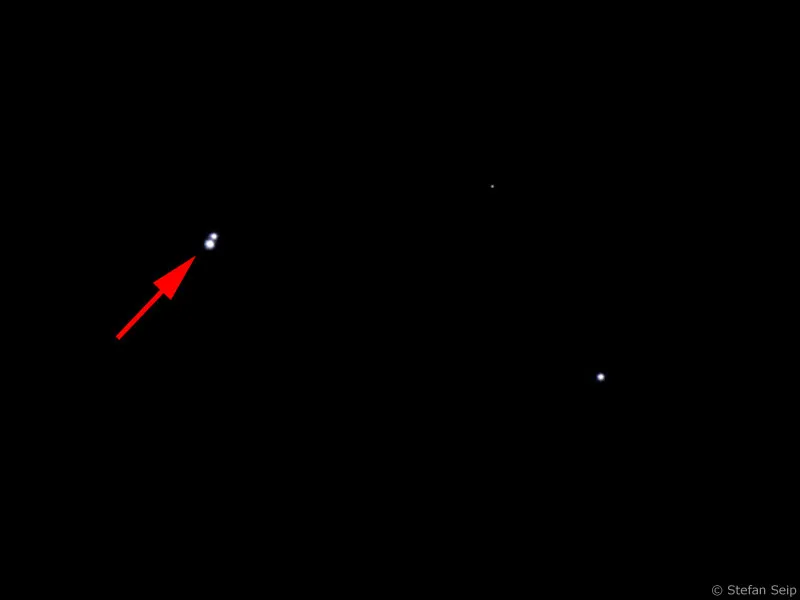
A telescope with a focal length of nine meters was needed to image the heart of the Orion Nebula. The focal ratio was 1:10 so that, thanks to the great brightness of the nebula, it was only necessary to expose for 90 seconds at ISO 1000 and there was no need to check the tracking.