The Path Tools in Adobe InDesign are essential for creating precise shapes, lines, and creative paths. They allow you to design individual designs, set text along a path, or develop complex layouts. With tools such as the pen tool, convert tool, and select tool, you can create, edit, and adjust paths. In this guide, I will show you step by step how to effectively use the path tools to translate your creative ideas into professional results. Let's start exploring the versatility of the path tools!
The Path tools appear in a flyout menu when you click on the symbol highlighted above in the toolbar and hold down the left mouse button.
They consist of:
• the pen tool,
• the add anchor point tool,
• the delete anchor point tool, and
• the convert direction point tool.
Clicking on one of them will select the corresponding tool.
1. The Pen Tool
With the pen tool (Shortcut P), you can create free-form shapes.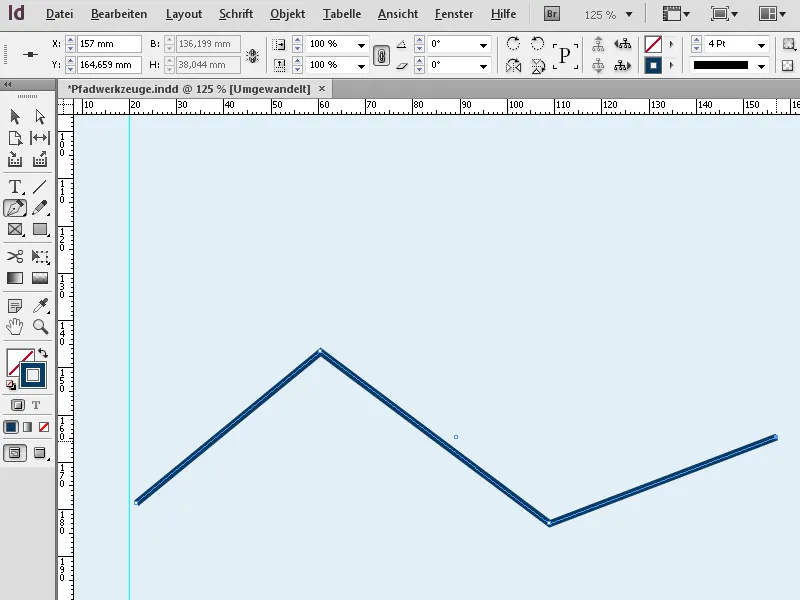
Simply click multiple times on the artboard to create a connected path.
By clicking with the pen tool on the path, additional anchor points are added to it. You must click precisely on the existing path with the mouse because otherwise the anchor points will be placed without connection to it (it's best to zoom in for this purpose).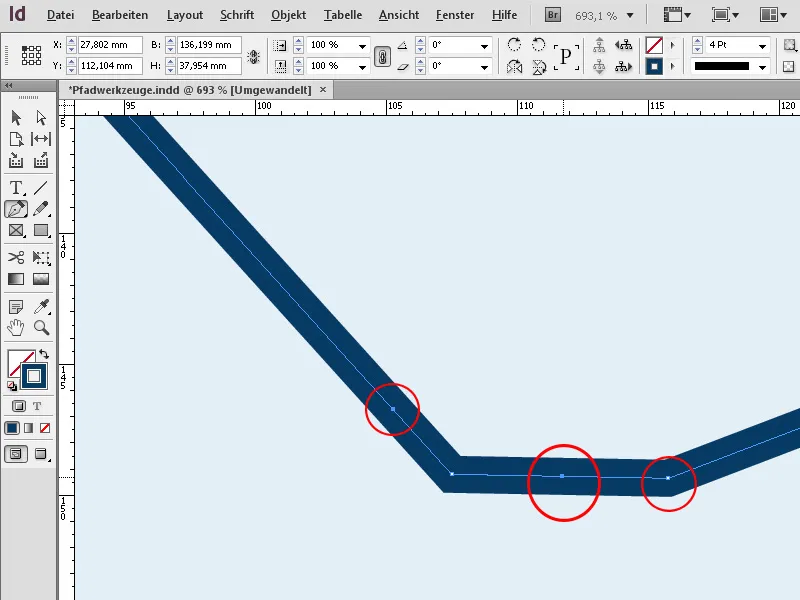
If you want to remove an anchor point, simply click on it again with the pen tool. The anchor points serve as joints where the path can be aligned.
To align, use the direct selection tool (A) and drag it at the anchor points. You can set the stroke weight in the control palette.
You can also set the stroke style. It doesn't always have to be a solid line; the entire range of styles like dotted, dashed, hatched, etc., is available.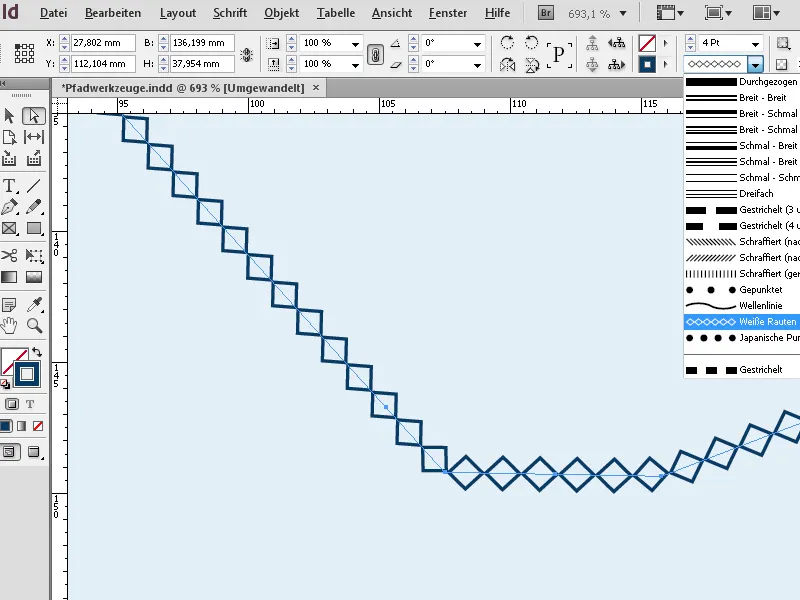
The stroke can be colored as desired and can be embellished with effects like drop shadow through the object menu.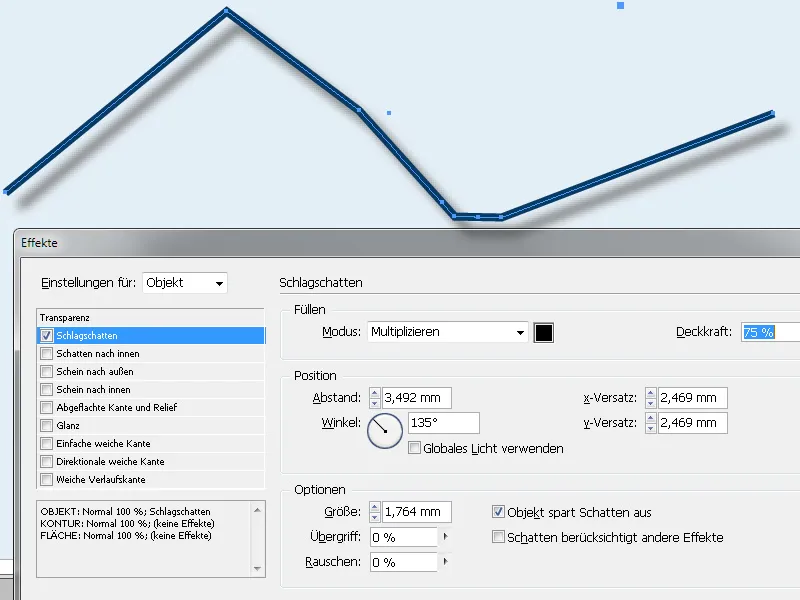
As long as you only set anchor points with individual clicks that connect in a straight line with each new anchor point, you create angular shapes.
If you want to create a curved shape, start by setting the first point. When setting the second anchor point, you need to pull the mouse a bit while clicking. Now the straight line will turn into a curve with tangents (handle lines) that can be grasped at each end by the control points and then extended or shortened, allowing you to shape the curve to your desired form. The handle lines always form a tangent (perpendicular to the radius) to the curve at the anchor points. The angle of the handle lines determines the curve's slope, while their length determines the curve's height or depth.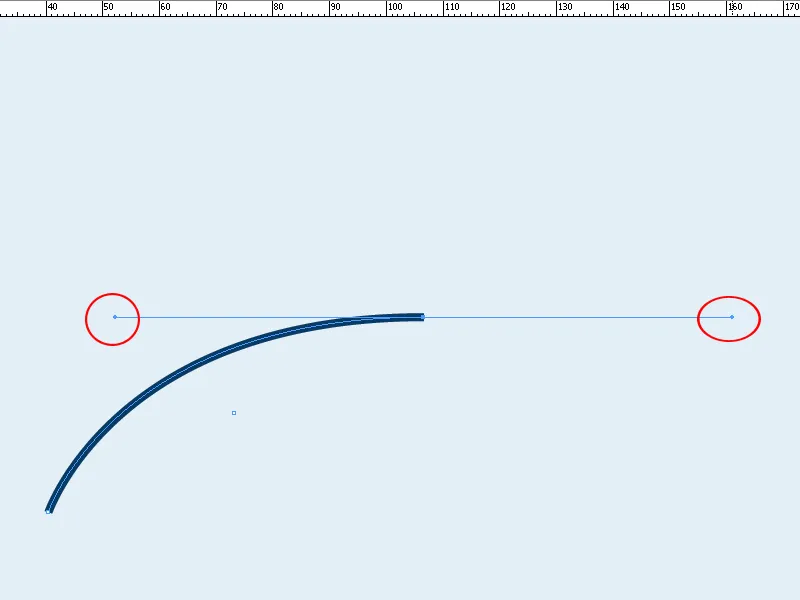
By setting connected anchor points, a path is created. This path can be an open or closed shape. In the middle of this shape, there is a midpoint that is not part of the actual path. This point can be moved or aligned with other objects.
If you want to create a more complex shape, click at the desired location and drag the mouse. The individual anchor points will be continuously connected and merged into a shape.
If you use a different tool in the meantime, it will close the created shape. But if you want to expand it, click initially with the pen tool on an endpoint of the open path (the anchor point must be solid). When you then add another anchor point, it will be connected to the existing form, allowing you to continue working on it.
Not only the stroke, but also the enclosed area can be colored as desired. In closed paths, this area is logically inside the stroke, while in open paths, InDesign connects the start and end points while coloring the areas between this line and the stroke.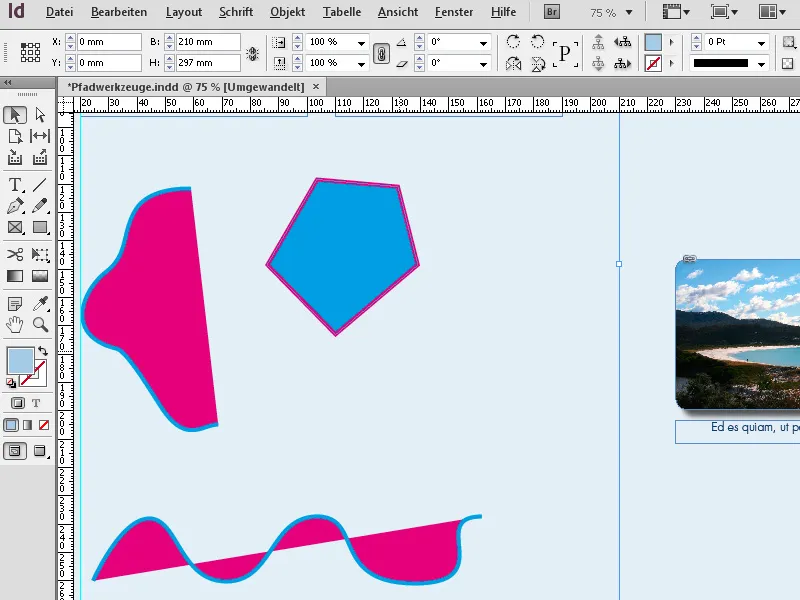
With the keyboard shortcut X, you can select either the area or the stroke (by pressing X again) of a highlighted object and then color it as desired by clicking on the corresponding color field.
If you later want text to run along the stroke (path text), you can also set the stroke weight to 0 so that only the curved text is visible.
2. The Add Anchor Point Tool (Shortcut +)
With the add anchor point tool, you can add additional anchor points to an existing path to change or extend its shape.
So you simply click on an existing path with it and place a new anchor point there.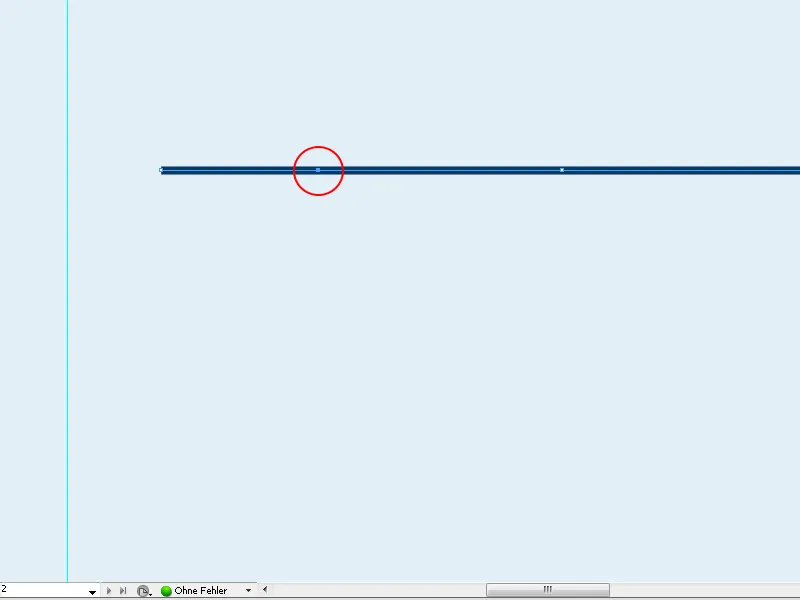
With the Direct Selection Tool, these anchor points can be selected and the shape can be modified by dragging them.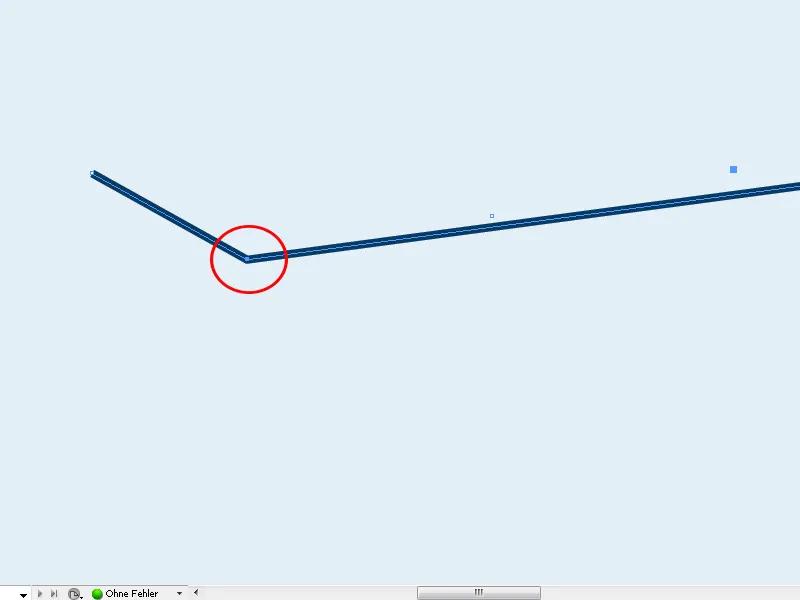
3. The Anchor Point Delete Tool (Shortcut -)
With the Anchor Point Delete Tool, anchor points on a path are removed. The shape adjusts in such a way that the points located to the right and left of the deleted anchor point connect in a straight line. The shape changes accordingly. Before deleting an anchor point: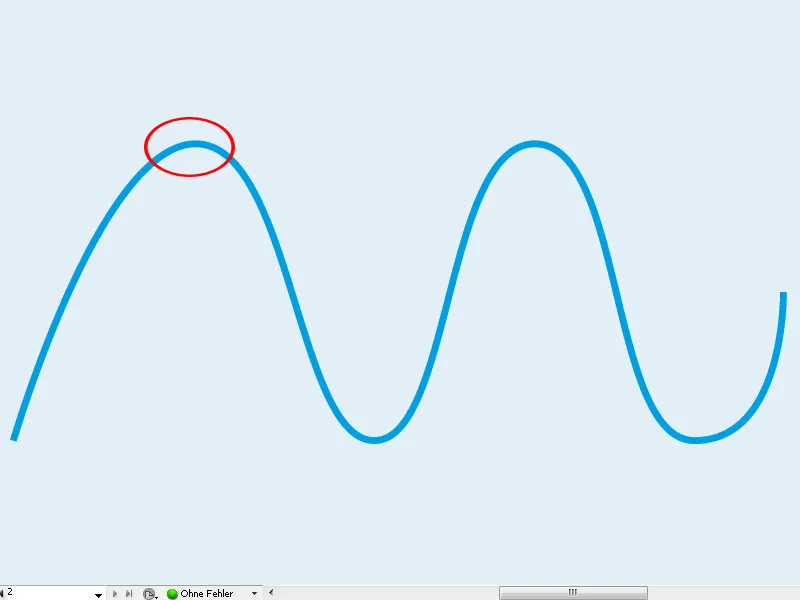
After deleting the selected anchor point: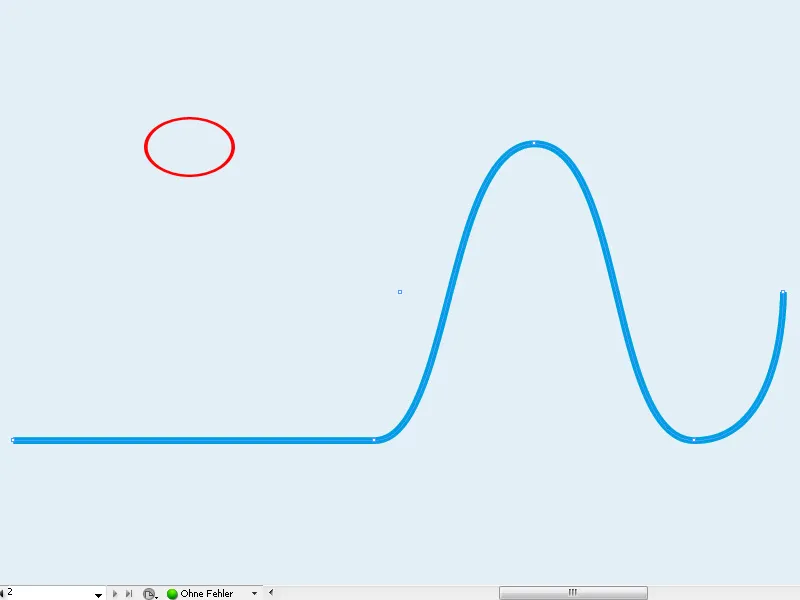
4. The Convert Direction Point Tool (Shortcut Shift+C)
With the Convert Direction Point Tool, corner points on a path are converted into curve points and vice versa. Click on an existing anchor point with this tool, hold down the left mouse button and drag it slightly. You will see that as you drag, the tangents lengthen or shorten accordingly.
Afterwards, using the Direct Selection Tool to select the end points of the tangents (by clicking and holding the left mouse button), you can create organic shapes by dragging, rotating, extending, or shortening.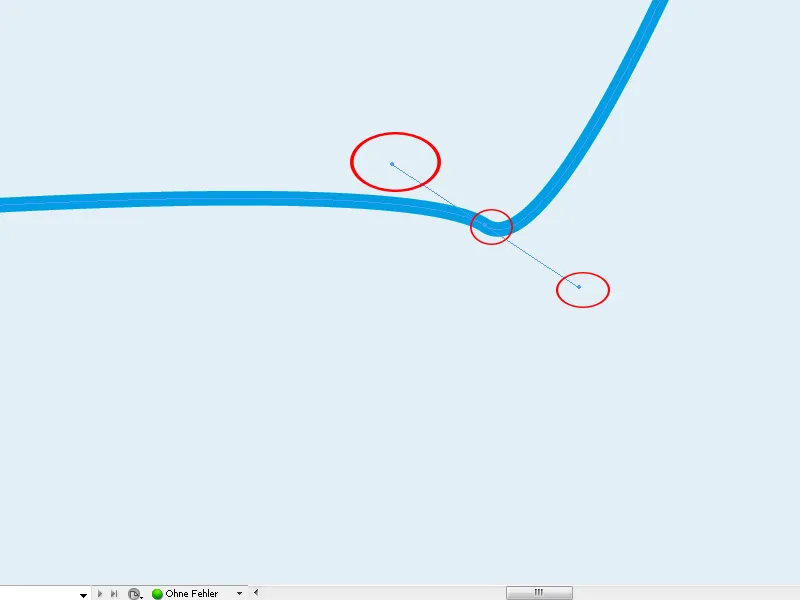
Conversely, you can convert a curve point back into a simple corner point with a click using this tool.
Working with the Path Tools becomes very convenient by alternately selecting the Pen, Add Anchor Point, Delete Anchor Point, Convert Direction Point, or Direct Selection Tool using the corresponding keyboard shortcuts.
The logic behind this is that for a temporary tool switch, you press the key for the respective tool and hold it down for the duration of the editing. When you release the key after editing, you have the original tool back in hand.
For example, you set an additional anchor point on an existing path with the Add Anchor Point Tool, then press the A key for the Direct Selection Tool and hold it down, drag the newly placed anchor point to the desired position, and only release the key afterwards. You are immediately back with the Add Anchor Point Tool.


