Note: This tutorial is a text version of the accompanying video training by Marco Kolditz. The texts may therefore have a colloquial style.
Now come the final steps of this tutorial. The aim is to make the image look a little bluer.
Step 1
Marco has already created a "Color look" group for this, which is currently still empty. Now add a "Color balance ..." layer. In this "Color balance 1" layer, the mid tones should be edited first.
To do this, move the Cyan slider to -48 and the Blue slider to +16. Magenta and green are not of interest as the image is dominated by blue.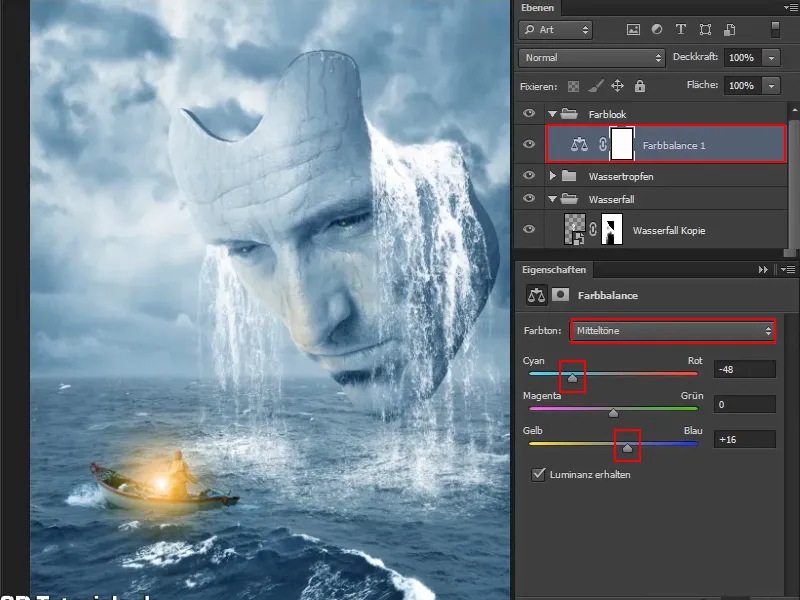
Step 2
Now switch to the shadows. You can also make some adjustments here.
The dark areas in the image are now enriched a little with cyan by moving the cyan slider a little to the left to a value of around -9. And of course also a little with blue; move the slider to a value of around +11.
To remove the slight green cast, move the middle slider a little to the left to magenta. At -9 this works.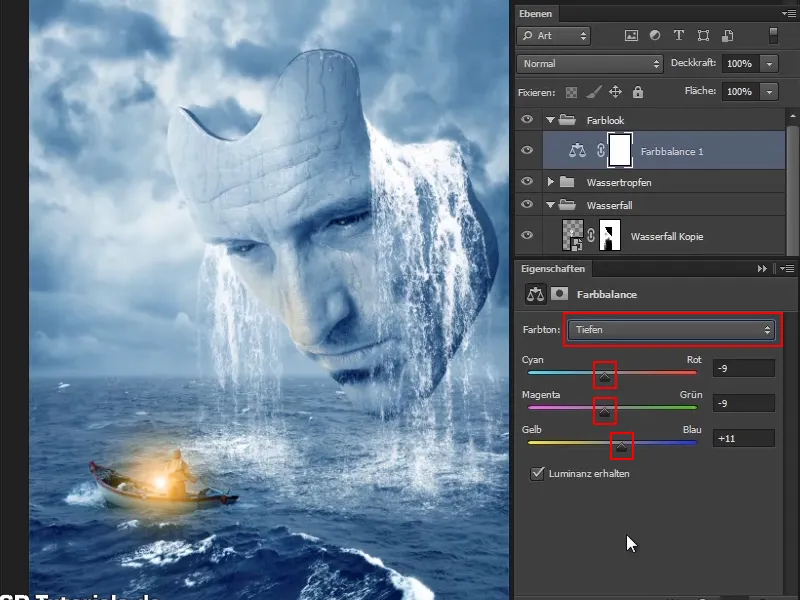
Step 3
Of course, you can still fine-tune everything and, above all, you could also create a completely different look. Marco has opted for blue here. If you let the whole thing go green by moving the middle slider into green, it reminds you a bit of Matrix. But here it should remain blue.
Now reduce the opacity of the layer to 90%.
Rename the layer to "Color look" and the basic color look in the image is adjusted.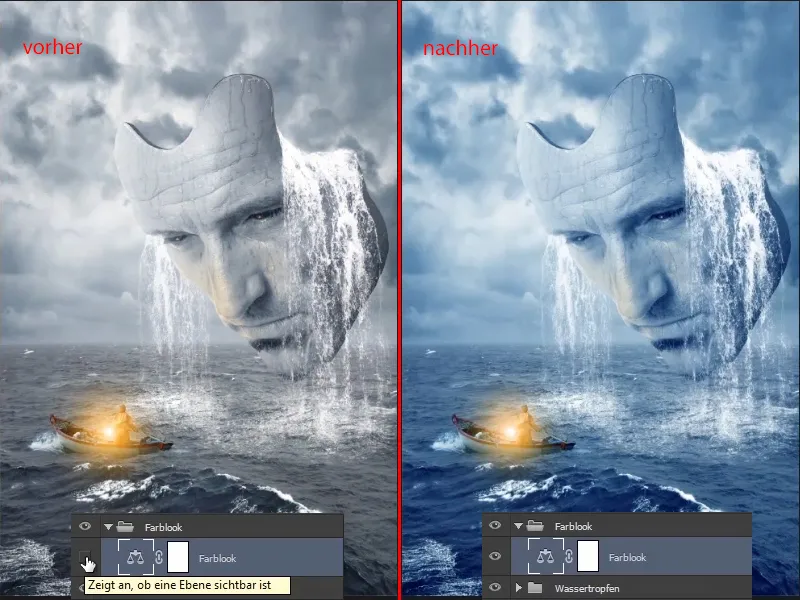
It was nice before, but a little cooler and more grayish.
Step 4
Now the edges should be darkened a little to create something like a vignette. However, not a fully-fledged one that really darkens evenly, but one that darkens exactly where you want it.
To do this, create a tone correction layer and set it to Luminance mode. This means that the color saturation should not be increased, but the colors should be darkened in general.
Simply see how dark you want the image to be and adjust the sliders accordingly. It's not about darkening the mask or the boat, but really the edges of the image. This is because they will be explicitly darkened later using the mask.
You can adjust the degree of darkening later if you want, but for now it's fine. Rename the layer to "Vignette" even if it is not a real vignette.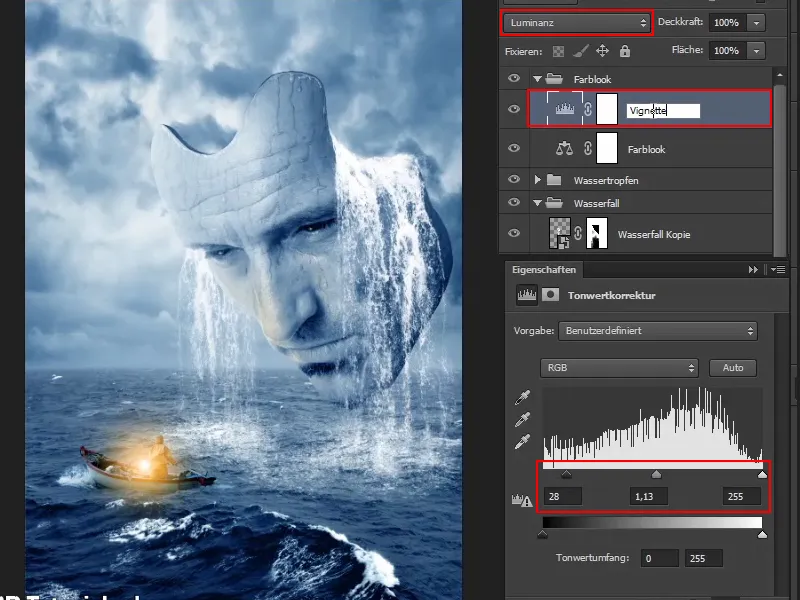
Step 5
Now invert the mask so that the effect is out of the way again.
Using a very soft brush and a white foreground color, paint the vignette into the picture. You can leave the opacity at 100%, as you can adjust it later using the opacity of the layer.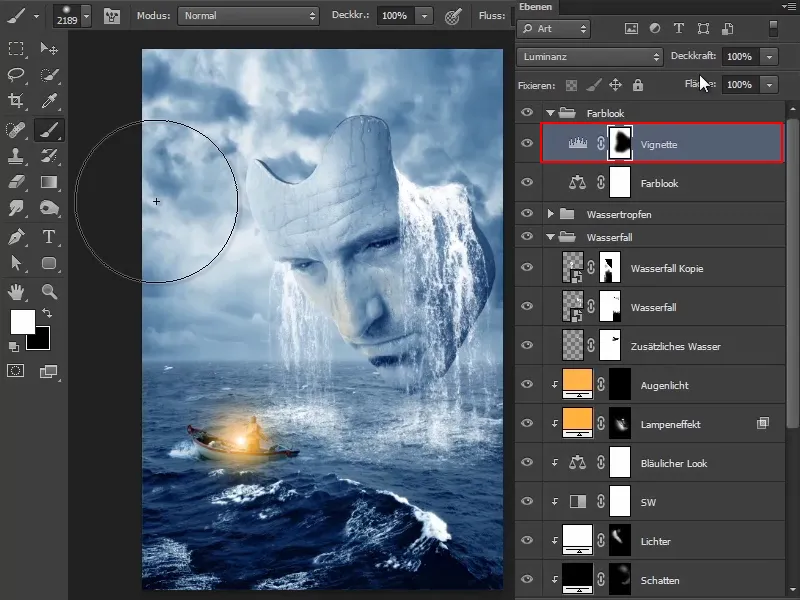
Step 6
To make the darkening even larger, double-click in the tone value correction properties window again and move the sliders accordingly.
You can then paint back into the image and make it a little darker at the edges.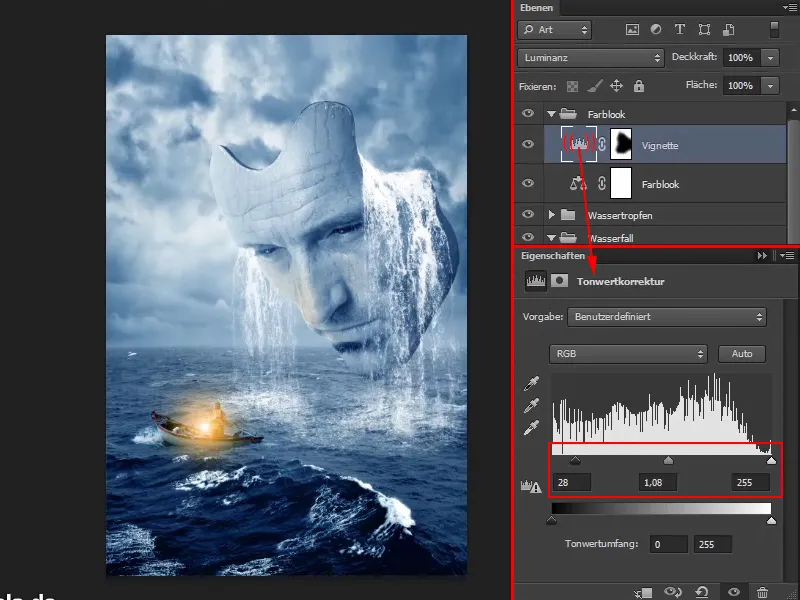
This is what the mask looks like: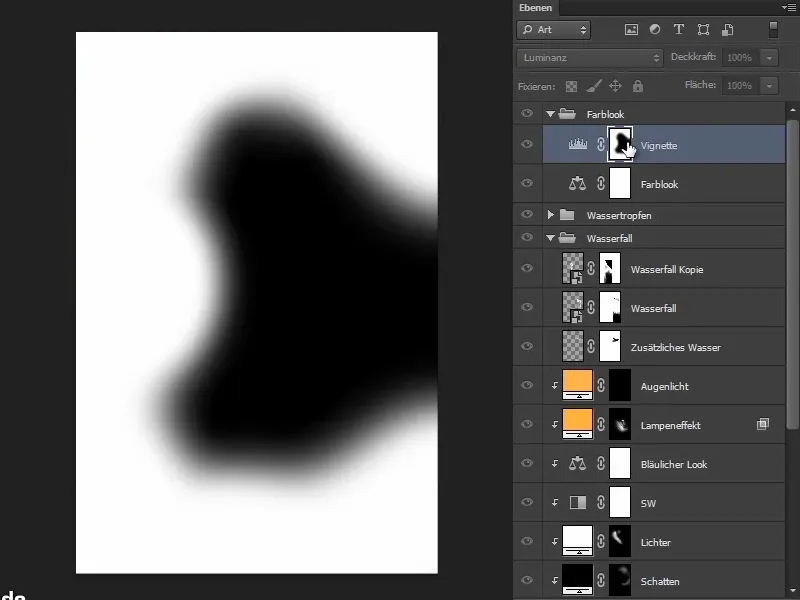
Step 7
Let the clouds and waves become a little dramatic.
In the area of the front waves, you can reduce the darkening again with a slightly lower opacity and a black foreground color. As I said, this is a partial darkening, so only where you actually want it.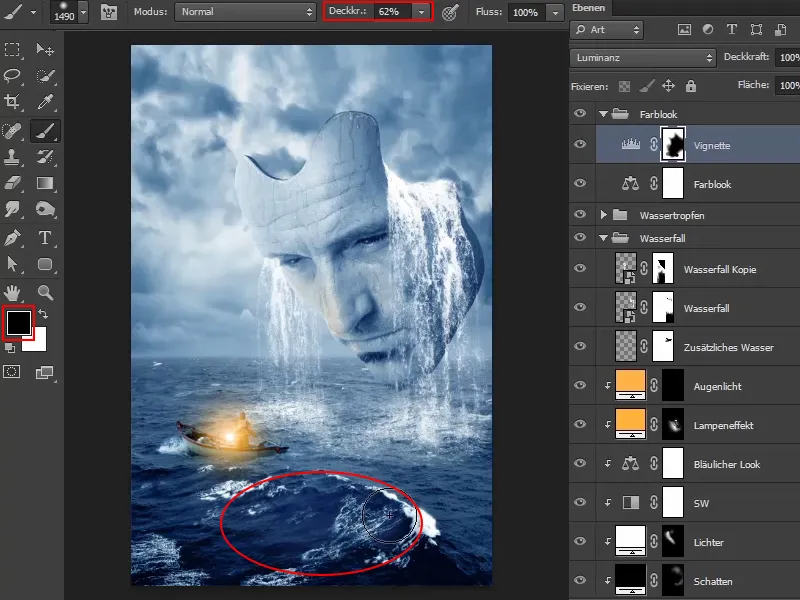
Step 8
You can now also bring back areas of the mask. Blender the before and after comparison in between.
The edges are well darkened. Now reduce the opacity of the layer to 90 %.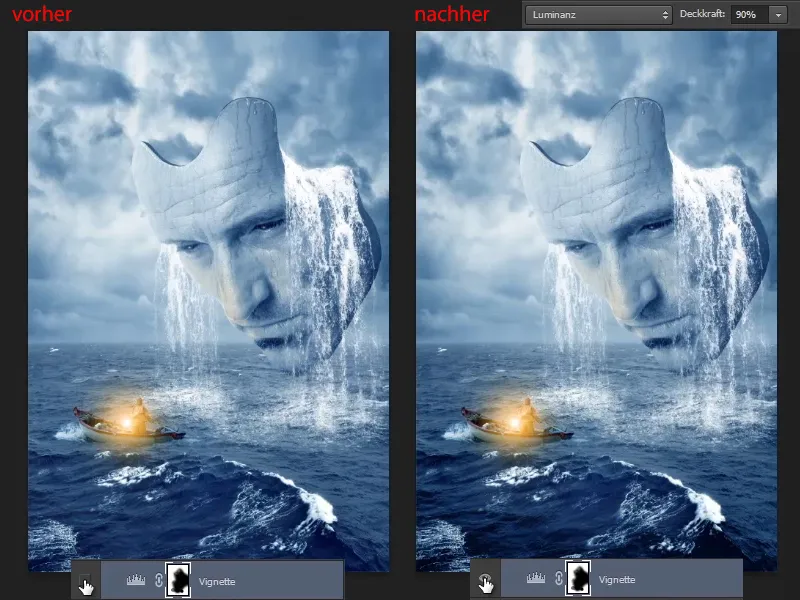
Step 9
If this is still too bright at the moment, you can create a dynamic layer and move the slider slightly to the left to remove some of the saturation.
The dynamic slidermeans that the color that is already strongly present in the image is reduced slightly. All other colors, which are more in the middle range, remain untouched.
The Saturation slider means that all colors are generally adjusted and desaturated.
Then rename the layer to "Desaturate".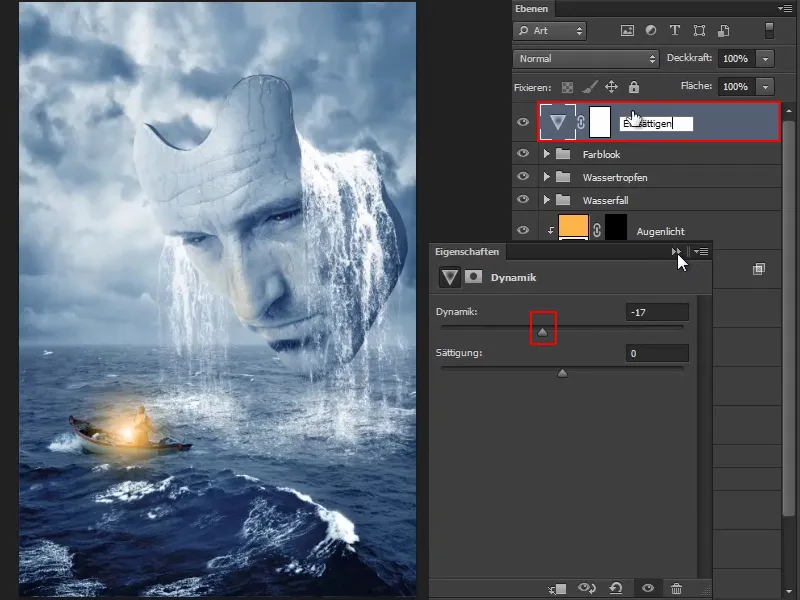
This marks the end of this tutorial series - the final image is now available.
Hopefully you have enjoyed this tutorial series and have learned a lot. As you can see, you should make individual settings for each image. In other words, you can't apply all the settings shown here to every conceivable image, it's always completely individual.
You have to define the goal beforehand and be clear about which elements appear in the image and which image look you want to achieve. And all the settings are made accordingly. And this is what the composing looks like when it's finished: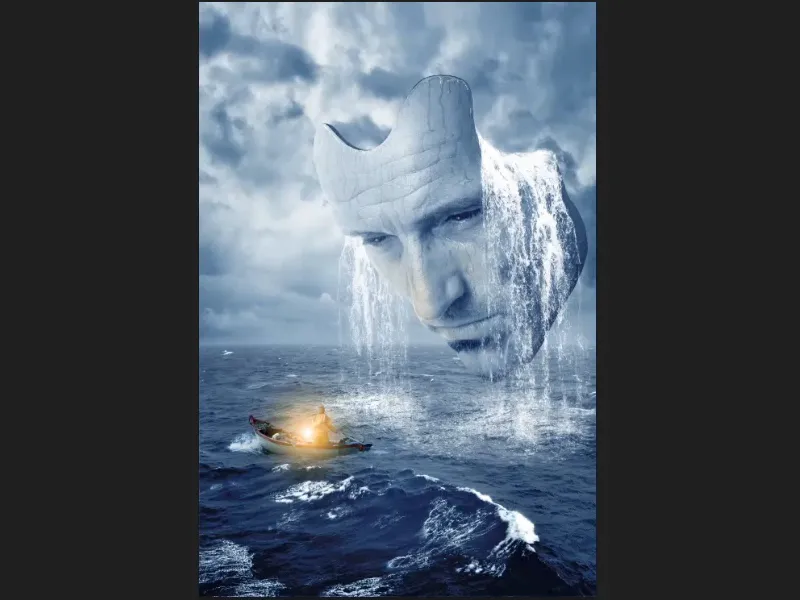
You can of course follow Marco on facebook at facebook.com/meerderideen or on youtube at youtube.com/meerderideen


