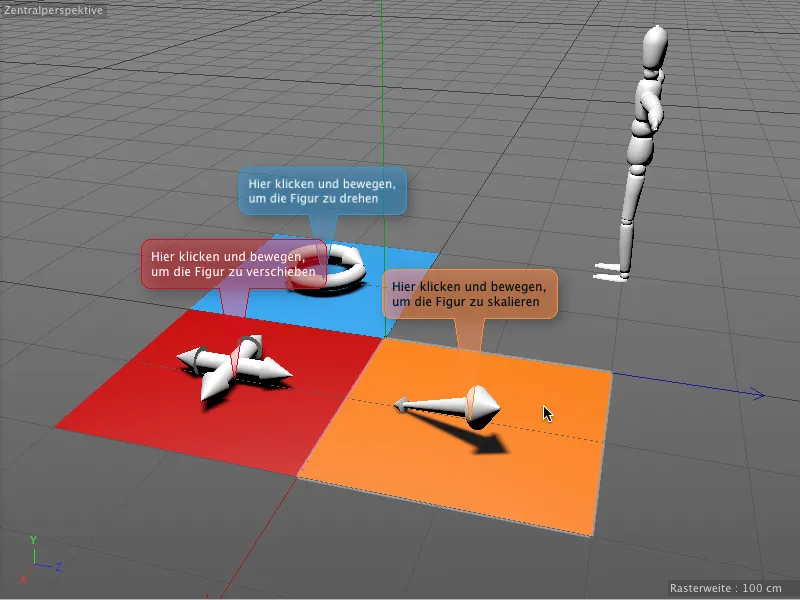
In this tutorial, we want to take a look at the two new tags. In the working materials you will find our common starting point with the document "PSD_C4D_R16_Interaktivitaet_start.c4d".
In front of the well-known figure object there are three colored fields, each with one of the basic editing tools Rotate, Move and Scale as a simple 3D object. We will now use the interaction tag to teach these fields exactly these tasks for the figure object.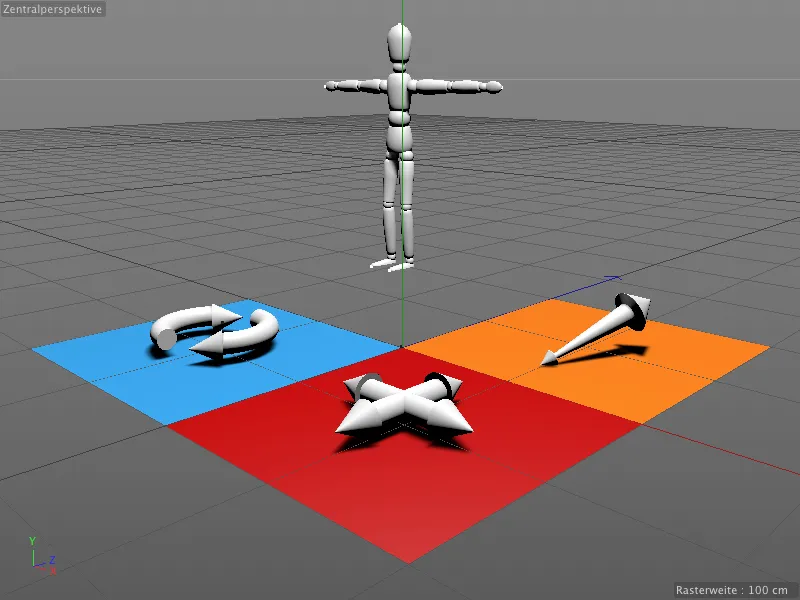
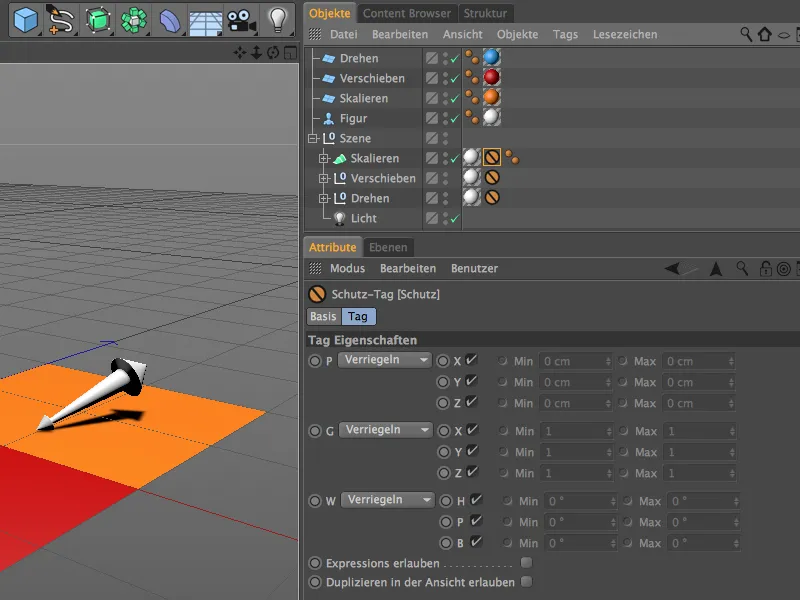
To ensure that only the three colored fields react to our editing, the 3D objects on them all have a protection tag that protects them from unintentional modifications.
Interactive control with the interaction tag
We start with the blue rotate field. To enable this object to react to our inputs, we assign the interaction tag to it via the context menu using the right mouse button from the CINEMA 4D Tags menu.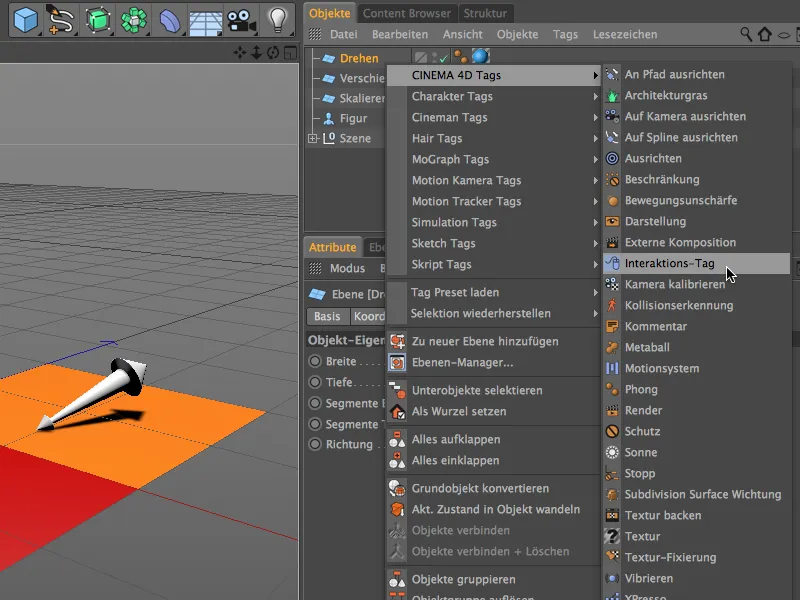
In the settings dialog of the interaction tag, we are first interested in the two pages Tag and Proxy. There we make sure that the Adjust option is deactivated, otherwise we would also shoot in the blue field for all modifications. Our interactive control will also only work if the object is not selected. Thanks to the automatic tweak mode, this is not even necessary.
On the proxy page, we specify which object should receive the control commands. In our case, this is the figure object, which is why we drag it from the Object Manager into the Proxy Object field.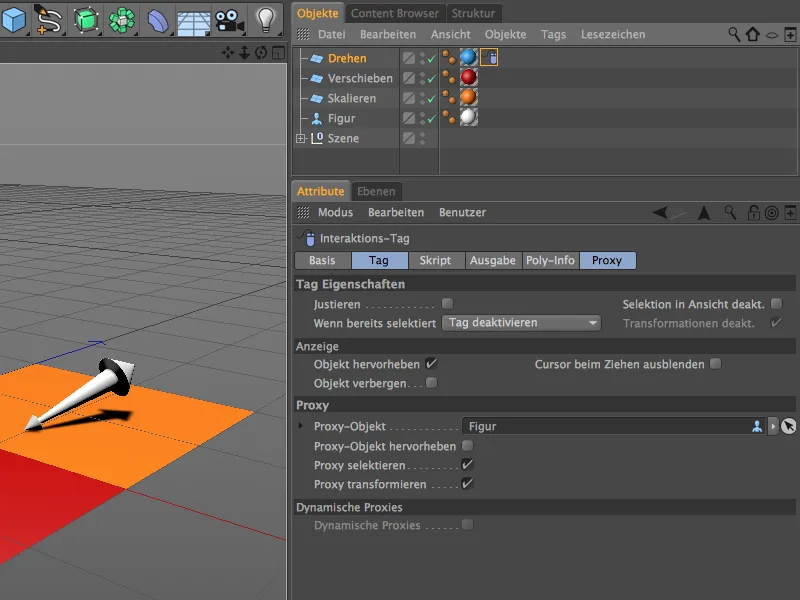
The Output and Poly-Info pages are intended to collect information about the inputs, positions etc. and make it available for further processing. As we forward our tool inputs directly and unfiltered to the proxy object, we do not need to make any adjustments here.
A small script is required to pass on the control information, which we define in the Script field. We choose Python as the scripting language.
After this entry, a field called Script opens, in which we find the usual mouse input commands that we also encounter, for example, when programming Internet pages and applications.
To edit the script from the settings dialog in the script editor, we click on the Edit script button at the bottom.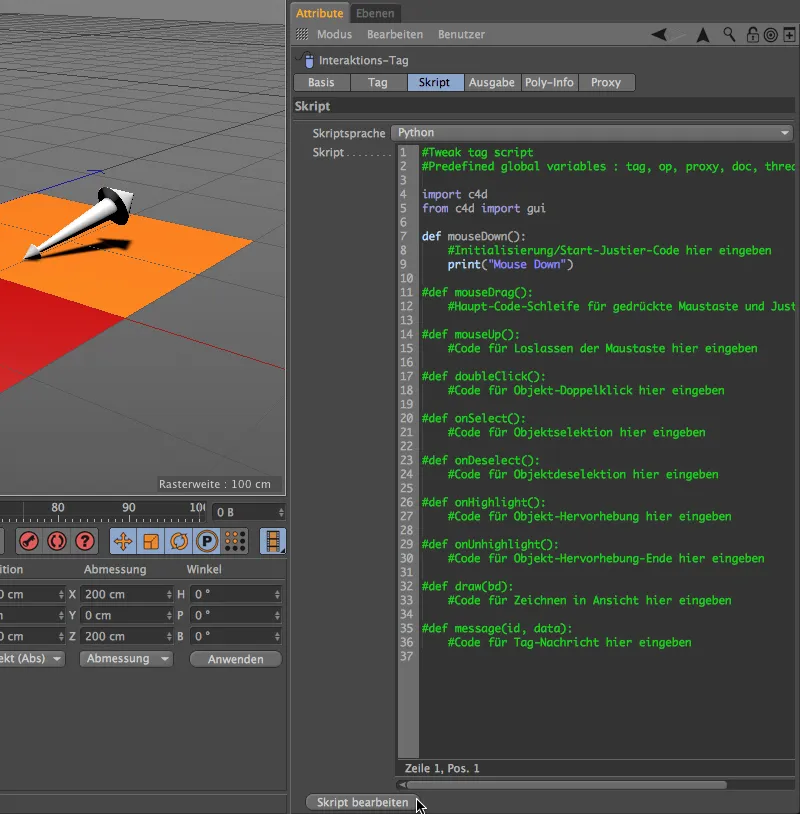
This opens the expression or script editor, which offers us many more options for entering and testing the script. Most of the input loops are set to inactive via the hash # at the beginning; for our example, we only need the already activated mouseDown() lines.
The mouseDown() event should call and execute the rotation tool instead of the placeholder lines. To do this, we first delete the lines 8 and 9 in the script that we do not need.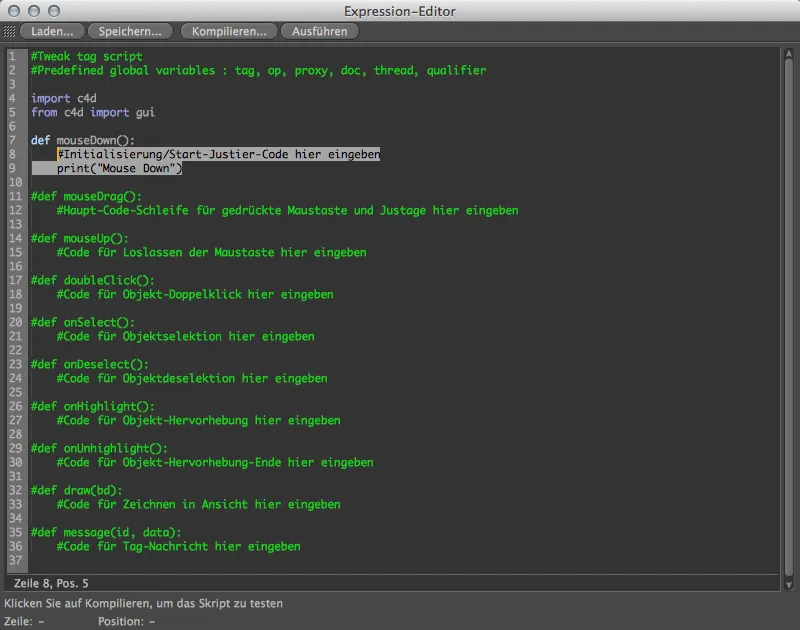
In order to determine the correct code for the rotate tool, we also call up the command manager via the Window>Customize>Customize commands... menu.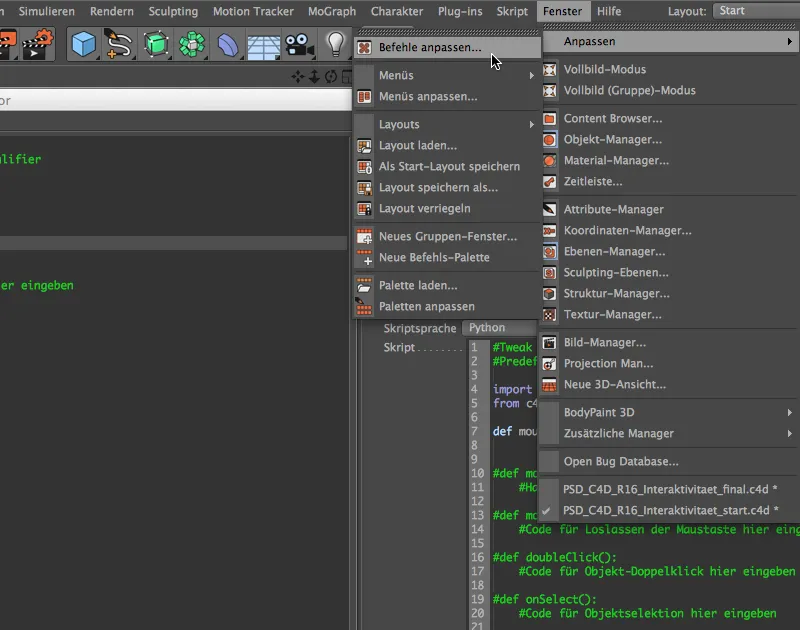
After entering the first few letters of the word "Rotate", we will find the Rotate tool as an entry under Filter: Name. Now we just have to drag and drop the line of the rotate tool from the command manager into line 8 of our script editor.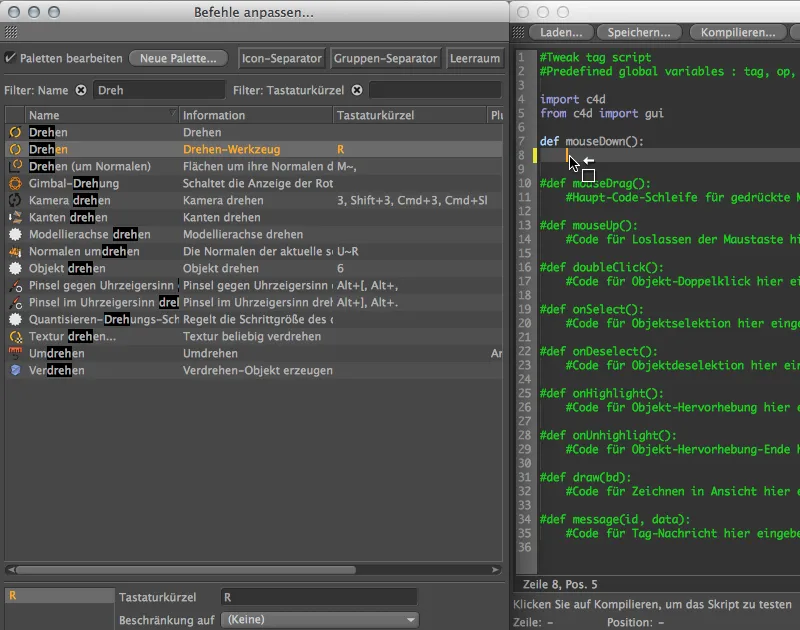
The call of the turning tool with the corresponding command ID is already entered in our mouseDown() event. To make sure that the script is OK, we click on the Compile button ...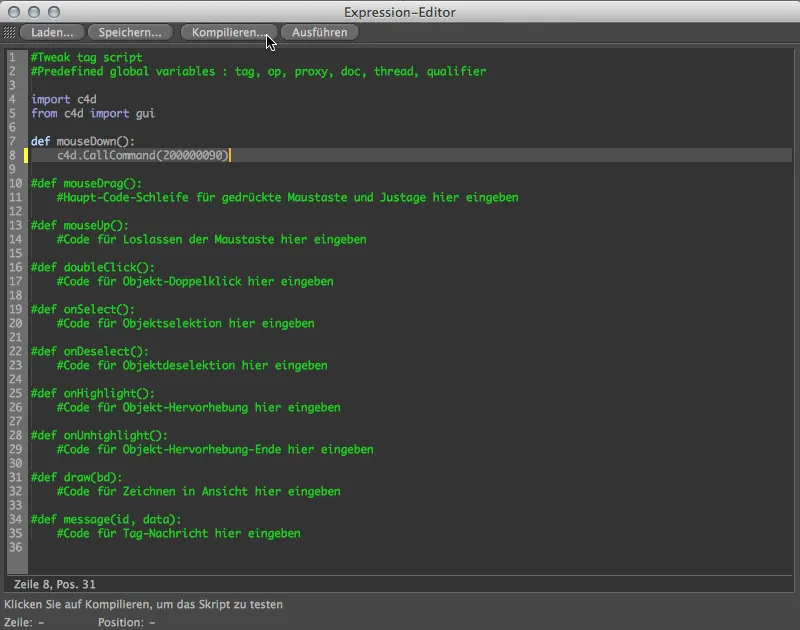
... and the green highlighted line indicates that there are no errors in our script. Not only the script, but also the interaction tag is now configured. We can continue to use it for the two other control objects straight away, as the tags only differ in this one command ID for the mouseDown() event.
We can therefore close the Expression Editor and duplicate the interaction tag in the Object Manager by dragging it to the other two control objects while holding down the Ctrl key.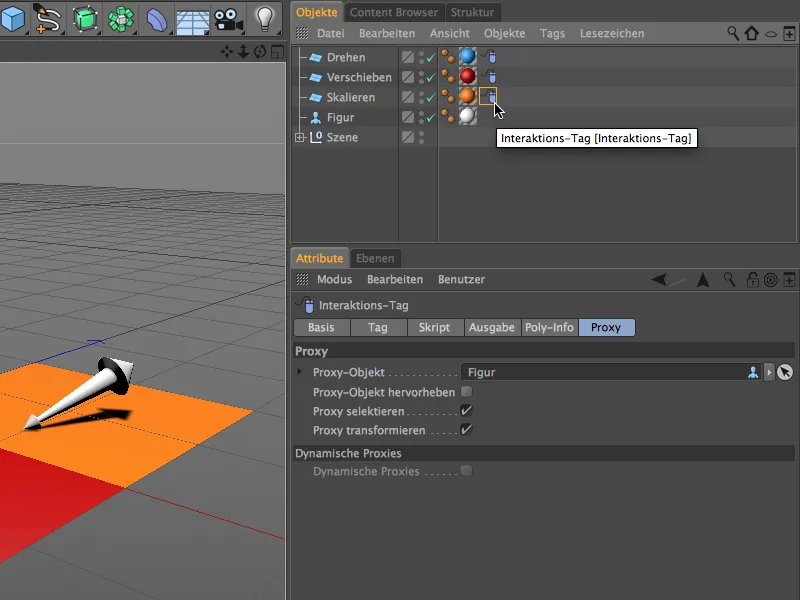
Let's now adjust the two duplicated interaction tags to the other control objects. The Move tool is quickly found in the Command Manager.
Now we can either delete the relevant line in the script and insert it again or simply enter the other command ID in the code. If the corresponding command is selected, it appears in the lower area of the command manager. The last two digits are affected, so the command ID of the Move tool ends with "88".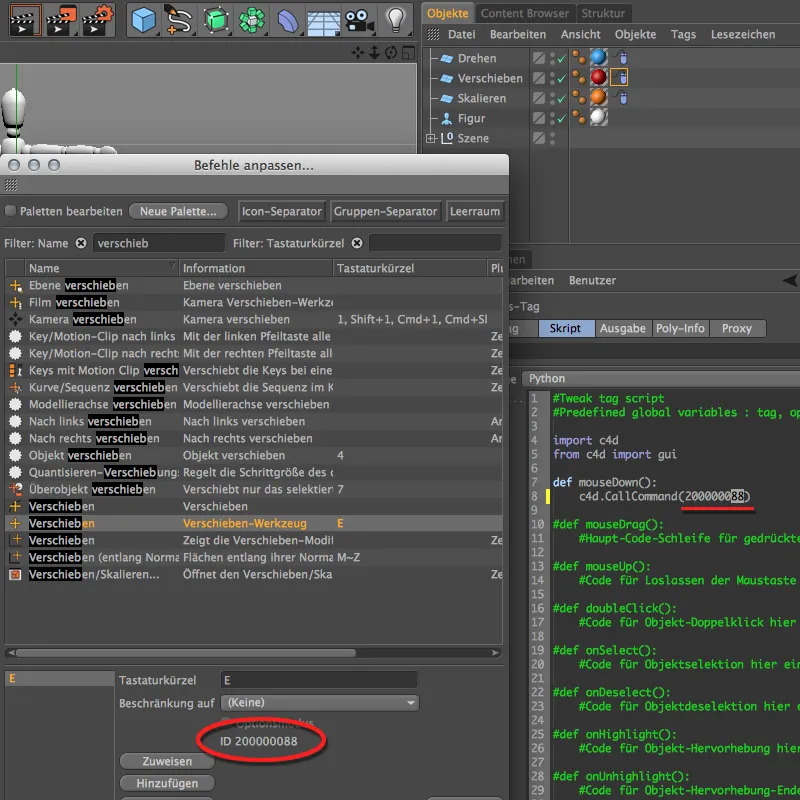
The same applies to the Scale tool. Its command ID ends with "89", so we have to change the last digits in the script of the interaction tag to this number. There is nothing else to consider when adapting the interaction tags to the control objects.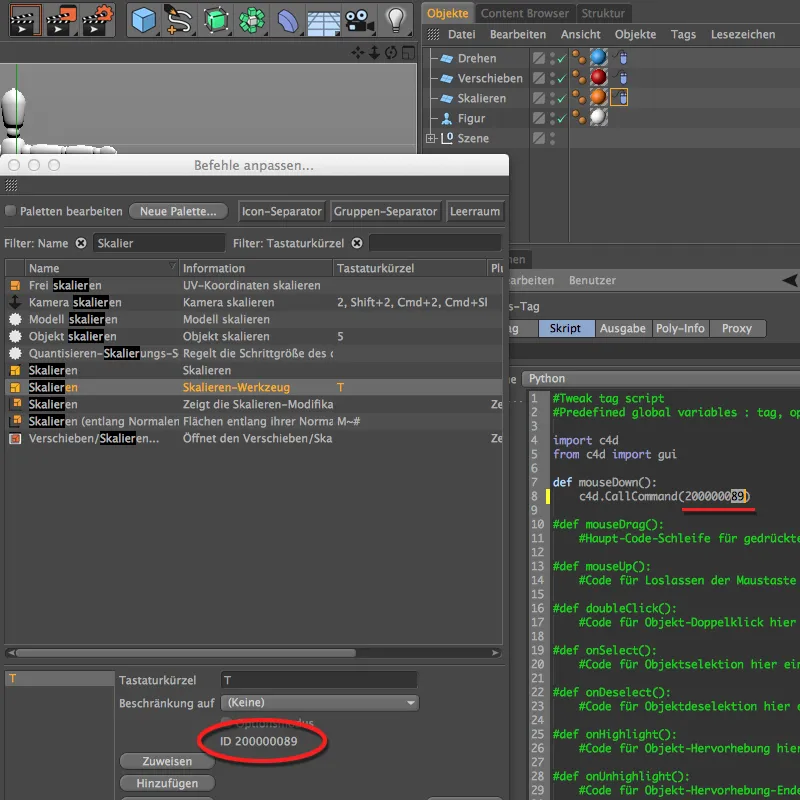
Now we can finally test our interactive scene. Make sure that no object in the scene is selected and place the mouse pointer in one of the three colored fields. While holding down the mouse button and moving the mouse pointer, modify the figure object with the corresponding basic editing tools Rotate, Move and Scale.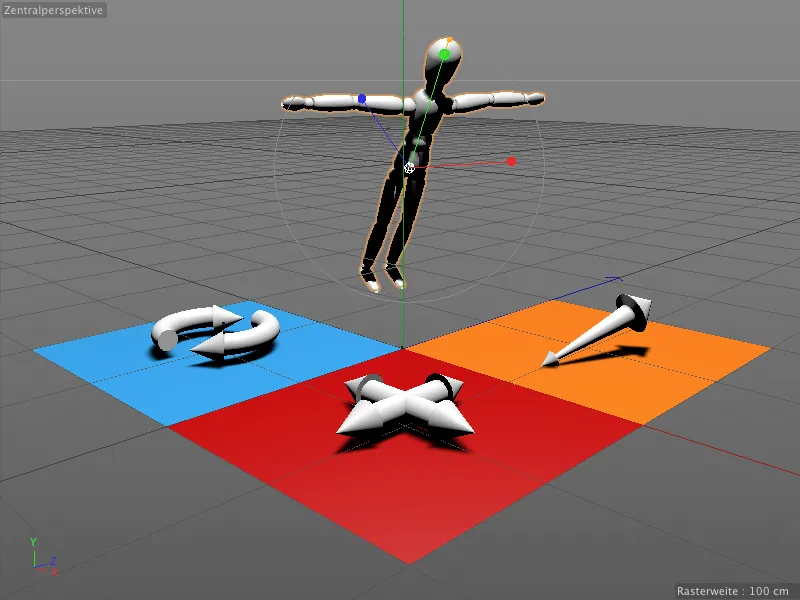
Now our finished, interactive scene is not necessarily self-explanatory. However, with the new comment tags in Release 16, we can quickly integrate a little help.
Annotations in the editor with comment tags
The comment tags can also be found under the CINEMA 4D tags in the context menu via the right mouse button. We assign it directly to the object that is to carry the annotation.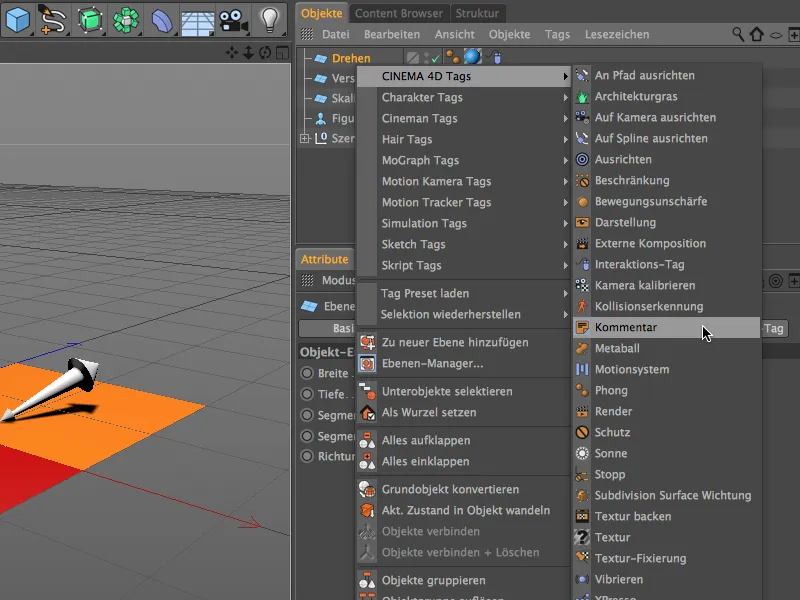
In the settings dialog of the comment tag, we can now enter a text and even a link via URL on the comment page. Longer text can either be wrapped manually in the text field or minimized using the Collapse option on the display page. There we also find some parameters for the design and display options for the comment tag. I have adjusted the color of the comment tag for our rotate control object.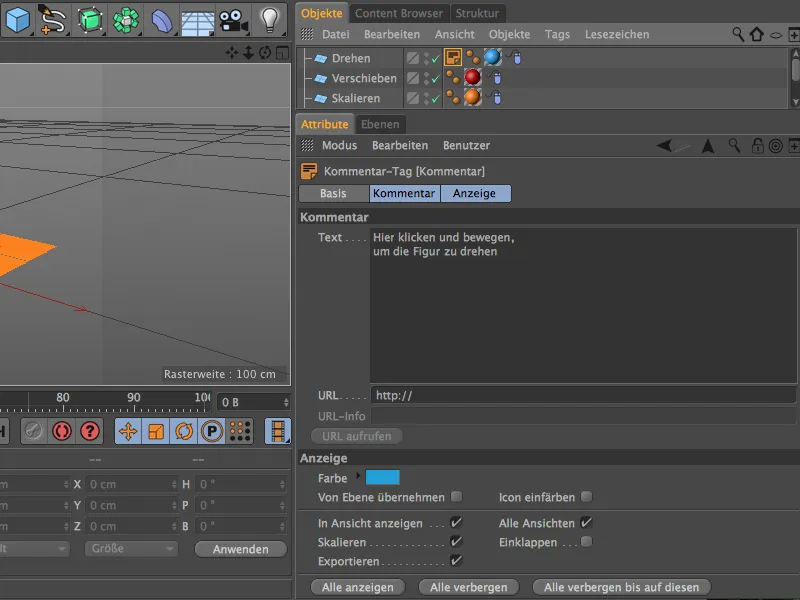
We will now use the comment tag for the blue rotate control object as the basis for the two other control objects. We duplicate it by moving it in the Object Manager while holding down the Ctrl key and adjust the text and color accordingly for the move control object ...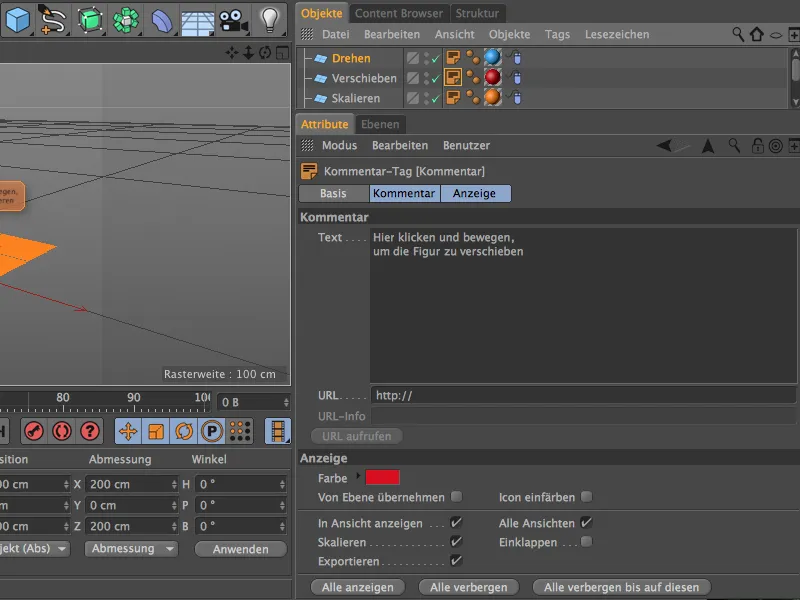
... and for the Scale control object.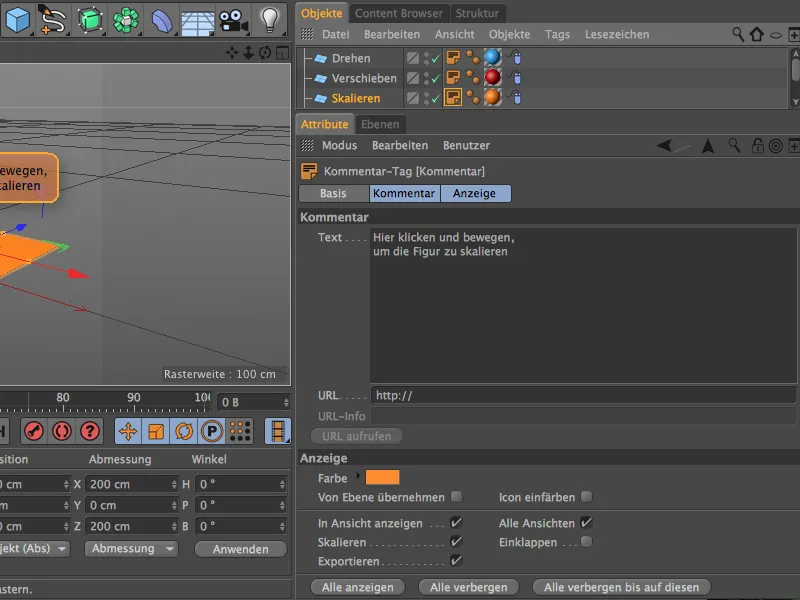
Our scene is now equipped with the necessary annotations so that the control of the figure object via the fields provided should be clear.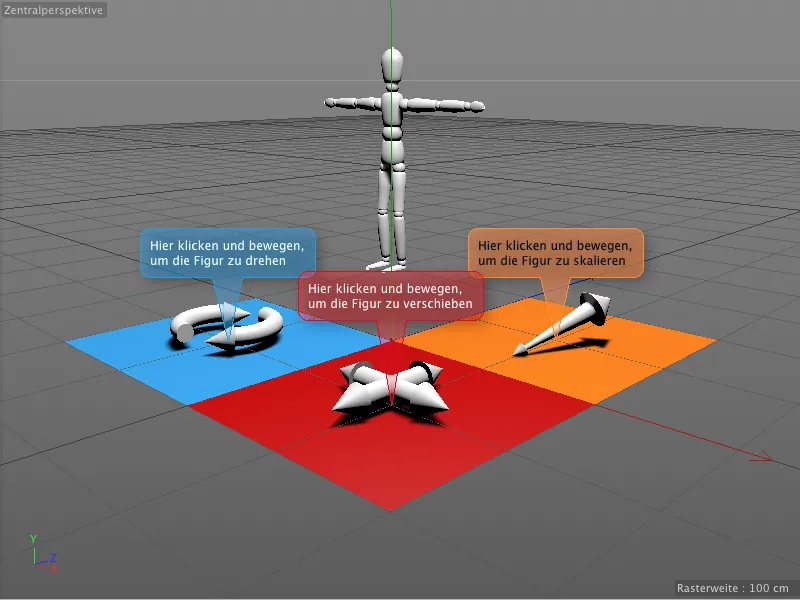
The notes in the comment tags are permanently attached to the objects and are perfectly legible at all times, even if the view or perspective is changed.