Excel is a powerful tool that helps you not only with data organization, but also with ensuring data integrity. One key function is data validation, which allows you to set restrictions on cells to prevent input errors. In this tutorial, I will show you how to effectively utilize this function to ensure that only correct data is entered.
Key Takeaways
- You can define input restrictions for cells in Excel.
- Data validation helps display error messages for invalid inputs.
- You have the option to validate data in specific formats such as date, number, or time.
Step-by-Step Guide
Step 1: Open the Sample File
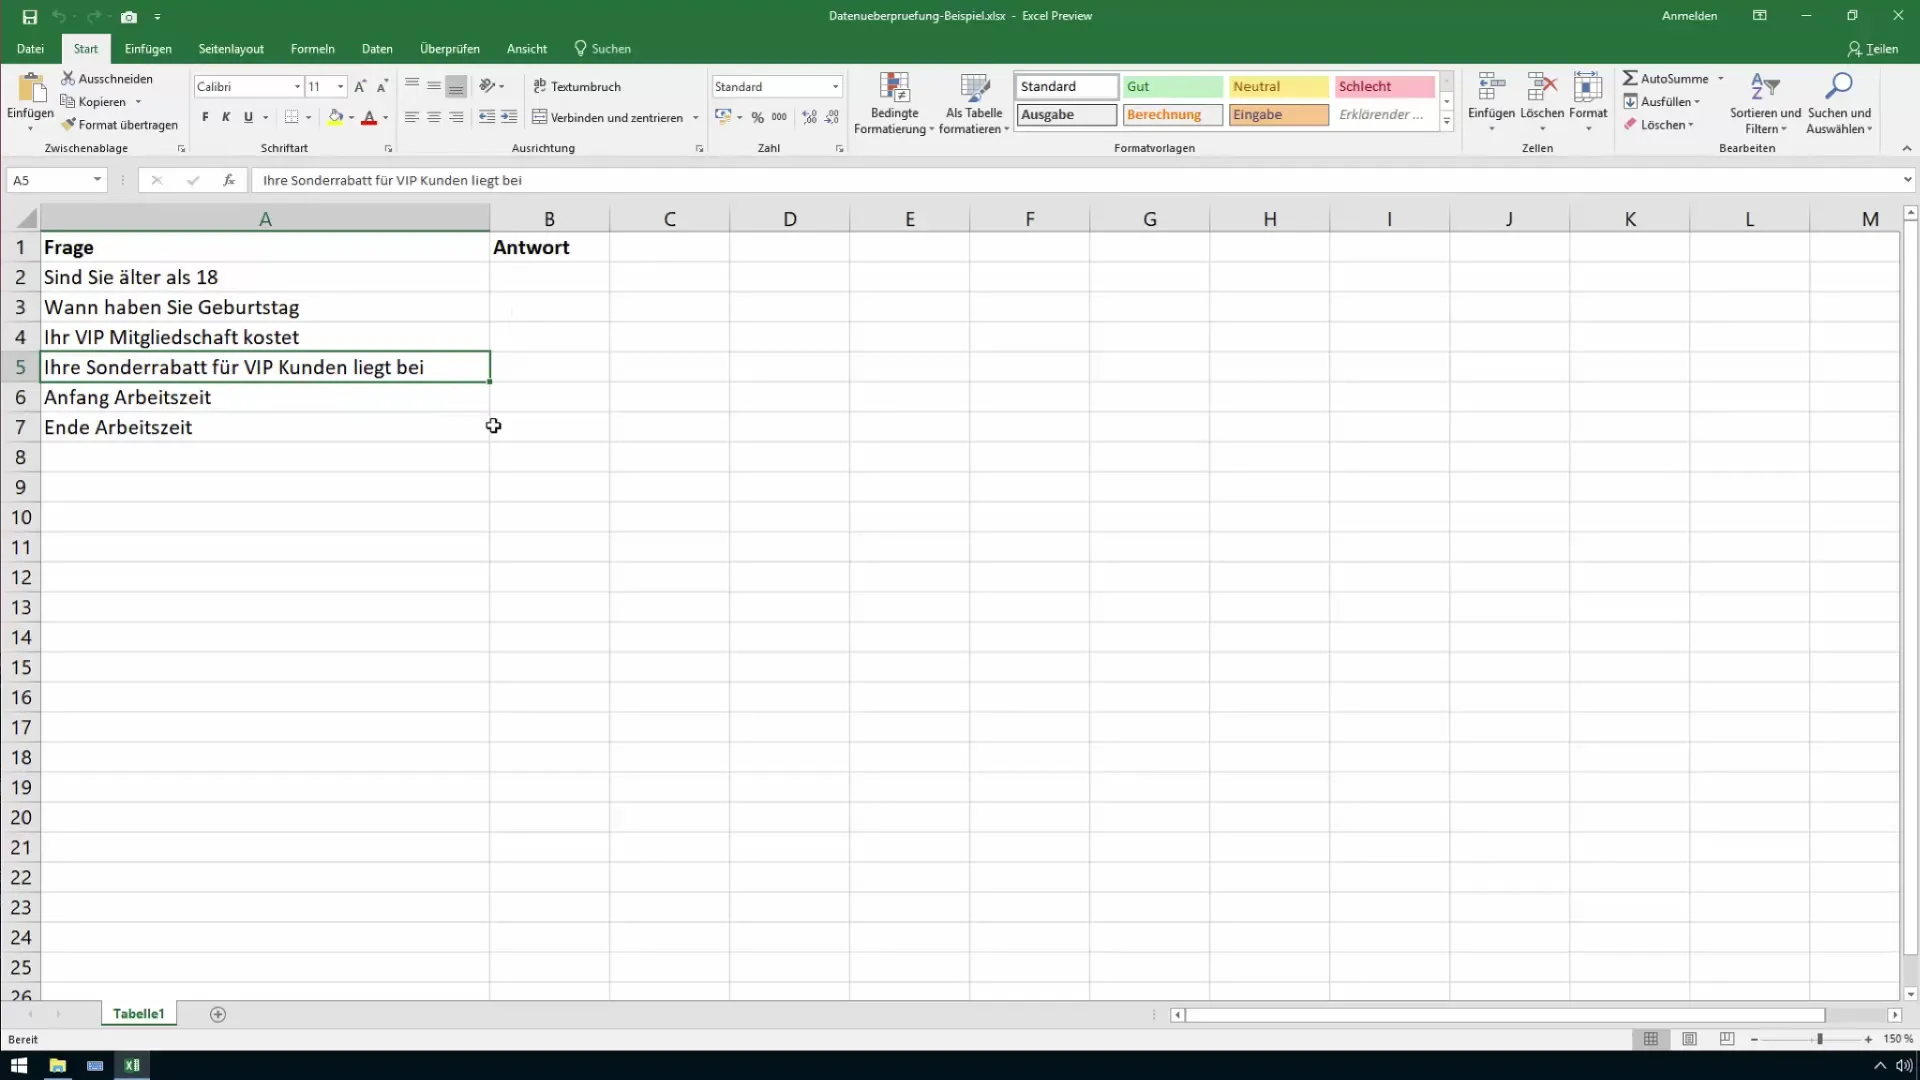
Before we begin with the settings, open the sample file "data validation example.xlsx". This file already contains some questions that we will use for our data validation.
Step 2: Select the Cell for Data Validation
Focus on the question "Are you older than 18?". Only the input "Yes" or "No" should be allowed here. Select the cell where this answer should be entered.
Step 3: Activate Data Validation
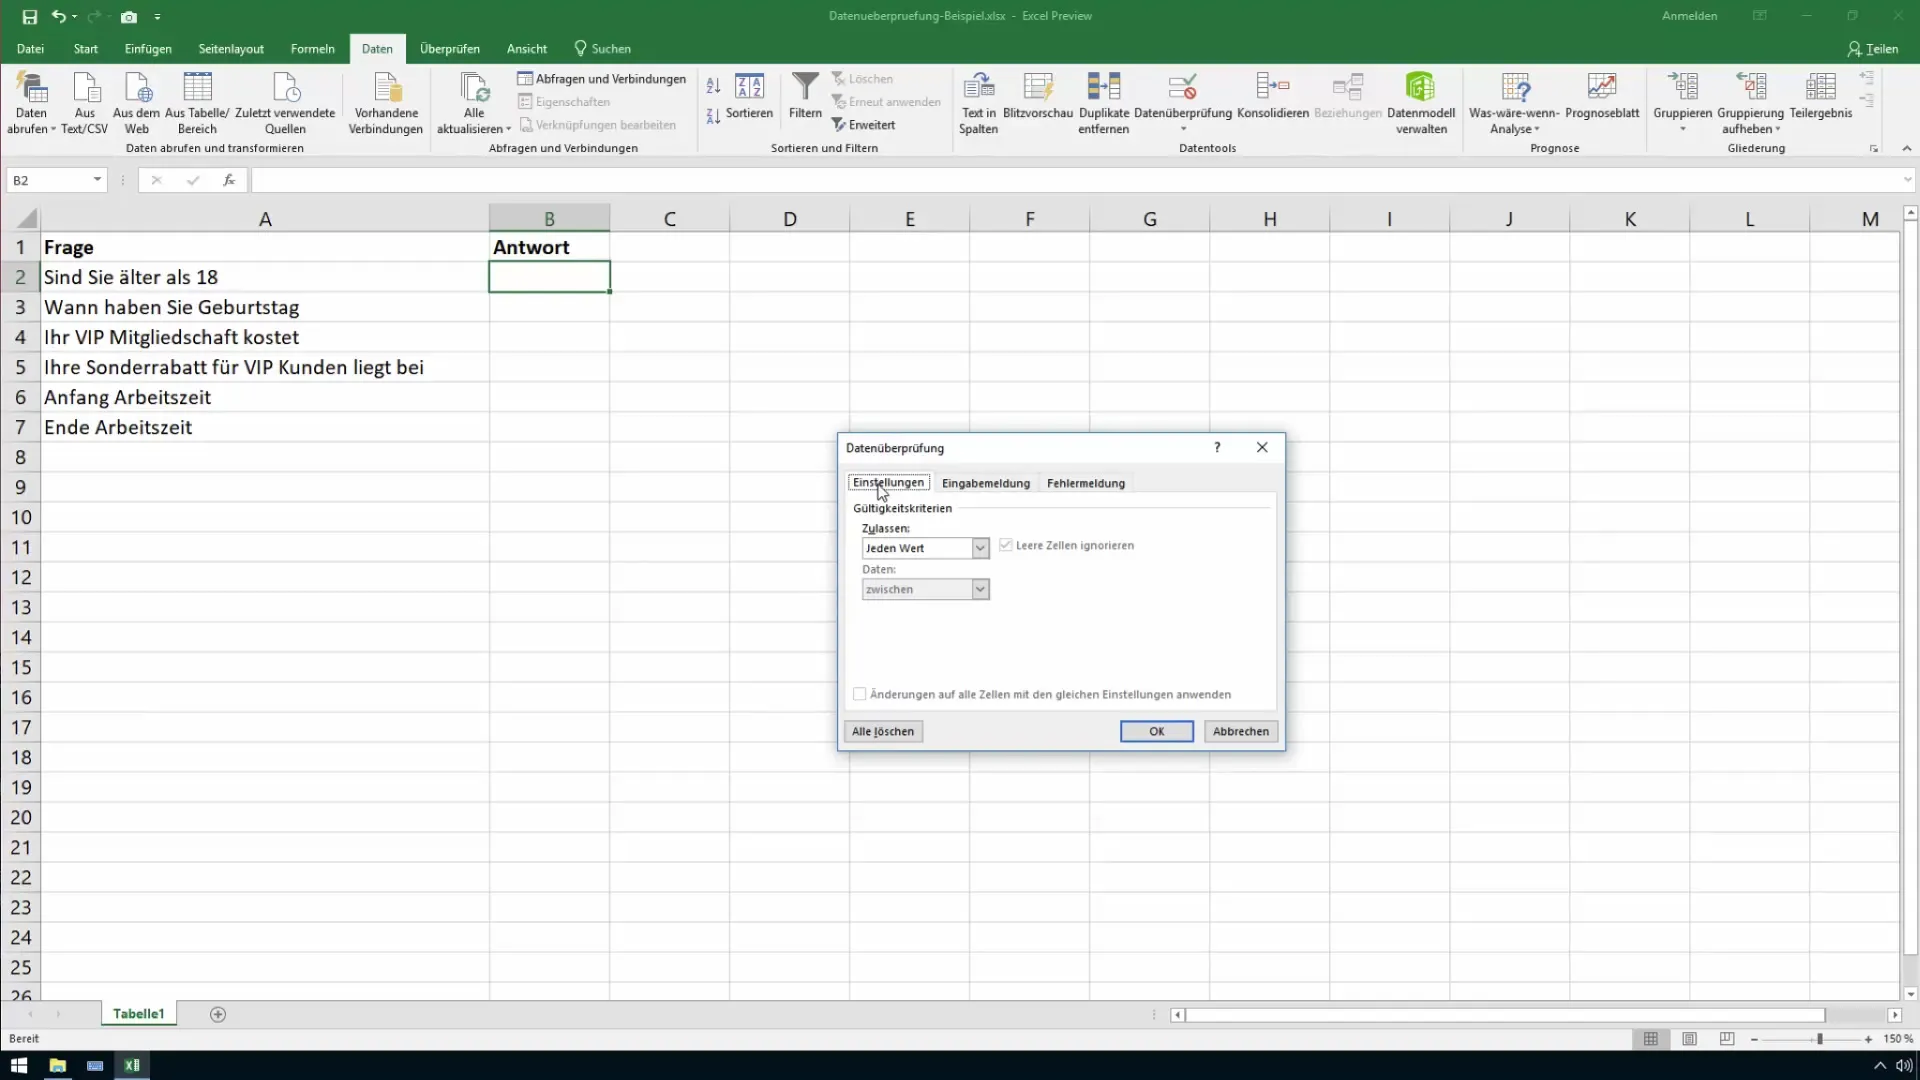
Now go to the "Data" tab in the top menu bar and look for the "Data Tools" section. Click on "Data Validation". A new window will open with the settings options for data validation.
Step 4: Set Input Restriction
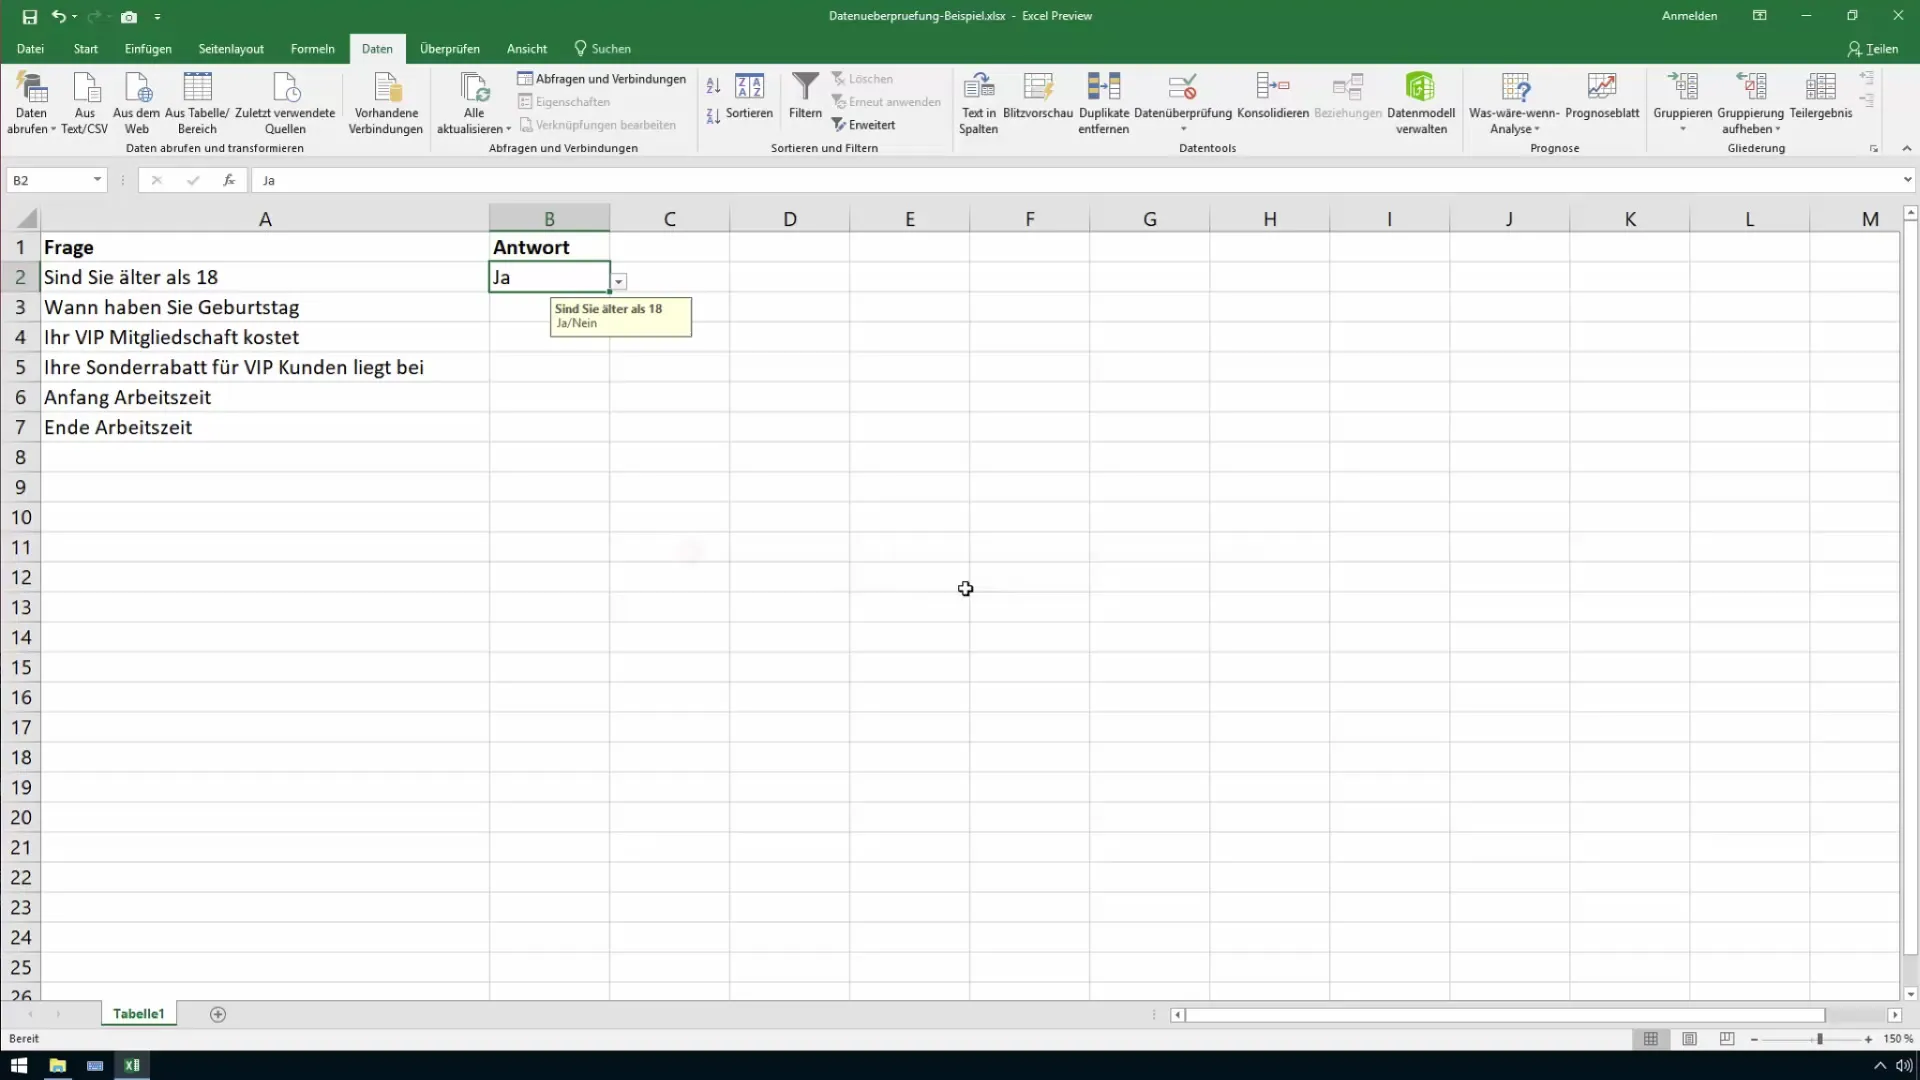
In the data validation window, under "Allow", select the option "List". Here you can either choose a range of cells where the allowed answers are, or enter the values directly: "Yes, No". Click "OK". This will create a dropdown list for input.
Step 5: Add Input Message
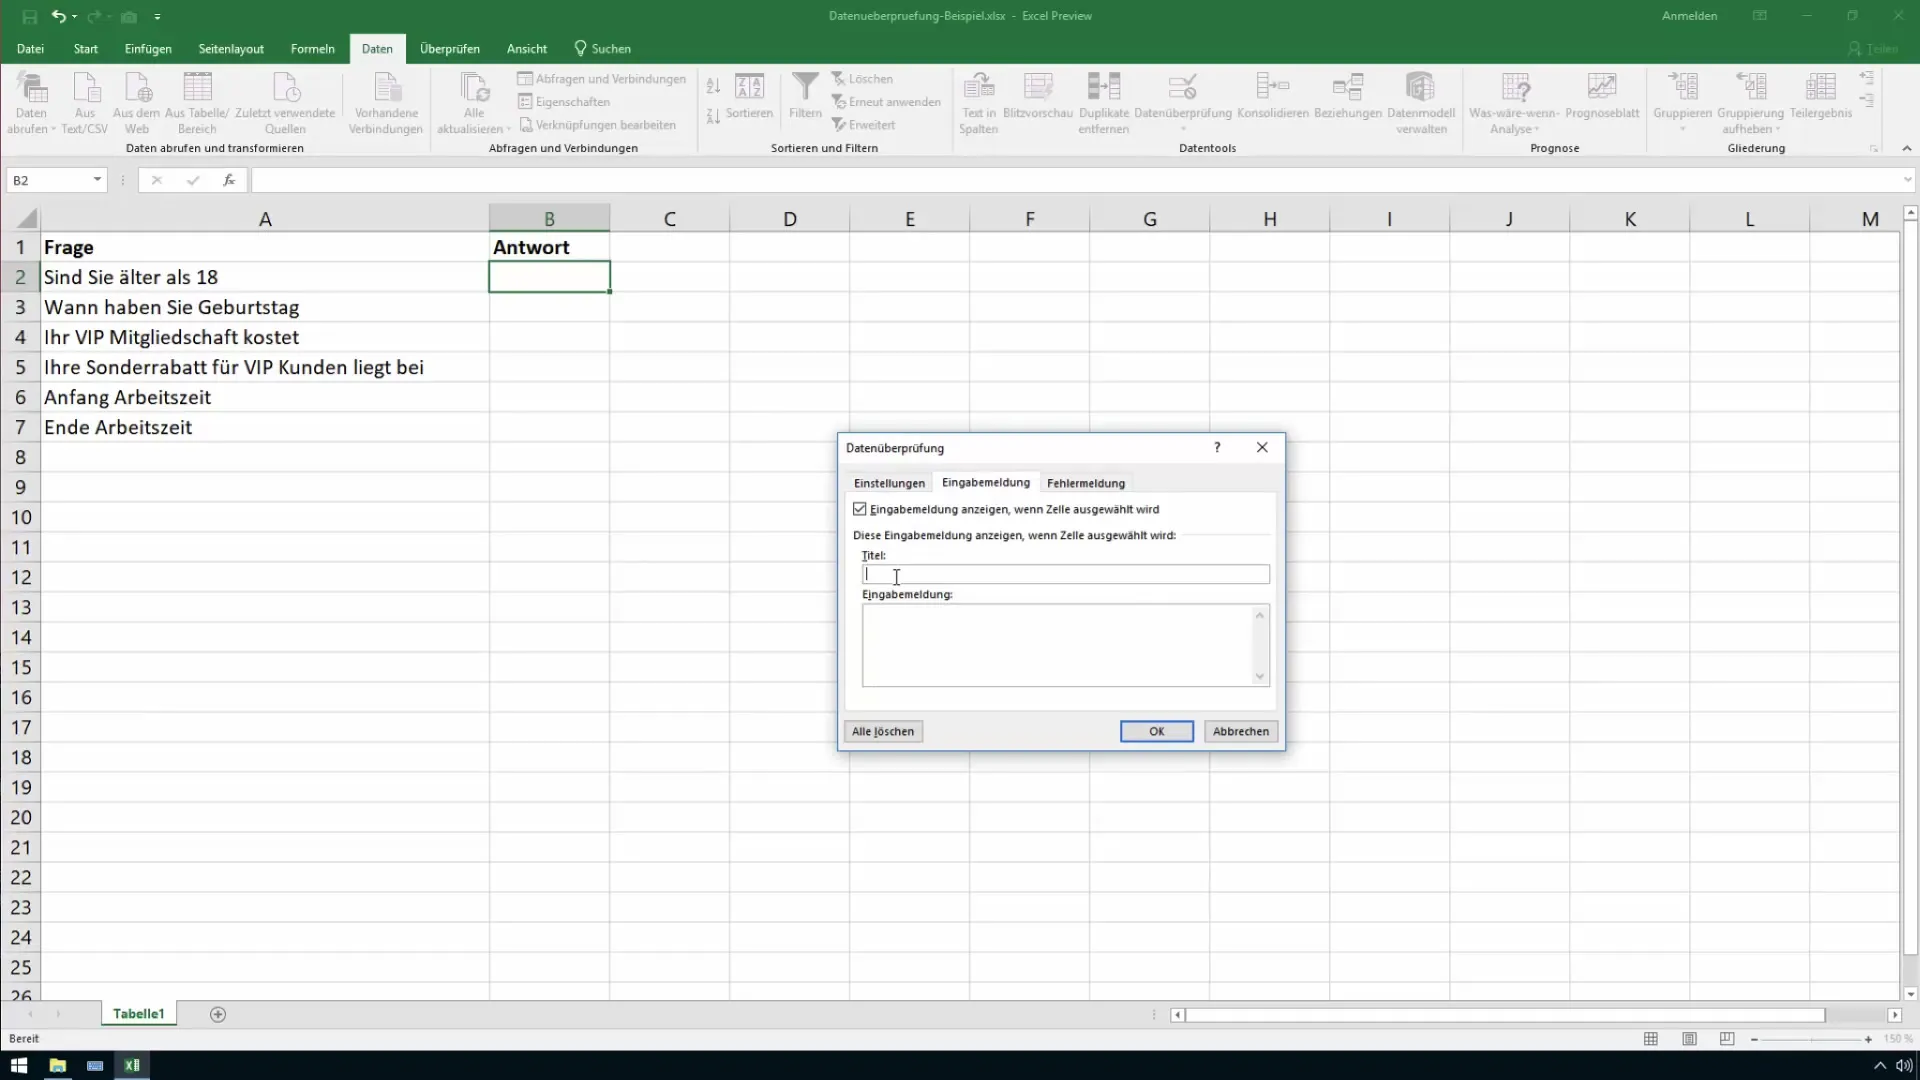
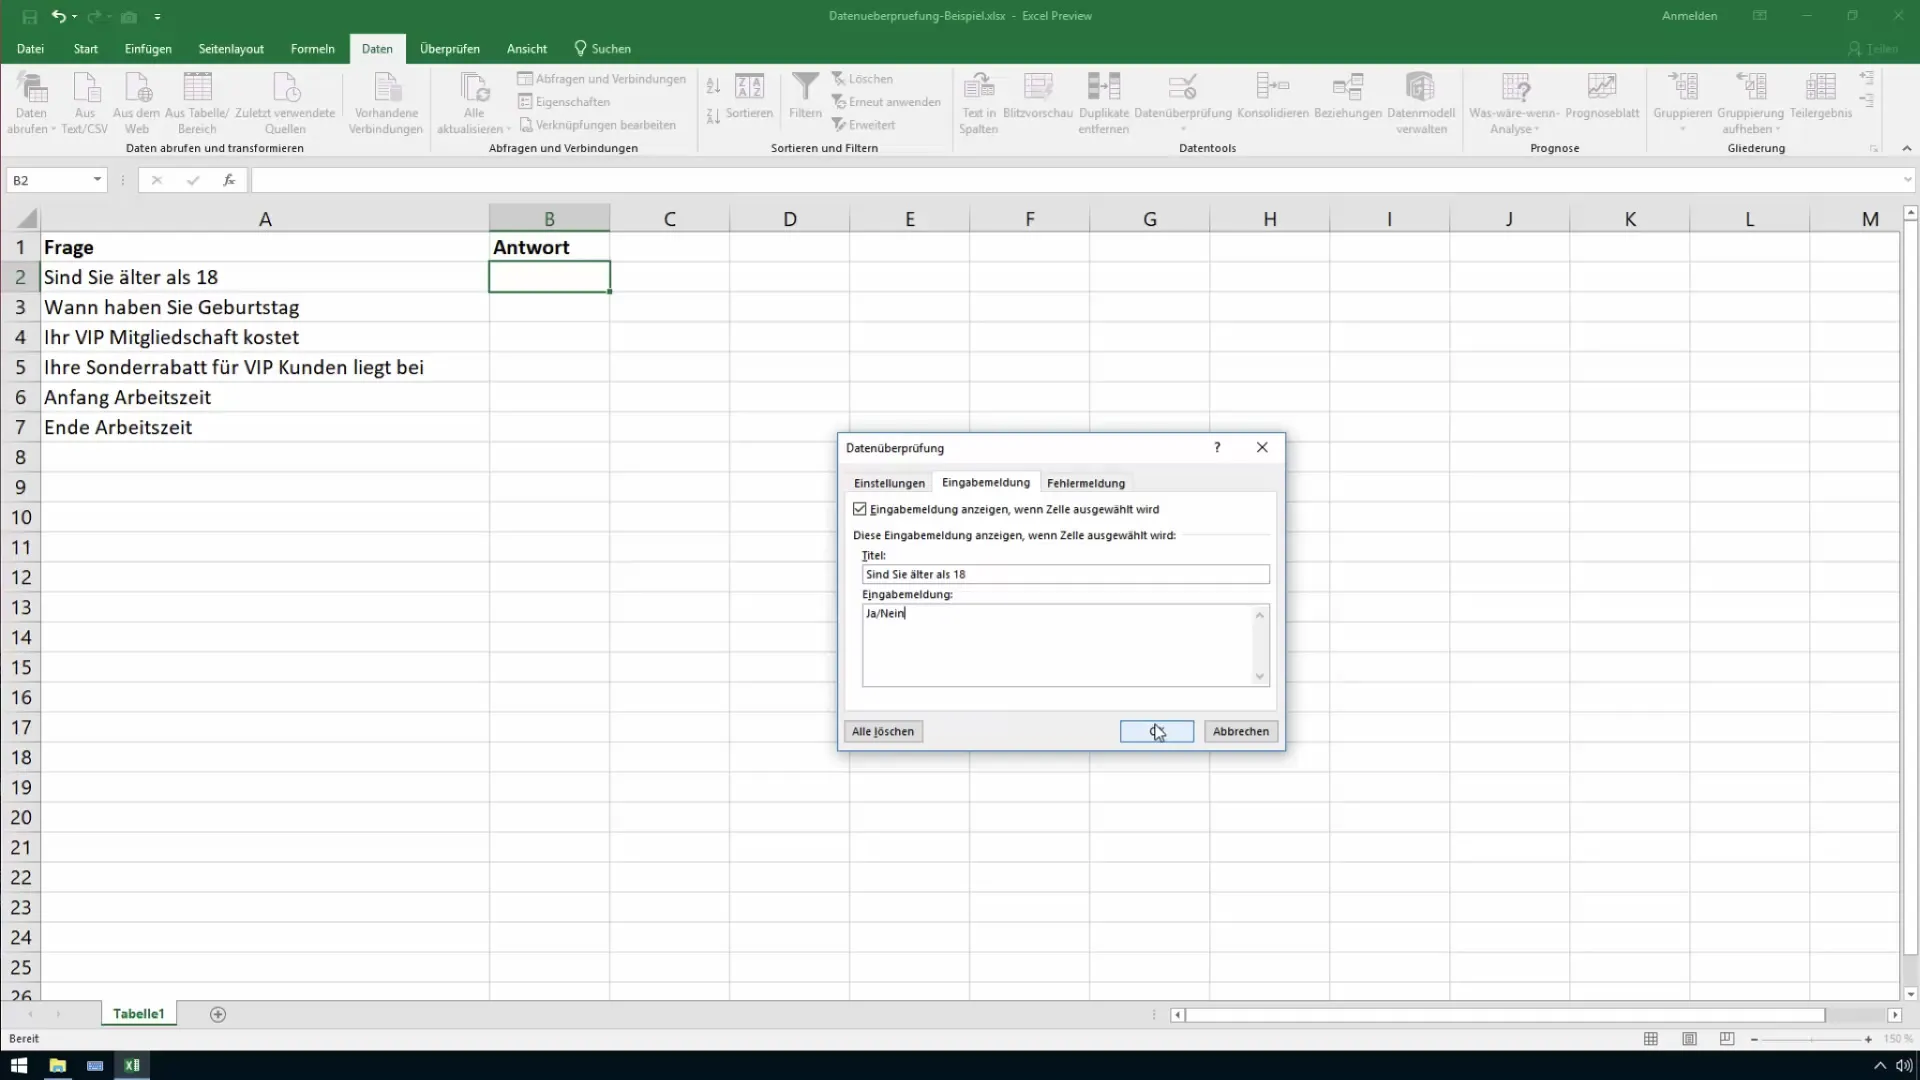
To provide users with a hint during input, you can add an input message. Activate the "Input Message" tab in the same window and enter a title and a corresponding message, such as "Please specify: Are you older than 18?".
Step 6: Define Error Message
To ensure that invalid inputs are caught, switch to the "Error Message" tab. Here you can configure the title and message for the error message that will be displayed if someone enters anything other than "Yes" or "No". Click "OK" again to apply all settings.
Step 7: Set Date for Birthday
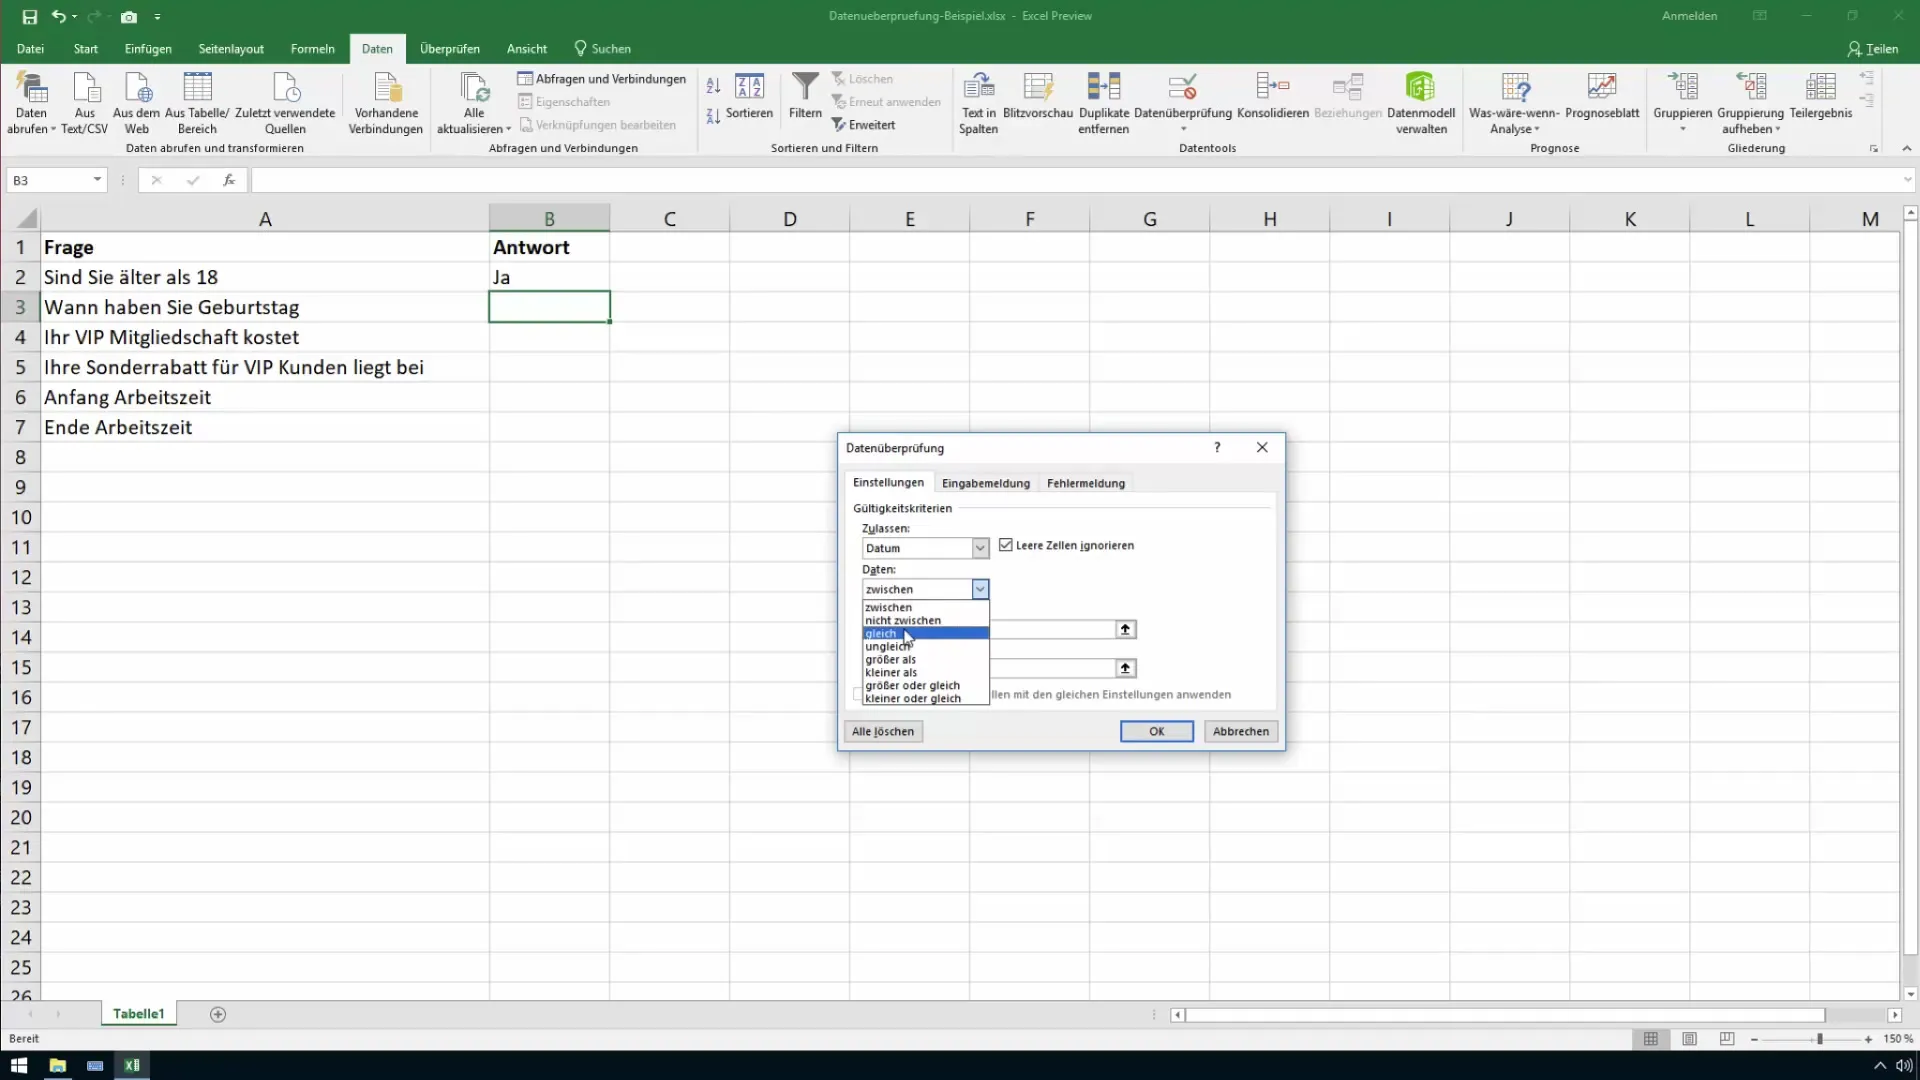
Now we want to set the input for the birth date. Select the cell for the birth date and go back to "Data" and then "Data Validation". Choose "Date" under "Allow" and set the constraints for the date. For example, you can specify a minimum date of 1/1/1900 and a maximum of today's date.
Step 8: Add Reminder for Date
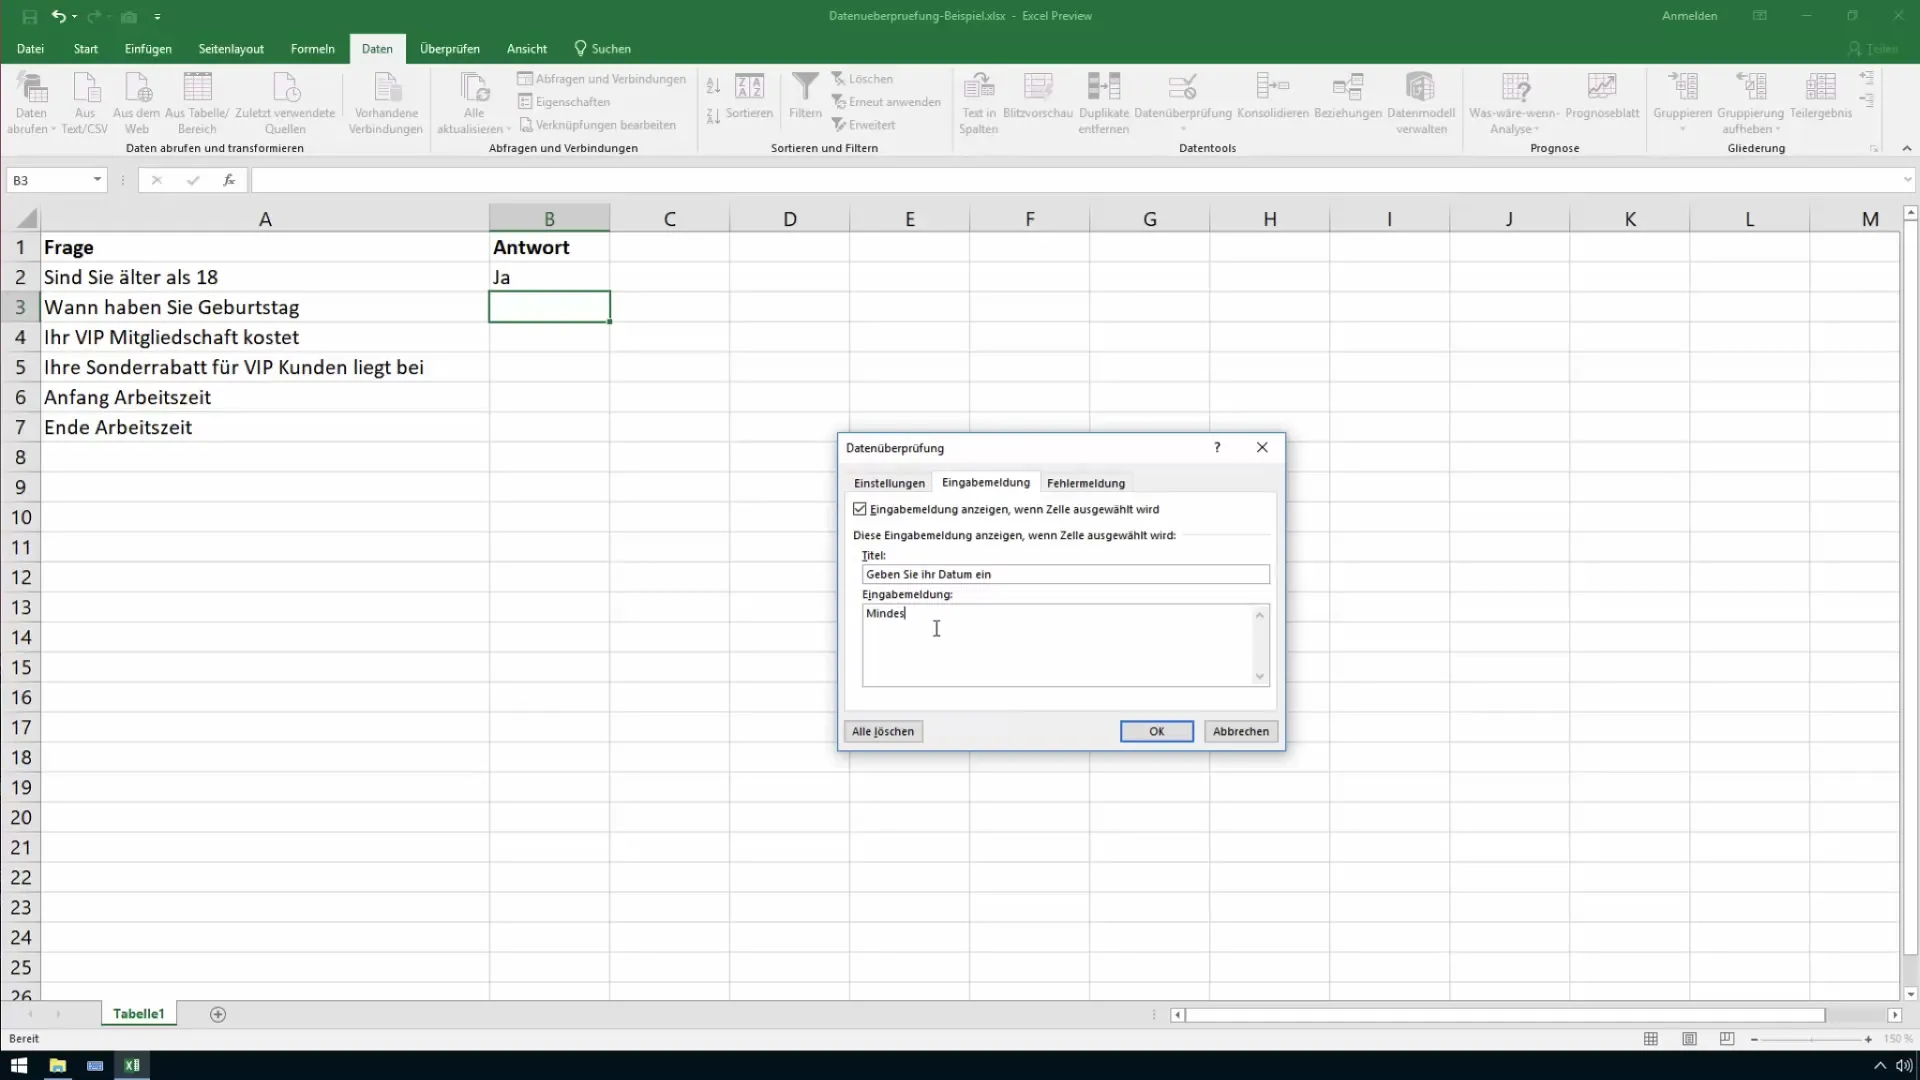
You can also add an input reminder that tells users to enter their birth date. This could say something like, "Please enter your birth date (minimum age 18 years)".
Step 9: Set Price for VIP Membership
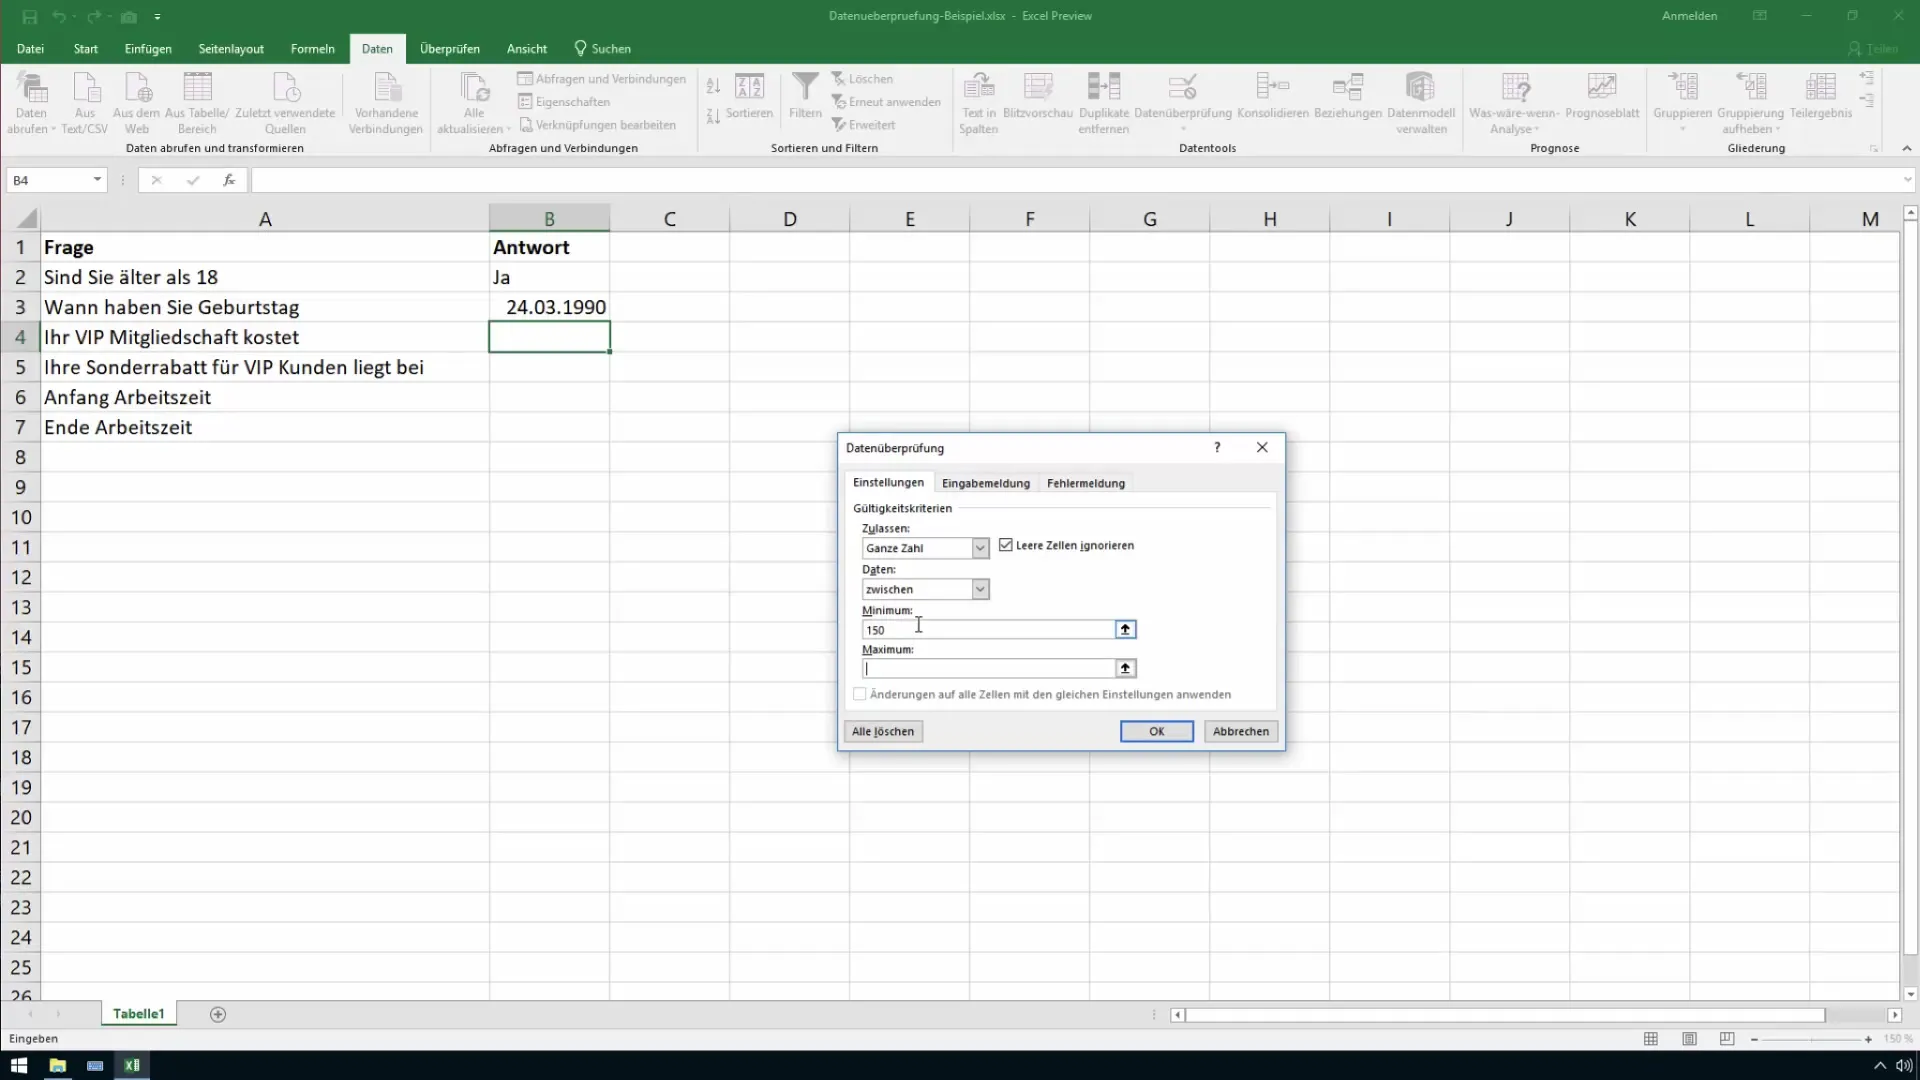
The next cell pertains to the cost of the VIP membership. Set up the data validation to only accept integers between 150 and 200 euros.
Step 10: Define special discounts for VIP customers
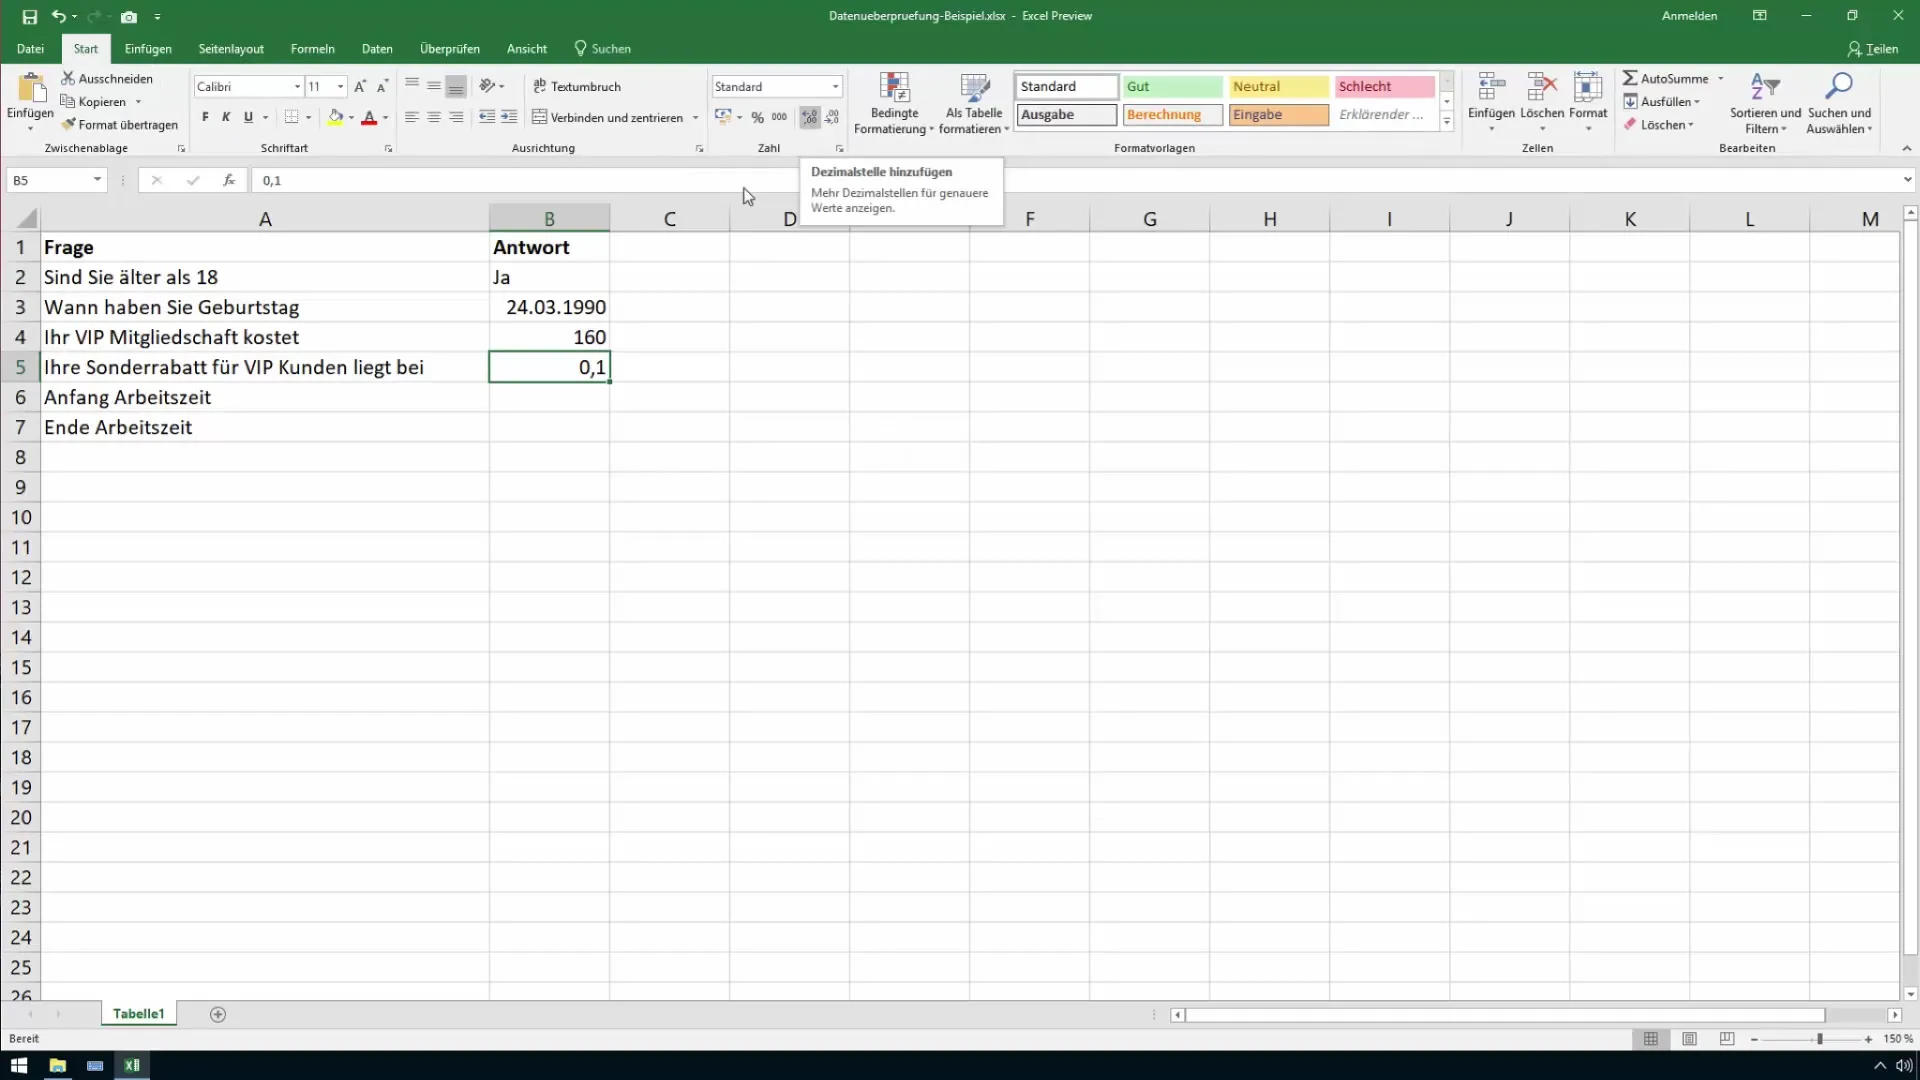
Similar to before, you can now add the possibility to enter decimal numbers for special discounts, ranging between 10% (0.1) and 30% (0.3).
Step 11: Define working hours for the start
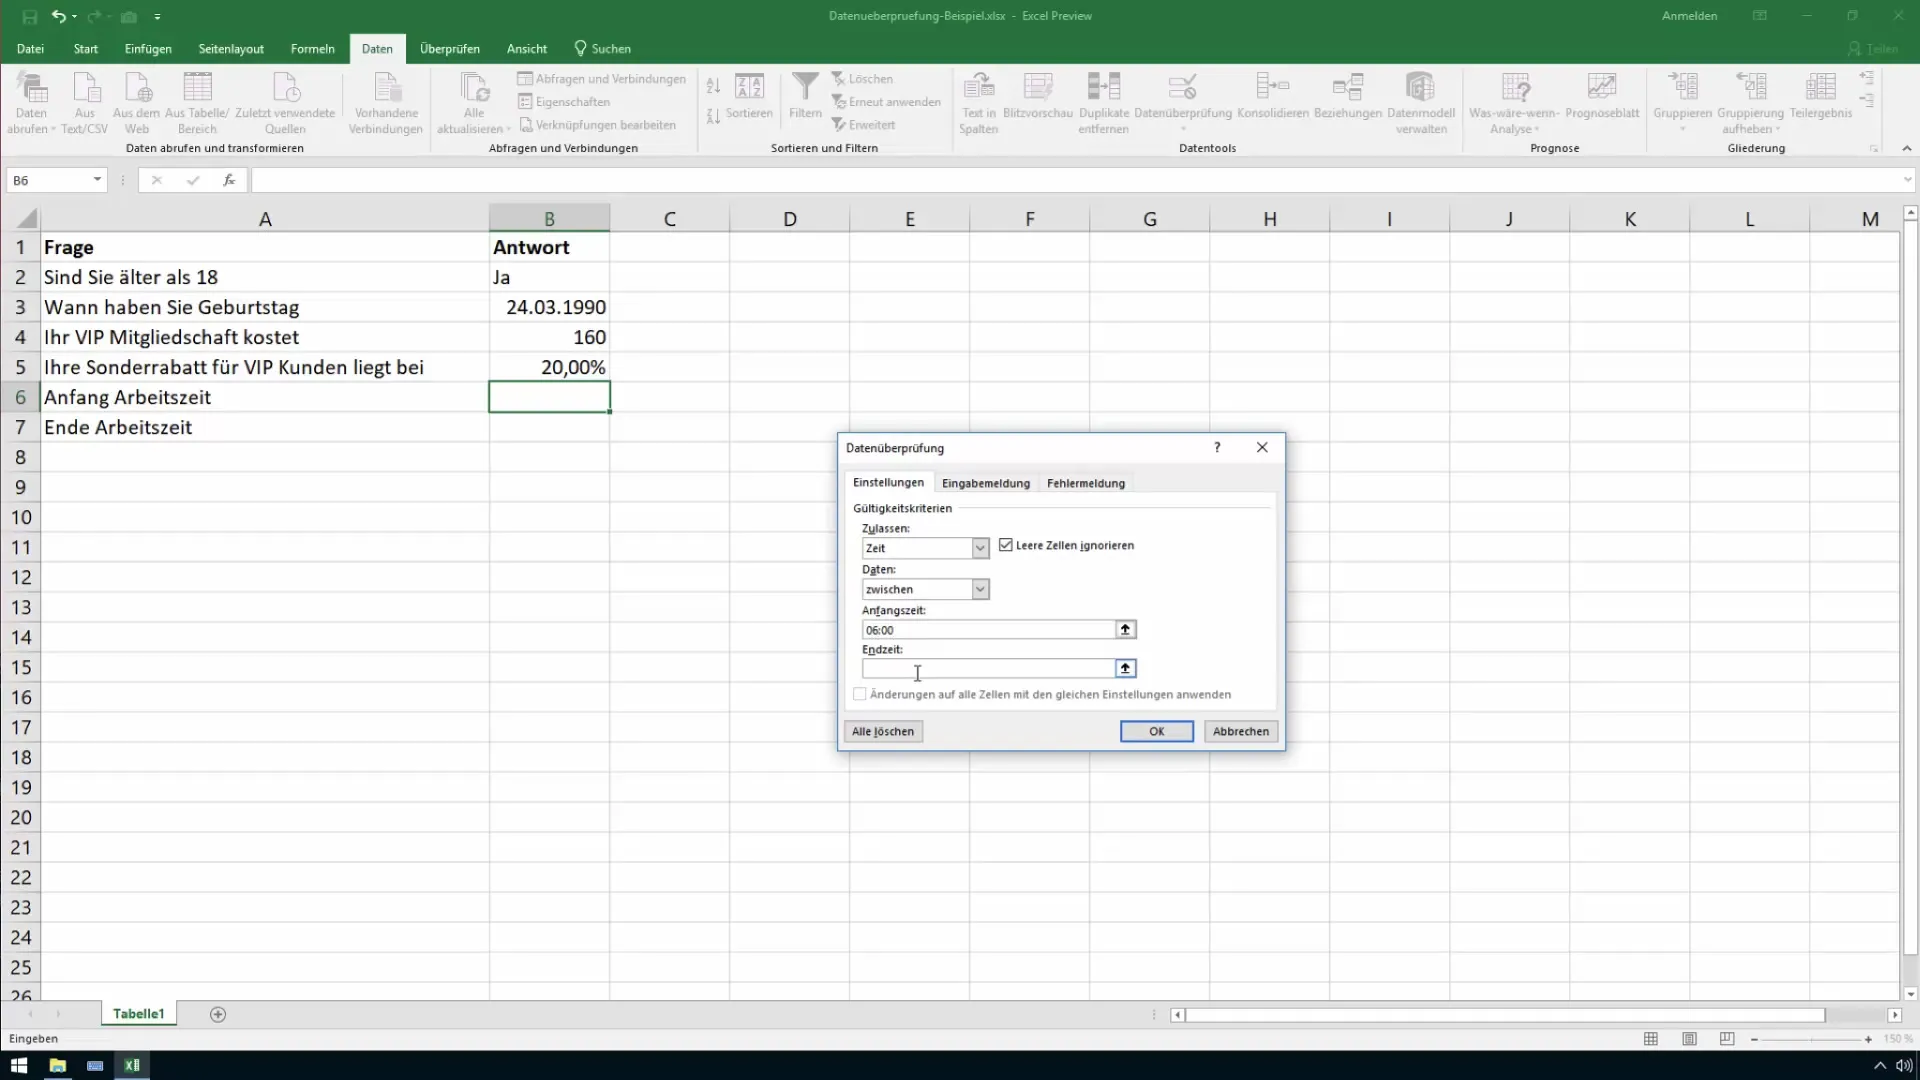
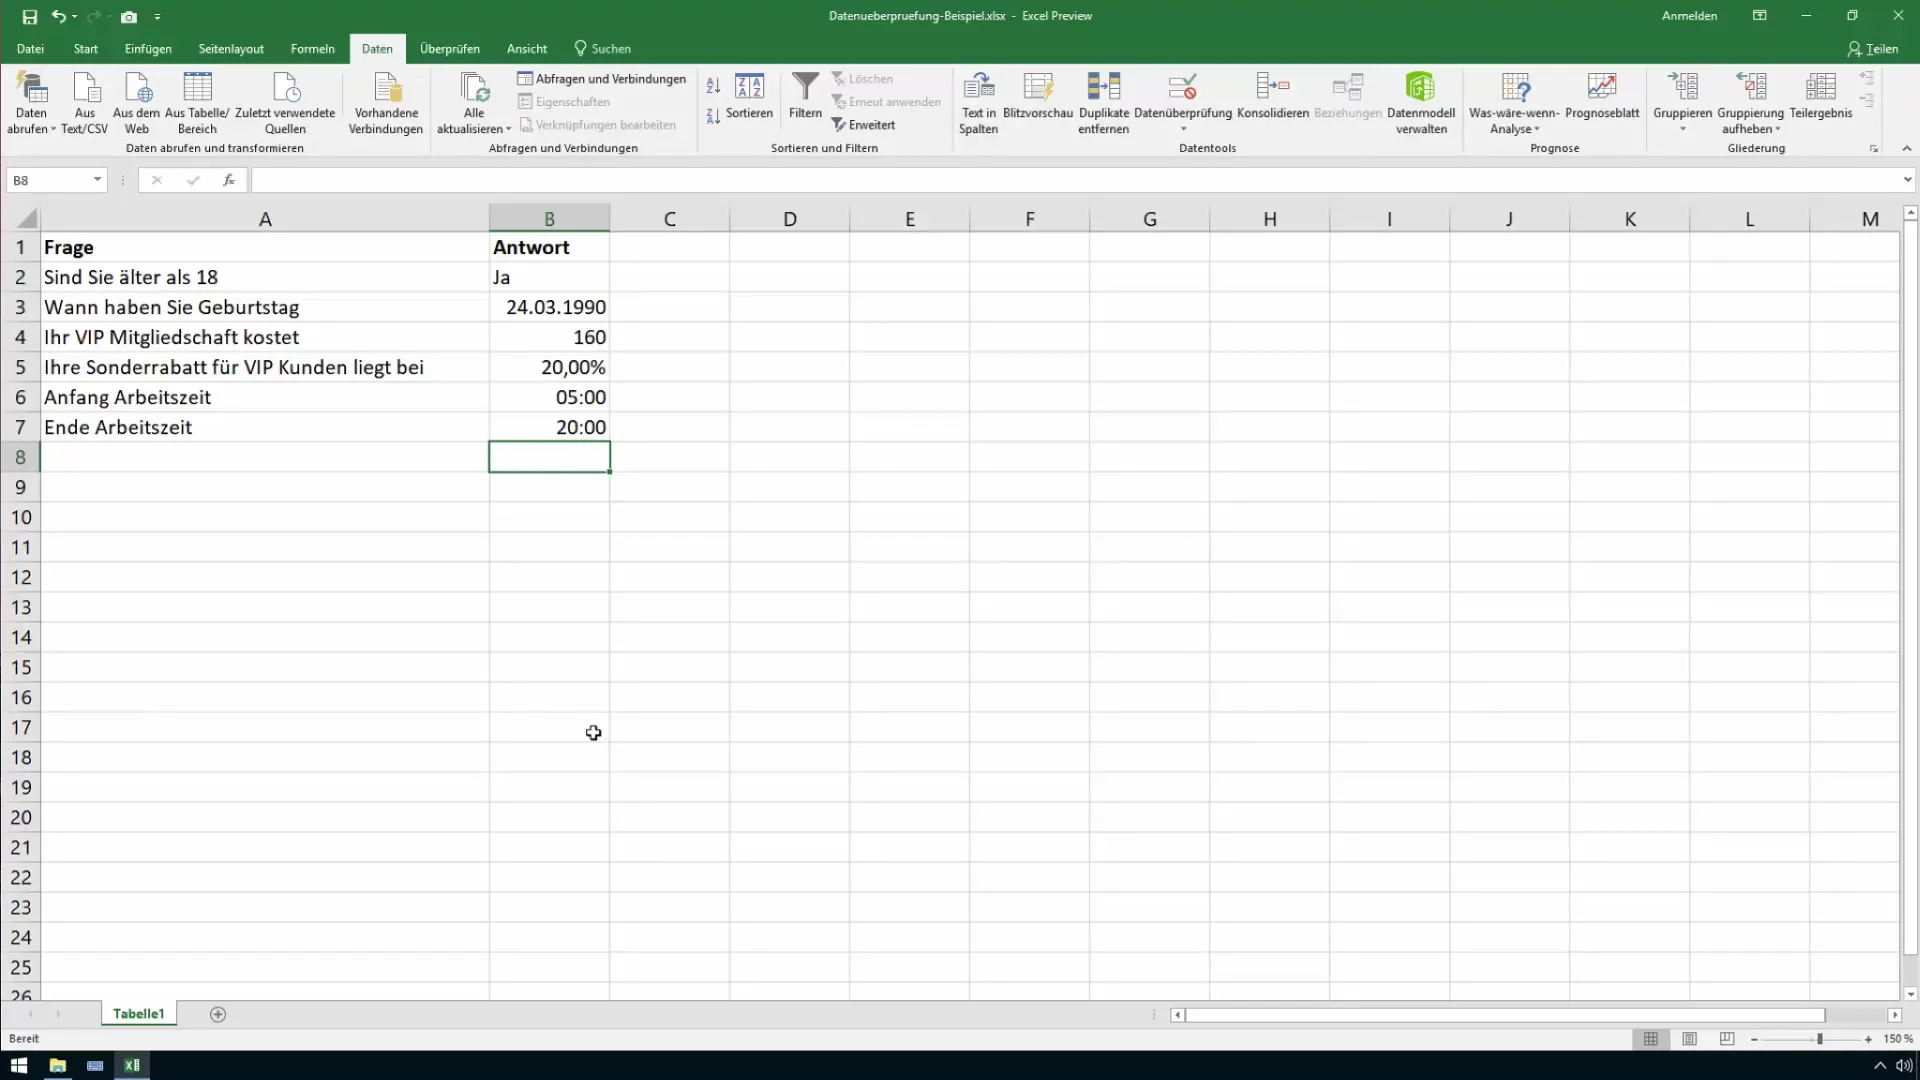
To input working hours, go to the relevant cell, choose "Time" in the data validation, and set the input between 6 AM and 8 AM.
Step 12: Customize error messages for working hours
Here you can also define error messages to display a warning if the entered time is outside the defined range.
Summary
In this tutorial, you have learned how to use the data validation feature in Excel to ensure that only valid data is entered into your cells. This reduces errors and ensures consistent data in your Excel sheets.
Frequently Asked Questions
How can you activate data validation in Excel?You select the cell, go to "Data," and then to "Data Validation."
What types of inputs can you validate?You can validate inputs for lists, numbers, dates, times, and more.
What happens if someone makes an invalid input?An error message will be displayed, and you can choose the option of rejecting the input or issuing a warning.
