We are now satisfied with the animation of the bouncing ball. But it should burst at the end and a second ball should come down so that you can look at the path.
It's actually about the in-between poses that would have been drawn in the past, which I would still like to show. That's why the original ball bursts and the first path change comes in.
Step 1
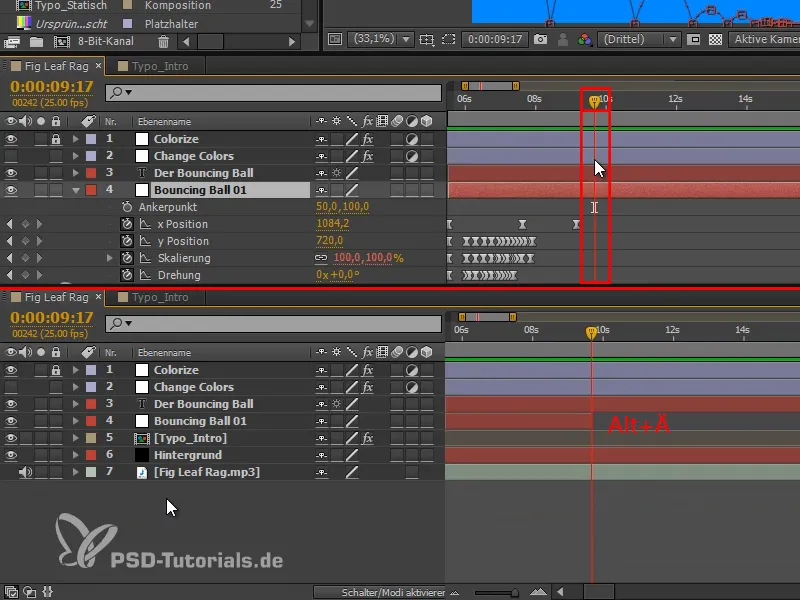
The bursting can be done very quickly by simply hiding the layer. Alt+Ä is the shortcut for hide layer and one of the best tricks for making objects disappear from one moment to the next.
Step 2
However, we don't just want to make the ball disappear, we want it to burst properly and effectively. The only thing that should remain are small splashes in the color of the object.
You can create these splashes in different ways. I have a very simple method for you:
I use the Pen tool and a shape layer without an area, only with a white outline, because we will then be below the "Colorize" layer.
No layer must be selected or only the "Shape layer 1" layer. Then I click once in the image and drag the path as I want it. Then I click anywhere while holding down the Ctrl keyand the path is finished.
Click, drag, Ctrl+click.
That's how I draw all the little splashes. It's very quick.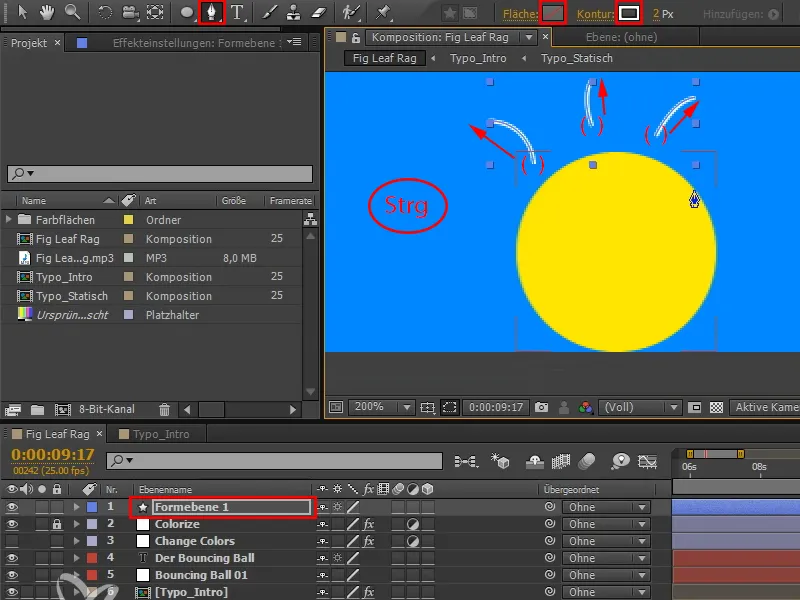
Step 3
I can use V to move individual paths afterwards.
The biggest problem is that you have to create these paths anew for each object, because they have to fit the shape of the object. You can't just use these strips universally for every object, because a circle pops differently than an elongated lettering. With this technique, however, the new creation is quite quick and easy.
The strokes can also be irregular, because it is more or less a coincidence that the ball bursts like this.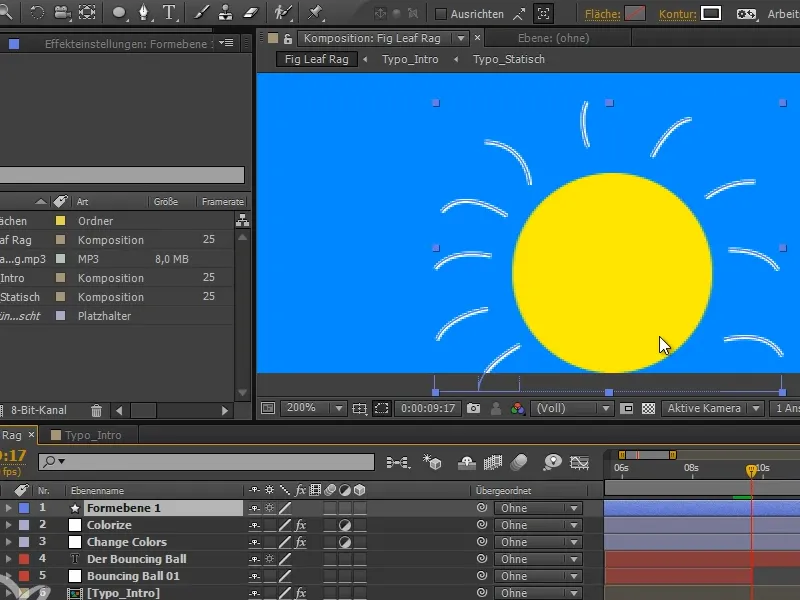
Step 4
I open up "Shape layer 1" and we have lots of shapes in there, each with their own paths.
But we need all the paths in one shape. That's why we have to expand everything and insert it accordingly.
I select everything (shape 1 to shape 10) (1). Then I press the Ctrl keyand open a path, which unfolds all elements up to the last hierarchy level without exception (2).
If I now collapse everything again with the Ctrl keypressed and then expand everything again with Ctrl, I have only expanded the first level everywhere, the rest is collapsed (3).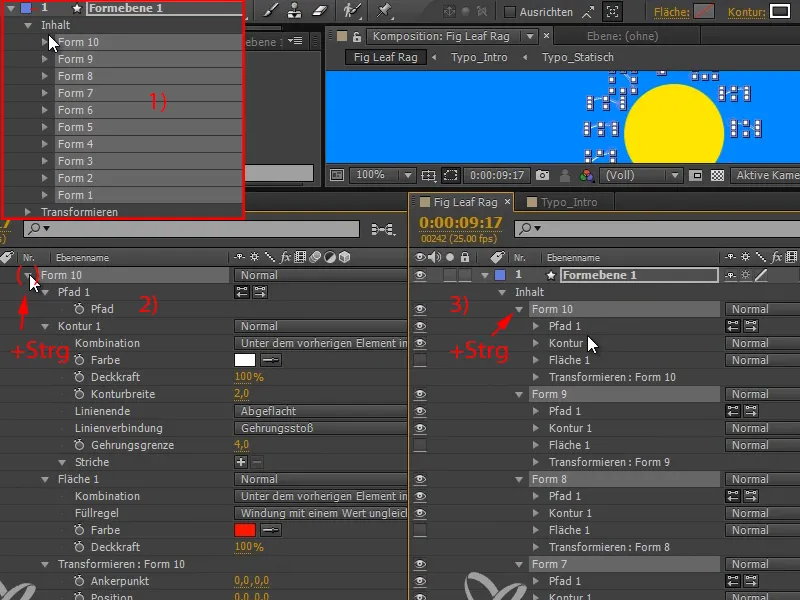
Step 5
Now I drag all the paths under one shape (here: "Shape 10") and then delete the other layers (here: "Shape 1" to "Shape 9").
As one path has obviously been lost when moving, I draw this and - because there is space - an additional one in the image and move the paths back into "Shape 10" as before.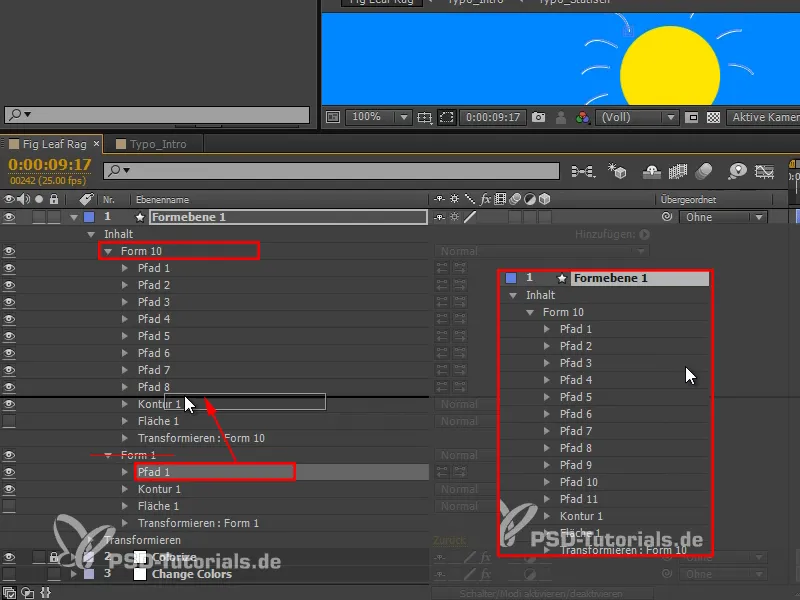
Step 6
Now we have a group to which we can apply an effect: Trim paths.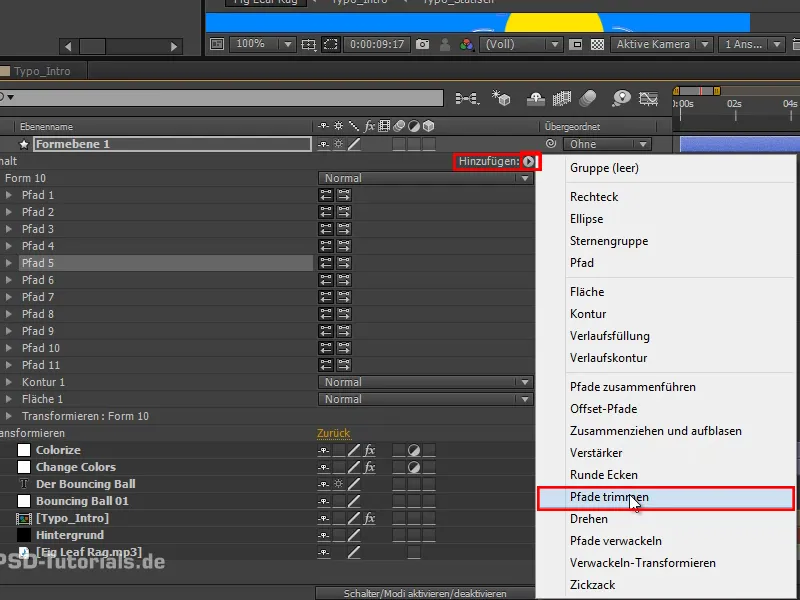
Step 7
This gives us exactly the same properties that we had earlier when we animated the painting or the stroke effect, namely Start and End.
I can use End to move all the strokes apart. So I animate the end from 0 to 100 in five frames..webp?tutkfid=69683)
Step 8
And I do the same with Start, whereby it's enough if I copy and paste the End keyframes.
Start and end always have the same value.
I can't see anything at the moment, but if I move the start by one frame, we get little lines that go along the path..webp?tutkfid=69684)
Step 9
I have an outline for all the paths.
At the beginning it can be a bit thicker. I set the outline width to 4 and Rounded so that we have really nice rounded shapes that are almost reminiscent of sparks (1).
The strokes should get smaller and smaller towards the outside and then disappear completely. So I set the contour width to zero at the end (2).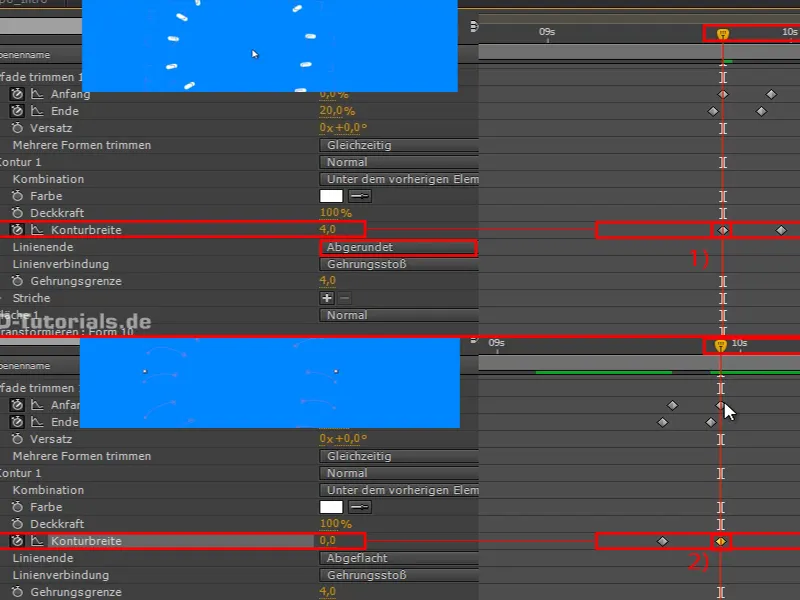
If we look at this, we have these dots that thin out and get smaller and smaller towards the outside.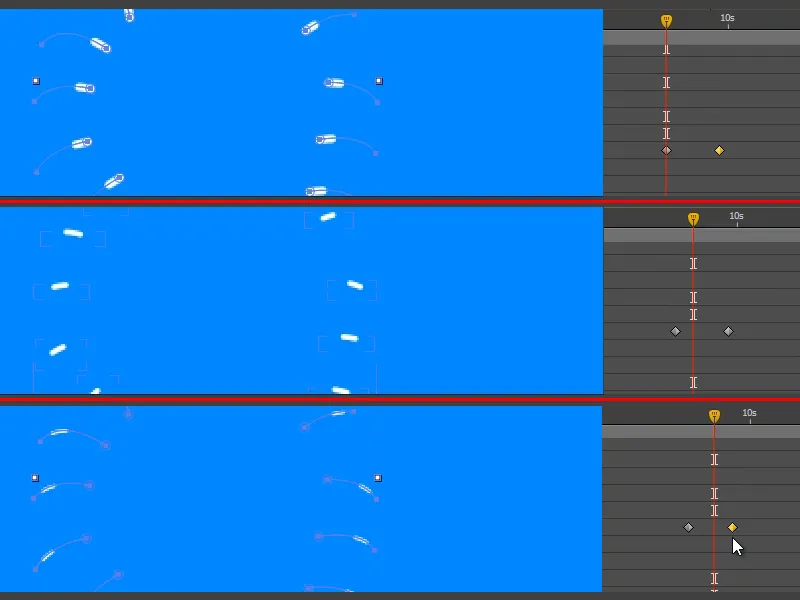
Step 10
You can copy this animation and the next time you want to make something pop, all you have to do is paint in new paths. You then no longer need to touch the trim paths and contour.
I'll move the "Shape layer 1" under the "Colorize" layer so that the strokes are also yellow.
And then we cut the layer to the part where it is really visible. We do this again with Alt+Ö and Alt+Ä..webp?tutkfid=69687)
Step 11
We look at the part and the ball bursts really nicely. However, this is quite unexpected. That works better.
Let's remember the Disney Rules: Anticipation. The principle means, for example, that you bend down before you jump up.
Just before the ball disappears, it has reached its personal zenith. So we squash and stretch it as if it were going to flinch for a moment before it disappears.
And you'll see: It makes such a difference!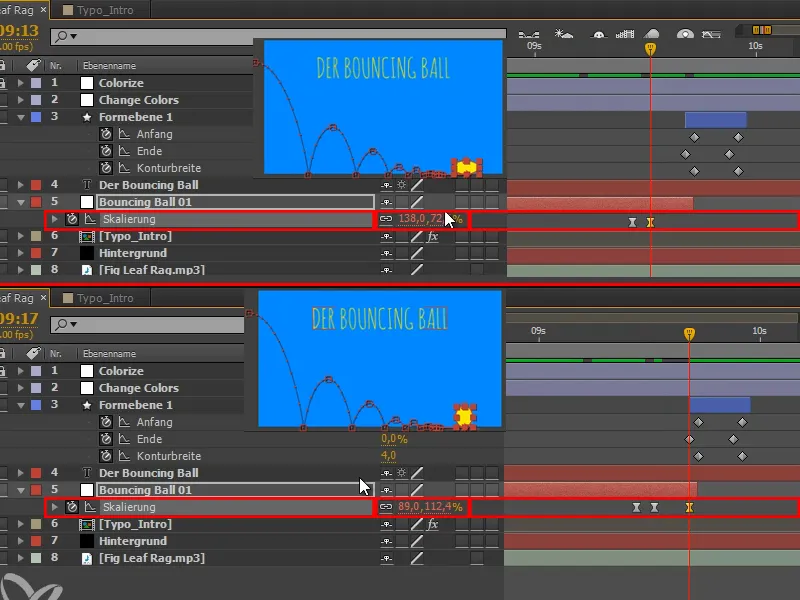
Step 12
We select this one and do Easy Ease with F9.
We take a look at it and realize that it's not supposed to be Easy Ease after all. We can undo the Easy Ease with Ctrl+click.
I'll also rename the "Shape layer 1" to "Plop".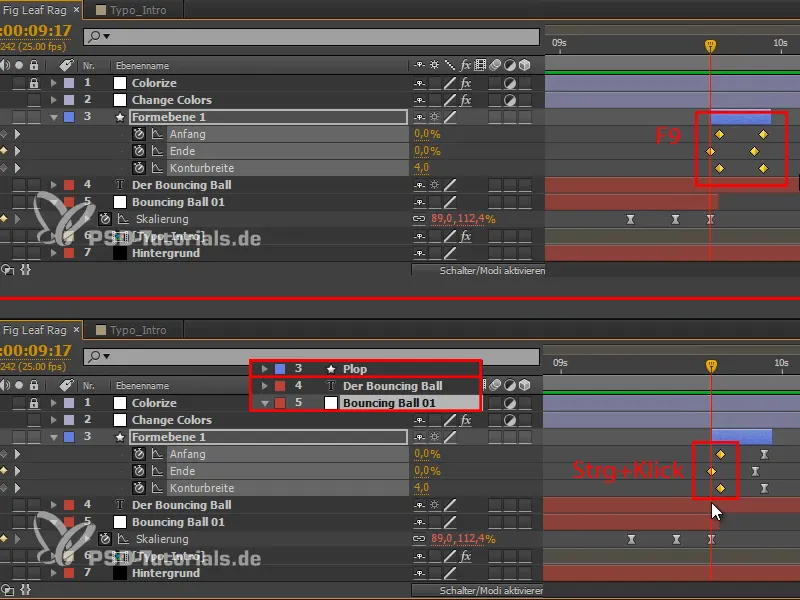
Step 13
We duplicate the "Bouncing Ball 01" layer to create a second ball that comes in from the top left.
This second ball should only come into play when the first one has burst, so we move it accordingly.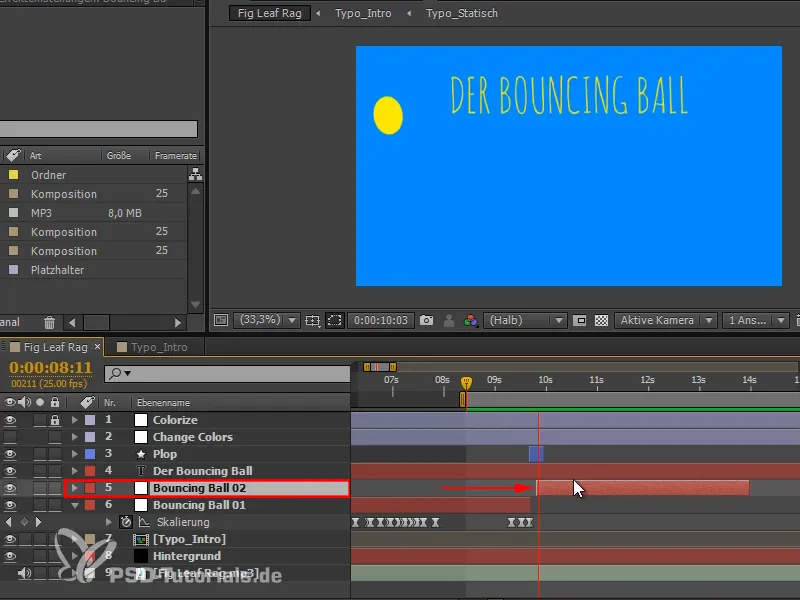
Step 14
The first part of the animation should be the presentation of the bouncing ball and the second part provides the explanation with the second ball.
To make this change clear and to bring structure to the video, I want to change the colors at the point where the second ball comes into play.
I use U in "Change Colors" to display all the keyframes, then I select them all and go to the place where I want them..webp?tutkfid=69691)
This already looks quite good, but it still lacks a little reference to the video.
Step 15
The ball falls diagonally into the picture from top to bottom. We can pick up on this direction of movement by simply rotating the colored background so that the yellow color also enters the picture diagonally from top to bottom.
For rotation, we choose 135, which is the 45° angle in the other direction, which looks harmonious.
The bars can be a little wider, so we use the scaling and stretch the whole thing a little.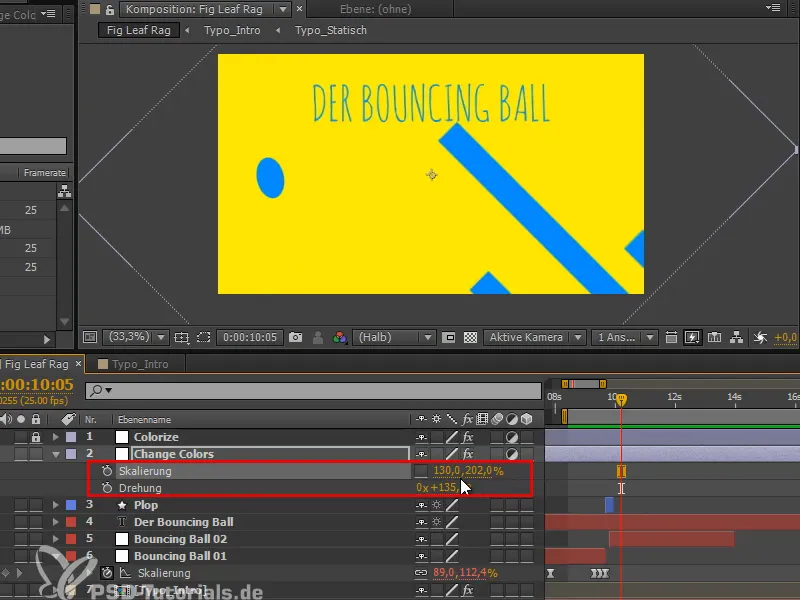
Step 16
This looks quite good, but this one bar is really lagging behind. I click on it and see that it's "Mask 10". So I drag the frames a little to the left.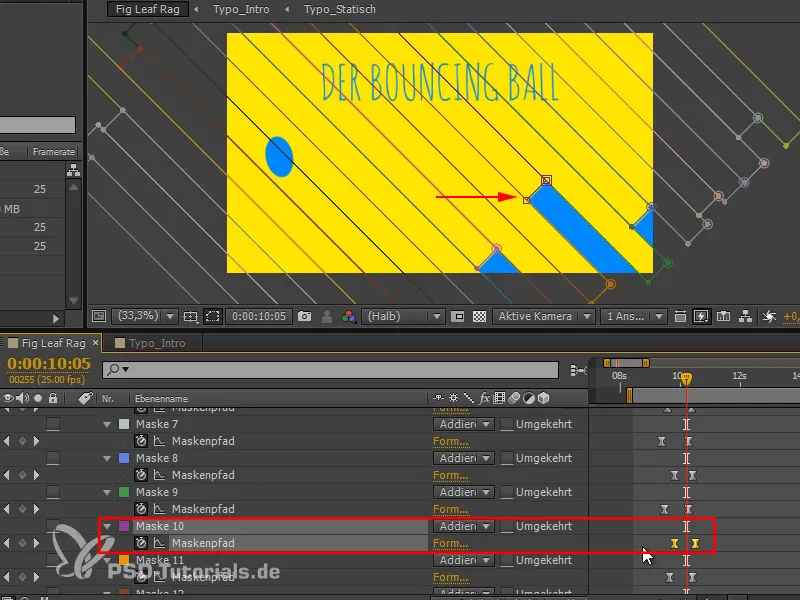
In the next part of the tutorial series "Bouncing Ball - the transition" we will show the analysis, restrict the whole thing with a mask and change the title.
