You want to ensure that certain cells in your Excel table are not accidentally overwritten? It is possible to protect data in cells without locking the entire table. This allows you to maintain the integrity of your information while still having the flexibility to edit other parts of your table. In this guide, you will learn step by step how to protect important cells from unwanted changes.
Key Takeaways
- You can protect cells from accidental changes without enabling sheet protection.
- Data validation in Excel allows setting up a custom formula for protection.
- After setting up this function, you will receive an error message if an attempt is made to overwrite the protected cells.
Step-by-Step Guide
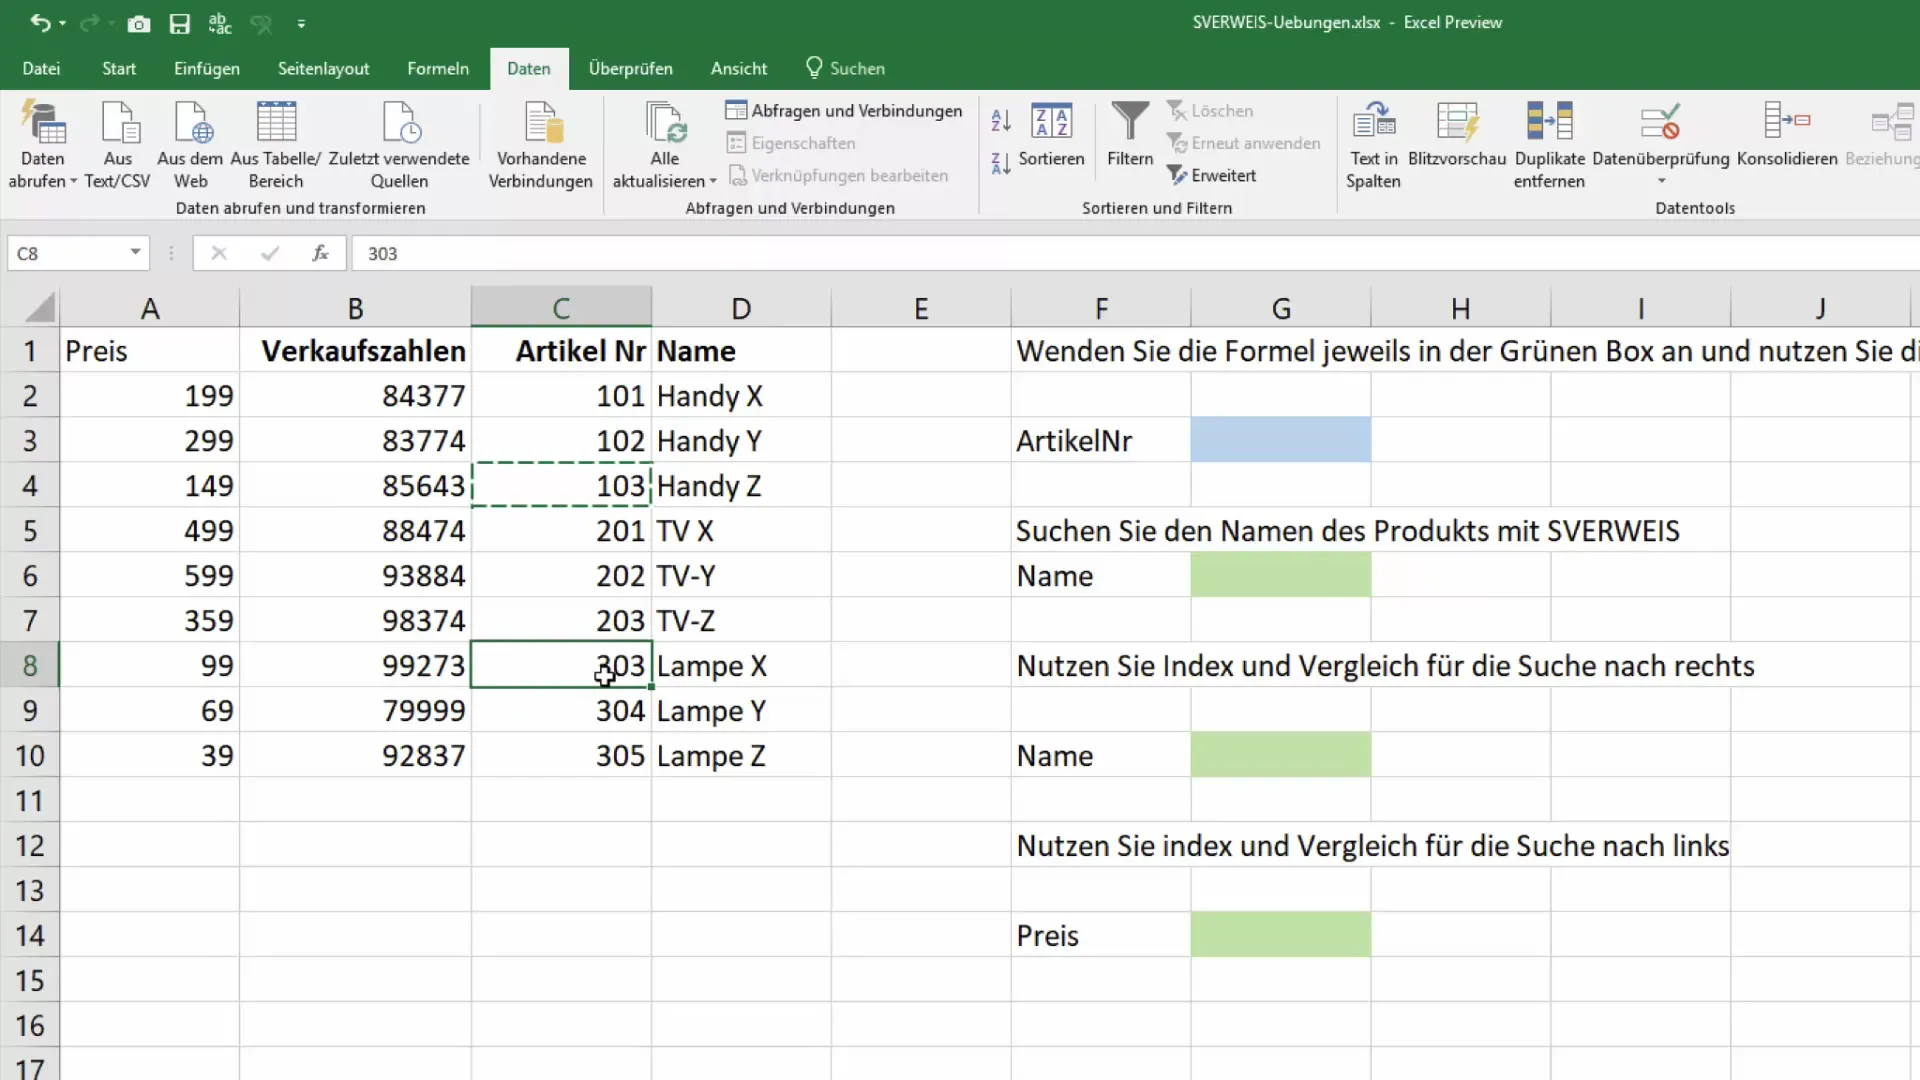
First, select the cells you want to protect. For example, if you have a list of item numbers that should not be changed.
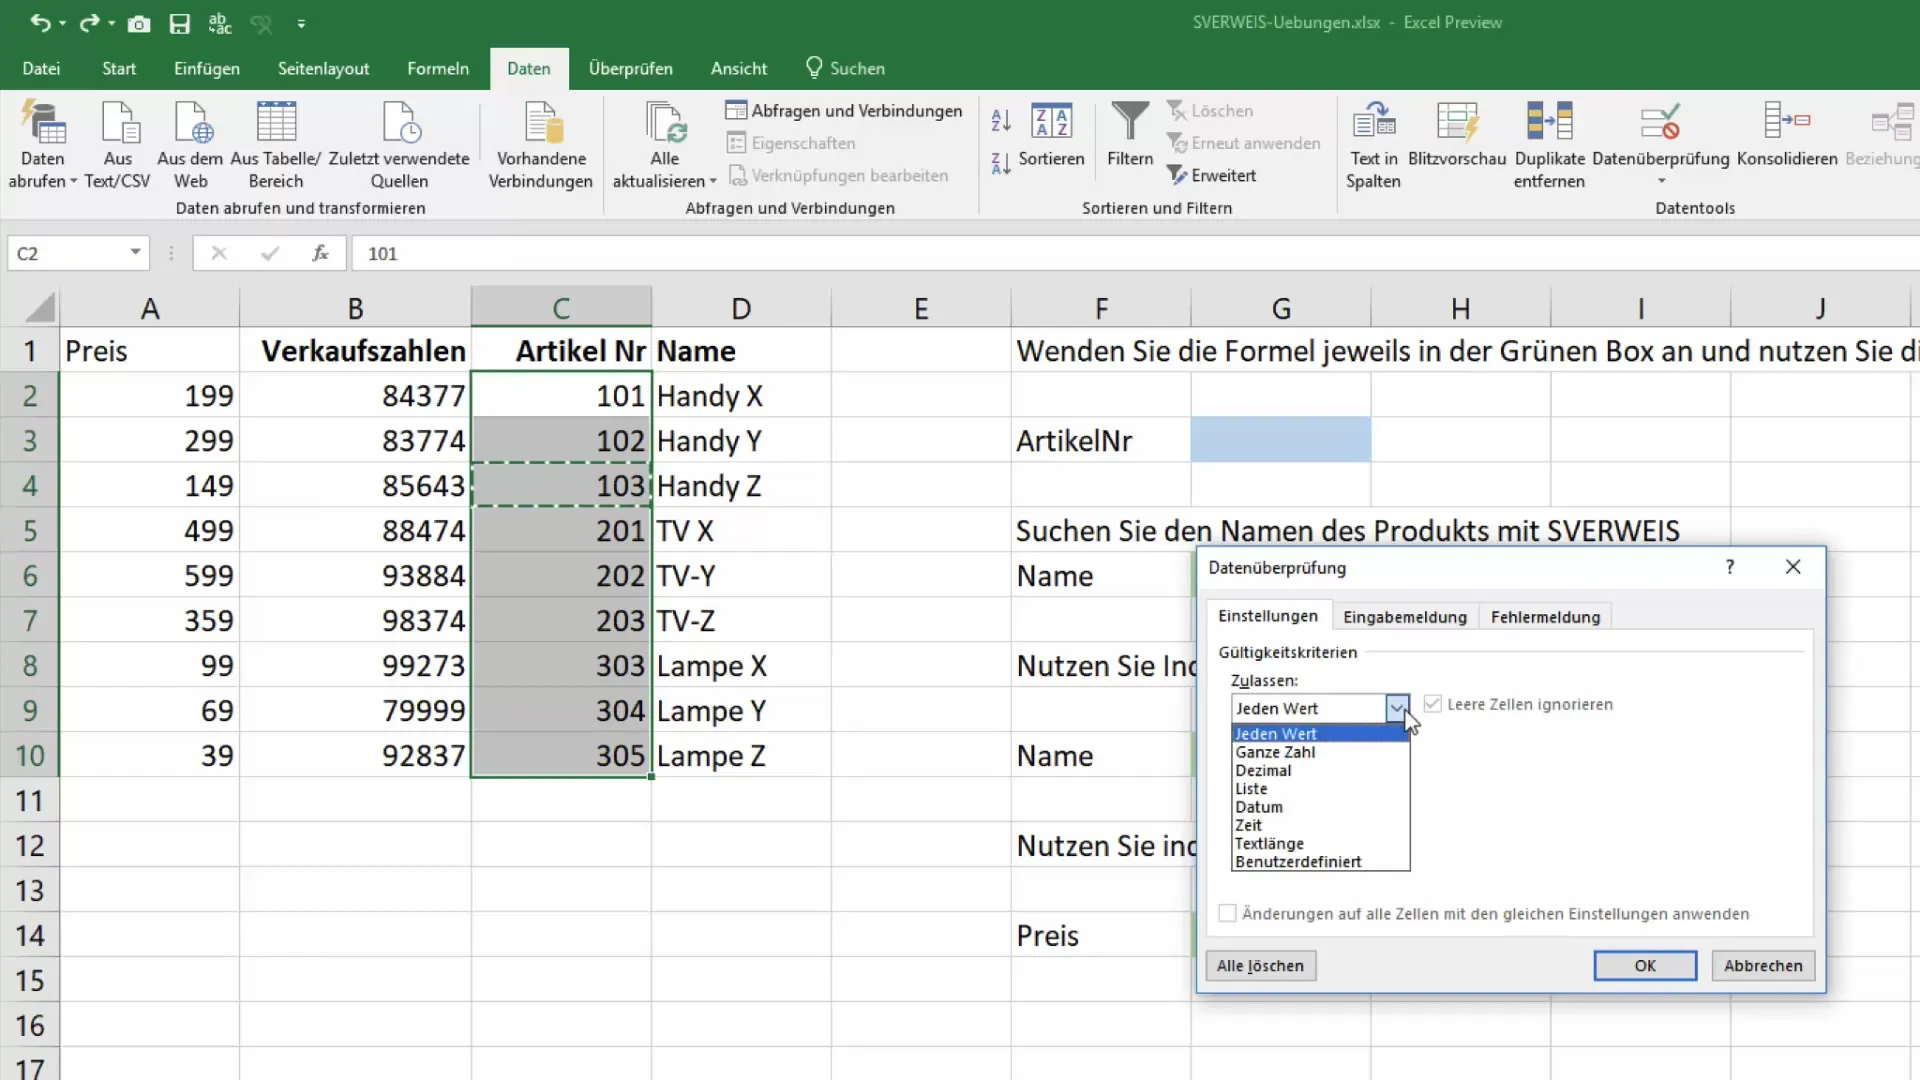
Initially, you should mark the relevant cells in your Excel file. These are the cells you want to protect from changes. Go to "Data" in the menu bar and navigate to "Data Validation."
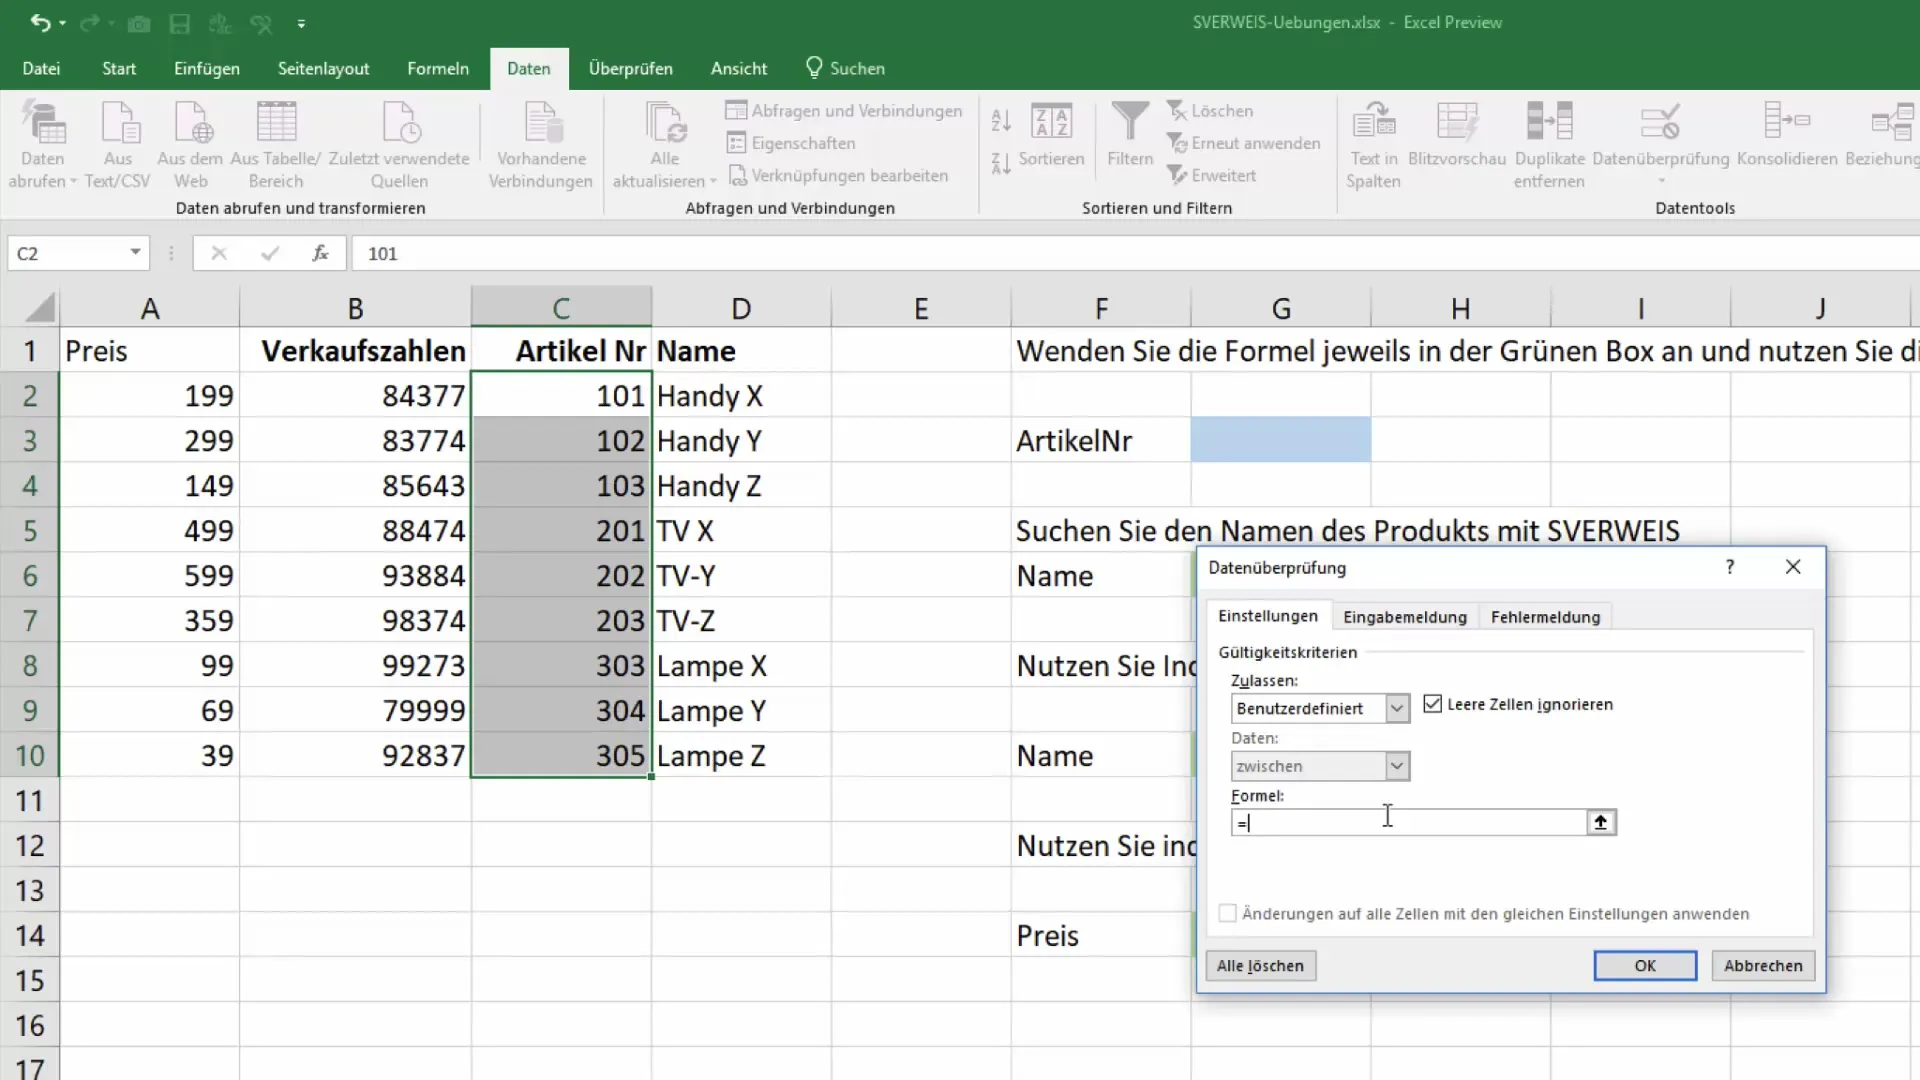
In the "Data Validation" section, select the "Custom" option. Here you can enter a formula that helps prevent unwanted entries. This formula will confirm or reject the input based on the rule you set.
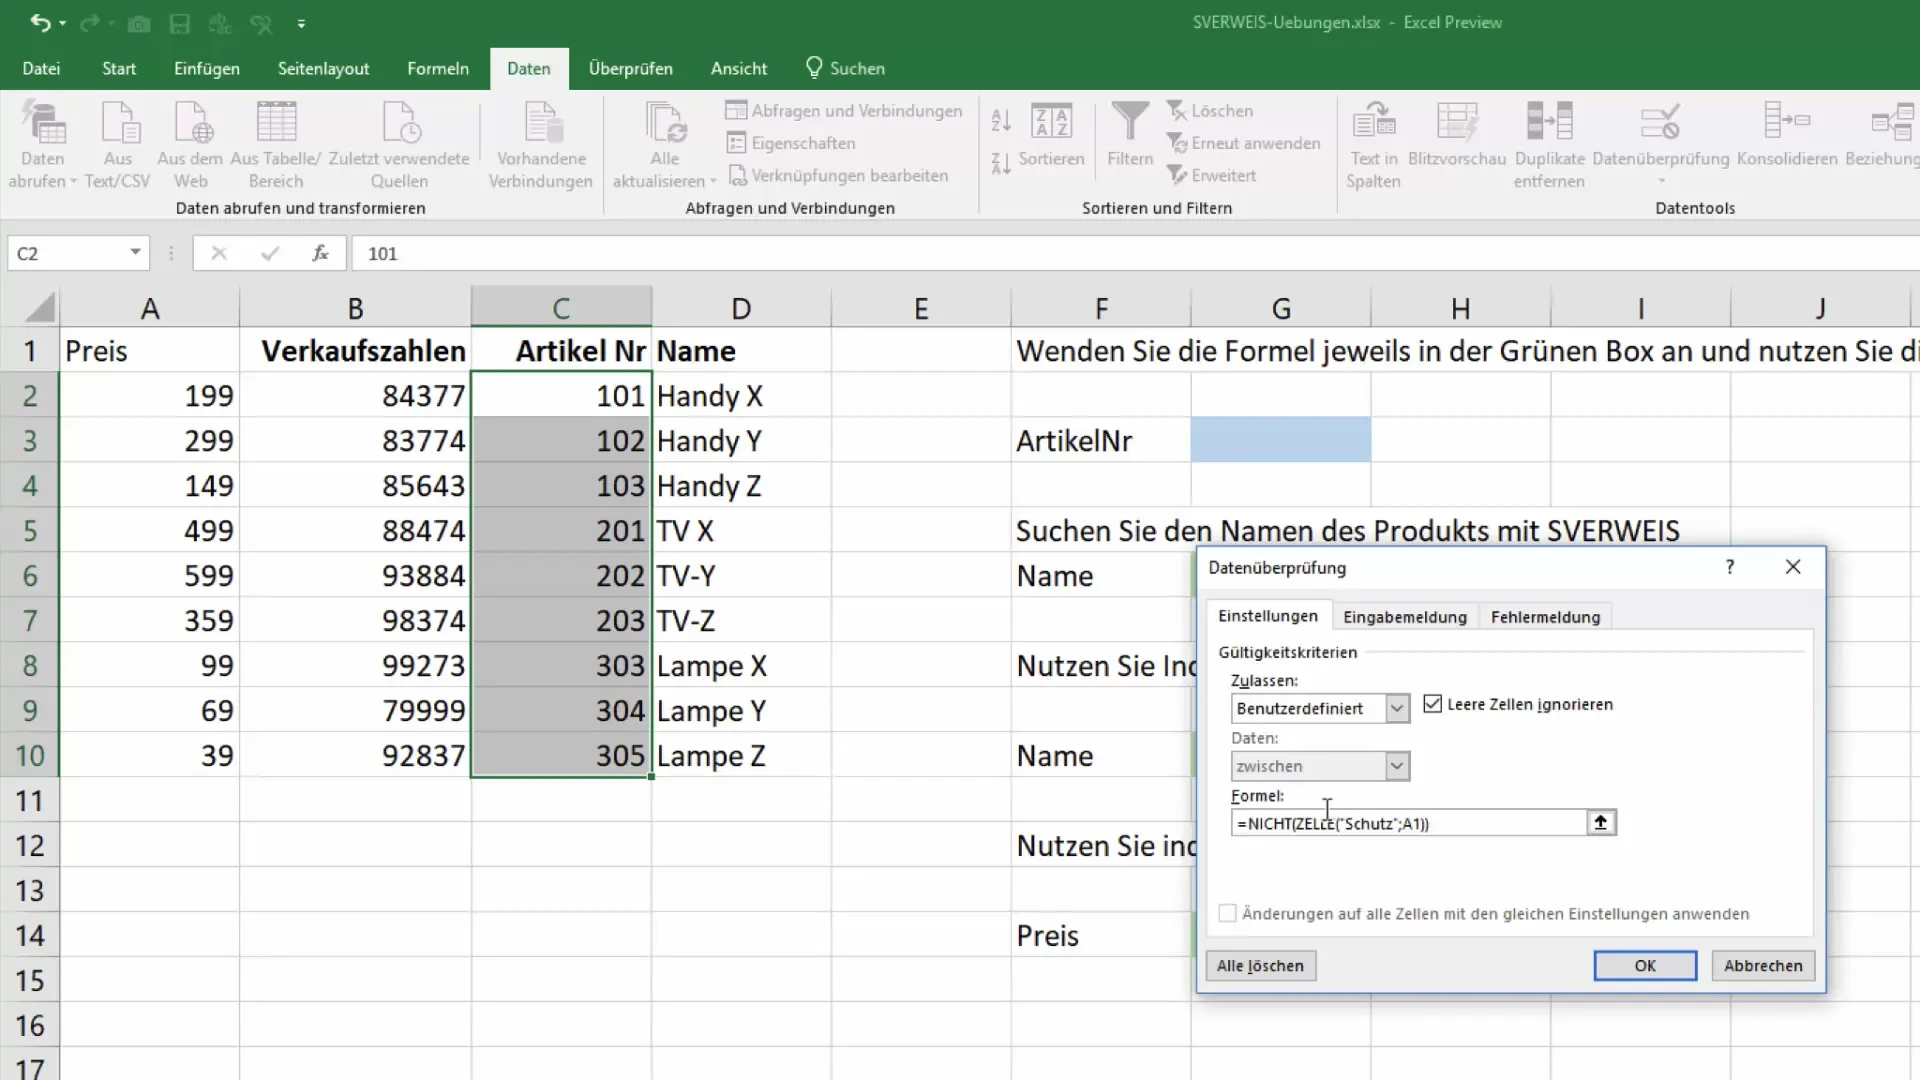
To implement a simple protection formula, use the following structure: =NOT(ISBLANK(A1)). Here you reference the cell you want to protect. This formula specifies that the input will only be accepted if the cell is not empty.
After entering the formula, confirm the settings. Visually, nothing has changed in your table, but a protection mechanism has been activated.
If you try to enter something into these cells and confirm it, you will receive an error message. This alerts you to the rule you established earlier.
It is important to note that although you cannot change the inputs in the protected cells, you are able to delete the data. If you copy the cells with "CTRL+C" and then paste them into another cell, the data validation will not be triggered. This means the data will still be copied.
If you want to revert the inserted data, you can use the "Backspace" or "CTRL+Z" to undo the last actions. This gives you the ability to quickly correct errors.
If you want to remove the validation, select the protected cells again and go back to "Data Validation." There you can remove the existing values and reset the protection.
With these steps, you can ensure that your cells are well protected without having the entire table locked.
Summary
Here you have learned a method description on how to protect certain cells in Excel from being overwritten without the need to activate sheet protection. This effective technique allows you to maintain the important data in your table while simultaneously allowing other users to work on unprotected areas.
Frequently Asked Questions
How do I protect cells in Excel from changes?You can use data validation and enter a custom formula to control the input in specific cells.
Will I receive an error message if I try to change protected cells?Yes, an error message will appear if you try to enter something into a protected cell.
Can I lift the protection at any time?Yes, you can lift the data validation at any time and change or delete the protected values.
What happens if I insert something into a protected cell?Inserting values from another source is possible; data validation does not apply in this case.
