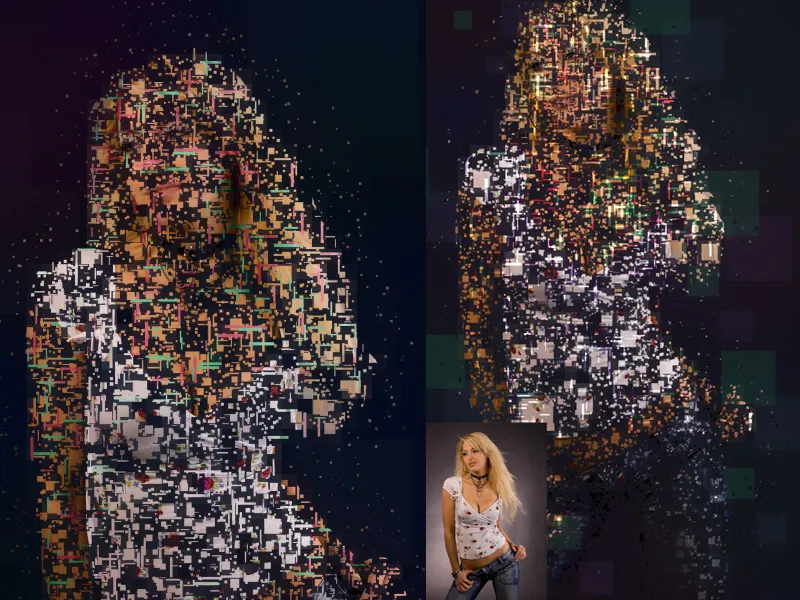
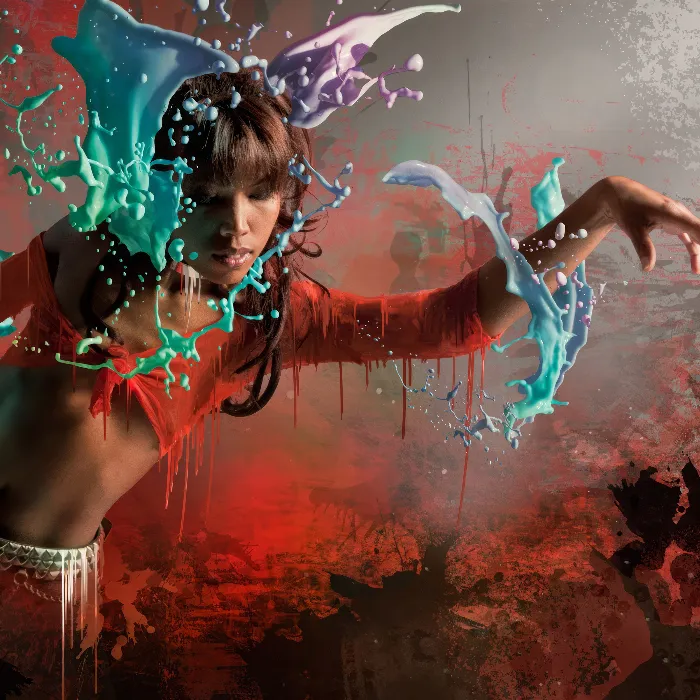
The pixelation effect is an impressive technique that transforms portraits into a dynamic and fragmented composition. This Smashing effect makes your image explode into pixelsquares, creating a modern, digital look. With Photoshop, you can easily achieve this effect by combining masks, transformations, and pixel-based structures. In this tutorial, I'll show you step by step how to create a Smashing portrait using the pixelation effect. Let's get started and turn your portrait into an exciting piece of art!
Foreword
The settings in the panels and filters need to be adjusted accordingly for different image sizes.
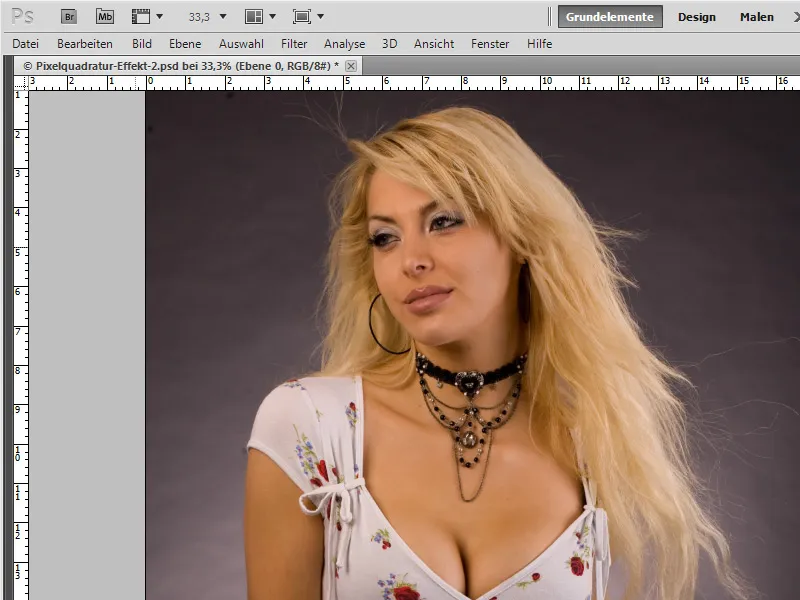
Step 1: Select the Subject
The first step is to extract the main subject from the background. Since the effect itself doesn't really reveal extraction errors in the intricate edges like the hair, I can be a bit more aggressive with the extraction.
I choose the Quick Selection Tool W and select the person with Add to Selection active. If areas are selected that should not be extracted, such as between the legs, I can subtract the unnecessary areas by holding down the Alt key and clicking on the existing selection.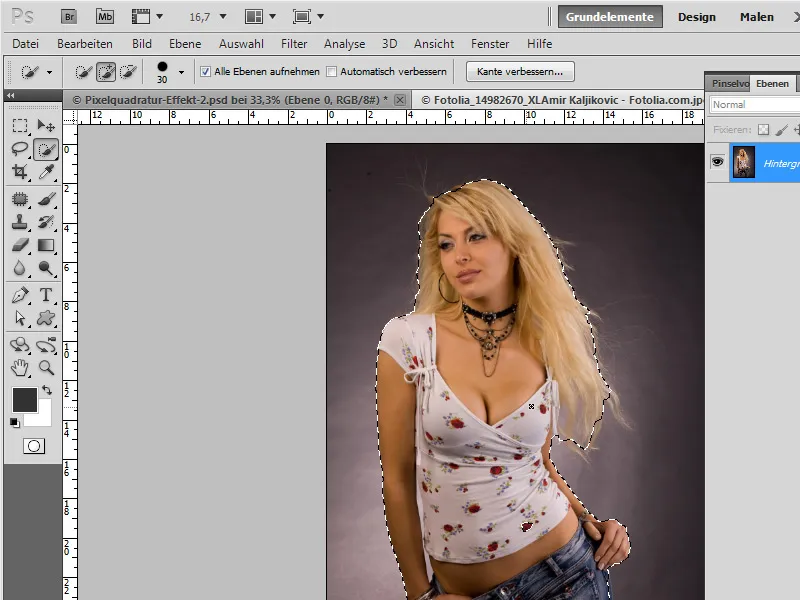
Step 2: Create a Layer Mask
I convert the background layer into a transparency layer with Double-click. Then, I select the icon to Create a layer mask. The previously made selection is now set as a layer mask. My subject has been roughly extracted.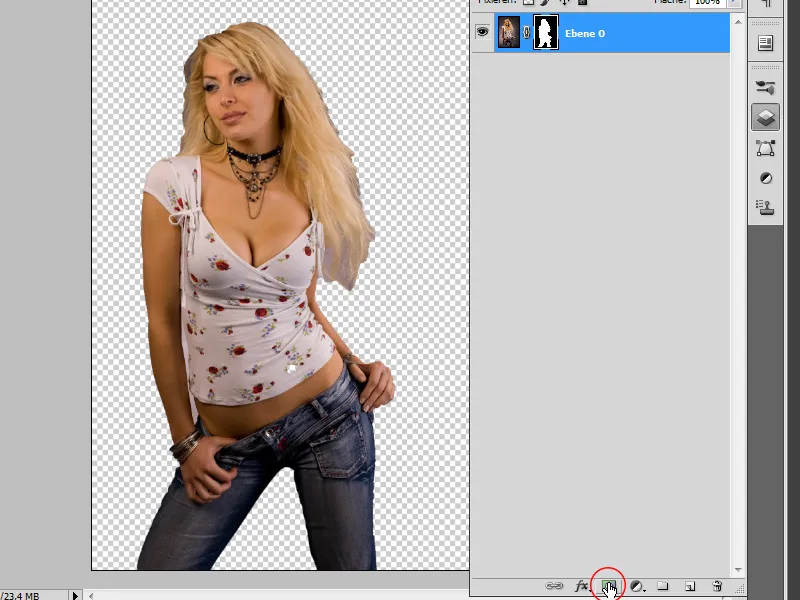
Step 3: Background with a Gradient
By pressing Ctrl and clicking on the icon to create a new layer, I add a new layer at the bottom of the layer hierarchy. I fill this layer with a subtle gradient going from dark blue to deep dark blue. The blue is slightly desaturated.
Using the Gradient tool, I can create the desired gradient in the Menu bar. My gradient has the colors: 100e18 to 0a0910.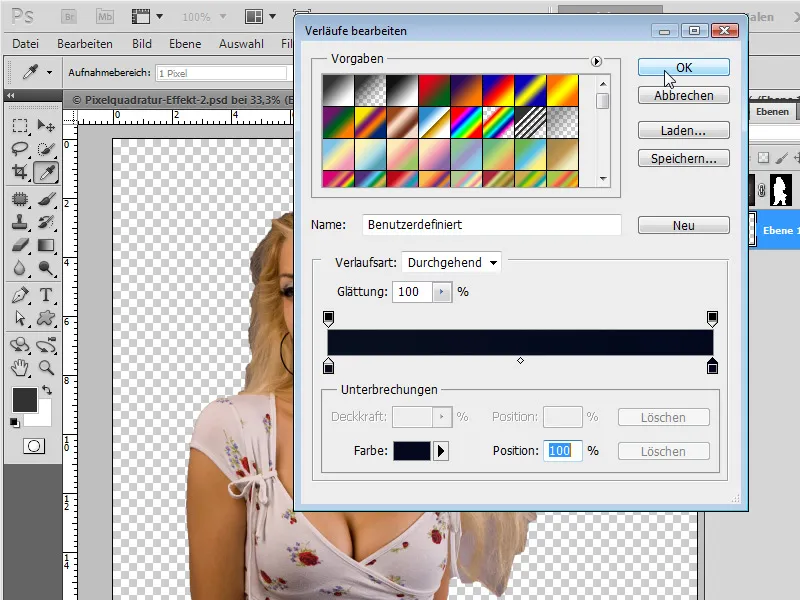
With the Gradient tool set to Radial Gradient, I drag from the center to the outer area of my layer, so that the lighter part of the gradient is in the middle.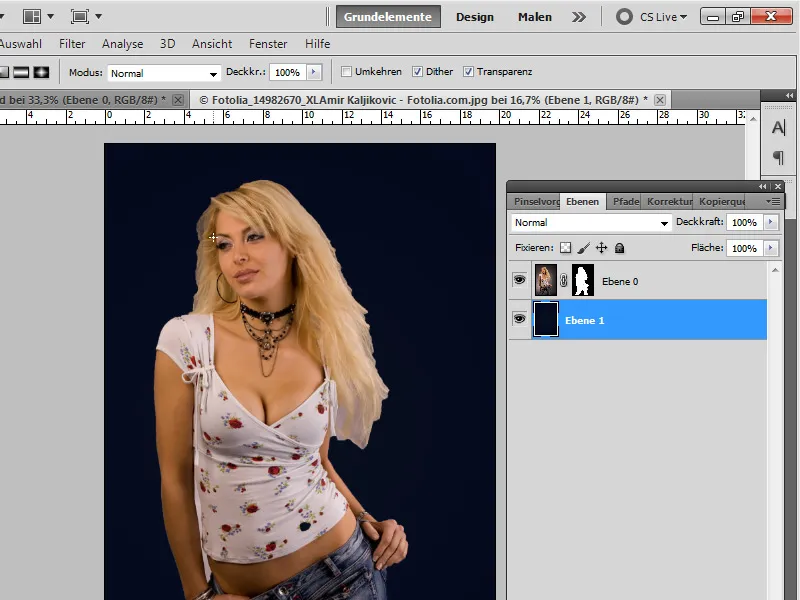
Step 4: Set Brush Preset
Photoshop offers several square brush presets. However, in a high-resolution application, they show some blurriness at the edges. Therefore, we will now create two brush presets with which we will draw the brush squares later.
I create a new document (Ctrl+N) with the dimensions 2000x2000 pixels, 300 dpi.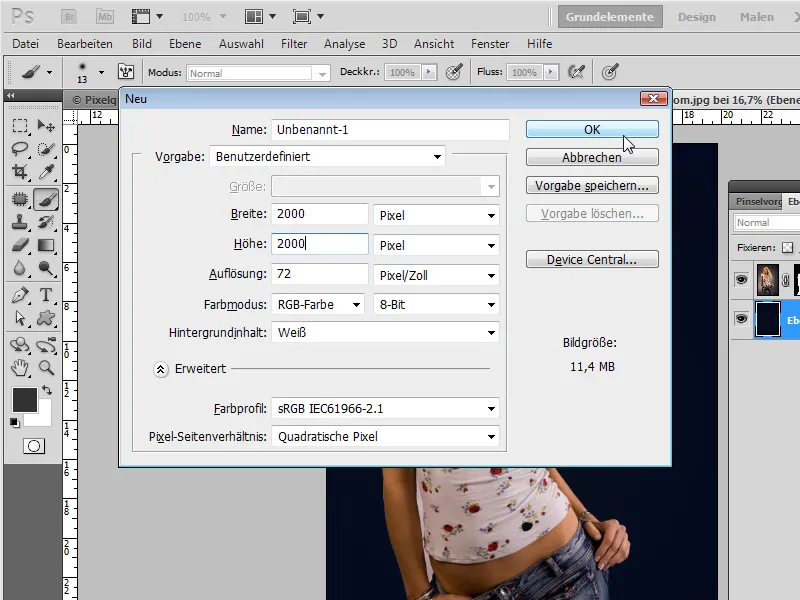
With D, I set the default colors in the Tool bar and with Alt+Enter, I fill my layer with the foreground color (black).
Using the menu Edit>Define Brush Preset, I now set my new brush tip. In the dialog box that opens, I name my brush preset "Pixel Square".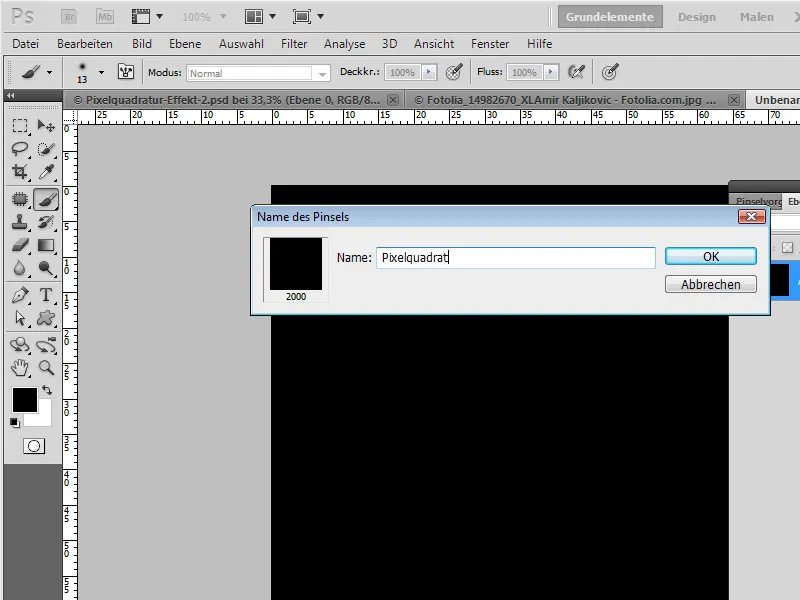
Step 5: Set Another Brush Preset
Since I will need a rectangular, rather narrow brush tip later, I now select the Crop Tool C and select my entire workspace.
I reduce the area to be cropped via the side point and confirm with Enter.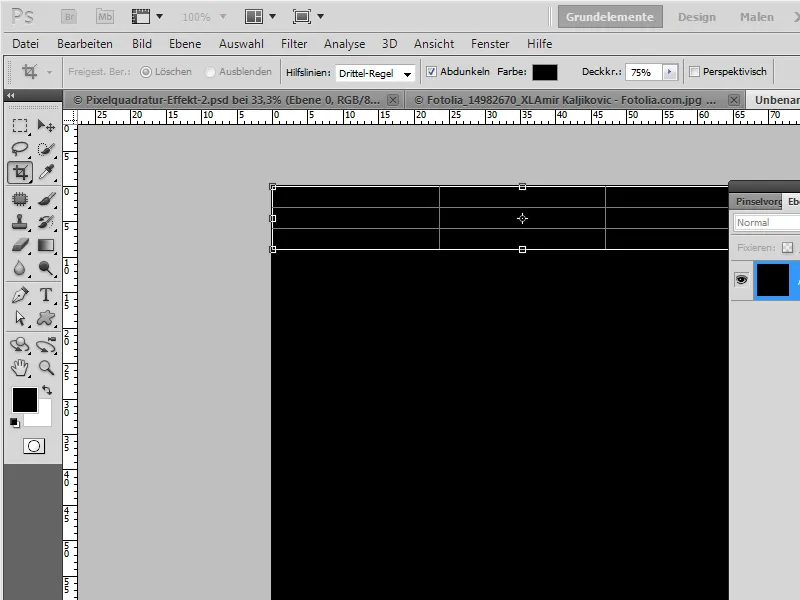
Again, through the Edit menu, I select the Define Brush Preset command and can now save the narrow brush tip in the dialog box that opens with the name "Rectangle Brush".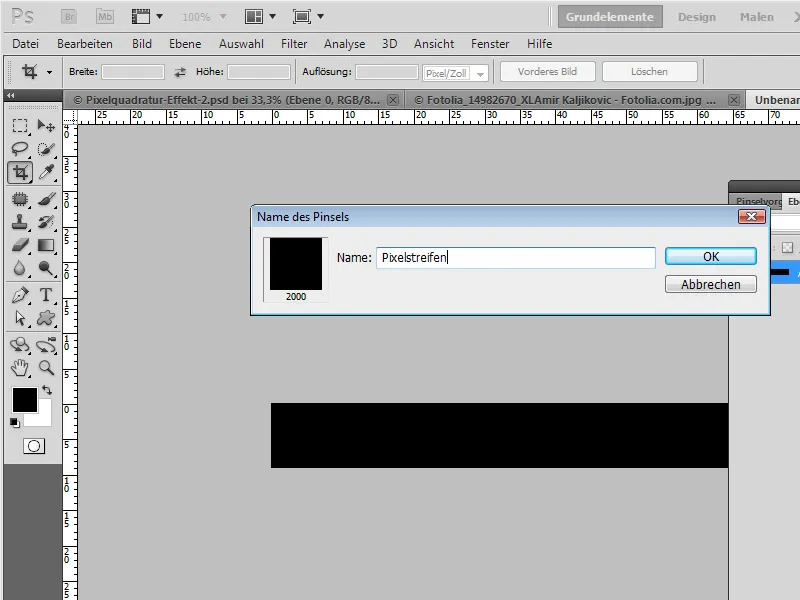
Step 6: Back to the Original Document and Minor Preparations
In the original document, I duplicate the layer with the extracted person.
I apply the layer mask to the duplicated layer and create a new layer mask. To immediately invert the layer mask, I simply hold the Alt key while clicking on the icon for the new layer mask.
Since I already know that I will need this layer with the inverted mask multiple times, I can also duplicate this layer three more times now. To keep things organized, I can name them as follows: Duplicate 1, Duplicate 2, 3, and 4.
I name the layer with the extracted person "Subject Extraction" and reduce its opacity to 10 percent.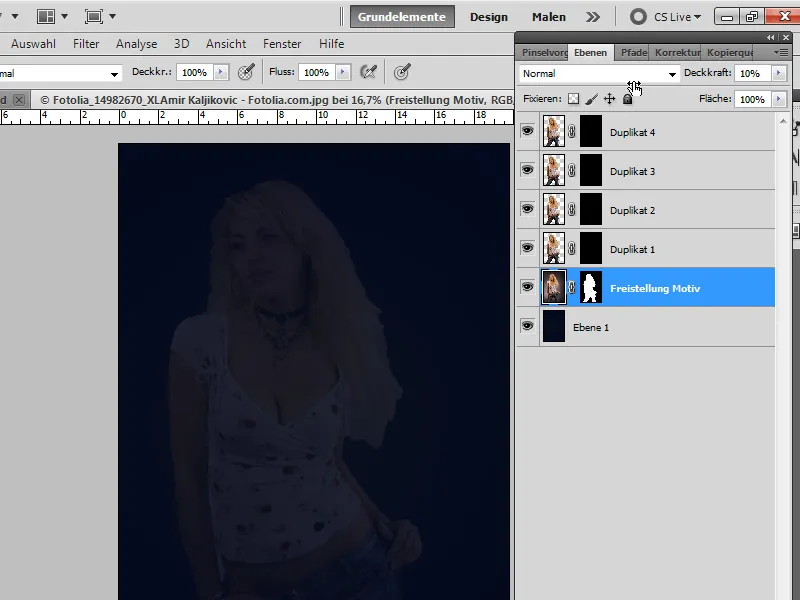
Step 7: Brush settings
I now select the Brush Tool B and open the Brush Panel F5. Here I find my two previously created brush presets, of which I choose the first one.
The following settings are chosen:
Brush shape:
• Size: 14 px
• Spacing: 220 percent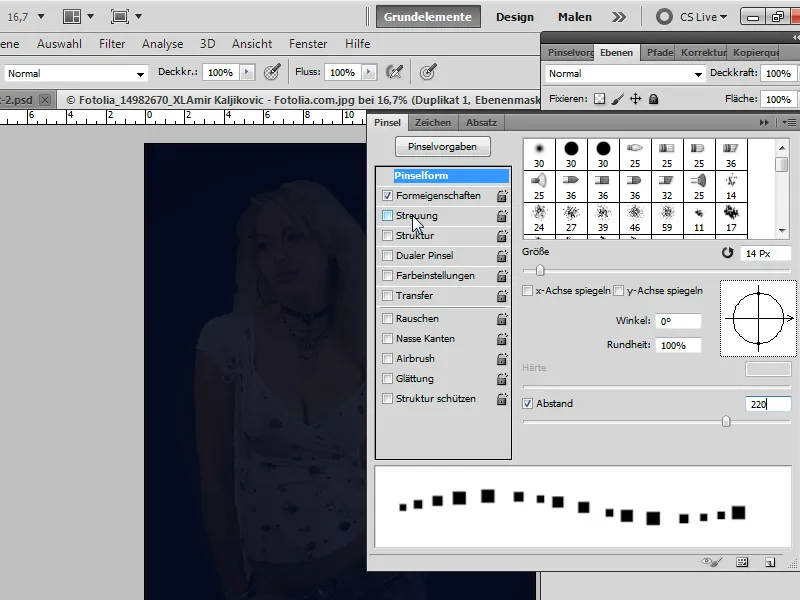
Shape properties:
• Size Jitter: 70 percent
• Minimum diameter: 30 percent
Scatter:
• Scatter: 600 percent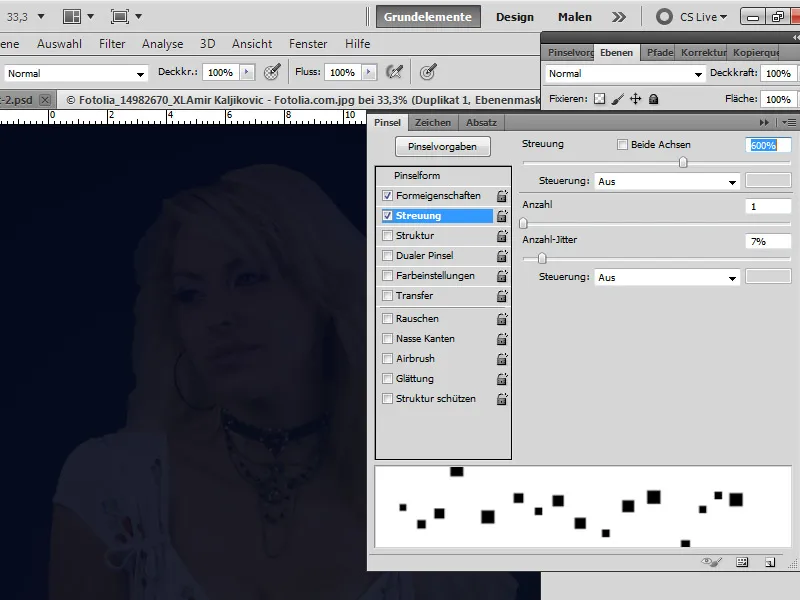
Step 8: Painting in the layer mask of the "Duplicate 1" layer
With X, I swap the foreground color with the background color, so now the white color is in the foreground. I select the layer mask of "Duplicate 1" and let's get started. I paint with the Brush Tool with the foreground color set to white into my mask. I start with the face.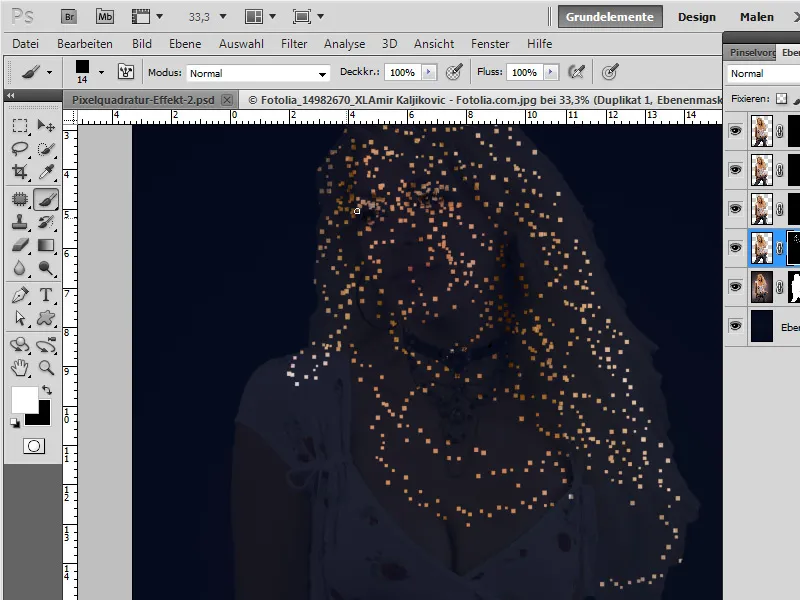
To vary the size a bit, I can also slightly enlarge the brush tip. The easiest way to do this is by using the Alt key + Right Mouse Button + Left/Right movement with the mouse. When painting the face, I make sure that the essential features for recognizing the face - eyes, nose, and mouth - are brushed especially intensively.
Especially for the more uniform areas like the legs and the shirt, I should make slightly larger brush strokes.
To better identify gaps in the strokes, I can temporarily hide the "Cut-out Person" layer. This way, the interim result will show where I currently stand.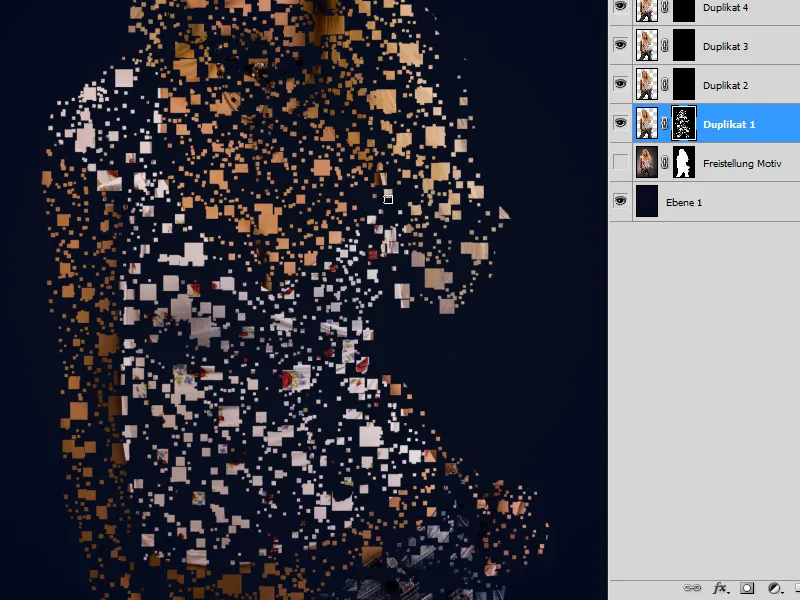
Step 9: Painting in the layer mask of the Duplicate 2 layer
Now I activate the layer mask of the "Duplicate 2" layer.
In the Brush Panel, I select my previously created brush rectangle with the following settings:
• Brush size: 50 pixels
• Spacing: 600 percent
Shape properties:
• Size Jitter: 90 percent
• Minimum diameter: 30 percent
Scatter:
• Scatter: 600 percent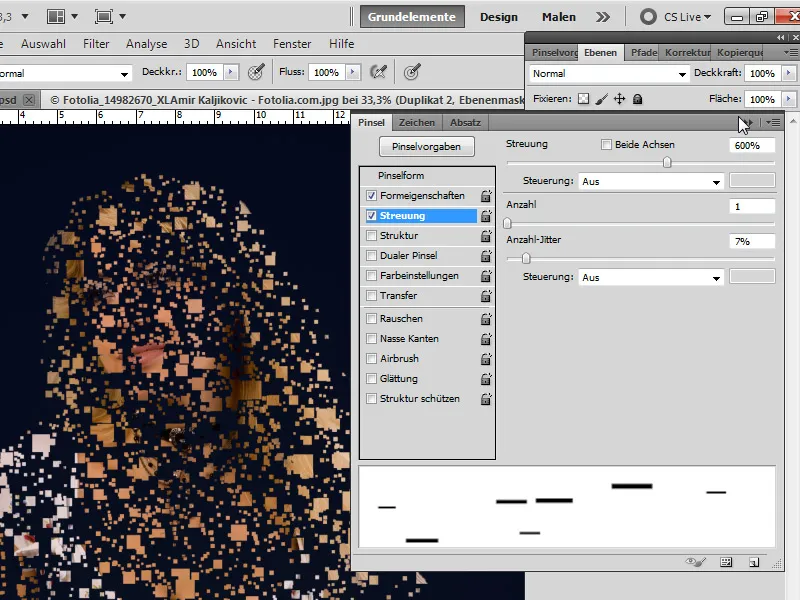
With this brush, I now paint horizontal stripes into my image's layer mask.
As before, once a first layer of brushes is applied to the mask, I can slightly enlarge the brush tip and apply another layer.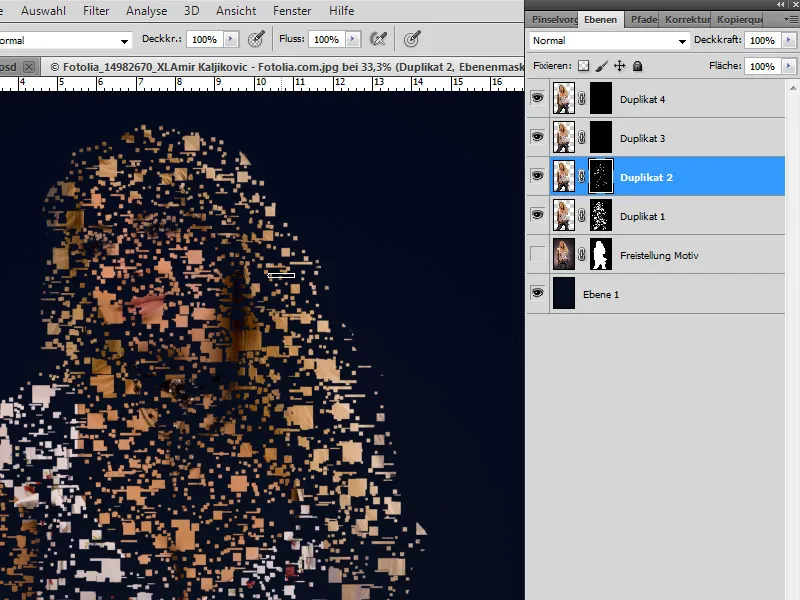
Step 10: Rotating the brush tip
In the Brush Panel, I now rotate my brush tip by entering 90 degrees for the Angle Setting. This way, I can easily paint vertical stripes into the mask.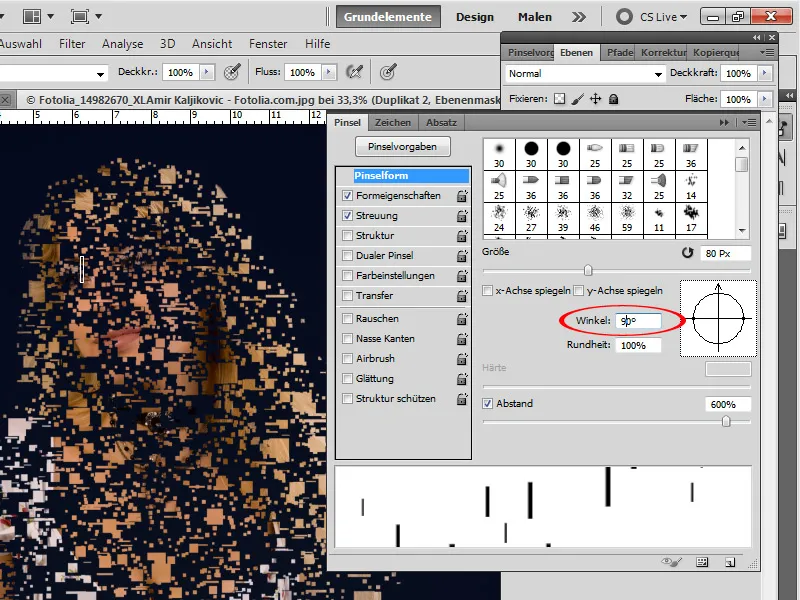
Step 11: Painting in the layer mask of the "Duplicate 3" layer and introducing color
Using the same brush, I now paint horizontal and vertical stripes into the layer mask of the "Duplicate 3" layer. Once I have enough stripes in the image, I create an Hue/Saturation adjustment layer as a clipping mask.
I move the Hue slider slightly to the left to tint my stripes reddish. If the tint is too strong, I decrease the Saturation by 10 to 20 percent.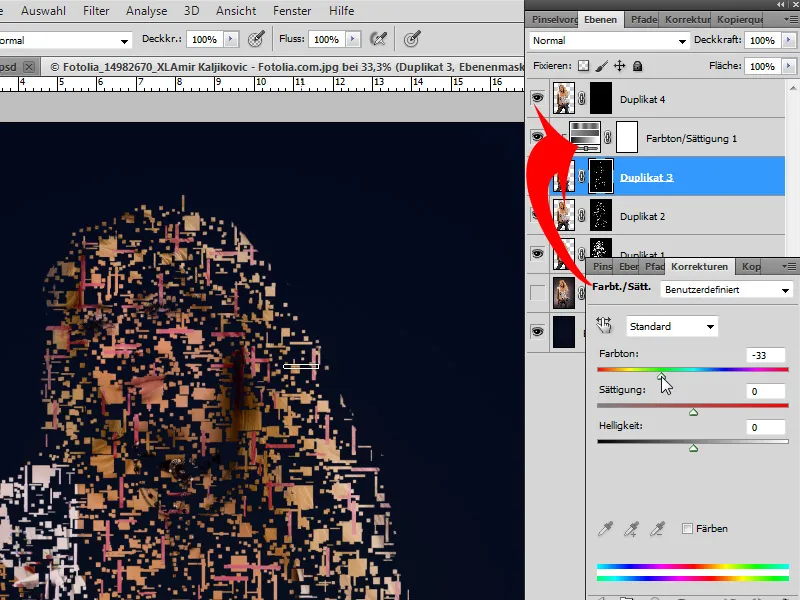
Step 12: Repeating with Layer "Duplicate 4"
I repeat Step 11, but this time, I activate the layer mask of "Layer Duplicate 4".
After brushing in the layer mask, I create another Hue/Saturation adjustment layer and move the Hue slider slightly to the right.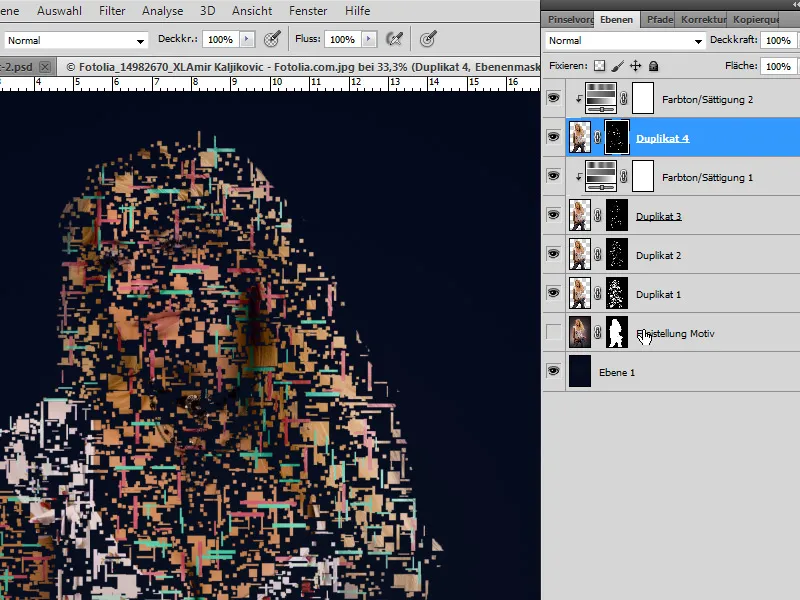
Step 13: Fine-tuning
If the layers with the cut-out person are not hidden yet, I can hide them now. If there are still gaps in my brush strokes, I can ideally fill them in the layer mask of the "Duplicate 1" layer using the small square brush of about 12-14 pixels.
Step 14: Smashing Contour
I create a new layer and name it "Edge Splatters".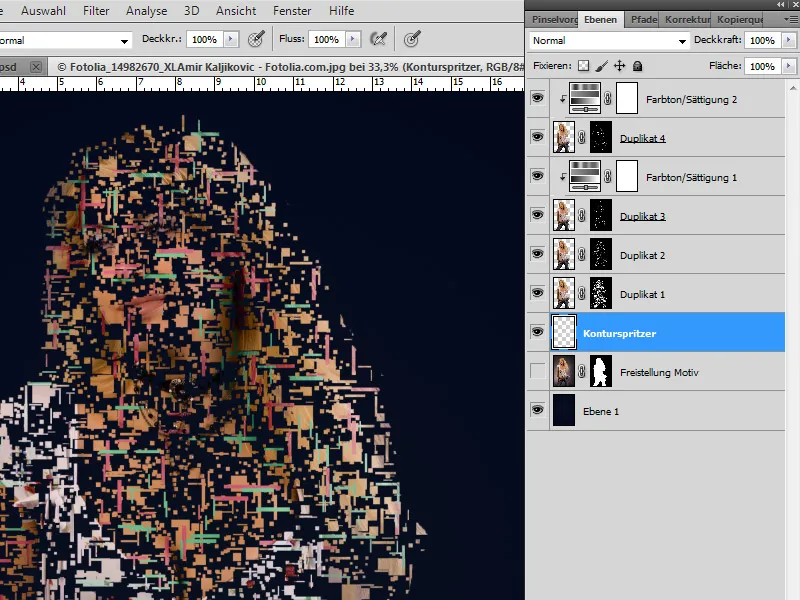
With the Clone Stamp Tool, I can select my square brush preset. Once again, I choose the following settings for the brush tip:
• Size: 12 px
• Spacing: 600 percent
Shape properties:
• Size Jitter: 100 percent
• Minimum diameter: 30 percent
Scatter:
• Scatter: 1000 percent
I set the layer with the cut-out person to 100 percent opacity. In the tool's menu bar, I choose the Hue blending mode, check the Aligned box, and select Current and below for Sampling.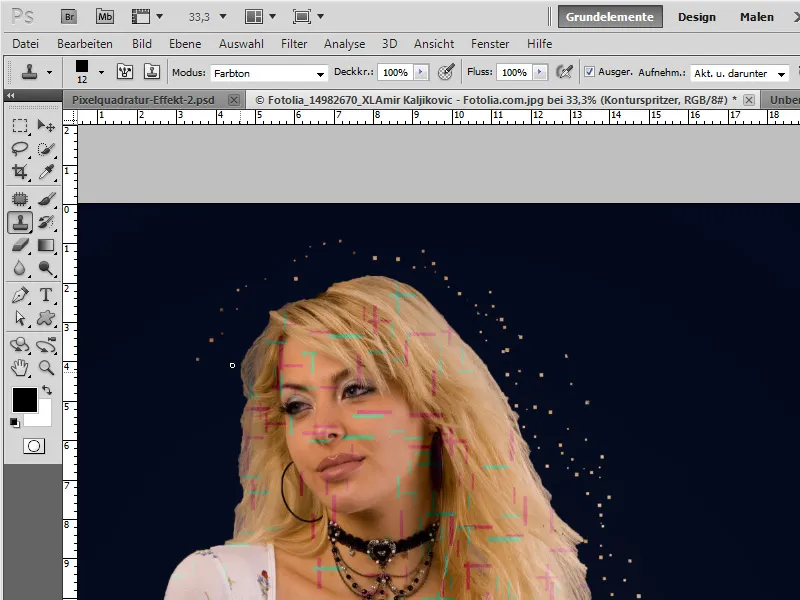
By clicking Alt I can now paint splatters in the edge area of my motif in the new layer. This way I immediately have the same colors as adjacent in my main motif.
If the splatters appear too strong, I can reduce the layer's opacity to 40 to 50 percent.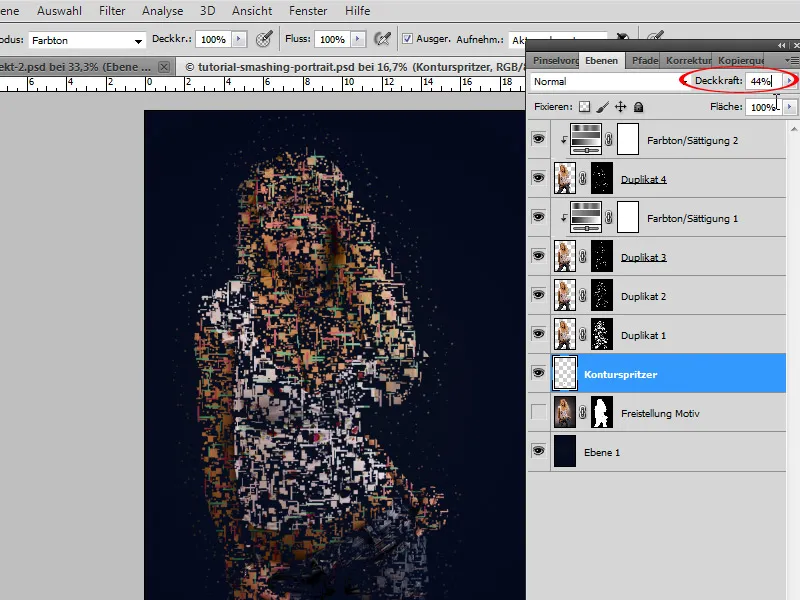
Step 15: Accentuate the Background
I create a new layer positioned above the background layer.
Using a large soft brush, I paint various colored dark dots in the background.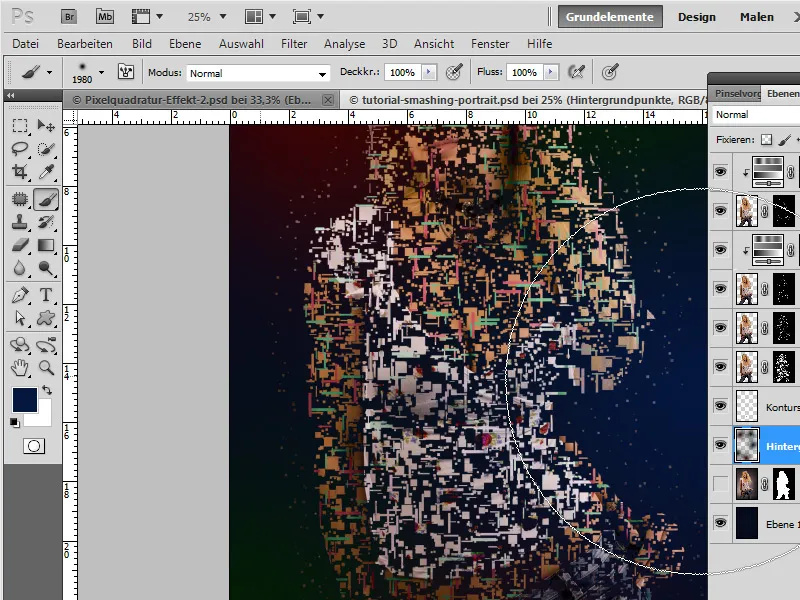
To ensure the color effect blends cleanly, the layer is processed with the Gaussian Blur with a very high radius. Then I check which blending mode works best. In this case, it's Difference at an opacity of around 50 percent.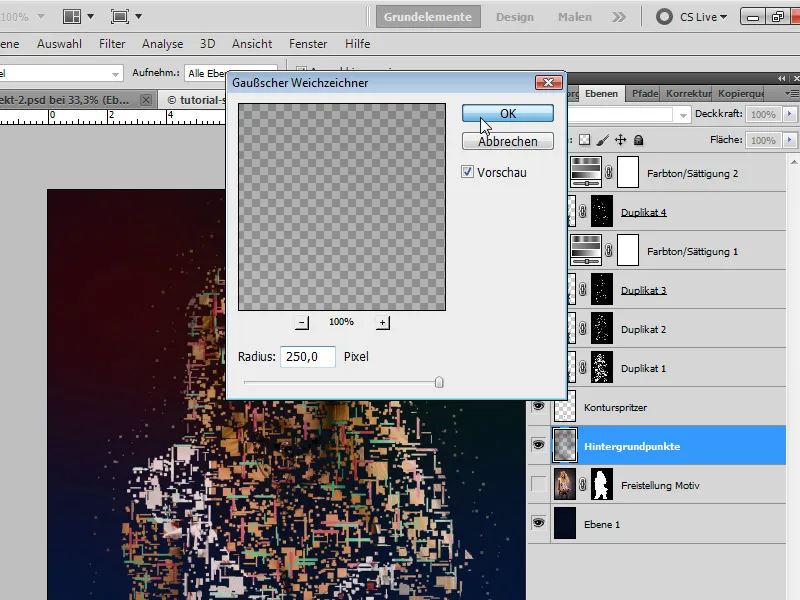
Step 16: Large Square Area
I create a new layer and select the Square Brush with the Clone Stamp enabled with the following settings:
• Size: 350 pixels
• Spacing: 630 percent
• Size Jitter: 100 percent and 30 percent Minimum Diameter.
While holding Alt, I choose color spots from the underlying layer. In Hue mode, I can now place various colored squares in the edge area of the model to round off the effect towards the document edges. I repeatedly select new color sources to obtain squares of different colors.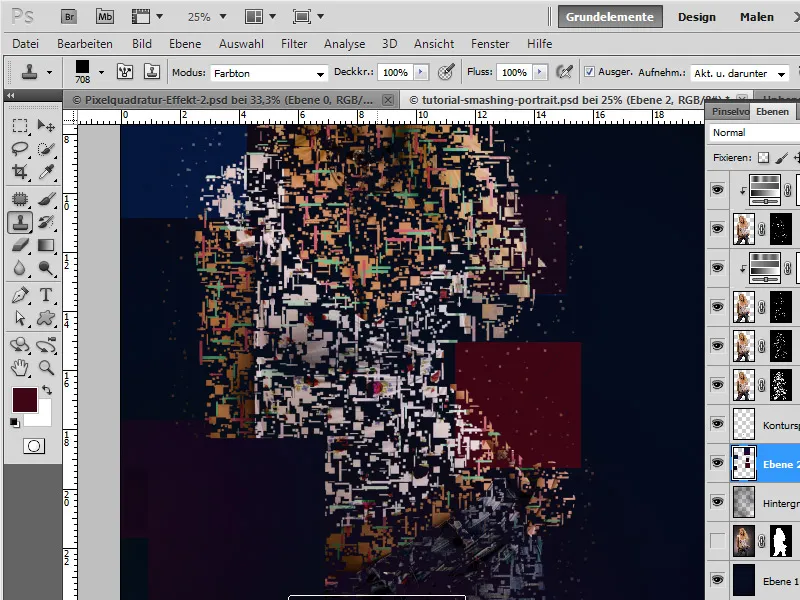
Subsequently, I reduce the layer's opacity to about 30 percent and see which blending mode works best for the effect. In this case, it's Luminosity.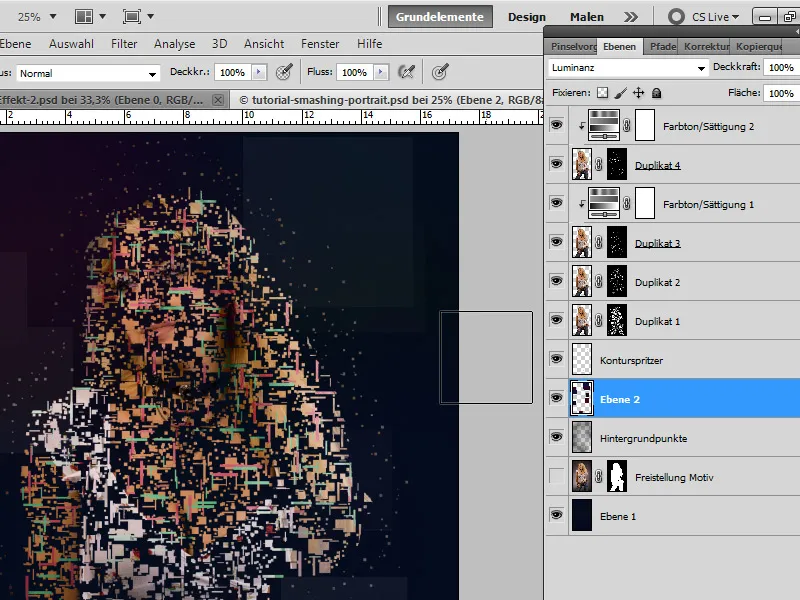
Step 17: Mosaic Effect
In the final step, I duplicate all visible layers reduced to one layer with the shortcut Ctrl+Shift+Alt+E.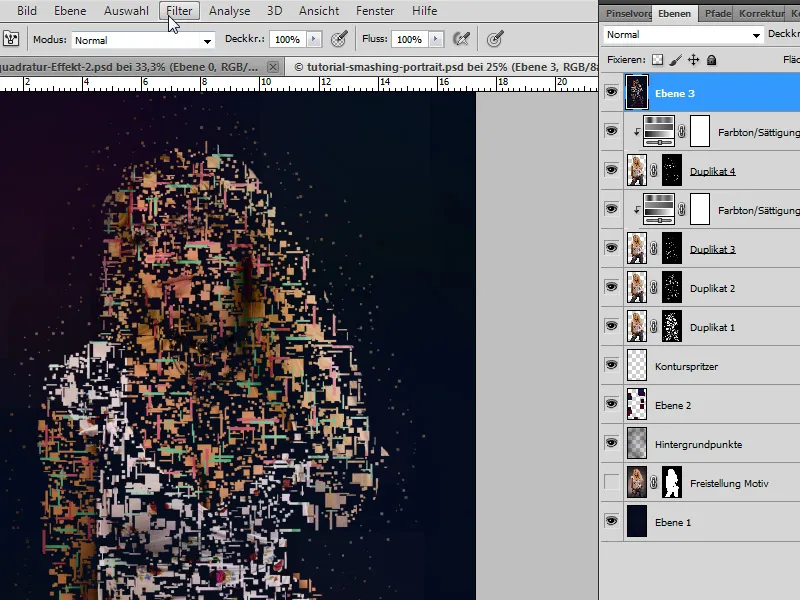
I convert the layer to a Smart Object and then apply the Smart Filter Mosaic Effect via the Pixelate Filter.
I set a value of about 60 squares.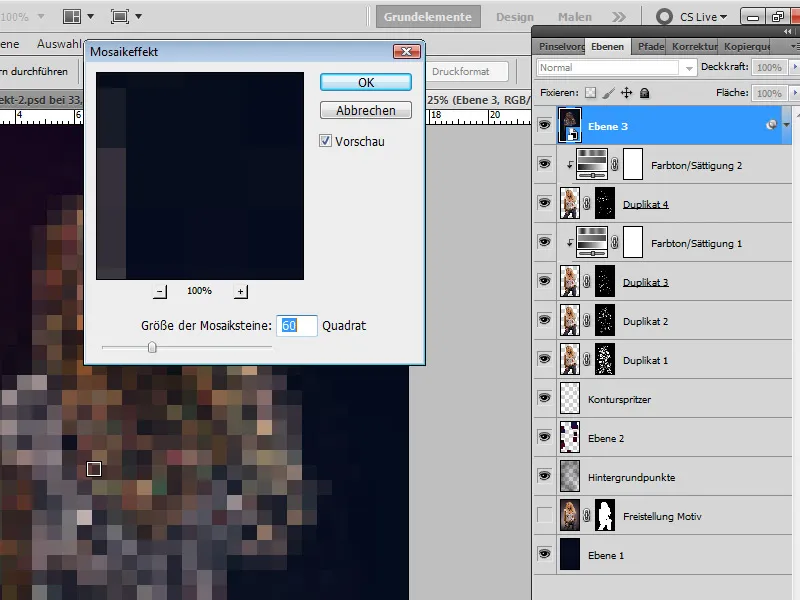
I move the layer down in the layer hierarchy and reduce the layer's opacity to around 40 percent. This creates an additional nice rounded square effect on the contours of the motif.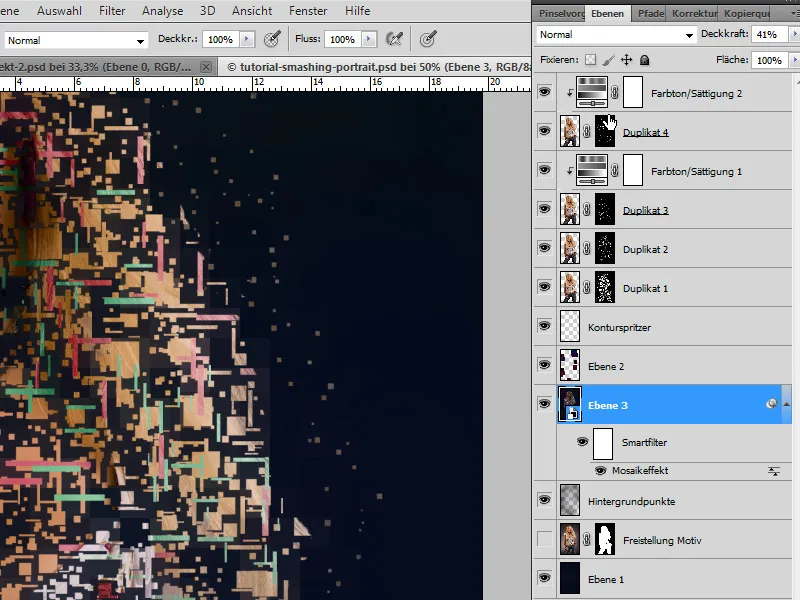
And there you have the Smashing Portrait completed.