Oftentimes you notice that after working on something in Excel, you have to go back a step again. It can be frustrating when you've made multiple errors and Excel only offers you a limited number of undo steps. Fortunately, there is a way to increase this number and handle your work steps more effectively. In this guide, we will show you step by step how you can adjust the maximum number of undo steps in Excel to optimize your work.
Key Takeaways Before Excel 2016, there was a limit of 16 undo steps. From Excel 2016 onwards, you can increase this number up to 100. To do this, adjustments need to be made in the Windows Registry. You will need administrative permissions to make these changes.
Step-by-Step Guide
Step 1: Ensure Administrative Permissions
To change the number of undo steps, you need administrative permissions on your computer. If you do not have the required permissions, contact your IT administrator for assistance.
Step 2: Access the Registry Editor

Click on the taskbar and type "regedit" into the search bar. When you run the command, you will be prompted to confirm administrative permission. Once you have opened the Registry Editor, you can make the necessary changes.
Step 3: Find the Right Registry Path
In the Registry Editor, navigate to HKEY_CURRENT_USER. Under this point, you will find the subfolders for Software. Open the "Microsoft" folder, then the "Office" folder. Here you will find additional subfolders depending on the actually installed version of Excel.
Step 4: Determine the Excel Version
Depending on your Excel version, the folder may be titled differently. Make sure to select the correct version – be it 12.0 for Excel 2007 or 16.0 for Excel 2016 and higher.
Step 5: Find Undo Options
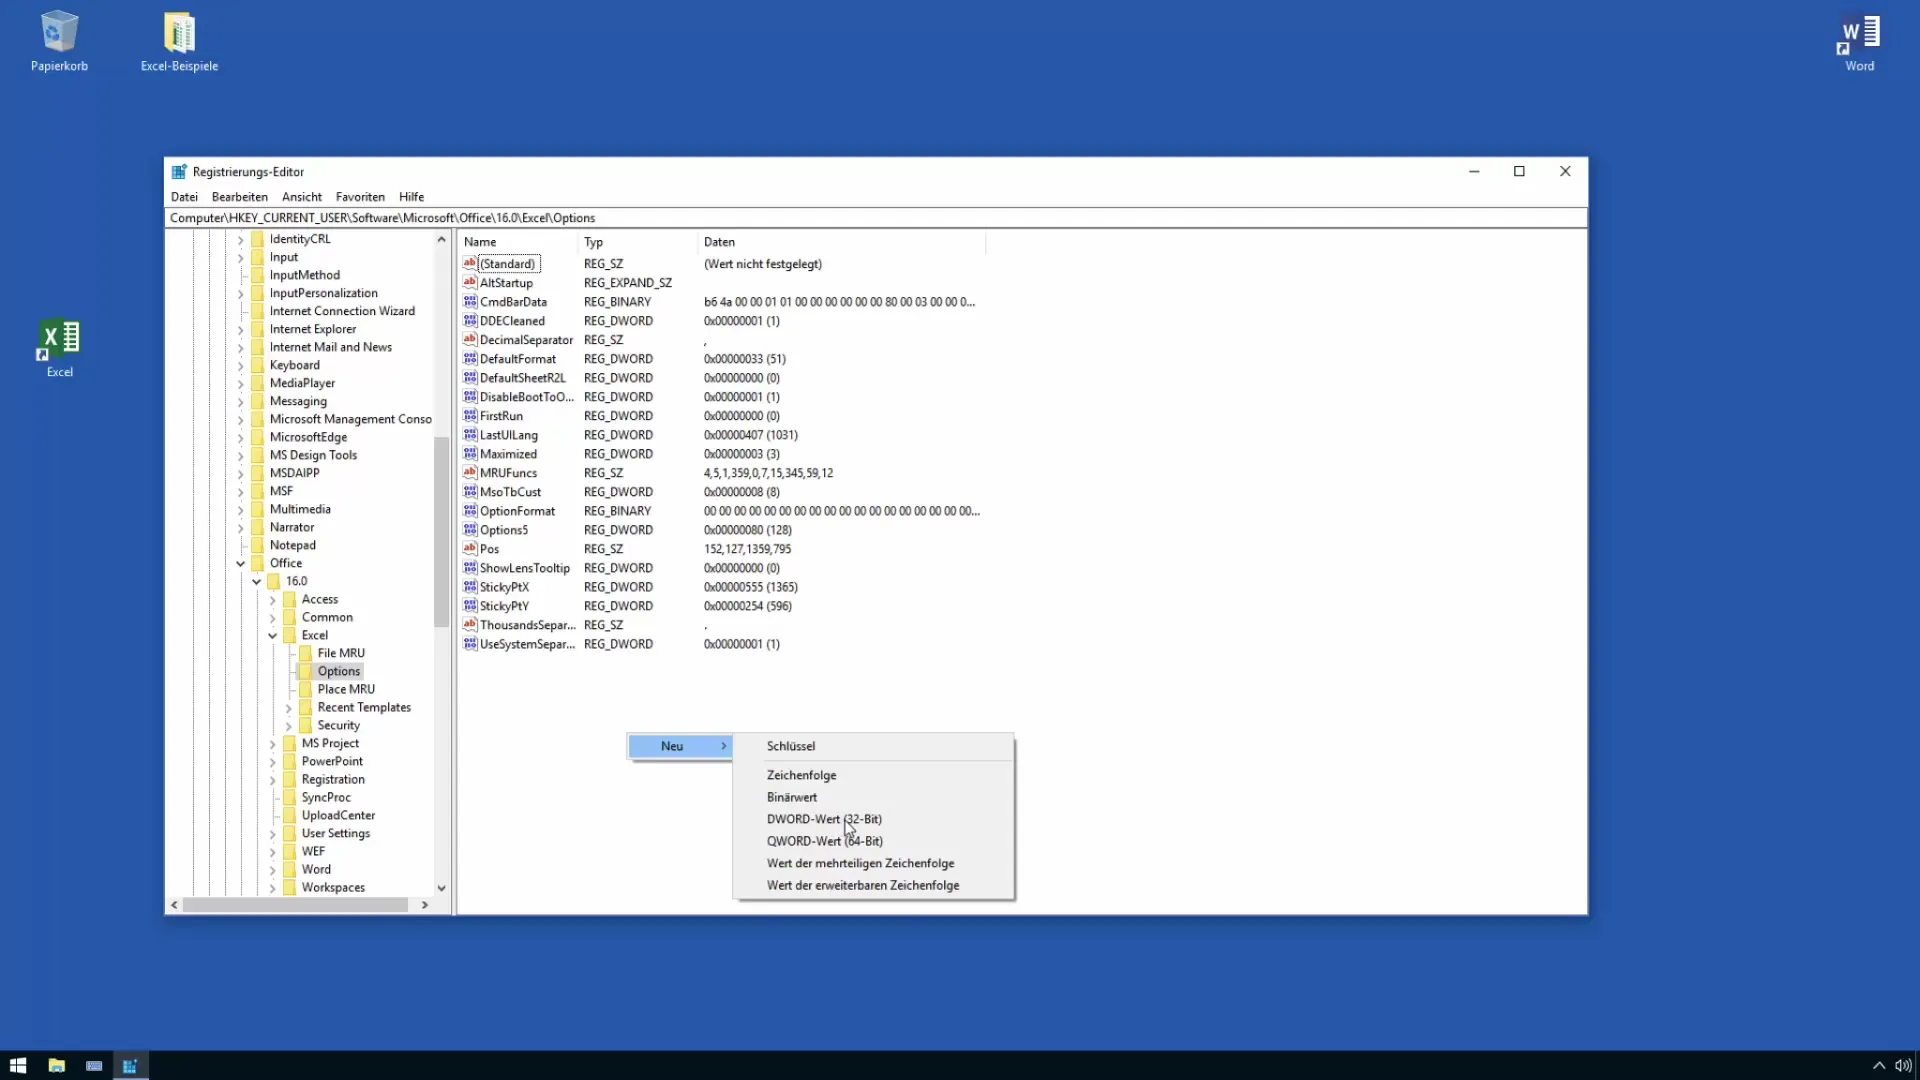
Once you are in the corresponding Office folder, look for the "Excel" subfolder and open it. Here you will find the "Options" settings, where you can adjust the value for undoing.
Step 6: Add New DWORD Value
Right-click in the right window and select "New", then "DWORD Value (32-bit)". Name the new value "Undo" and make sure to apply the spelling exactly.

Step 7: Adjust Value
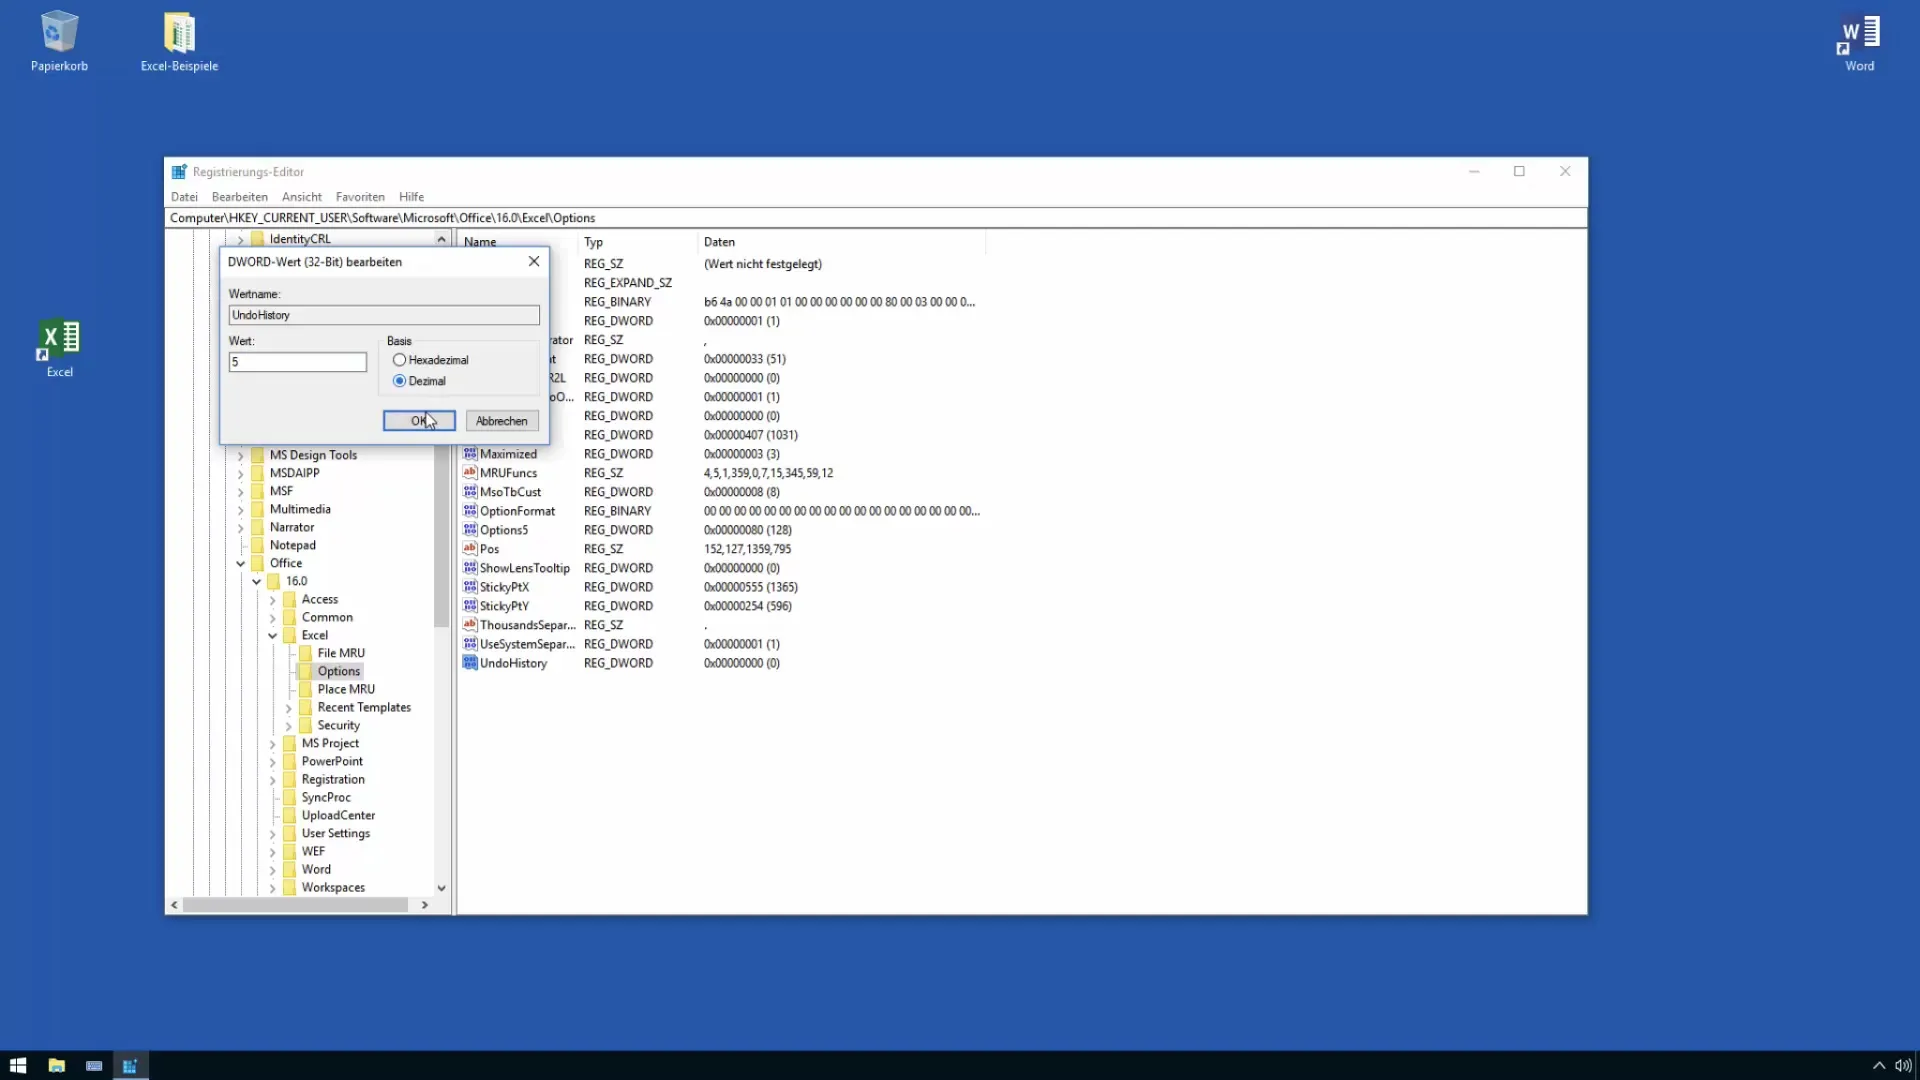
Double-click on the new value and enter a desired decimal value. For example, you could set this to 100 to increase the maximum number of undo steps to 100. It is important to ensure that the value is selected as "Decimal".

Step 8: Restart Excel
Close the Registry Editor and restart Excel for the change to take effect. After Excel is restarted, you should now be able to undo many steps.
Step 9: Test the New Setting
Add some elements to an Excel document and make several changes. Then check the undo function to see if you can go back the desired number of steps. Set the number back to, for example, 7 and test the functionality.
Step 10: Reset Value
If you no longer need the number of undo steps, you can simply delete the value. Right-click on the "Undo" value and choose "Delete".
Summary
This guide shows you how to increase the number of undo steps in Excel from 16 to up to 100, to efficiently fix errors. The adjustments are made through the Registry Editor while considering administrative permissions.
Frequently Asked Questions
How many undo steps can I have in Excel?If you are using Excel 2016 or higher, you can increase the number of undo steps up to 100.
Do I need special permissions to change the number?Yes, you need administrative permissions to make changes in the Windows Registry.
What happens if I no longer need the number of undo steps?You can simply delete the "Undo" value in the registry editor to return to the default number.
Will the changes take effect immediately?Yes, after restarting Excel, the changes will take effect.
Can I increase the undo steps in earlier versions of Excel?Only up to 16 steps can be changed in Excel versions prior to 2016. From 2016 onwards, the limit is 100.


