A precise time tracking is essential in many offices. Excel offers a simple and effective way to accurately add up your working hours. In this tutorial, you will learn how to create a time tracking sheet and avoid errors when summing up the hours. The following steps are suitable for both beginners and advanced users.
Main Insights
- Correct cell formatting in Excel is crucial for the accurate display of work hours.
- Use the "Sum" function to efficiently add up the hours.
- Cell formatting provides a better overview of working hours.
Step-by-Step Guide
Step 1: Create a template for time tracking
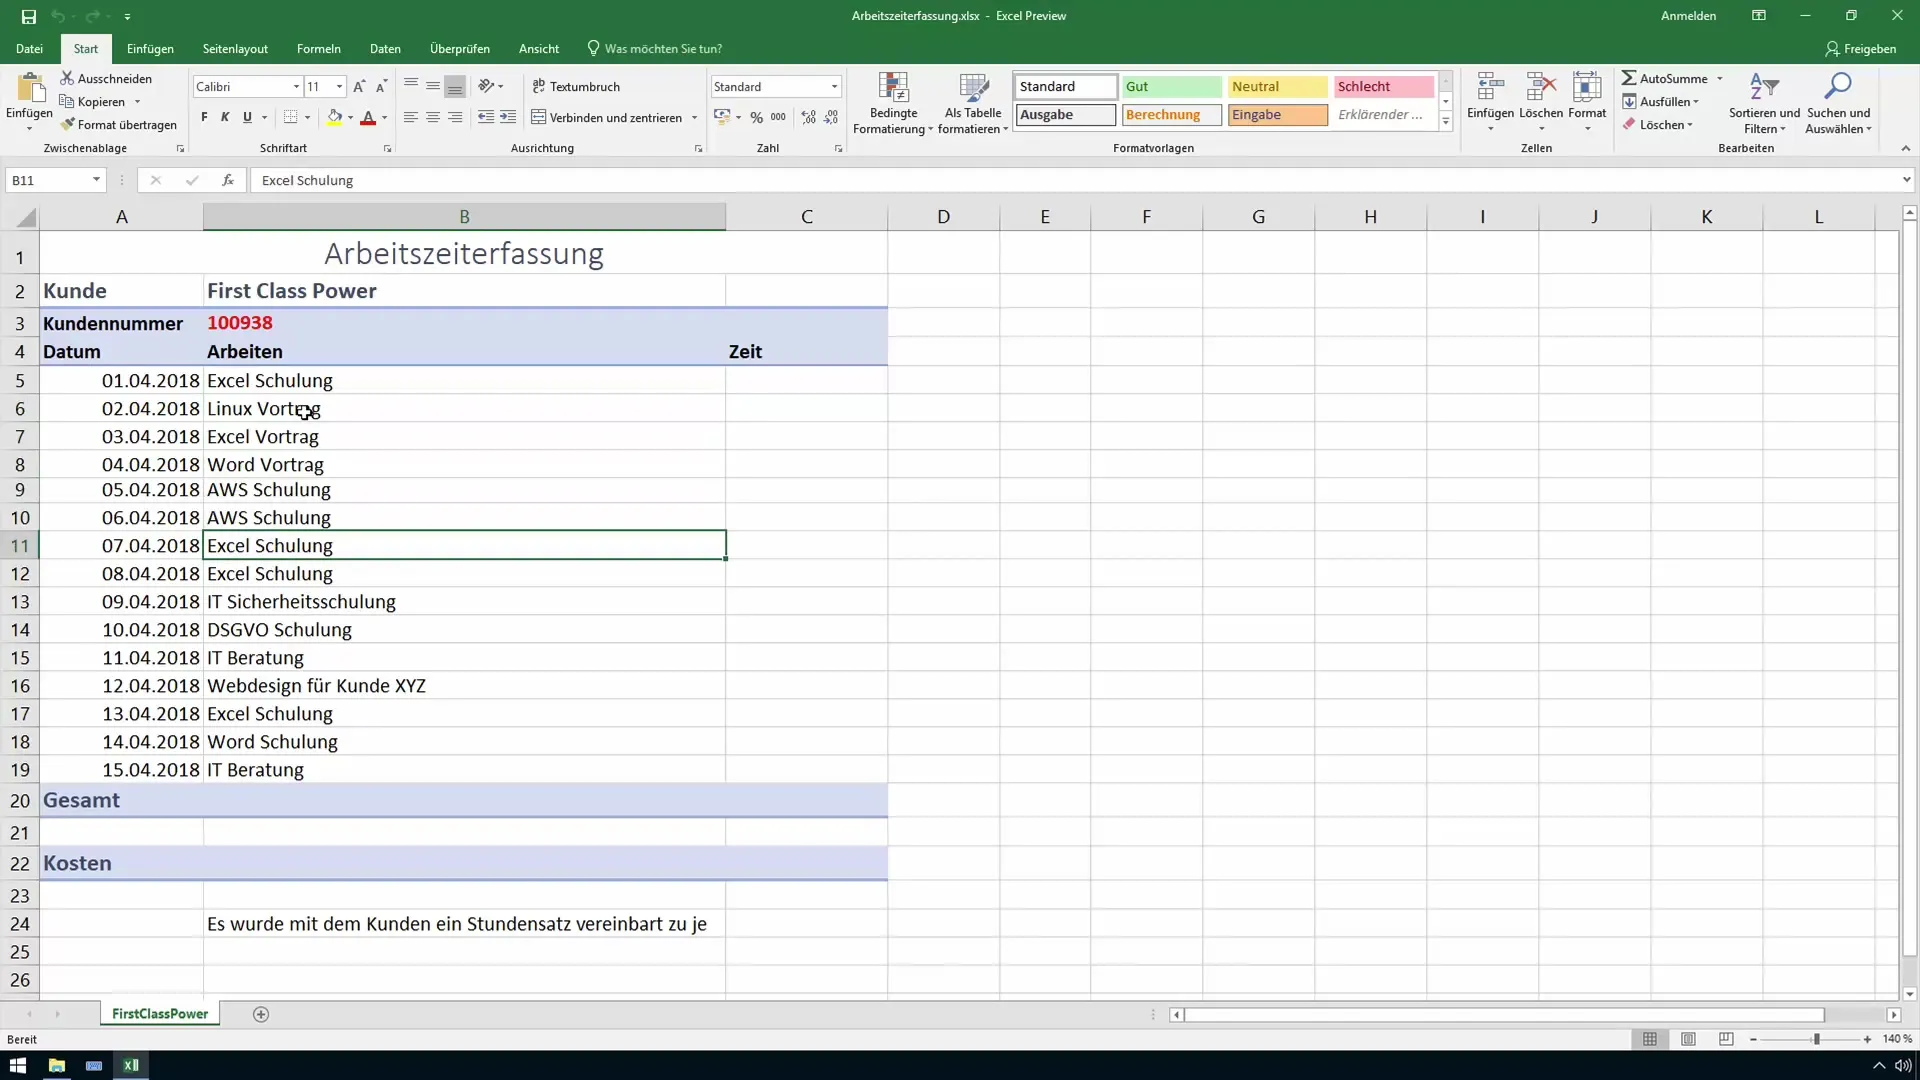
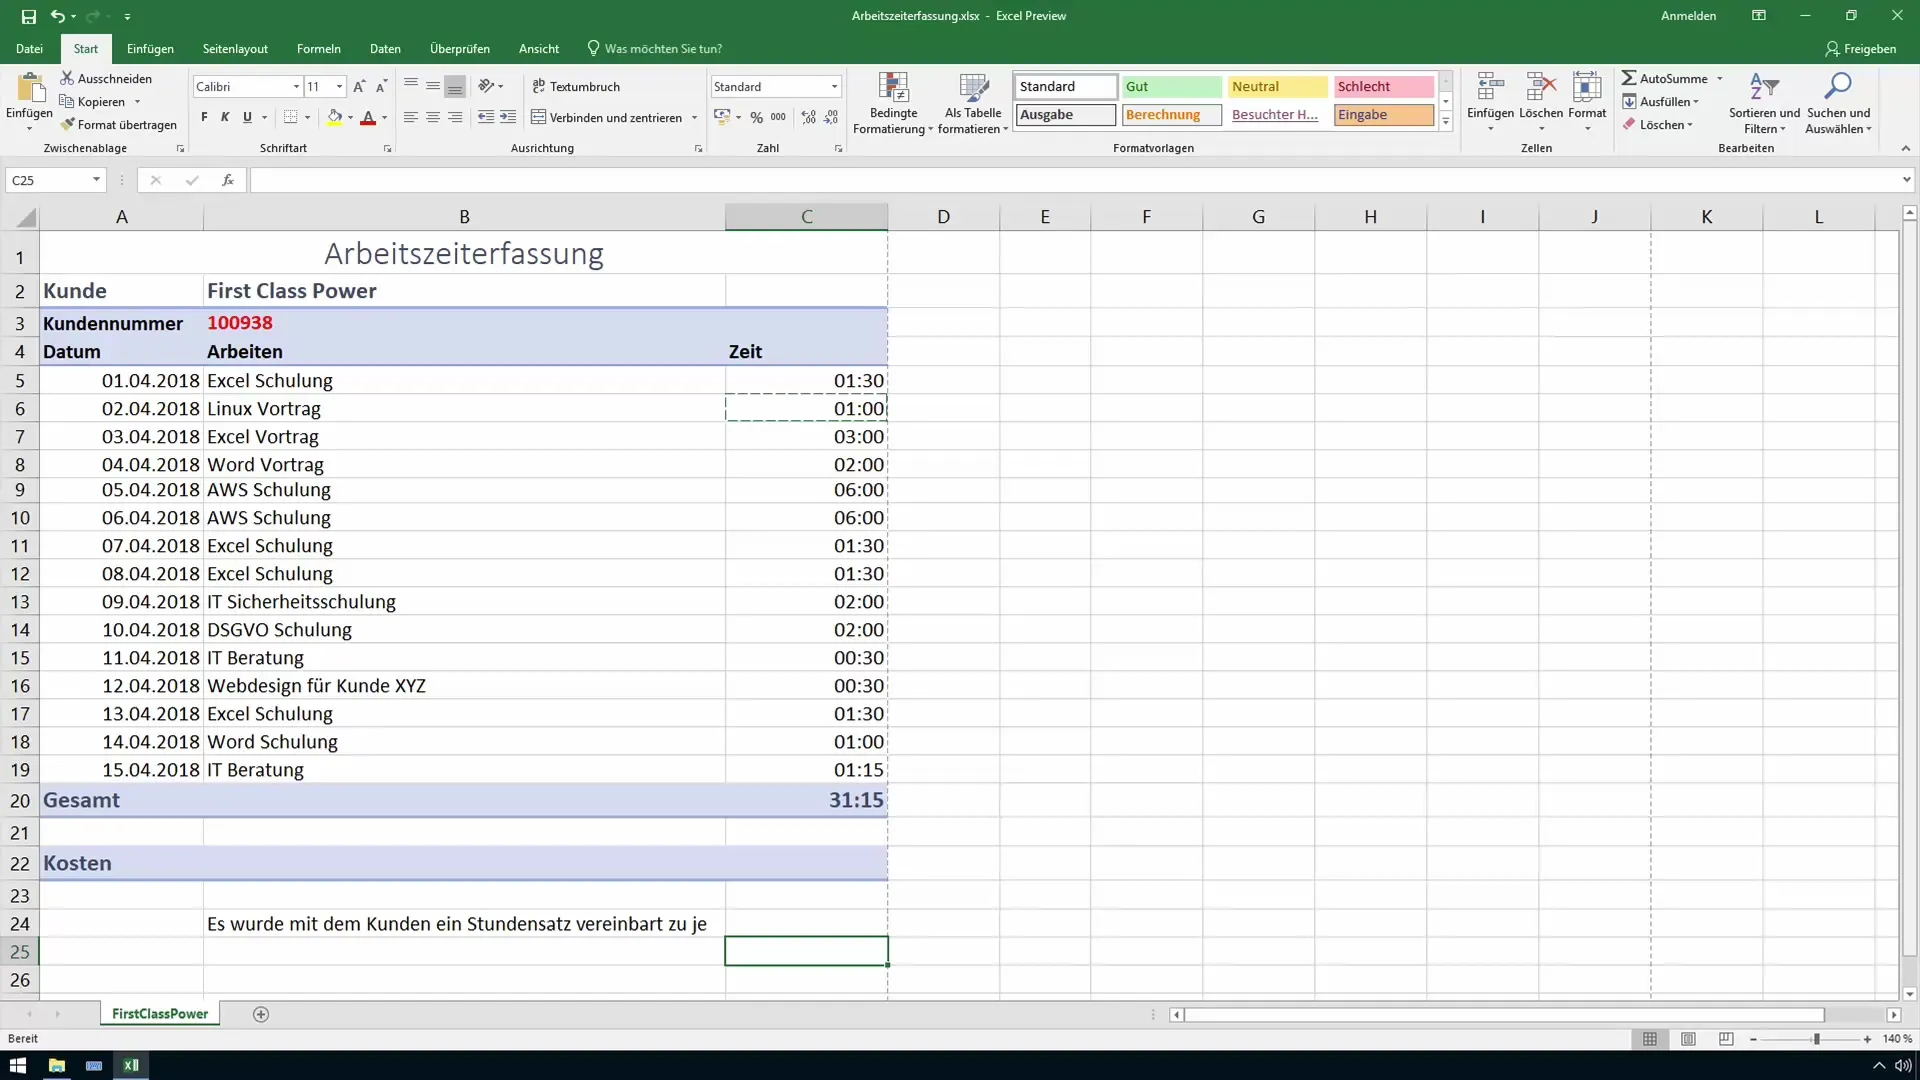
Open a new Excel file. You can either use an existing template or create your own blank table. Ensure that the table is well-structured to facilitate entering work hours. Add columns for customer name, type of activity, and the corresponding working hours.
Step 2: Enter working hours
Start entering the working hours for different projects and clients. For example, you could input hours for training or consulting. Ensure that the entries are consistent, such as in hours and minutes.
Step 3: Use the sum function
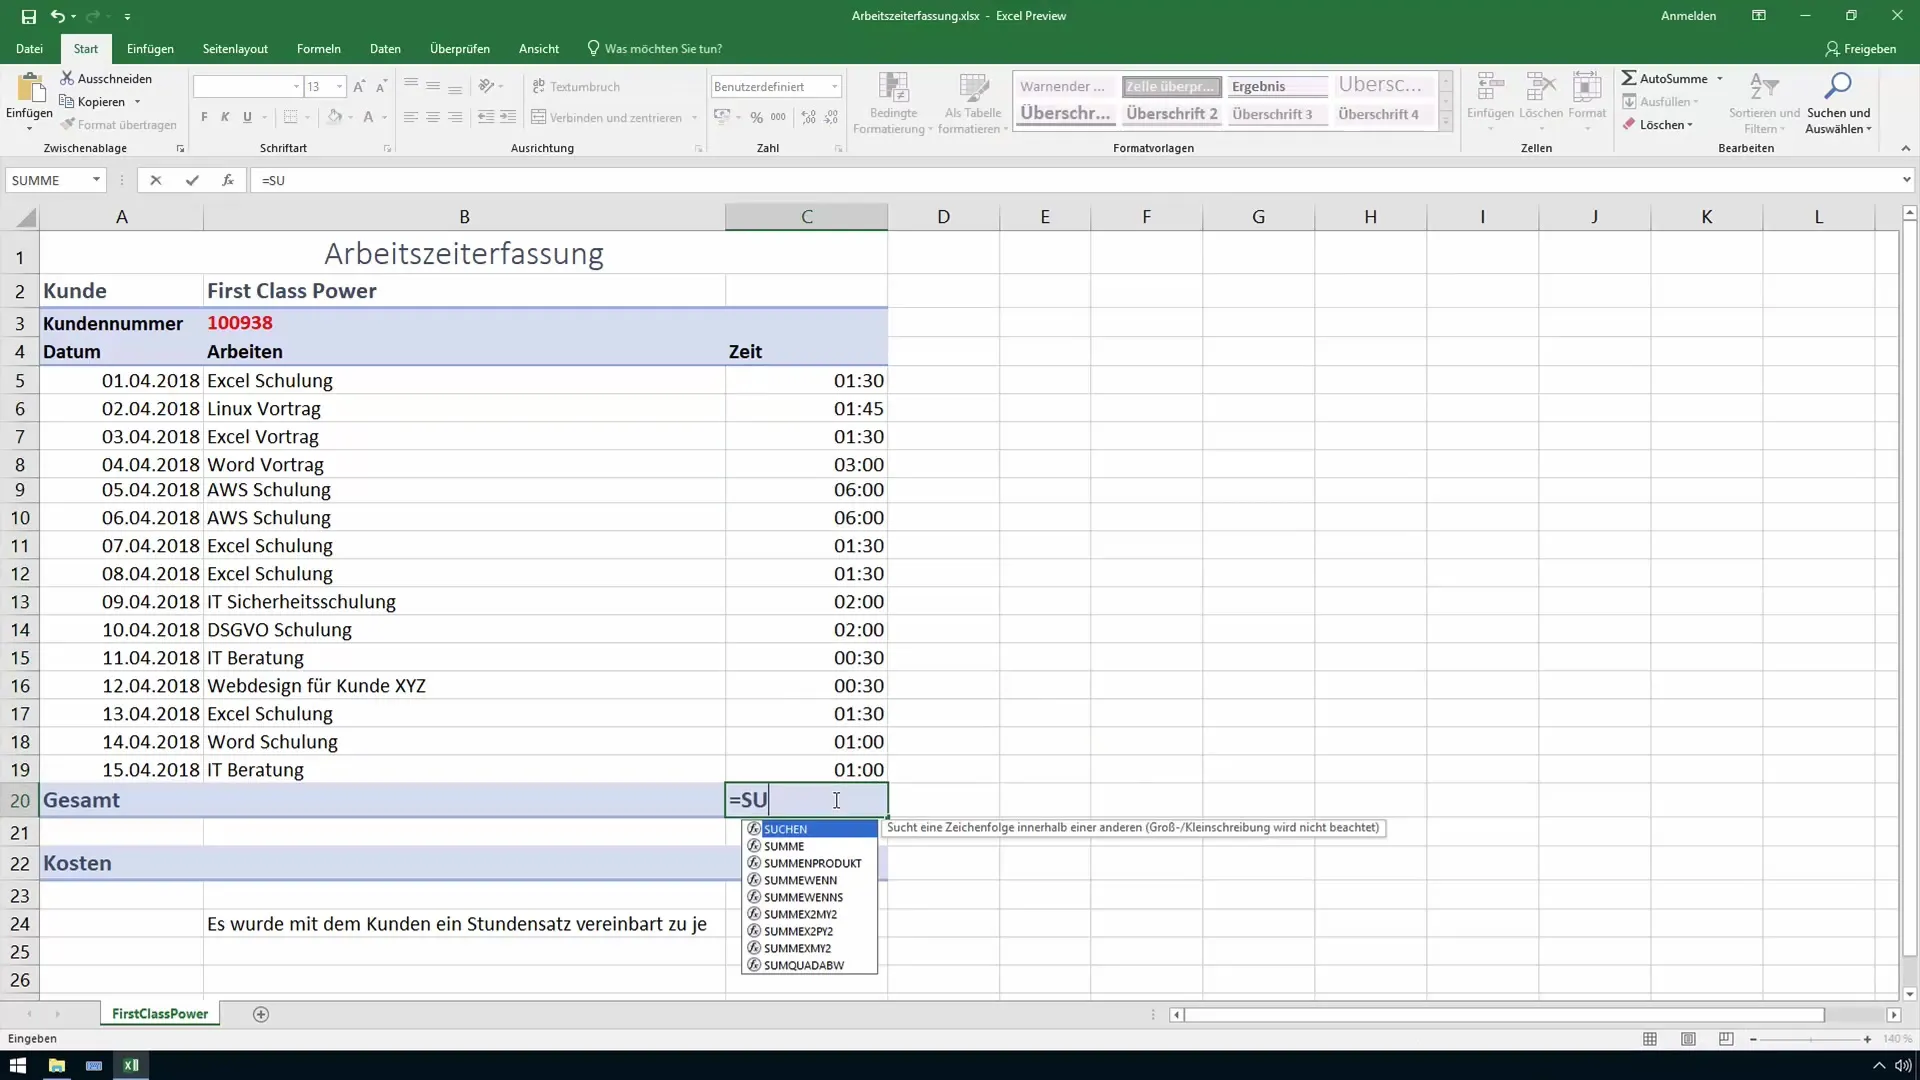
To calculate the total hours, you can use the sum function. Select the cell where the result should be displayed and type "=SUM(" followed by the range of cells you want to add up. Press Enter to see the result.
Step 4: Verify the calculation
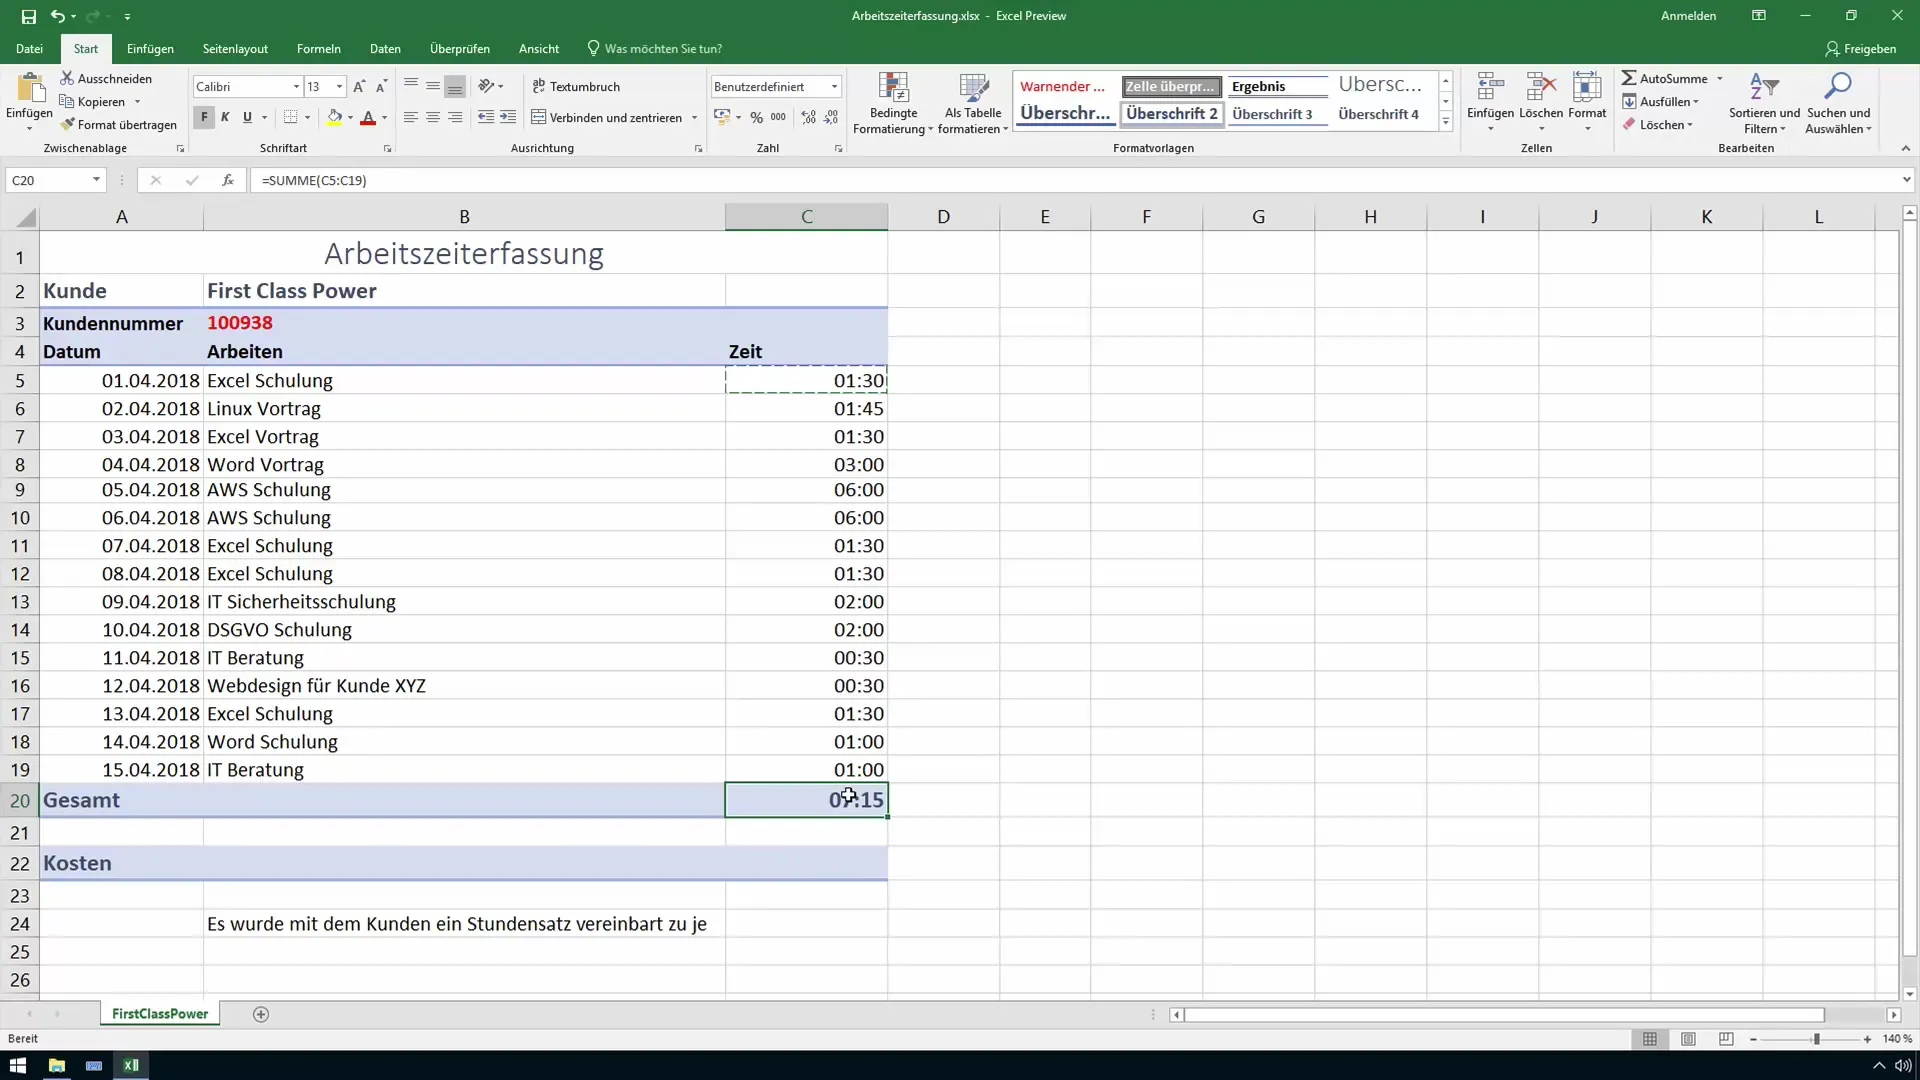
After the sum is calculated, verify the values representing the total hours. Often, miscalculations can occur due to incorrect cell formatting, especially when dealing with times over 24 hours.
Step 5: Adjust cell formatting
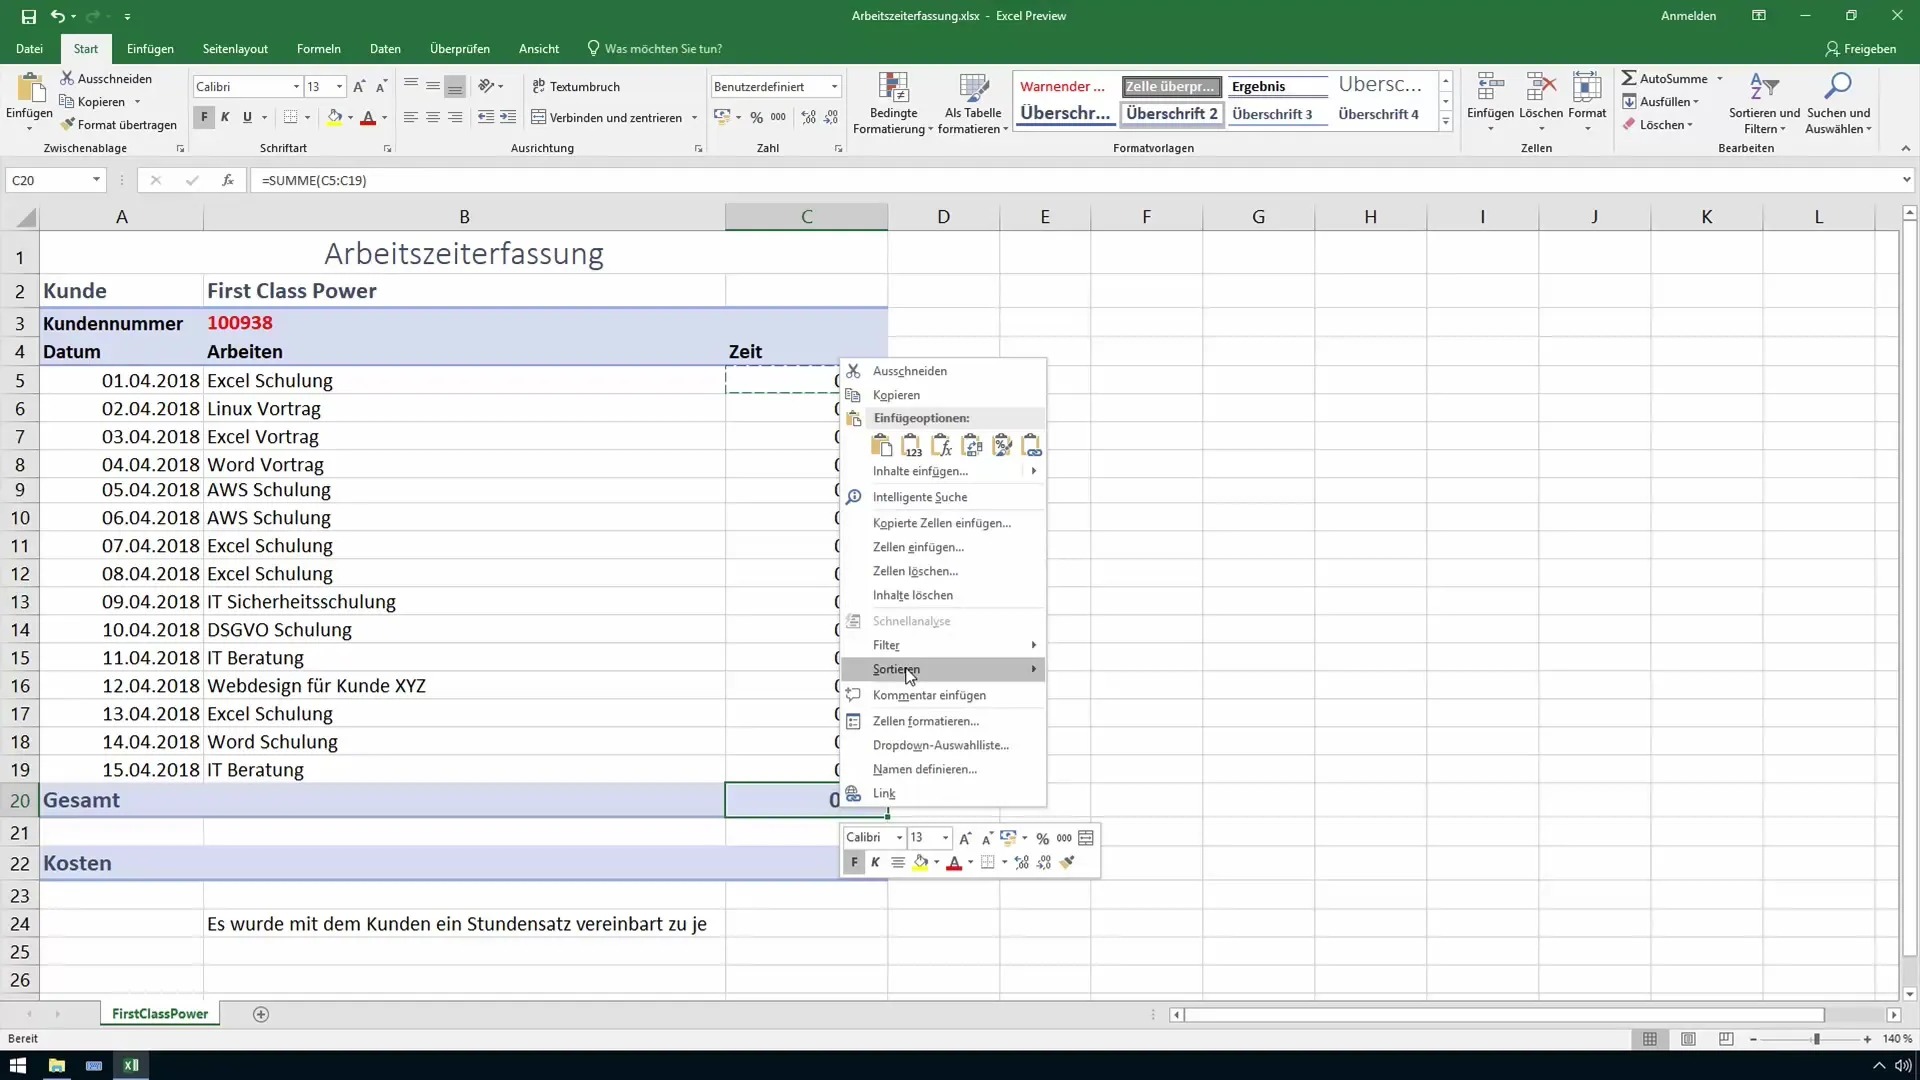
To ensure Excel correctly sums up the hours, you need to adjust the cell formatting. Right-click on the relevant cell and select "Format Cells." Under the "Custom" category, you can adjust the format so that the hours are displayed in a time format (e.g., [hh]:mm).
Step 6: Check the correct display
After adjusting the cell formatting, the sum should now be displayed correctly. Check if the results for individual projects and the total sum match the input data.
Step 7: Customer-based calculation
If you have multiple clients and want to evaluate working hours by client, you can repeat the same process for each client. Keep the table organized to avoid confusion. This way, you can always keep track of the hours worked and access the data whenever needed.
Summary
The presented steps help you create a structured and error-free time tracking sheet in Excel. Correct cell formatting is crucial to display and add up the correct values. You can apply the learned functions for your individual timekeeping as well as project planning.
Frequently Asked Questions
How do I adjust cell formatting in Excel?Right-click on the cell > Format cells > Select Custom.
What to do if the sum function does not give the desired results?Check the cell formatting; the formatting may not be correct.
How can I track working hours for different clients separately?Use separate rows or columns for each client and sum up the hours accordingly.
Can I edit previously entered values later?Yes, you can change the values at any time; but make sure the formatting remains intact.
How are hours stored in Excel?Excel stores time values in a specific format; incorrect formatting can lead to calculation errors.


