Data visualization is an essential tool for presenting information in a clear and appealing way. Especially in Excel, you can significantly enhance the readability and visual appeal of your tables by applying targeted cell formatting. In this tutorial, you will learn how to insert lines into cells and customize them to your needs, creating structure and clarity in your Excel documents.
Key Takeaways
- You can insert lines into cells through the formatting menu.
- You can customize outer borders and inner lines individually.
- Different line types and colors help in visually distinguishing data.
Step-by-Step Guide
Step 1: Select Cells and Open the Formatting Menu
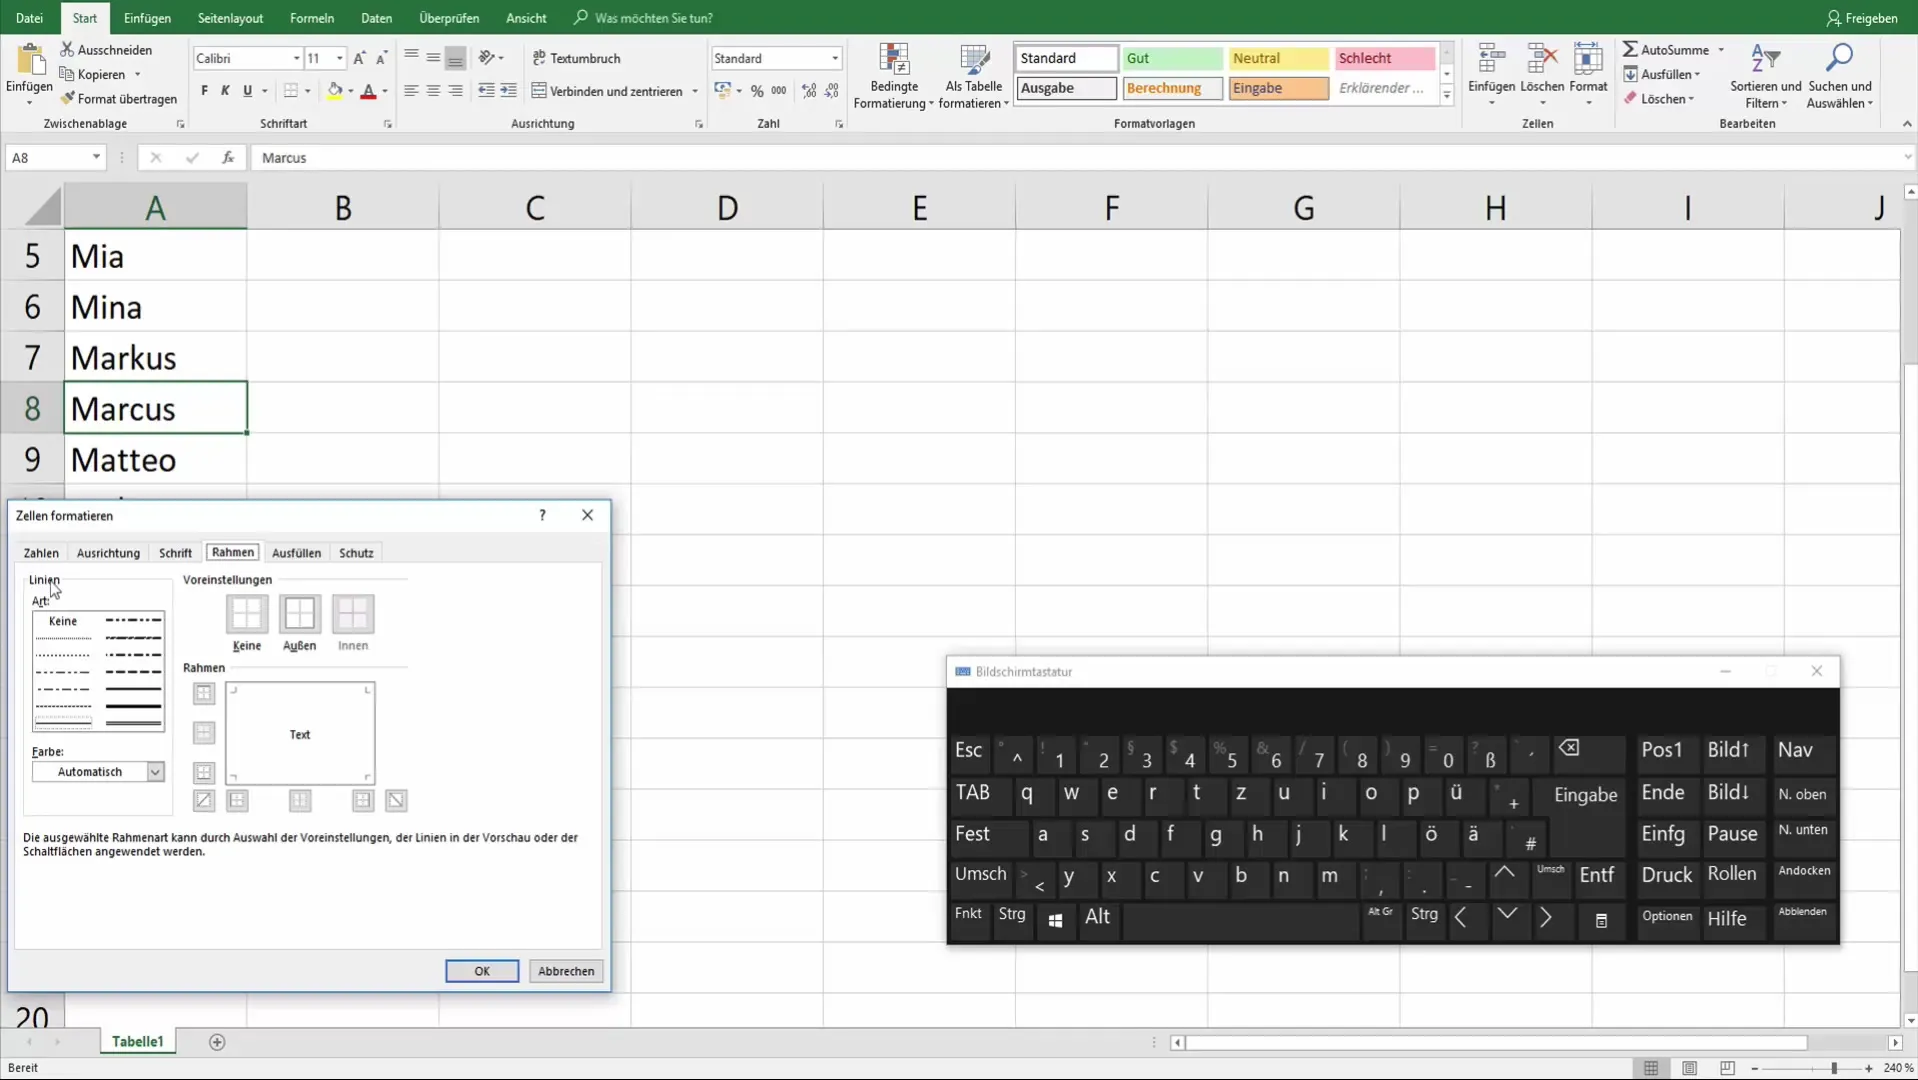
To insert lines into your cells, start by selecting the cell you want to format. Right-click on the cell. In the context menu that appears, select the option "Format Cells."
Step 2: Choose the Border Options
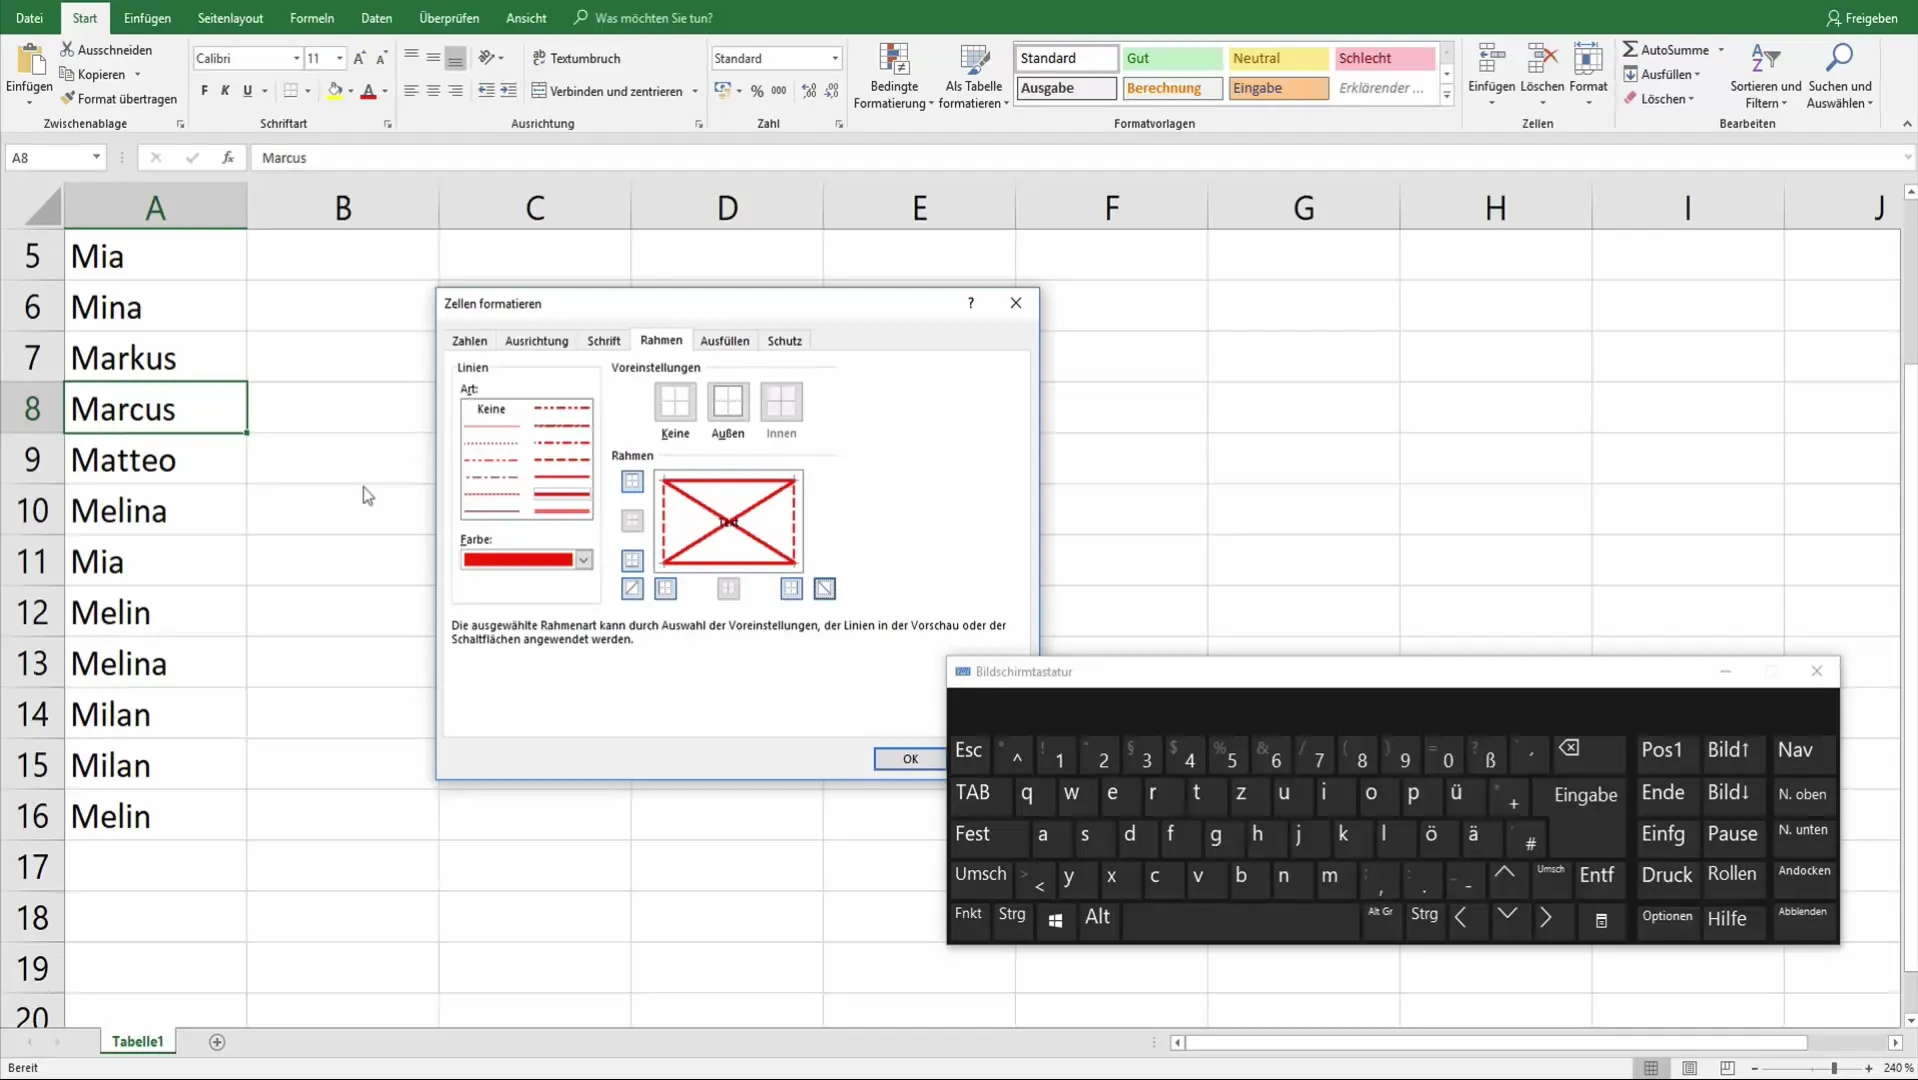
A new window will now appear. In this window, you can select various line options under the "Border" section. You may initially see the option for outer lines. Begin by activating the outer lines to separate the cell from others.
Step 3: Adjust Inner Lines
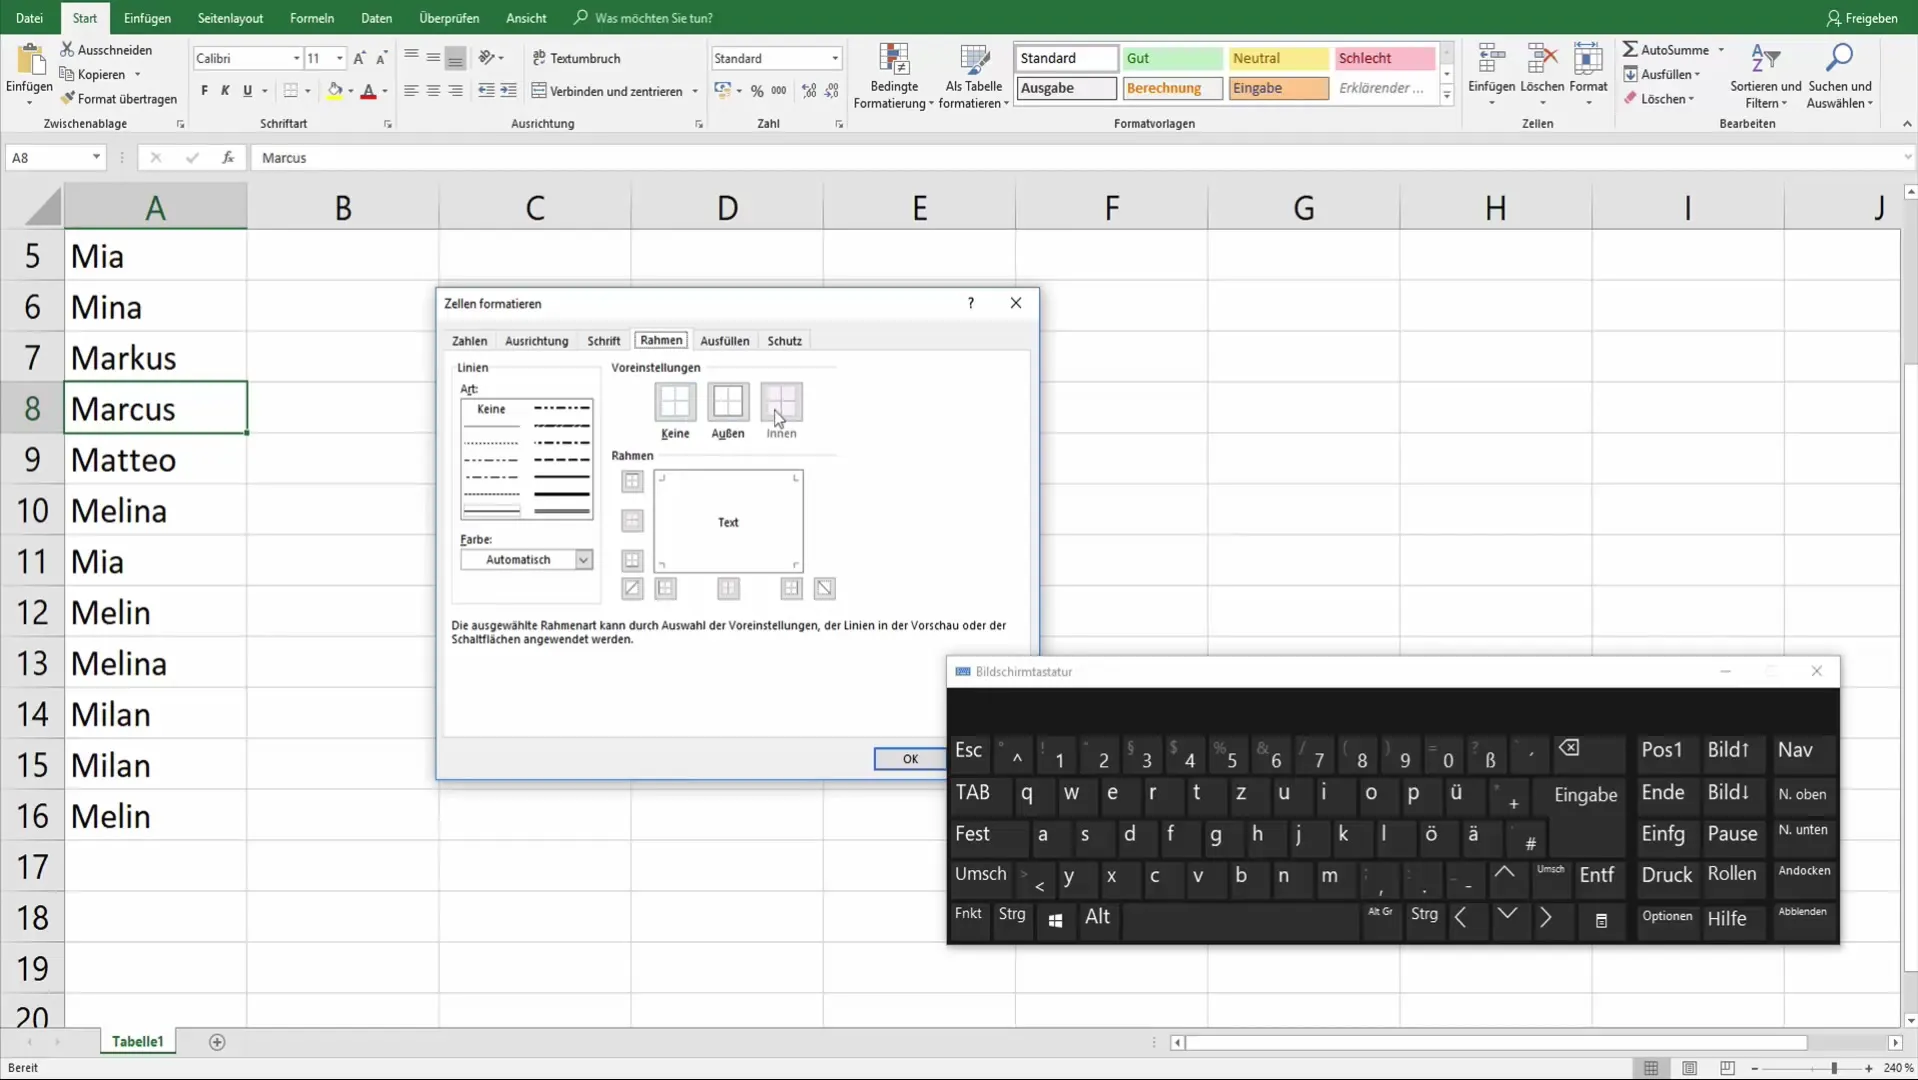
To format multiple cells simultaneously, select them and activate the inner line options. These are useful to create a visual structure within a group of cells. When you select multiple cells, the inner lines have no function unless you activate them.
Step 4: Select Line Type and Color
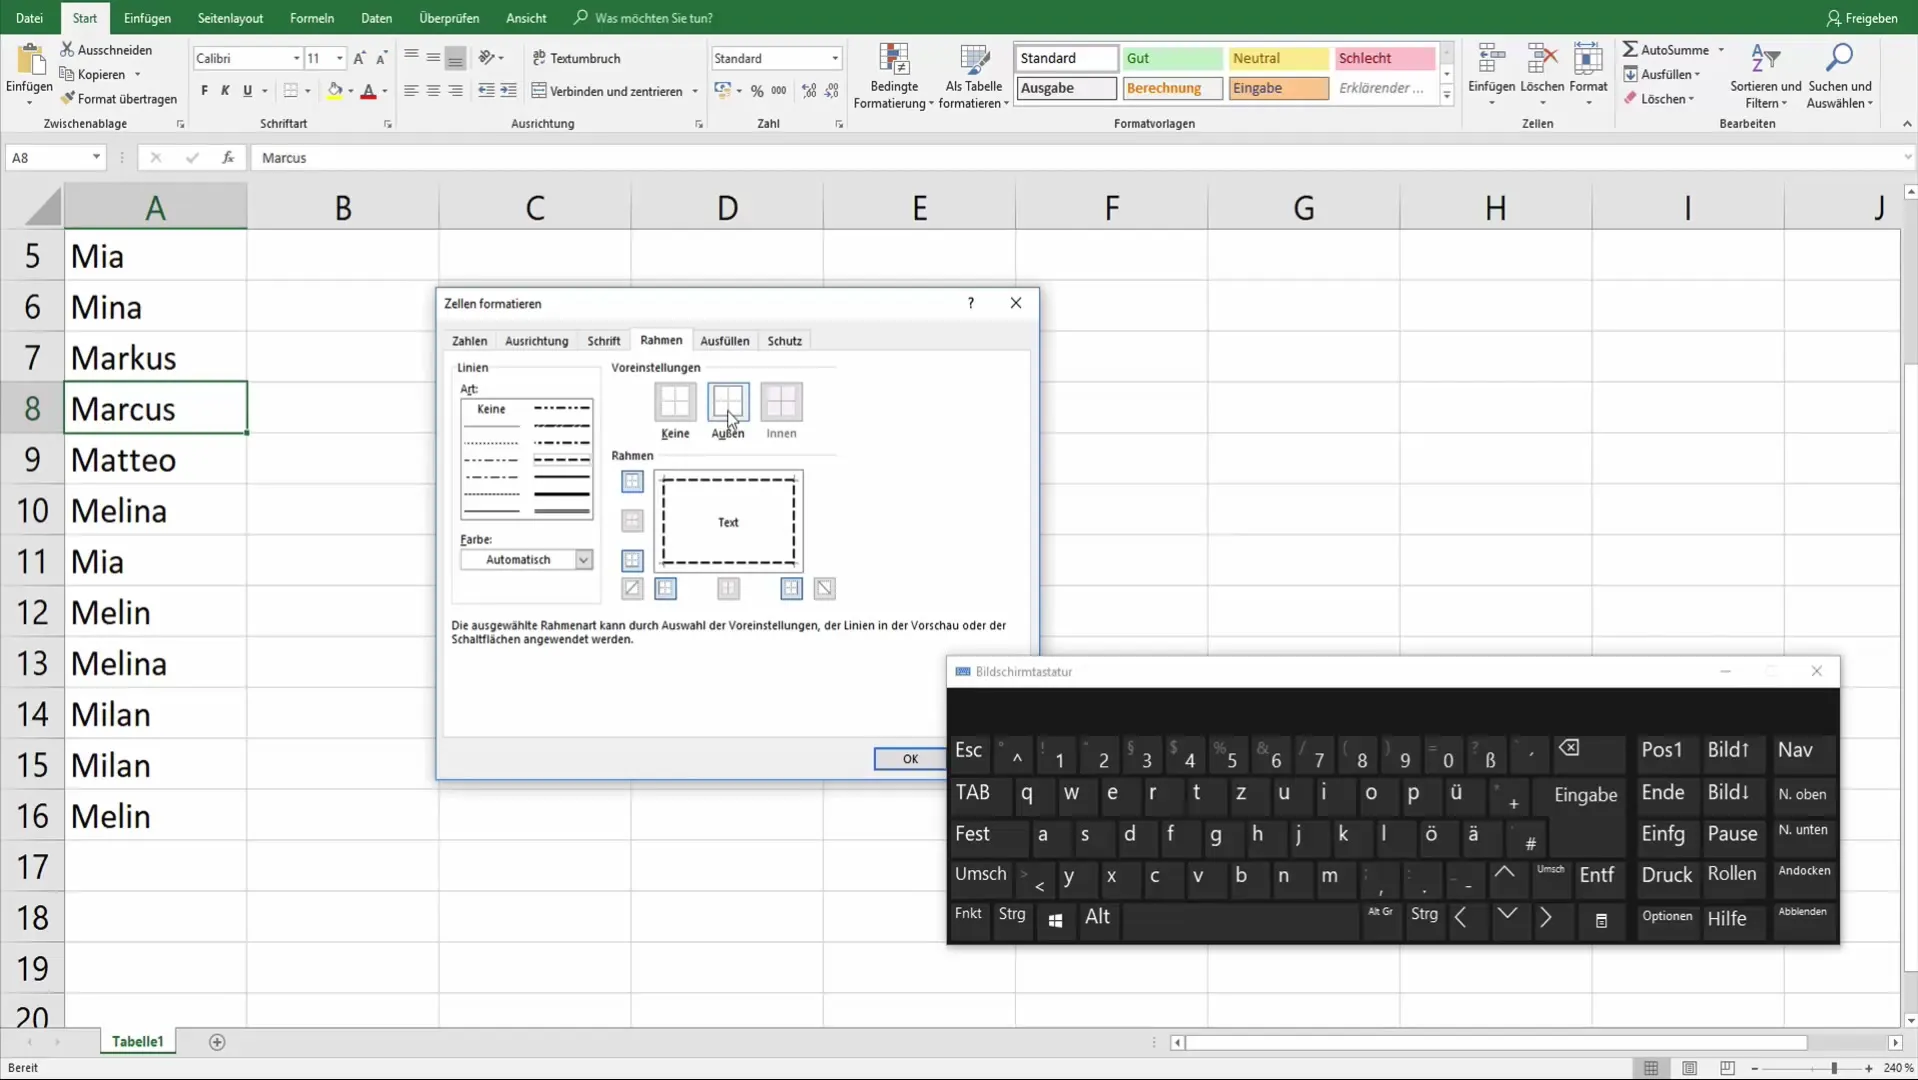
By choosing different line types, you can give your cells a unique appearance. Experiment with options such as dashed or thick lines to achieve a specific effect. To adjust the line color, select the corresponding color, for example, red, to draw more attention.
Step 5: Refine Line Thickness and Style
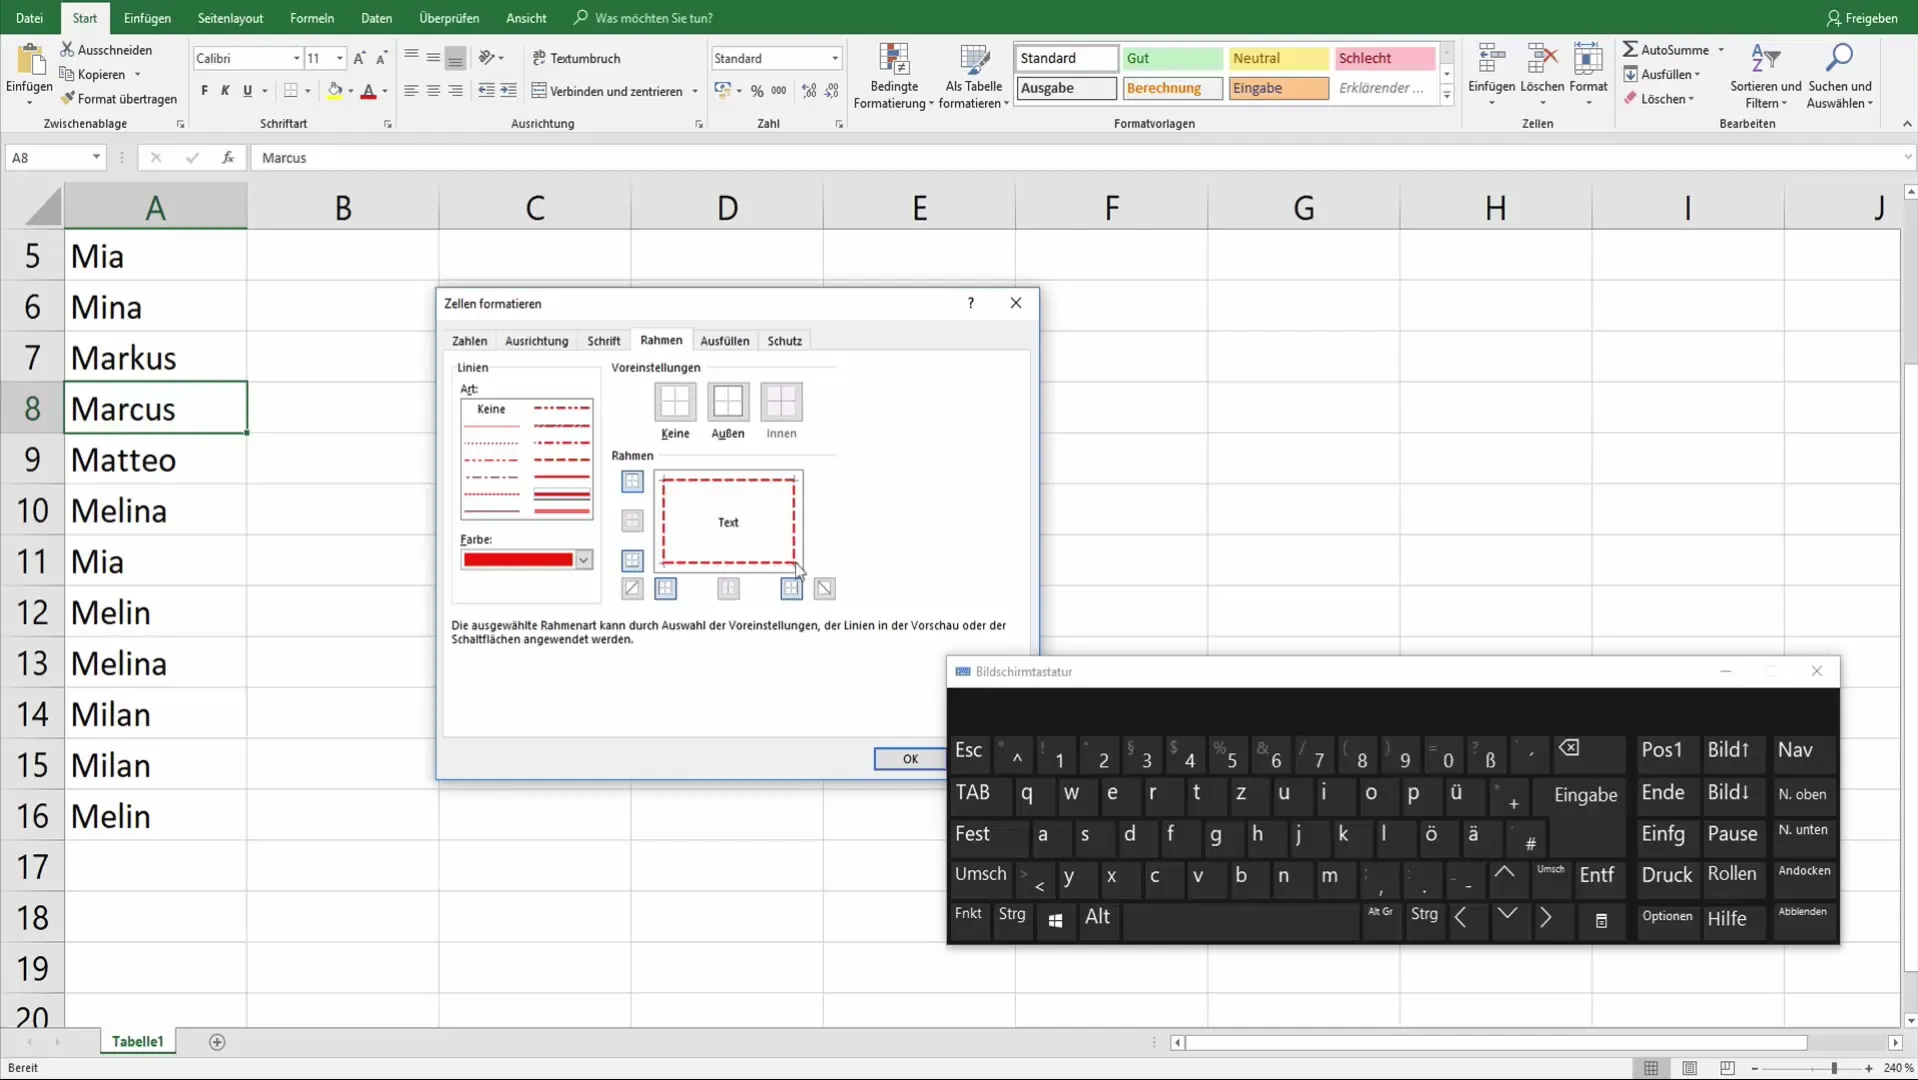
If you have specific requirements, you can also set the line thickness and style specifically for each side of your cell. For instance, choose a thick line for the bottom and a dashed line for the top by targeting the respective options in the formatting menu.
Step 6: Work with Strikethroughs
Another powerful tool is the strikethrough option. If necessary, you can represent a strikethrough text in the cell by activating the corresponding function. This can be useful to mark which values are no longer relevant.
Step 7: Confirm Changes and Review
Once you are satisfied with your adjustments, click "OK" to apply the changes. Your cell should now display the lines you have set. Correctly review the appearance of your cells by using Excel's preview or print mode to ensure everything looks proper.

Step 8: Summarize and Apply
The adjustments you have made can be utilized optimally for presentation or printing. You can now apply the techniques learned so far to create a consistent and attractive table design. Continue experimenting with the options to find your personal style.

Summary
In this tutorial, you have learned how to adjust line settings in Excel for cells. You now know the steps from opening the formatting menu to individually customizing lines in cells. With these skills, you can create Excel documents that are both informative and visually appealing.
Frequently Asked Questions
How do I add lines in Excel cells?You can add lines by selecting the cell, right-clicking on "Format Cells", and using the options in the "Border" tab.
Can I apply different line styles and colors?Yes, you can select different line styles and colors to customize your cells.
What should I do if I want to format multiple cells at once?Simply select the desired cells before opening the context menu and activate the inner border options in the formatting window.


