Now it should be about letting this ball leave its points or the movement path so that it becomes clear that this is really about animation. It should be clear that the ball has to be moved from A to B and that the animator has thought carefully about how. It should be suggested that everything was animated by hand. That's why we want to show all the key poses.
Step 1
We can create the path using the animate paint effect.
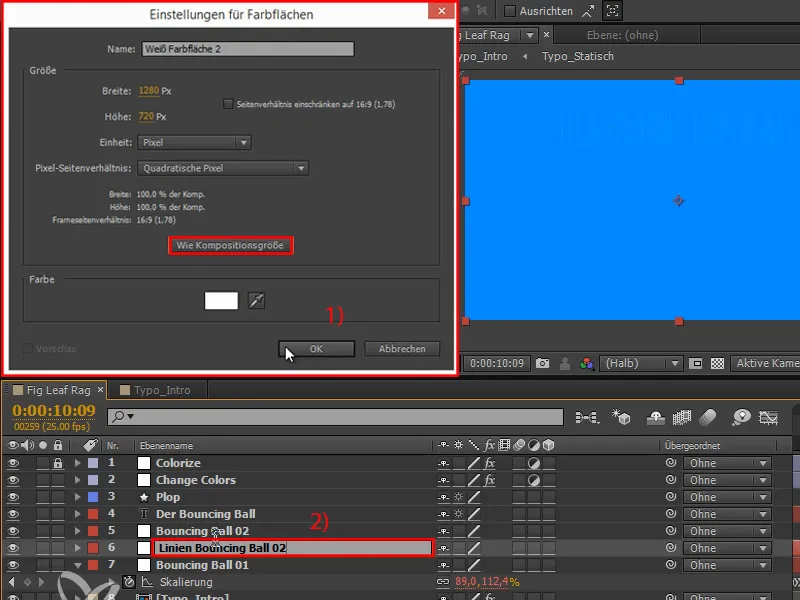
But first we need to create a new color area. We make it as composition size (1) and place it under the "Bouncing Ball 02" layer (2).
This will change the color of the layer from white to blue because we have made Change Colors.
I also rename the layer to "Lines Bouncing Ball 02".
Step 2
Right-click to add an effect: Generate>Animate Painting.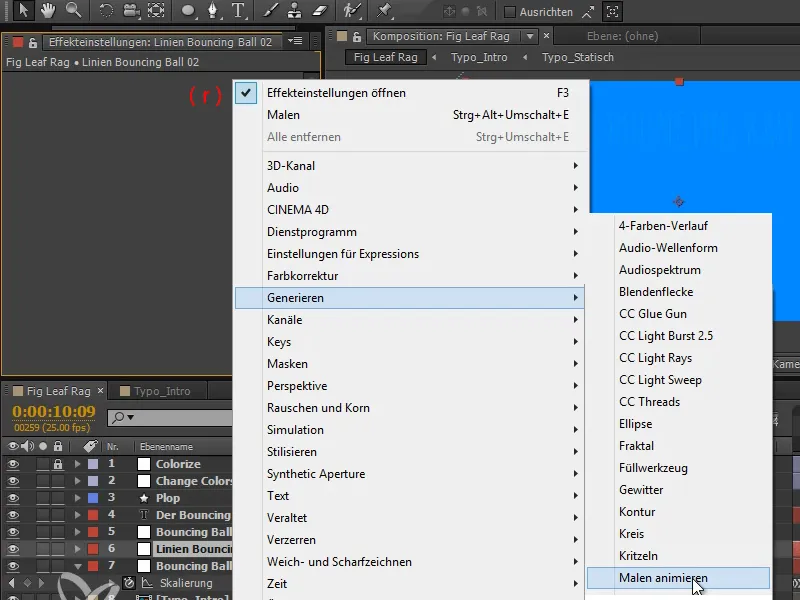
Step 3
Set the painting style to Transparent.
Now we have a position that we can animate and between which dots are painted when we move the ball from left to right. So that we can see this better, we set the width of the dots slightly larger.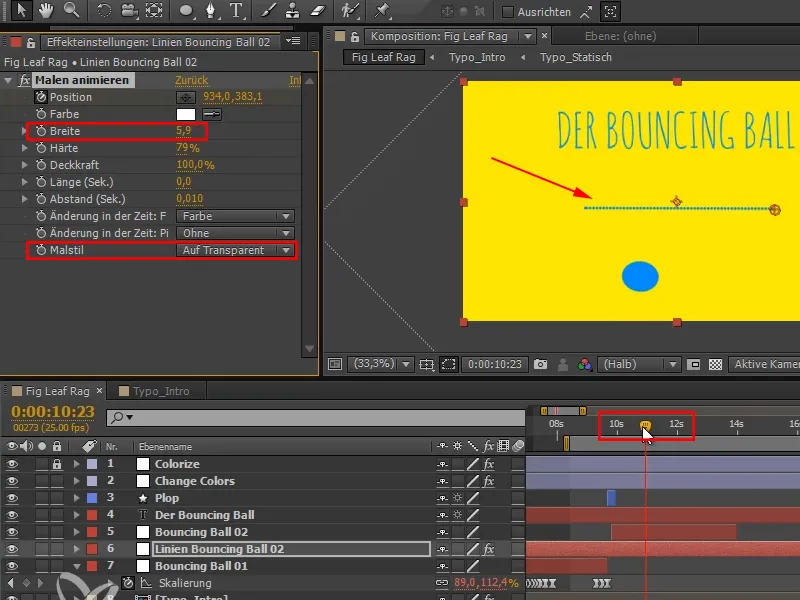
Step 4
The problem at the moment is that the positions of the "Bouncing Ball 02" are separate - and the positions of the "Bouncing Ball 02 Lines" are together again.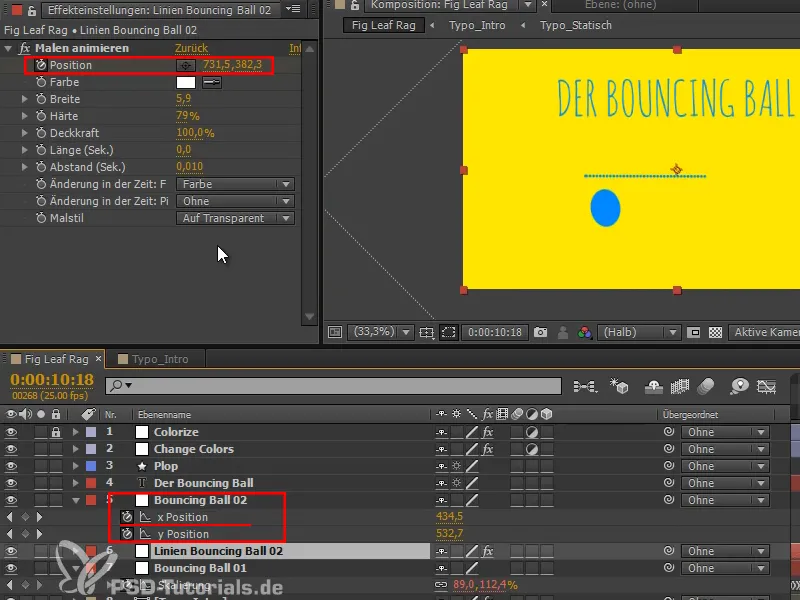
But what happens if we move the layer?
Step 5
I want to pin an effect to another layer. And this works with the most useful expression After Effects has to offer. I can really recommend it to you when it comes to connecting effect positions or points to layer positions: The toComp expression.
This expression takes a layer and converts its coordinates into the composition coordinates: Top left is 0, 0 and bottom right is 1280, 720, so we go 720 pixels down and 1280 pixels across.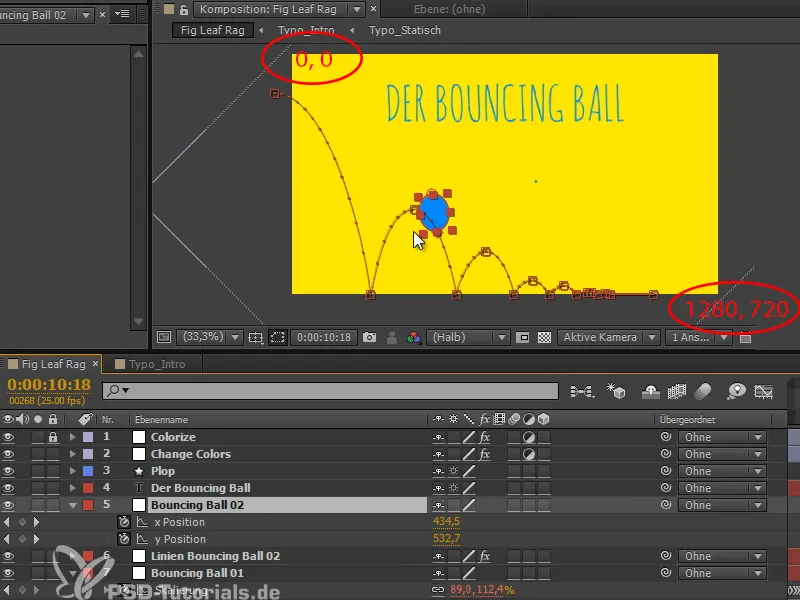
This conversion works for all layers, regardless of whether they are subordinate in any way, and even if it is a 3D layer.
Step 6
So After Effects converts that into these screen composition coordinates and those happen to be the coordinates that our effect needs here.
That means we Alt-clickon it, write layer "e = " and then we select the layer "Bouncing Ball 02".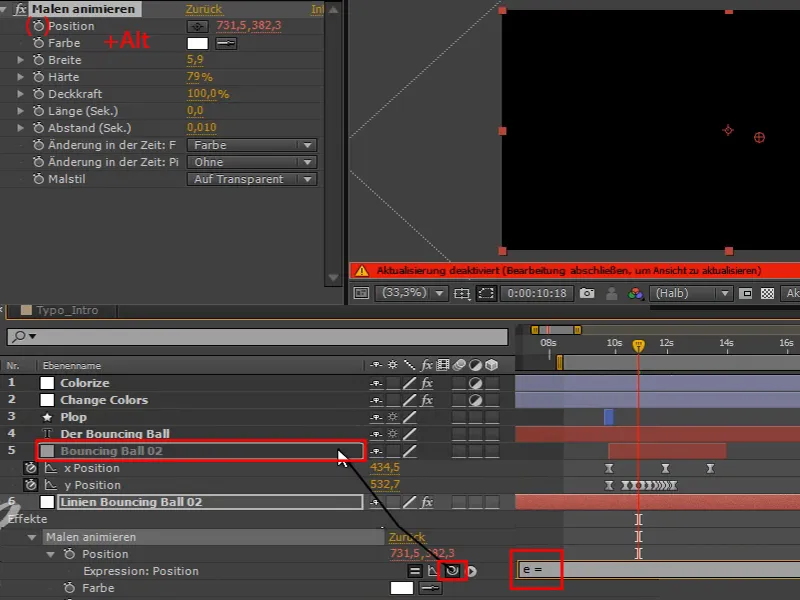
This is an expression error, so I just click OK.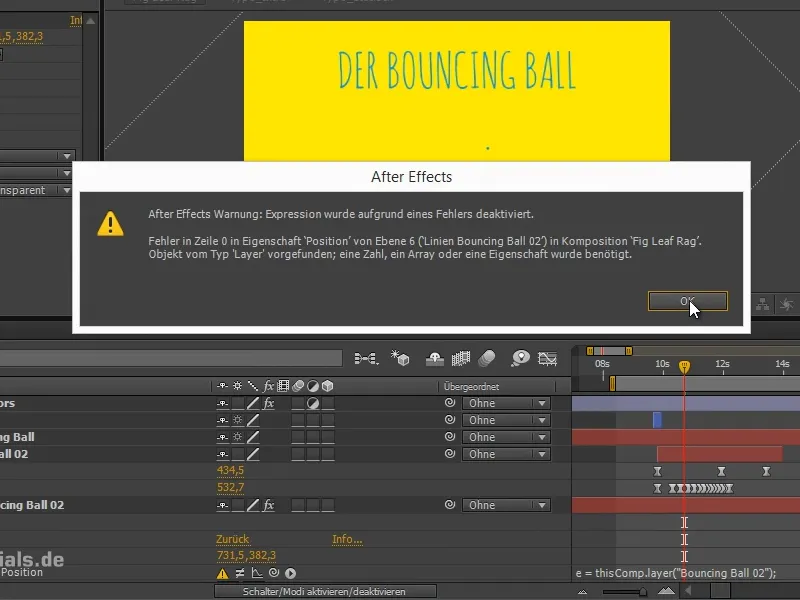
Step 7
I would like to have a dimension transformation of this layer.
We go into the transformation space of the layer by writing "toComp" behind it.
Then we want to convert a point, the anchor point of the plane. So we write "e.anchorPoint" in brackets.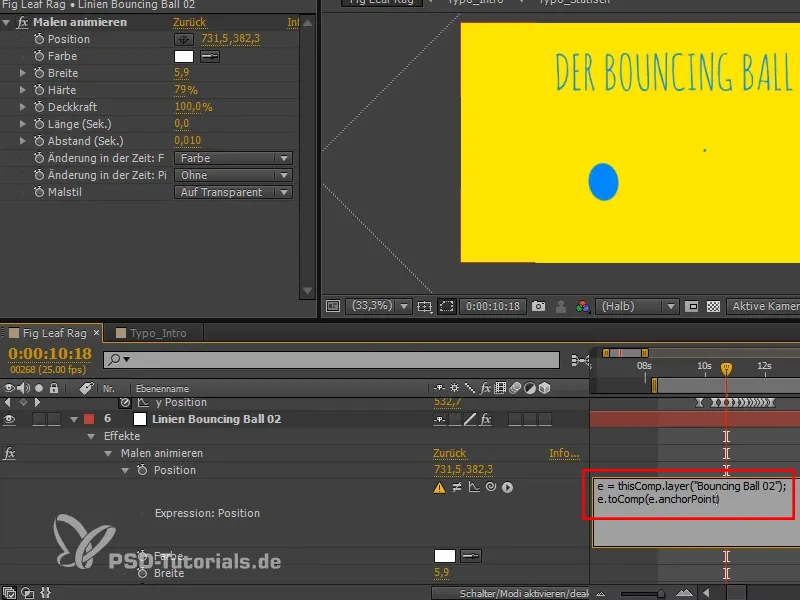
Step 8
And that works really well.
Our anchor point of the plane is converted into the composition space using this plane and this gives us these points.
However, there are still too many points for me, so we can adjust the time interval at which the points are drawn by changing the distance (sec.).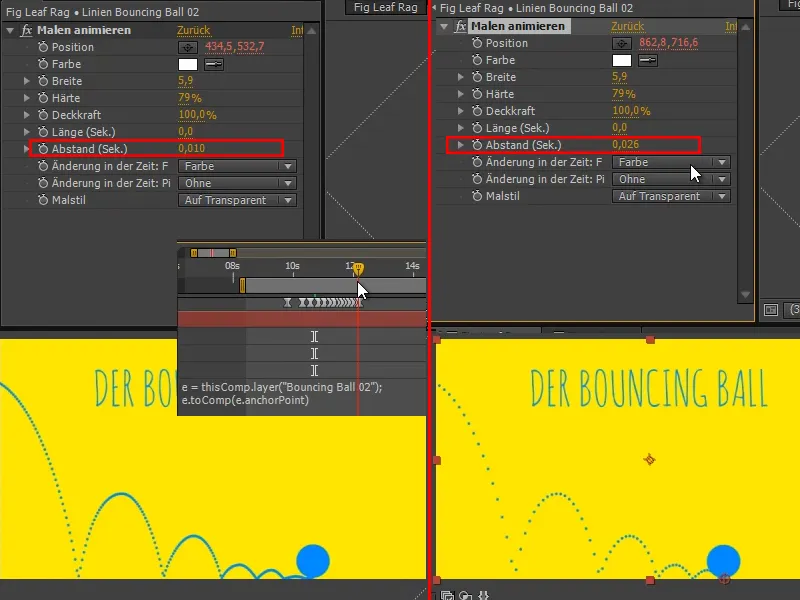
Step 9
I like this quite a lot, I'll change it a bit and make the individual points a bit bigger.
You could also enter "[0,0,0]" here, which would be the top corner of the ball. If I were to enter "[50,50,0]", that would be exactly the middle, for example..webp?tutkfid=70740)
That would also be possible, but we want the arcs to be nicely on the ground, so we leave the setting at "(e.anchorPoint)".
Step 10
The text should now also change when the color changes. This means that it should no longer say "The Bouncing Ball", but a different text.
We rename the "Change Colors" layer to "Change Colors 01" and duplicate it. We call this copy "Change Colors 01 - MASK 01". We can number the mask as we need several masks.
As masks do not work in conjunction with adjustment layers, I will remove the adjustment layer symbol.
We don't need the invert here either, so let's delete it.
We just want this mask, just the same keyframes at the same time from the mask strip..webp?tutkfid=70741)
Step 11
Then I click on the "Bouncing Ball" layer and click on Activate/Deactivate switch/modes again.
Now I set the Moving mask to Inverted alpha mask - similar to before, when we drew the strokes and made the text appear.
Then the bouncing ball is only where the mask is not. As soon as the mask is through, the bouncing ball can also be ended..webp?tutkfid=70742)
Step 12
Always remember to crop the layers. Here again - I accidentally pressed the Windows key and it crept in. Alt+Ö to crop, Alt+Ä to set the end.
Now it fits again.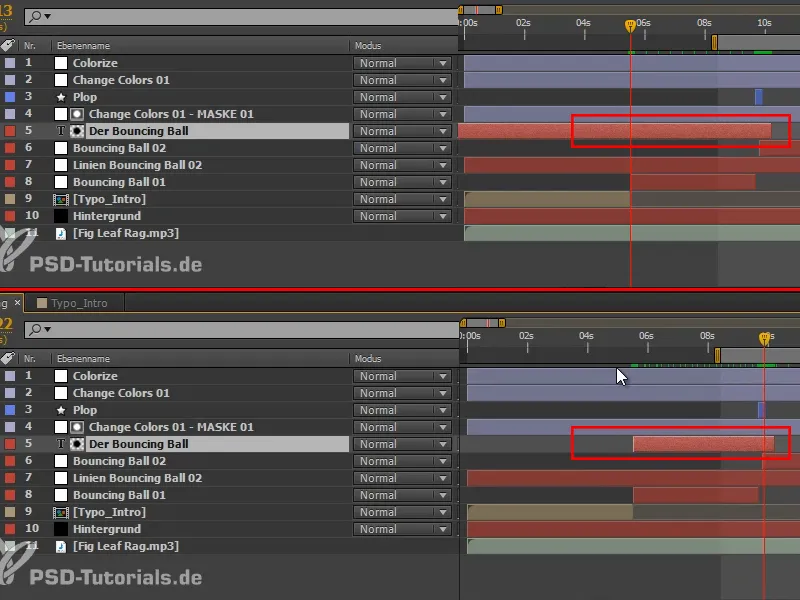
Why do I crop the layers at all? It's not necessarily After Effects performance, because the program already understands that it doesn't need to render what's behind it. But if I have to change something on the layer and it goes over the entire composition period, then I run into problems. Let's try the model experiment:
I make a RAM preview with a layer that spans the entire composition period. At first everything looks good, but at one point I would like the spacing to be slightly larger. But if I change it now - bang - the whole RAM preview is gone. That can be very, very annoying.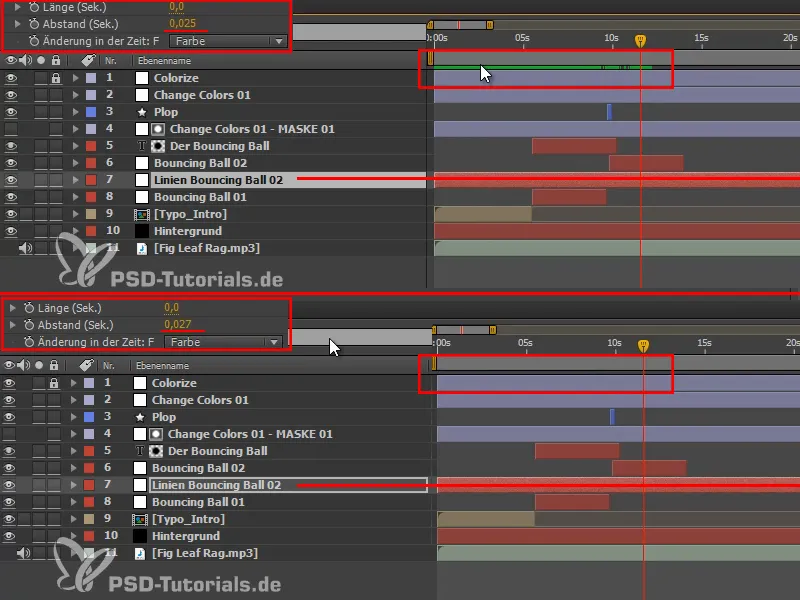
And it's different when the layers are cropped. If I have a RAM preview and now change the spacing, the RAM preview remains in the front area and only disappears from the start of the current layer. The whole thing does not have to be recalculated.
This is the real advantage of cropping the layers.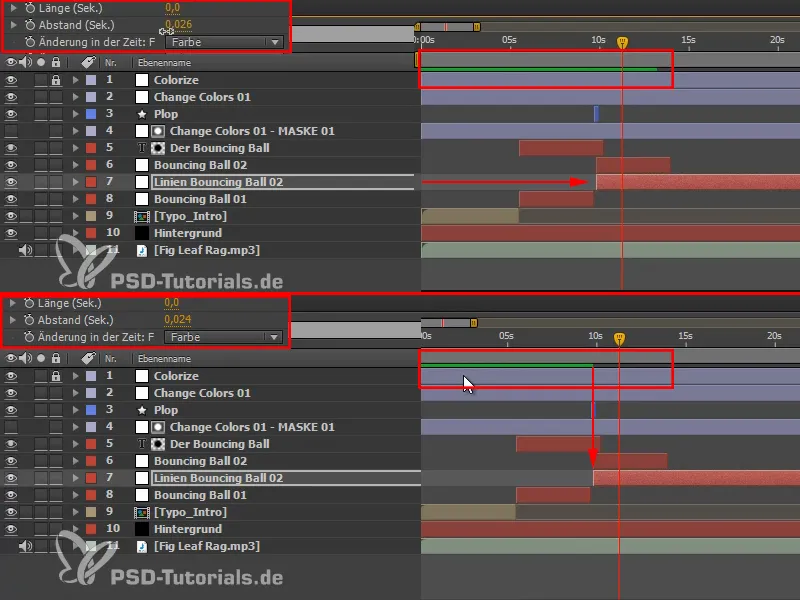
The layers should also be cropped again at these two points in order to maintain an overview.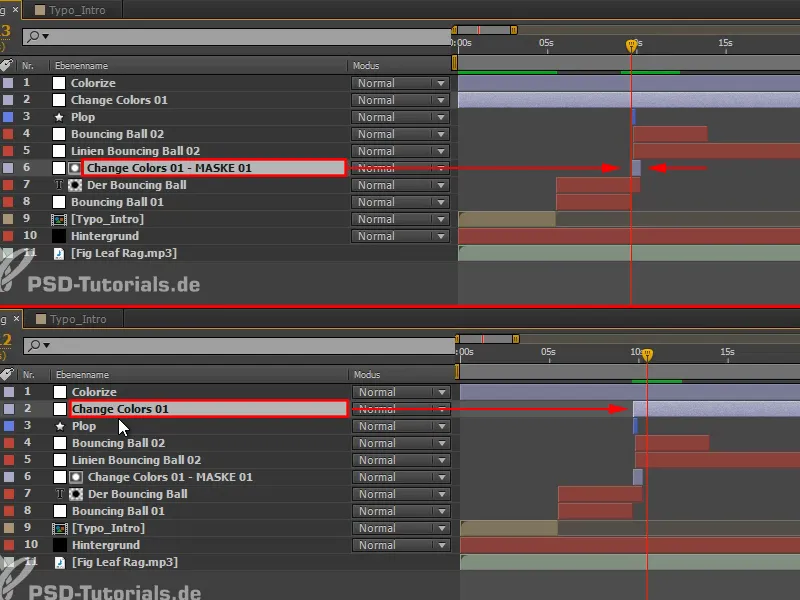
Step 13
At the point where the ball jumps back in, we still need the second text.
In other words, we duplicate the two layers "Change Colors 01 - MASK 01" and "The Bouncing Ball" and move the duplicates to the top (1).
Then we move the adjustment layer with the color strip to the right place (2) and extend it (3) to the end of the composition; we will then crop it more precisely later.
We set the copy of the "Bouncing Ball" layer to alpha channel and then it becomes "THE FIRST AND MOST IMPORTANT EXERCISE" (4).
I make the text field a little smaller and add more line spacing, and raise the whole thing further.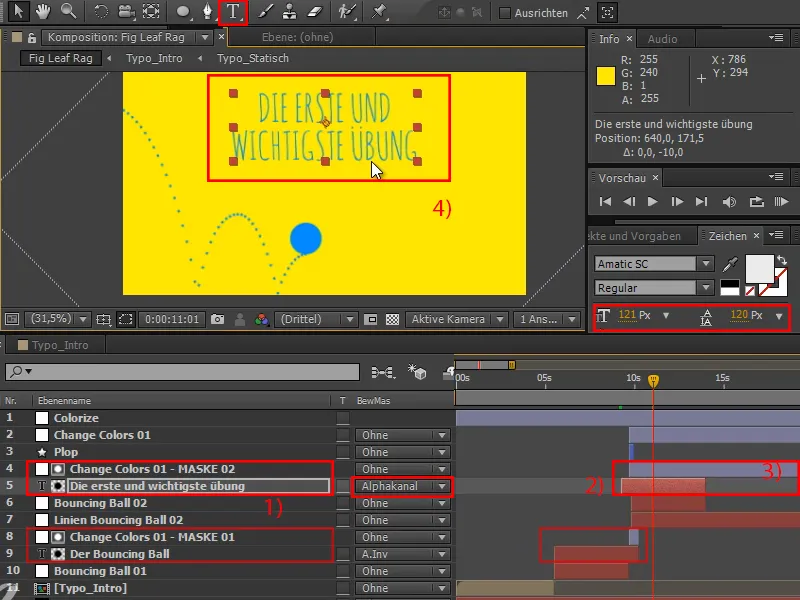
Step 14
Let's do another RAM preview - and suddenly this whole stripe and color change thing makes sense because it structures the video. It separates the questioning and explanatory positions and thus introduces a new chapter. And it also looks good, especially because it happens in the middle of the movement and doesn't stop the movement at all.
Next, this ball should not burst here - we can delete that part right away - but this ball should tip down to the right.
We don't have a second plop for this either. We move the "Plop" layer directly to "Bouncing Ball 01".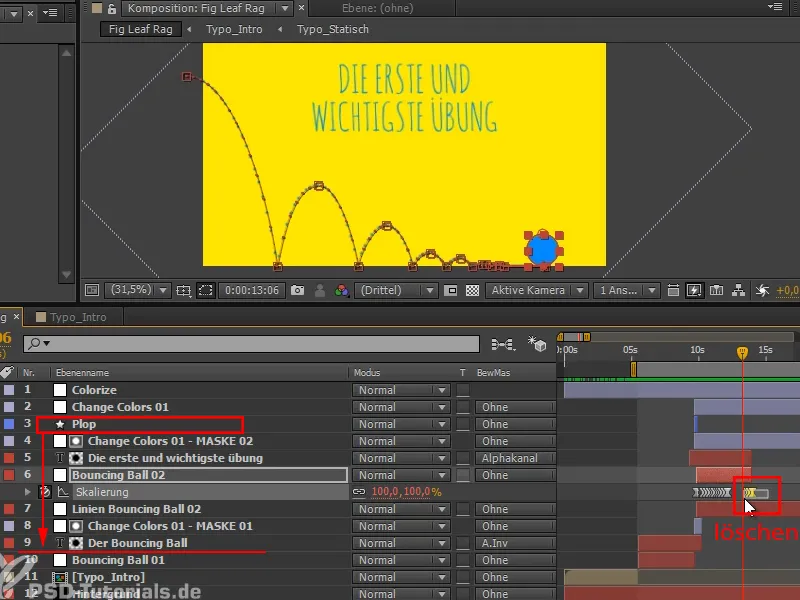
And then we'll see you again in the next part of the tutorial series, when it's about making the ball tip down here: "Bouncing ball - overlaying animations".
