This tutorial is about retrofitting 3D balls into a film sequence. However, the balls should not remain static in the scene, but roll down the filmed alley. Just take a look at the embedded video (not visible in the PDF view).
Automatic reconstruction
As you would expect from Cinema 4D, even complex tasks such as reconstructing the camera position, orientation and focal length from a film sequence are largely automatic and convenient. To do this, we call up the Full Reconstruction command from the Motion Tracker menu.
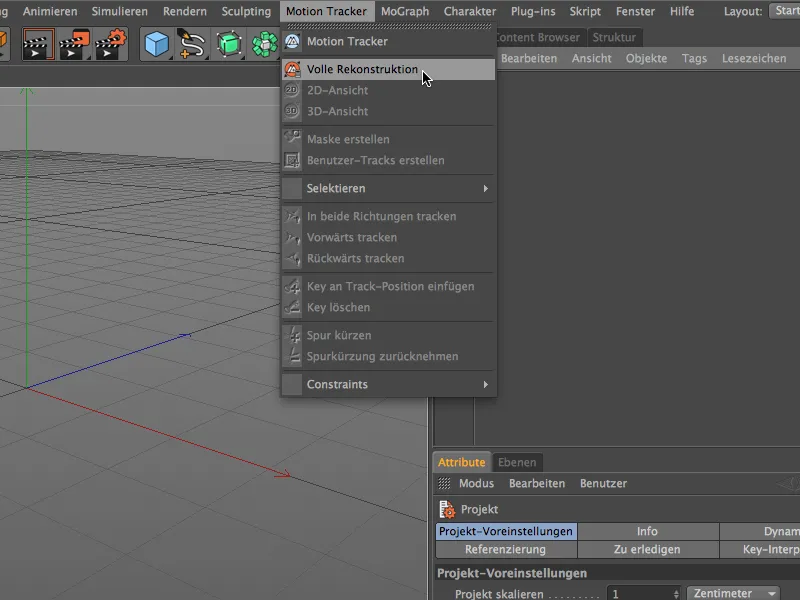
We are now guided step by step through the motion tracking workflow. First, we specify the film sequence for the reconstruction. For our joint tutorial, this is the movie "Gasse.mov" from the package with the working files.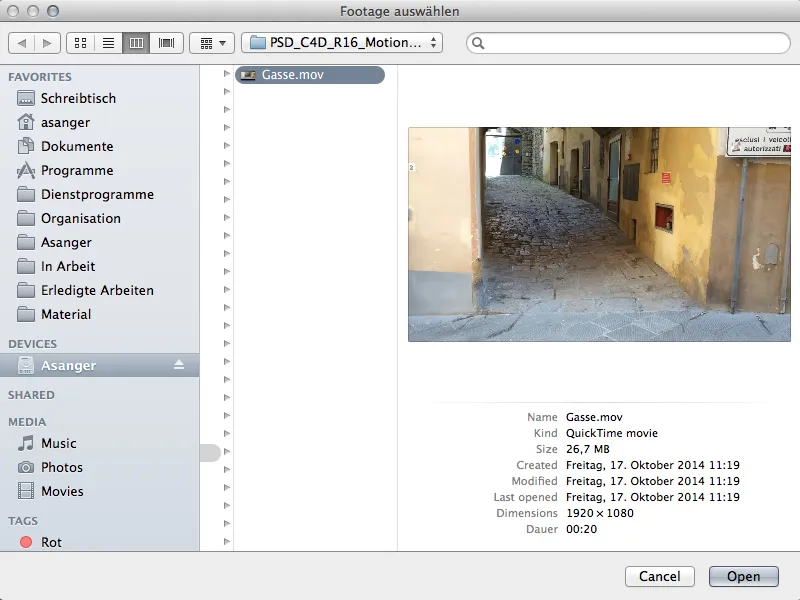
Depending on the size and length of the film sequence - and of course the computer performance - it will take some time until our footage is loaded, analyzed, tracked and reconstructed. At least the status bar at the bottom left keeps us up to date.
As soon as the message 3D reconstruction completed appears there, the motion tracker has done its job. The camera data has been successfully reconstructed from the film sequence.
If we take a look at the 3D editor, we see an animated camera placed on the zero point and a colored cloud of points, the so-called features. These features are tracking points that are saved as zero objects and used to reconstruct the camera data. Green features signaled a good quality of the tracks, while red tracks were less helpful for reading out the camera information. Incidentally, most unusable tracks or features are filtered out in advance due to an automatic process.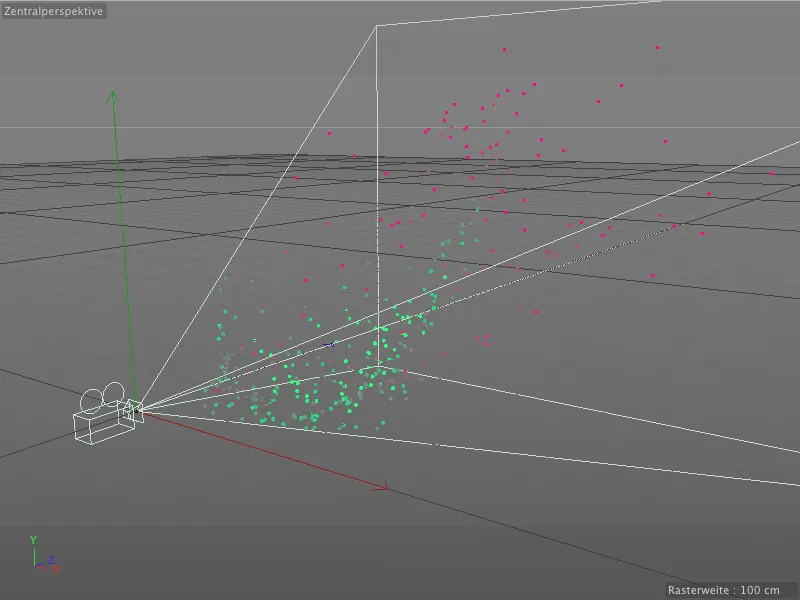
Take a look at the Object Manager for comparison. The parent Motion Tracker objectcontains the most important commands and settings for tracking and reconstruction. The reconstructed camera and the aforementioned null objects are created as sub-objects in their own Auto Features group.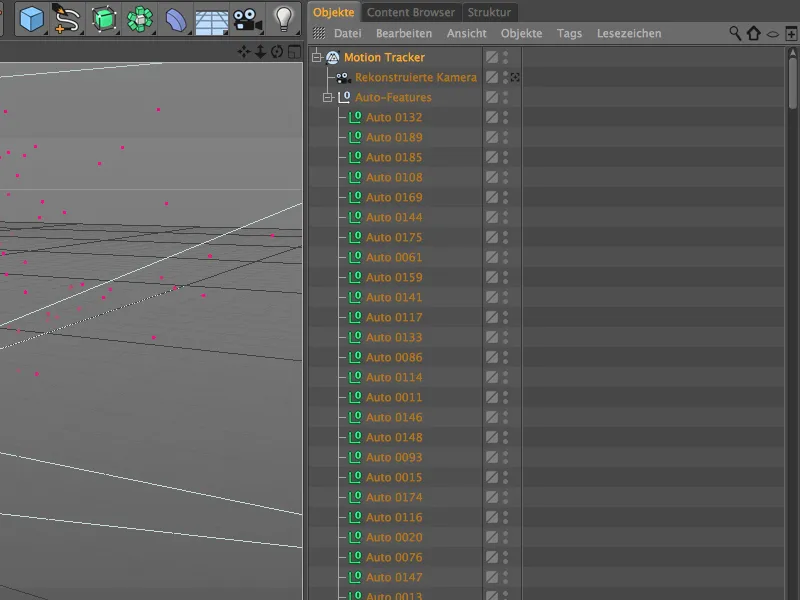
The settings dialog of the Motion Tracker objectis divided into the areas Footage, 2D Tracking and Reconstruction. In principle, these are the three steps of the Motion Tracking workflow that were carried out automatically. In the Footage area, the film sequence we have selected is stored with all the important information.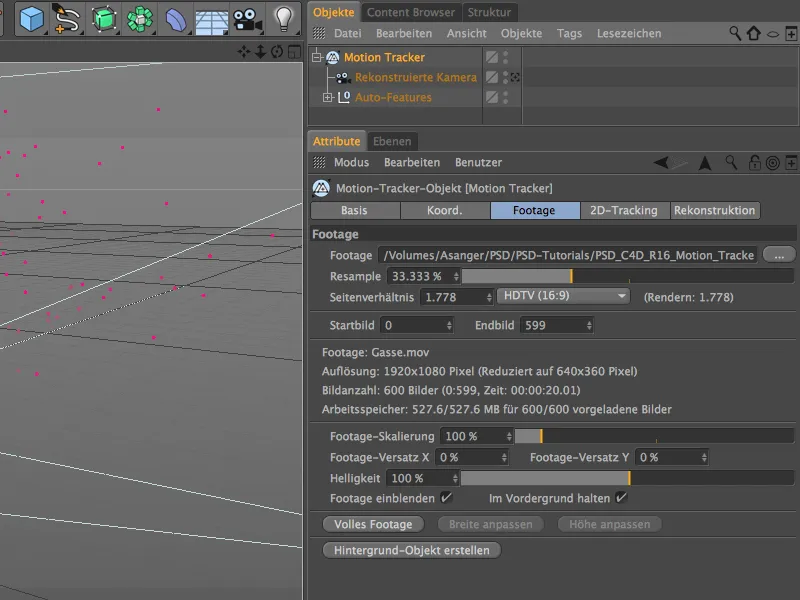
The 2D tracking area shows us the settings used for the automatic tracking that has already been completed. We will go into manual tracking in a moment, but first let's take a look at the film sequence together with the tracking points in the editor view. To do this, we simply switch the reconstructed camera to active by clicking on the camera icon in the Object Manager.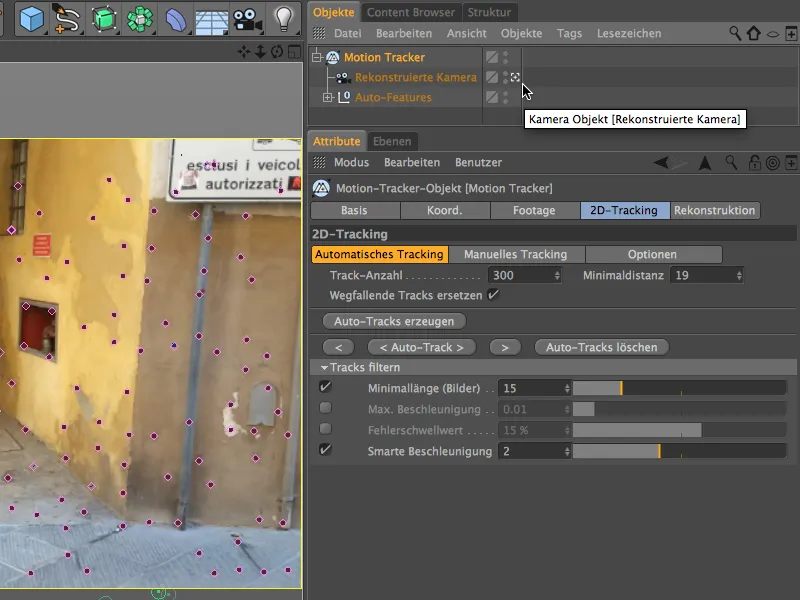
Manual tracking
During the automatic tracking run, the motion tracker has already found many prominent points. On the other hand, we will certainly also notice places in the film sequence that we ourselves consider to be suitable or helpful for tracking. Especially for the subsequent calibration or integration of 3D elements, it is advisable to have additional tracks or features reconstructed by manual tracking.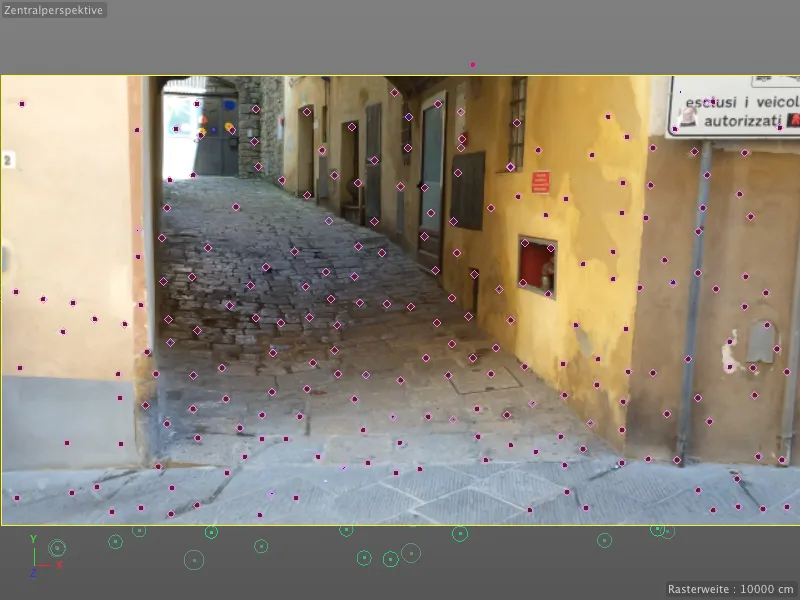
When we start the film sequence by clicking on the play button, we can follow the path of the tracking points. There are no outliers here that we would have to delete because they behave completely differently and would therefore be disruptive.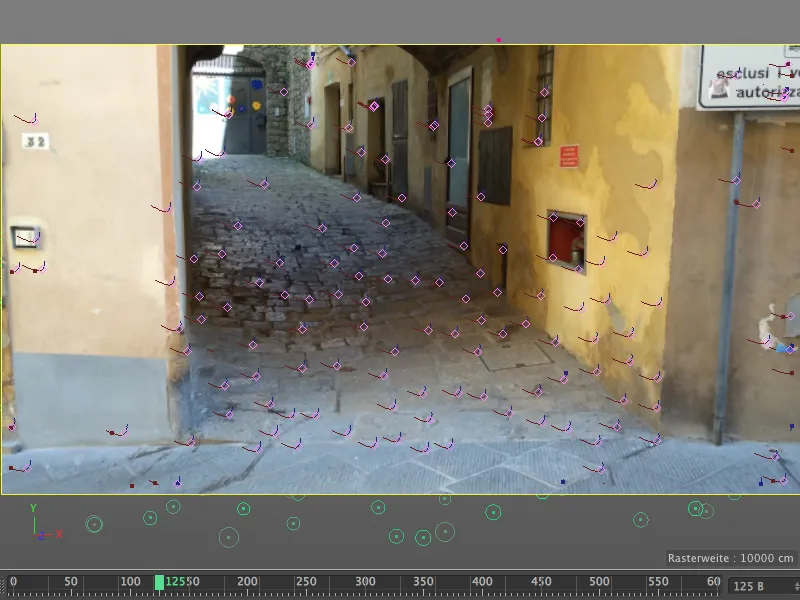
Instead, we set the time slider back to the beginning and integrate some manual tracks via the editor. To do this, we hold down the Ctrl key and click on the desired position in the film sequence.
An orange framed field with two squares inside each other appears. In the middle is a frame for the sample size, the outer frame marks the search size. We can adjust these sizes by clicking on the handles of the orange frames at the bottom right. To move the field, simply grab it in the center and move it to the desired position.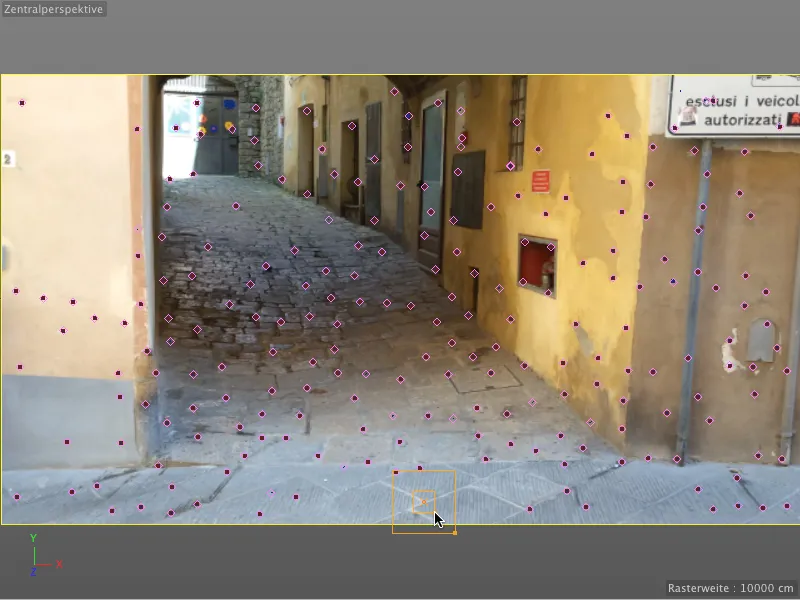
High-contrast transitions, such as here at the corners of the walled-in box, are always very useful tracking points.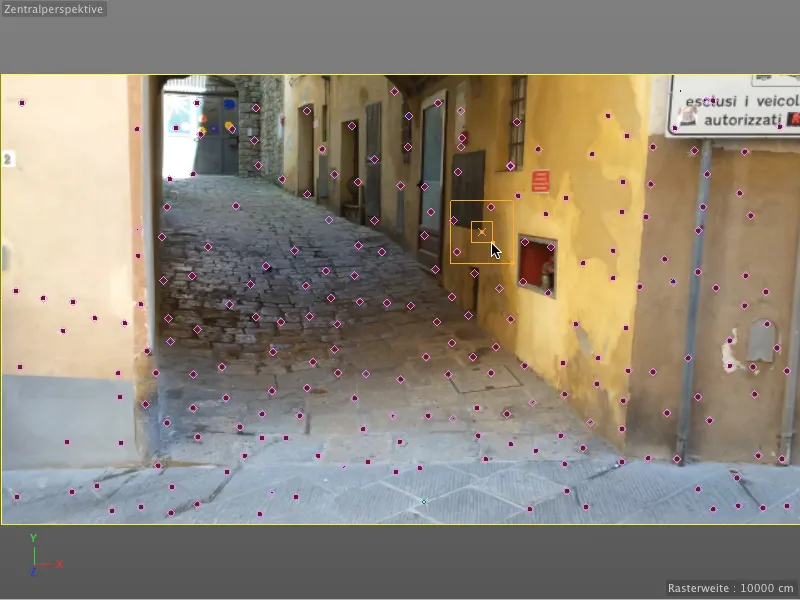
Tracking points can also be helpful for the later integration or modeling of 3D elements. For example, I looked for the corner point of the rear entrance to the house. By holding down the Alt key at the same time, we can enlarge the section to make positioning easier.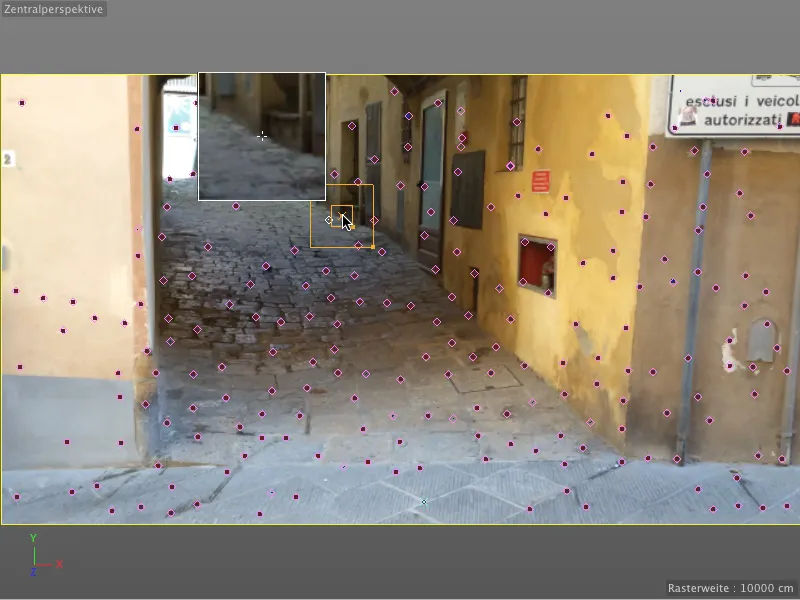
Manually set tracking points are marked as turquoise crosses in the editor. Among other things, I have set a few more tracking points, especially along the top of the alley, to make it easier to recreate the 3D object later.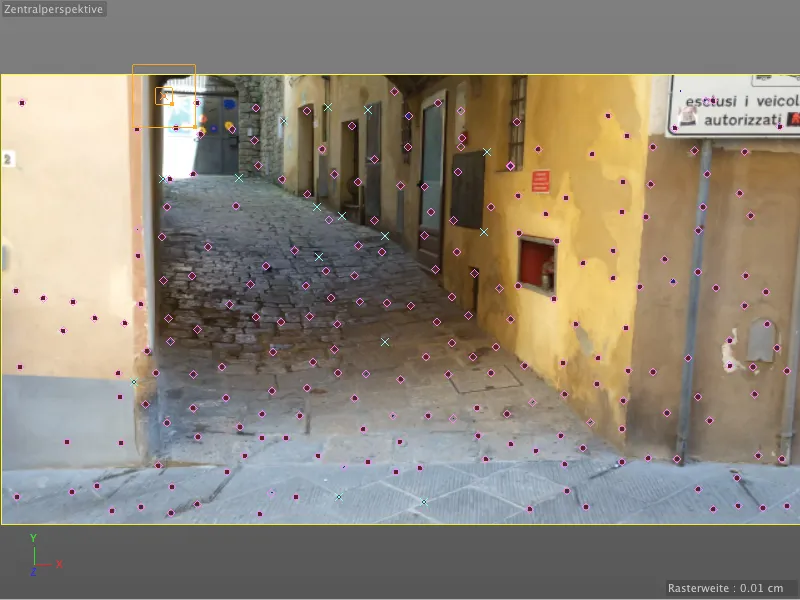
To subsequently calculate these manually set tracking points and convert them into features, we open the settings dialog of the motion tracker objectin the 2D tracking area and first look at the options. Here we see the default settings for the pattern and search size of the tracks as well as some additional options. Using the Extrapolate search position option, we can help a little by moving the search size range forward a little in the expected direction of movement.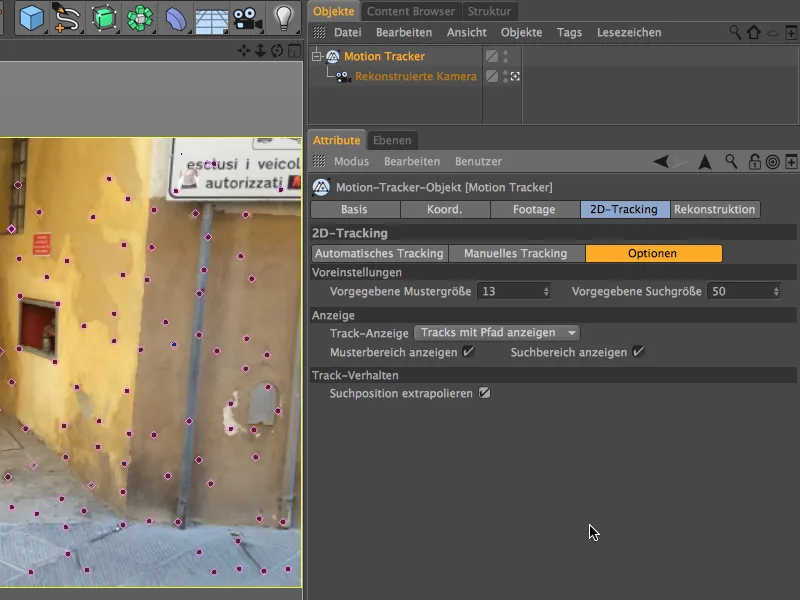
Now we switch to the Manual tracking page. In the Tracks field, we see a list of all the tracking points we have created. If none of the user tracks are selected, a click on the Manual tracking button causes all listed tracking points to be calculated, otherwise we can also select tracking points individually and track them separately.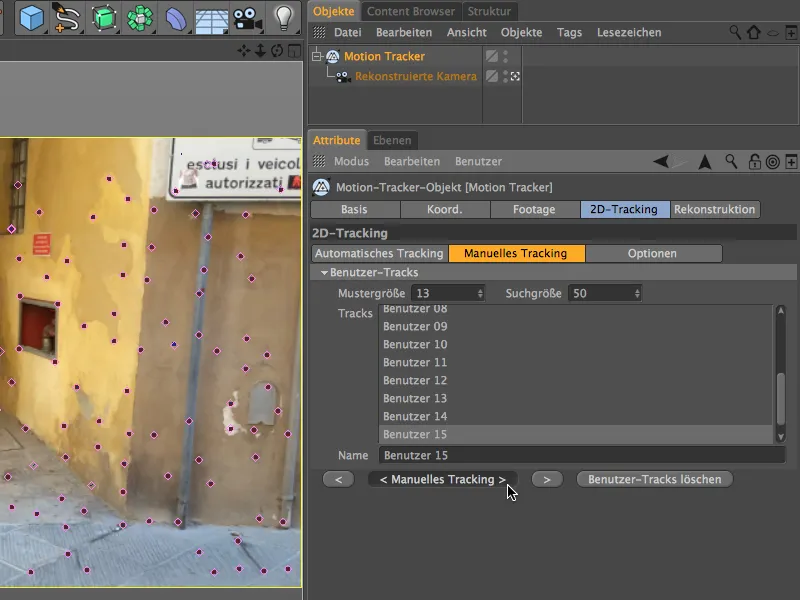
If you have observed the Object Manager carefully, you will have noticed that the subordinate auto tracks are no longer available after manual tracking.
We have to update the 3D reconstruction again after manual tracking has been completed. This is done using the 3D Reconstruction button in the Reconstruction section of the Motion Tracker settings dialog.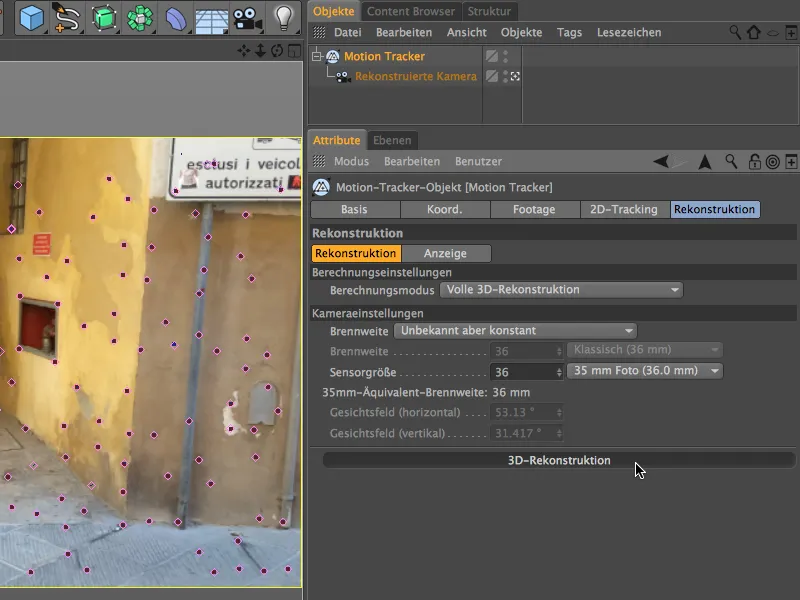
After the successful reconstruction, we will not only find our auto features again below the motion tracker object, but also the points that we have manually set and tracked as user features.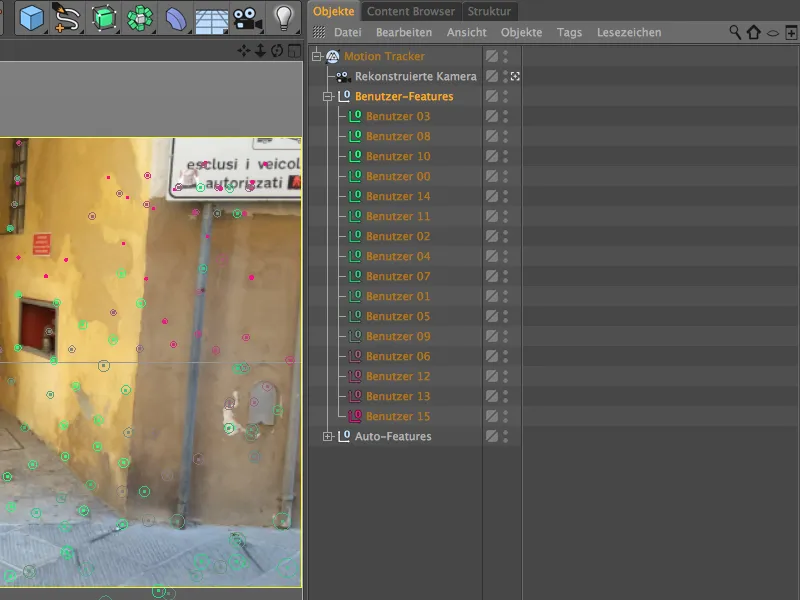
Calibrating the scene
As already mentioned immediately after the automatic reconstruction, our reconstructed camera is currently still at the position of the origin with a straight alignment to the tracked features. This is of course very impractical for orientation and positioning in the next steps. In addition, we need a correctly aligned scene for the subsequent animation. We therefore need to calibrate the scene, which is done using so-called constraint tags, which we can find in the Motion Tracker>Constraints menu.
Let's start by defining the origin of the scene; this is done using a position constraint.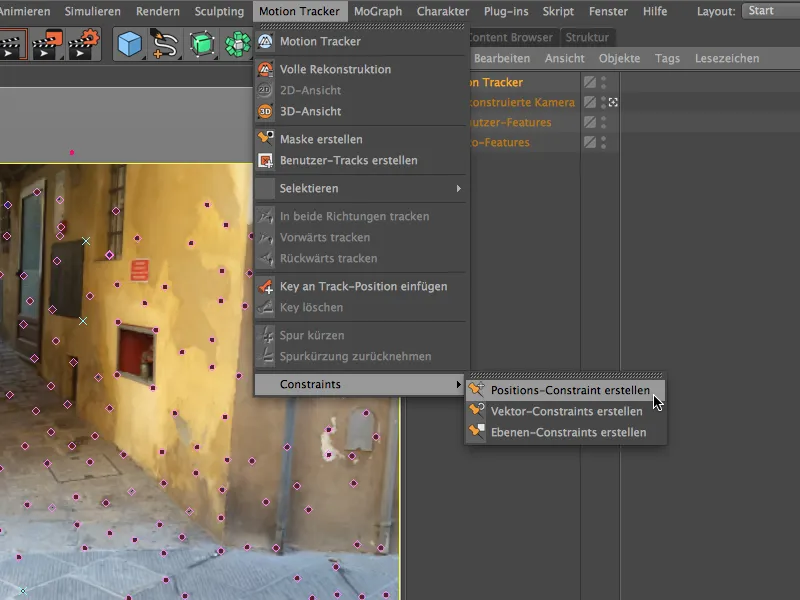
We can now use any tracked feature in our 3D view to define the origin. Once we have called up the Create position constraint command, all we have to do is click on the chosen tracking point. I have chosen the bottom left corner of the alley, it is exactly on the floor of the filmed scene.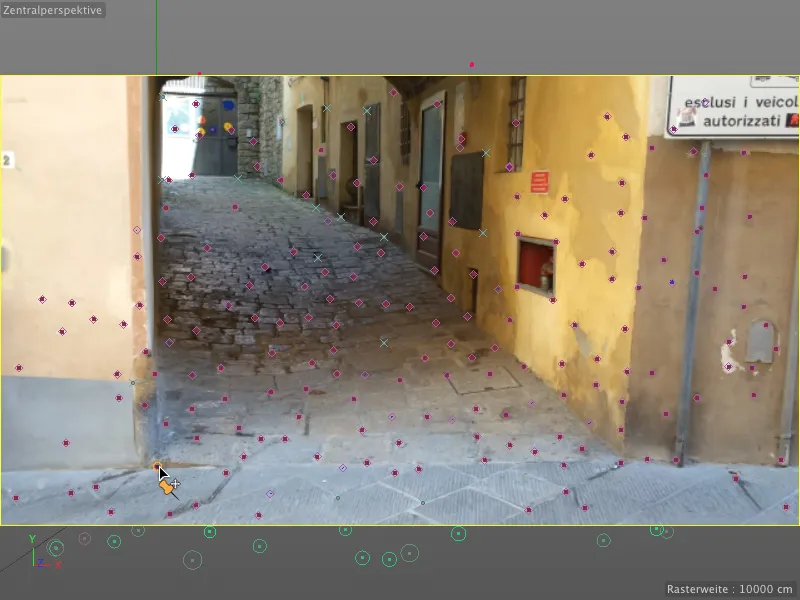
In the settings dialog of the position constraint tag, we can see which feature serves as the target for the constraint and can specify which position values should be applied there. As we want to set the origin here, we leave all values at 0.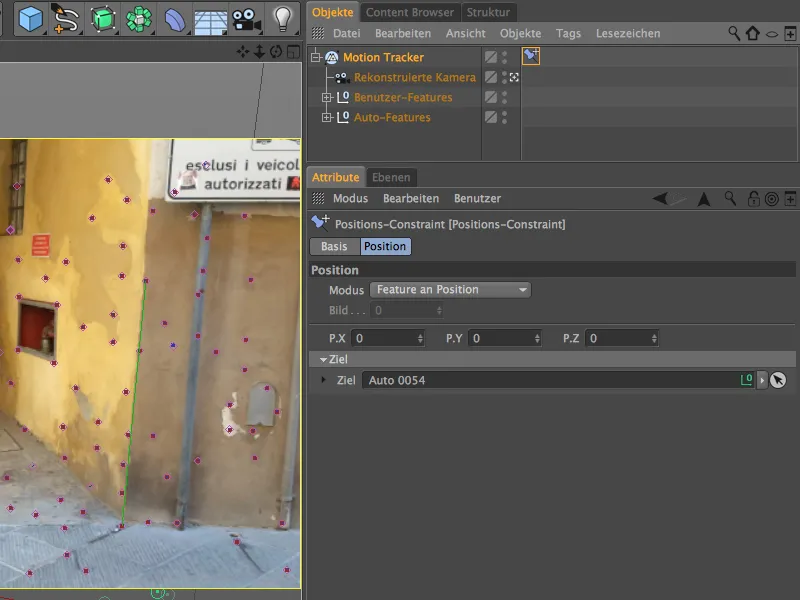
In order to set the camera orientation and thus the tracked features to be usable, we create a plane constraint using the command of the same name in the Motion Tracker menu.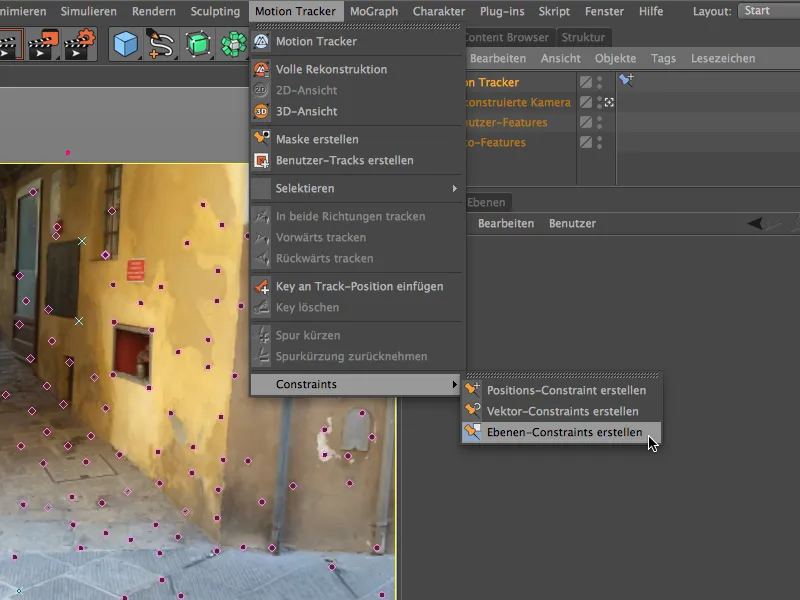
Using this tool, we now draw a triangle between the features that should be on the same plane in our scene. Anyone familiar with the small Italian alleyways will know that such flat areas are rather rare, but for our purposes, the three features shown are perfectly adequate for the plane constraint.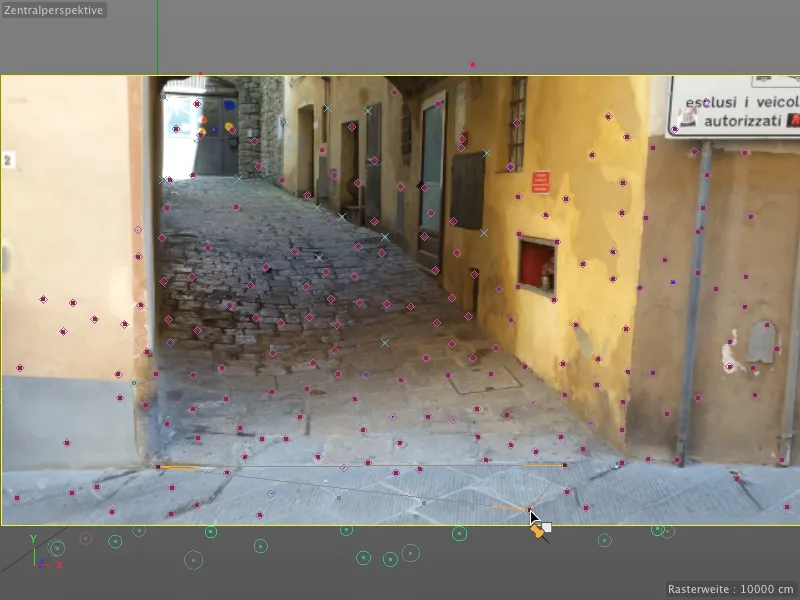
In the settings dialog of the plane constraint, we now have to specify the axis on which the plane we have drawn is perpendicular. In our case, this is the Y axis.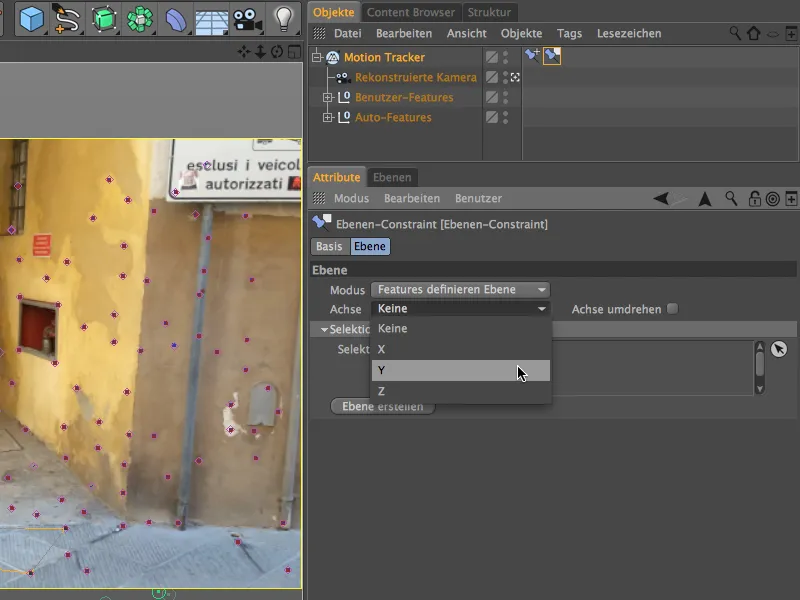
After this calibration step, let's take a look at the position of the reconstructed camera and the associated features in the 3D view. By clicking on the camera icon next to the camera in the Object Manager, we can quickly switch to the editor camera. As we can see, the camera is currently upside down, because apart from the origin and the axis of a world coordinate plane, we have not stored any other information.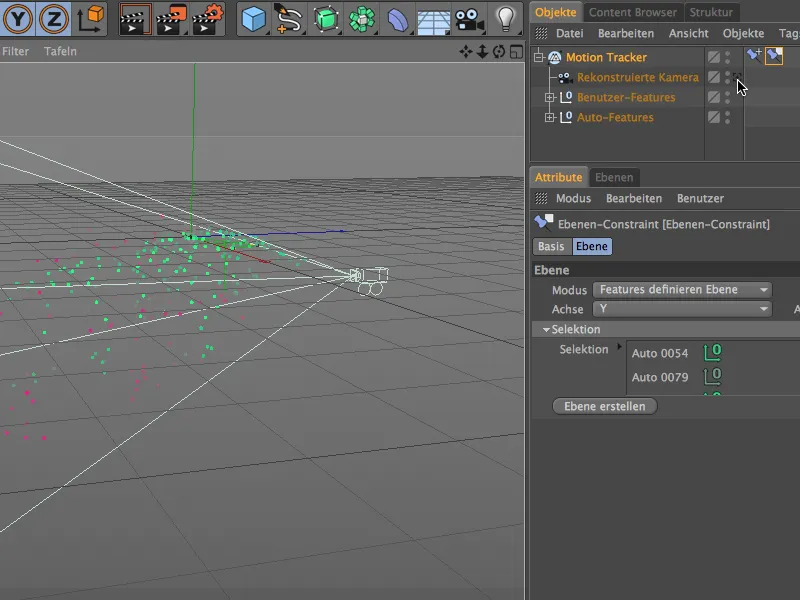
However, we can quickly rectify this error by activating the Flip axis option in the settings dialog of the layer constraint. The camera is now rotated correctly in the editor. Using the features, we can also trace the course of the alleyway from this perspective, which we can easily remodel in the next step.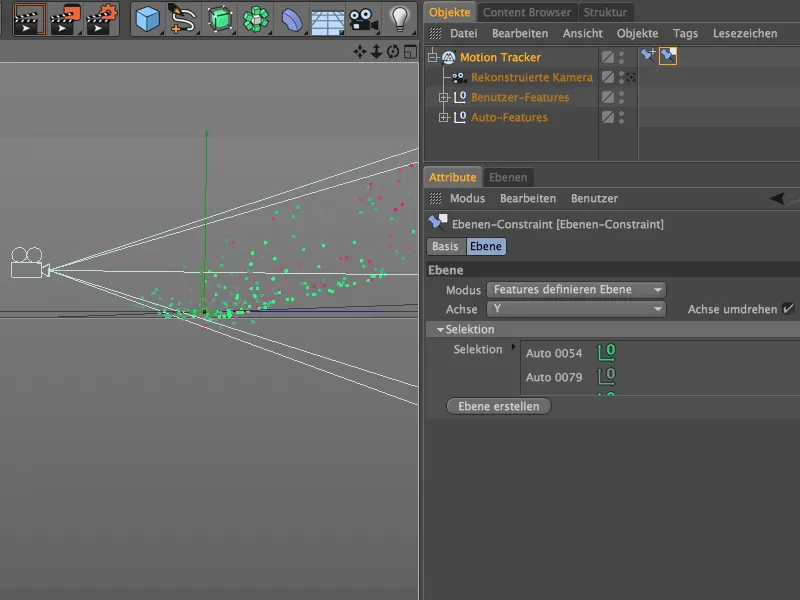
Recreating the tracked scene
With the polygon pen, Cinema 4D Release 16 offers a wonderful tool for remodeling a simple scene. Of course, we limit ourselves to the parts that are absolutely necessary; in the case of our alley, this would be the stone floor, the right side wall and a small section of the left wall so that we can hide the emitter of the spheres behind it.
To do this, we switch back to the view of the reconstructed camera via the camera symbol in the Object Manager, activate the Edit points mode via the Edit modes palette and call up the polygon pen from the Mesh>Create menu.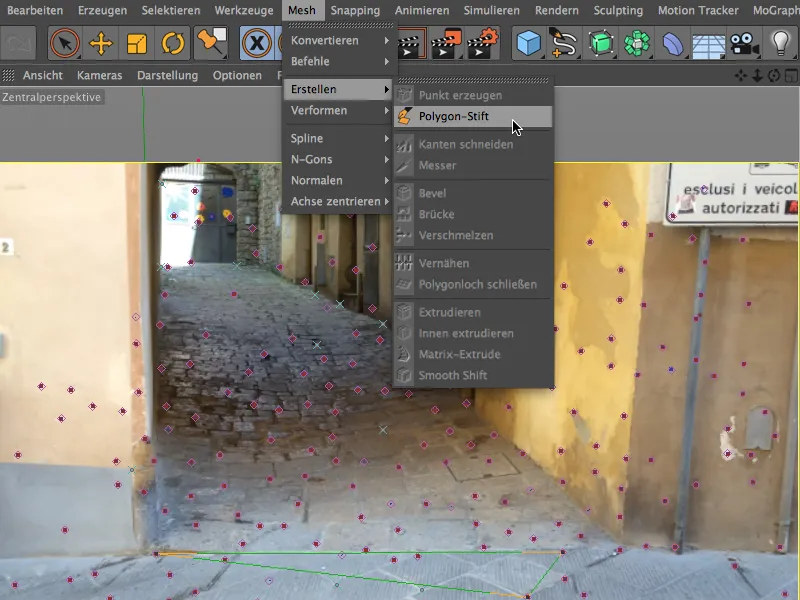
So that we can use the tracked features as auxiliary points when working with the polygon pen, we also activate snapping for points and axes via the snapping palette.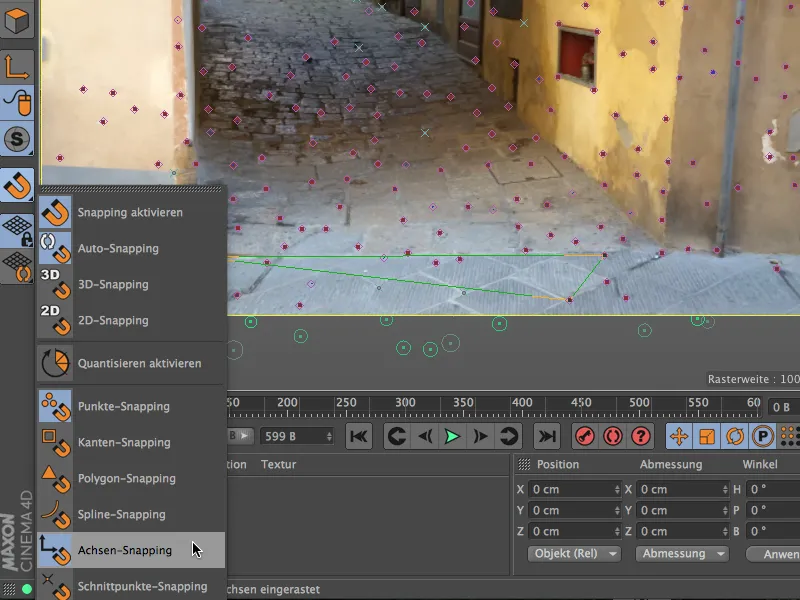
Now we can start modeling the alley with the polygon pen. Thanks to activated point and axis sn apping, we can even model the base model from the camera view. I start at the origin of the scene, which is on the ground and on the left edge of the house wall.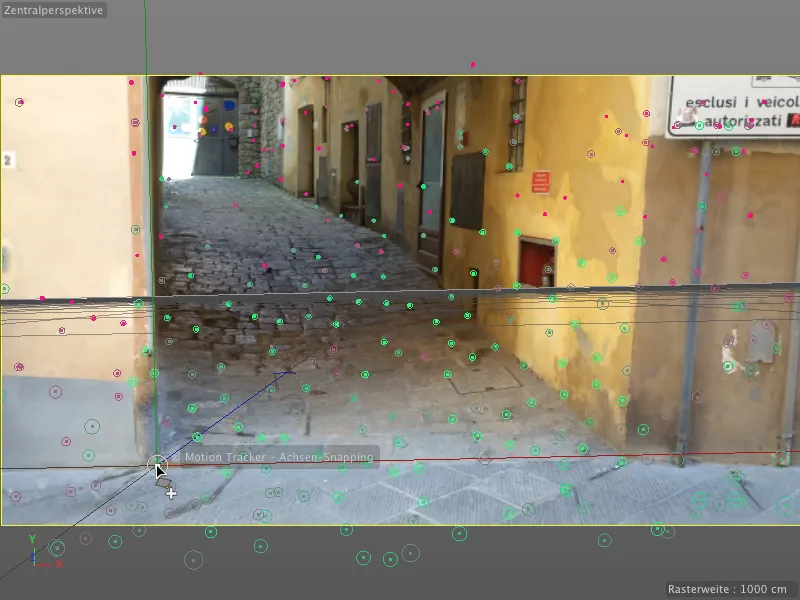
With a few quick points with the polygon pen, we have already traced the basic shape of the alley.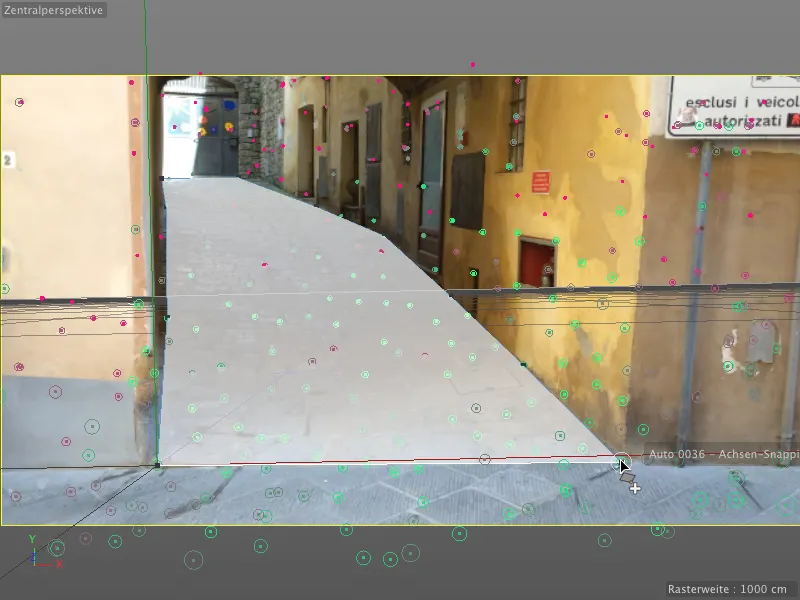
Click on the opposite outer edges to create the first subdivisions with the polygon pen. Make sure that the points follow the course of the alley as closely as possible and make any necessary adjustments.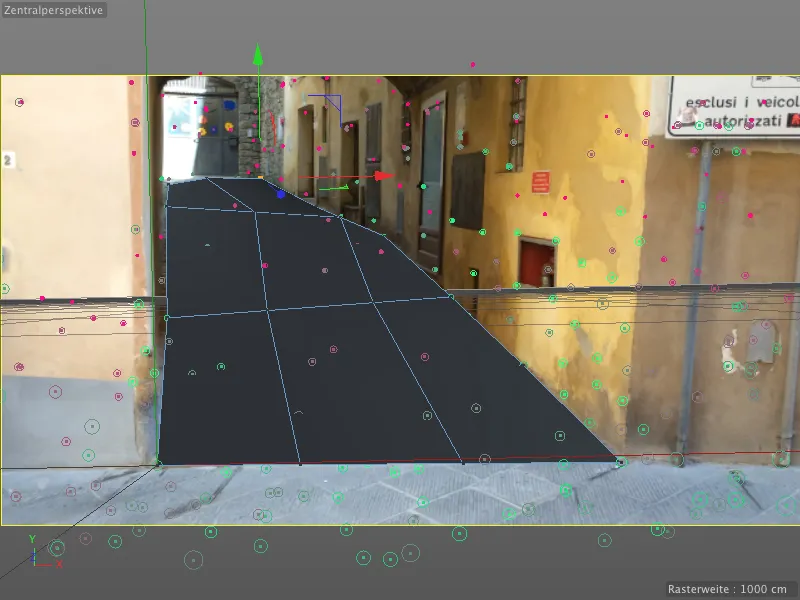
Use the Subdivide command in the Mesh>Command menu to subdivide the bottom of the alley in order to obtain further points for adapting the polygon object to the tracked features. To do this, select the polygon point that is closest to the tracking point and drag it onto the feature object until the point snaps onto it.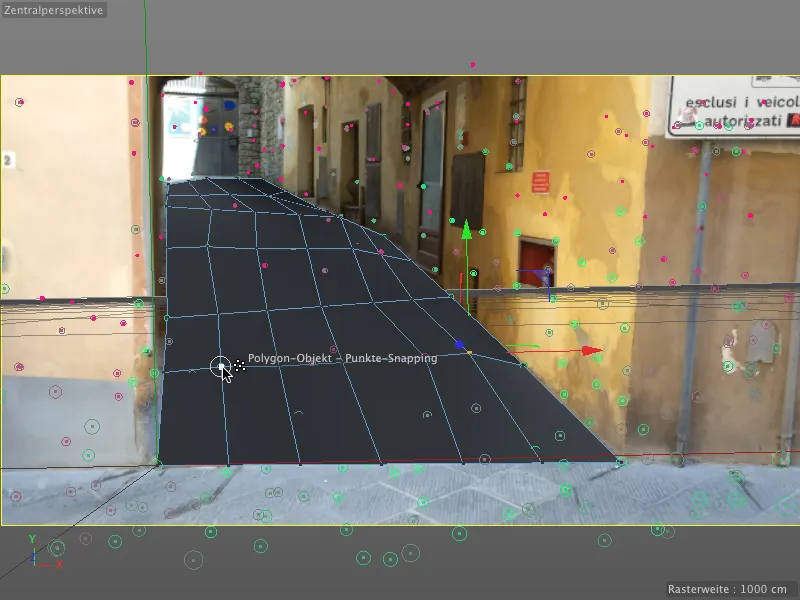
When you have finished with the floor of the alley, use the polygon pen to draw the edge of the floor upwards. There should also be enough tracking points available here to recreate a rudimentary version of the house wall.
Please note: We need this polygon object less for the rendering, but primarily for the animation with the spheres. However, we should still work with some precision, otherwise the shadow areas will not be cast correctly.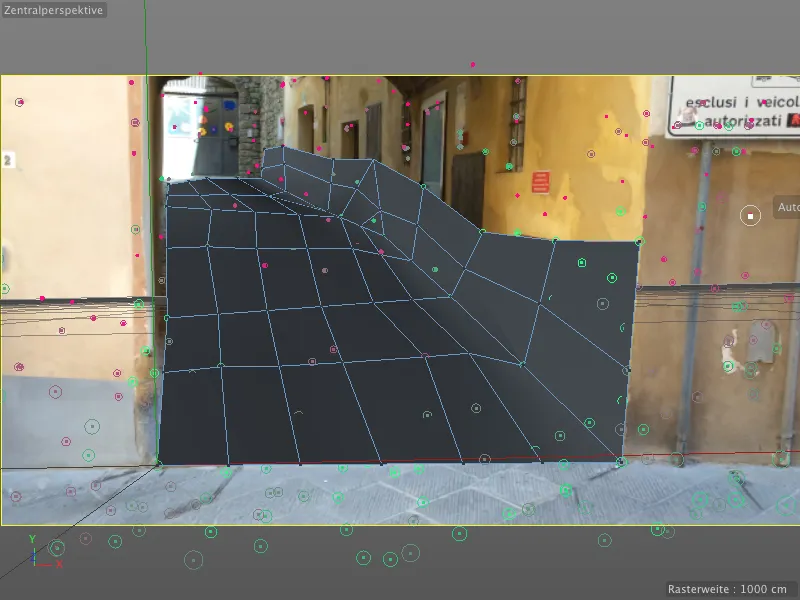
Finally, we need a hiding place for the emitter. It should look as if the balls are being rolled out of a side entrance on the left. Therefore, switch to the standard view of the editor camera for a better overview.
Then extrude the rearmost edge on the left-hand side slightly upwards with the polygon pen in edge-editing mode by holding down the Ctrl key and dragging.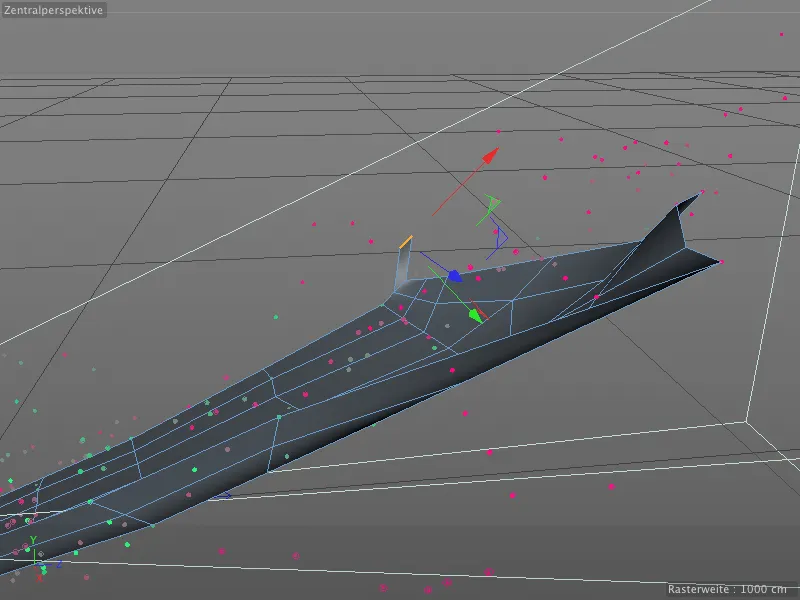
Back in the view of the reconstructed camera, we extrude the front edge to the left in the same way using the polygon pen. We place the emitter for the spheres behind this protrusion.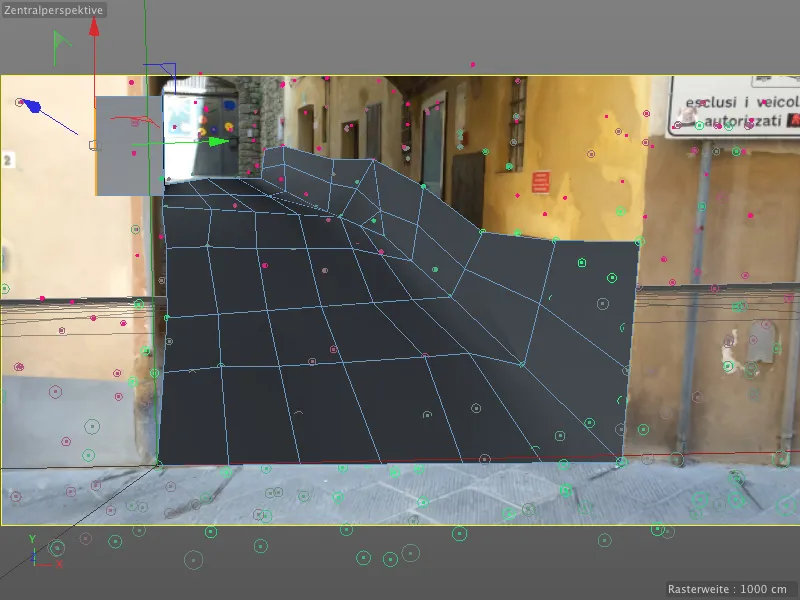
We also need to build a path to guide the balls rolling down from the alley. With the help of the tracked features, we can use the polygon pen in point-edit mode to easily add new polygons to the path.
It is a good idea to play back the film sequence from time to time to check whether any parts of the camera movement are not covered or are insufficient. An additional extruded polygon row is certainly sufficient here.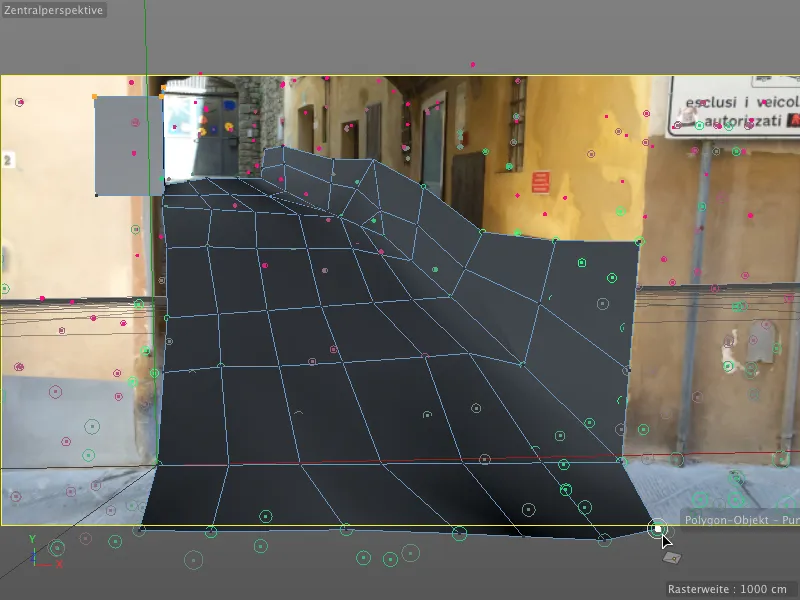
Here once again is my completed polygon object for the alley in the complete view. The projection for the emitter can be seen at the top left. We could simply hide this polygon for the animation using Dynamics, but then we wouldn't be able to generate shadows for the spheres. Therefore, we simply texture this polygon object with a material that contains our footage.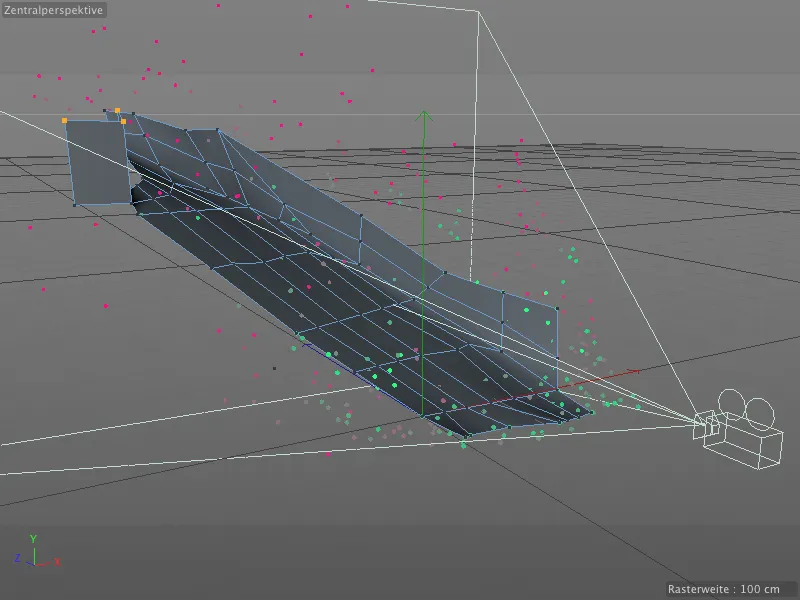
Texturing the recreated scene
If you have clicked on the render buttonin the meantime, you will already know that despite extensive work with the motion tracker, there is still no real render result.
The solution can be found in the Motion Tracker settings dialog. Using the Create background object button, the Motion Tracker creates a new background object and immediately maps this object with the footage texture.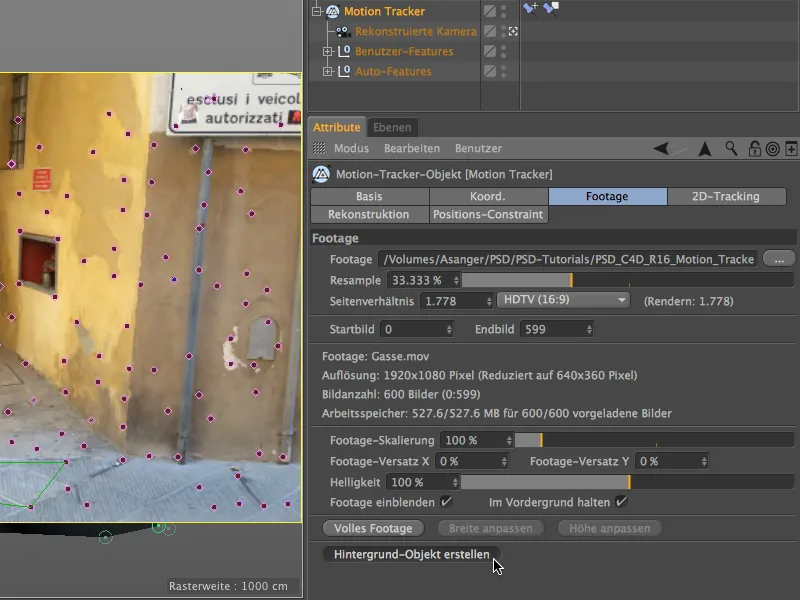
We can now use the texture tag created for the background object directly for our modeled polygon object. We simply drag and drop it upwards in the Object Manager while holding down the Ctrl key.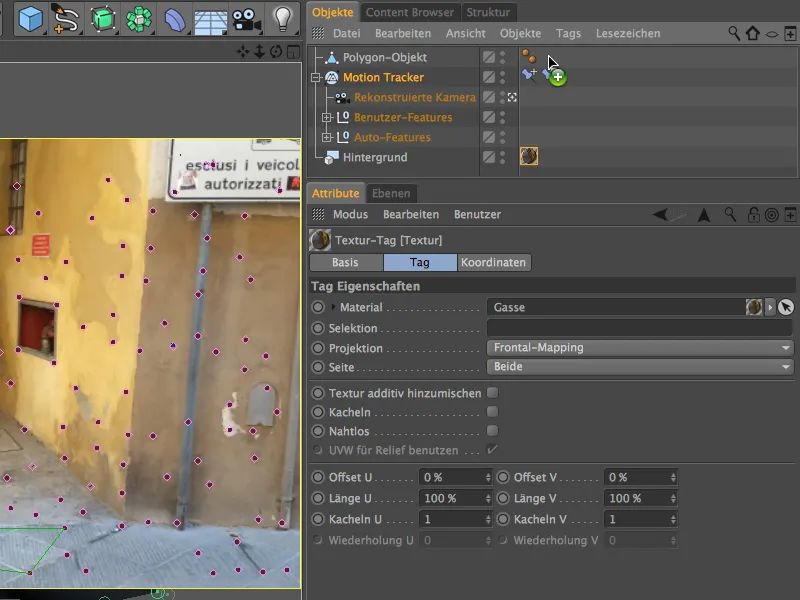
To ensure that our textured polygon object only receives shadows, but does not react to lighting or cast shadows, we assign a render tag to it in the Object Manager via the context menu using the right mouse button from the CINEMA 4D tags menu.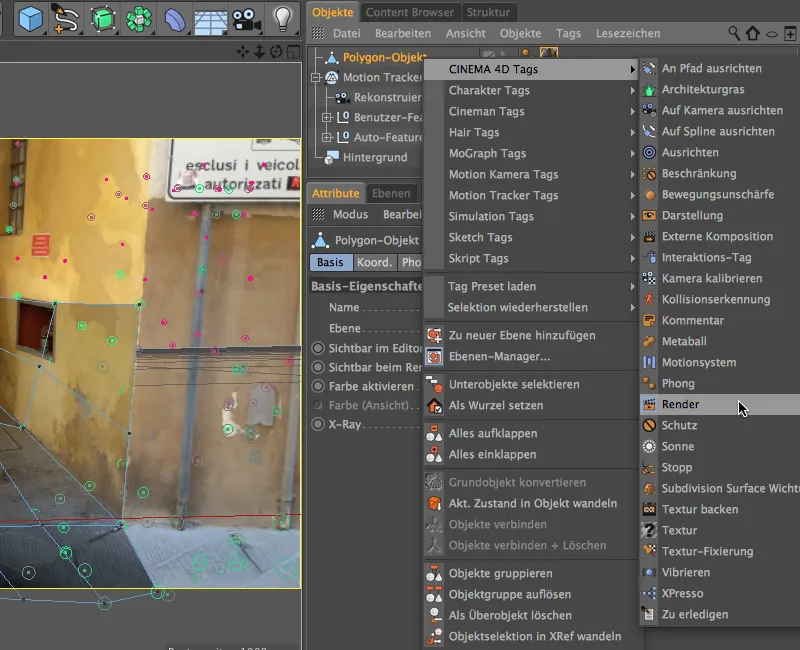
In the settings dialog of the render tag, we deactivate the Cast shadow option while activating the Background compositing option. This allows the polygon object to blend unobtrusively into the scene as desired and to cast adequate shadows.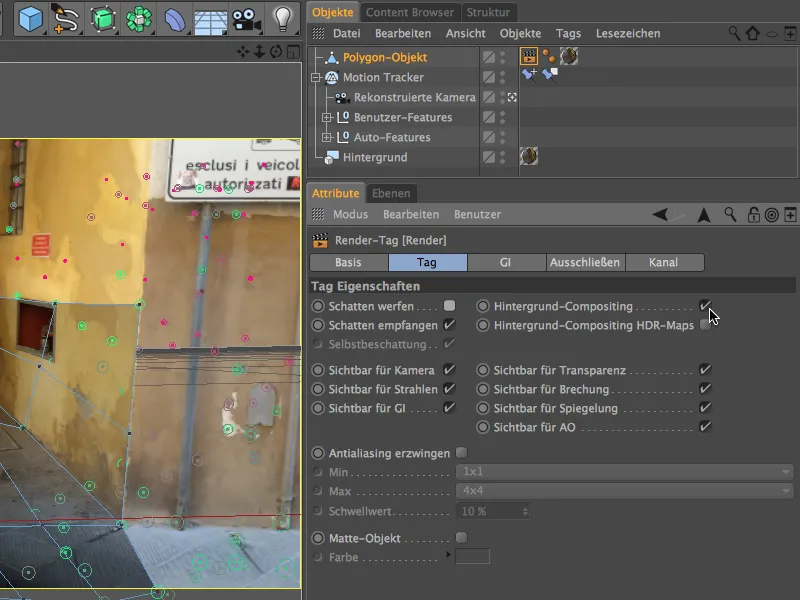
A look at the 3D view from the perspective of the reconstructed camera shows that the footage textures fit together perfectly. This is ensured via the texture tag using the frontal mapping projection type.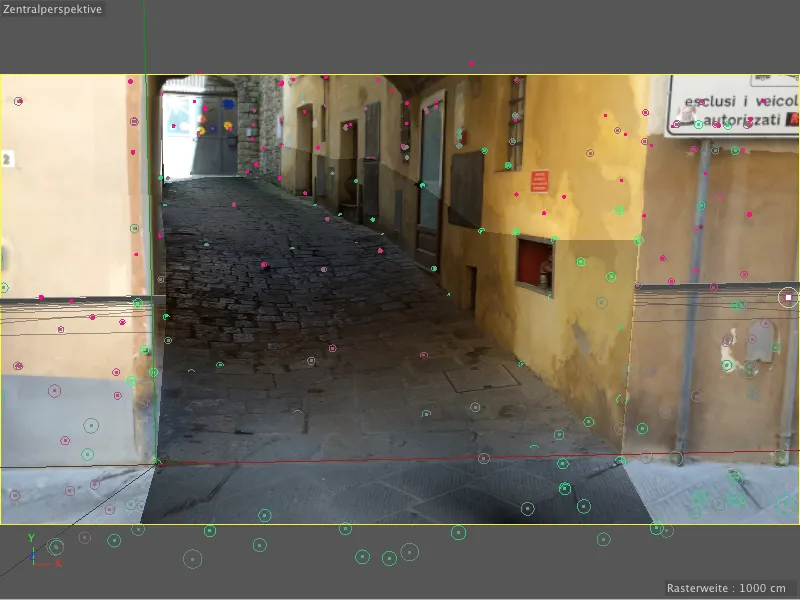
Integrating the rolling balls using a particle system
With a small particle system, we now let balls roll down the alley. If you don't want to recreate the particle system including the ball yourself, you can find it in the document "PSD_C4D_R16_Motion_Tracker_start.c4d" under the working files for downloading.
The standard Cinema 4D particle system is perfectly adequate here. So let's start by adding an emitter to the scene from the Simulate>
particle system menu.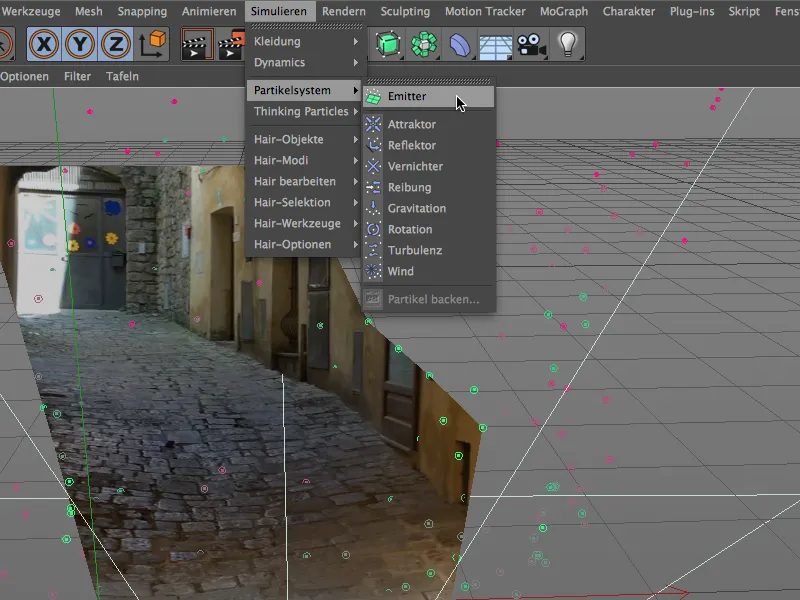
As a particle, we create a sphere object with the properties shown via the menu or the palette of basic objects and assign it to the emitter in the Object Manager.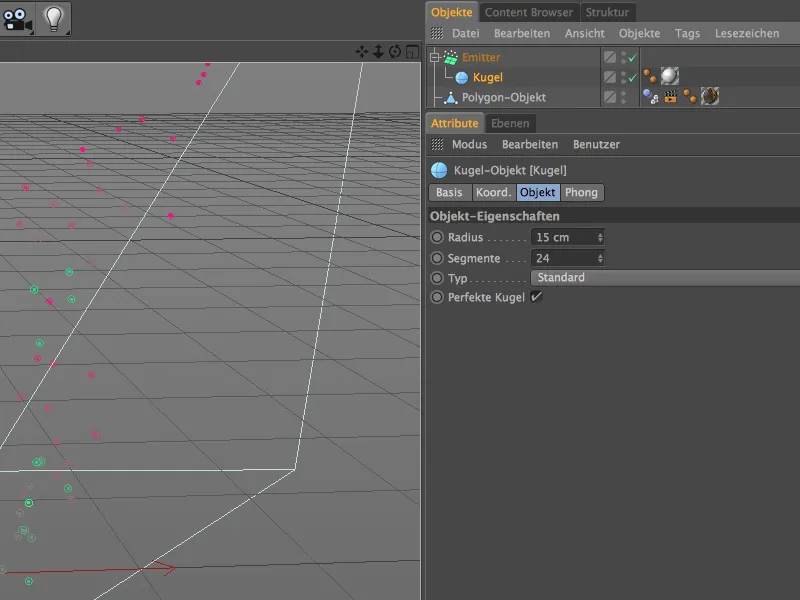
The filmed scene was created in the Tuscan town of Volterra. It feels like every second store in the city center sells works of art made of alabaster. The pattern of the material shown here is reminiscent of this material.
In the color channel, I selected the noise shader Electric and set a light, greenish gray as the second color next to white. The global size is set to 500% so that the natural grain is clearly visible.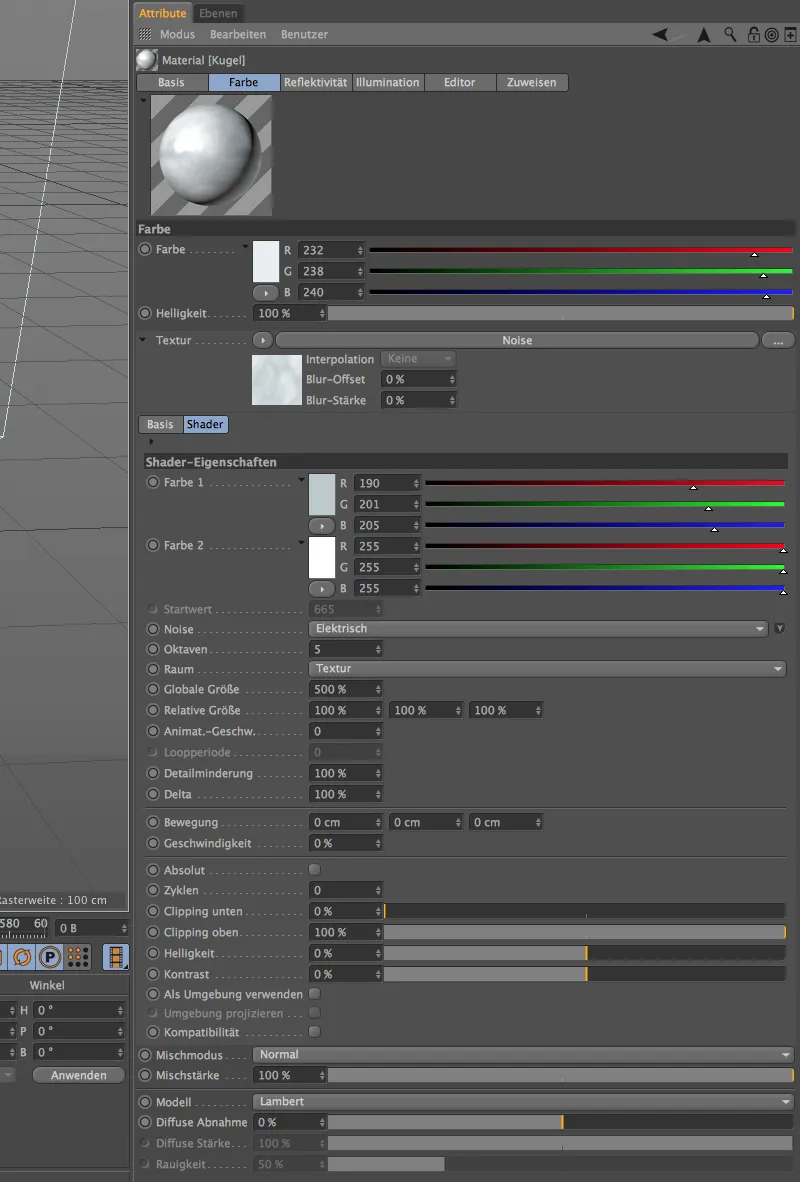
For the reflectivity channel, I used the old standard glossy light and the old reflection as layers with the settings shown. Although this material is really very simple, it comes relatively close to the desired impression of alabaster.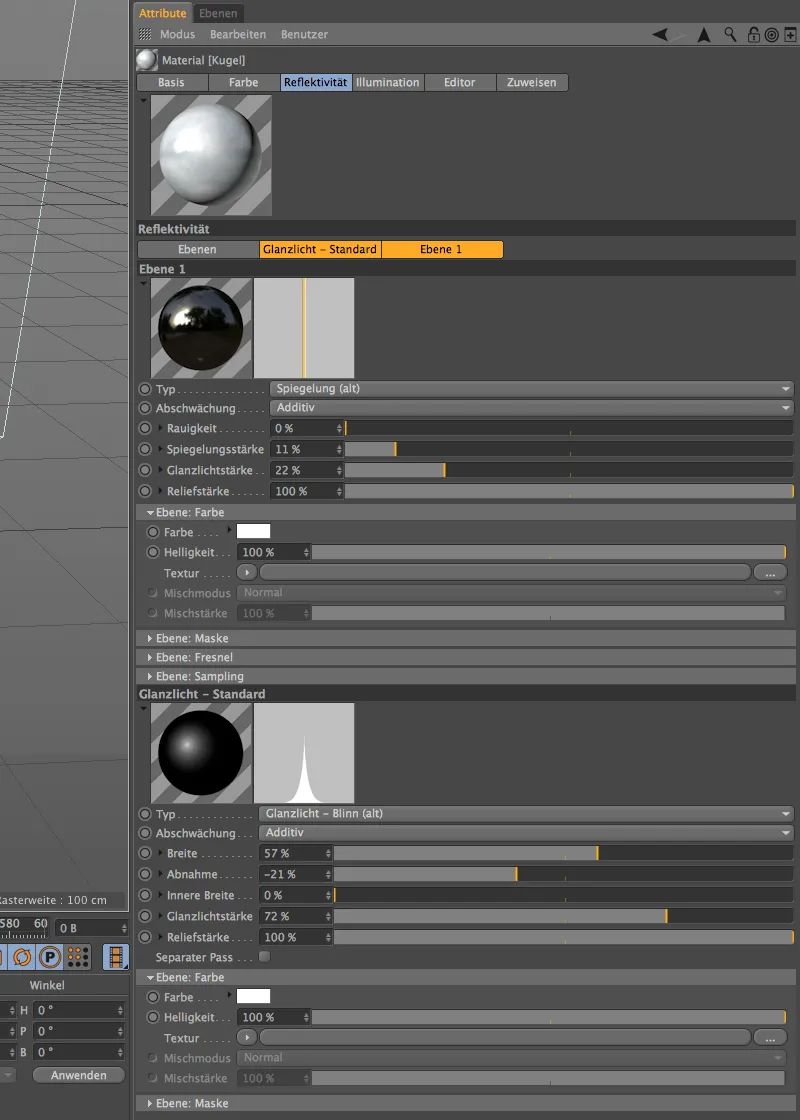
Now that the particles and spheres have also been textured, we can set up the emitter. In its settings dialog, we specify a low birth rate of 3 so that the lane is not flooded with spheres. The emission should start at frame 0 and the production should end at frame 450 so that all the balls can roll down the lane at the end of the film sequence.
200 frames are sufficient for the lifespan, the balls do not need any longer to make their way through the lane. A speed of 200cm gives the balls a good boost, but we leave some room for deviations by varying the speed by 50%.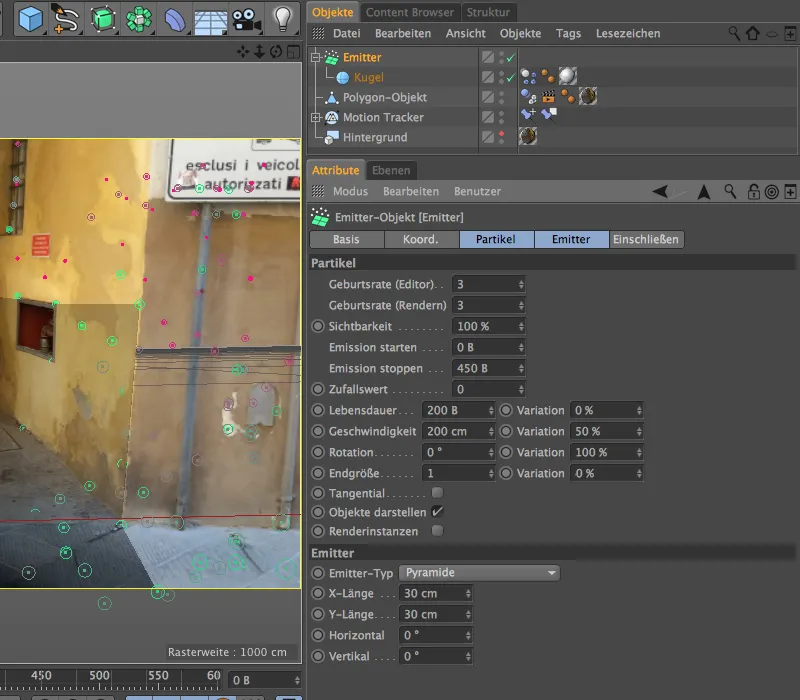
Setting up the dynamics simulation
In order for the emitted spheres to participate in our physical simulation, they need a Dynamics Body tag as a rigid body. We assign it to the sphere object either via the Tags>Simulation Tags menu of the Object Manager or via the context menu using the right mouse button.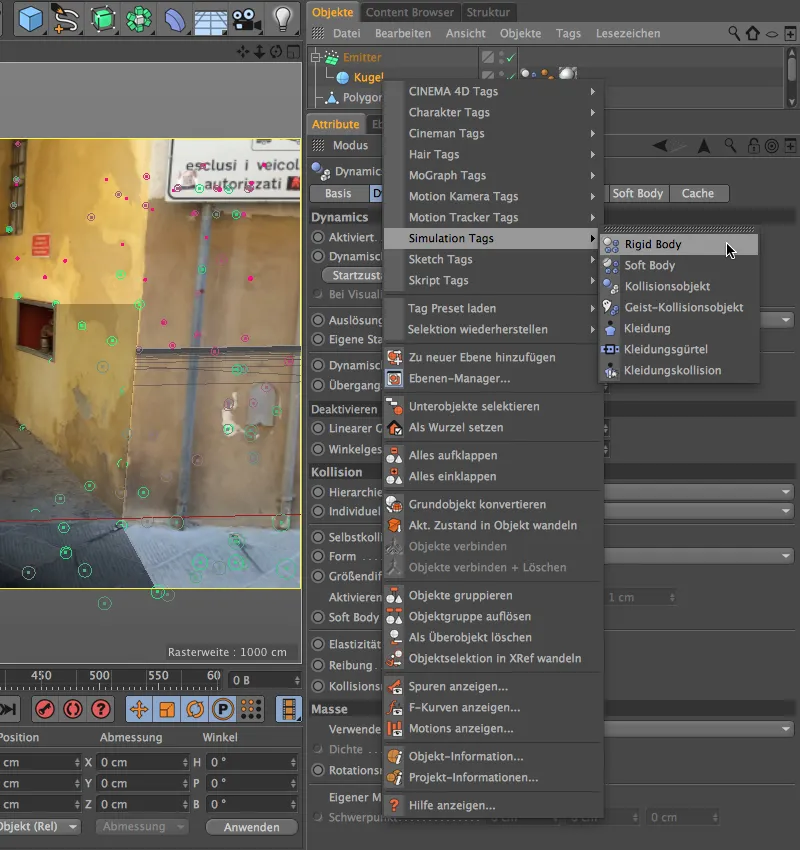
In the settings dialog of the Dynamics Body tag, we can leave the default values in the Dynamics and Collision areas. We only set our own mass of 20 on the mass pageso that the spheres appear heavy enough.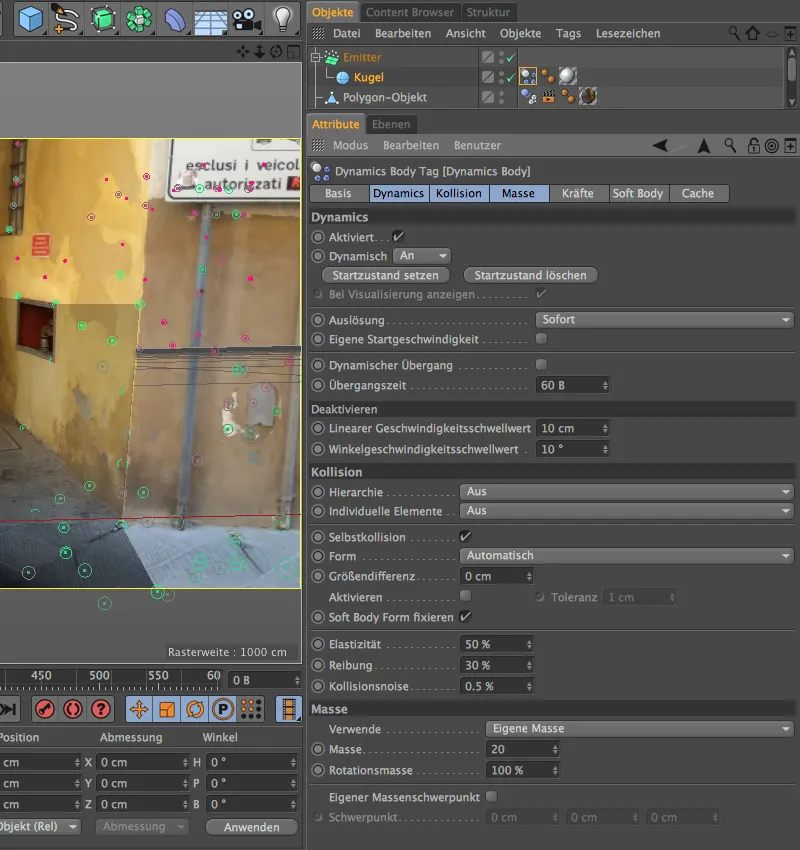
The polygon object of our modeled alley also needs a dynamics body tag, but only to act as a floor for the collision of the balls. We therefore assign a Dynamics body tag of the collision object type to this polygon object.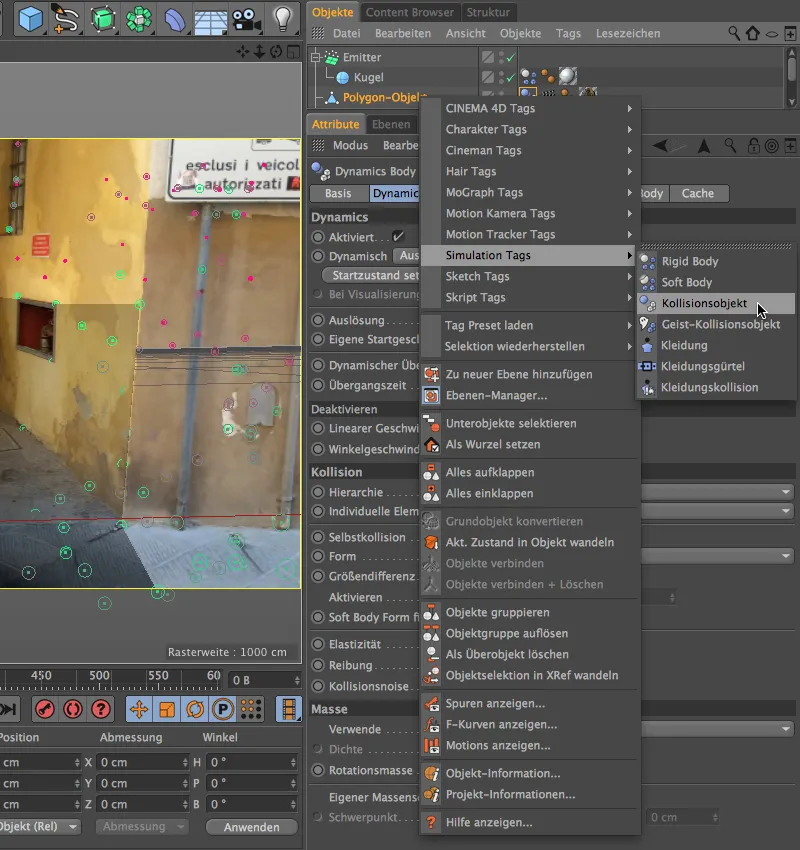
Here, too, only a small adjustment is necessary in the settings dialog of the Dynamics Body tag. The parameters in the Dynamics and Mass areas remain at the default values, while we select the Static Mesh as the shape on the Collision page. Otherwise, a correct collision would not be possible with the very special shape of the modeled alley.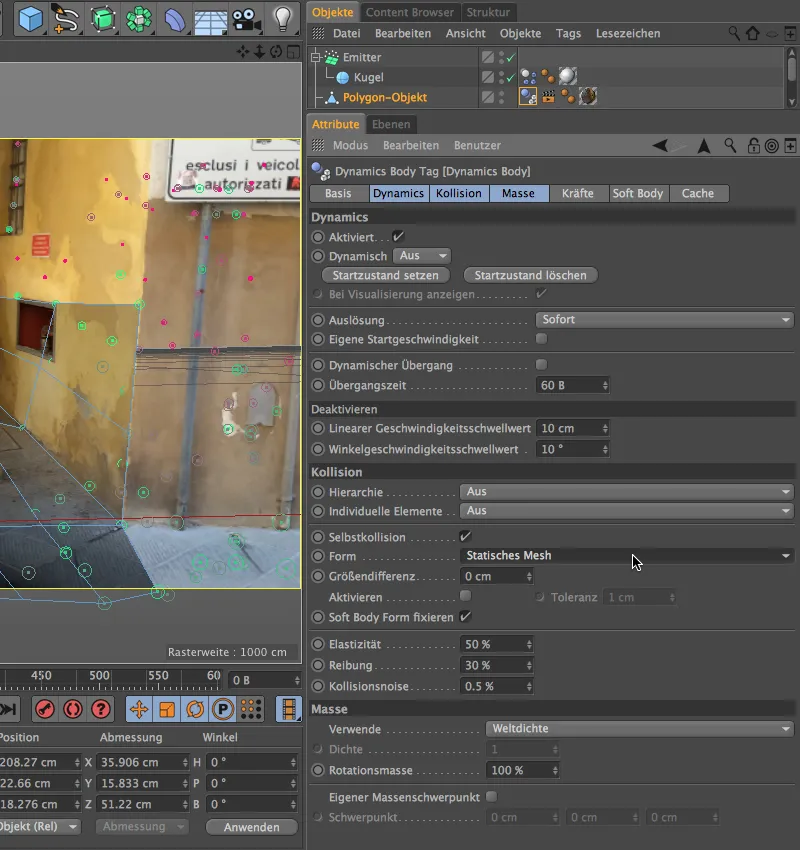
So that not all spheres have the same size, we simply create two or more duplicates of the finished sphere and change their radius. In my version, I have created a sphere with a radius of 10 cm and a sphere with a radius of 22 cm.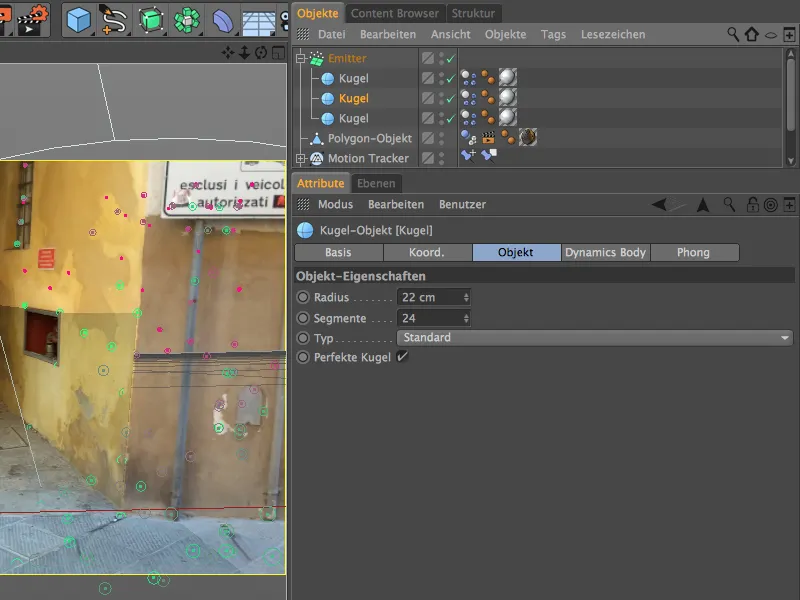
Positioning the particle system
The particle system is now fully functional, so we just need to position it appropriately in the scene. The best way to do this is to switch off the reconstructed camera and work in the standard editor view.
We have already created the space for the emitter when modeling the corridor. We simply position it just above the floor of the aisle behind the projection and rotate it so that it can emit its particles into the aisle via its Z-axis.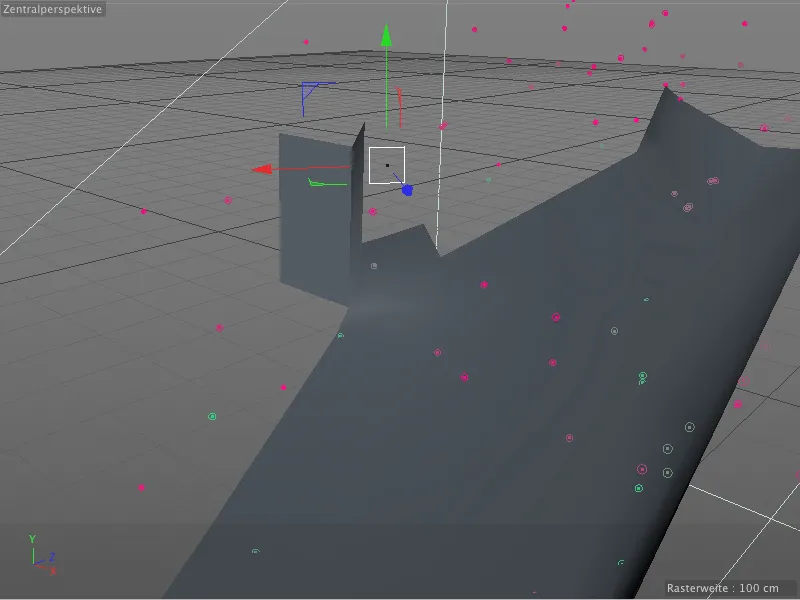
Back in the view of the reconstructed camera, it is now time to check the physical animation. By clicking on the play button, we start the animation and observe whether all elements act as intended.
Setting up shadows and lighting
As you have already recognized from the title of this step, we will first take care of the shadows that our balls cast on the alley or on the wall of the house. As there is mostly indirect light in this scene, we generate the shadow areas on the balls using the Ambient Occlusion render effect. To do this, we open the render presets via the Render menu ...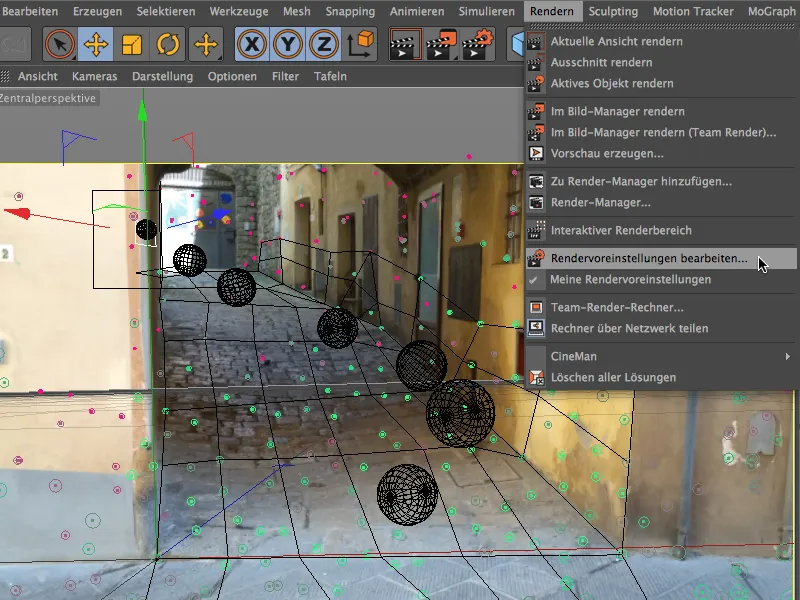
... and use the Effects button in the left-hand column to add the Ambient Occlusion render effect to our scene.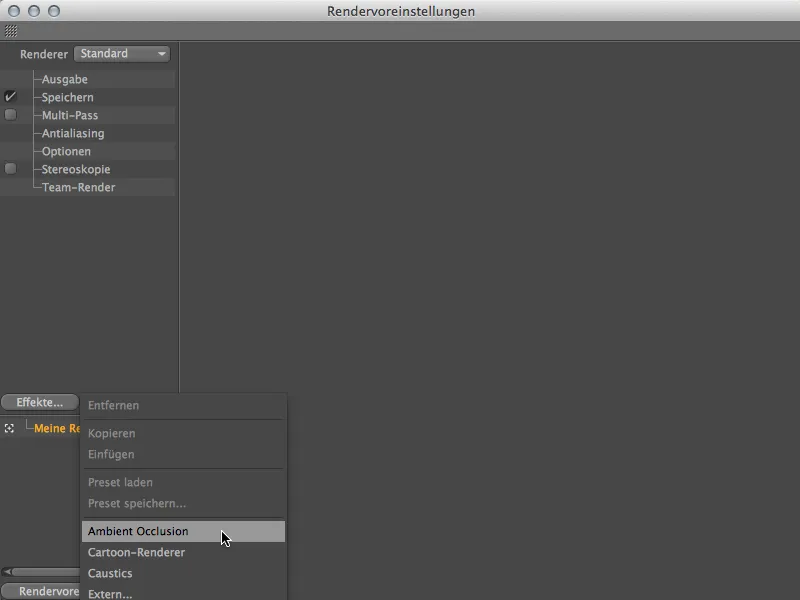
We leave the settings for this render effect at the default values, only dragging the black point of the gradient in the Color parameter slightly to the right to increase the shading a little.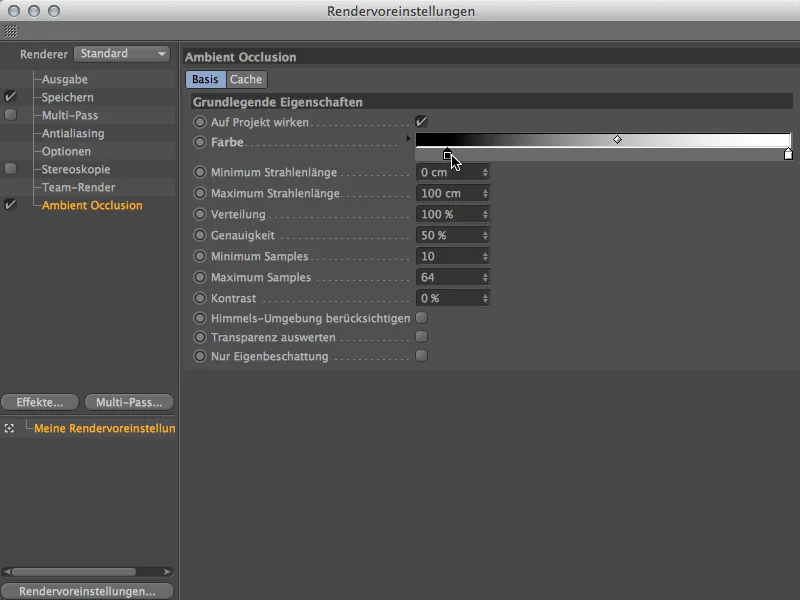
We can immediately check the effect of the ambient occlusion with a test rendering. There is a nice shading on the alley under the spheres, which we can basically leave as it is.
However, the spheres do not yet look properly integrated into the scene, because although they are partly in an alley, all the spheres are evenly lit. We can make this much more authentic with a few light sources.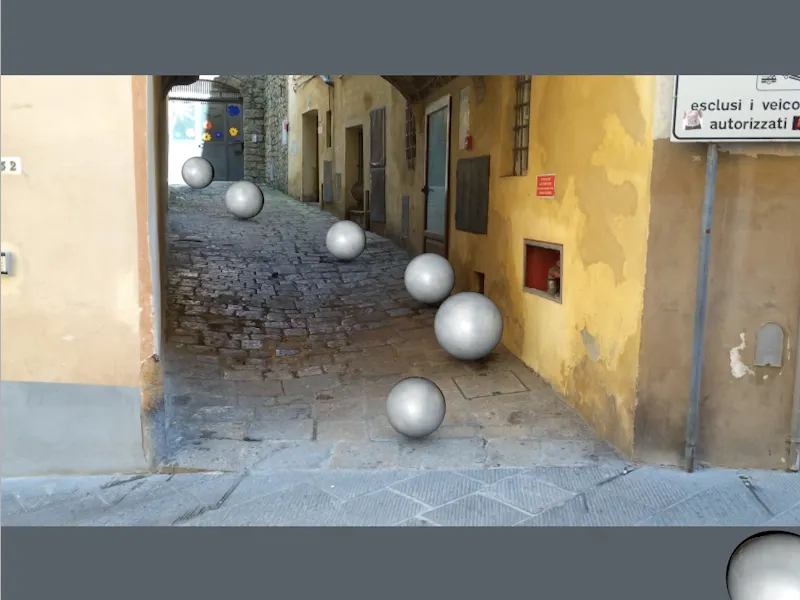
At the far end of the alley, we have direct sunlight. It would therefore only be appropriate if the freshly emitted spheres were also illuminated from above. To do this, we take a spot light source from the range of light objects and set the outer angle of the spot to 40°. The spotlight helps us to ensure that the lighting only affects this point at the top of the alley.
We have already taken care of shadows using the Ambient Occlusion render effect, so we don't need to deal with this again for the light sources.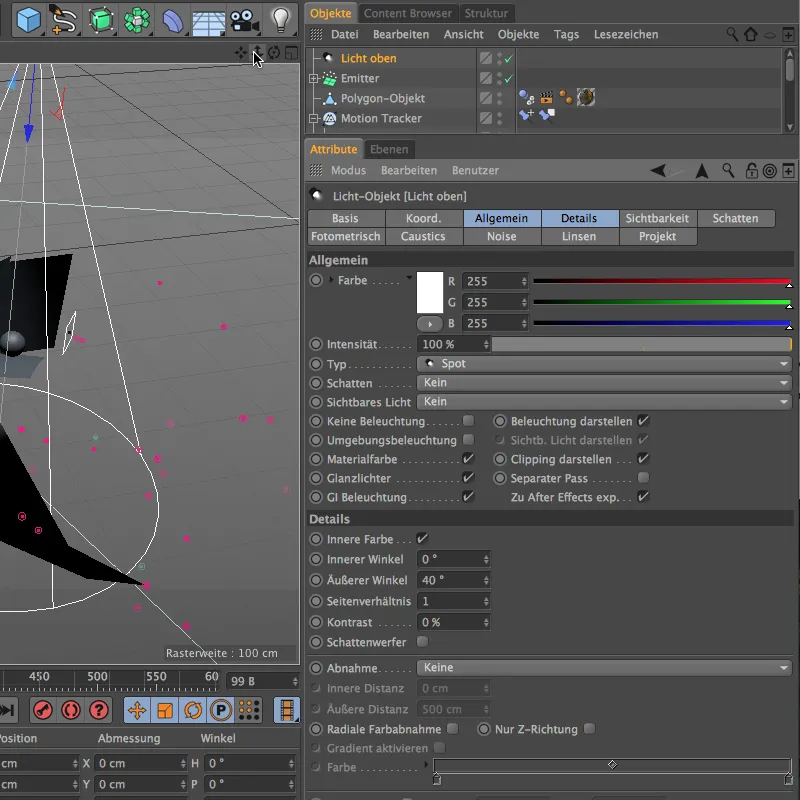
The alignment and positioning of this first light source is again done using the standard editor camera. We place the spot lightdirectly above the point where the emitter releases the spheres into the alley.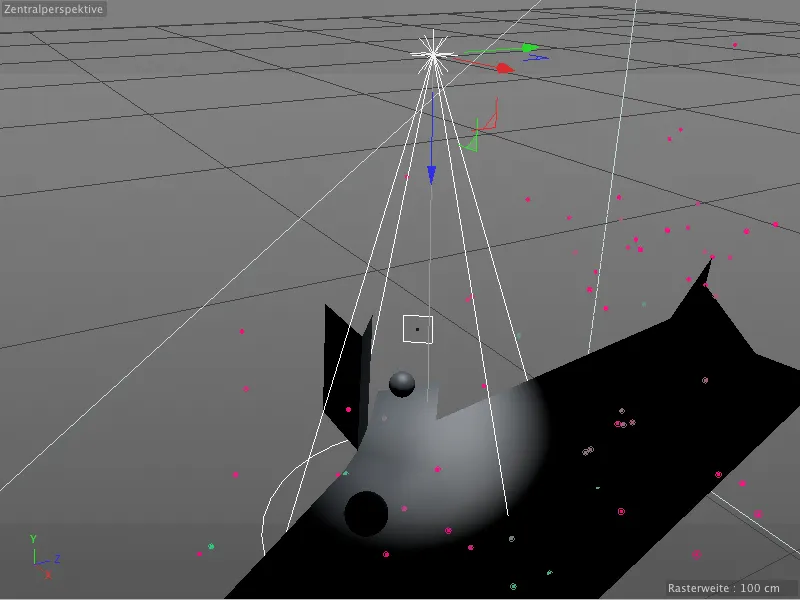
A second light source is to receive the balls rolling out of the lane at the bottom. In principle, we imitate the oblique incidence of light into the alley so that the balls are not illuminated directly between the two light sources.
Here we also use a spot light sourcewith an external angle of 50° in order to be able to precisely control the lighting effect. With a slightly bluish light color, we also imitate the blue of the sky somewhat.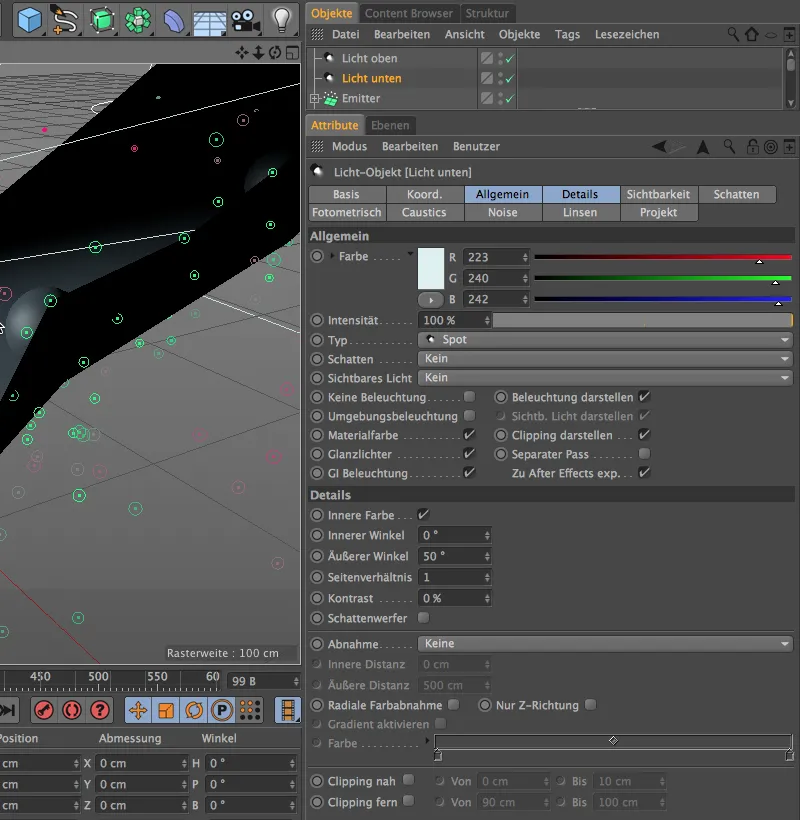
As already mentioned, we want to simulate the oblique incidence of light into the alley with this second spot light. We therefore position the light source a good distance above the scene and align it slightly to the right, analogous to the film sequence.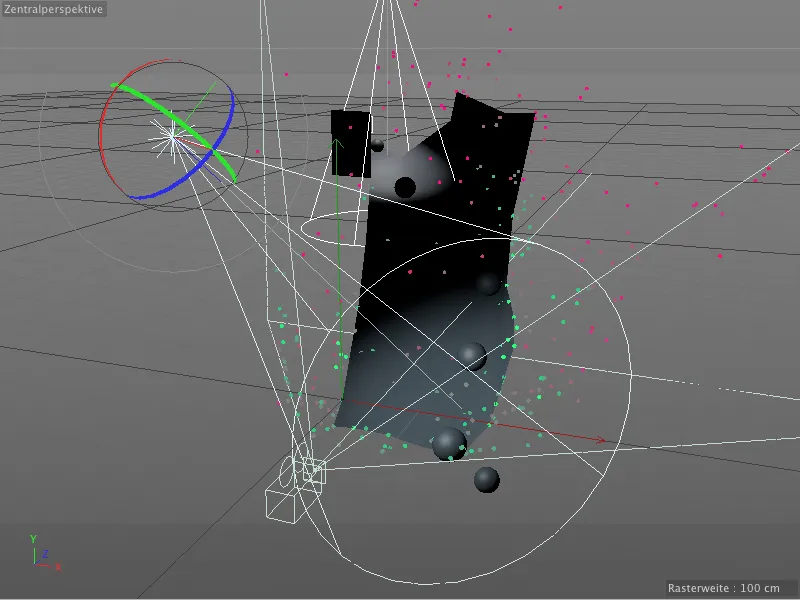
With a few additional point light sources, we now simulate the indirect light that hits the spheres from the walls and from the other side of the street. The first of the light sources is given a yellowish color with an intensity of 60%. Highlights are not necessary for this lighting. We position them slightly offset to the right at the lower end of the alley, where the yellow of the wall also comes into its own most clearly.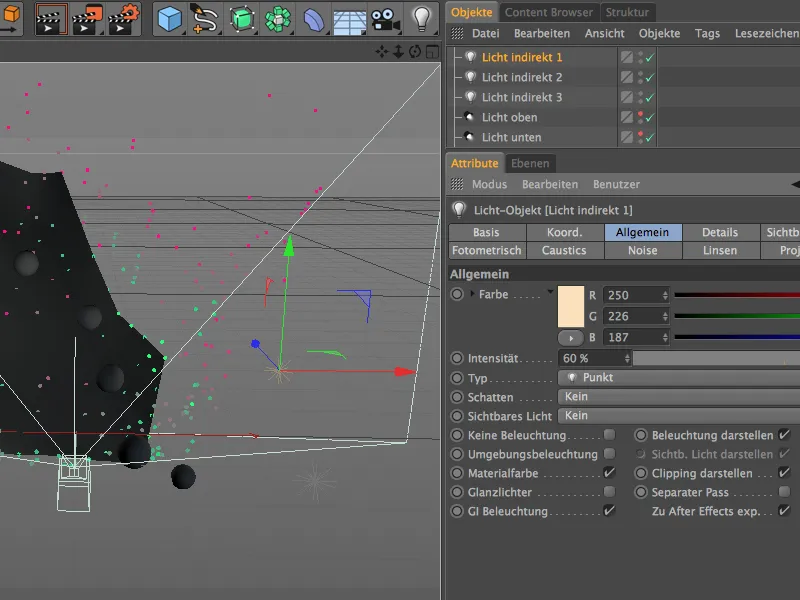
The second of the point light sourcesis given a slightly weaker yellowish light. This light should not produce any highlights either, as it should only simulate the indirect lighting cast by the left-hand wall. Accordingly, we place this light source roughly in the middle of the left-hand side of the alley.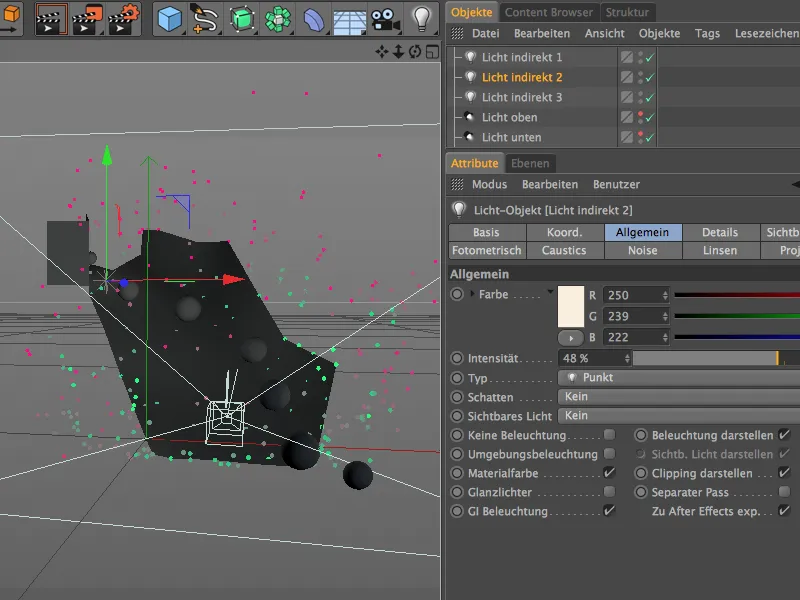
The last of the three point light sourcesacts as a fill light, so to speak, and is intended to brighten up the balls rolling down from the right-hand side. Here we use a slightly bluish light color with an intensity of just over 50%. Again, we do not use highlights, as this light should also only reflect the indirect lighting.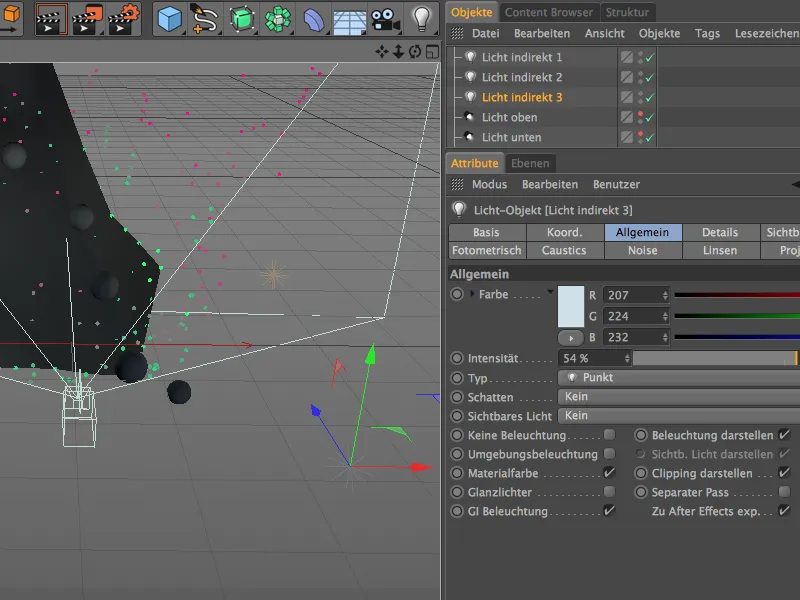
Finally, we start the simulation again and check our illumination at a time when the spheres are in all three lighting stations. At the very top, our spot light sourceprovides the light from above, while the spheres in the lower area are captured and illuminated by the lower spot light sourceas they transition into the light incidence. In the middle of the alley, on the other hand, the spheres receive only a little light as desired.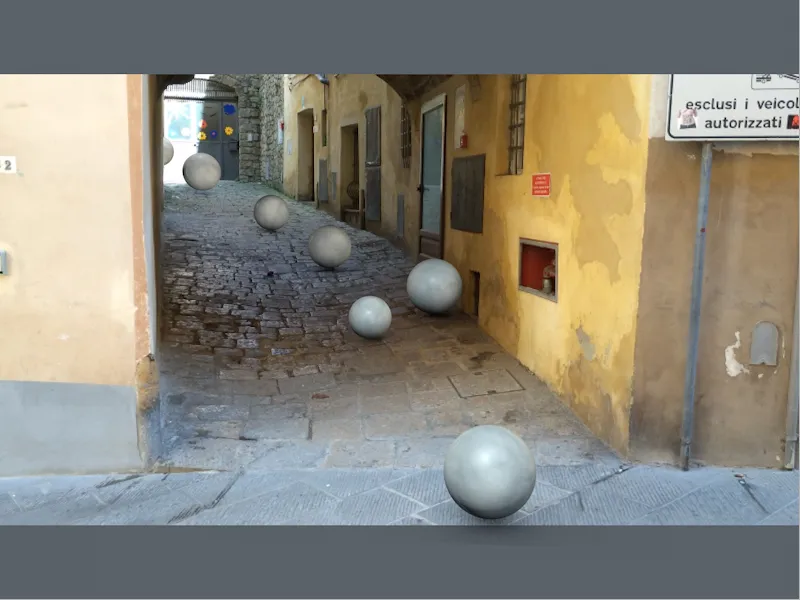
With these final fine-tuning steps, the integration of the rolling balls using match moving is complete and we can start rendering the complete animation.


