A realistic ice text and icicle effect can give your designs that special touch – ideal for winter greeting cards, frosty advertising banners or seasonal projects. With Photoshop, you can deceptively replicate the properties of real ice, such as transparency, texture, and light reflection. In this tutorial, you will learn how to create an impressive ice text effect step by step, which looks so realistic as if it originated in a frigid winter landscape. Unleash your creative tools and let's dive into the frosty world of design!
Step 1:
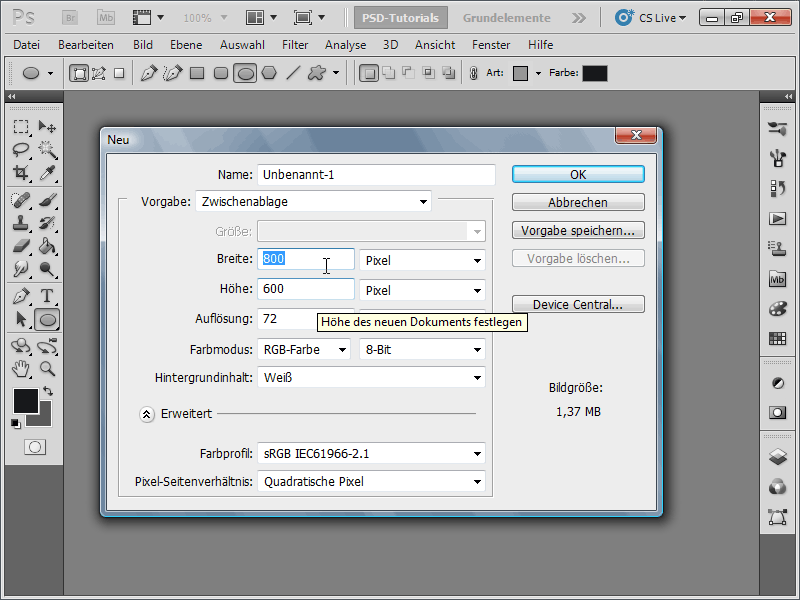
I create a document with the size of 800x600 pixels, although the size is actually unimportant.
Step 2:
Now I create a text with a very round font style and rotate it.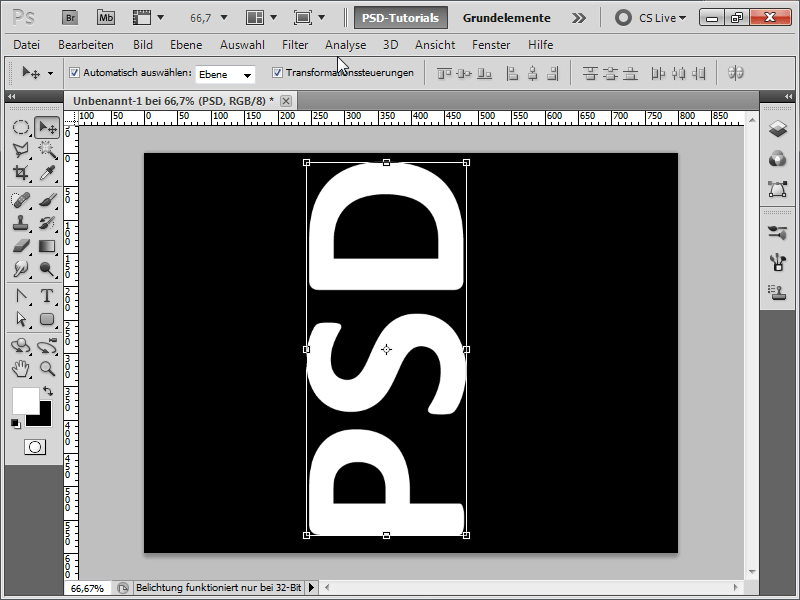
Step 3:
Now, under Menu>Filter>Stylize Filter, I invoke the Wind Effect. I apply this filter using the Wind method and the Left direction two times or even three times for longer icicles (the last used filter can be quickly started with Ctrl+F).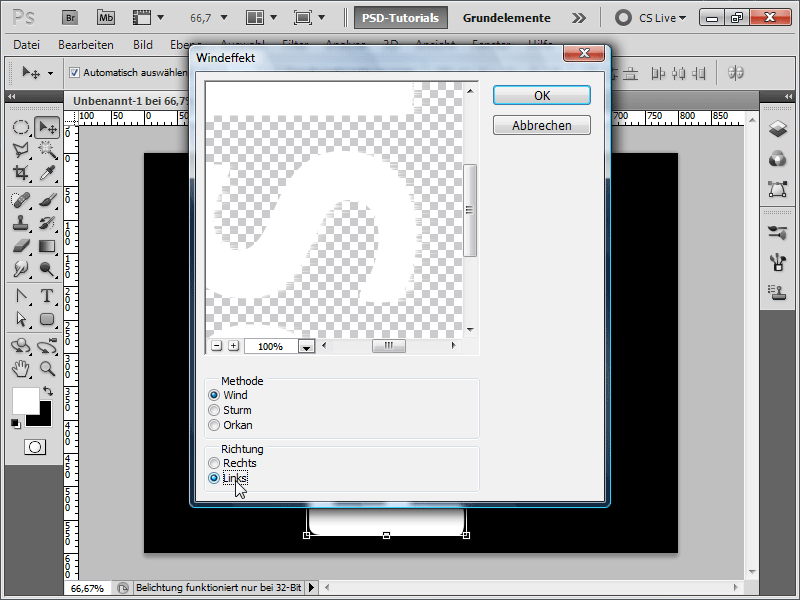
Step 4:
Next, I rotate the text back and press the Ctrl Key on the PSD layer in the layers panel to create a selection. I can now recolor it in blue using Alt+Backspace, if the foreground color is blue.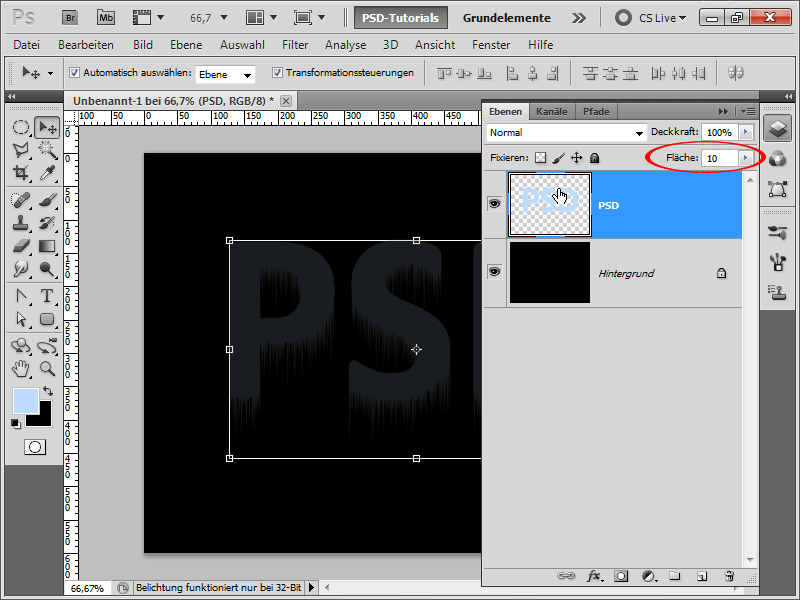
Step 5:
Next, I go into the Layer Styles and add an Outer Glow with these settings: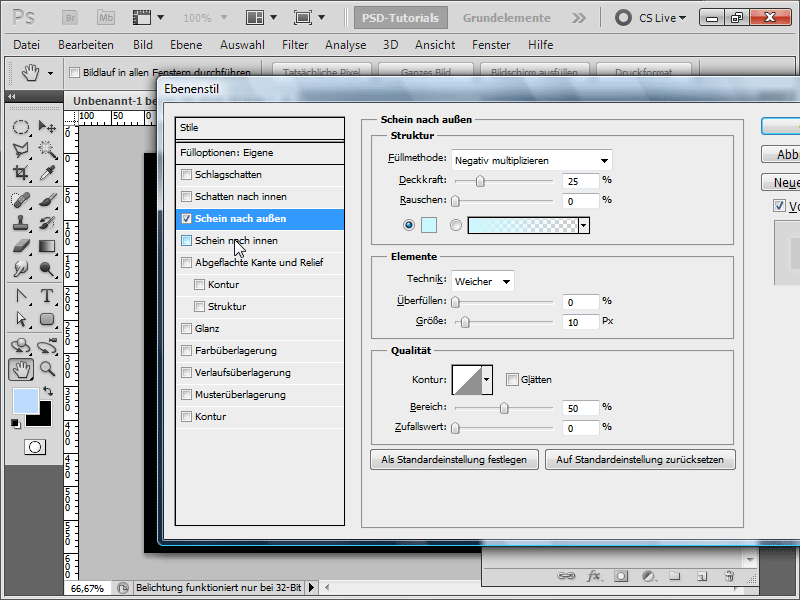
Step 6:
Then, I also activate the Inner Glow: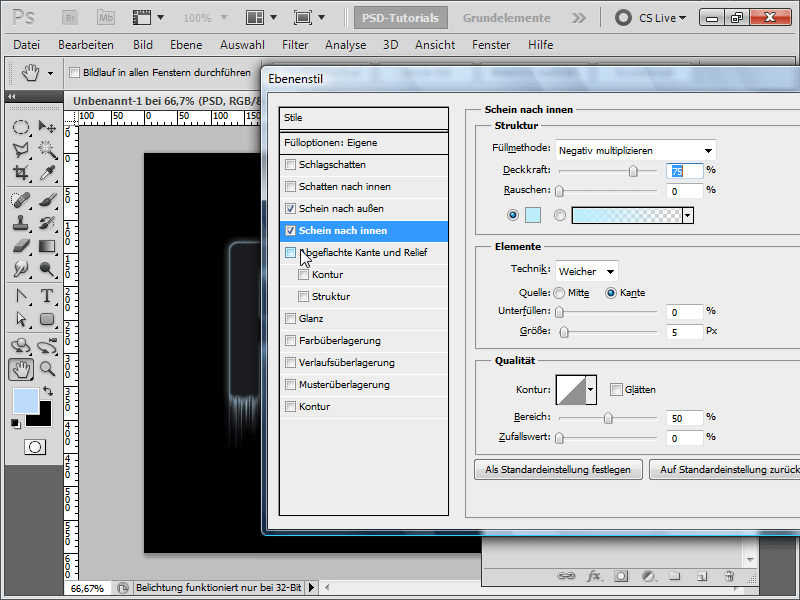
Step 7:
And finally, I activate the Bevel & Emboss with these settings: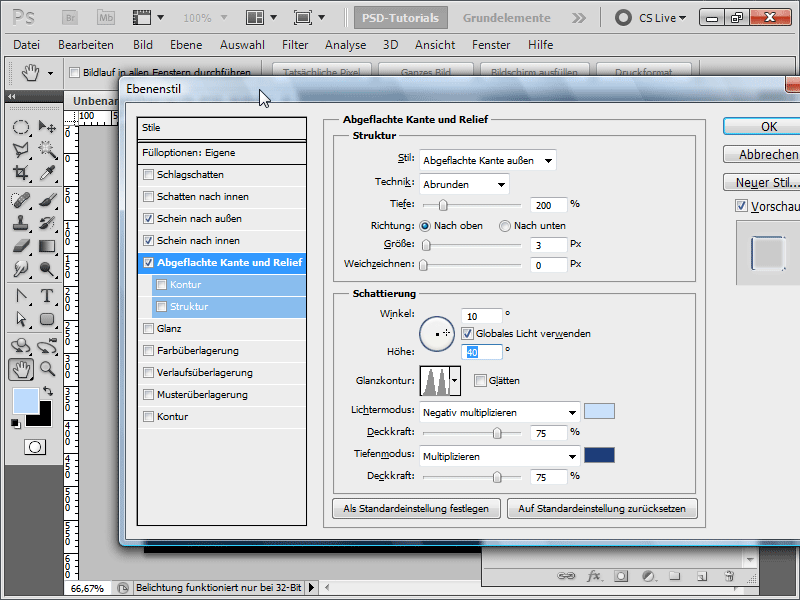
Step 8:
After inserting a suitable photo in the background, the result looks quite good already. However, the background should behave differently exactly where the letters are, just like in reality when looking through ice. That's why I duplicate the photo using Ctrl+J.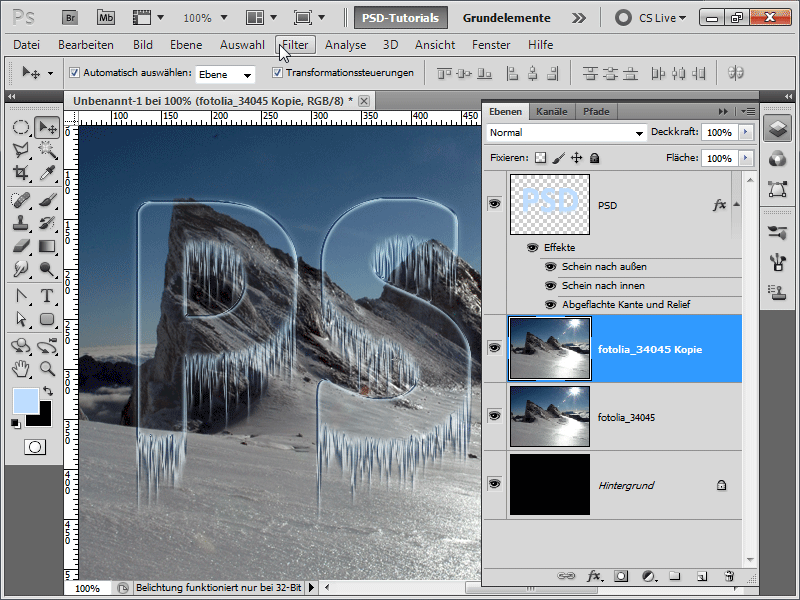
Step 9:
Now, I apply the Ripple Filter found under Menu>Filter>Distort Filters. The settings should be experimented with individually. I use these settings: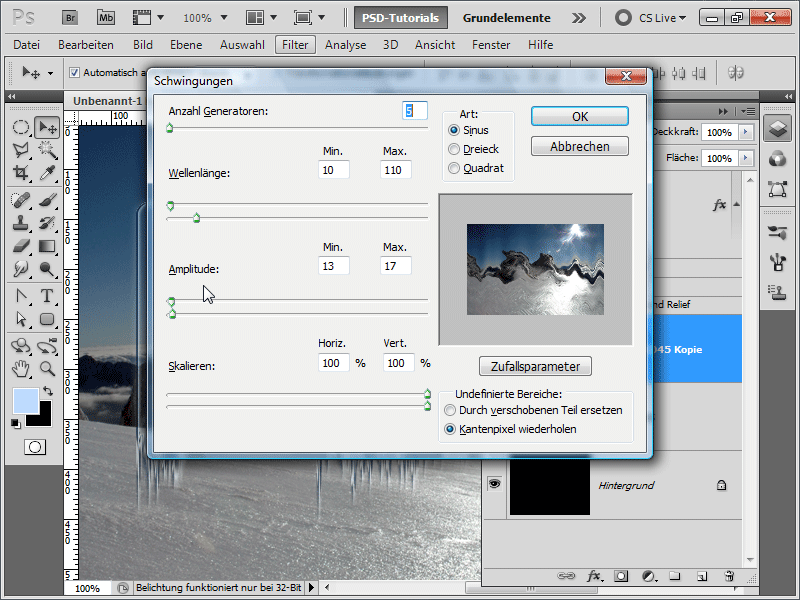
Step 10:
After clicking on my PSD layer while holding the Ctrl Key to create a selection, I re-enable my photo, which has applied the Ripple FilterMask Icon. This way, the ice effect only affects where my letters are located. The result is not yet 100% convincing. That's why I will now try out other filters.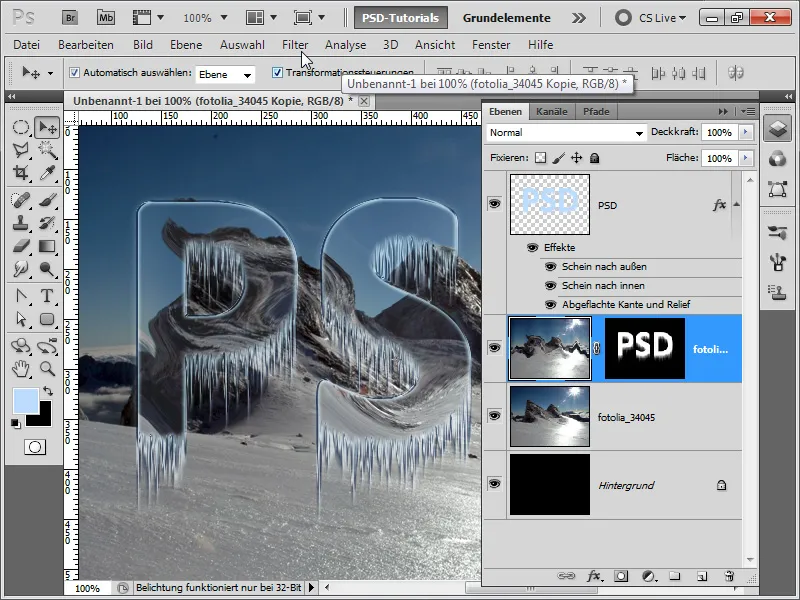
Step 11:
If I now apply a Gaussian Blur, it already looks better.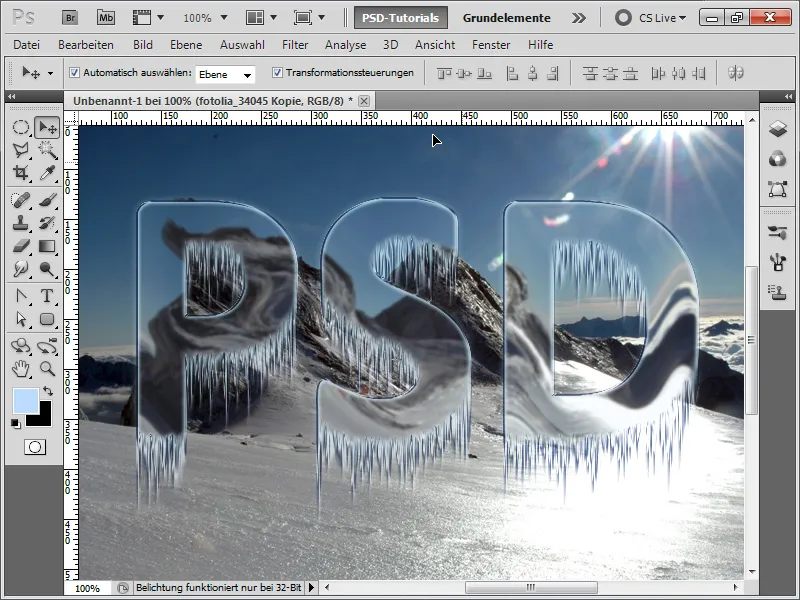
Step 12:
Or I try out a different photo and instead of the Ripple Filter, I choose Menu>Filter>Noise Filters>ZigZag.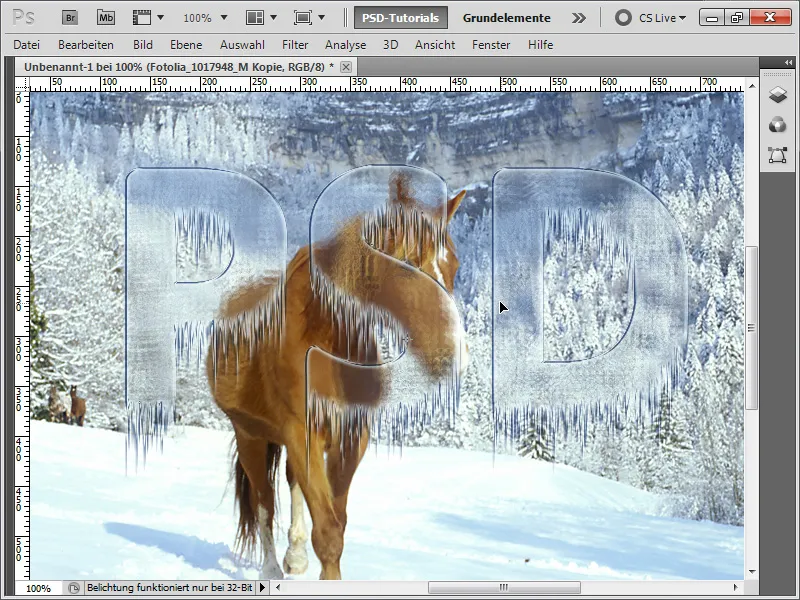
Step 13:
Or I experiment with Menu>Filter>Noise Filters>Shear. As can be seen, using different filters can lead to very different results.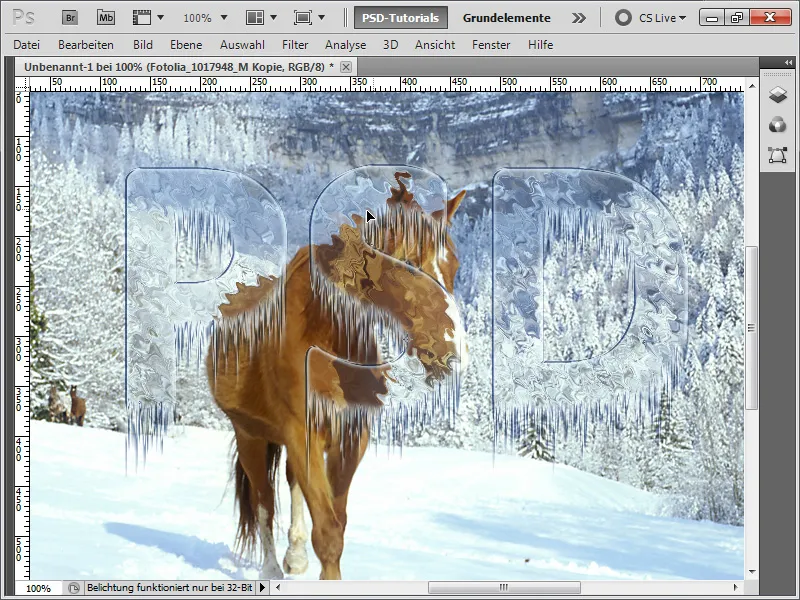
Step 14:
In the second part of the workshop, I want to show how to create a comic-like snow-icicle effect. First, I create a new file and draw a shape using the Rounded Rectangle Tool as a shape layer with a 20 pixel radius.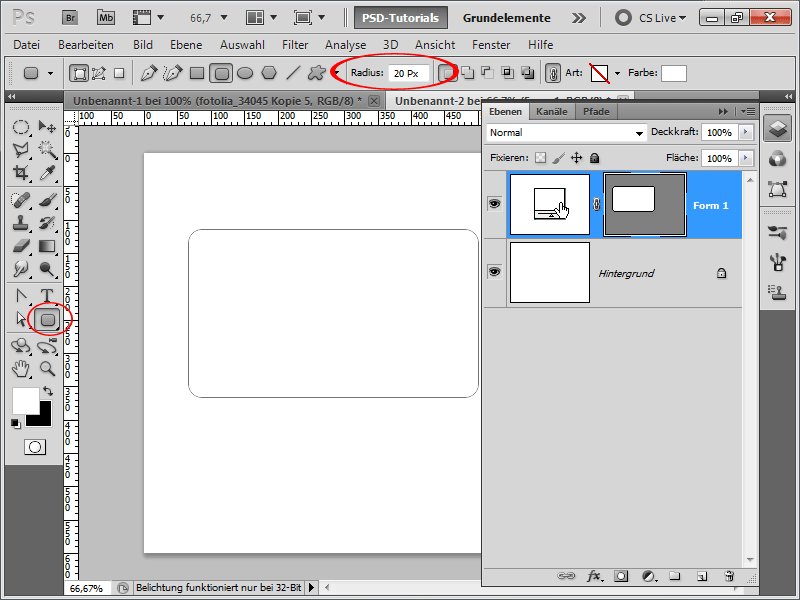
Step 15:
Now, in the Layer Style, I adjust the values for Inner Glow as follows: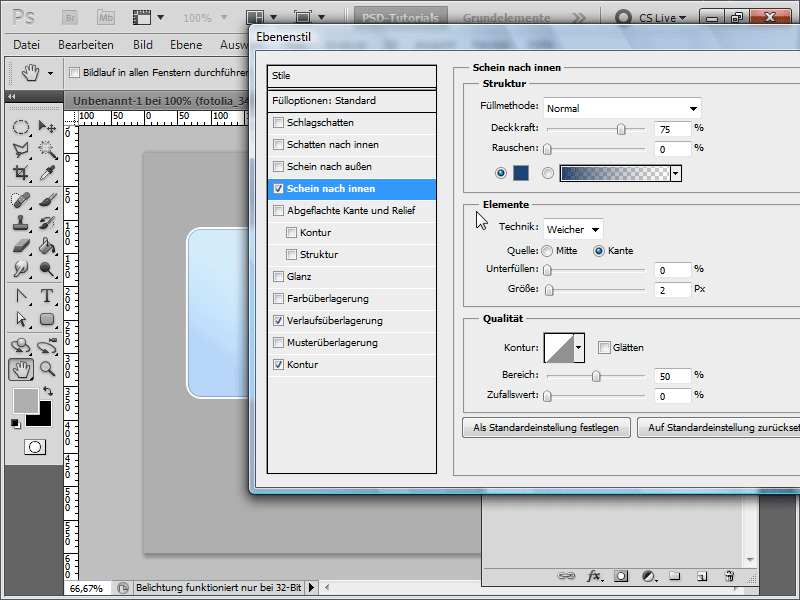
Step 16:
For the Gradient Overlay, I create a gradient from blue to light blue.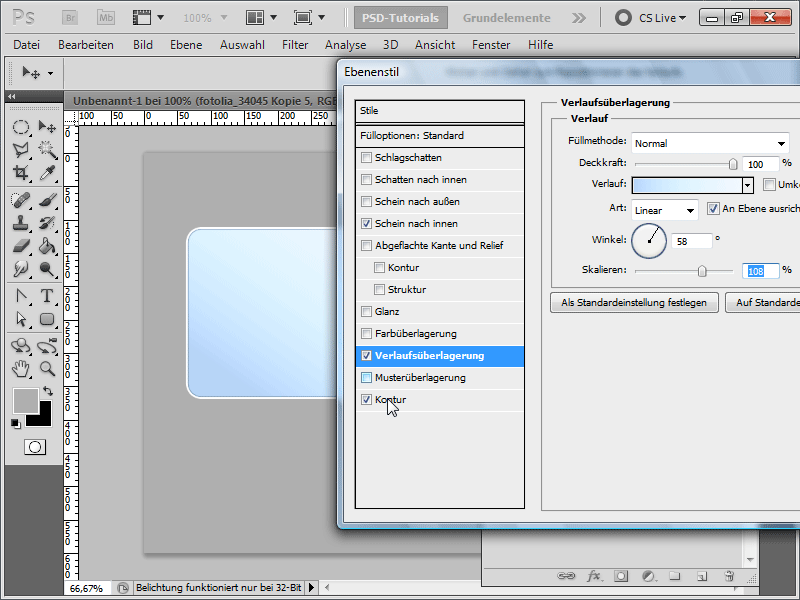
Step 17:
And for Stroke, I enter these values: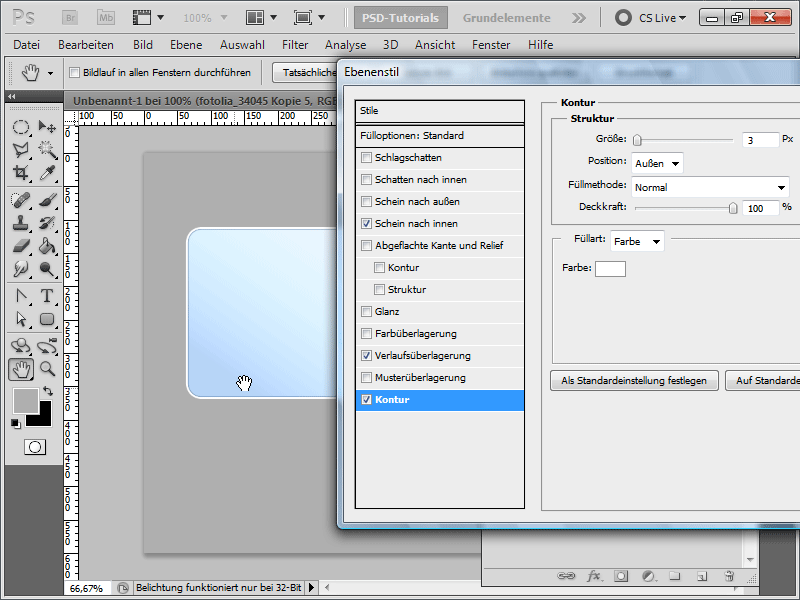
Step 18:
Next, I create another shape in blue using the Ellipse Tool. Then I press Ctrl on my first layer to create a selection.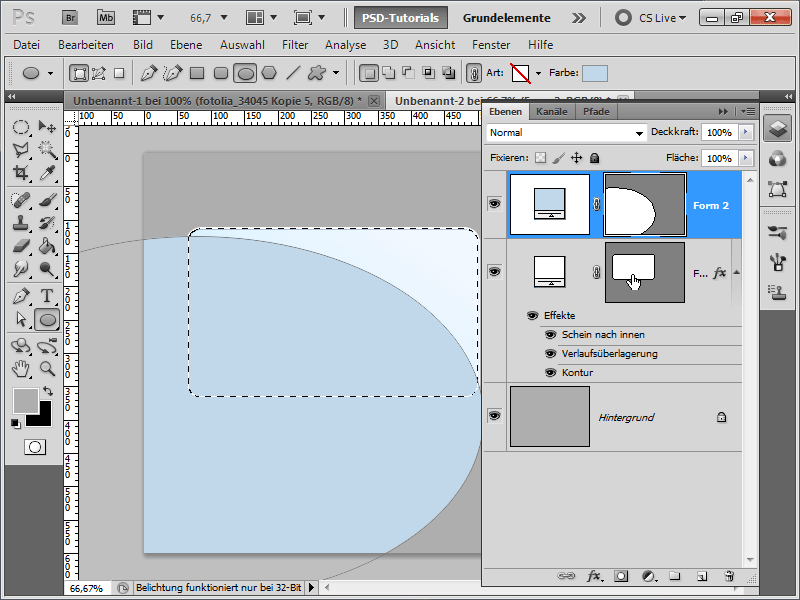
Step 19:
Now I press the Mask Icon so that the glow only appears within my rounded rectangle.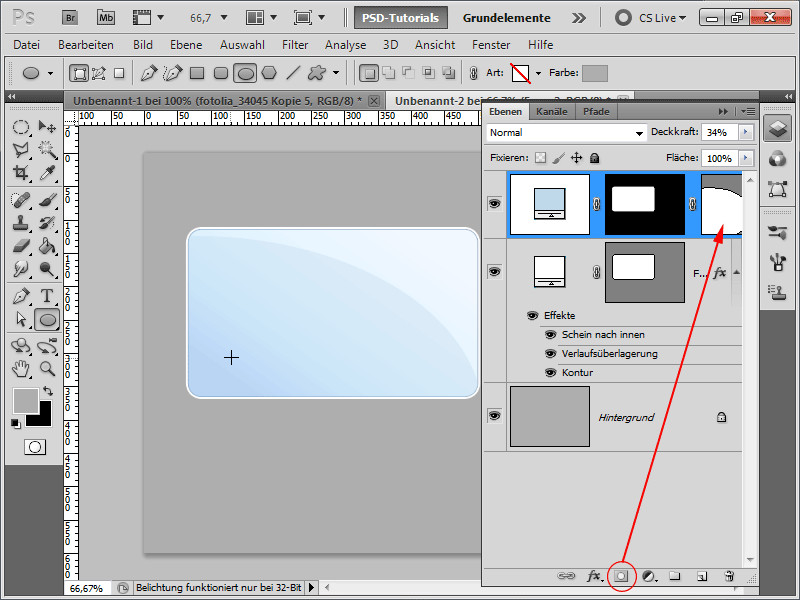
Step 20:
Now it's time for my object to get some snow. To do this, I take the Pen Tool and create a snow area click by click. Tip: Hold down the mouse button while drawing to create a clean curve and reduce the need for post-work.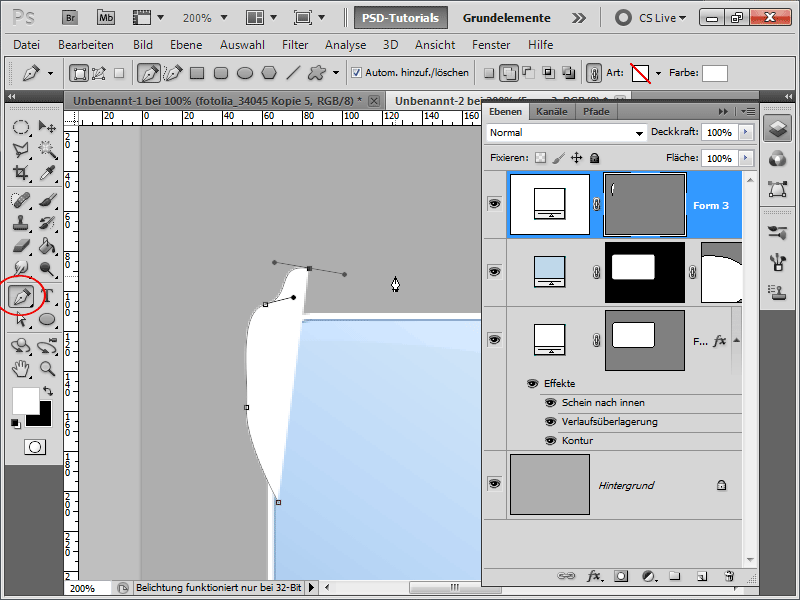
Step 21:
It's coming along nicely: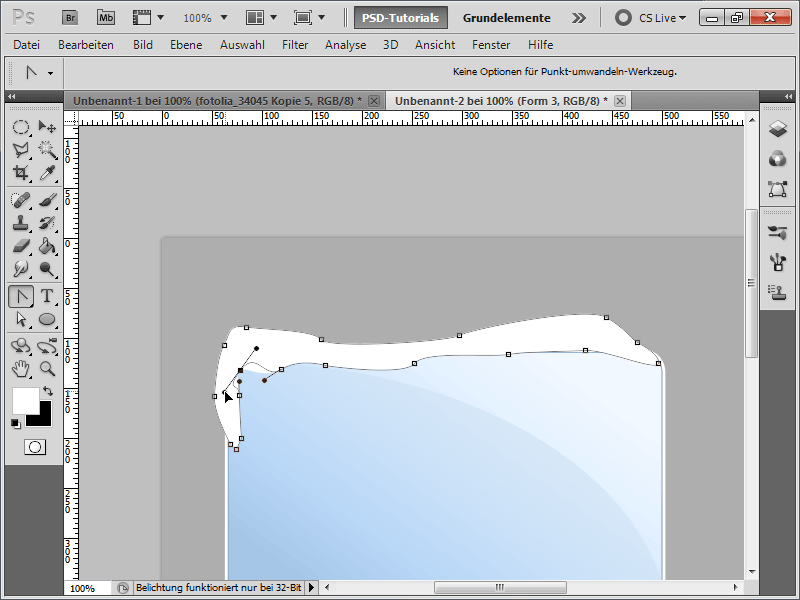
Step 22:
When my snow layer is ready, I duplicate it, change it to blue-gray, create a mask, and invert it with Ctrl+I. Now, I can use a white Brush in the mask to bring out the shadow.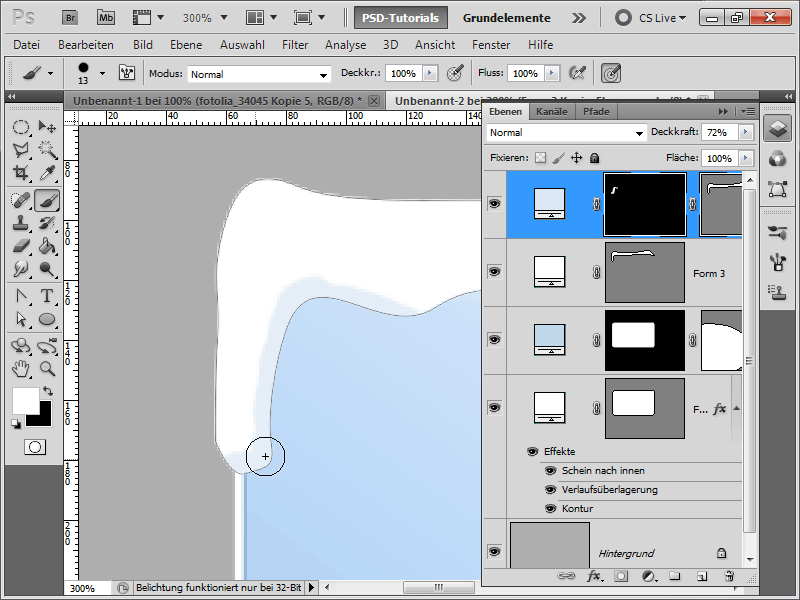
Step 23:
Next, I add a Drop Shadow to my white snow layer.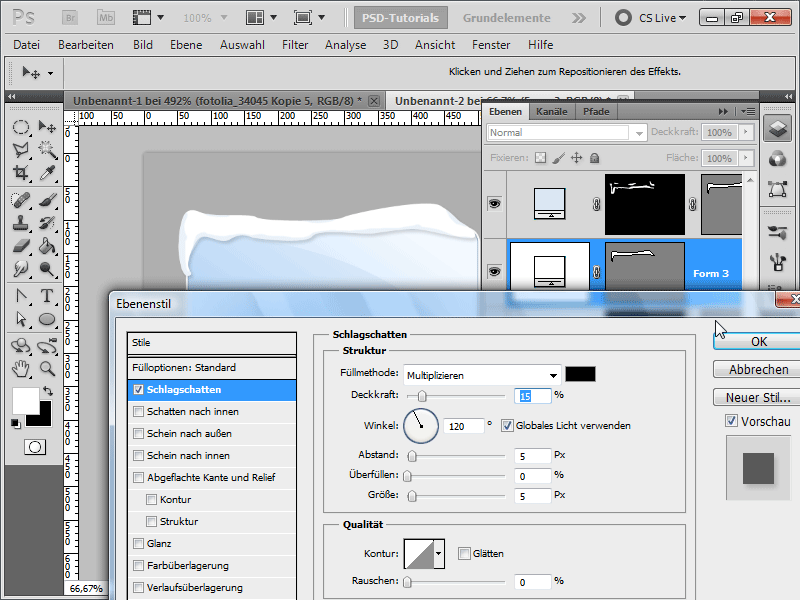
Step 24:
The great thing about vectors is that I can scale them at any time without losing quality. So, I select both snow layers to enlarge them a bit since they seemed a bit small.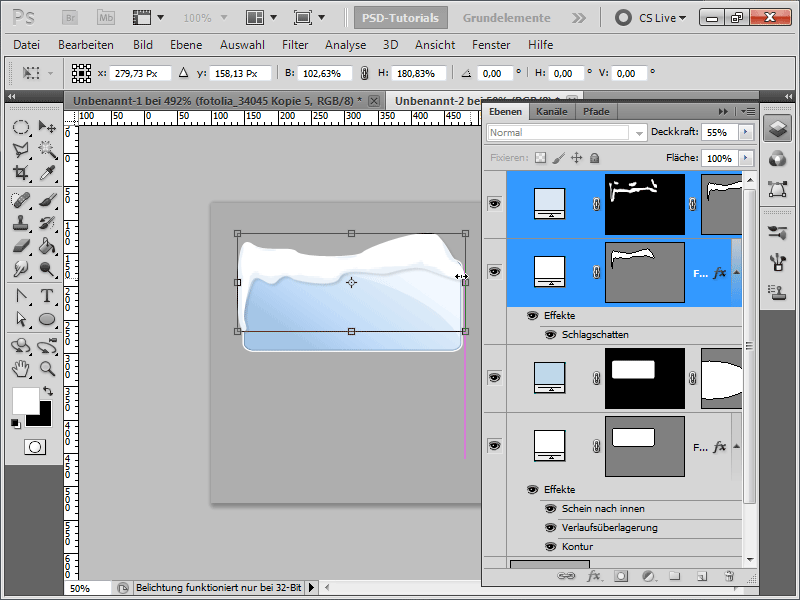
Step 25:
Now it's time for icicles. I create them in a new layer with the Pen Tool as a shape layer.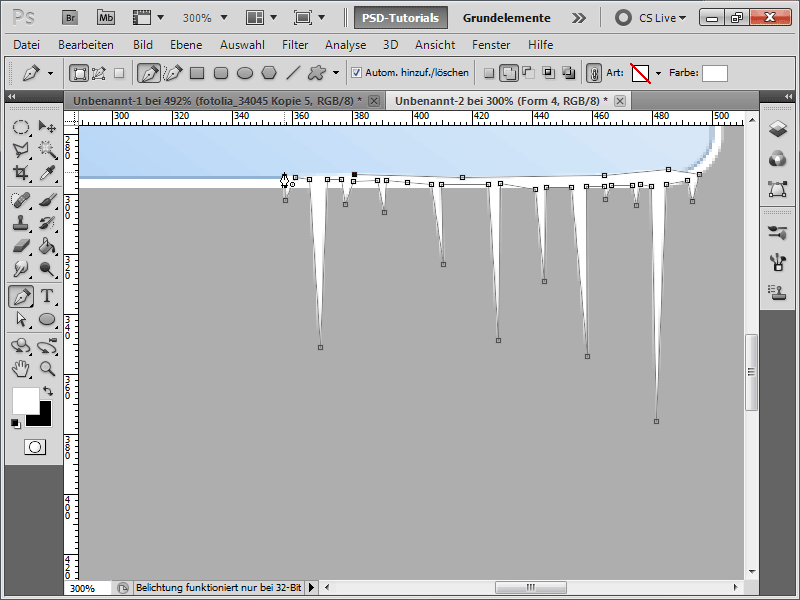
Step 26:
Once the layer is ready, I do the same with the shadow as before: duplicate the layer, recolor it, mask it, and paint the shadow back in with a Brush.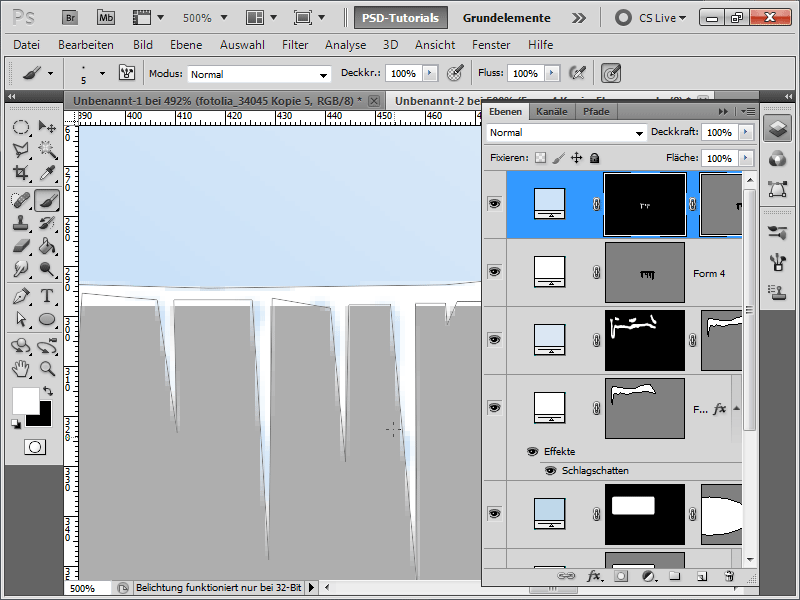
Step 27:
This time, I enlarged the icicle layers because I had created them too small. As mentioned, this is not a problem with vectors.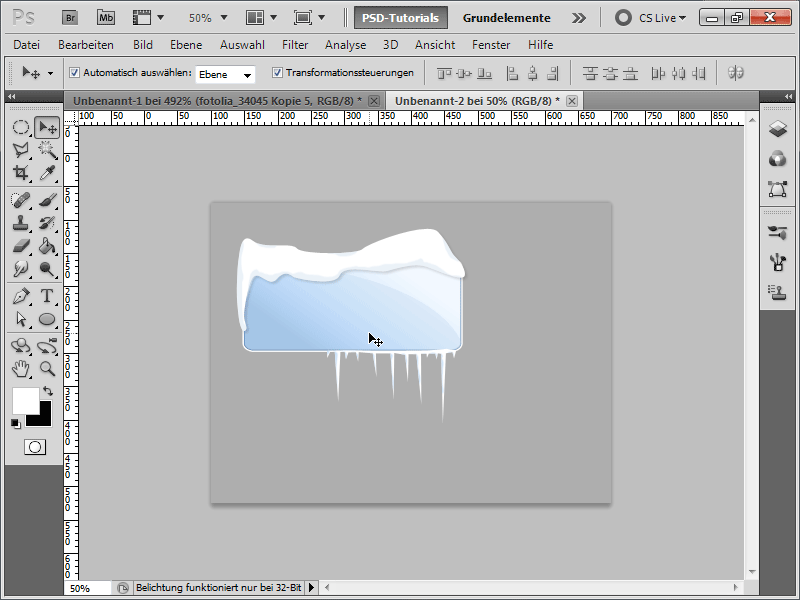
Step 28:
I also add a text in the box called "Ice Age." I give it the following values for the Drop Shadow: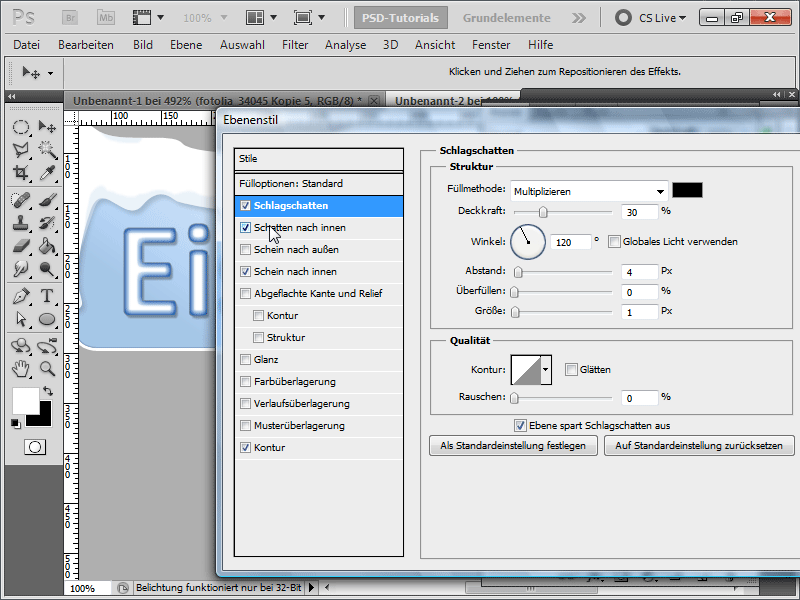
Step 29:
The Inner Shadow receives these values: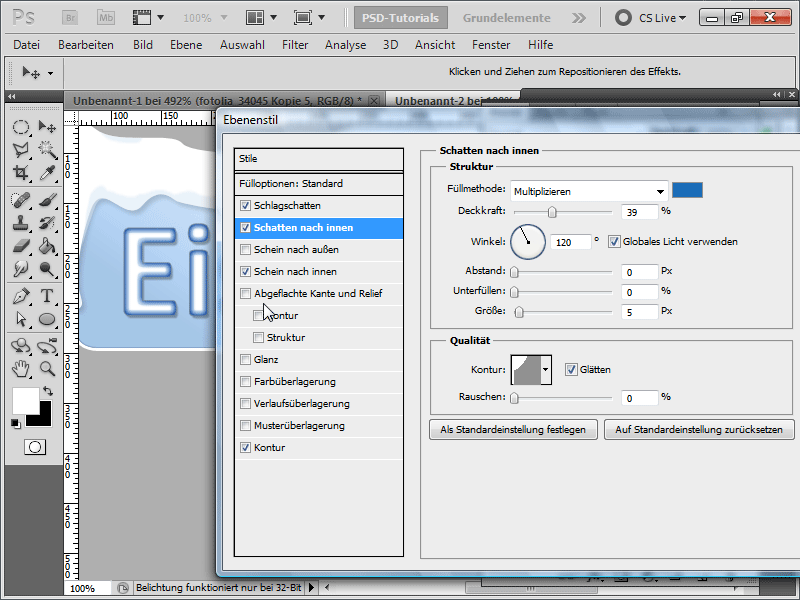
Step 30:
The inner shine gets these values: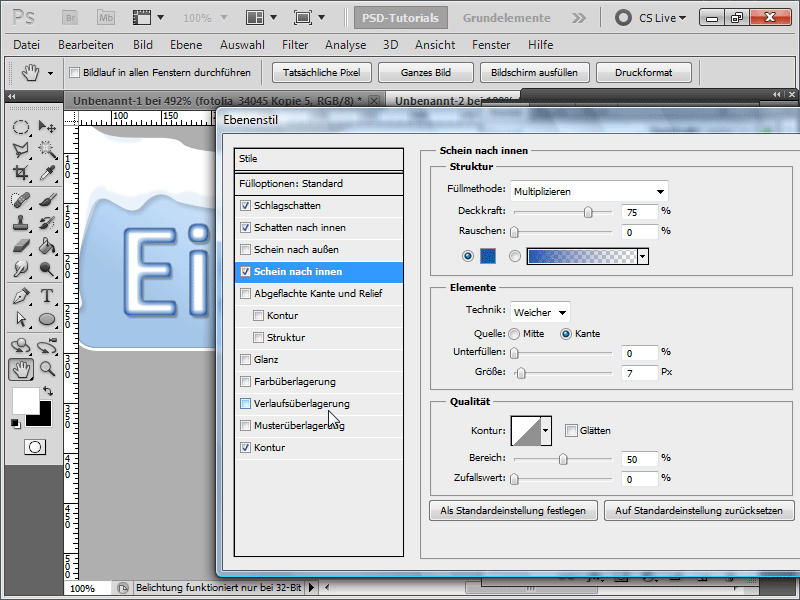
Step 31:
And last but not least, the contour: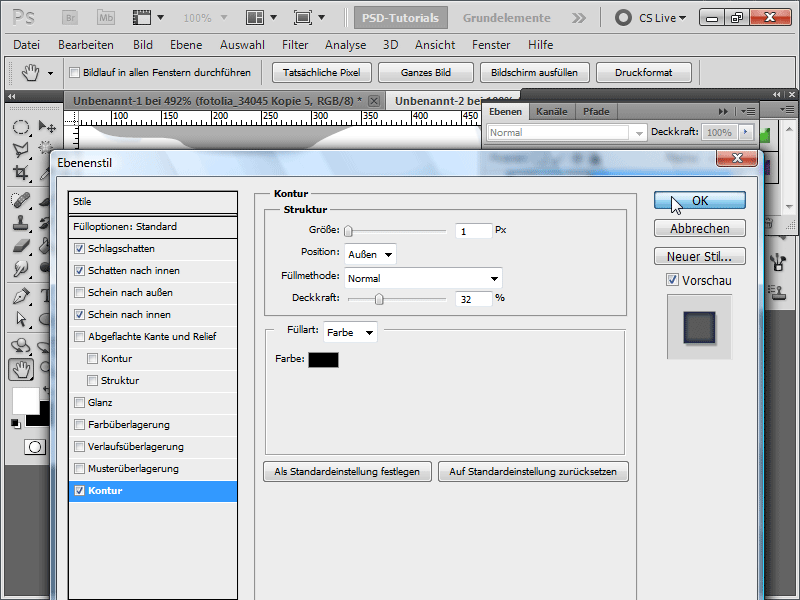
Step 32:
This is what the finished product looks like: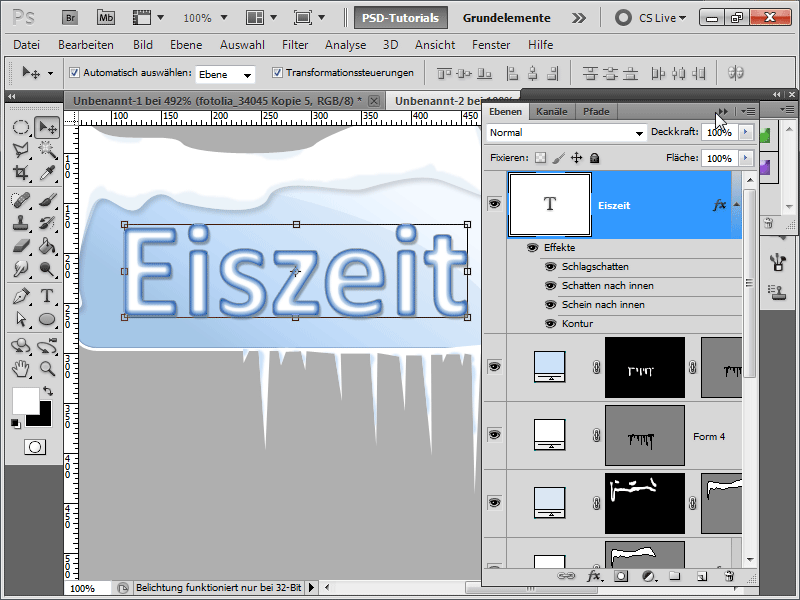
Step 33:
With capital letters and a different background, the result would look like this: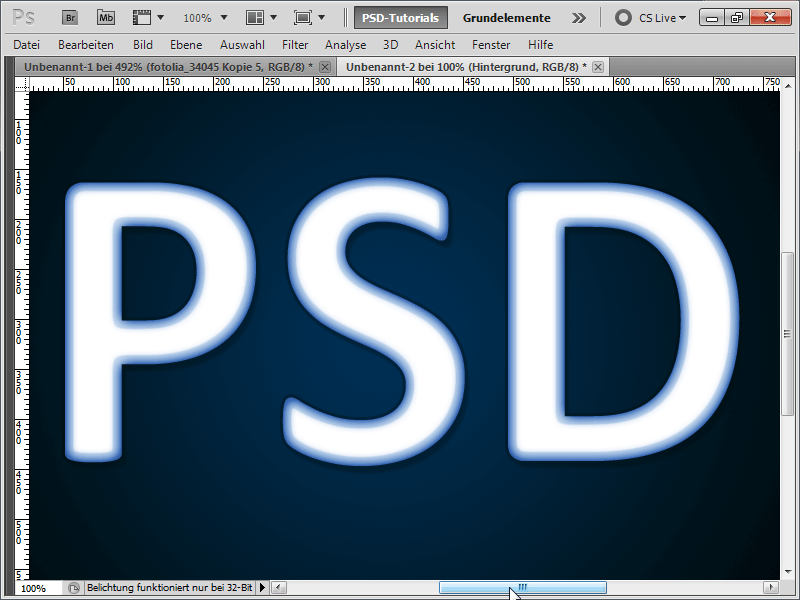
Step 34:
To give this image an additional wintry touch, I grab the snowflake brush.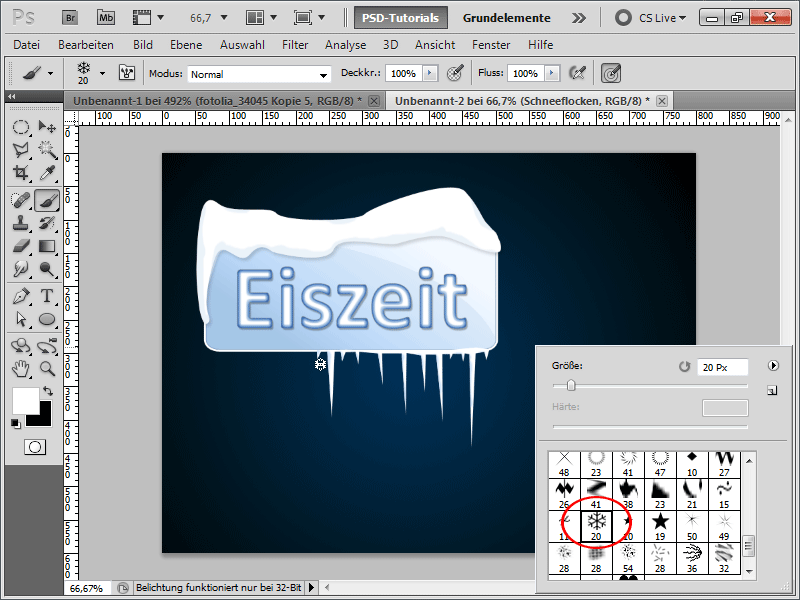
Step 35:
Pressing F5 brings up my brush panel, and under Brush shape, I set the following: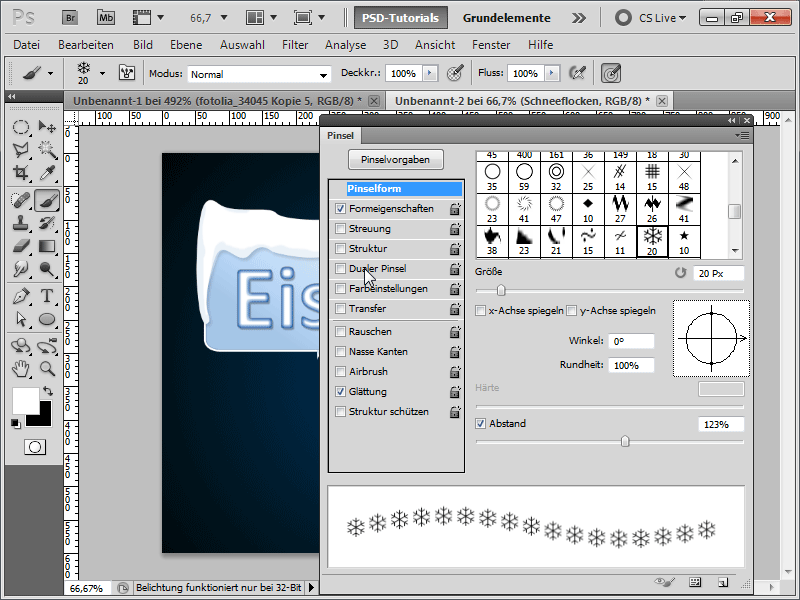
Step 36:
For Scattering, I adjust the sliders as follows: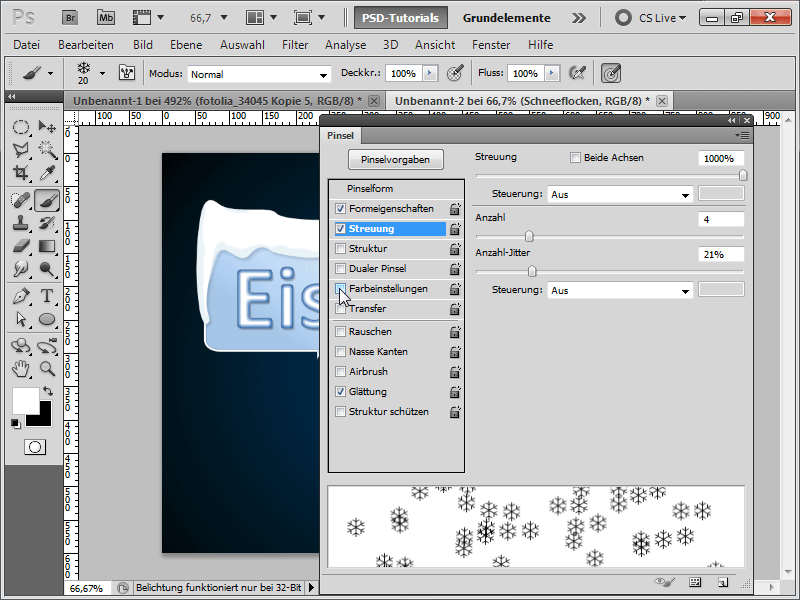
Step 37:
Under Transfer, I enable Opacity and Flow Jitter to make some snowflakes less opaque.
Step 38:
And in Shape dynamics, I set Size Jitter to 100% so that some snowflakes have a different size.
Step 39:
After that, I can easily start painting with the brush and have all the snowflakes painted within about 10 seconds. And here is the result:
I have added the ice styles as the working file.


