Creating labels in Word is a practical skill that can be useful to you in many ways. Whether you need labels for gifts, address stickers, or organizational purposes, Word provides you with simple tools to efficiently accomplish this. In this guide, you will learn how to quickly and easily create labels, customize them, and even add serial numbers. With the right template and the helpful features of Word, you can generate hundreds of labels in no time.
Key Takeaways
- Word supports a variety of label formats that are easy to find.
- You can use the mail merge function to create multiple labels at once.
- It is possible to provide labels with dynamic data such as names and phone numbers.
Step-by-Step Guide
1. Finding label templates
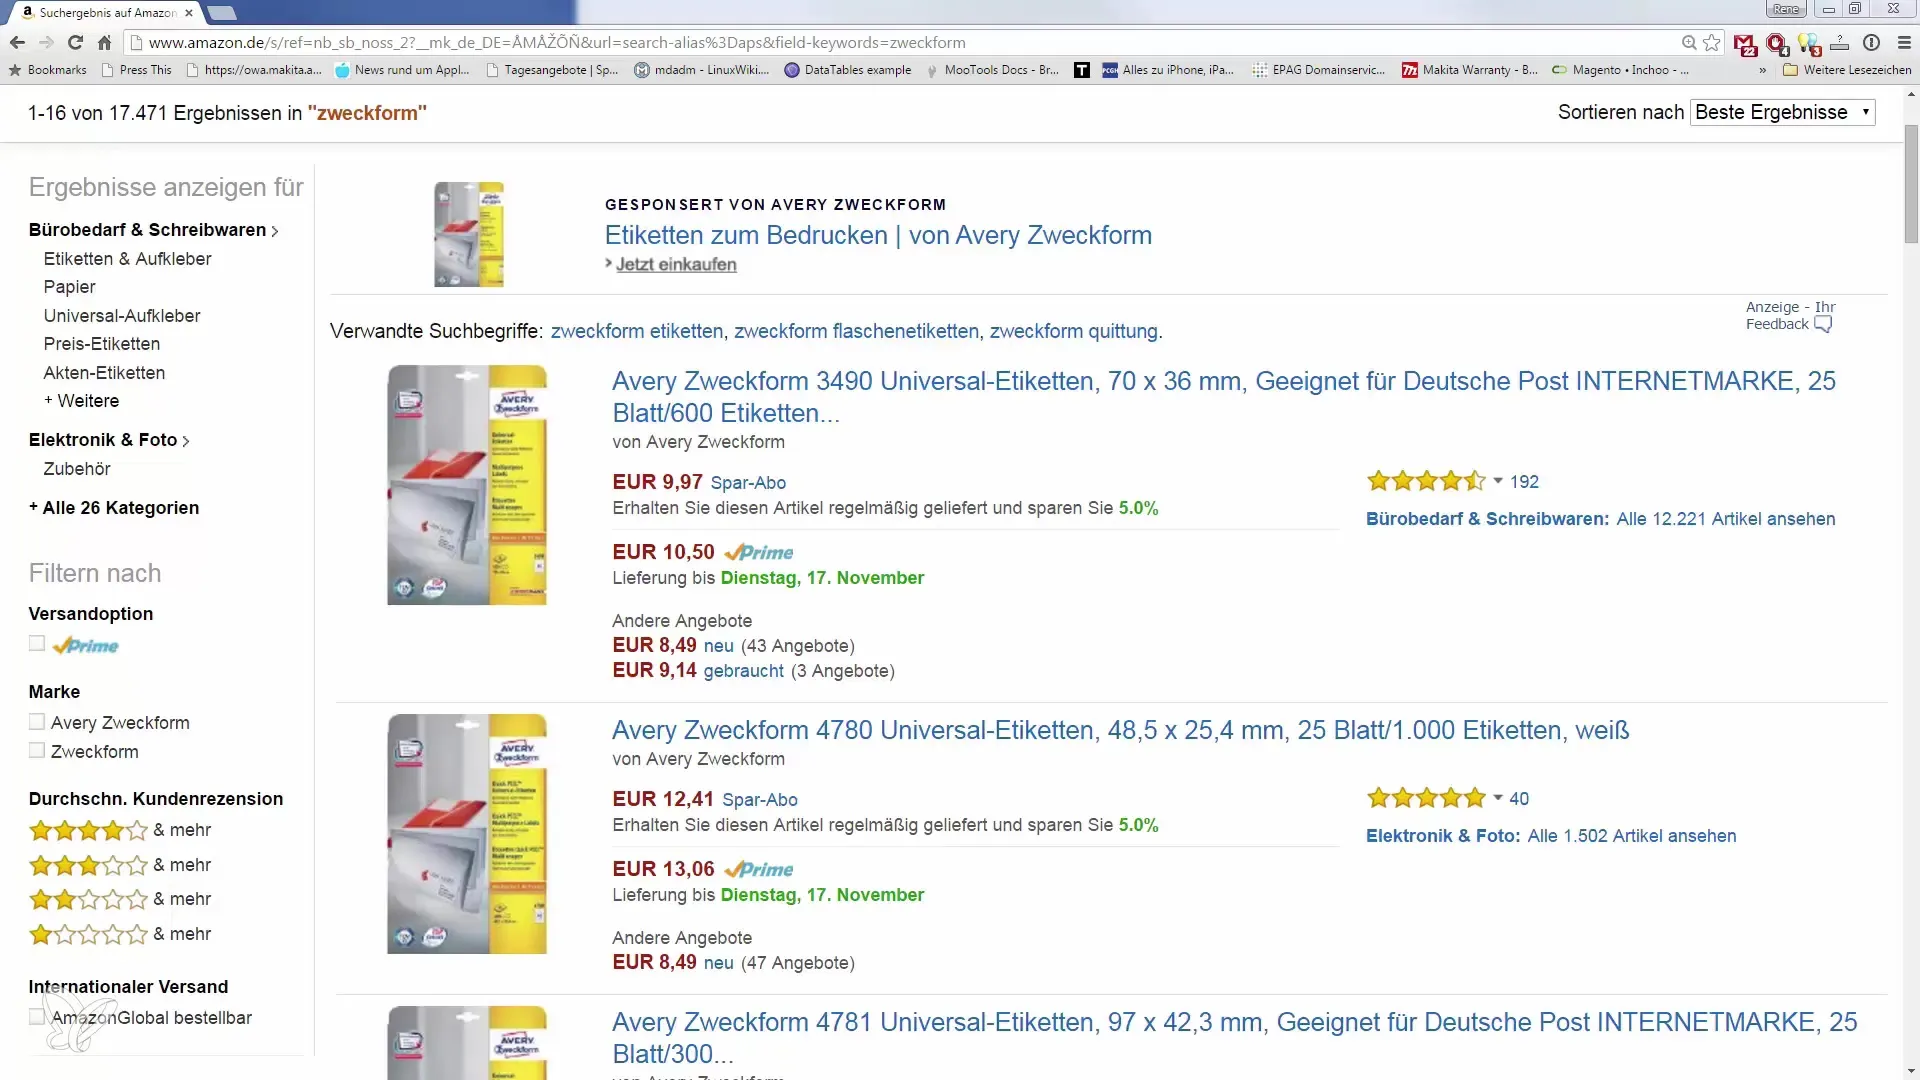
To start your journey, open Microsoft Word and navigate to the "Mailings" menu. Here, you have the option to choose from various label formats. You can select pre-made labels from providers like "Zweckform," which saves you a lot of time.
2. Choosing the right template
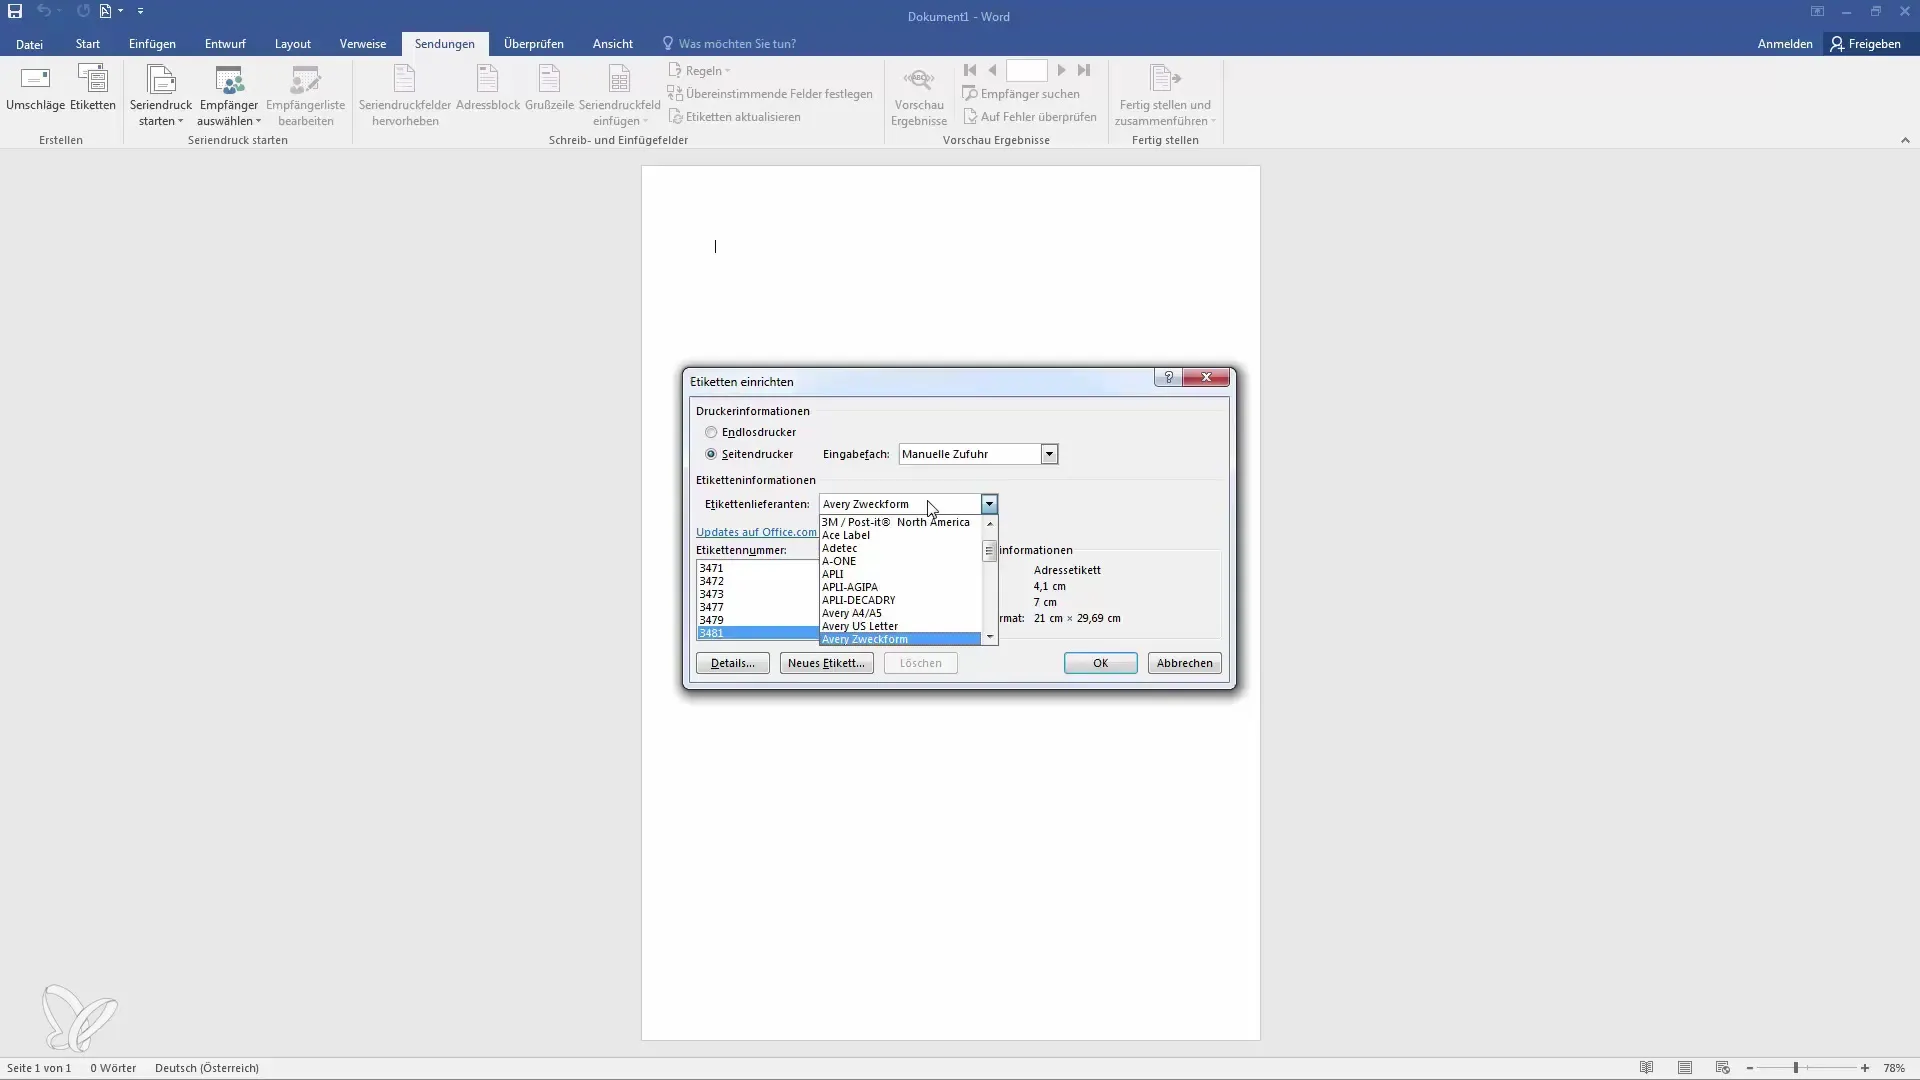
After selecting the "Labels" option in Word, some choices will appear. Choose the desired template from the list that matches the standard size of your labels. Make sure that the measurements correspond to the labels you have purchased.
3. Customizing the labels
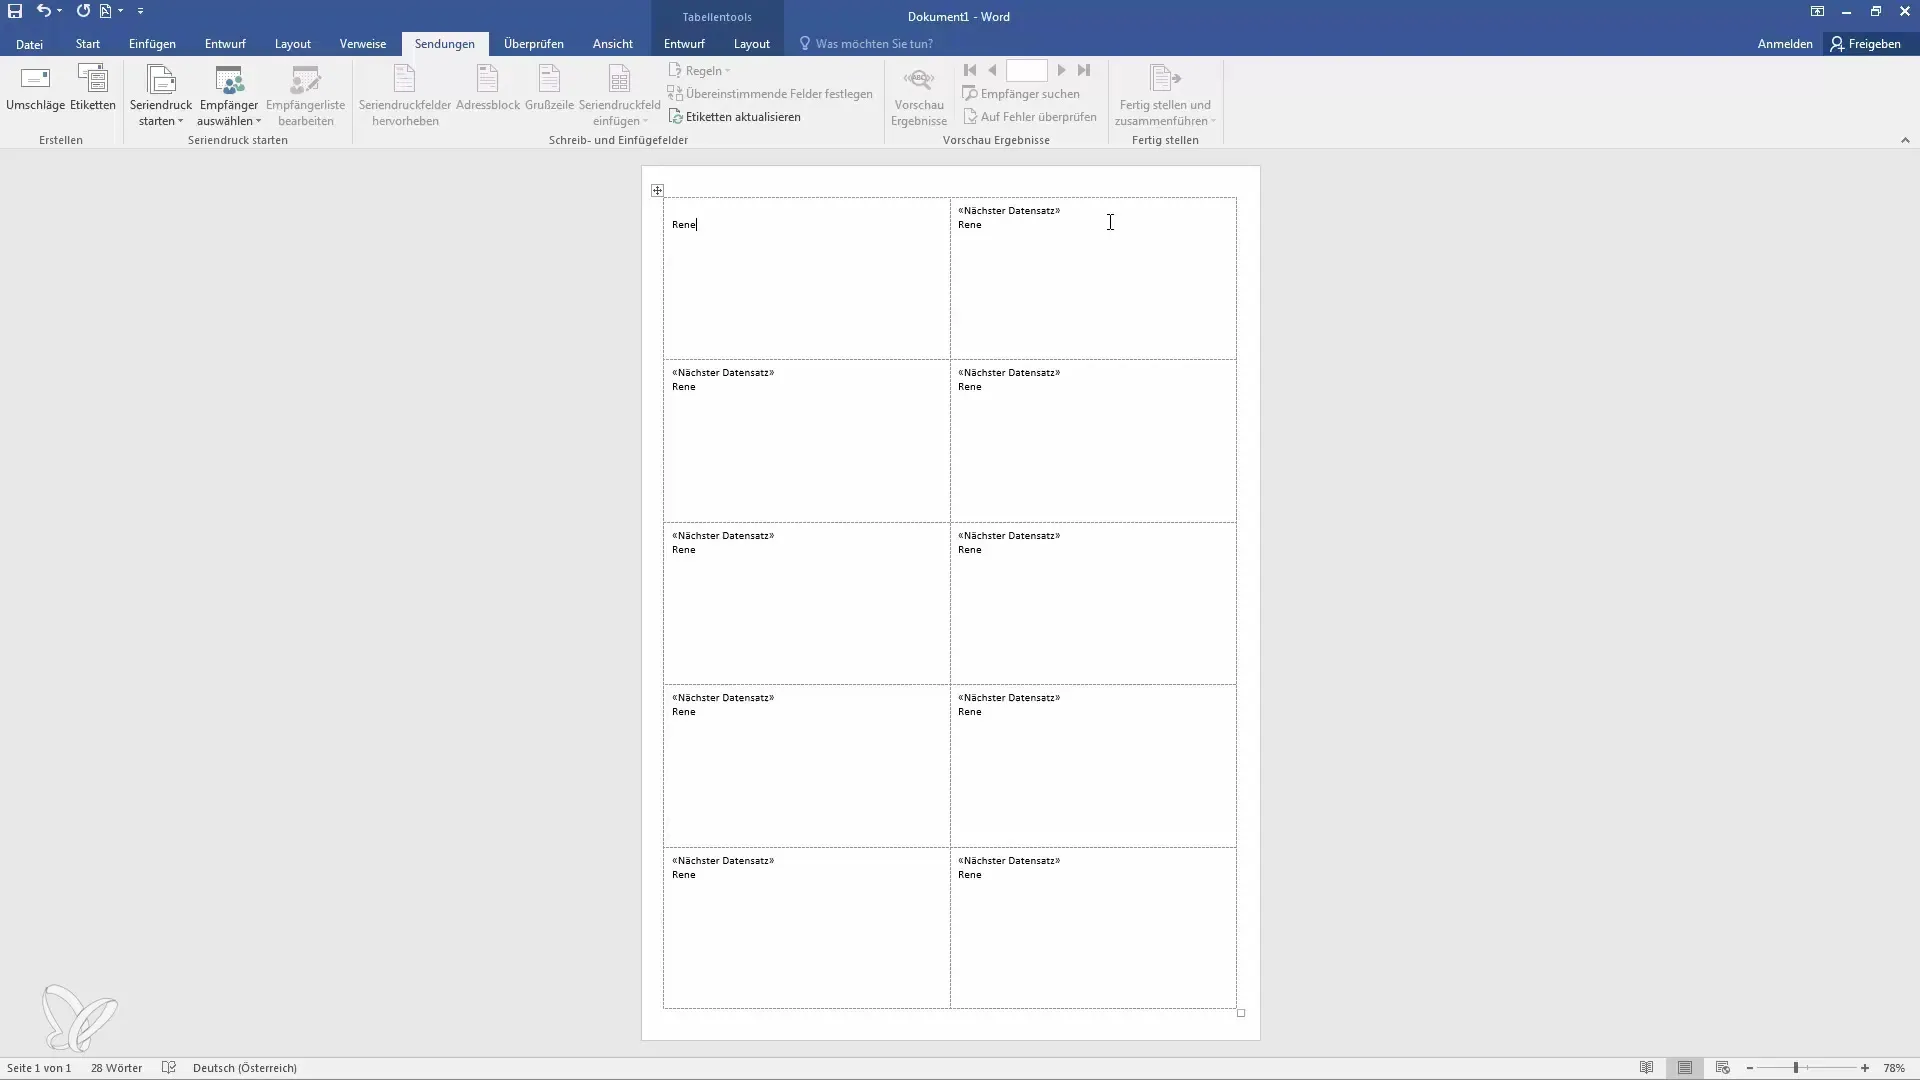
Once the template is loaded, you will see the predefined fields on your document. Here you can easily enter your name or other information, and thanks to the mail merge function, this text will be automatically applied to all labels.
4. Creating serial numbers
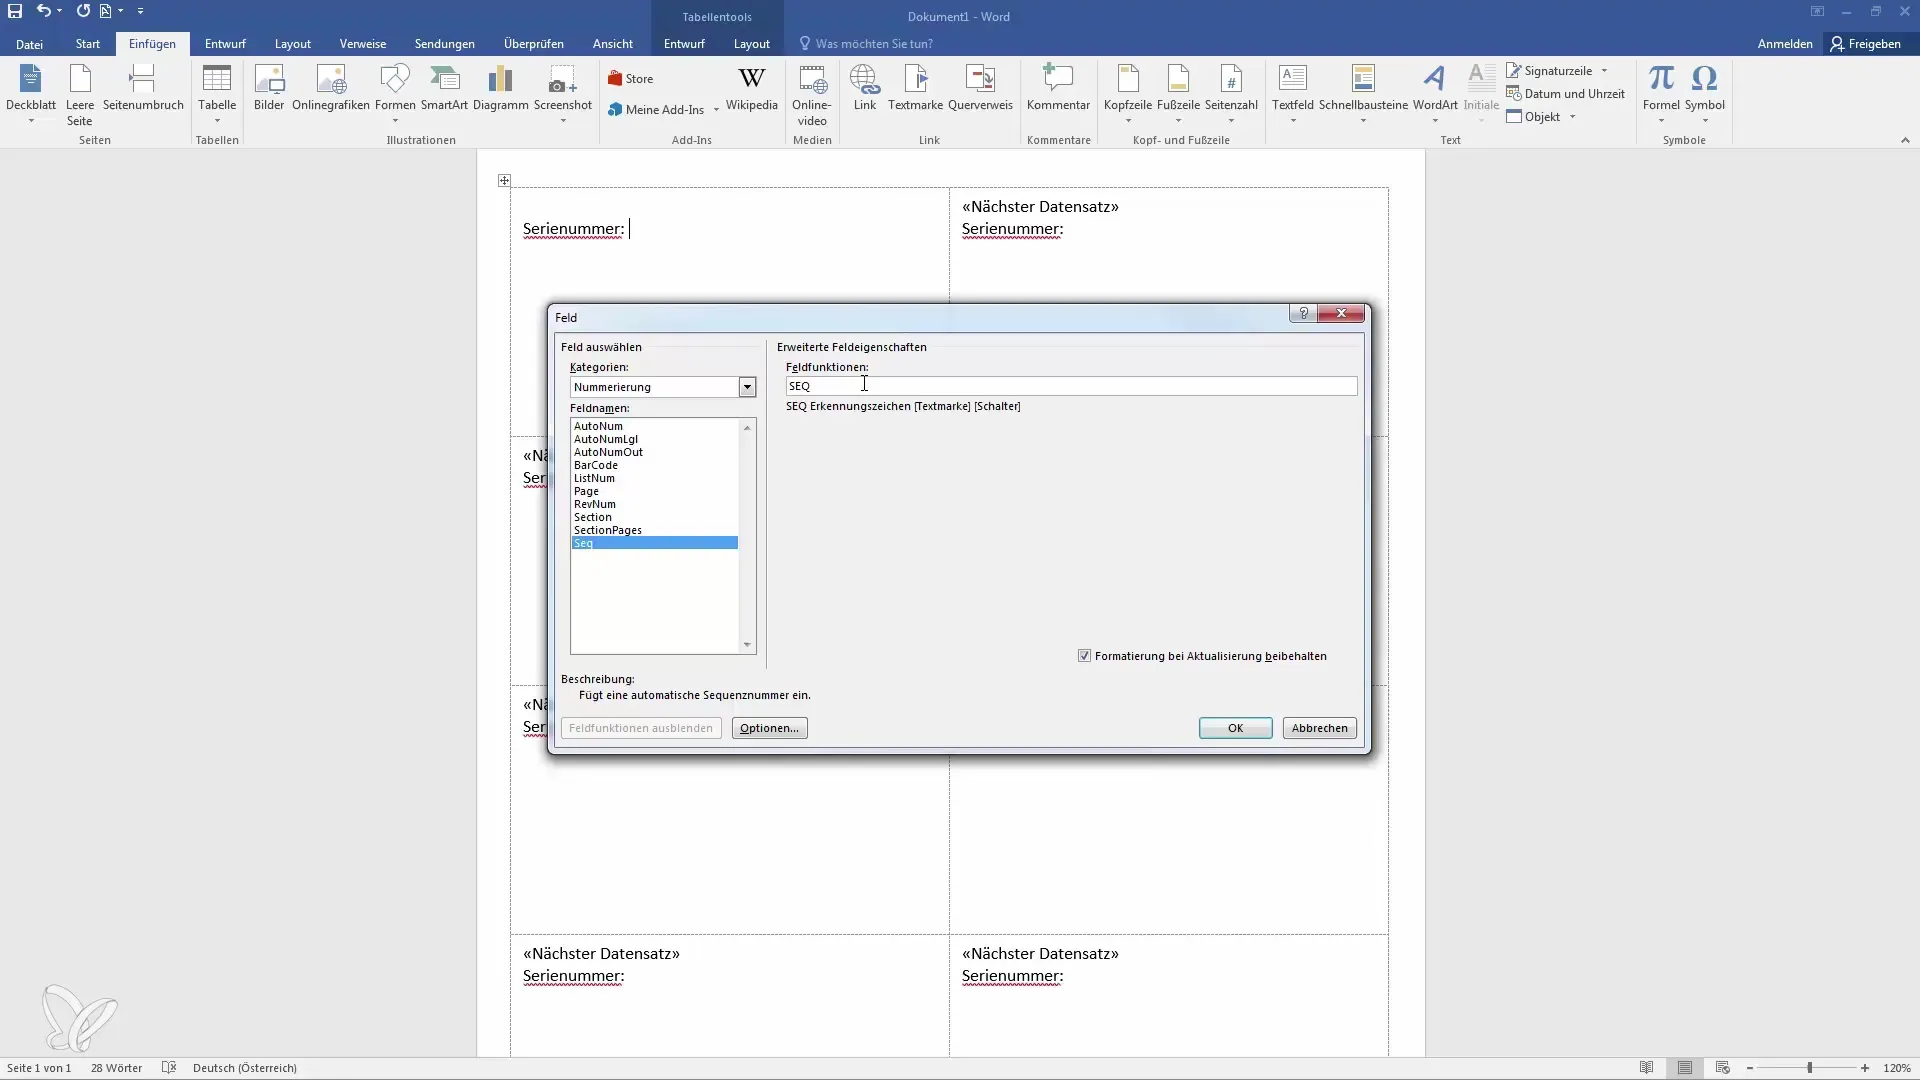
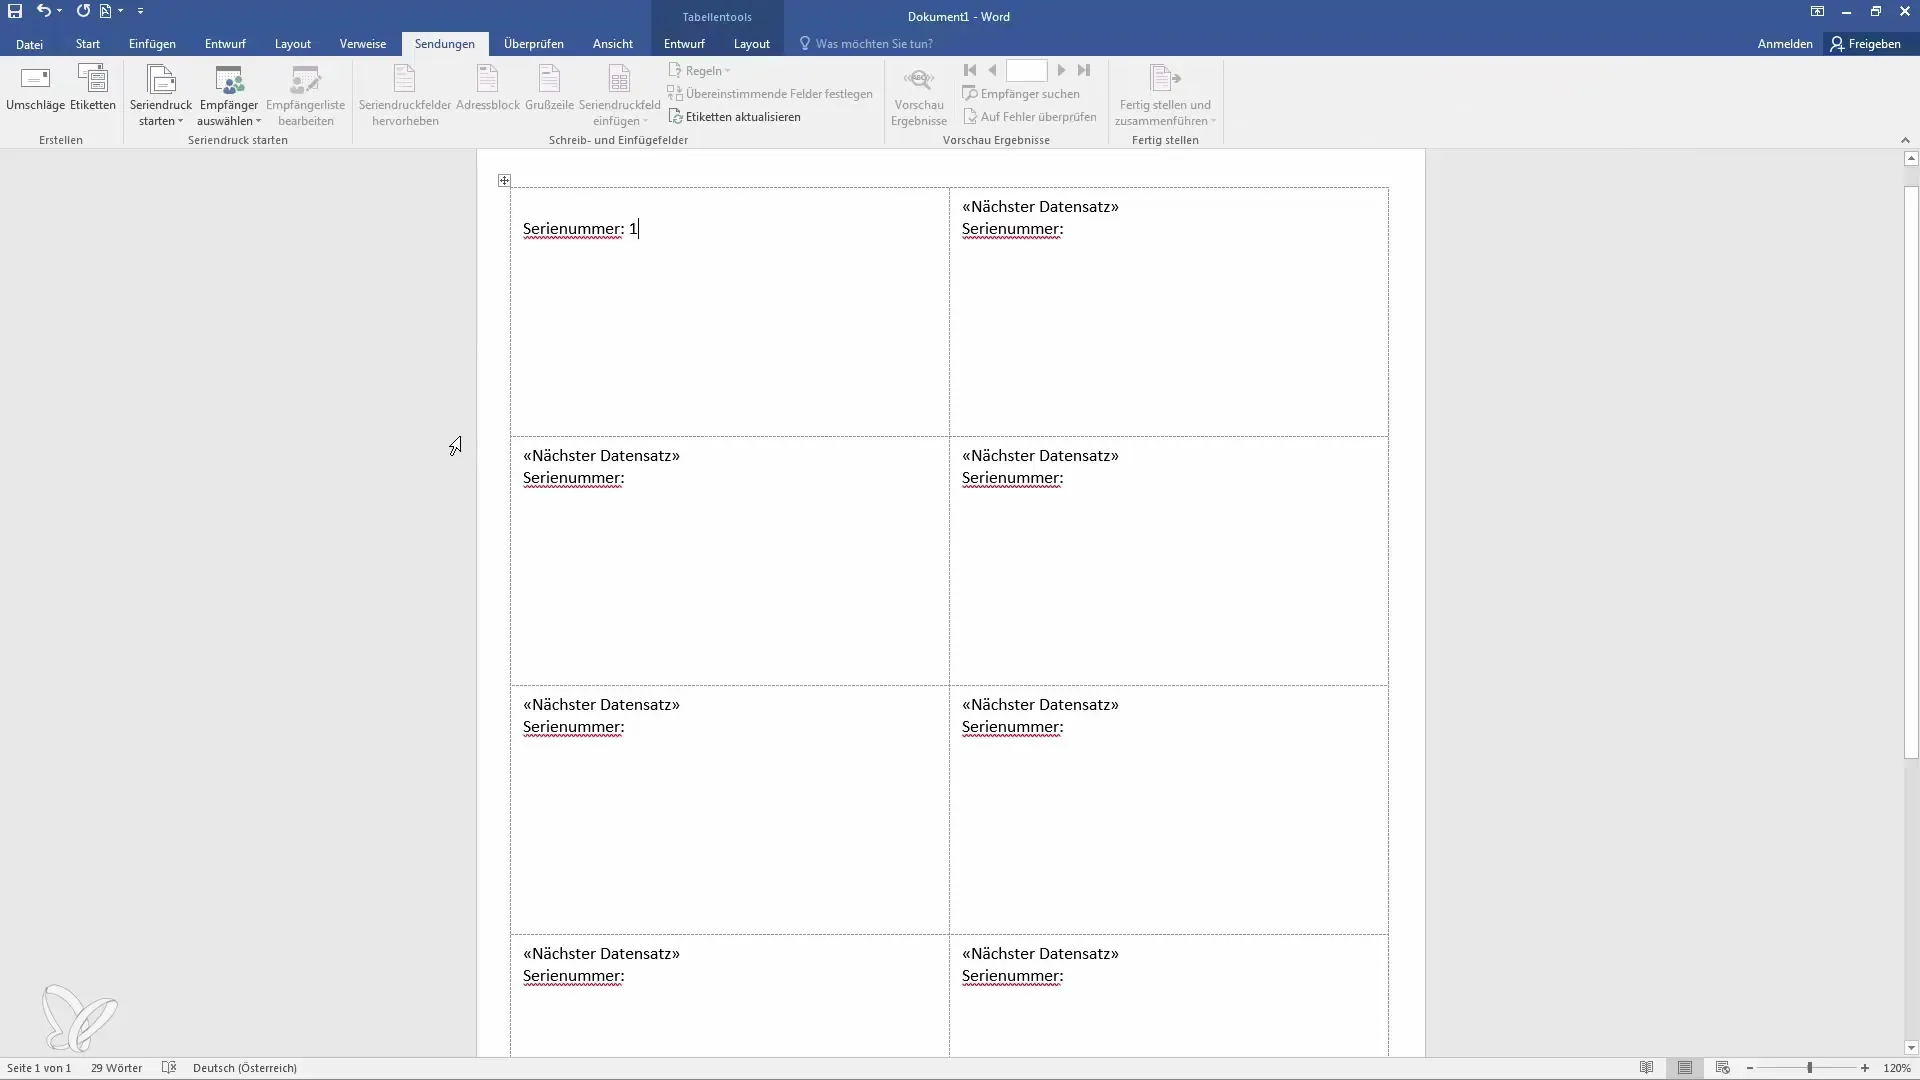
If you want to create labels with sequential serial numbers, you can also use this function. Place the cursor in the field where the number should appear and go to "Insert." Under "Quick Parts," you will find the category "Numbering." Here, choose the "Seq" option and customize the numbering style as desired.
5. Updating the labels
After configuring the serial numbers, you need to update your labels. Go back to "Mailings" and select "Update Labels." This will apply the set serial numbers to all labels.
6. Adding additional data
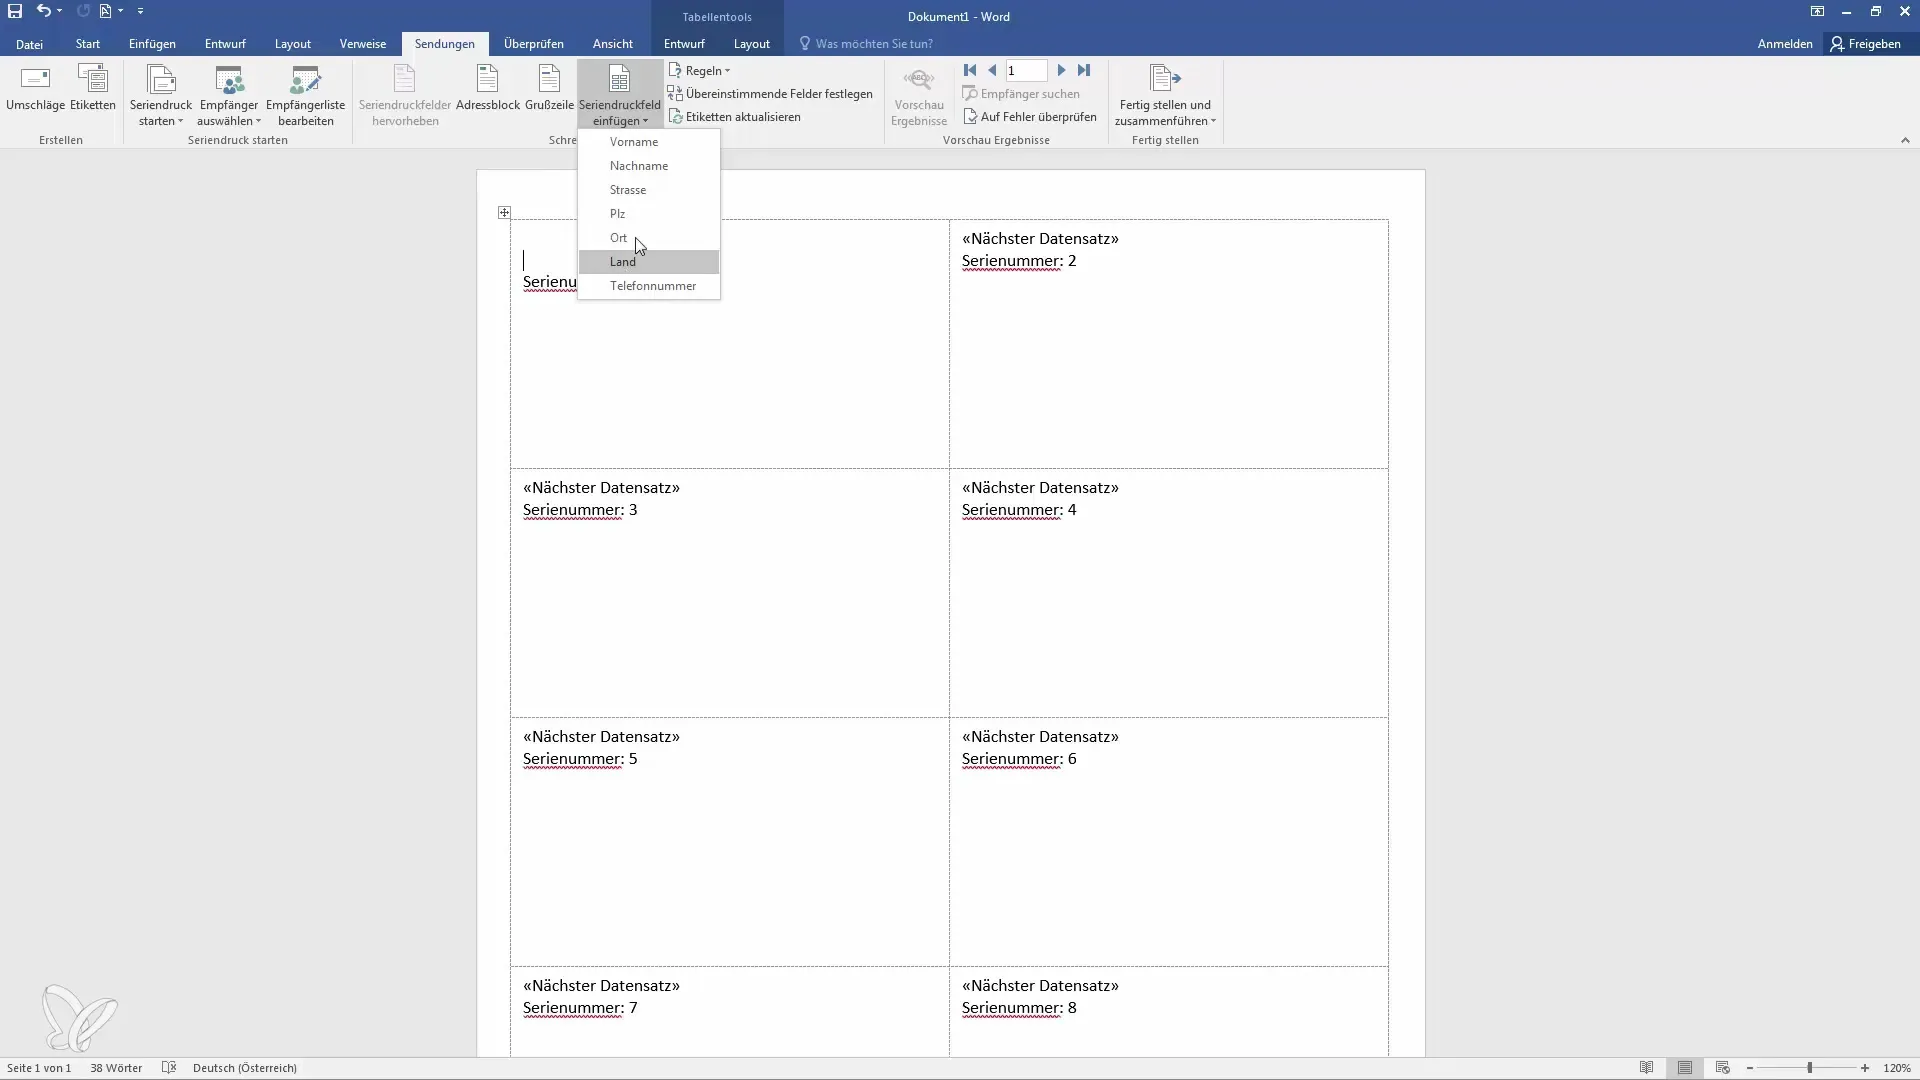
If you want to personalize the labels, you can even add addresses or phone numbers at this point. Choose "Insert Recipient" and decide whether you want to create a new list or import from existing Outlook contacts.
7. Previewing the labels
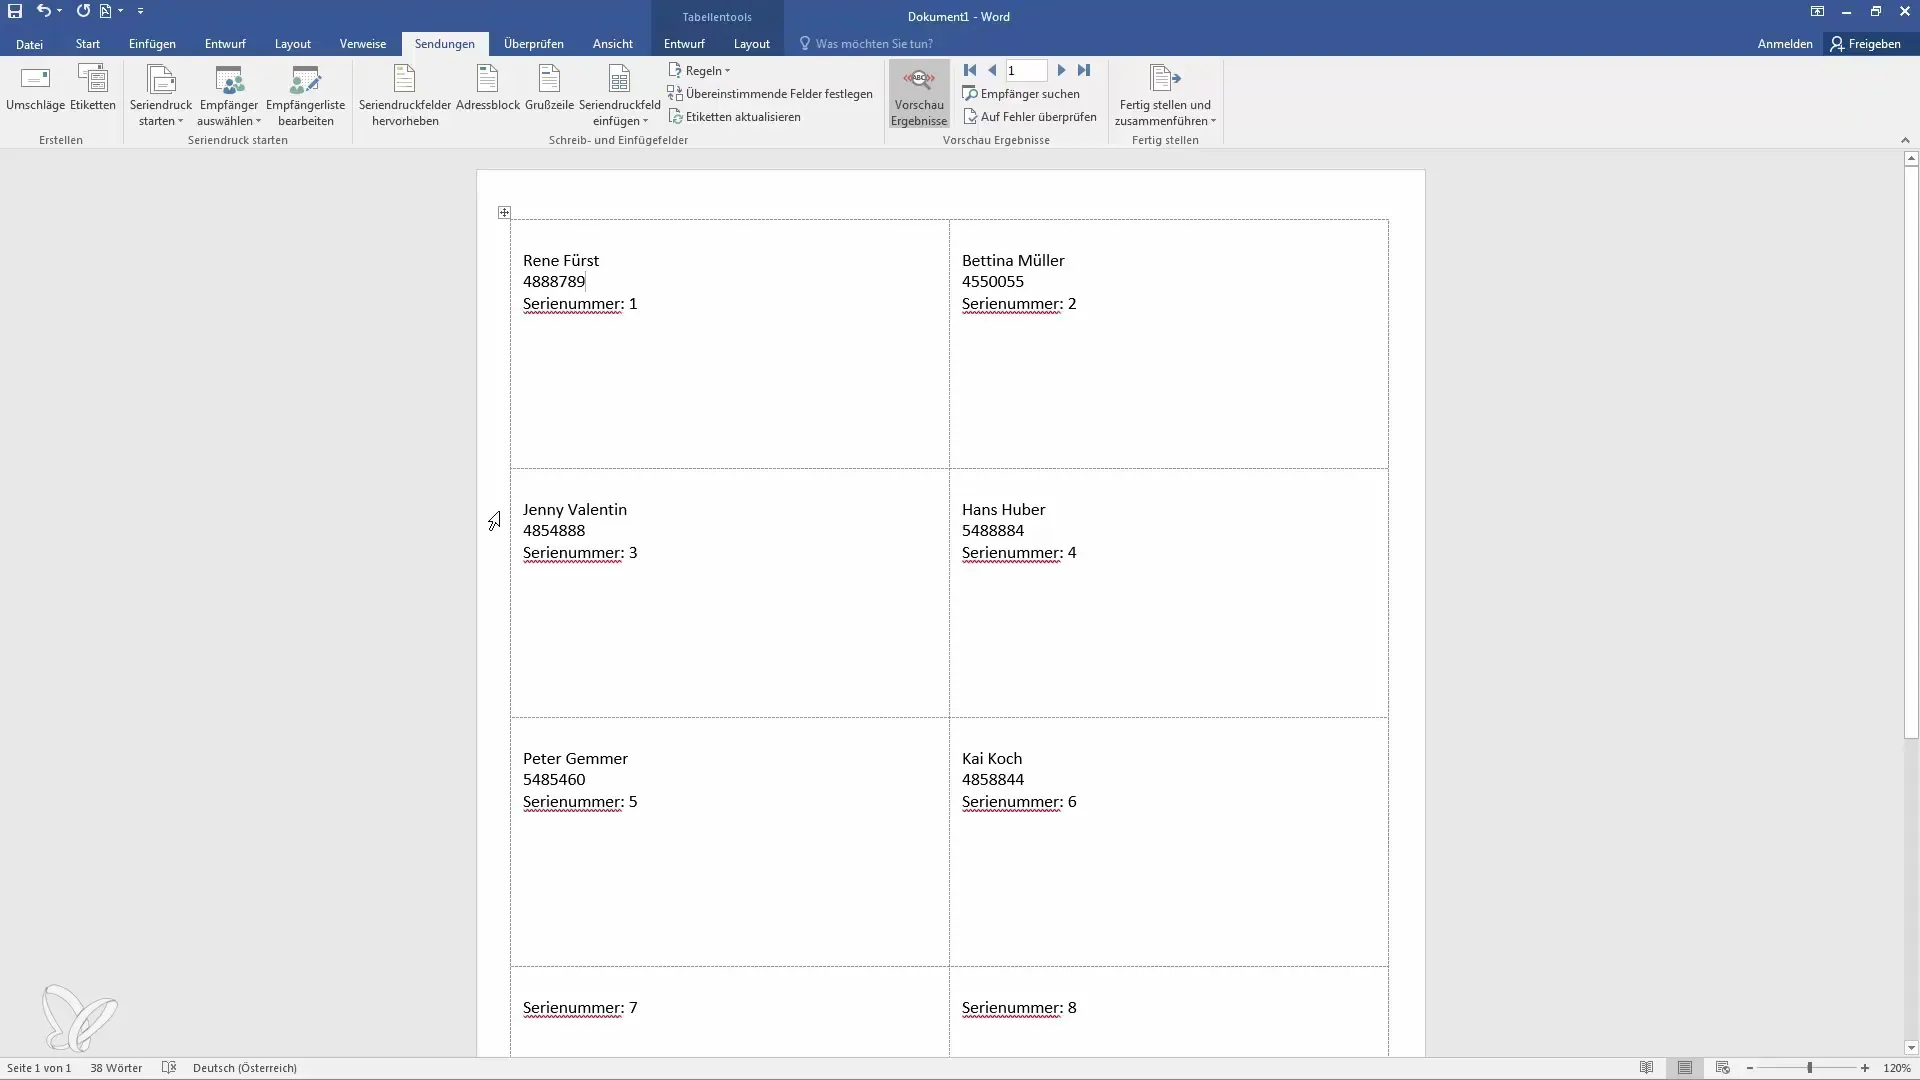
To ensure everything is set up correctly, you can preview your labels. Click on "Preview Results" to see how the final labels will look.
8. Printing the labels
If you are satisfied with the preview, you can print the labels directly. Make sure the printer is set up correctly and the labels are loaded in the correct format.
Summary
The steps you have followed allow you to create labels quickly and to your liking. With the mail merge function, it becomes even easier to generate a large number of labels in a short time. Whether you are planning a specific project or simply organizing your office, Word provides you with the necessary tools to do this effectively.
Frequently Asked Questions
How do I find the right template for my labels?You can search for predefined templates under the "Mailings" menu in Word and select the appropriate one for your label size.
What do I need to do to add serial numbers to my labels?Use the "Insert" and "Quick Parts" function to create a continuous numbering using the "Seq" option and then update the labels accordingly.
Can I import my addresses directly from Outlook?Yes, you can import existing contacts by choosing the relevant option in the "Recipient" section and selecting your Outlook contacts.
