Editing documents can be a double-edged sword in many situations. Especially when you have confidential information in a Word document, you probably want to ensure that it is not unintentionally altered. In this guide, you will learn how to effectively protect a Word document. This is particularly useful when you send a document to someone and do not want changes to be made while preserving the original content. Let's dive straight into the steps.
Key Takeaways
- You can restrict editing of a Word document through various options.
- A password can be used to block access to changes.
- Exceptions can be made for specific users.
Step-by-Step Guide
Step 1: Open the "Review" Menu
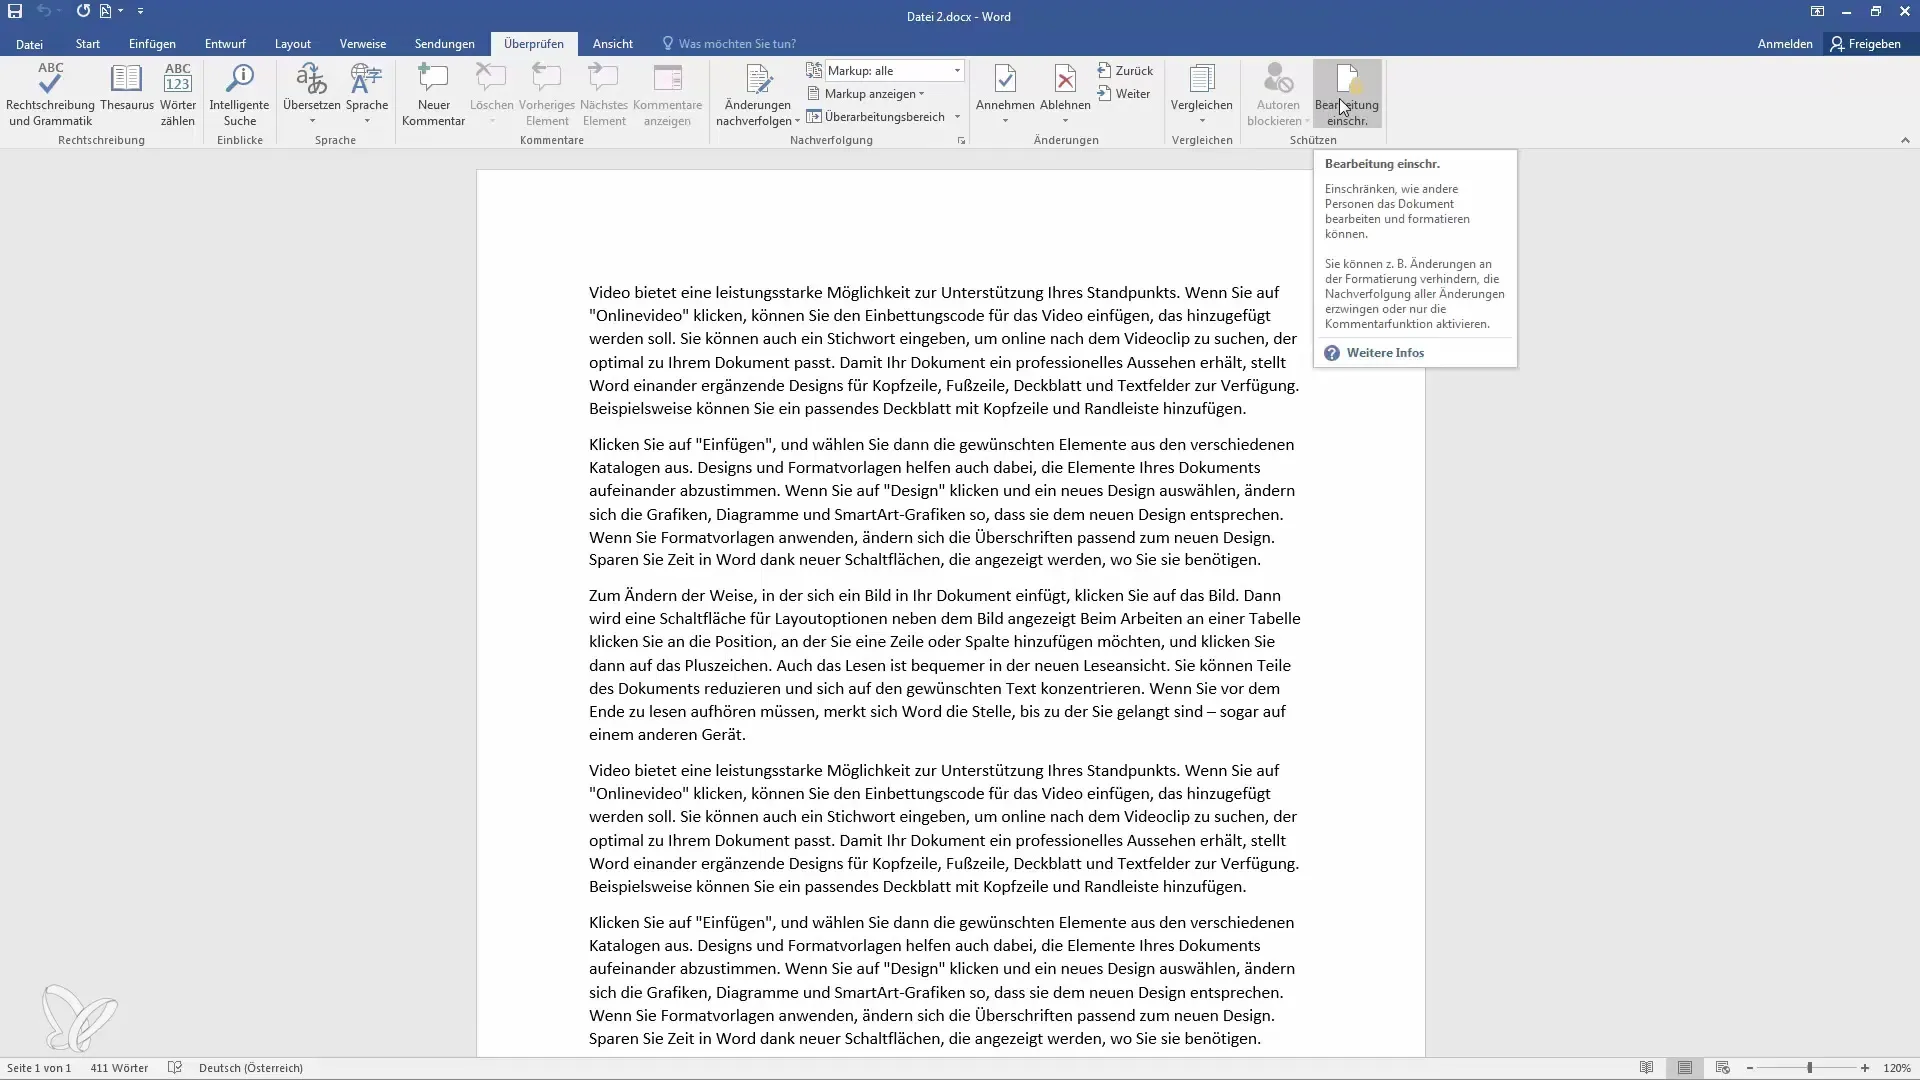
To protect a Word document from unwanted changes, you first need to open the "Review" menu. This is the first step in activating editing restrictions. You can find the menu in the top bar of Word.
Step 2: Restrict Editing
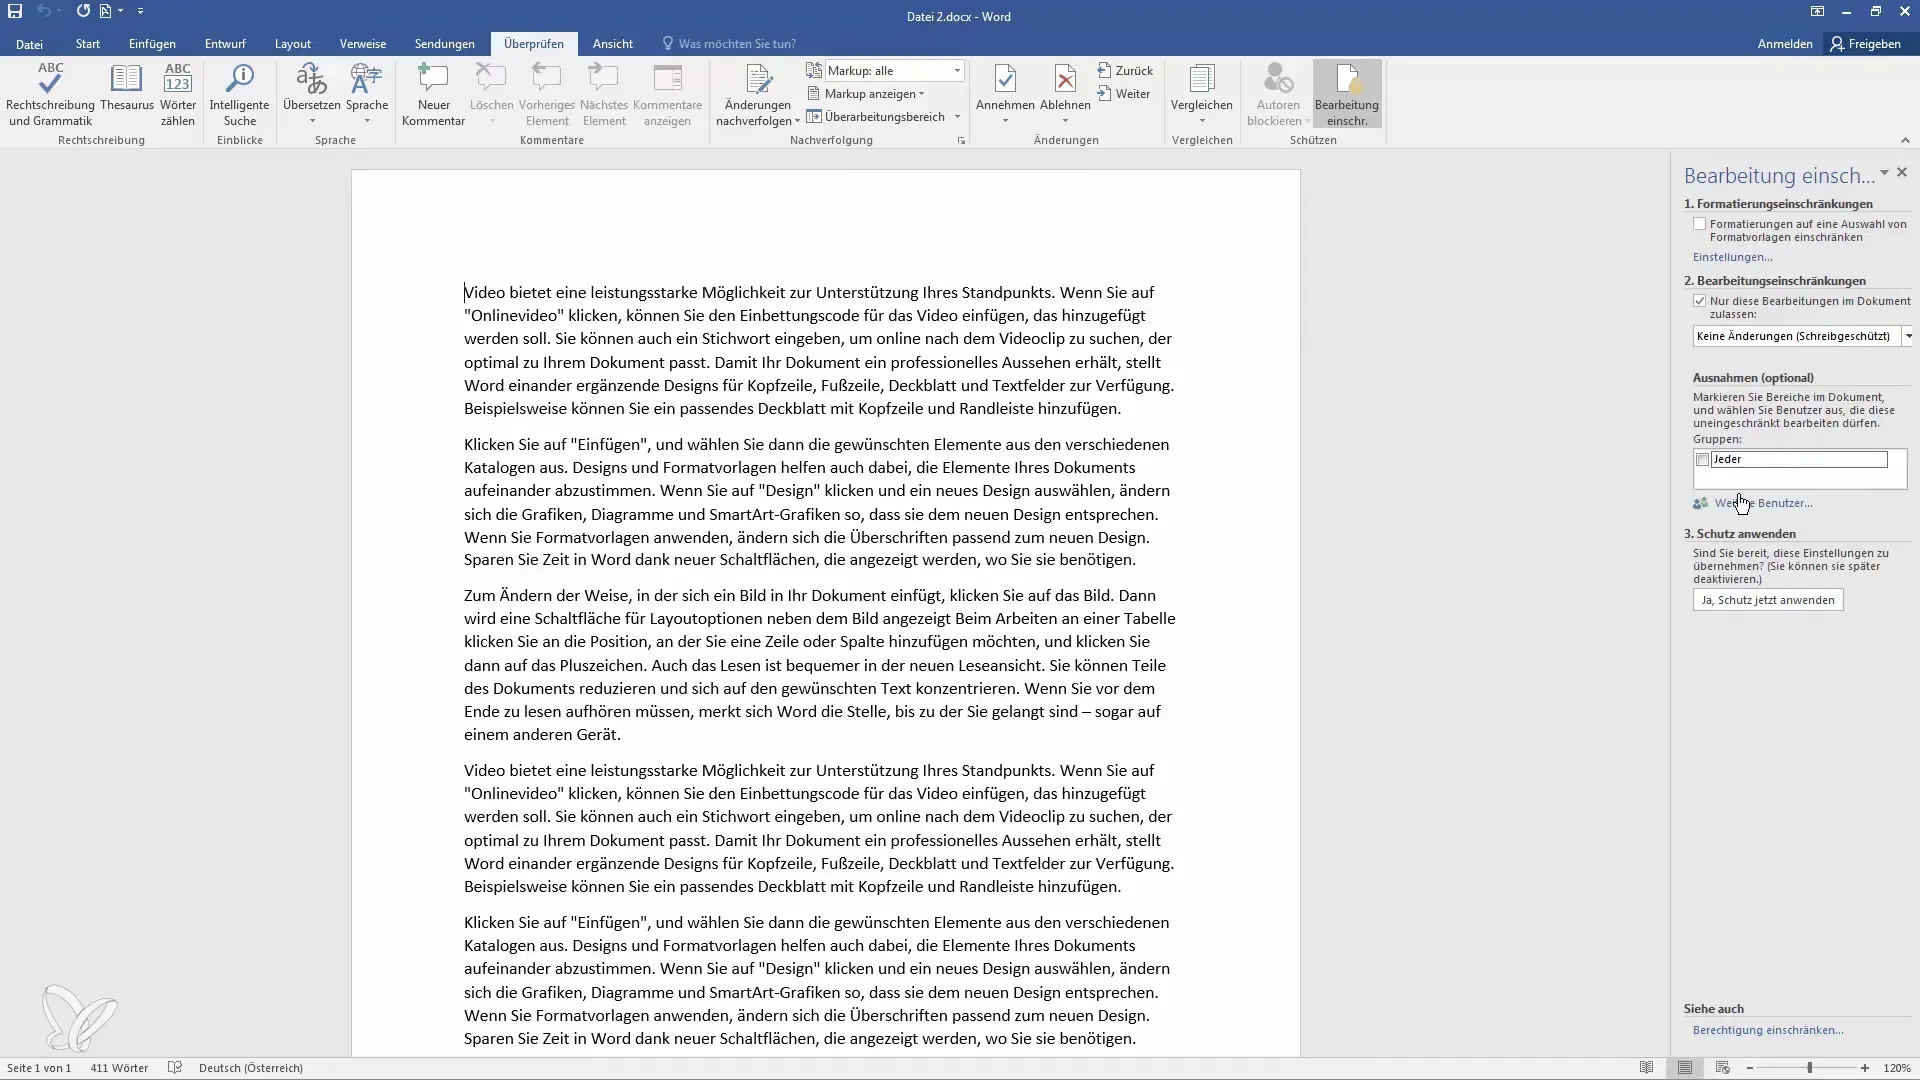
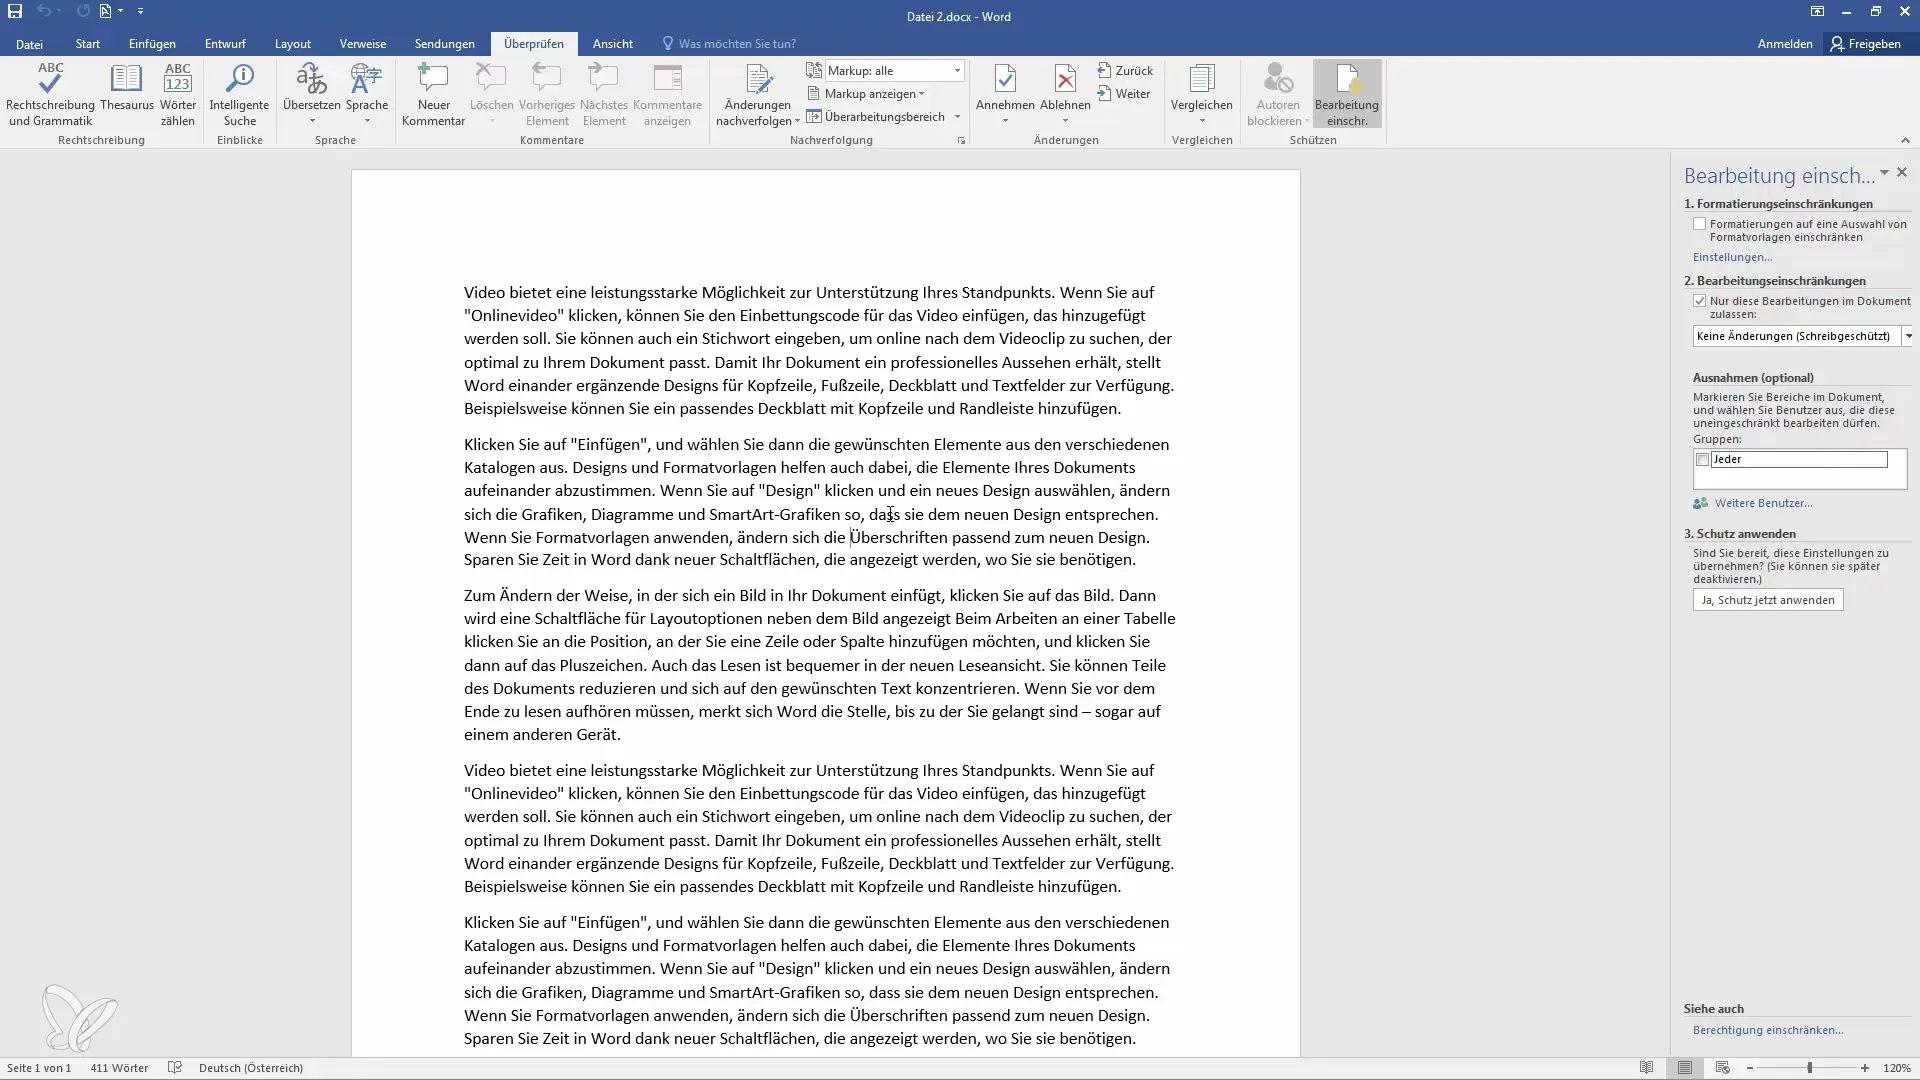
In the "Review" menu, go to the "Restrict Editing" option. When you click on it, a new menu will open on the right side, where you can make various settings to activate the protection.
Step 3: Select Editing Restrictions
Now you can determine what type of edits should be allowed in the document. You have the choice of various options, such as allowing changes, filling out forms, or editing comments. If you want to make the document completely read-only, choose "Allow no changes".
Step 4: Add Exceptions
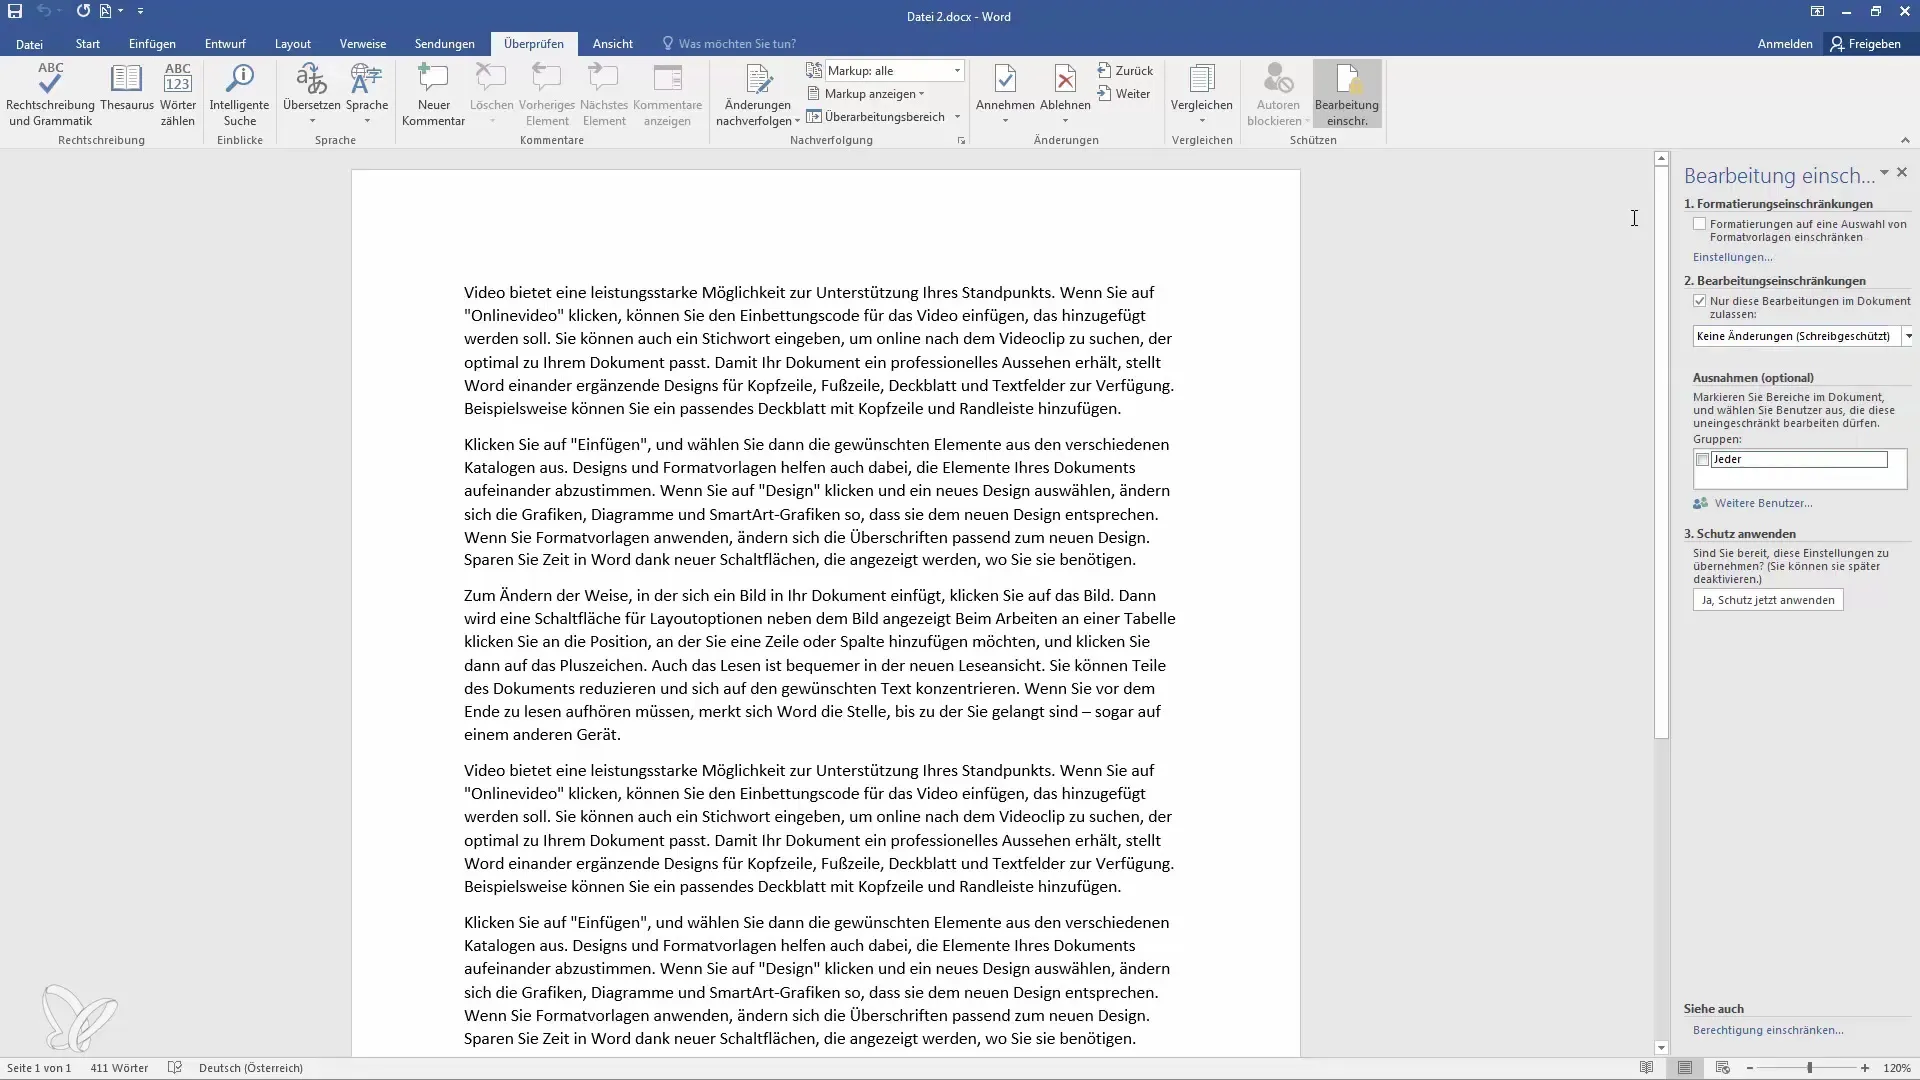
A useful feature is the ability to add exceptions for specific users. You can specify email addresses or users from the same domain who are still allowed to make edits. This is useful if you want to send the document to multiple people, some of whom should have editing rights.
Step 5: Apply Protection
Once you have set your preferences, you must activate the protection. Click on "Yes, apply protection". At this point, you will be prompted to set a password. Remember this password well, as it will be required for later editing of the document.
Step 6: Save the Document
After setting the password, save the document. To make the protection effective, it is important to save the document correctly. After saving, check if the changes have been properly applied.
Step 7: Check the Protection
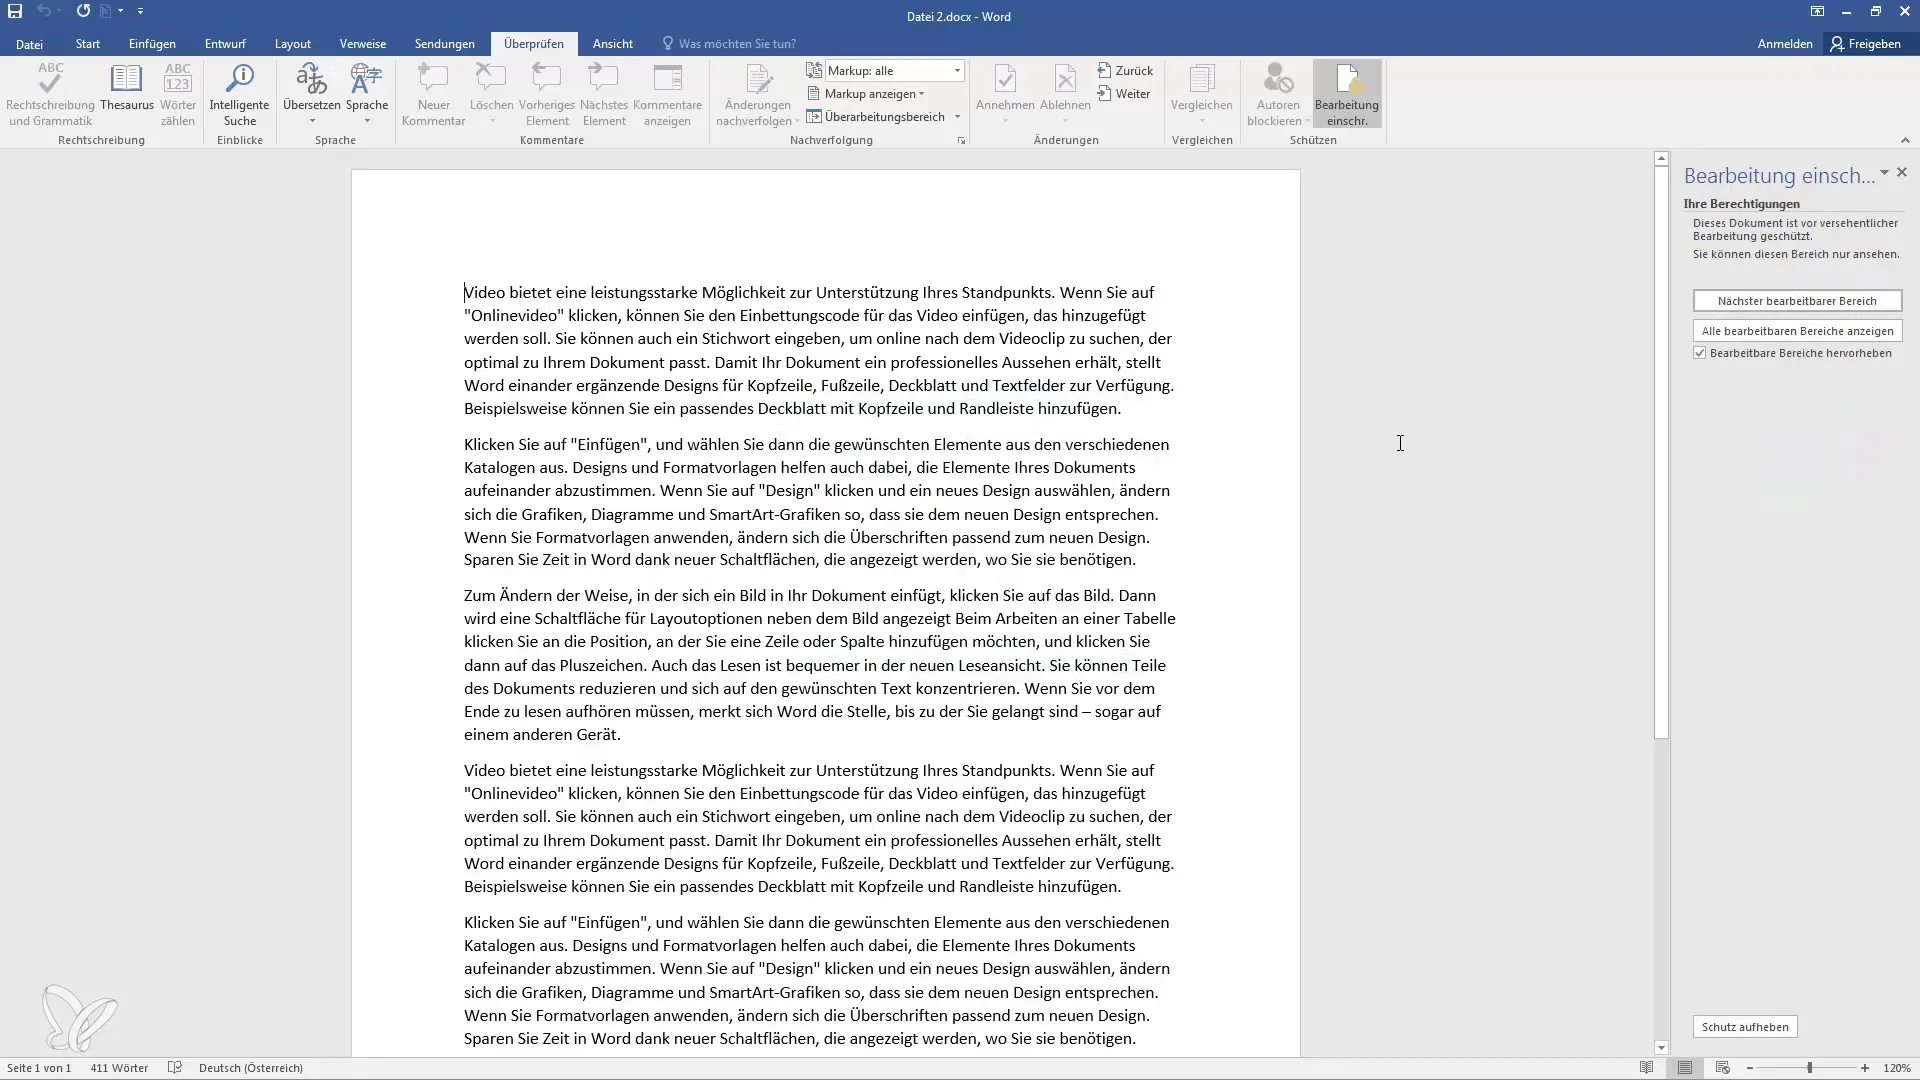
Testing is an important step. Try to edit the document by clicking anywhere. If the protection is set up correctly, a message will appear indicating that changes cannot be made.
Step 8: Remove Protection
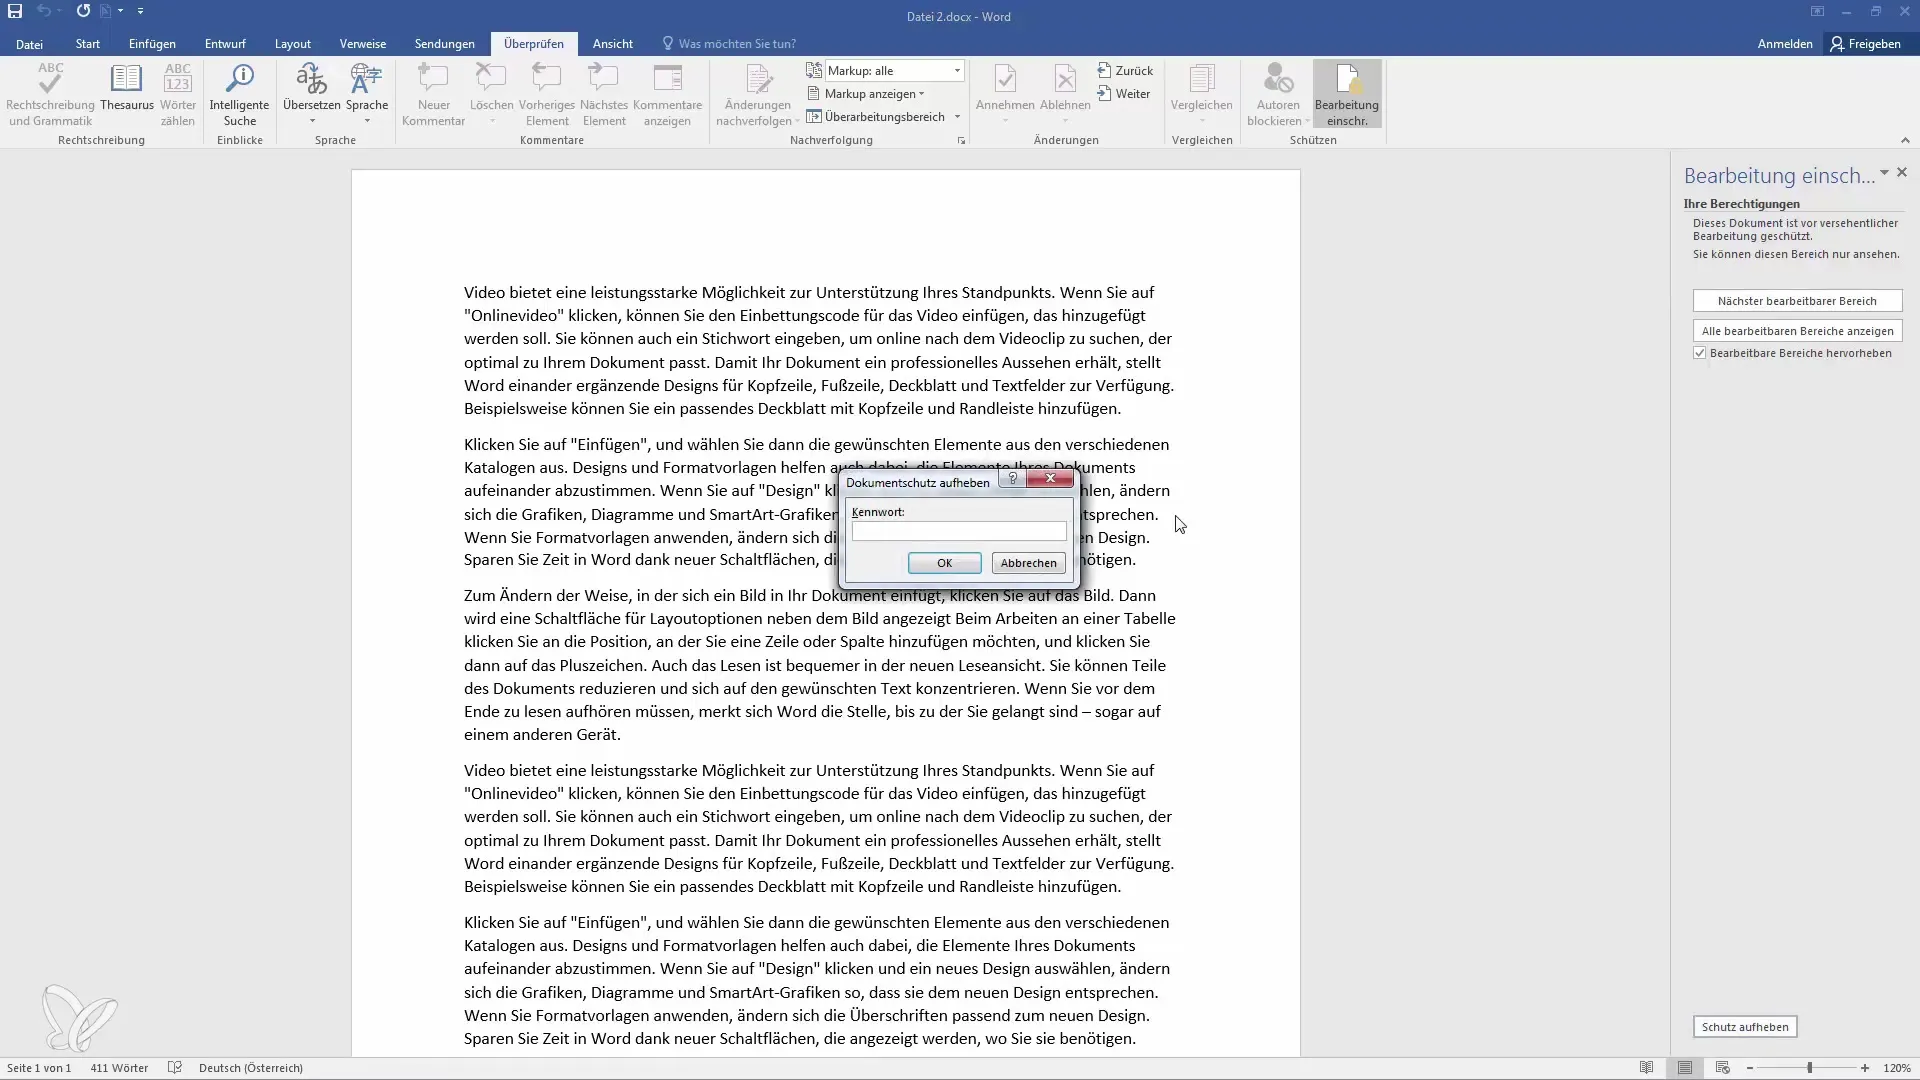
If you want to continue editing the document, you must remove the protection. Go back to the "Review" menu and select the "Remove Protection" option. Now you can make changes to the document.
Step 9: Save the Document Again
After making the desired changes, do not forget to save the document again. This ensures that all adjustments are retained.
Summary
In this step-by-step guide, you have learned how to protect a Word document from unwanted edits. By correctly applying editing restrictions and setting a password, you ensure that your documents remain in their original state while sending or sharing them. This approach is particularly important for sensitive data, such as resumes or other personal documents that you do not want altered.
Frequently Asked Questions
How do I set a password for my Word document?You can set a password by going to the "Review" menu, selecting "Restrict Editing," and then activating protection. You will be prompted to enter a password.
Can I allow specific people to edit?Yes, you can define users exempt from editing restrictions by adding their email addresses in the relevant section.
What happens if I forget the password?If you forget the password, it is difficult to edit the document again since you cannot make changes without removing the protection.
Has the protection been removed, and can I make changes?Yes, you need to remove the protection in order to make changes. This can be done in the "Review" menu.
Are these security measures 100% safe?The protection ensures that someone cannot easily edit the document, but it does not prevent copying or creating a new document based on its content.
