You want to present information in an appealing and clear way? With SmartArt in Word, you can visually represent complex information and convey your message in a simple manner. In this guide, you will learn how to use and customize various SmartArt graphics to visually present your content attractively.
Main Insights
- SmartArt offers a variety of templates for graphical representation.
- You can easily customize SmartArt elements to fit your needs.
- Text adjustments and designs can greatly enhance your graphics.
Step-by-Step Guide
Selecting and Creating SmartArt
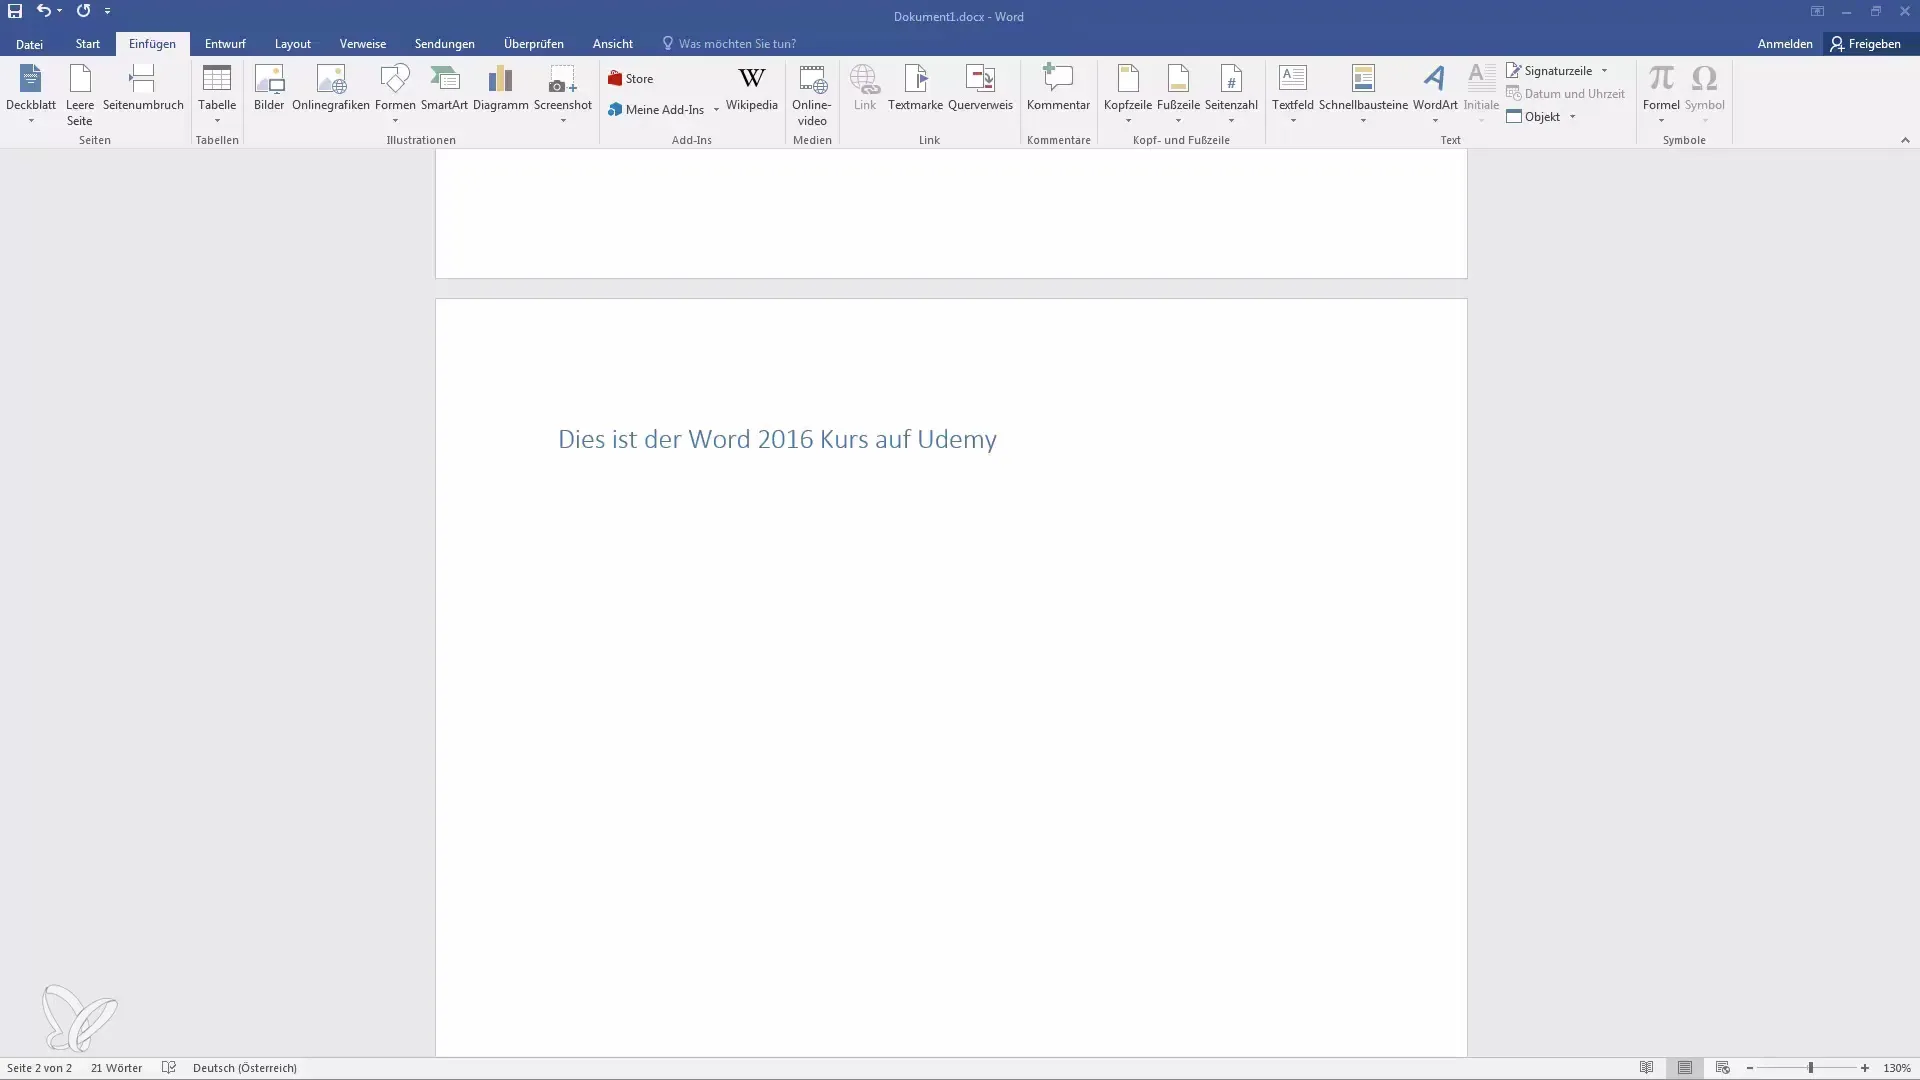
Start by opening Word. Navigate to the "Insert" tab and select the "SmartArt" option from the "Illustrations" group. Here, you will see a wide range of graphics at your disposal.
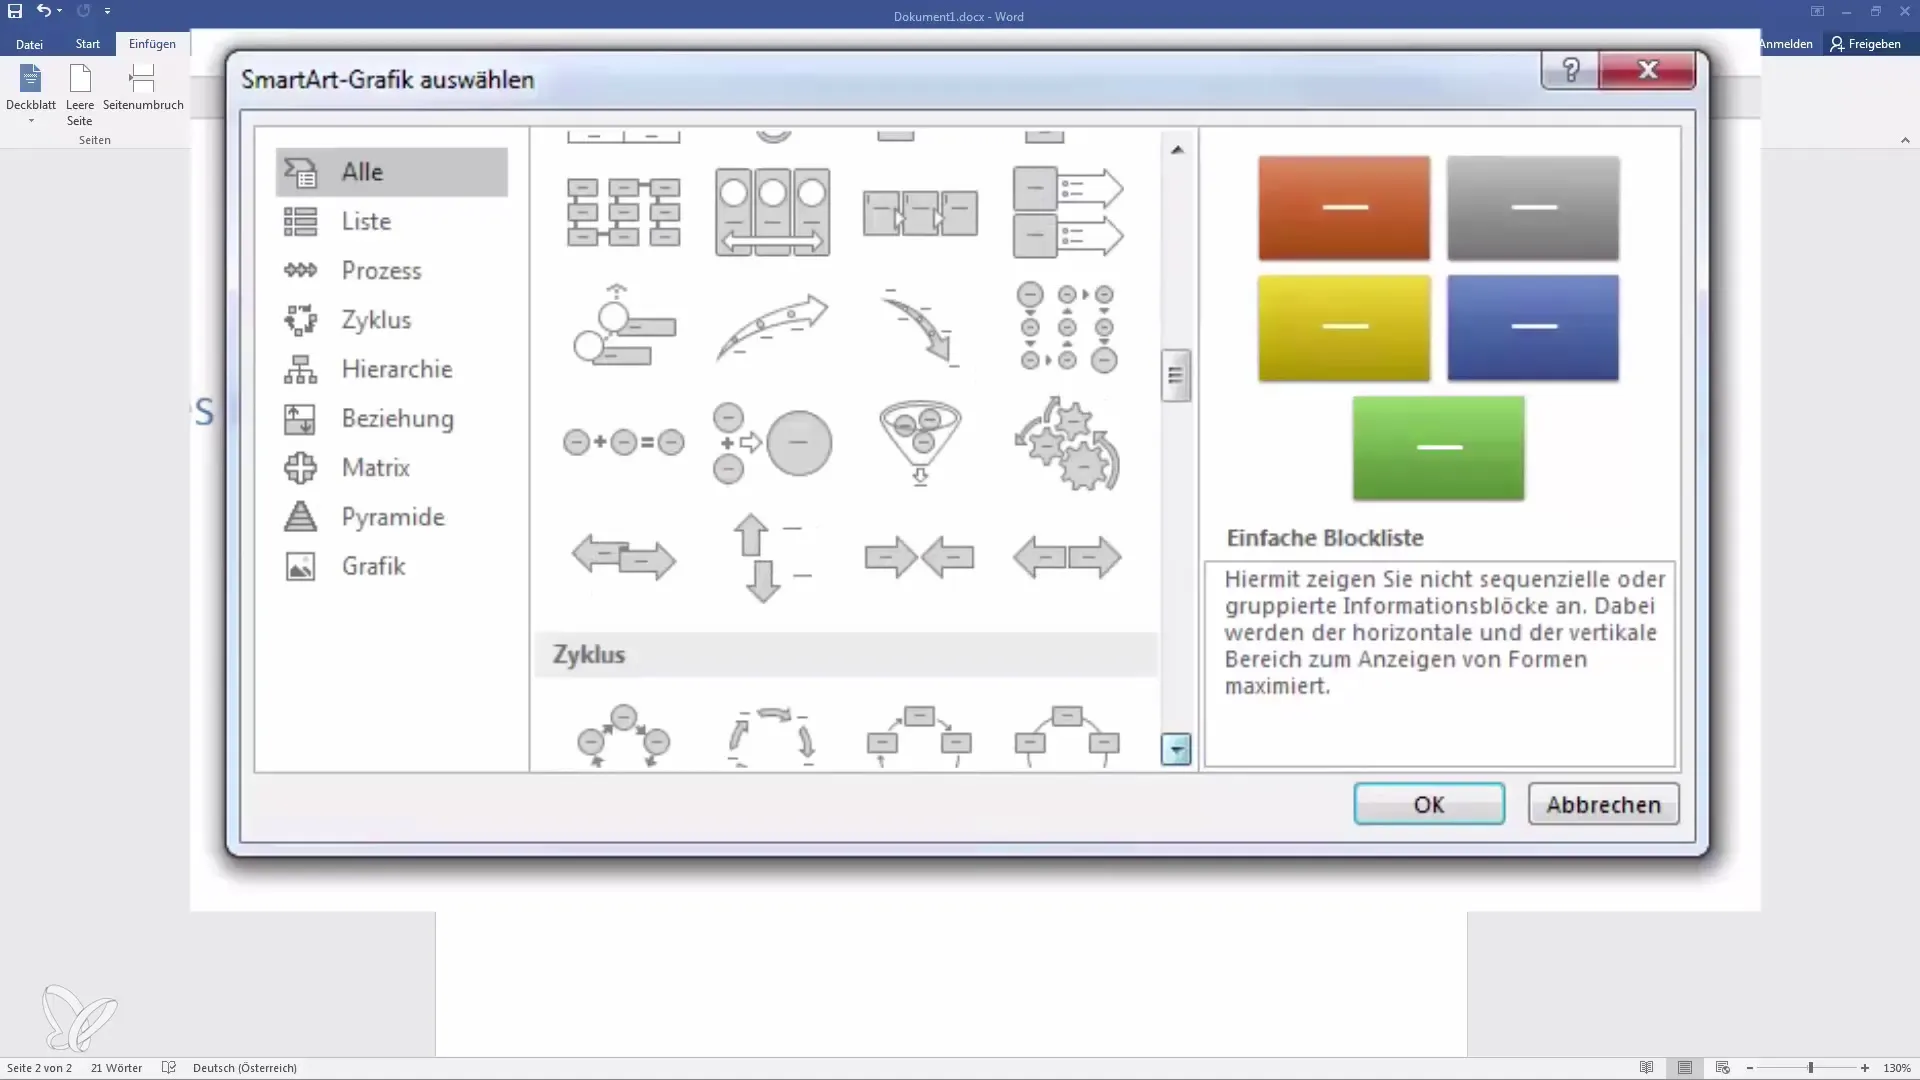
Choose a template that suits your style. For this example, we chose a simple circle as I personally prefer this round arrangement. Click on your chosen style and confirm with "OK".
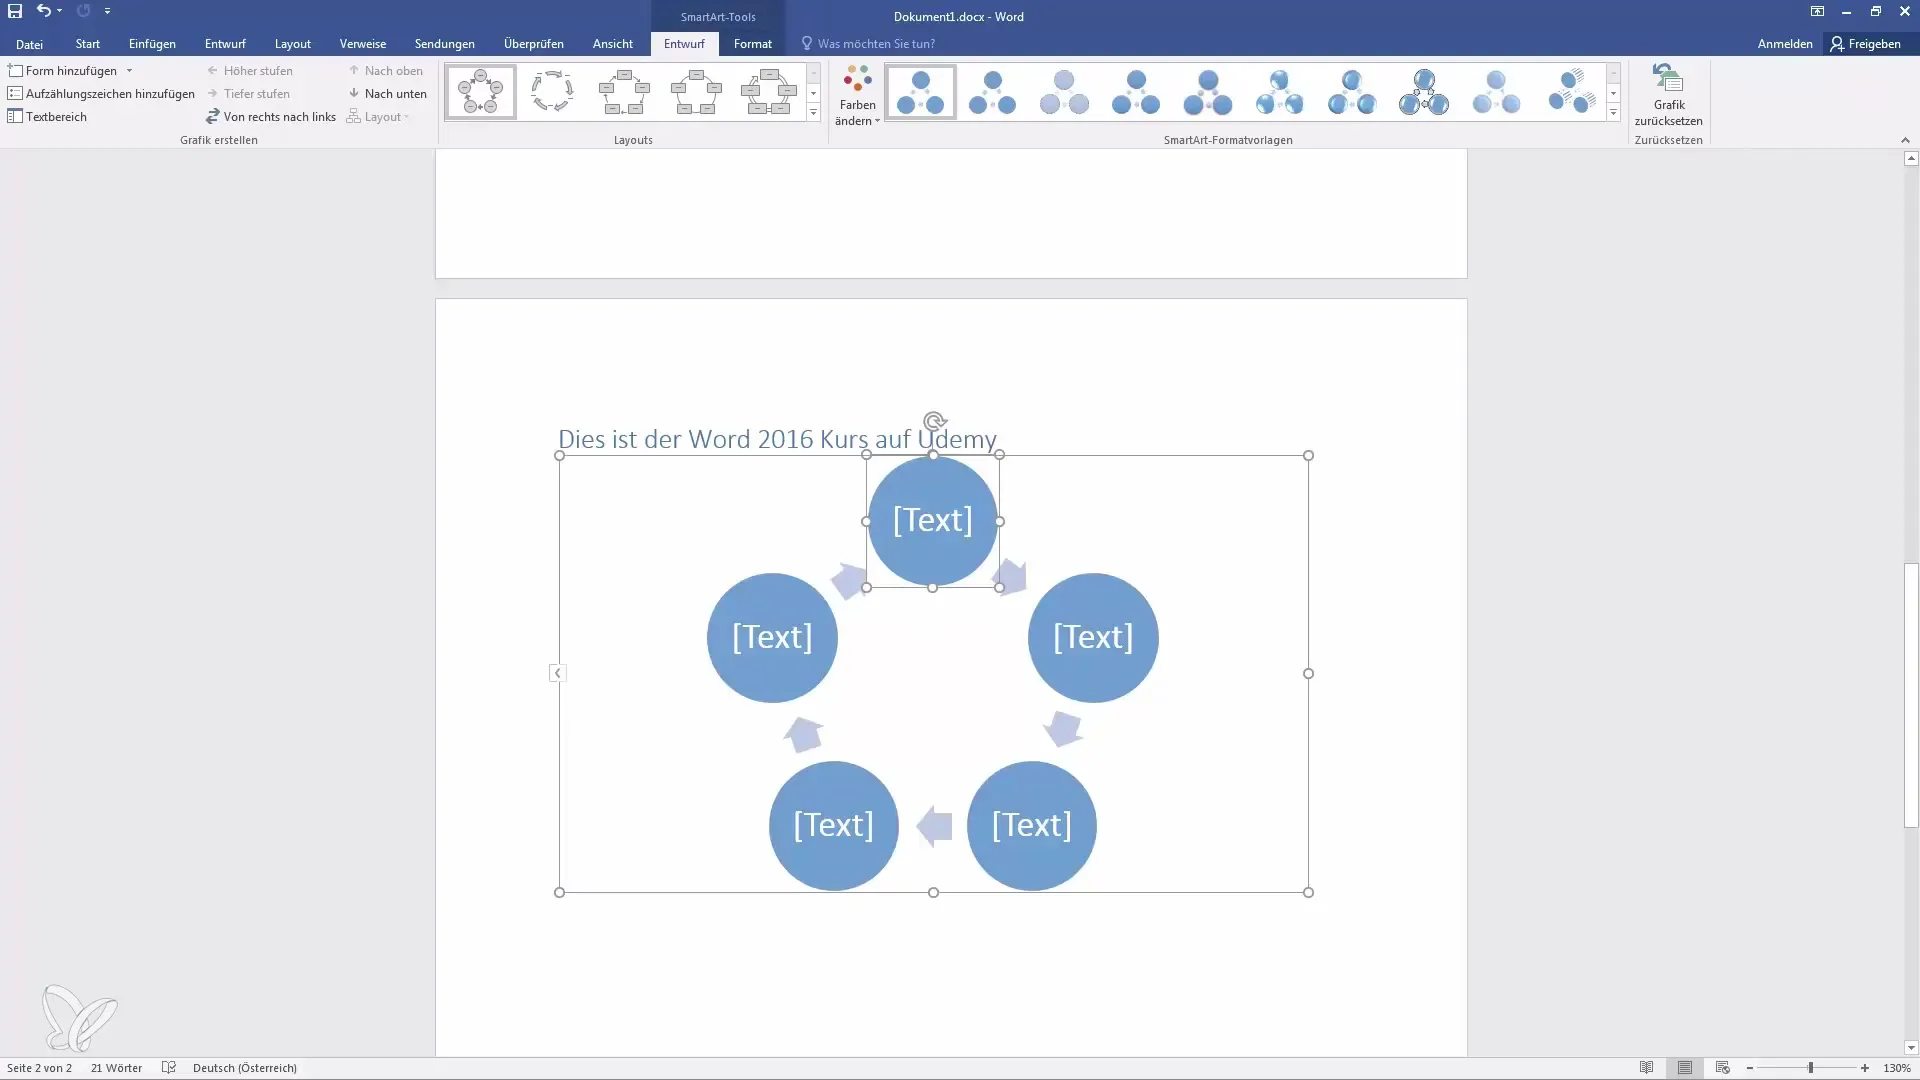
Now the SmartArt graphic will appear in your document, displaying multiple fields.
Customizing Graphics
If you are satisfied with the graphic arrangement, you can customize the SmartArt. Click inside the graphic to activate the Smart Tools. In the "Design" tab, you will find various formatting options. Here, you can also add 3D effects to make your graphic more lively.
Inserting Text into SmartArt
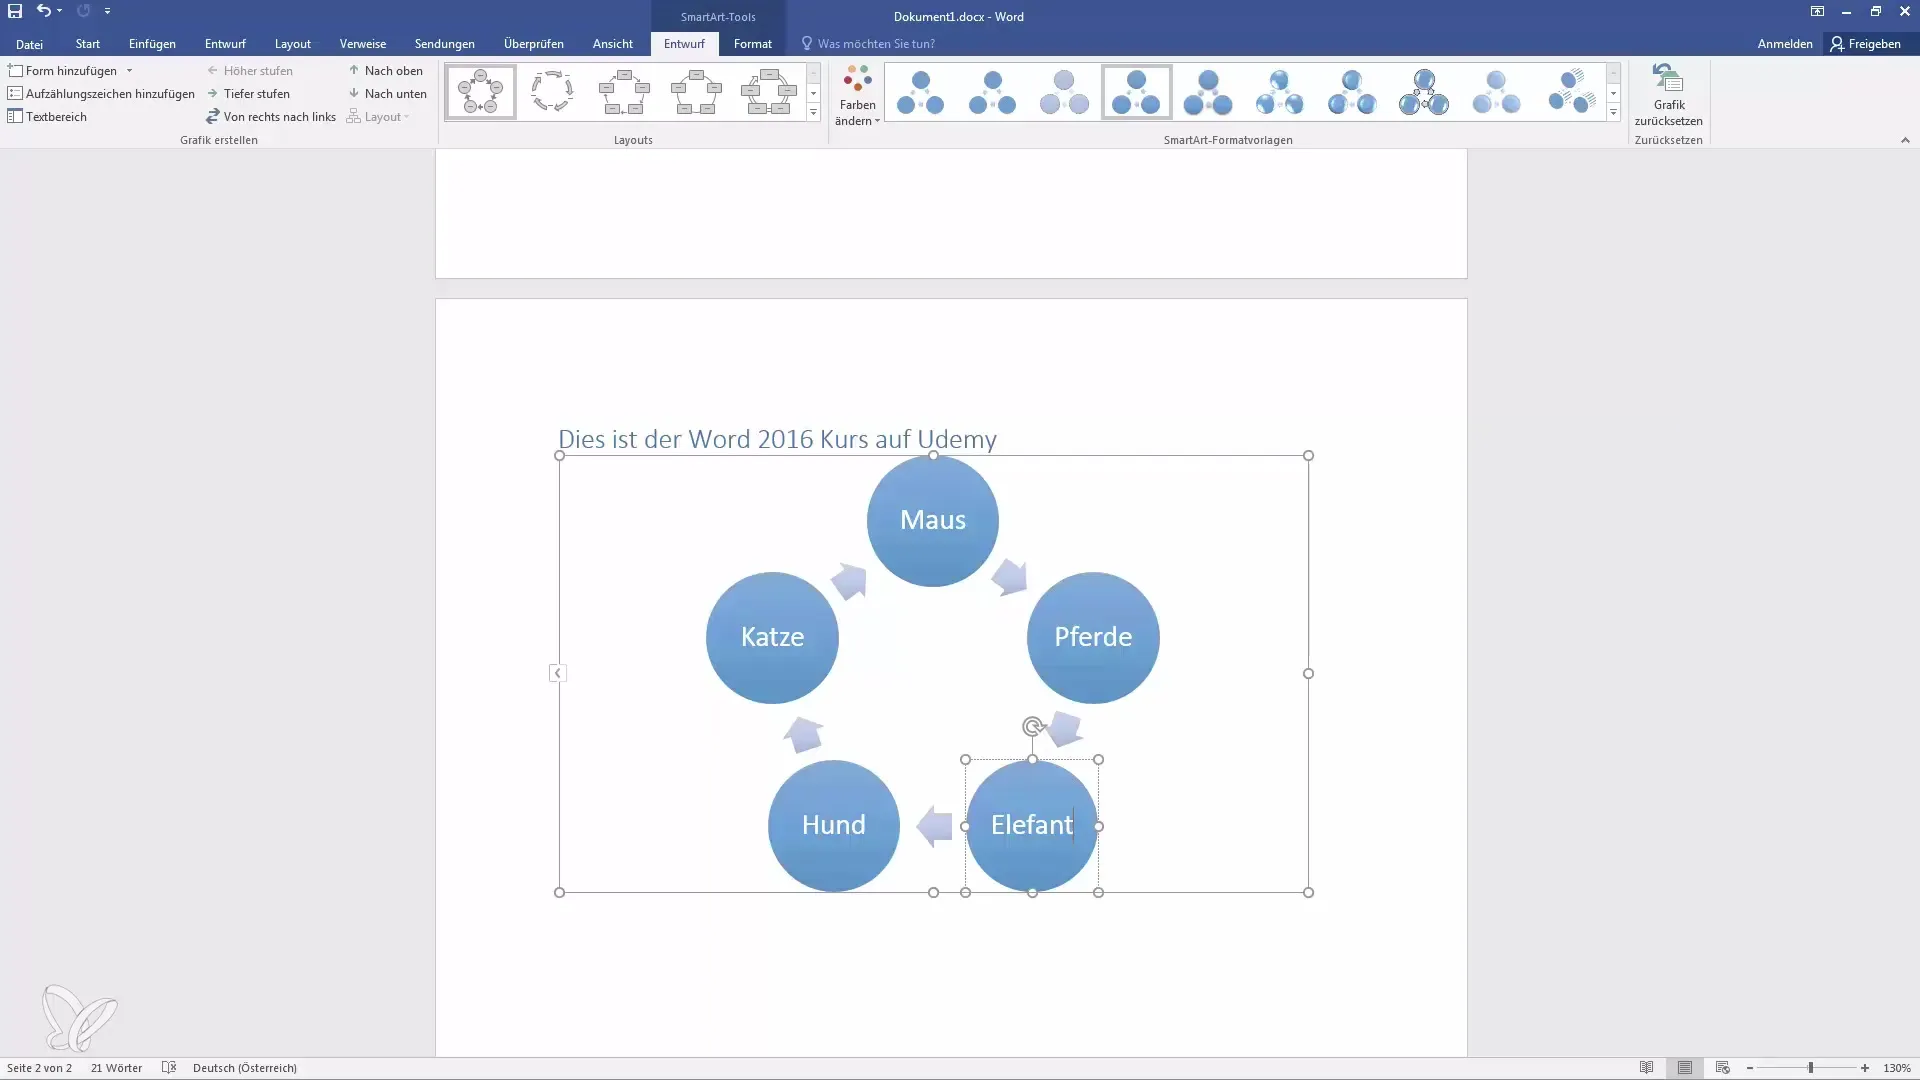
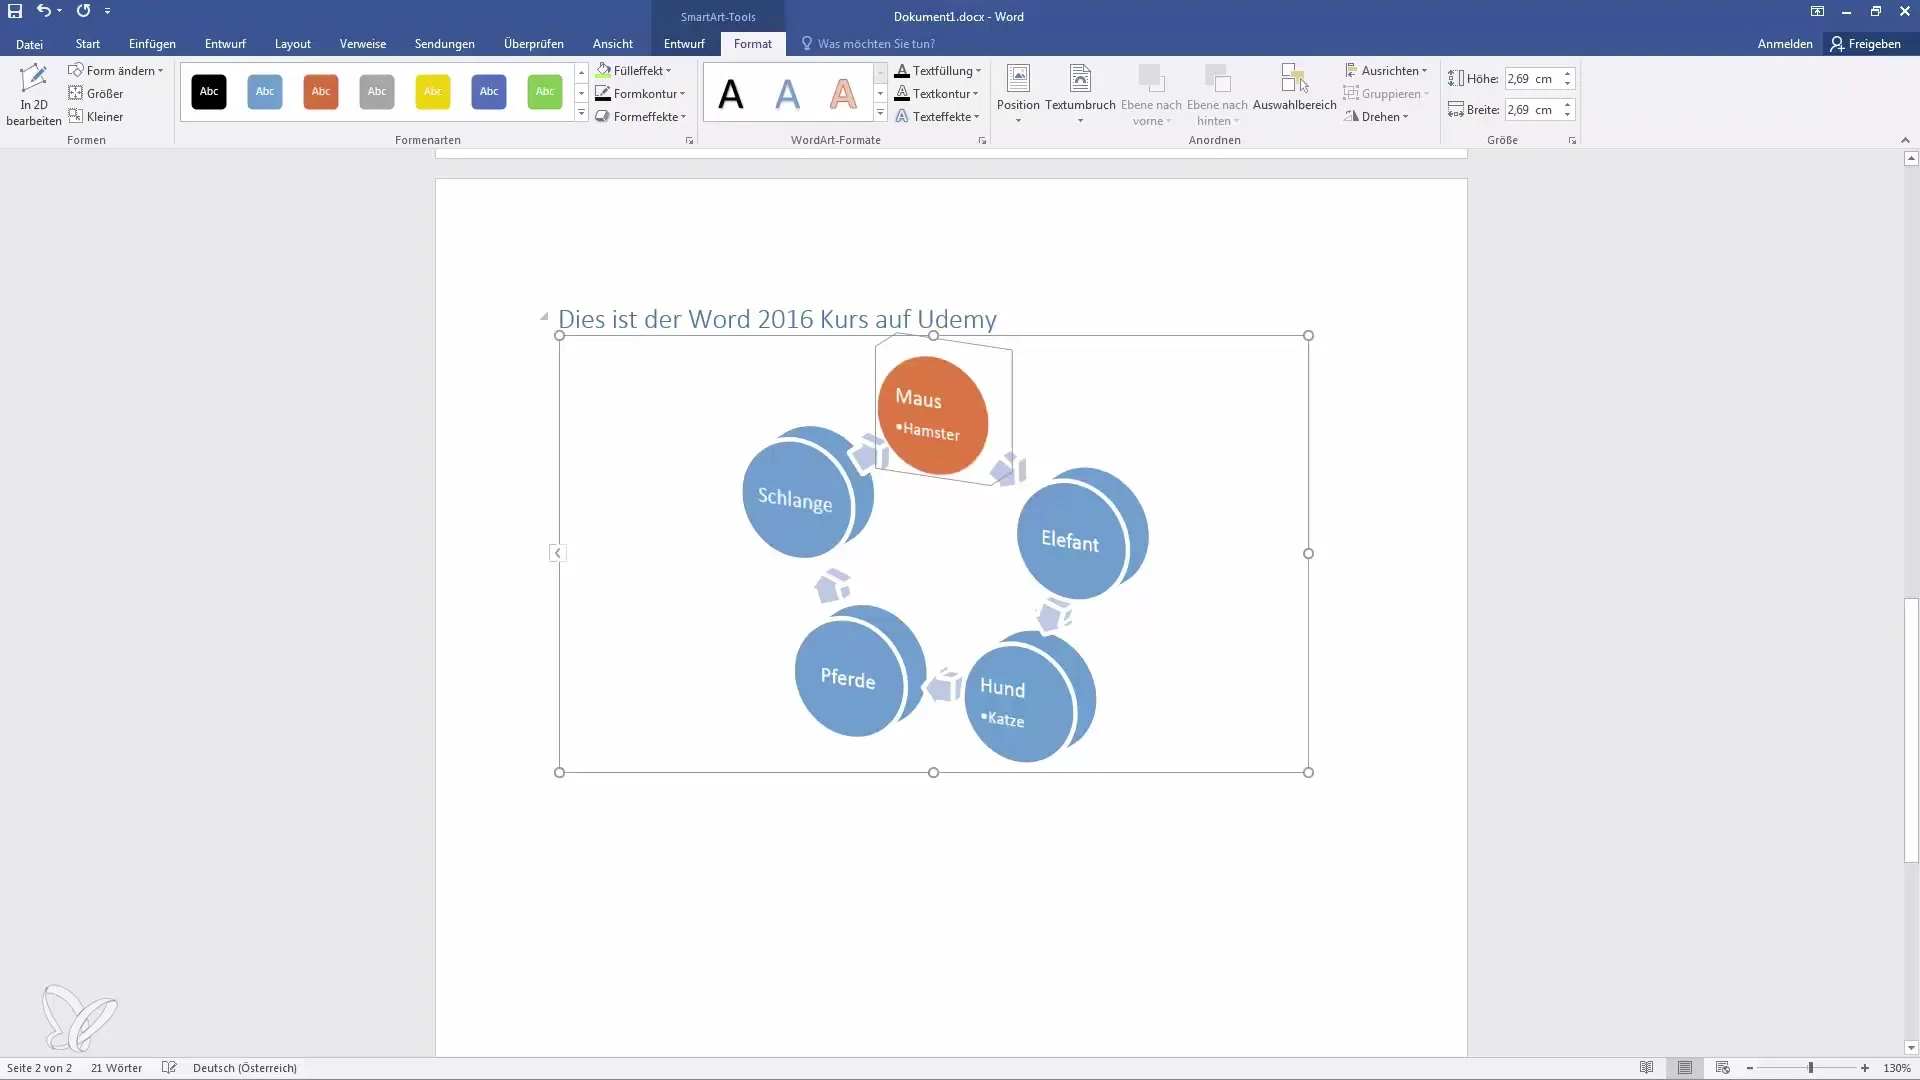
To fill in your SmartArt, click into the text areas of the SmartArt. Begin by inserting animals - for example, "Mouse," "Horse," "Cat," "Dog," and "Elephant." Word will automatically adjust the font size to ensure readability.
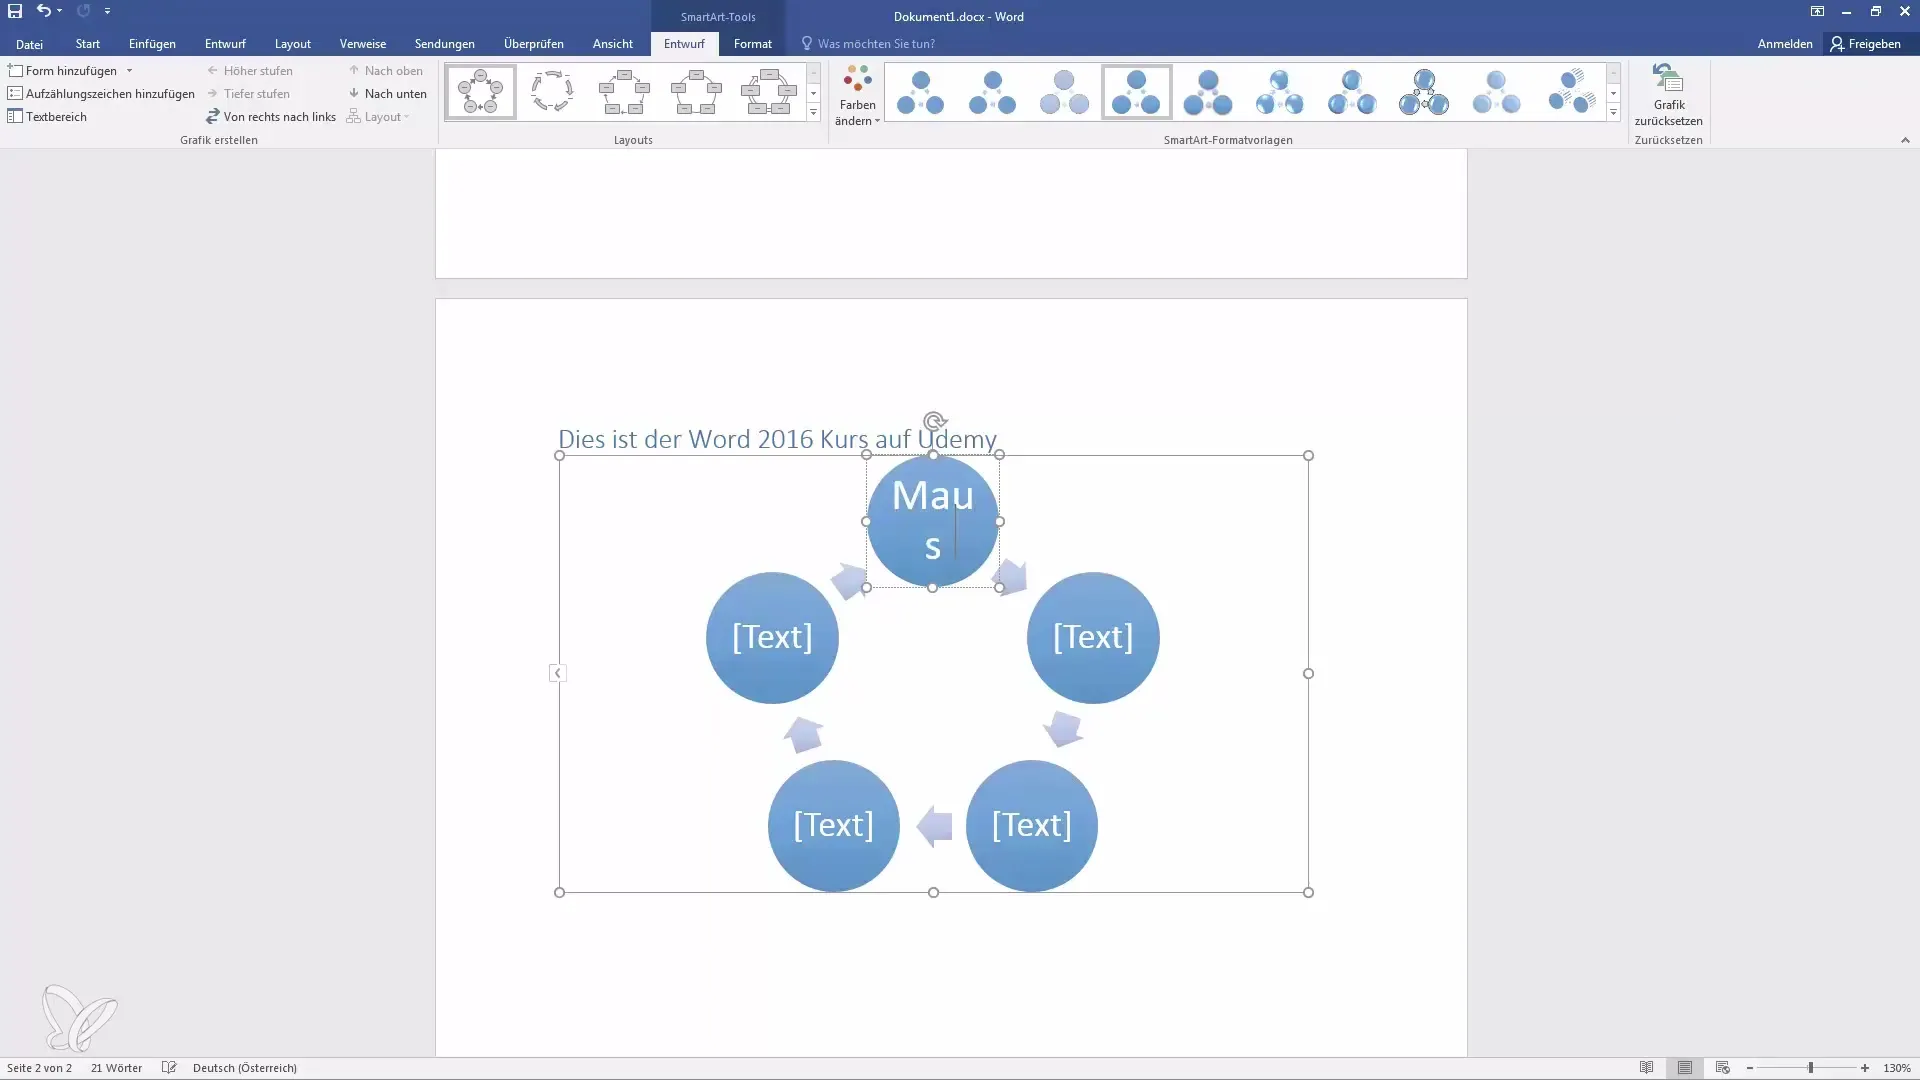
Looks good! However, note that with very long titles, the font size can be significantly reduced.
Adding More Elements
If you need more elements in your SmartArt graphic, such as an additional category, you can easily add new shapes. Click on "Add Shape," and a new circle will be created.
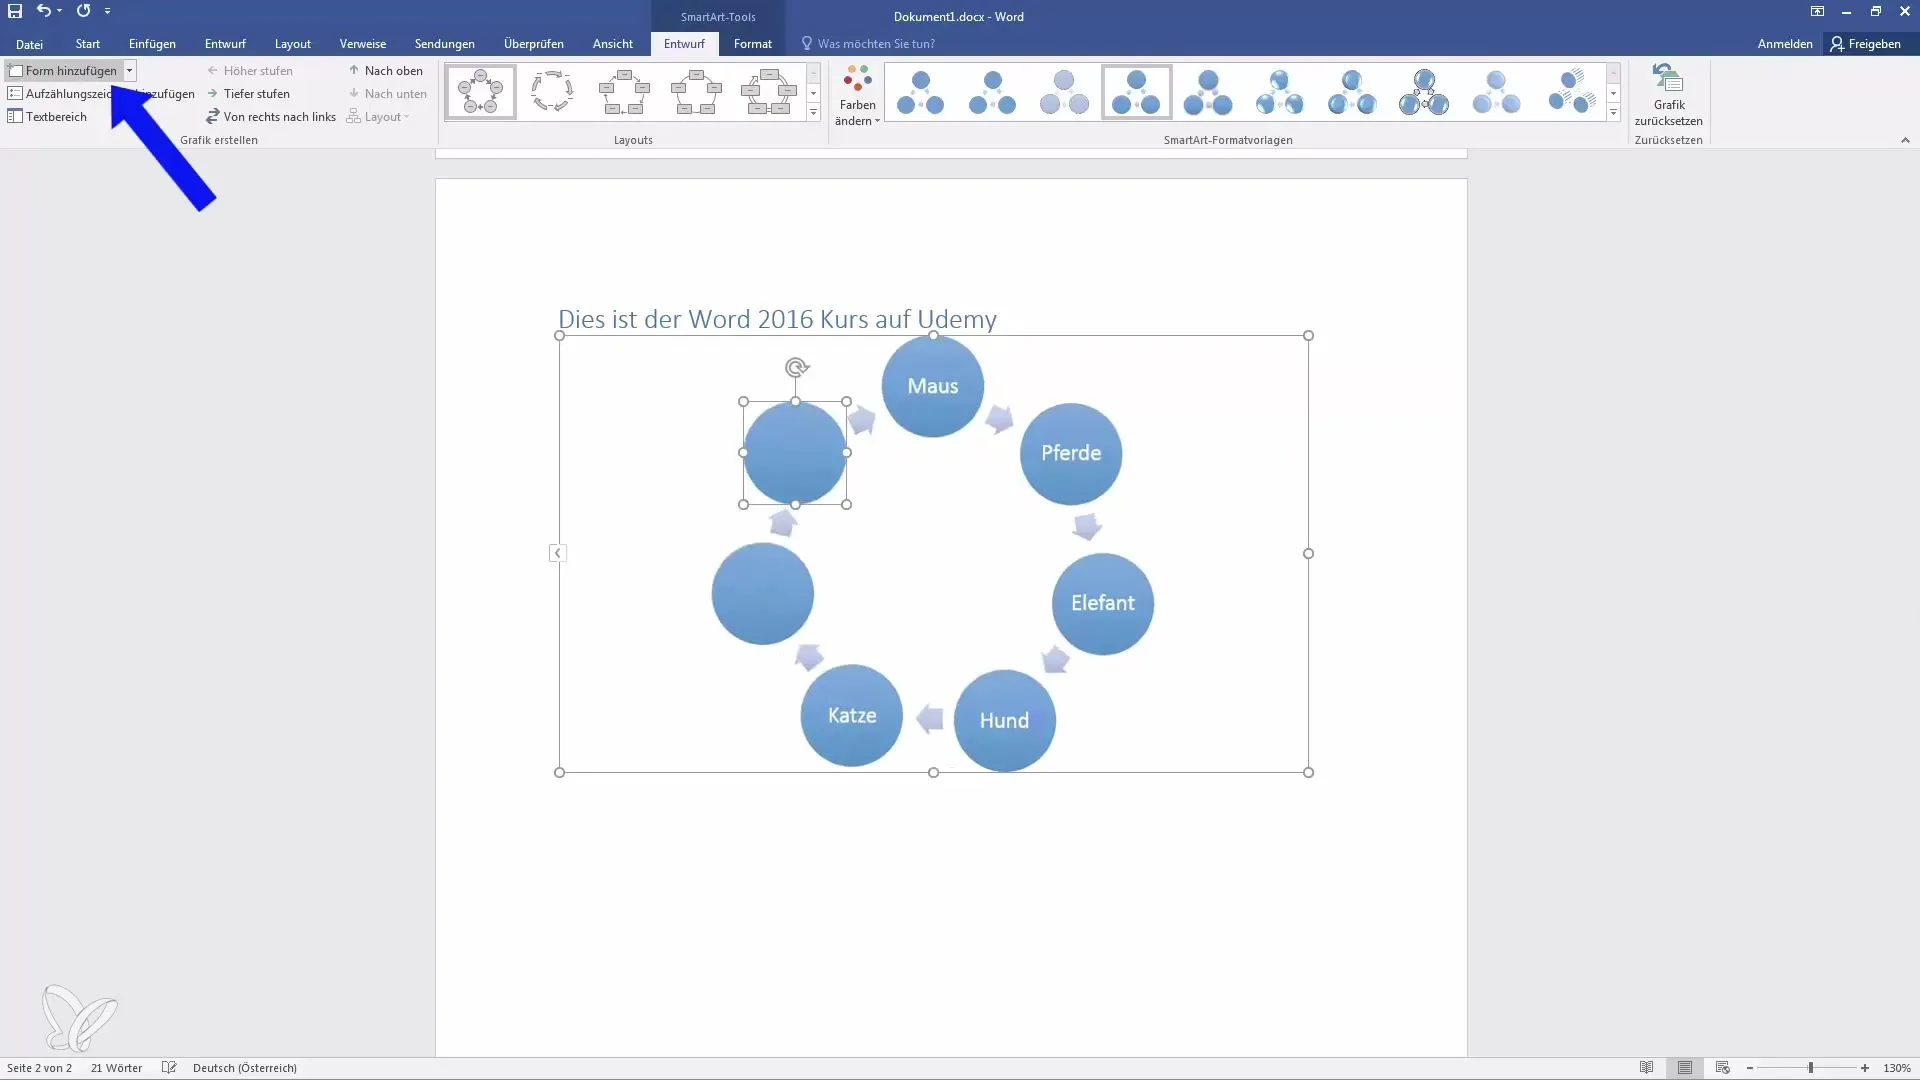
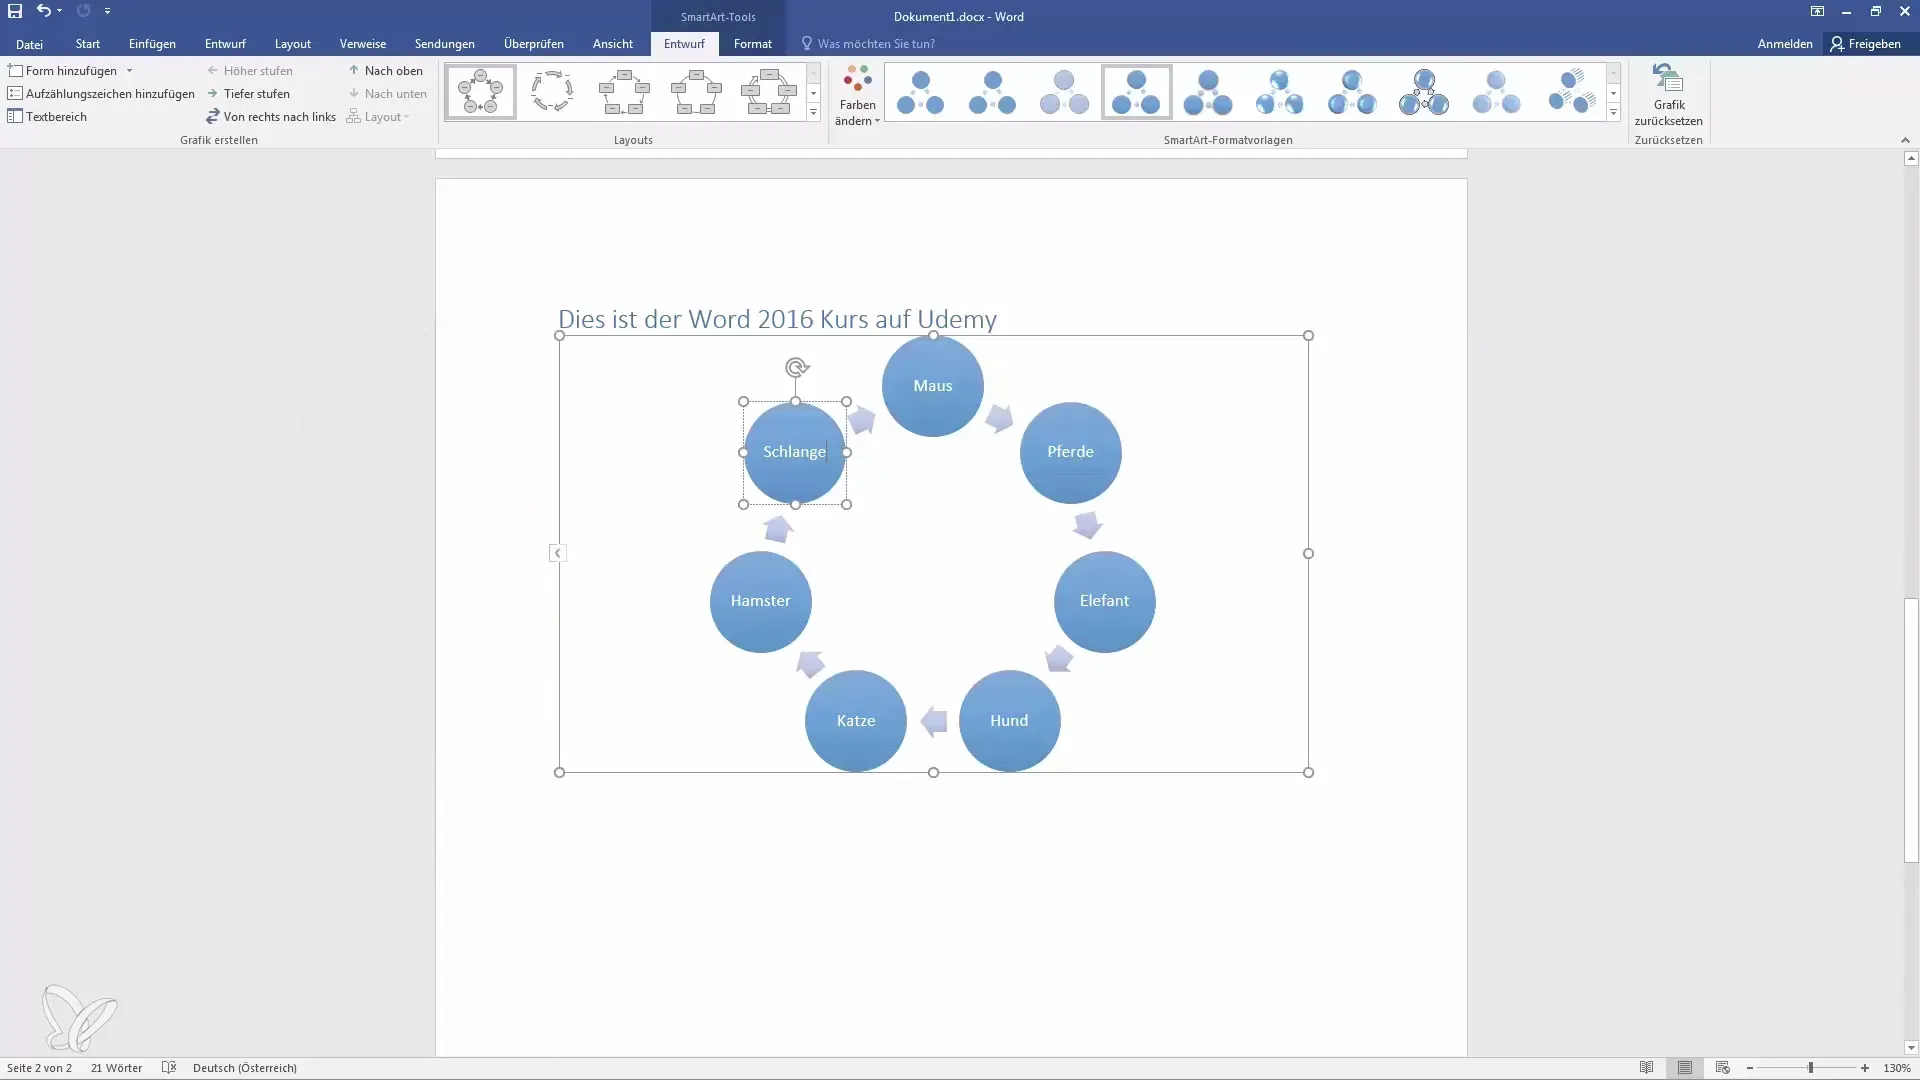
Now you can also add text to these new areas, like "Hamster" and "Snake." By inserting these, the existing elements will also be automatically adjusted.
Establishing Connections Between Elements
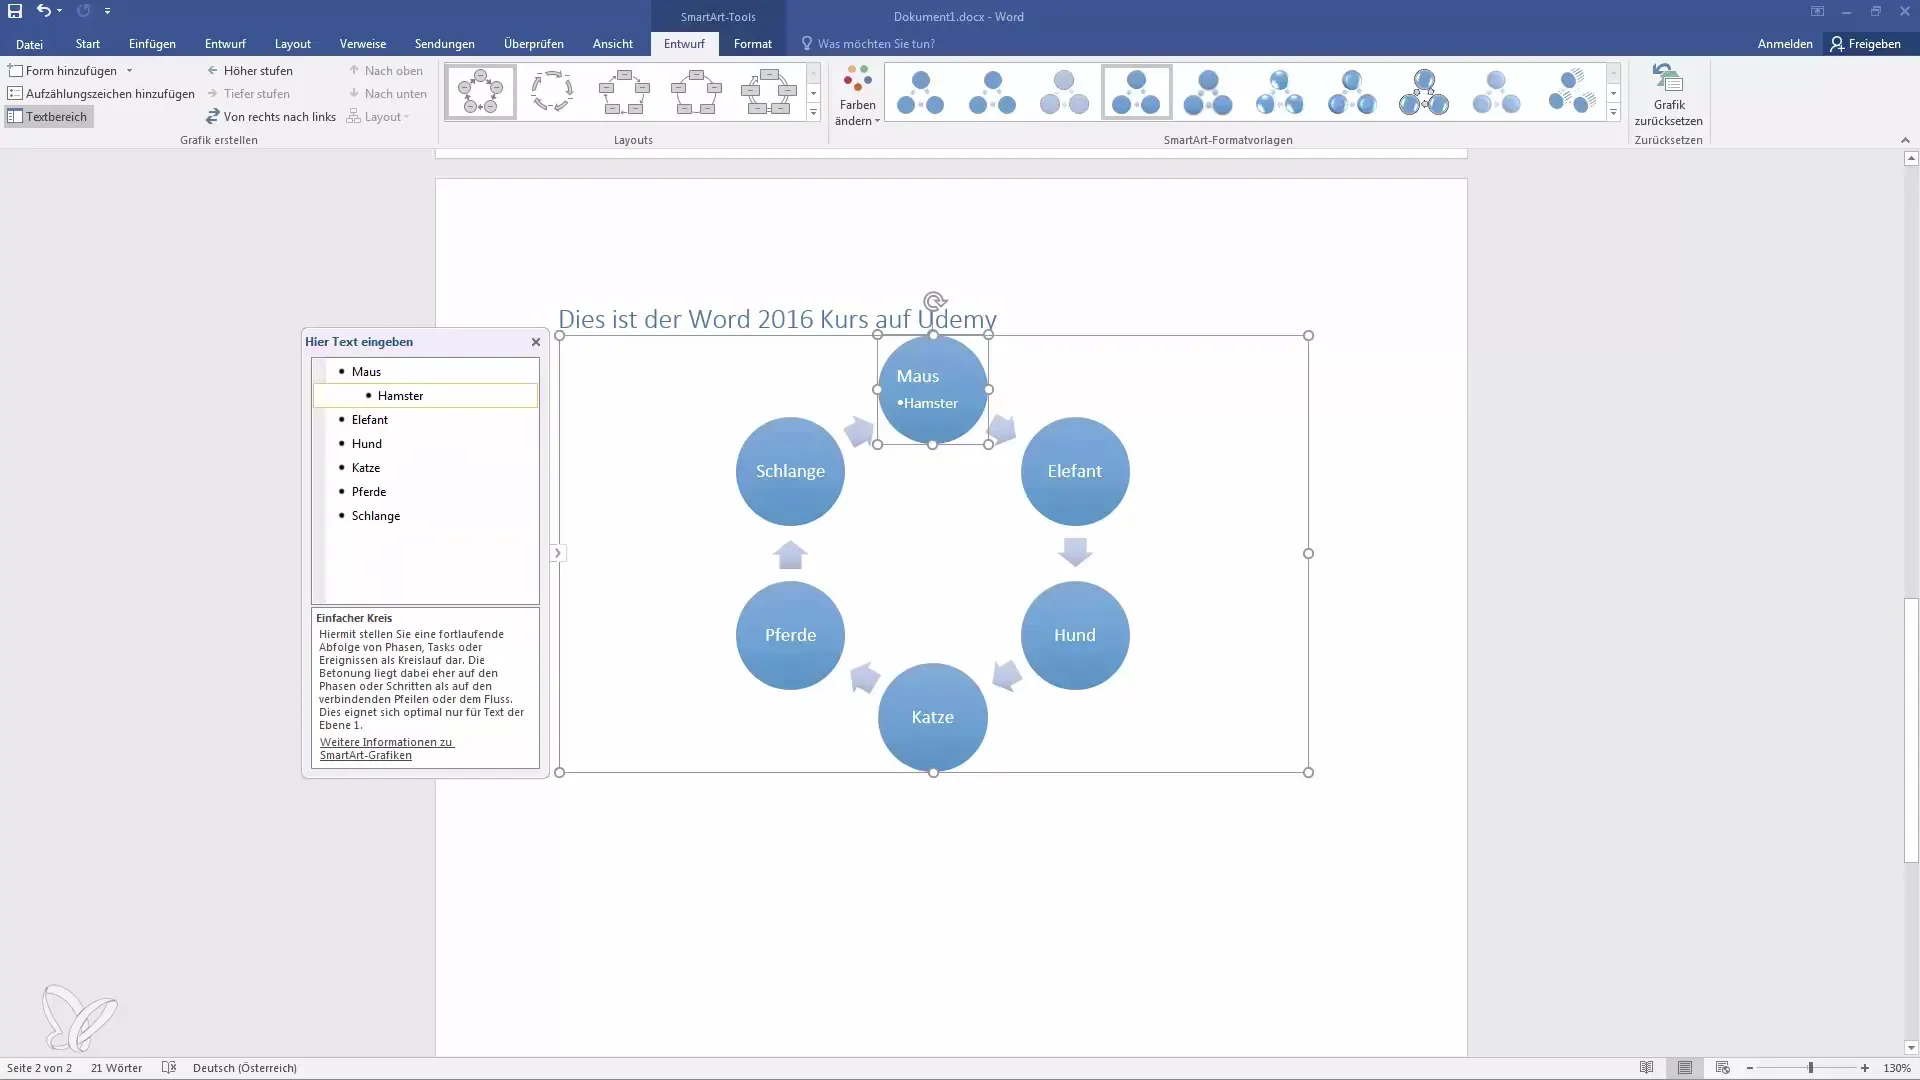
An interesting way to show relationships is by inserting "Tabs" to connect elements. You can change the position of the elements depending on how you want to represent their relationship to each other.
Color and Style Settings
Now go to formatting your SmartArt graphic. You can change the colors of the elements to distinguish them from each other or match a specific theme. Click on the respective shape and select the desired color.
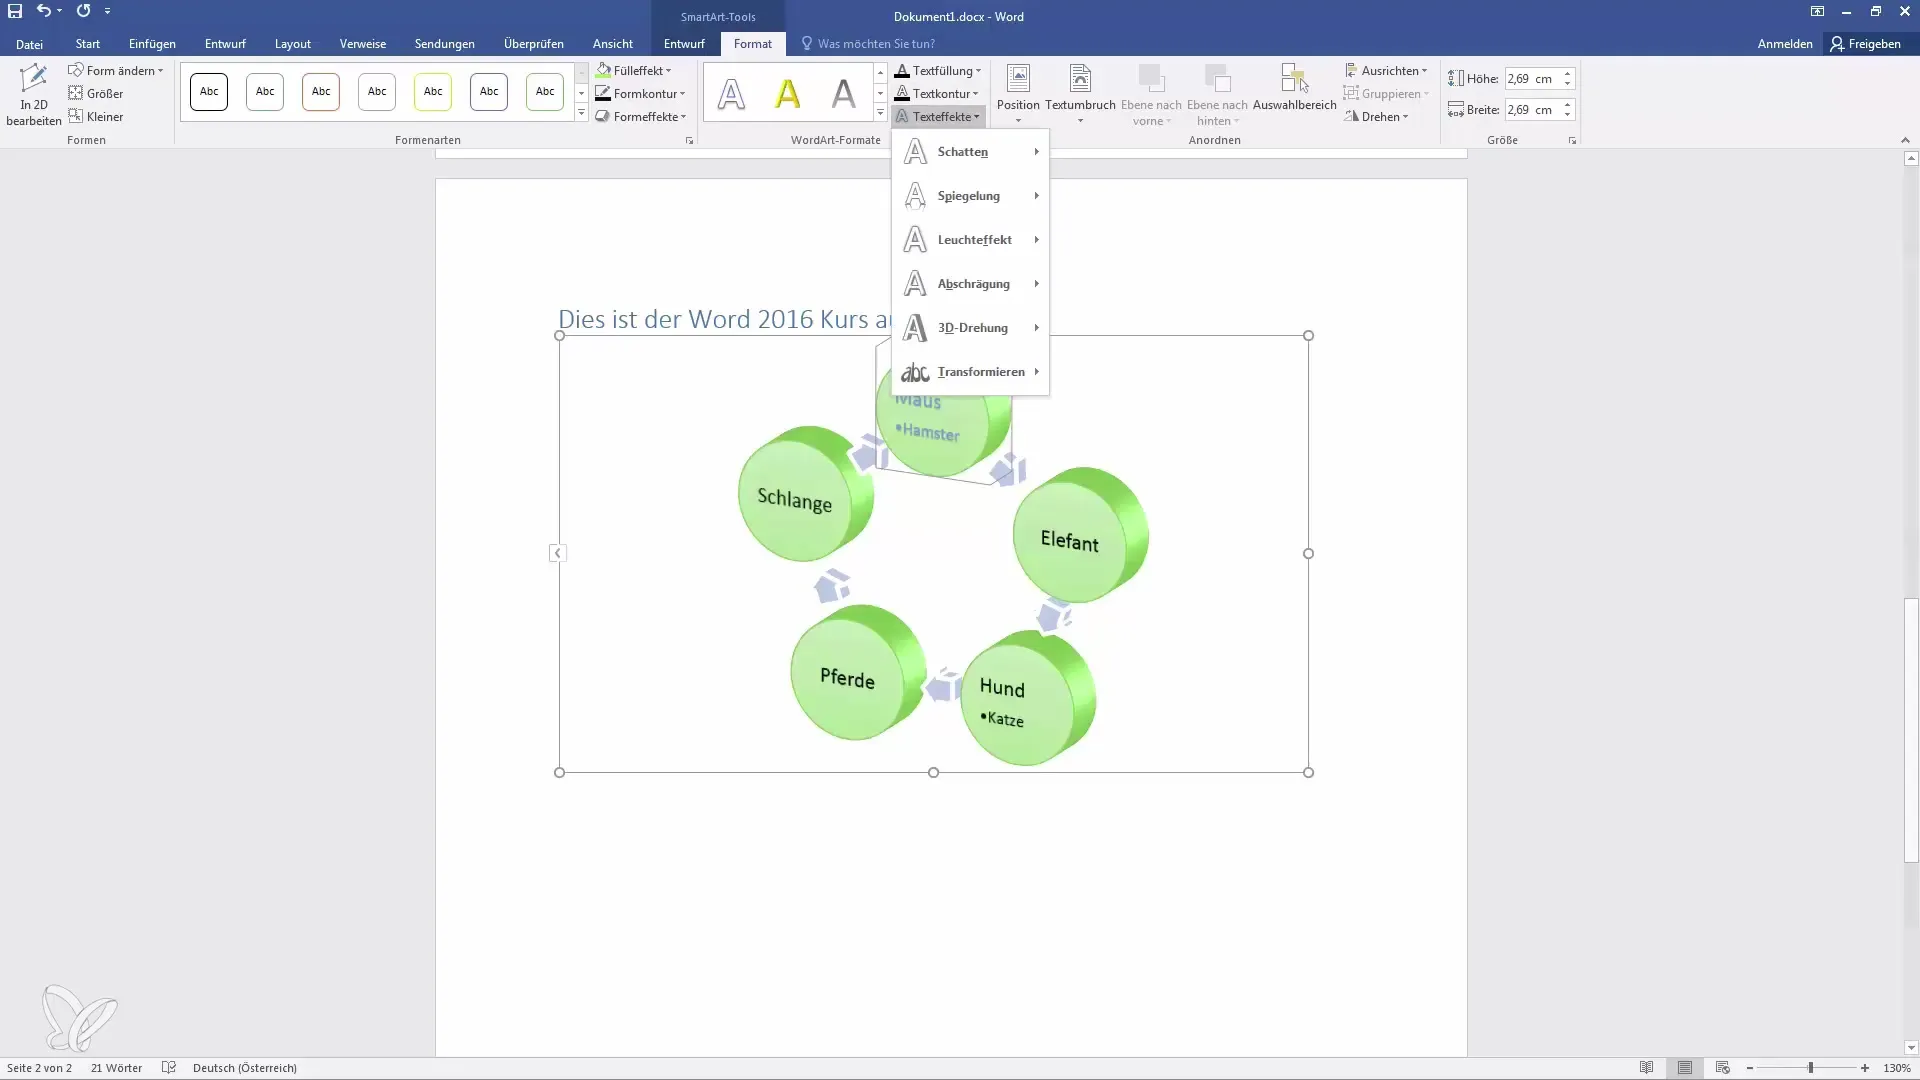
If you prefer your SmartArt to convey a certain mood or feeling, you can also insert gradients and other creative text options.
Creating Complex Structures
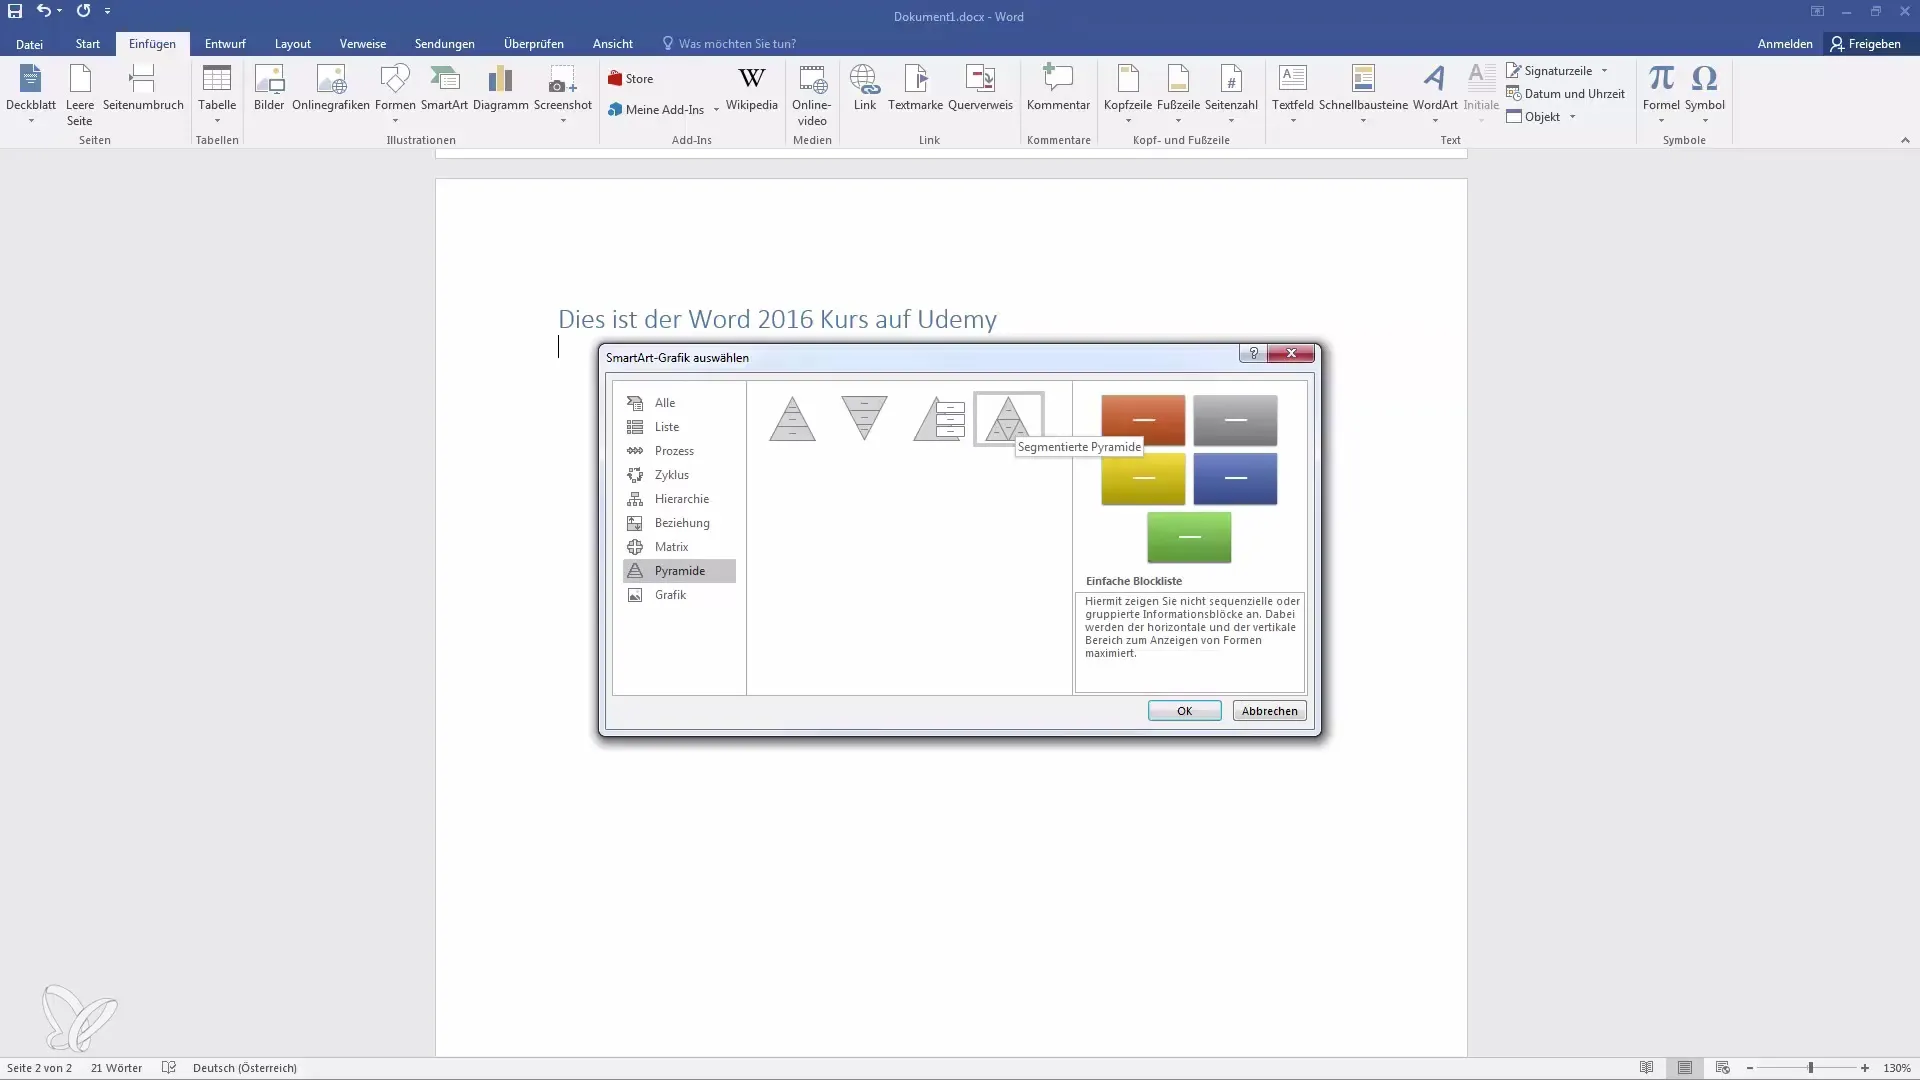
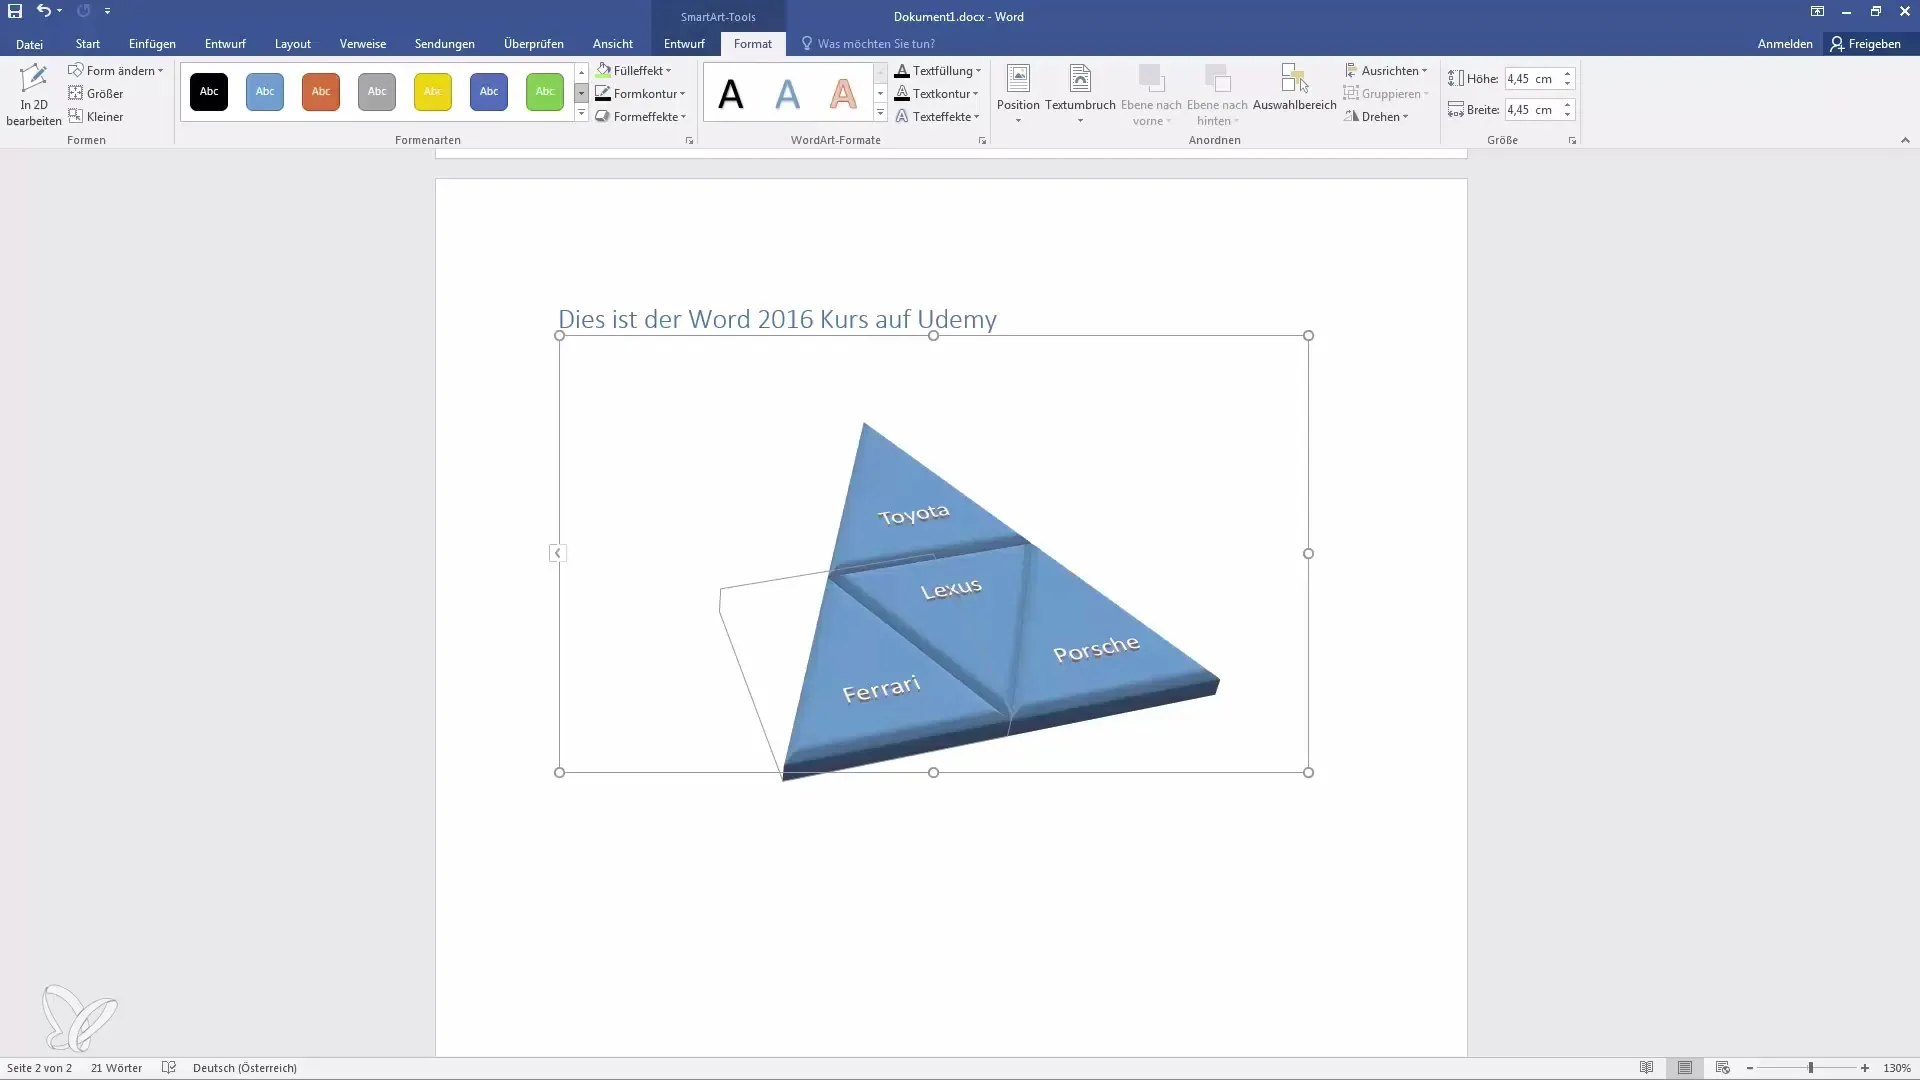
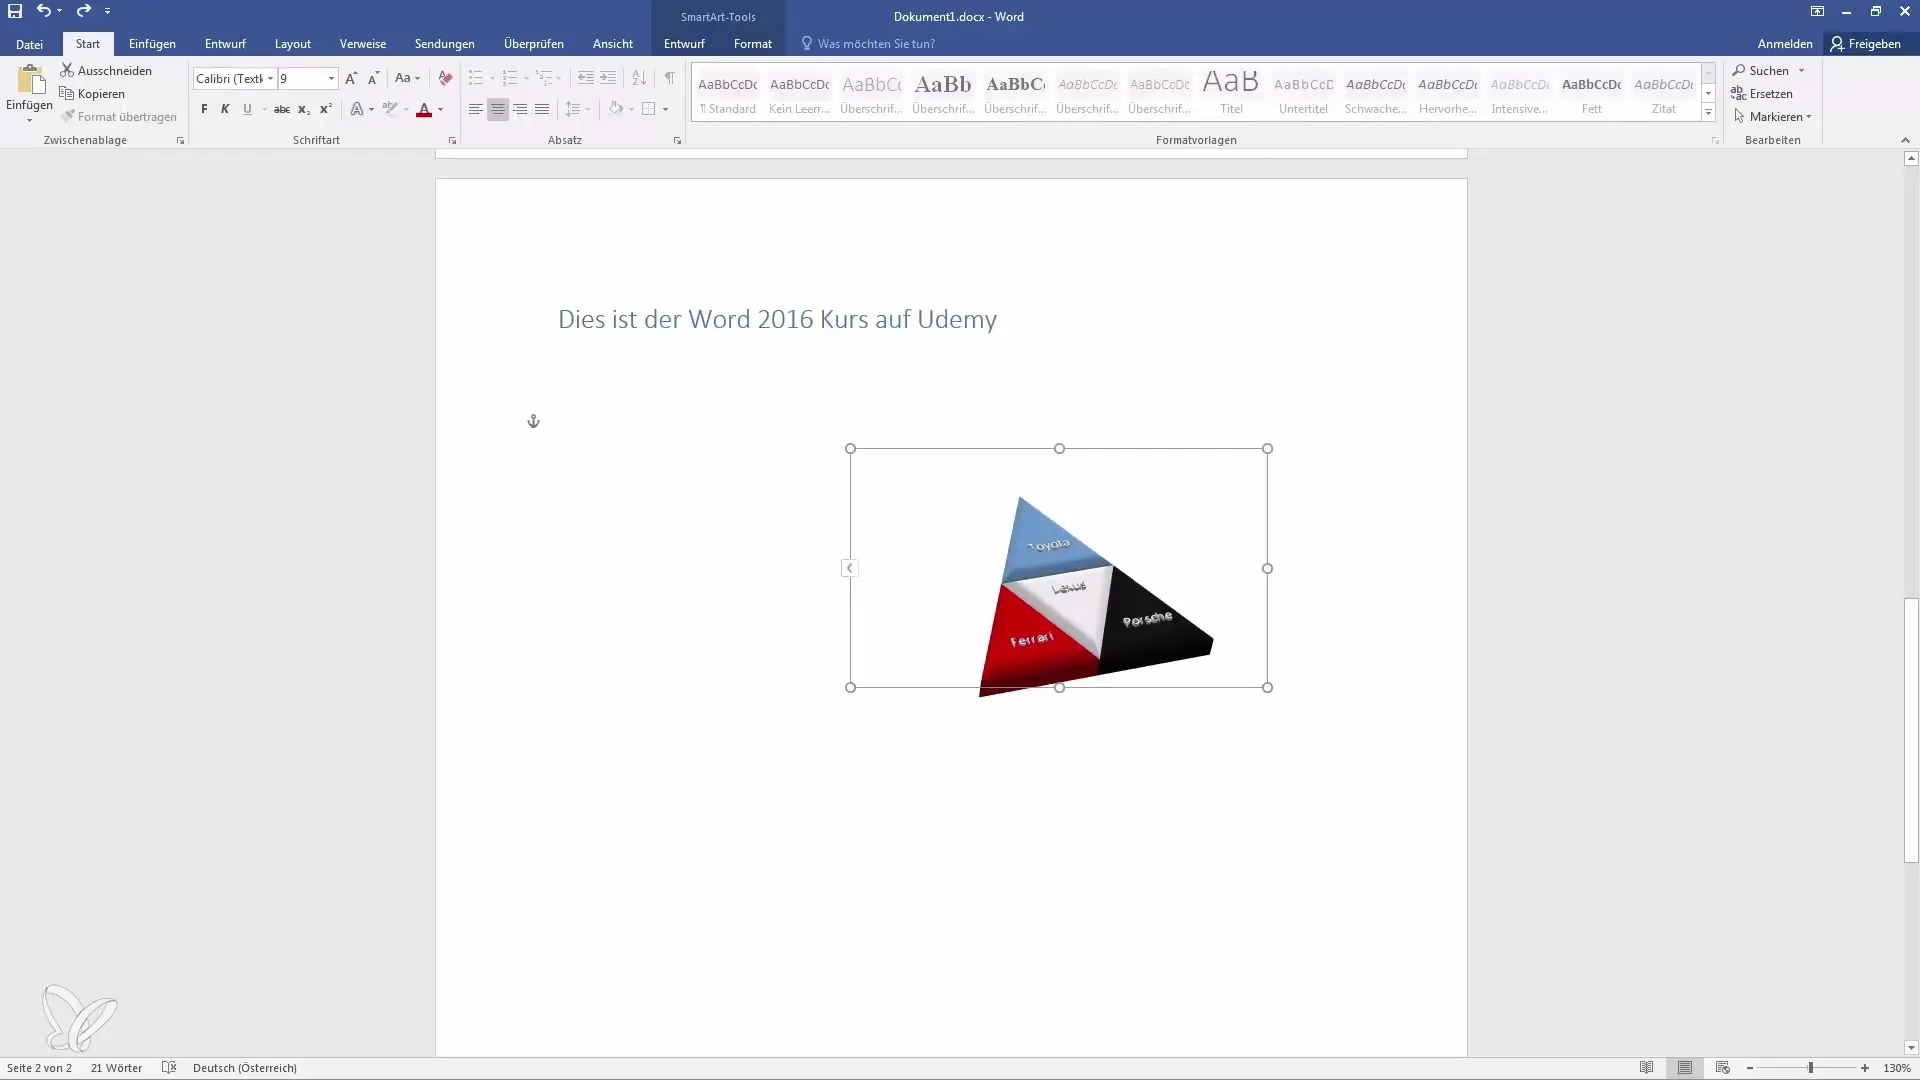
Another example of SmartArt is a pyramid. Go to "Insert" again and then to "SmartArt," and select the pyramid. You can customize the segments individually, to represent different company brands, for example.
For each segment, you can adjust different colors – for example, color the tip red while the other segments have a darker shade. This way, you highlight important information.
Moving and Adjusting Graphics
When moving SmartArt graphics, make sure you move the entire graphic and not just individual parts. Use the small control handles that appear when dragging. This ensures more control over the position of the graphics.
Final Steps
Once you are satisfied with everything, save your work. You can insert the SmartArt into any future presentation or document. This allows you to create visually appealing graphics that support your content.
Summary
With SmartArt in Word, you can present information not only attractively but also clearly. From selecting graphics to detailed customizations, you can design everything to your liking. Use the step-by-step guide described here to elevate your presentations to the next level.
Frequently Asked Questions
How do I insert a SmartArt graphic?You can insert a SmartArt graphic by clicking on "SmartArt" in the "Insert" tab.
Can I adjust the font size in SmartArt?Yes, the font size is automatically adjusted but can be changed manually.
Can I change colors in SmartArt?Yes, you can easily adjust the colors by clicking on the desired shape and changing the color.
How many elements can I add to a SmartArt graphic?You can add multiple elements as needed.
Can I copy SmartArt graphics?Yes, you can copy the entire graphic and paste it elsewhere.
