A PDF document can contain a variety of content, including images that can be used for various purposes. Often, the images contained in a PDF are needed for presentations, reports, or creative projects. Fortunately, there is a straightforward method to extract all images from a PDF file with just a few clicks. In this guide, I will explain step by step how you can extract images.
Key Takeaways
- With Adobe Acrobat, you can easily extract images from PDF documents.
- The crucial button can be found in the "Customize Quick Tools" menu.
- You can adjust the quality of the exported images.
Step-by-Step Guide
First, you need to open Adobe Acrobat and select the PDF document from which you want to extract images. Once your document is open, you are ready for the next steps.

Right-click on the document. A menu will appear with various options. Choose the option "Customize Quick Tools."
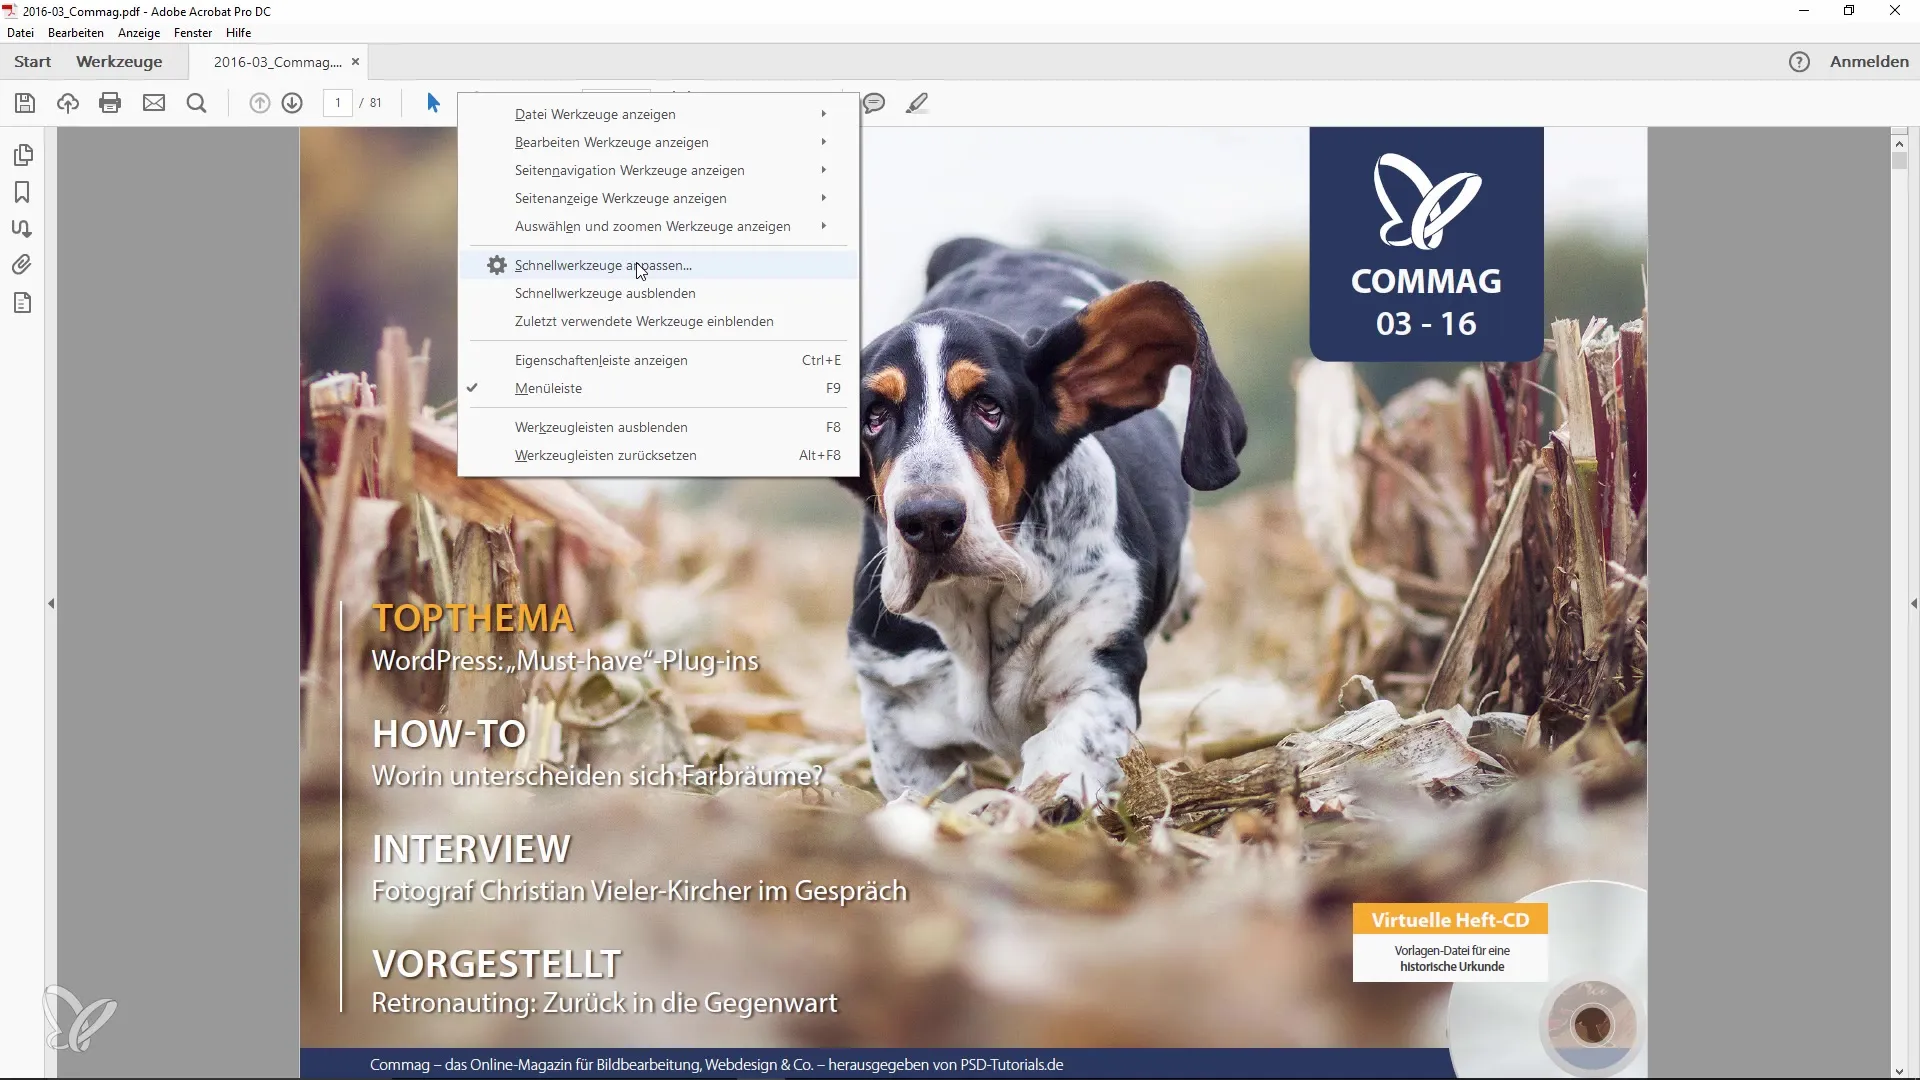
After clicking on "Customize Quick Tools," scroll down to the "Save and Export" section. Here, you will find a specific button labeled "Export All Images."
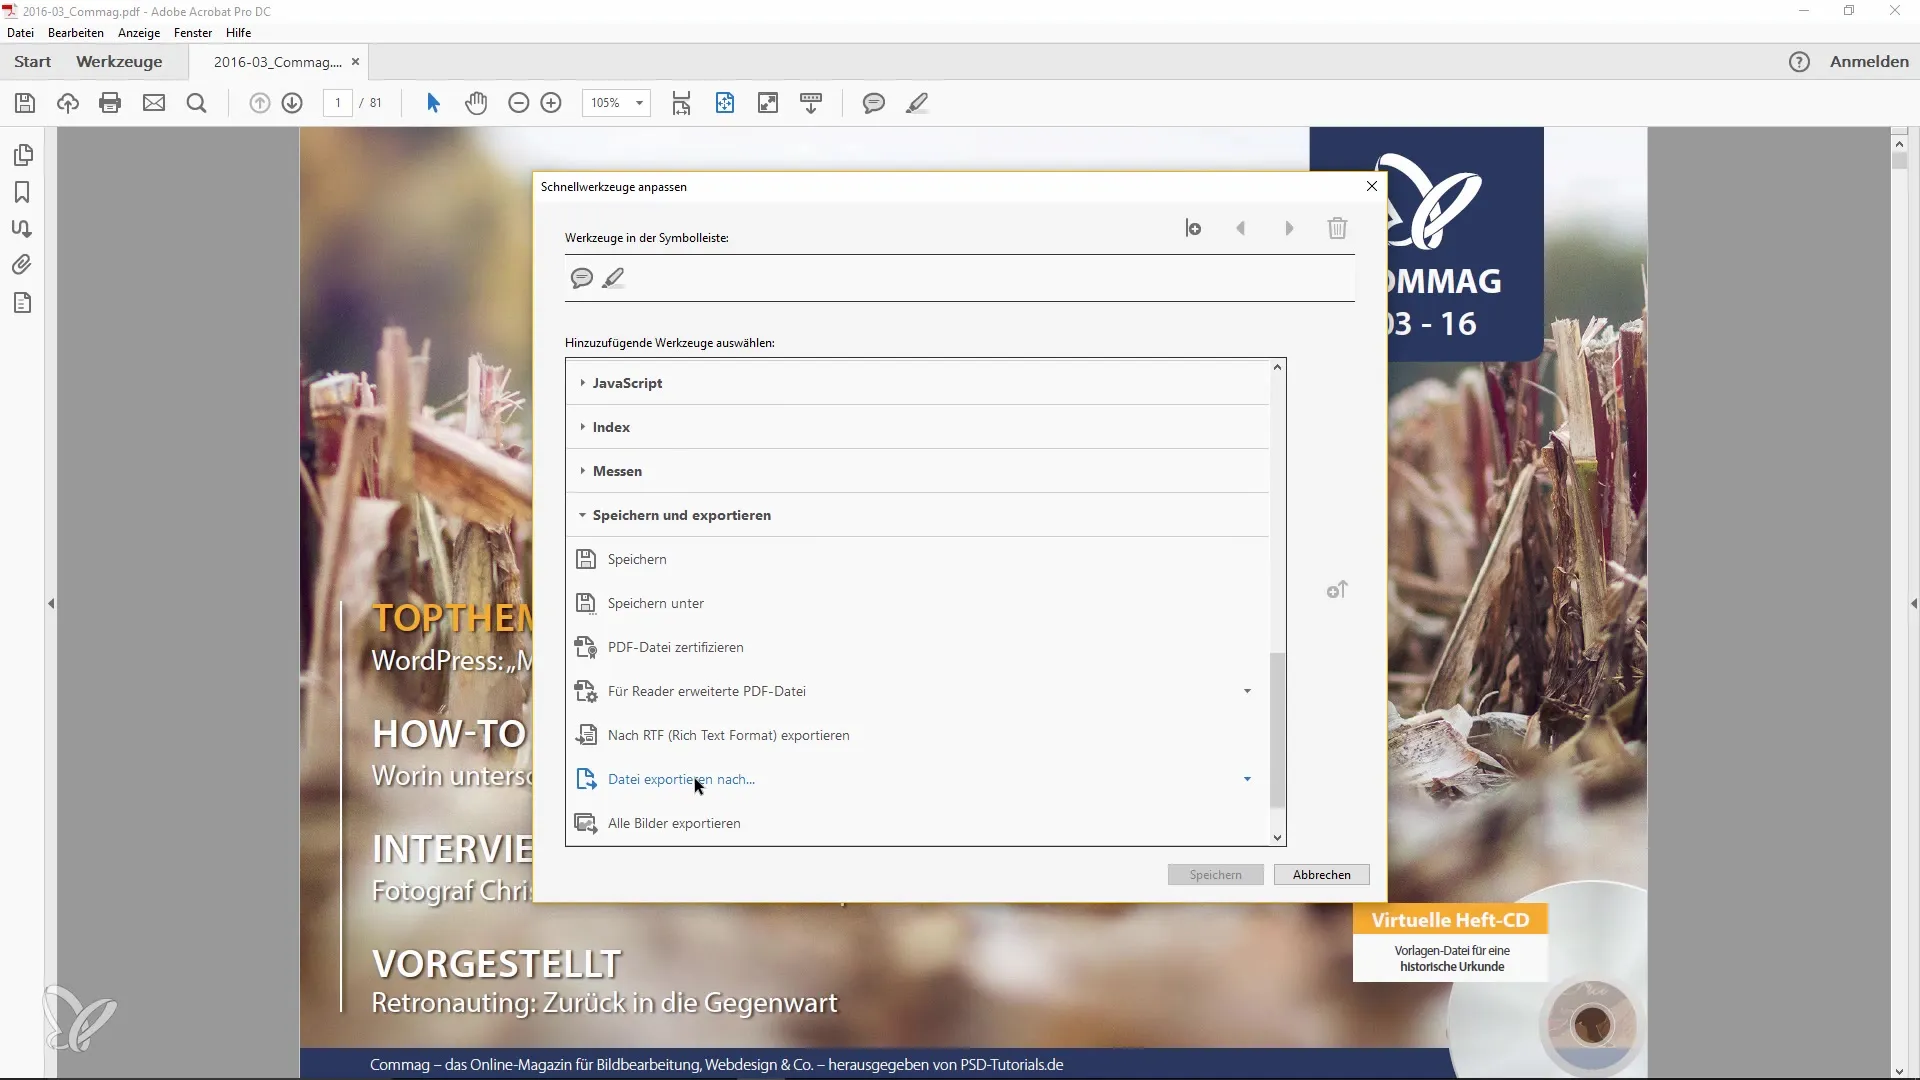
If the "Export All Images" button is not visible, you can add it. It can be found in the same list. Simply click on it, and it will be integrated into your toolset, where you can use it easily by clicking.
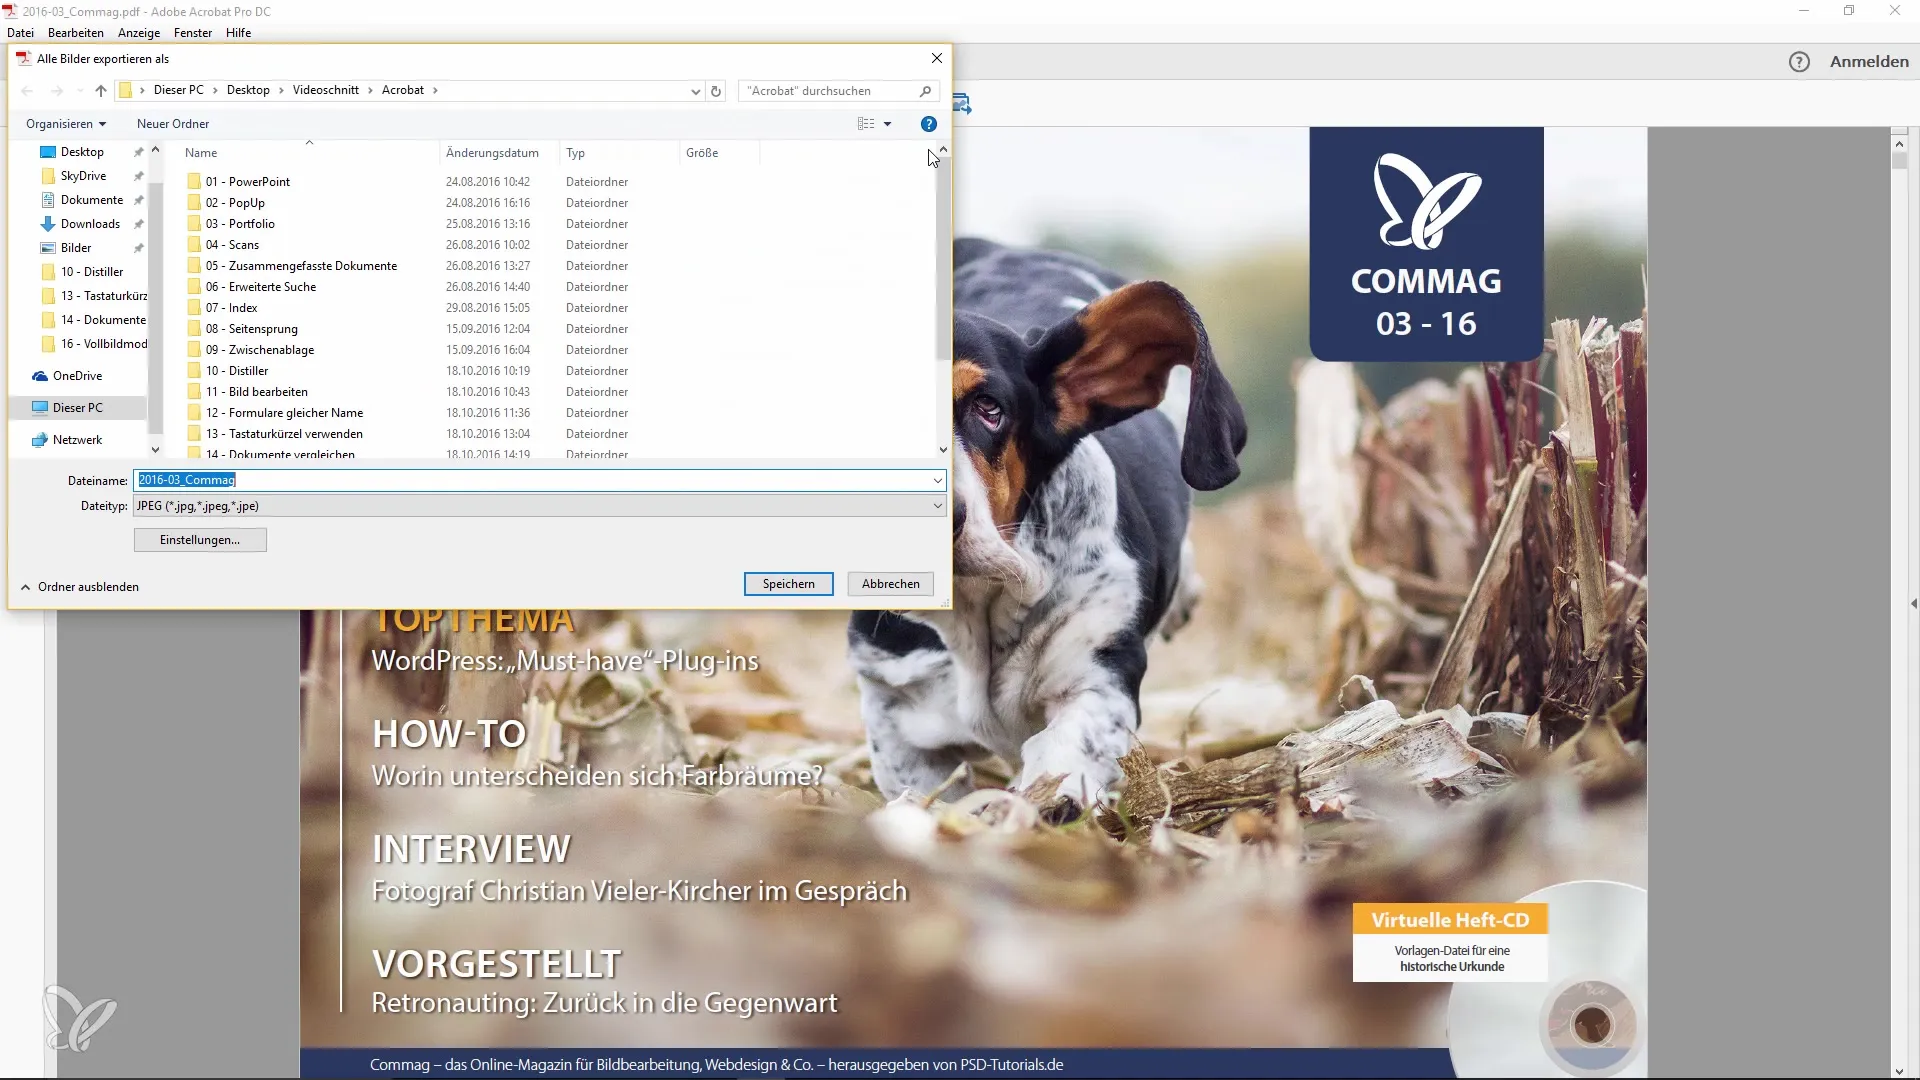
Now it's time to confirm with a click that you want to extract all images from the PDF. You can also create a new folder or select an existing folder to save the images.
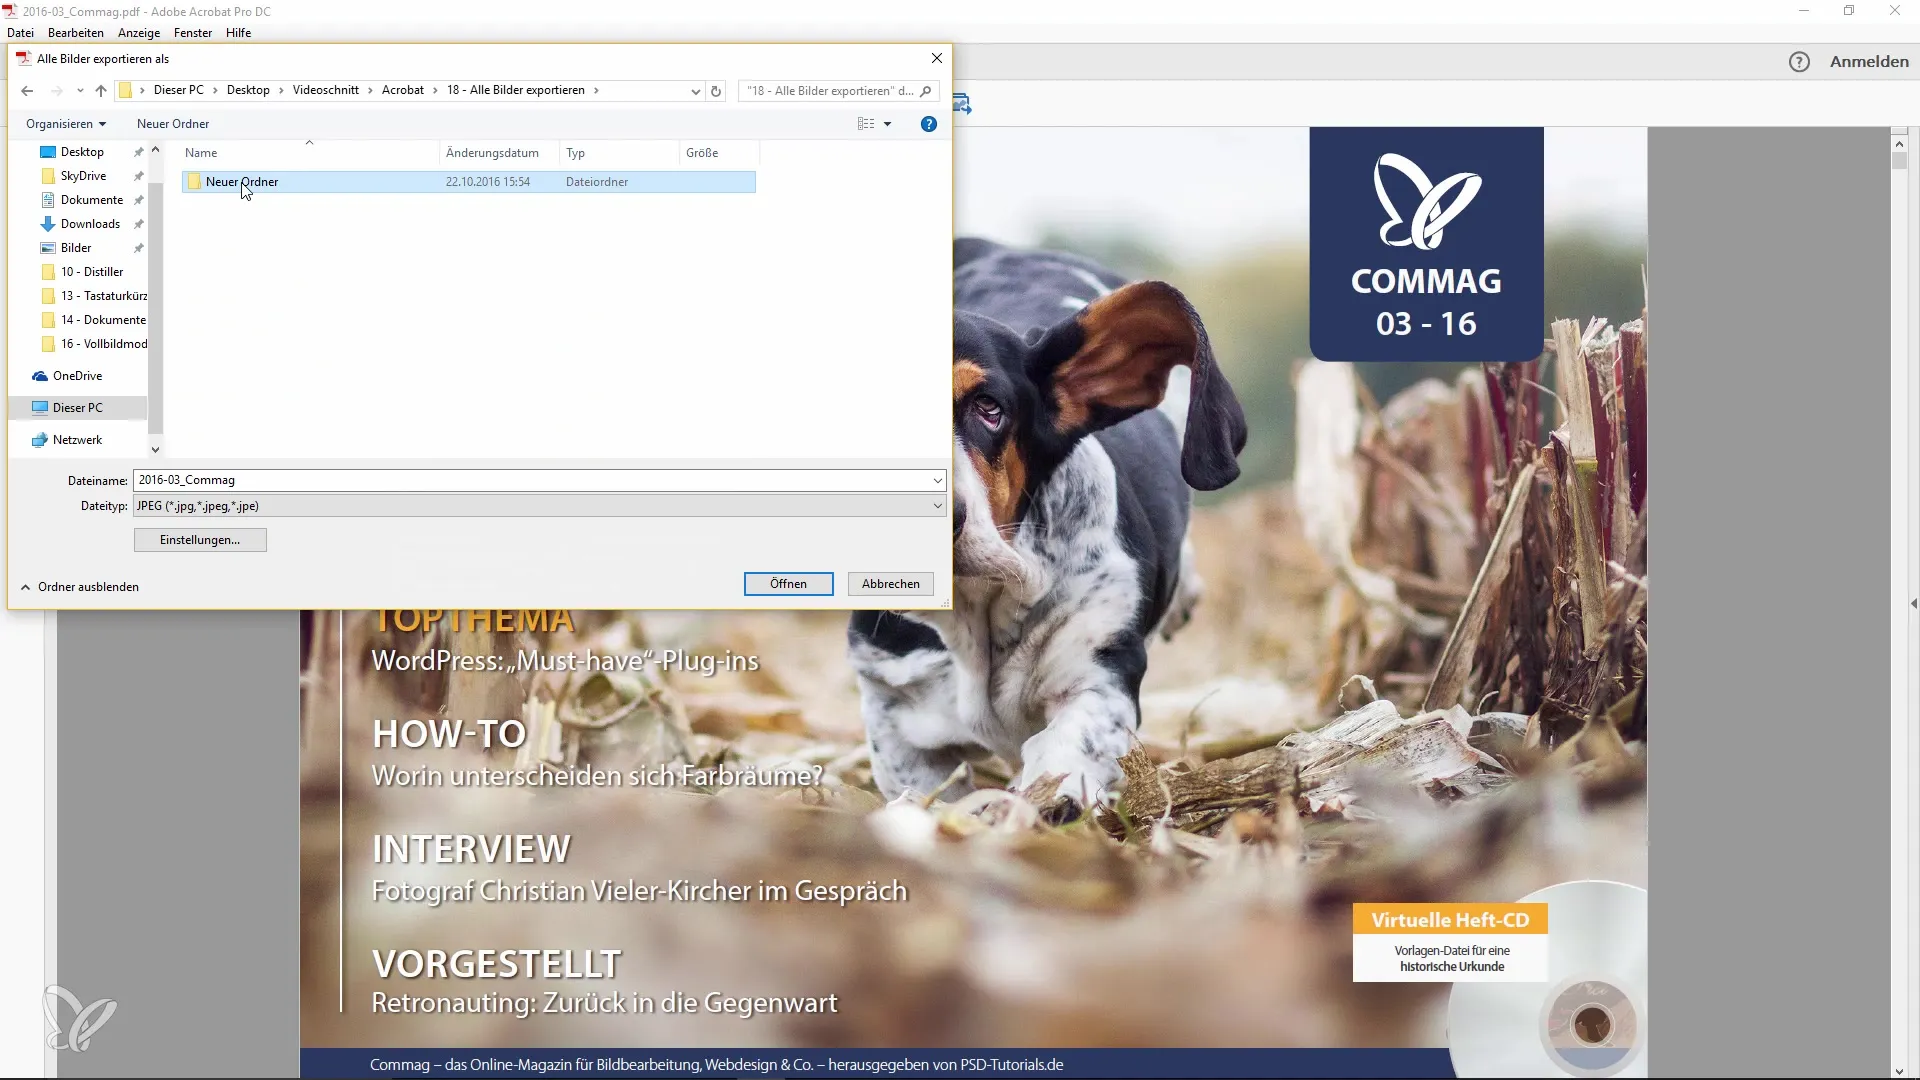
Once you have selected the target folder, you can adjust the quality of the images. These quality settings will affect how sharp and detailed the exported images will be. Make sure you make the right choice here.
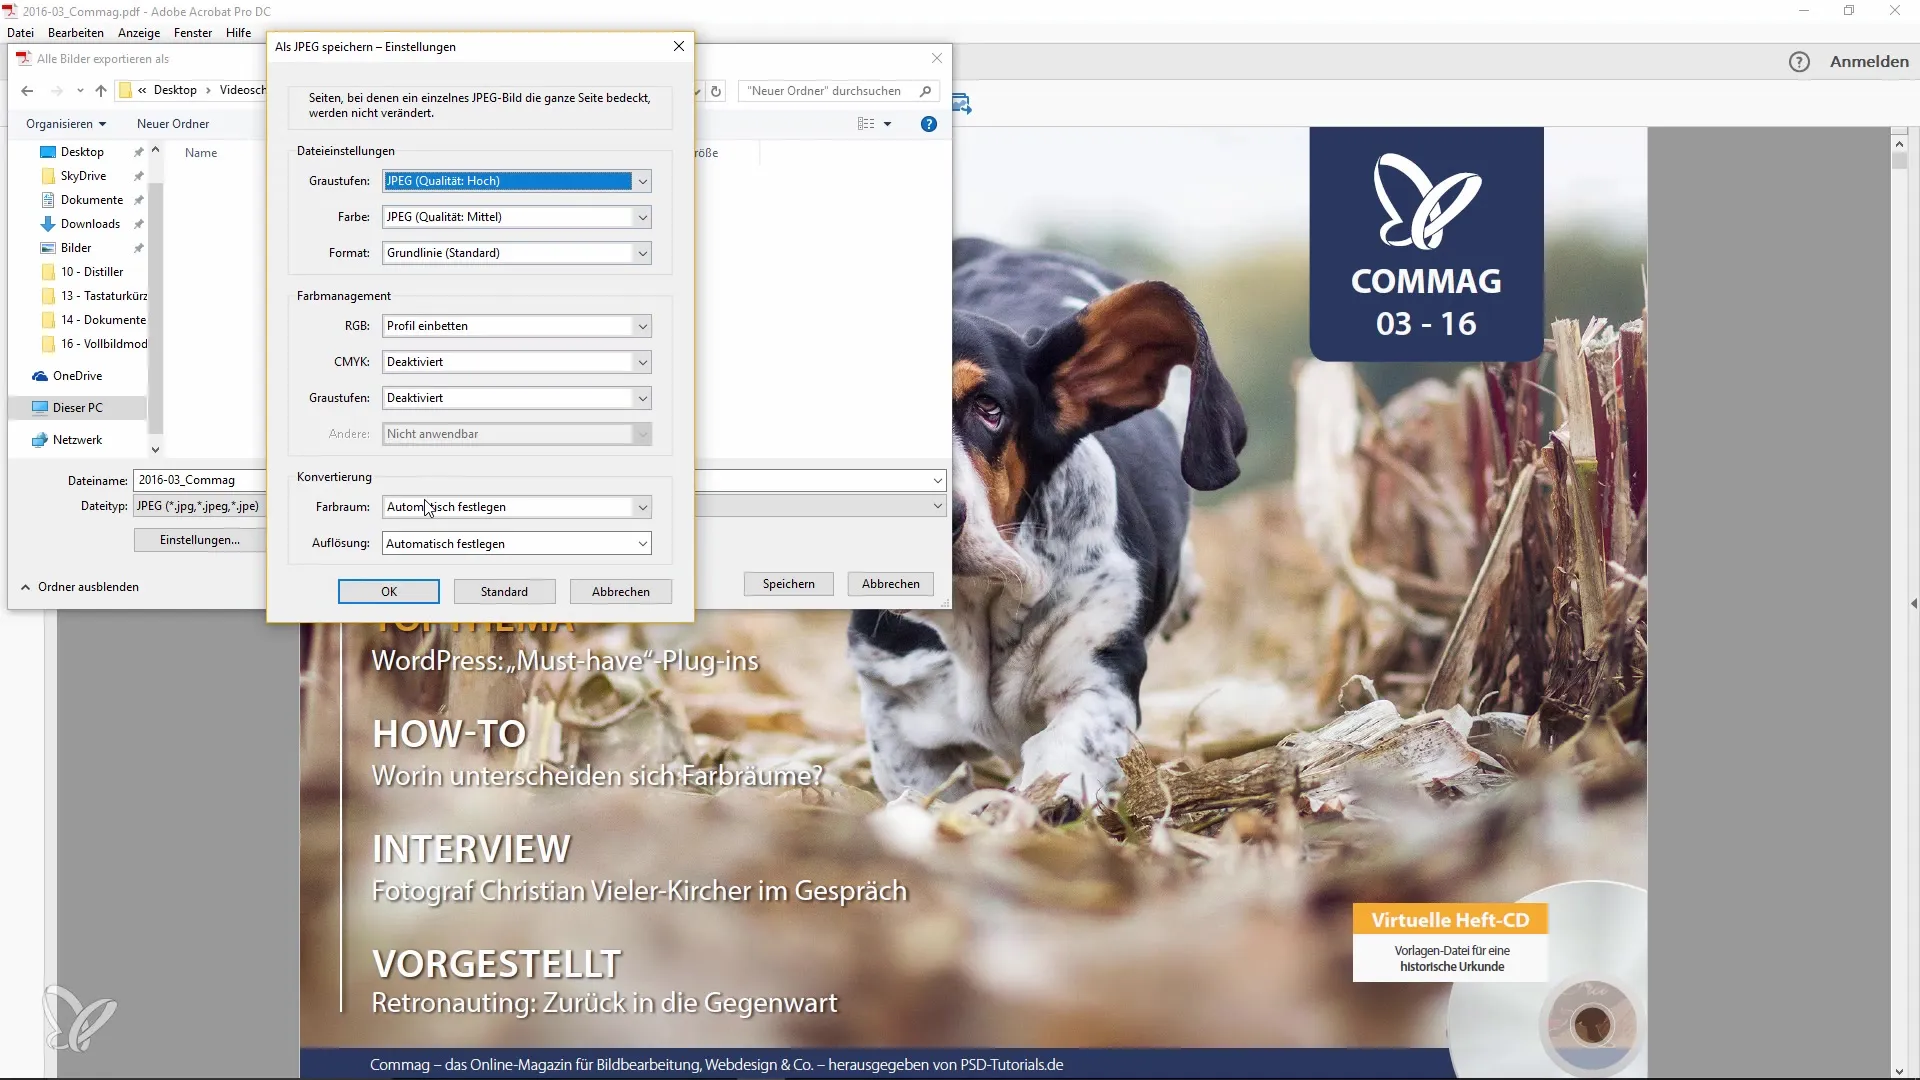
After making the settings, click "Save." The program will now begin exporting the images. You will see all the images being transferred to the selected folder.
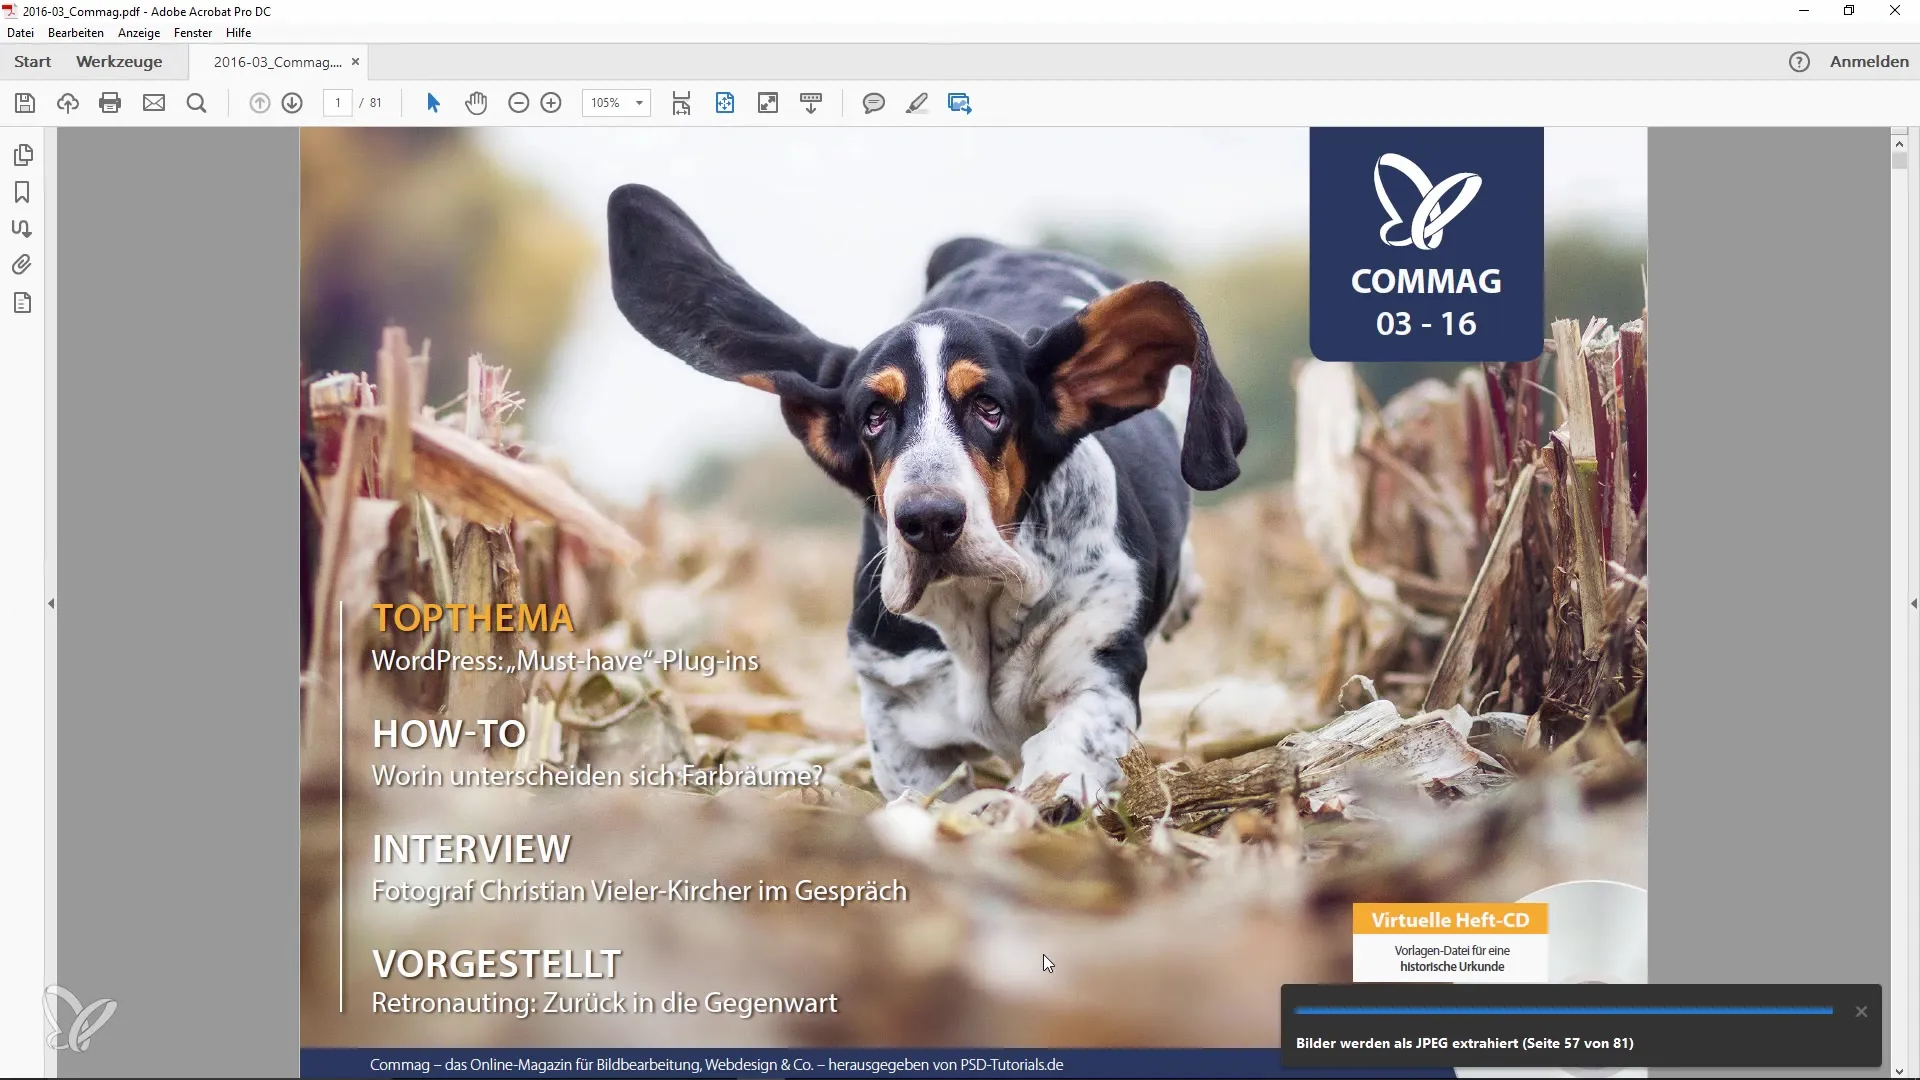
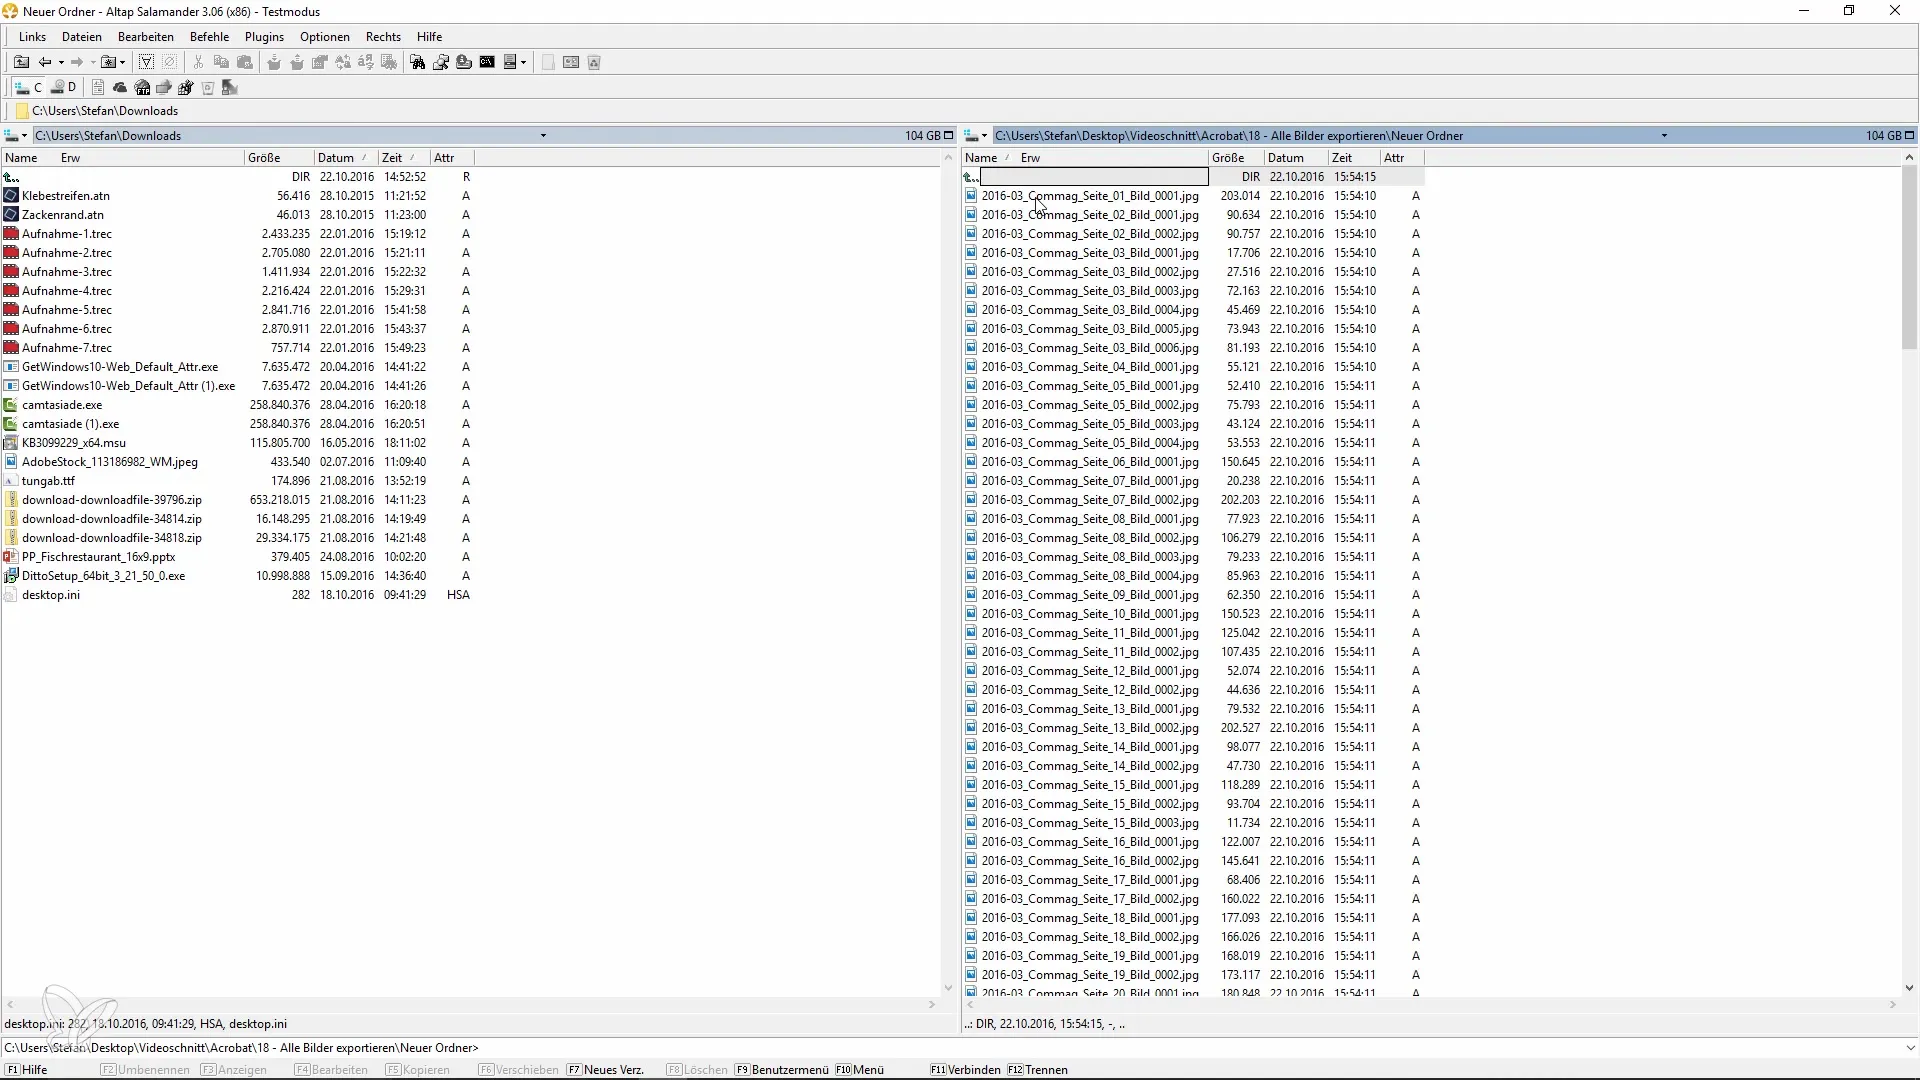
Once the export is complete, open the target folder to check if everything worked as desired. You should find all the images that were included in the original PDF file here.
Review the exported images in the new folder. There should now be a collection of images that were previously stored in the PDF file. You have now completed all the necessary steps and can use the images for your projects.
Summary - Extracting Images from PDF Files Effectively
In this guide, I showed you how to extract all images from a PDF file with a few simple steps. This is done through the "Export All Images" function in Adobe Acrobat, and you can choose where the images are saved and in what quality they are exported.
Frequently Asked Questions
How do I extract images from a PDF file in Adobe Acrobat?Right-click on the PDF document, select "Customize Quick Tools," and then "Export All Images."
Can I adjust the quality of the exported images?Yes, you can adjust the quality of the exported images before saving.
Where can I find the "Export All Images" button?You can find the button in the "Customize Quick Tools" menu under "Save and Export."
How long does it take to export the images?The duration depends on the size of the PDF file and the number of images, but generally, the export is done quickly.


