As the name suggests, this tutorial is about the supreme discipline of clipping, clipping hair with the help of channels.
This may sound complicated at first, as you don't come into contact with channels all that often, but it's not so bad in itself. So here we go.
Channels
You will usually find the channels control panel next to the layers control panel. If it is not activated, you can show it via windows.
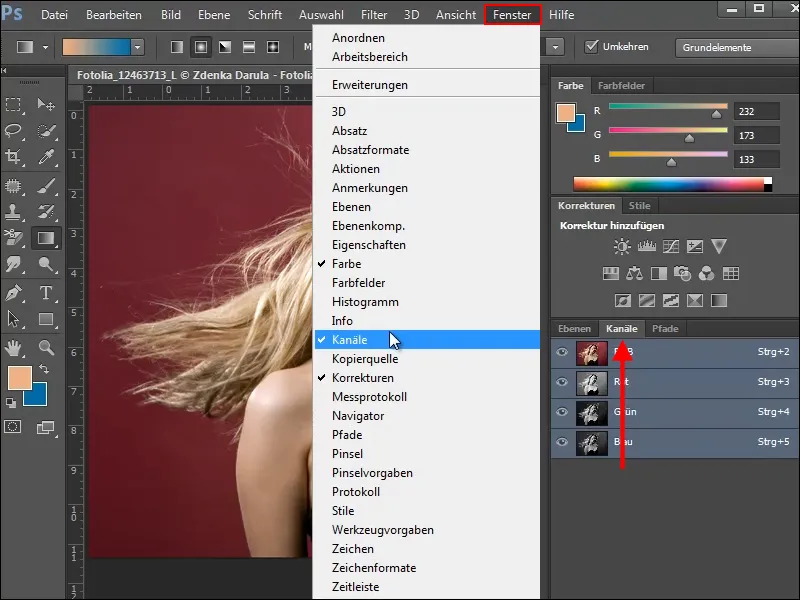
In our first example, we want to crop the woman from the background without losing the fine, flying hair.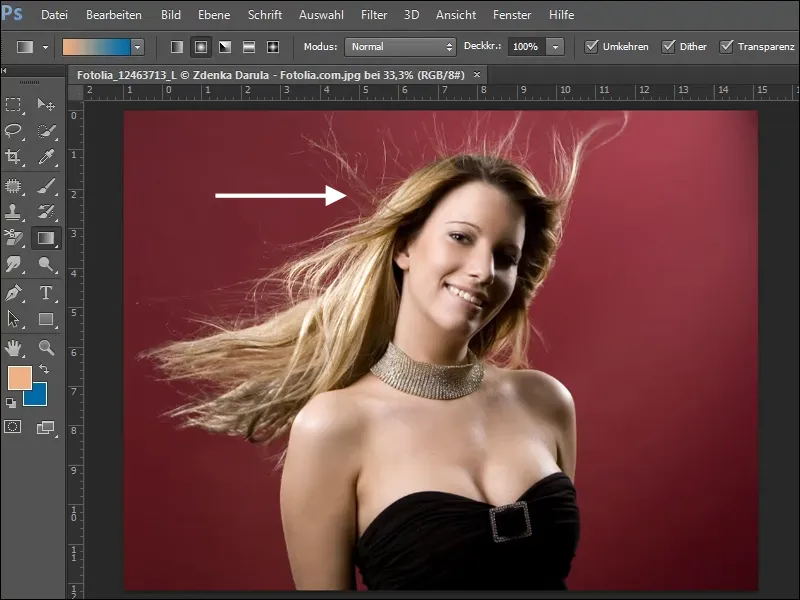
To do this, take a look at the 3 color channels and select the channel that offers the highest contrast to the background. In our example, this is the green channel.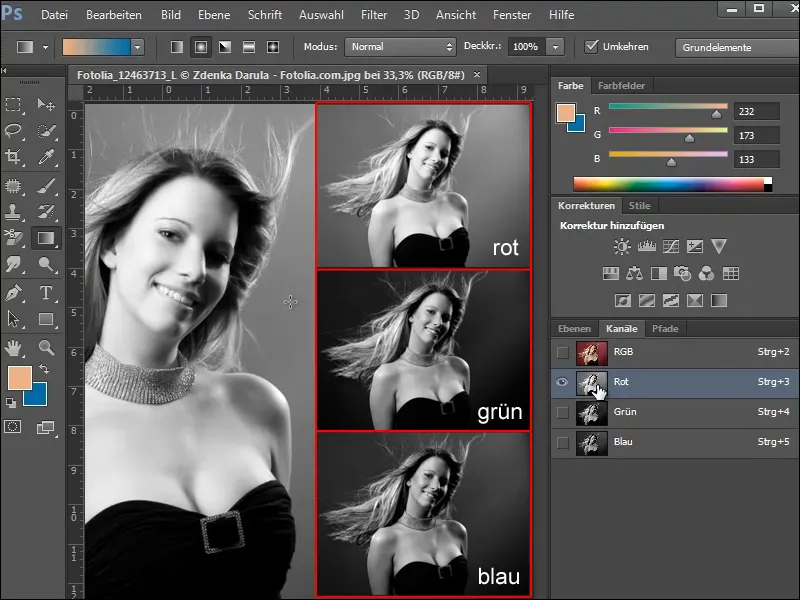
As you can see, the background is already quite dark and the hair provides a good contrast. But we want to show the hair in a high white tone so that we can crop it well.
To do this, copy the green channel by either simply dragging it onto the new channel icon or selecting the Duplicate channel option in the channel palette.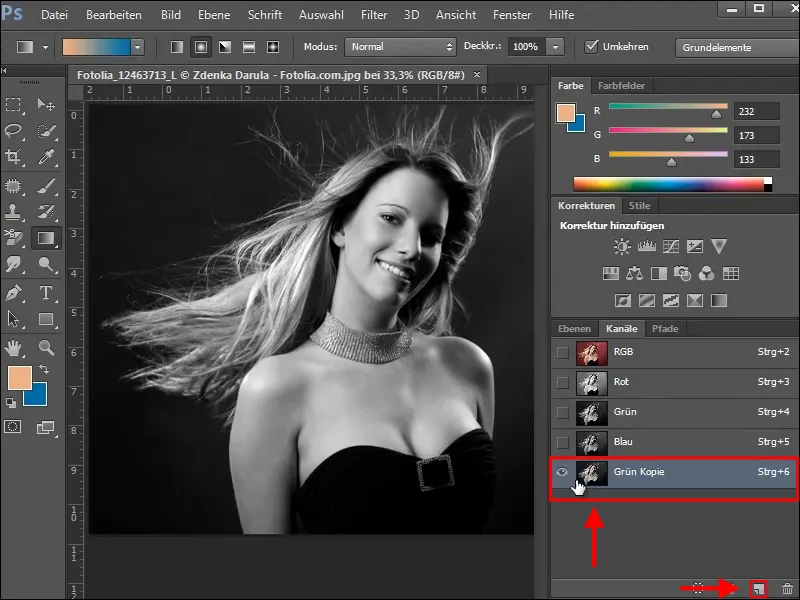
Tone value correction
To increase the contrast between the dark background and light hair, we use the tone correction. You can access this dialog box by pressing Ctrl+L or via the Image>Corrections>Tone correction menu.
You can use the three sliders below the histogram to further change the shadows, midtones and highlights of the selected channel.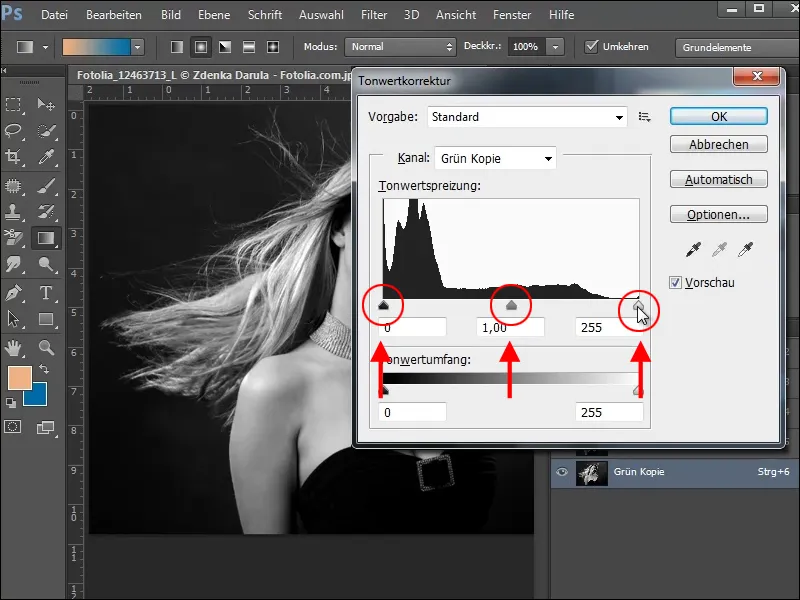
The right-hand slider boosts the bright tones ( highlights) and the left-hand slider boosts the dark tones (shadows). This separates the light hair from the background. However, you must be careful not to lose too much detail. Simply try on your image until you have a satisfactory result.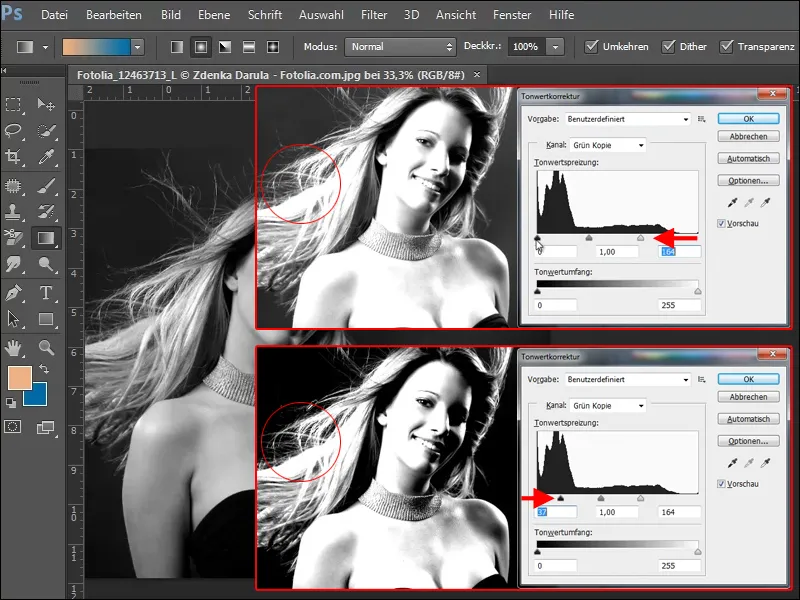
With the Dodge tool and the Highlights option selected, you can further increase the brightness of the fine hairs.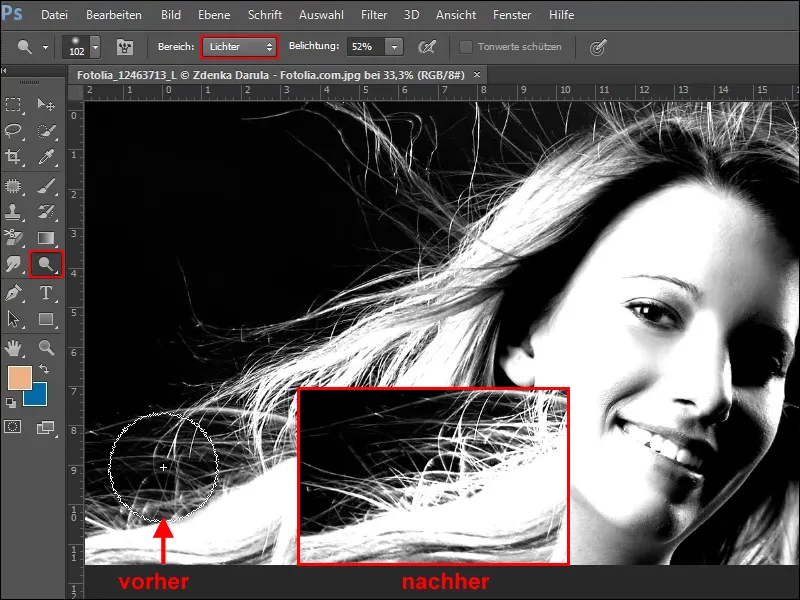
Create a mask
In order to remove everything later with a single click, you would now have to fill the light areas of the image with white. However, I would like to show you a simpler procedure for the time being. Therefore, create a selection by holding down the Ctrl key and clicking in the green copy channel.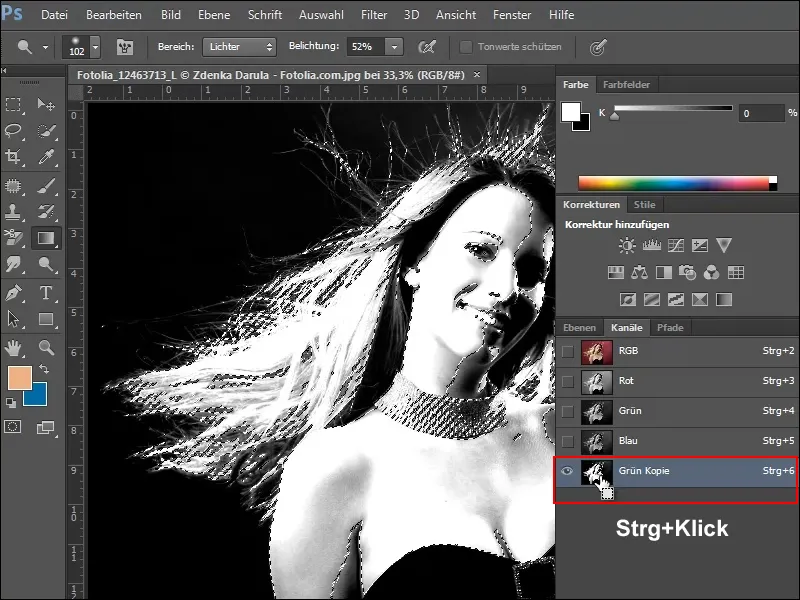
Now return to the Layers panel and create a copy of your background layer. To do this, drag the layer onto the new layer symbol or click on Duplicate layer in the layer palette.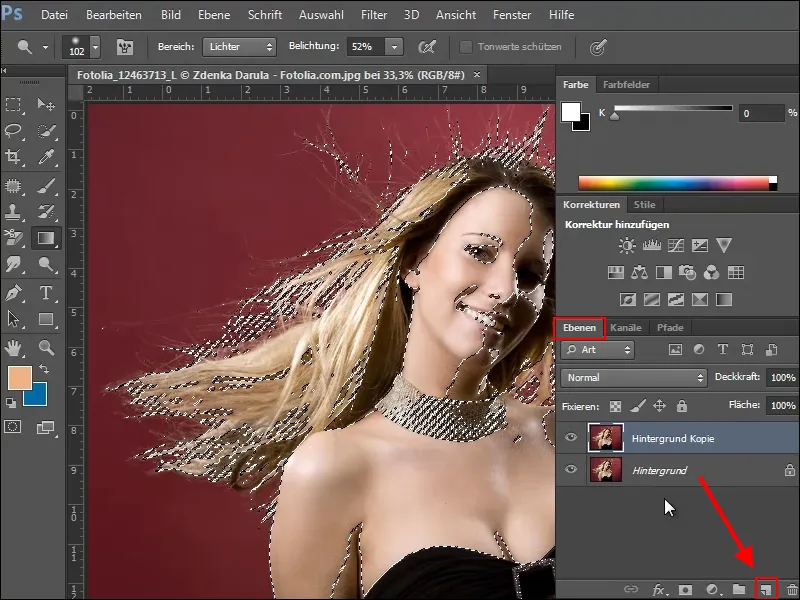
Before you create a mask on this layer, the selection must be extended by the areas that are to be retained. This can be done quite easily with the quick selection tool.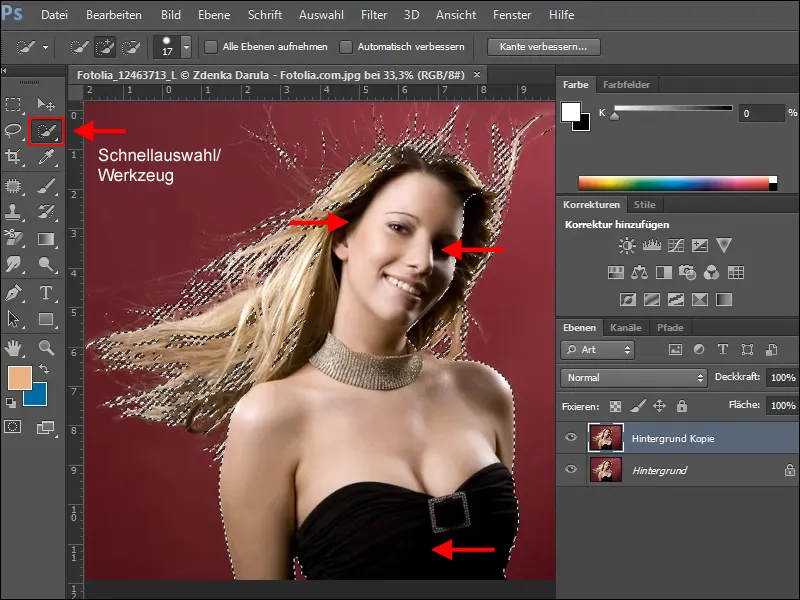
Once you are happy with the selection, you can create a mask. To do this, click on the mask icon in the layer palette. Blender out the background layer and you can see from the checkered pattern which areas have already been cropped and what is still missing.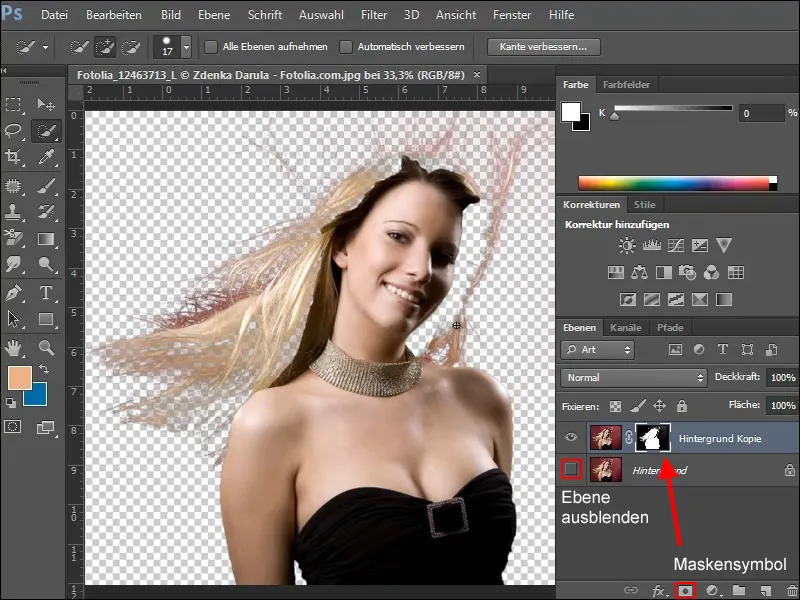
To add the missing areas, create a new layer under the working layer and fill it. Choose a color that makes it easy to see which areas of the image are still missing.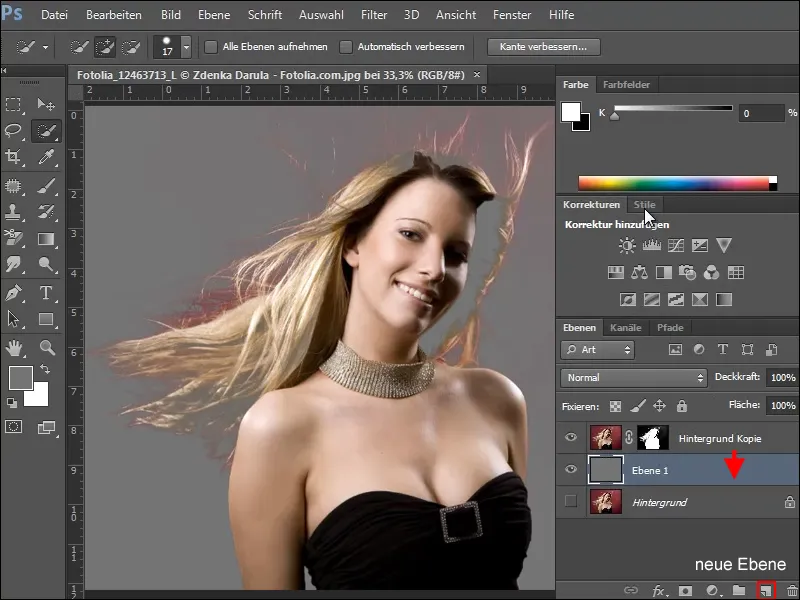
Now make sure that you only work in the mask during the next touch-up work. Select it and then choose a soft brush in a suitable size. Change the foreground color to white and fill in the areas that were not included in the mask.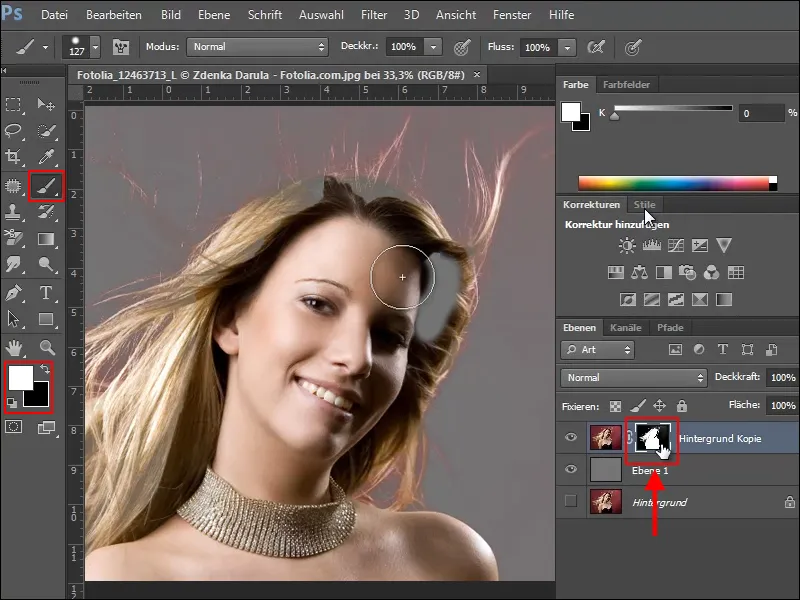
Remove background color
Now, however, there is still the problem that the red from the background has been picked up by the fine hairs. A simple way to remove this disturbing color tone is to correct it using hue/saturation.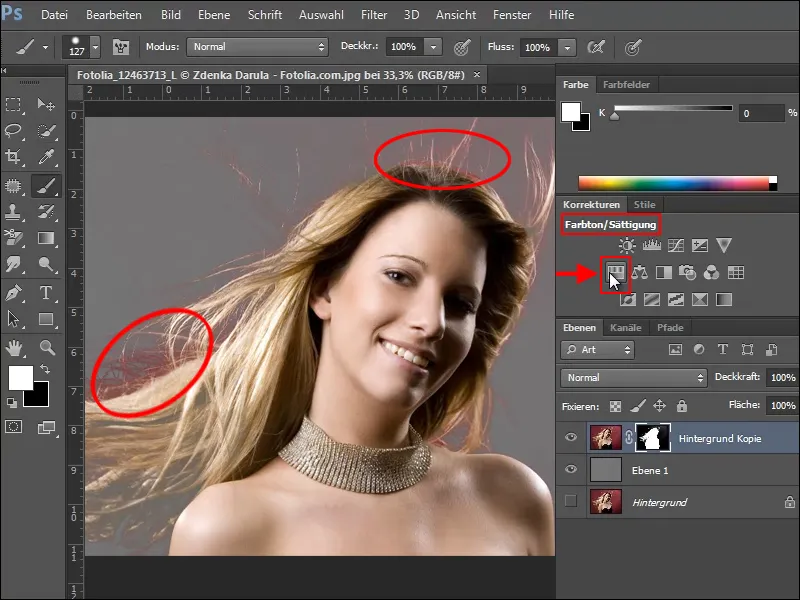
However, when creating the new adjustment layer, make sure to select the Restrict to layer option in the correction palette, as the settings you make will otherwise change your entire document.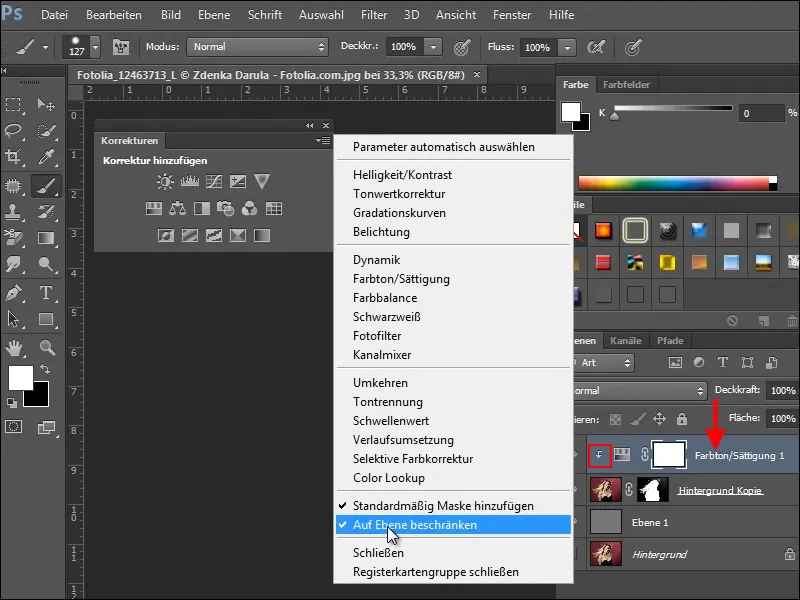
If you have not selected the Restrict to layer option, not only will the color of the woman in the foreground change, but also the grey layer below it, as you can see in the example image.
Now make the following setting in the hue/saturation palette for our example.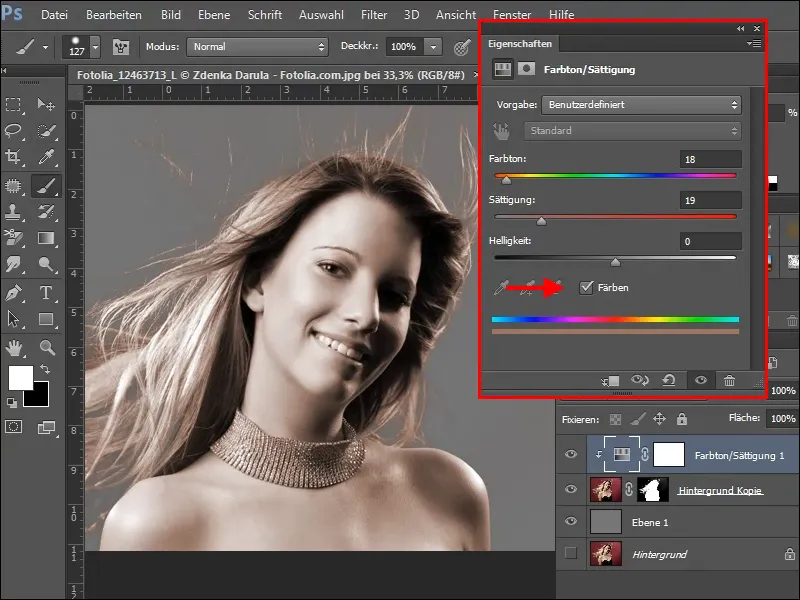
However, as the whole woman is now colored, you need to highlight the areas that should look original.
To do this, click on the mask of the Hue/Saturation adjustment layer , find a soft, relatively large brush and paint over the areas that you want to restore. Make sure that black is set as the foreground color.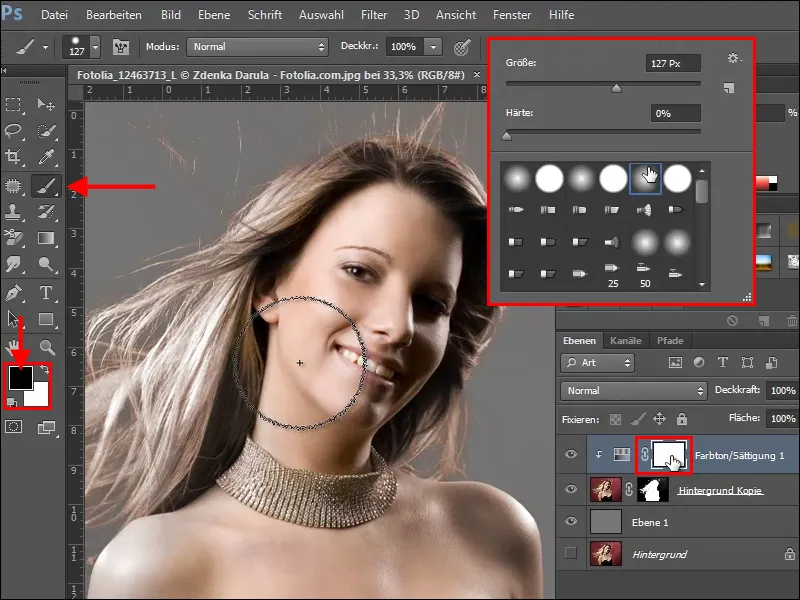
The whole thing also works the other way round. To do this, lift your mask completely by holding down the Alt+Backspace key; the foreground color must be black. The mask is now black and the adjustment layer has no effect on the image. Now paint with the soft brush and white paint only in the areas that you want to decolorize, i.e. over the fine hairs on the left and top of the image.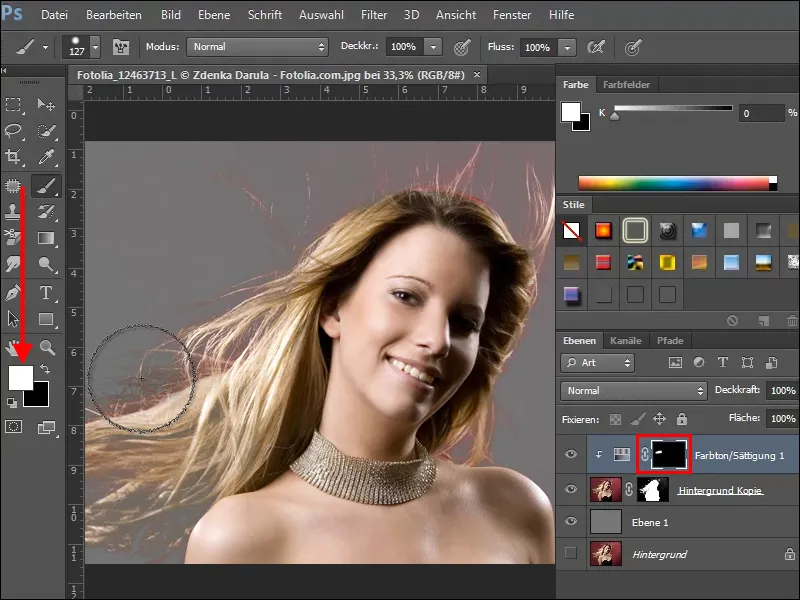
If you have removed too much color, no problem, use black paint and color the areas again. Try a little and when you are finished, your picture could look like this.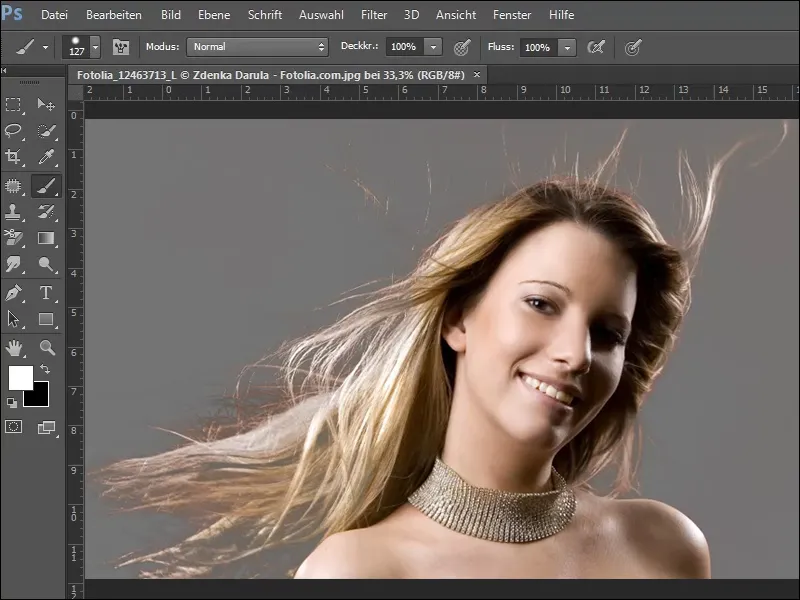
If you want to see how the result looks against a different background, find a texture, such as the brick texture from our texture pack, and insert it below the edited layer, i.e. the woman.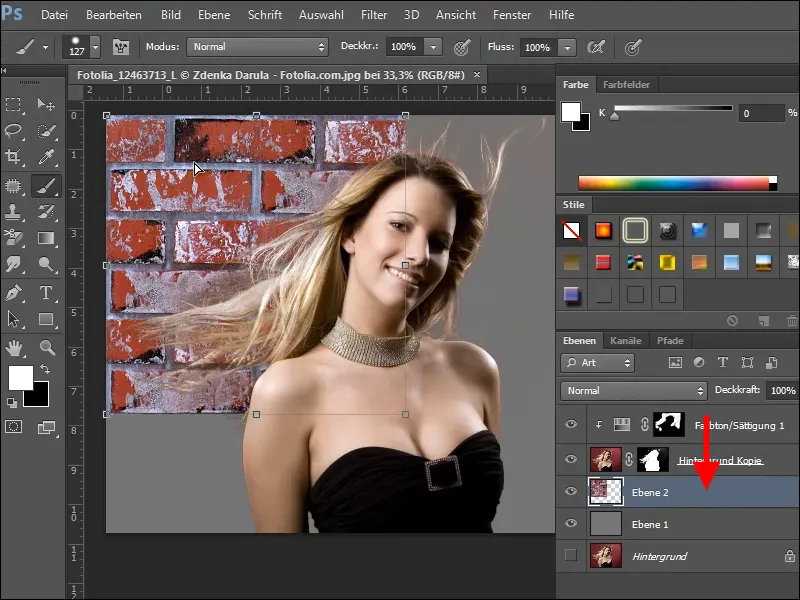
If everything has worked so far, your image could now look like this.
Example 2
In the 2nd image, I will summarize the individual steps again without explaining them in detail. First select a suitable color channel ....webp?tutkfid=72831)
... increase the contrast with tone value correction, ....webp?tutkfid=72832)
... lighten hair with the dodge tool, ....webp?tutkfid=72833)
... create a selection with the Ctrl key + click in the edited channel ....webp?tutkfid=72834)
... create a copy of the background layer and expand the selection..webp?tutkfid=72835)
Create a mask from the selection, add a layer underneath and fill it with color..webp?tutkfid=72836)
Then create a new Hue/Saturation adjustment layer..webp?tutkfid=72837)
Invert the mask (invert) and remove color distortions with Ctrl+E and a soft brush and white paint..webp?tutkfid=72838)
Inserts a new background or places it ....webp?tutkfid=72839)
... and, if necessary, touch up areas of the image ....webp?tutkfid=72840)
... and you're done..webp?tutkfid=72841)


