Black and white images have the unique ability to give a touch of drama and depth to a picture. This is especially true for portraits of athletes, where the strong contrasts between light and shadow highlight the aesthetic body shapes and capture the power of the moment. In this guide, I will show you how to convert color to black and white using Adobe Photoshop, fine-tuning the contrasts to create an impressive athlete portrait.
Key Takeaways
- Black and white images offer you the possibility to create a special drama.
- Using adjustment layers such as Black & White and Channel Mixer allows detailed adjustments of brightness and contrast.
- With masking tools, you can selectively edit specific areas of the image to achieve optimal results.
Step-by-Step Guide
To transform your athlete portrait into an impressive black and white image, follow the steps below.
1. Image Preparation
Start by opening Adobe Photoshop and load the color image you want to convert. Make sure the image is in high resolution for the best results. Your image should display a dynamic and powerful pose of the athlete to maximize the effect of the black and white conversion.
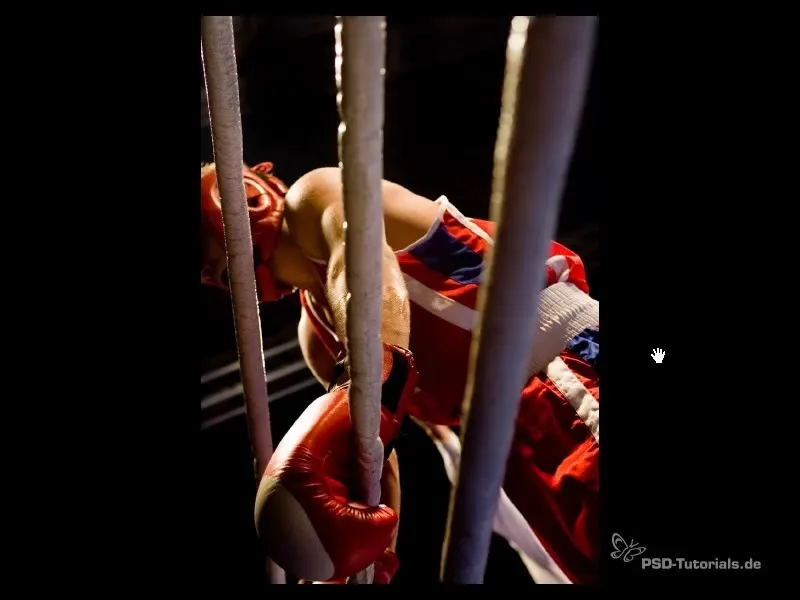
2. Initial Conversion to Black and White
Select the "Black & White" adjustment layer option. This function instantly converts your image to grayscale. The great advantage of this method is that you can adjust the tones of the image individually. Experiment with the sliders to enhance or lessen the desired light conditions. Keep the default settings for this initial conversion to establish a solid foundation.
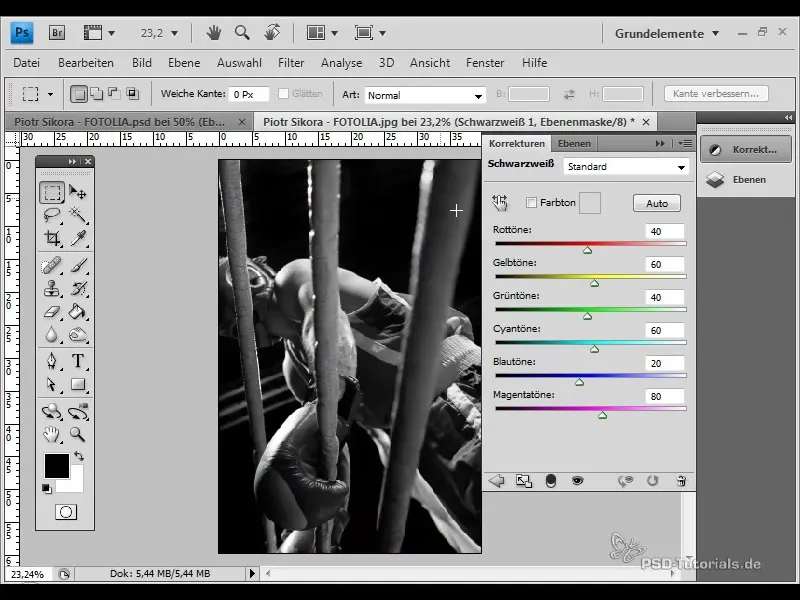
3. Applying the Channel Mixer
After applying the initial black and white correction, add another adjustment layer: the "Channel Mixer." Set this to "Monochrome." The Channel Mixer creates stronger graduations than the first correction and allows you to individually edit the color channels of Red, Green, and Blue. Try reducing the Red channel by a few percentages to darken the background and make the light-dark contrasts clearer.
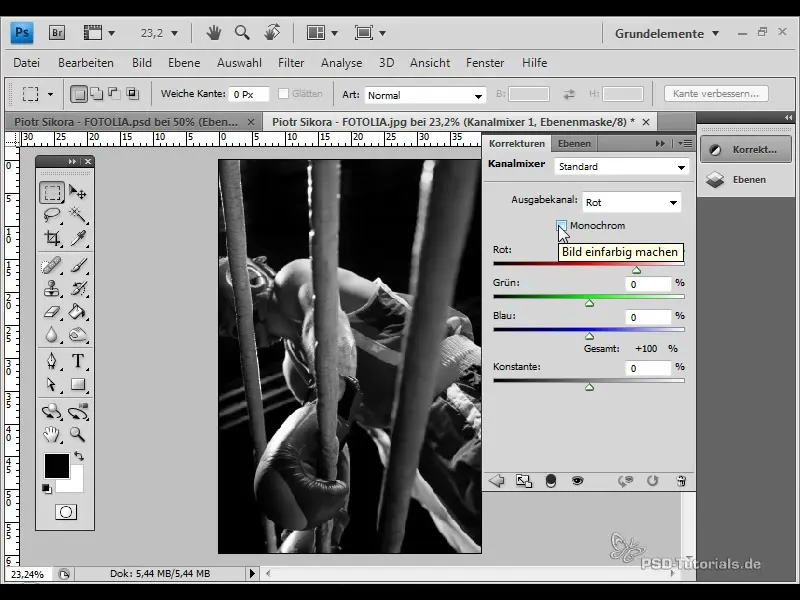
4. Fine-tuning the Contrasts
Ensure that the sum of the percentages in the Channel Mixer ranges between 90% and 100%. This ensures the image remains harmonious. If necessary, make adjustments to highlight "black" and "white" and enhance the overall effect.
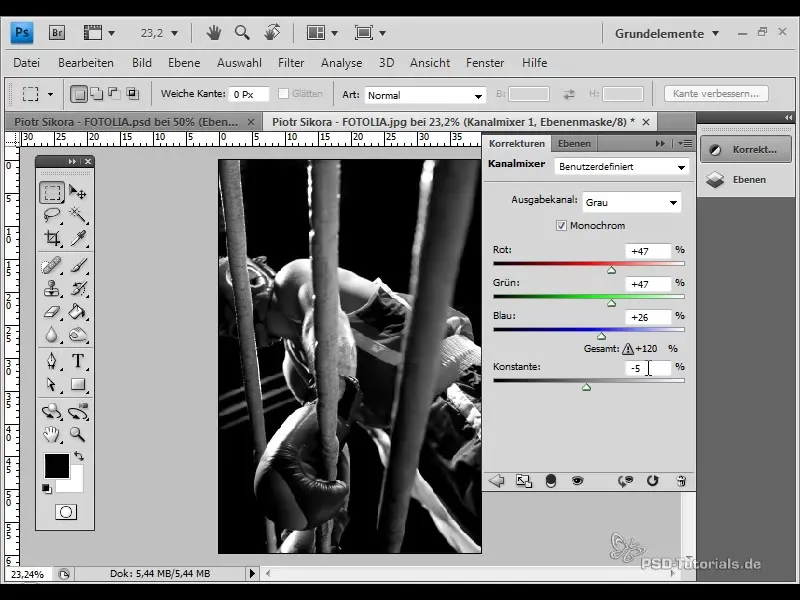
5. Optimizing the Grayscale
Sometimes, the gradients in the image can be too sharp. It is important to check these and adjust if necessary. Remove the Channel Mixer initially to see how the gradients look without this effect. This will allow you to decide if further adjustment is needed.
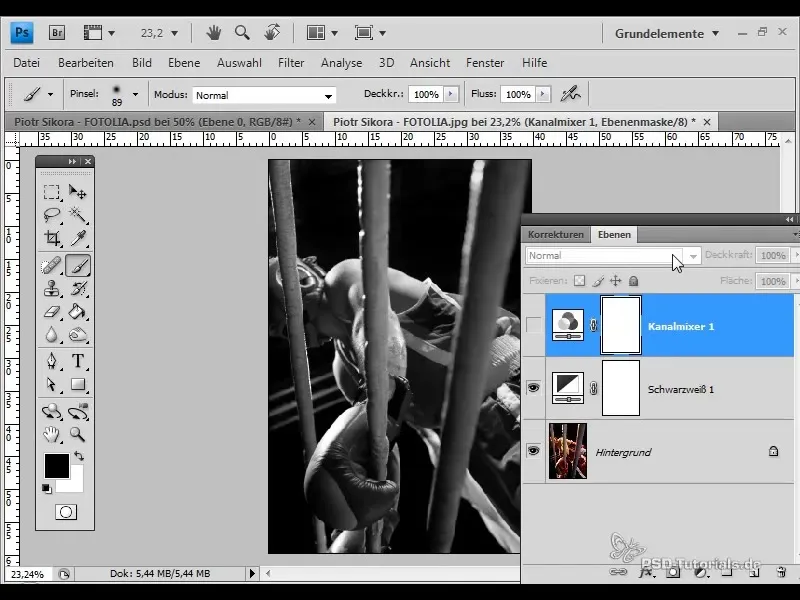
6. Masking Exaggerations
If you notice harsh contrasts in specific areas such as the athlete's glove, you can selectively apply a mask. Use a black brush in the layer mask of the Black & White adjustment layer to correct these stronger gradients in the problematic areas. This will reduce unwanted contrasts and increase detail fidelity in the image.
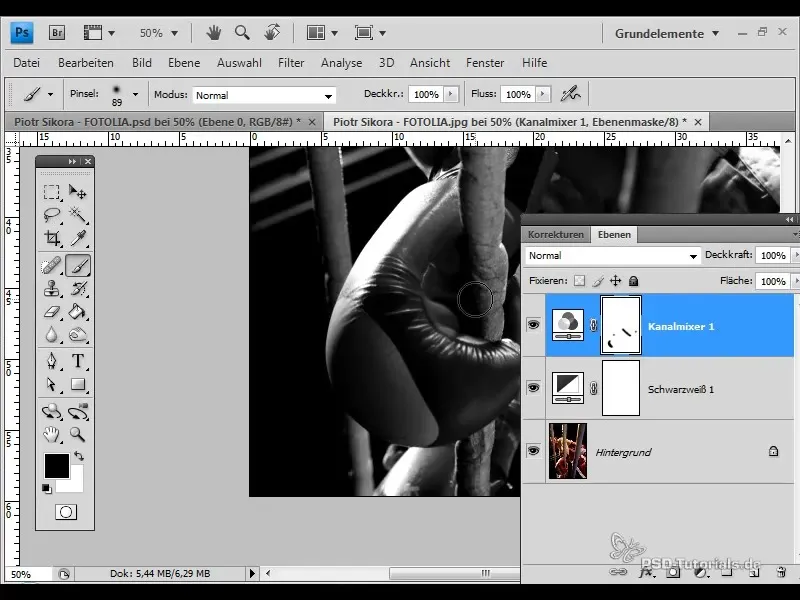
7. Adjusting Color Tones
To enhance the color depth, access the color sliders in the Black & White adjustment. Identify specific color tones in the image that represent important details, and adjust their intensity. This is done using the pipette, allowing you to selectively adjust the colors in the image to create a harmonious overall impression.
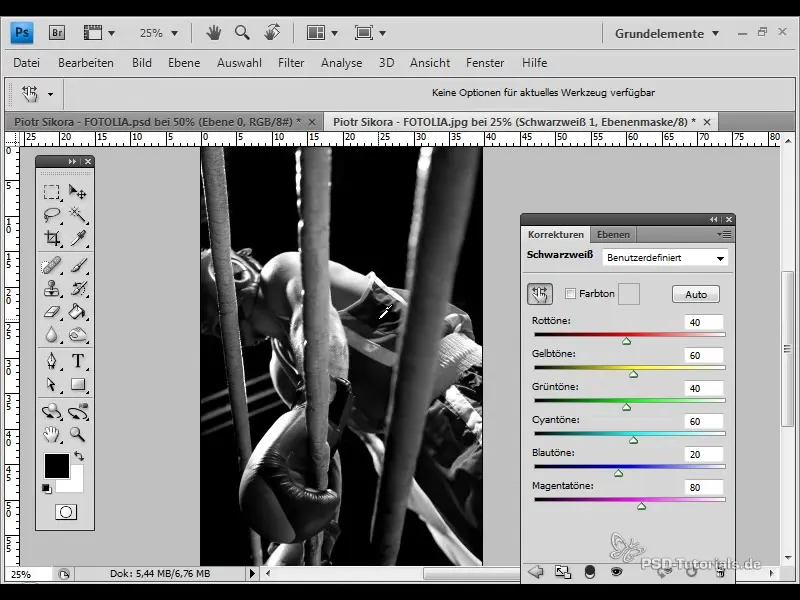
8. Final Adjustments and Review
Before you save the image, check all layers together. If necessary, apply masking again to adjust all areas ideally. A final review on harmonious contrasts and data distribution will help you achieve an optimal result.
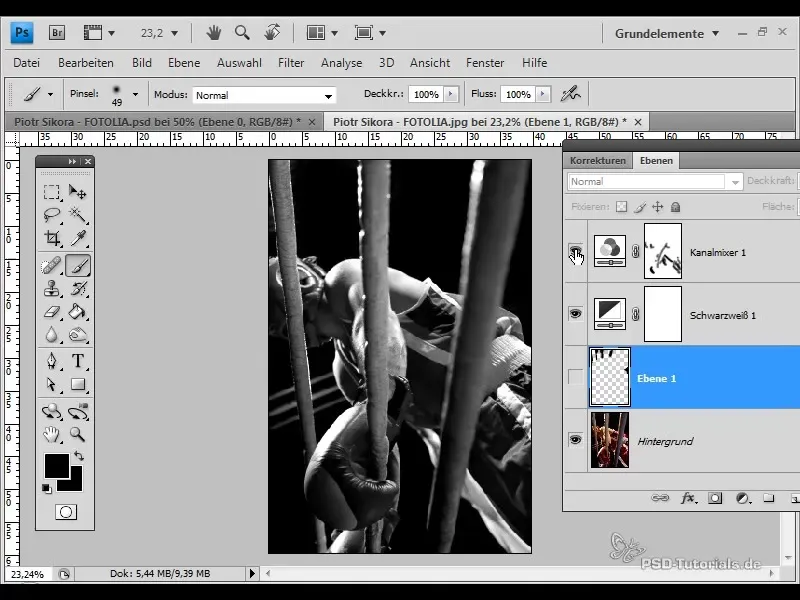
Summary
Converting a color image into an expressive black and white portrait requires targeted adjustments and techniques. By using adjustment layers and maskings, you can effectively bring out the power and aesthetics of a sports motif. Let your creativity run wild and experiment with the various possibilities that Photoshop offers.
Frequently Asked Questions
How do I turn a color image into black and white?You can convert your color image into a grayscale image in Photoshop by selecting the "Black & White" adjustment layer.
Which adjustment layer is best for contrasts?The "Channel Mixer" is excellent for adjusting contrasts in black and white images, as it allows you to edit specific color channels.
What can I do if the contrasts are too strong or too weak?Use the sliders in the Black & White or Channel Mixer adjustment to adjust the tonal values and achieve a harmonious gradation.
How can I adjust specific areas of the image?Use masking on the respective adjustment layer to selectively blank out or adjust specific areas of the image.
Can I highlight colors in black and white images?Yes, you can adjust the color tones in the image to selectively enhance contrasts and details that are important for the design of your image.


