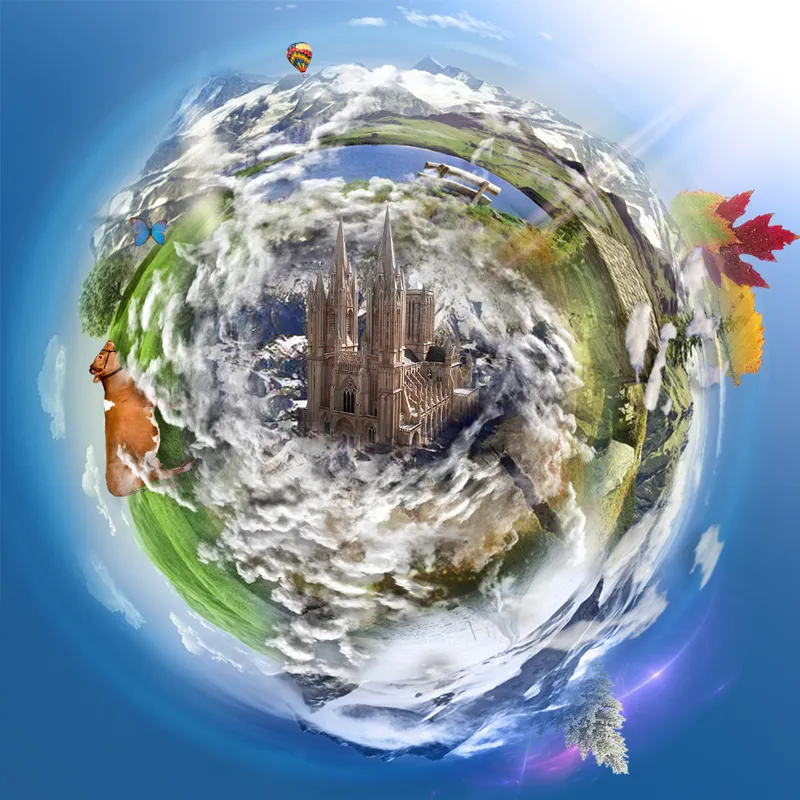
A planet that combines the four seasons in one artwork is a creative and fascinating idea for digital art. With Photoshop, you can create this unique look by combining textures, colors, and seasonal elements that represent spring, summer, autumn, and winter. In this tutorial, I'll show you step by step how to design a planet that shows each season on its surface - perfect for posters, digital presentations, or creative projects. Let's get started and unite the four seasons in an impressive design!
Artwork Planet 4 Seasons
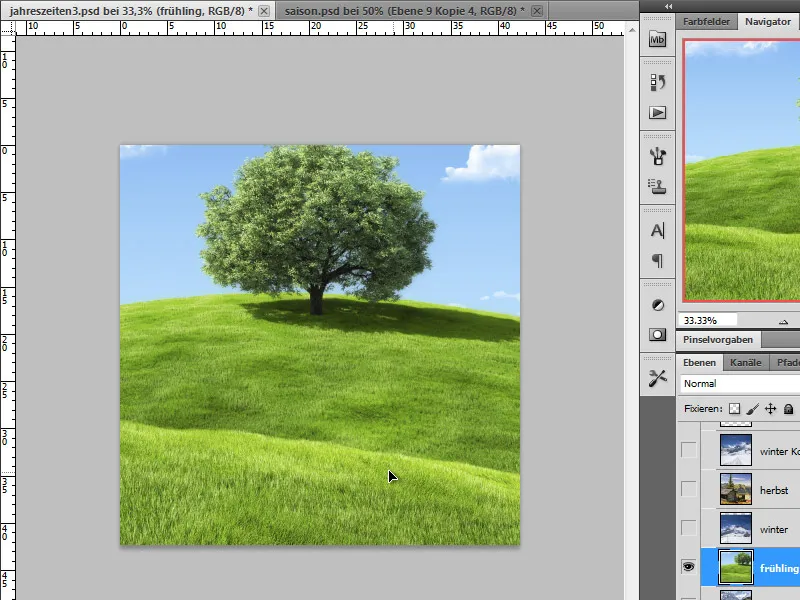
Let's start with the image selection for our 4 seasons.
Spring:
Summer: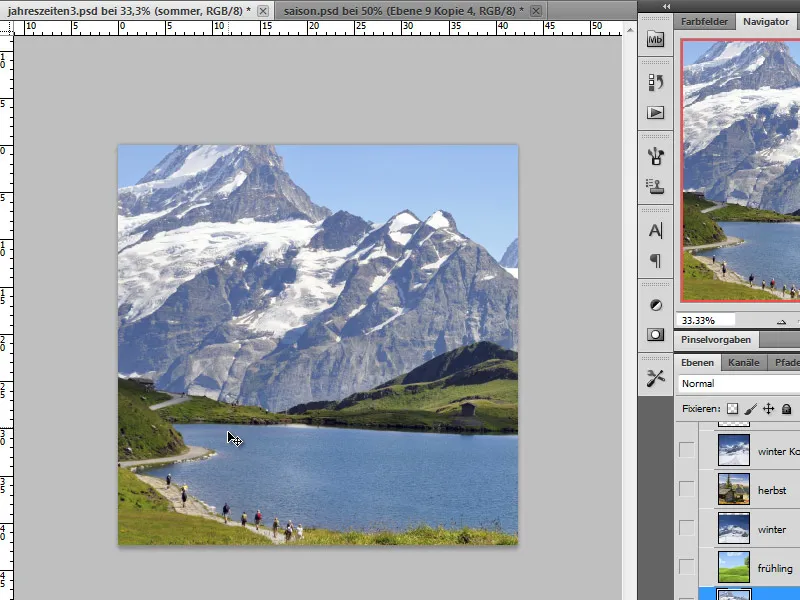
Autumn: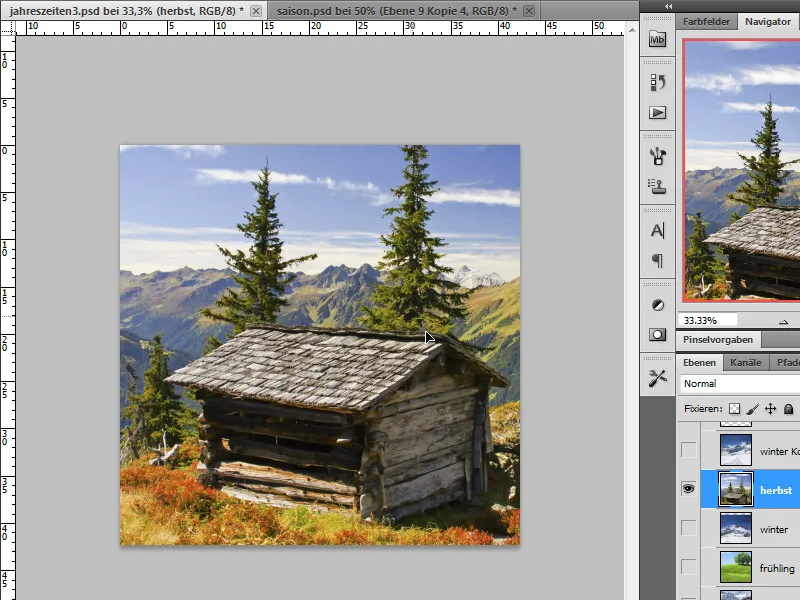
Winter: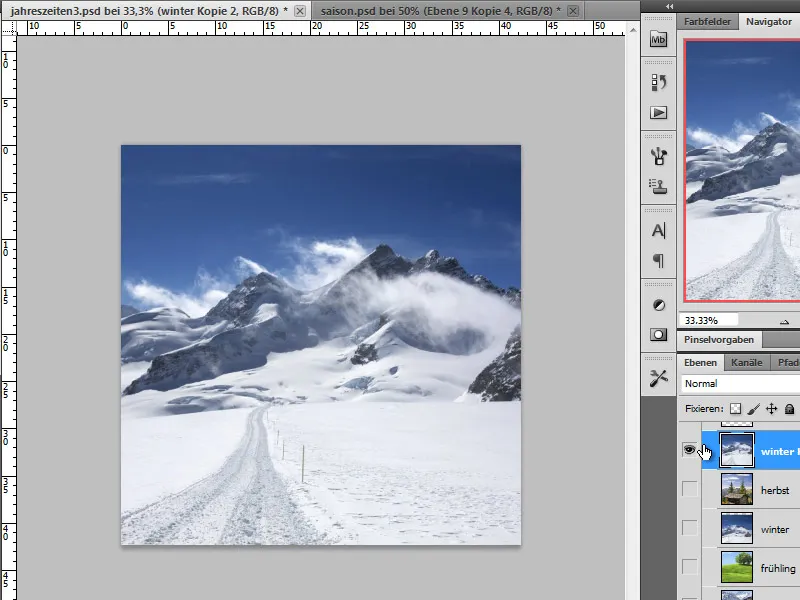
Step 1 - Adjust Image Size
These images will be resized to a pixel size of 600x400. I can either use the option Image>Image Size or create a new file with these dimensions and fit all 4 images in it. Excess edges - for example, in wide-format photos - can be cropped this way. Once all images have been resized to this measure, I save them now.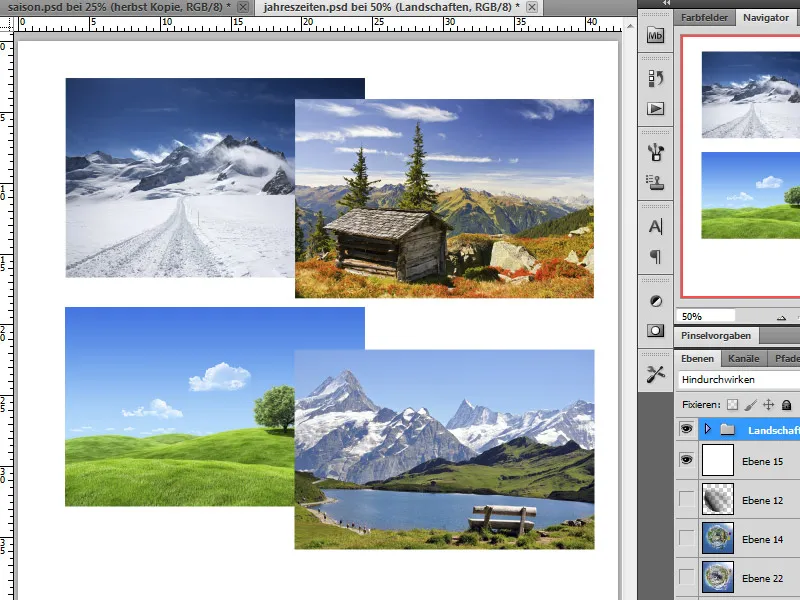
Step 2 - Align Images
Now I want to create a panorama from them. To do this, I first need to align all images in one file. I create this file first and set it to a size of 2400x400 pixels. I import the images into my document and arrange them from left to right in the order of the seasons. This way, a small panorama of spring, summer, autumn, and winter is created. I place a guideline at each of the edges first.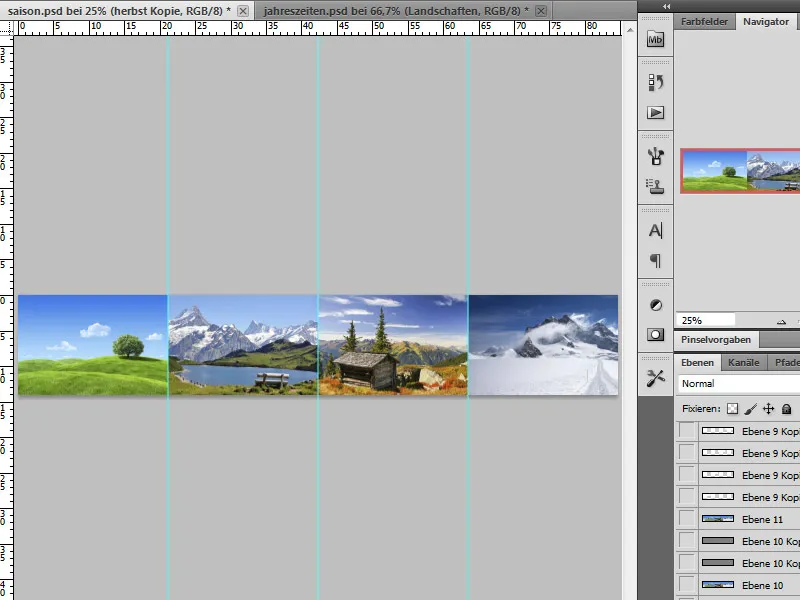
Step 3 - Create Blends
To ensure our image does not have harsh edges between the seasons later, we now try to achieve a blend of the individual image areas. I can blend the edge areas with the clone stamp on new layers. Alternatively, and more quickly, I can select image areas, duplicate them, and blend them into each other with layer masks after moving the position.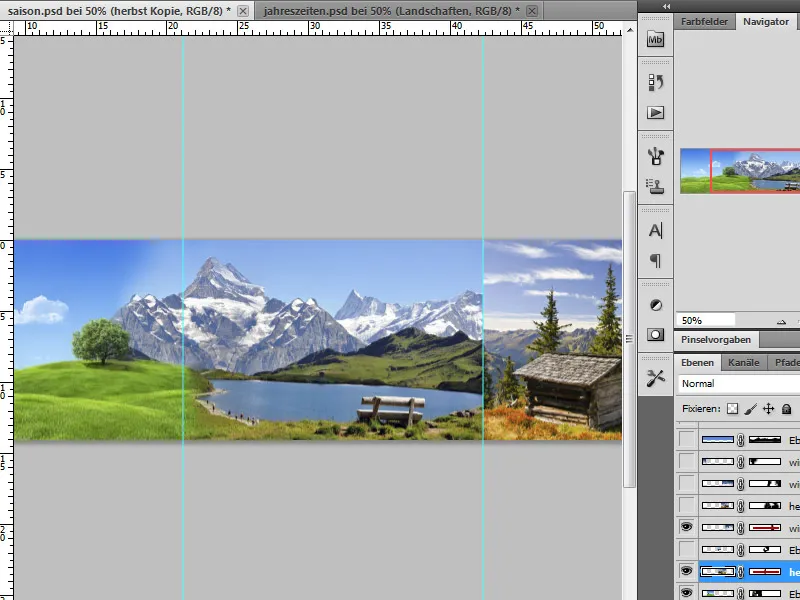
Step 4 - Match the Sky
Creating the panorama can take some time. The better the transitions were prepared, the better our seasons circle will look afterwards. Since we have now put together various images as a panorama, the sky is very different.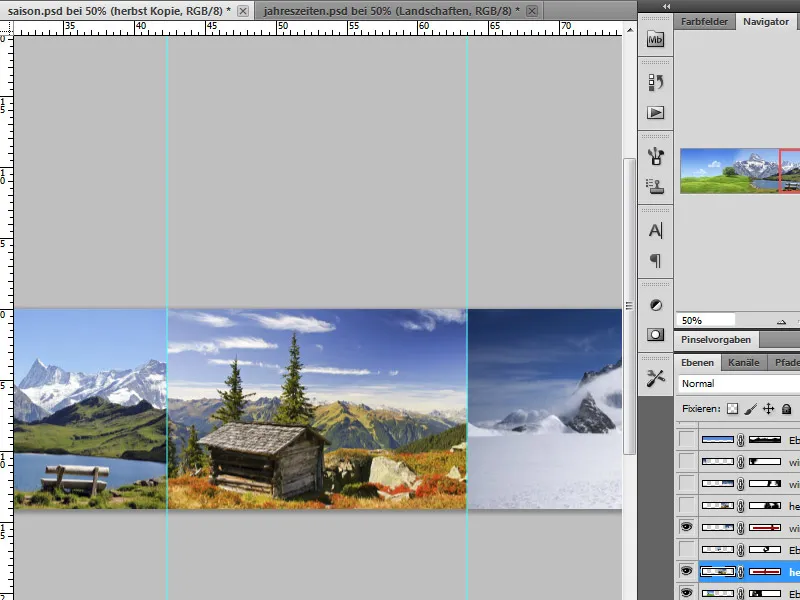
We can remedy this by inserting a simple color layer. To do this, we first select a suitable shade of blue of our choice and color a blank layer with it. By using a soft brush tip, we allow some of the cloud formations to shine through when the landscape is used with layer masks.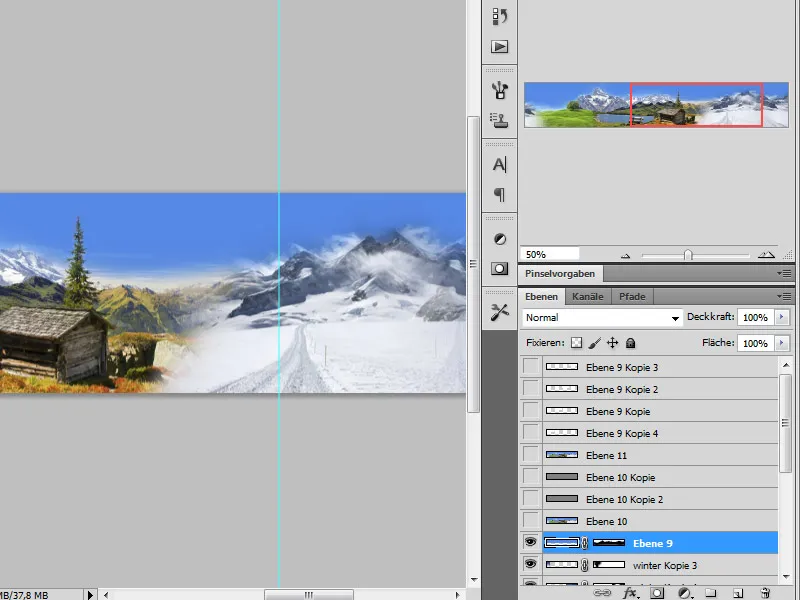
Step 5 - Merge Panorama and Sharpen
Once our panorama is complete, we merge it using the shortcut Ctrl+Alt+Shift+E. I create a copy of the merged layer via Ctrl+J. This copy is then sharpened using the high-pass filter.
To do this, I go to Filter>Other>High Pass and set a radius of about 0.9 pixels. After applying the filter, I set the layer mode to Overlay. This way, the filter directly affects the layer below and enhances the contours.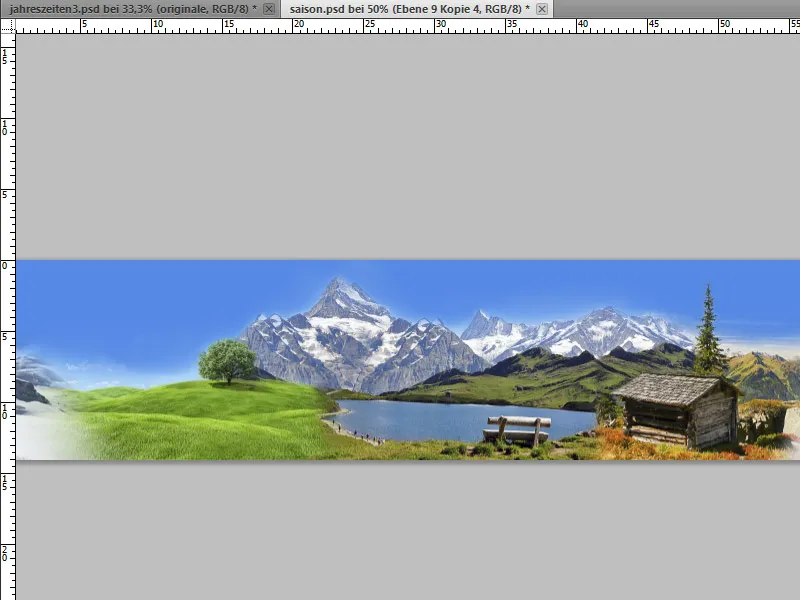
Step 6 - Crop Panorama - Insert Parts into New File
Now I need to summarize the layers again and use the shortcut Ctrl+Alt+Shift+E once more. I display my guidelines again if I had hidden them.
Now, I choose the rectangular selection tool and draw an initial selection starting from the left up to the first guideline.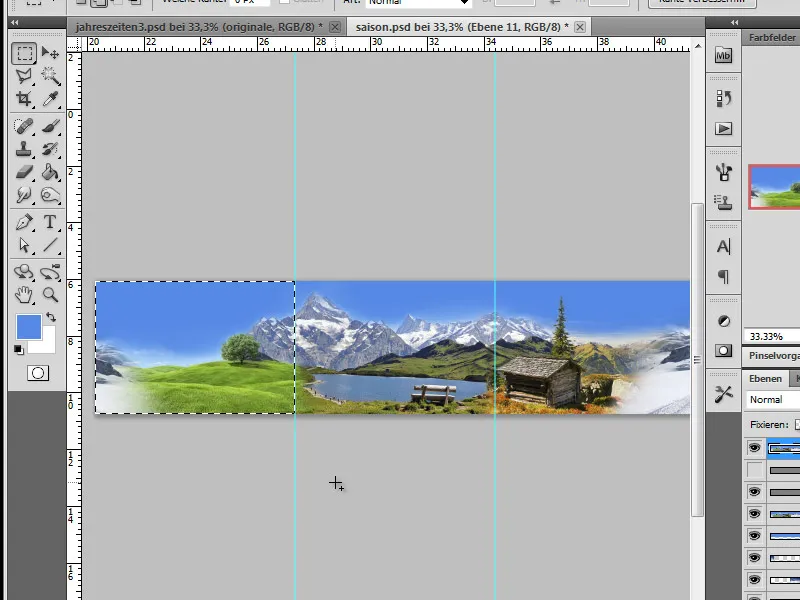
I copy this selection with Ctrl+C, create a new working document with dimensions of 1200x1200 pixels via File>New, and paste the copied part of the panorama there.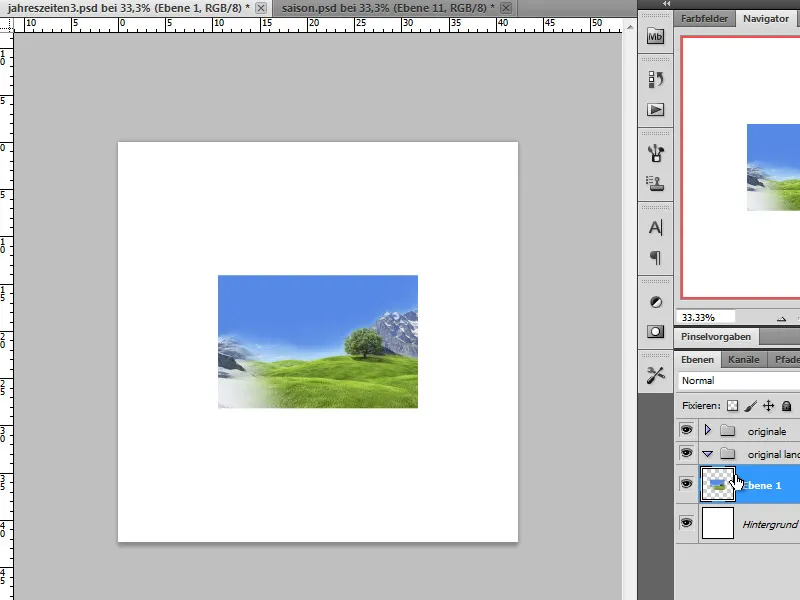
We repeat this step for the remaining 3 parts of the image.
Step 7 - Convert images to Smart Objects, warp
In order to preserve the images in their original quality, I first convert them to Smart Objects. To do this, I right-click on each layer individually and select the option Convert to Smart Object from the menu.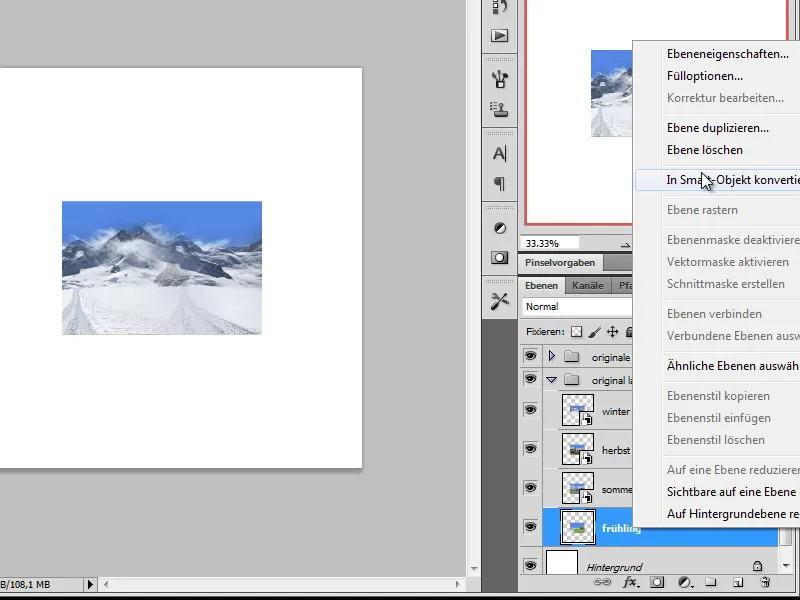
For safety, I create a copy of these layers and initially hide them. Now each of these objects is warped, and I navigate to the corresponding menu item: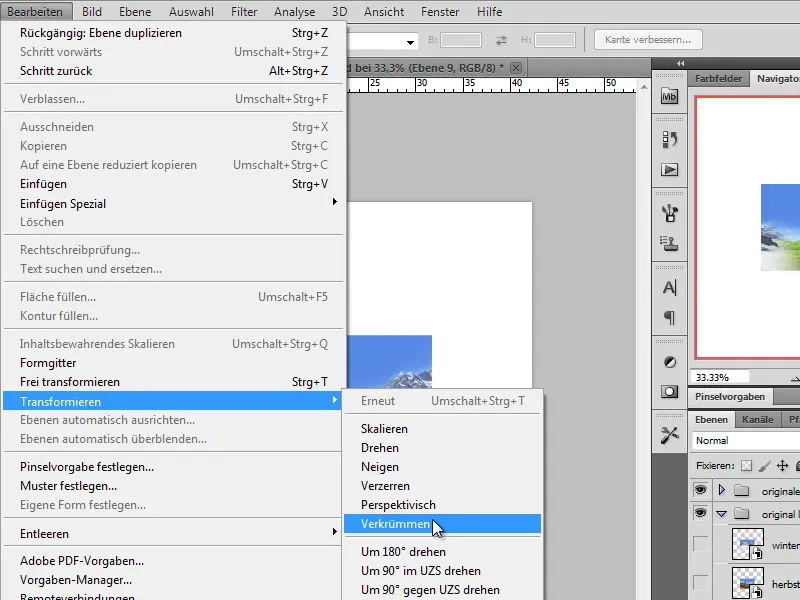
The goal is to transform this section of the image into a quarter circle. To make this easier, we simply use the presets of the drop-down menu and select Arc there.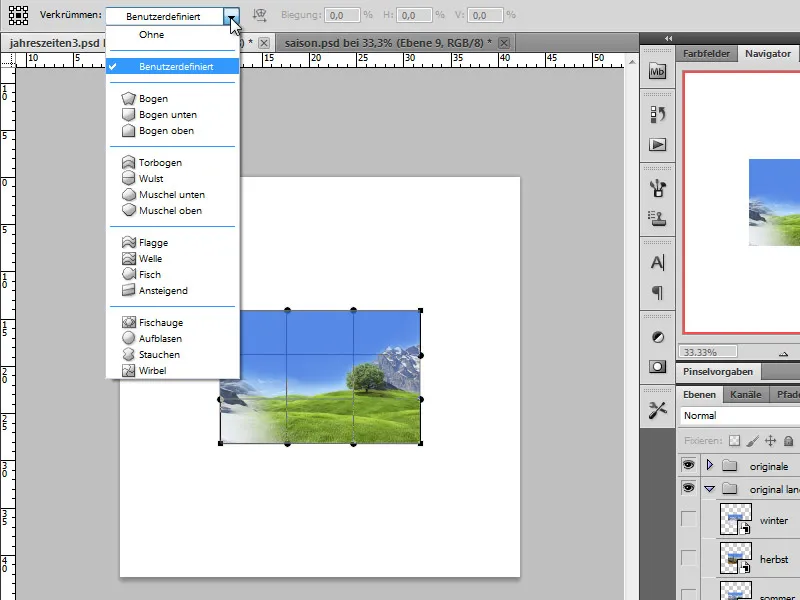
The curvature in the dialog box next to it is set to 50 percent. We confirm this editing and apply this step to the remaining 3 image parts.
Step 8 - Assemble arc segments into a circle
In this step, the focus is on assembling the circle. I start by first displaying the Spring and Summer. I move the Spring layer slightly to the top left. Then the Summer layer is rotated 90 degrees clockwise through the Transform menu.
After this layer is rotated, it is attached to the Spring layer using the Move tool. Both sides of the arc segment must be seamlessly joined together. If in doubt, you can also use the arrow keys on the keyboard to adjust these parts. At first glance, it becomes clear that the previous panorama creation was worthwhile.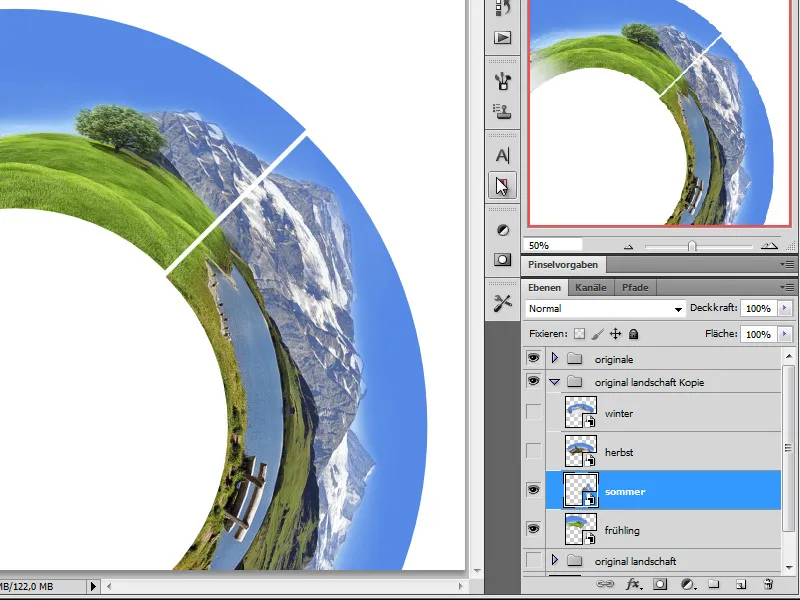
We repeat this step with the circle segments for Autumn and Winter, only adjusting the transformation mode. Autumn would be rotated by 180 degrees - Winter by 90 degrees counterclockwise.
Step 9 - Correct crossfades
In my case, the transition between Winter and Spring was not yet flawless. This needs to be corrected now.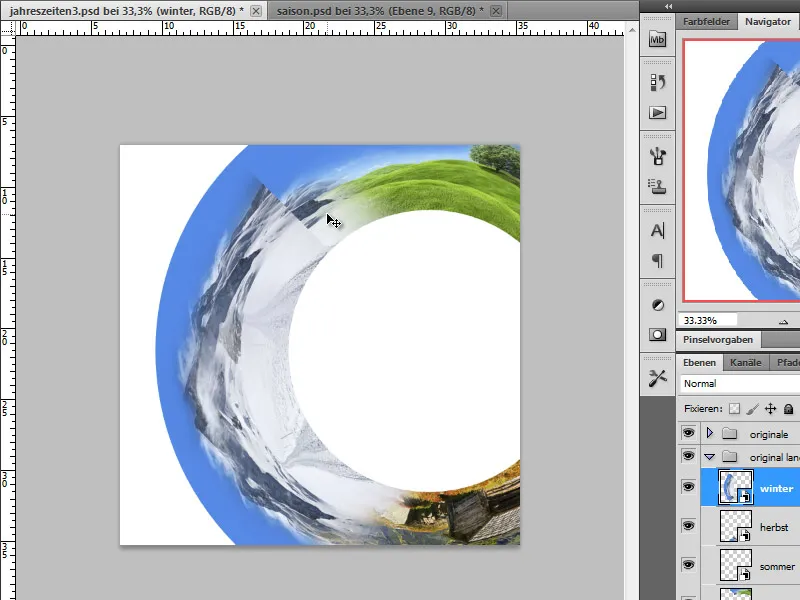
To do this, I duplicate the Spring layer, rotate it counterclockwise by about 45 degrees, and allow parts of the Winter landscape to overlap.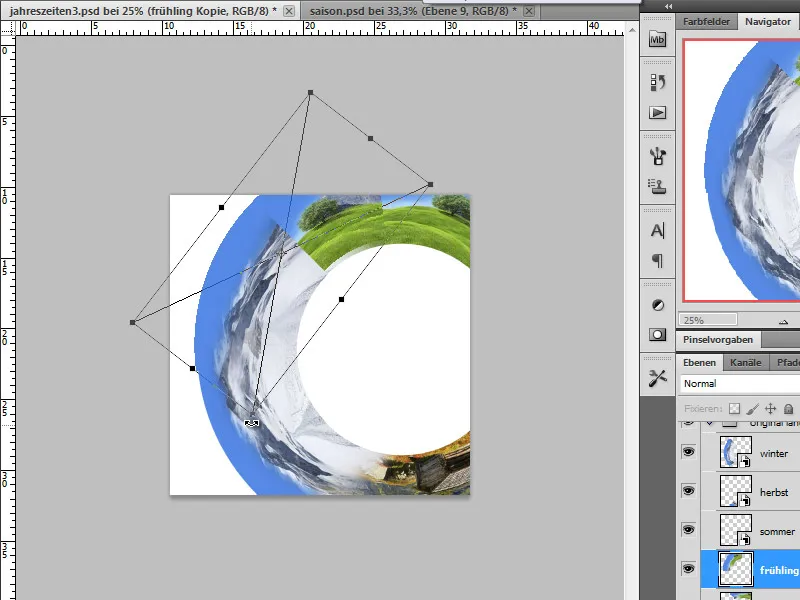
The copied and rotated Spring layer is now placed above in the Layer stack and partially hidden using a Layer mask. I use a soft brush with a medium opacity for this.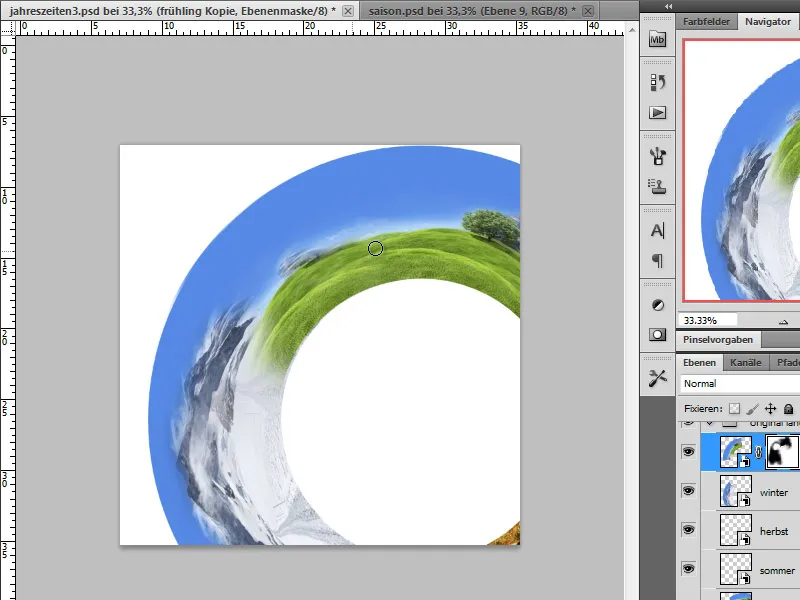
Step 10 - Merge layers - scale
Now we have merged our circle segments into a complete circle, which is however slightly oversized. Therefore, I will now transform and shrink it. I intentionally created larger circle segments to have more leeway and achieve better quality.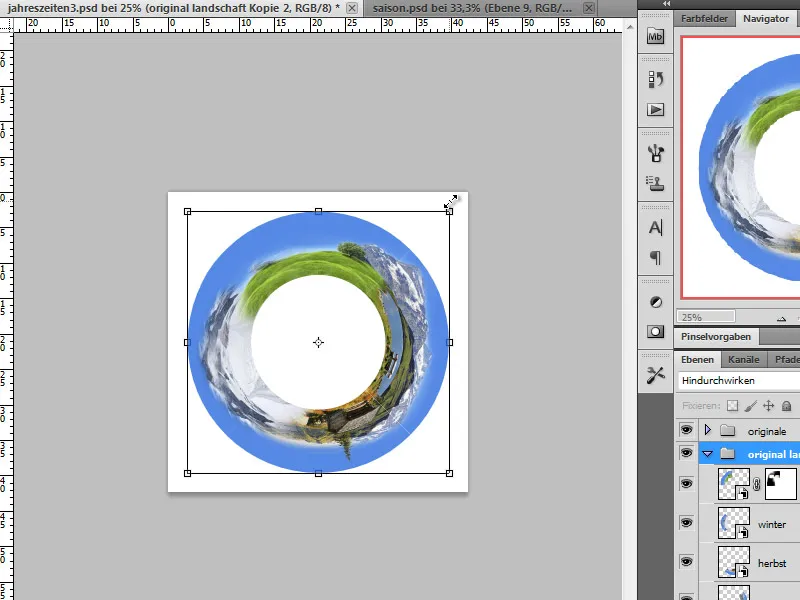
Step 11 - Apply a gradient to the background
To enhance the effect of our created circle, we will create a gradient background. Instead of simply coloring the layer, we will create an editable gradient using an adjustment layer. It will be preset from Blue to White and Linear. The shade of blue should match that of your sky.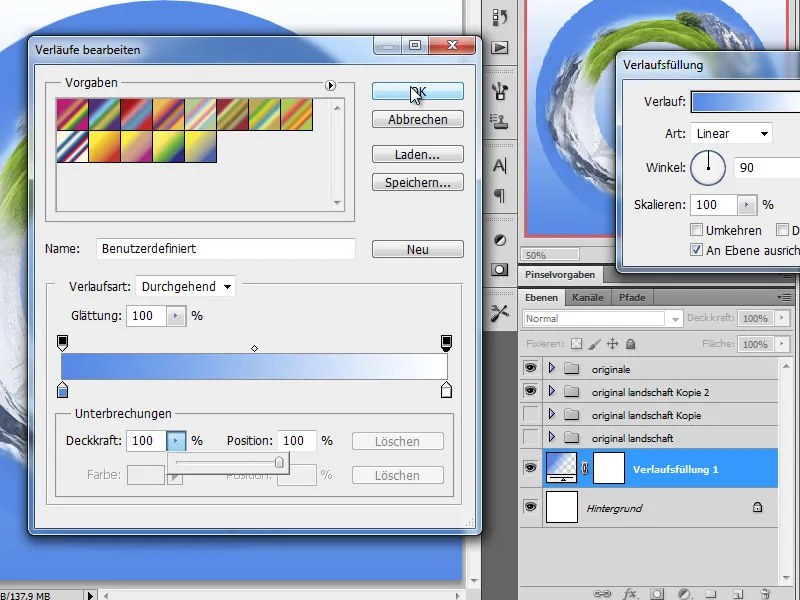
The direction of the gradient can be adjusted using the Angle dialog.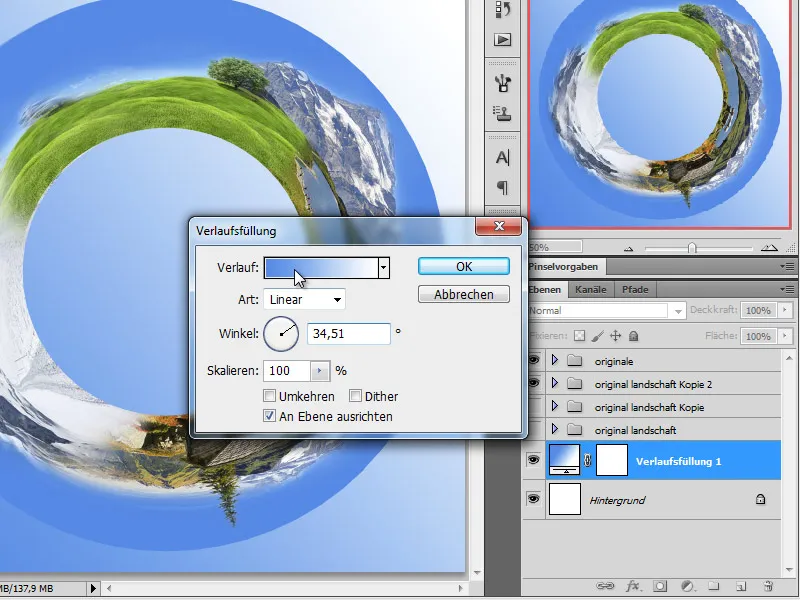
Step 12 - Hide sky areas of the circle and change the circle's effect by rotating
Upon reviewing the circle, I notice that the impact of the mountain landscapes is not coming across well. This might be due to the position or angle of the display. Therefore, I decide to rotate the circle and bring the mountains up a bit.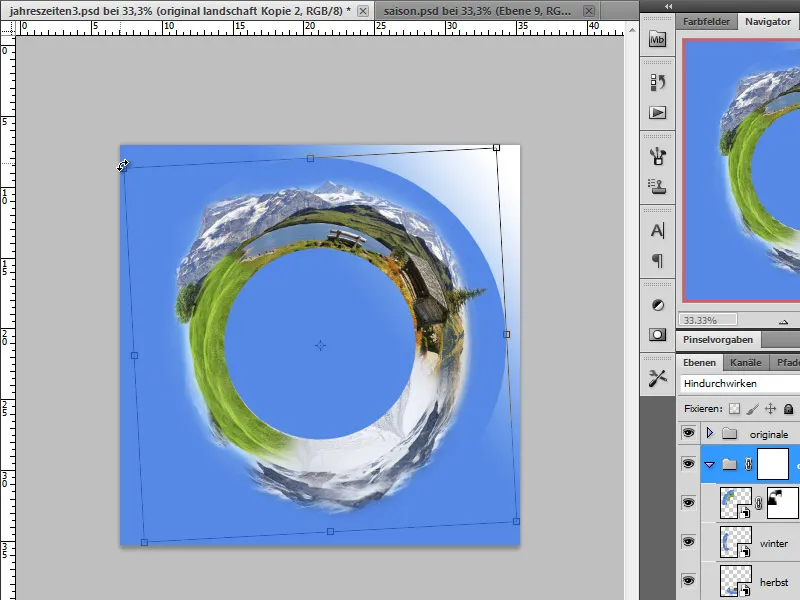
The previously set up blue, monotonous sky does not blend as well into the background after creating the gradient. Therefore, I apply a Layer mask to the folder containing all the circle segments. This is used to compensate for the differences in the transition from sky to gradient. Using a soft brush tip, I gently blend out the monotonous blue.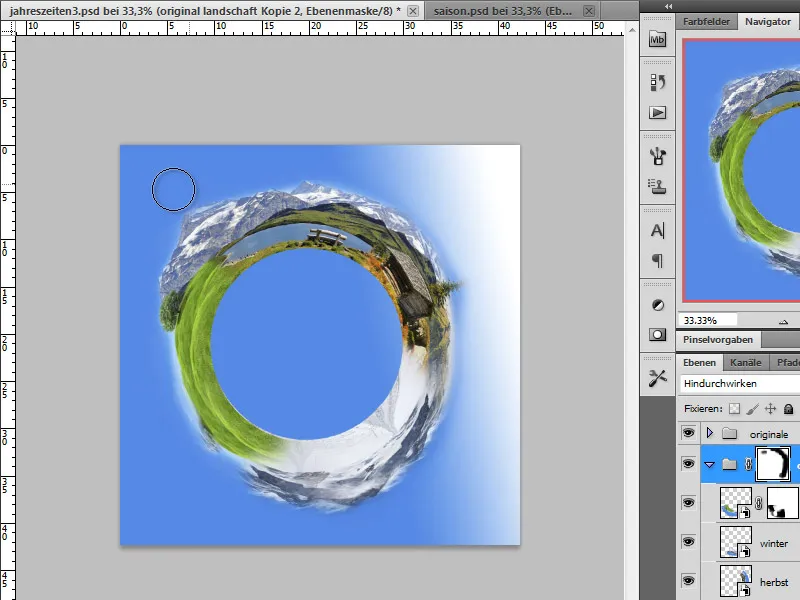
Step 13 - Add decorative elements
My landscape still looks somewhat flat and monotonous. I want to change this by adding small decorative elements. So I insert additional cut-out objects into my working document, including a butterfly, a vine leaf, a cow, a balloon, and a tree.
TIP:
I was able to extract these elements from an image collection that can still be purchased in some shops under the designation "Photo Objects". This is a quick method, as the images have already been cut out with alpha masks and I can export them as TIFF with foil from the program.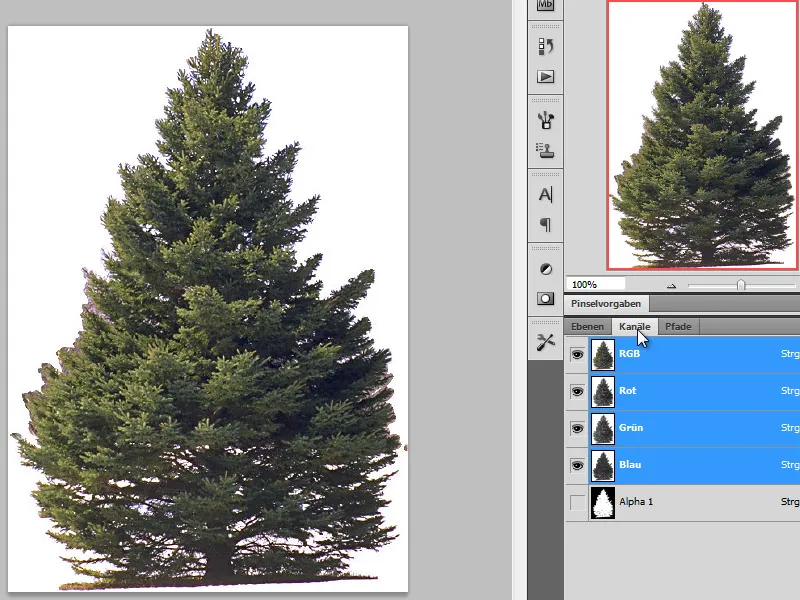
First, I pay attention to size and perspective, so I adjust each individual element to fit in place using the transform control. Shifting the tree to one of the lower levels was inevitable.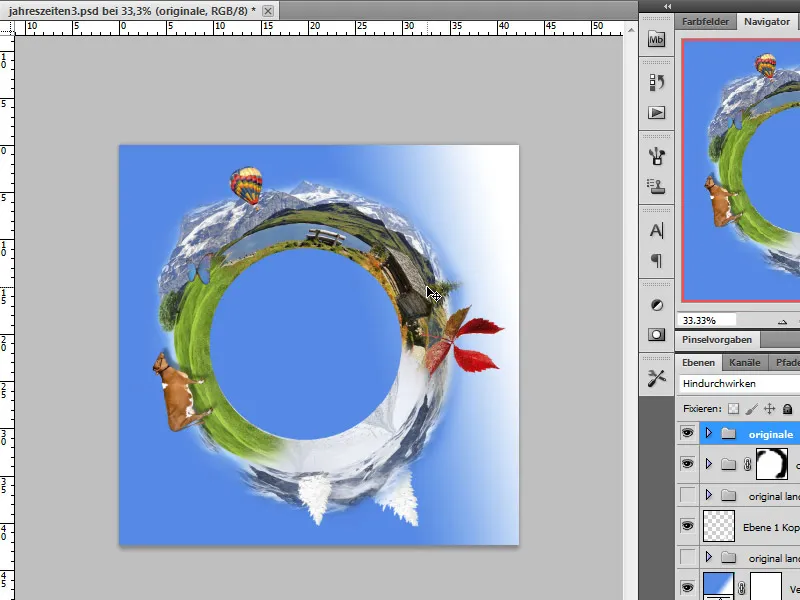
Step 14 - Fill circle hole
My circle segments still have a hole in the middle. Instead of filling it laboriously with the stamp tool, I simply use a graphic. Here I opted for a globe, which I first reveal at the edges with a layer mask.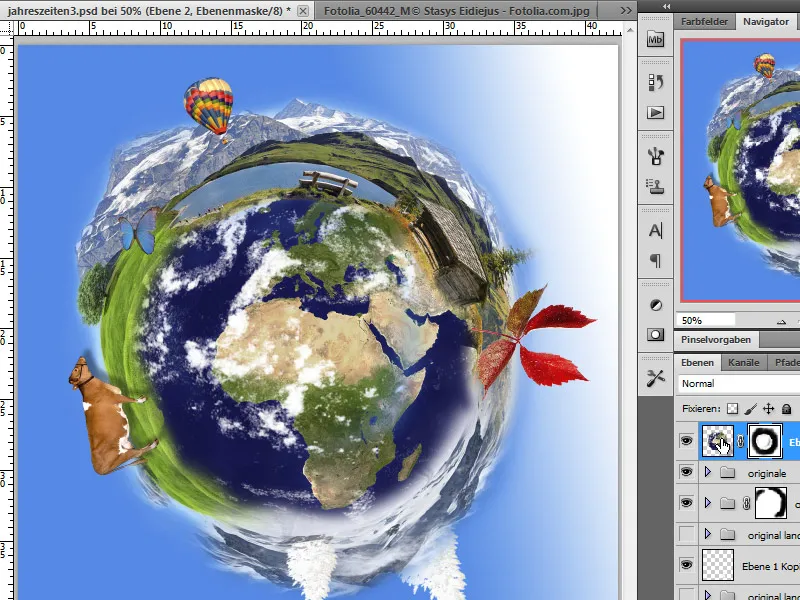
Next, I edit the color design of the globe to better blend into the surroundings. I do this using a gradient adjustment layer and color the image. To prevent the changes from affecting the entire working document, I create a clipping mask with the globe layer by clicking between these layers while holding the Alt key.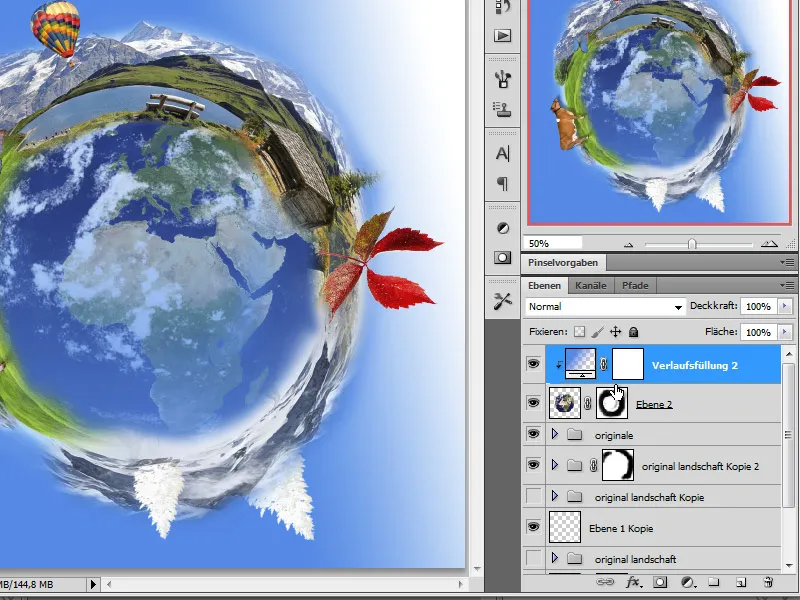
I base the color scheme on the meadows of the surrounding landscapes. A custom color gradient is created with shades from each circle segment. The type of gradient is output in the angle.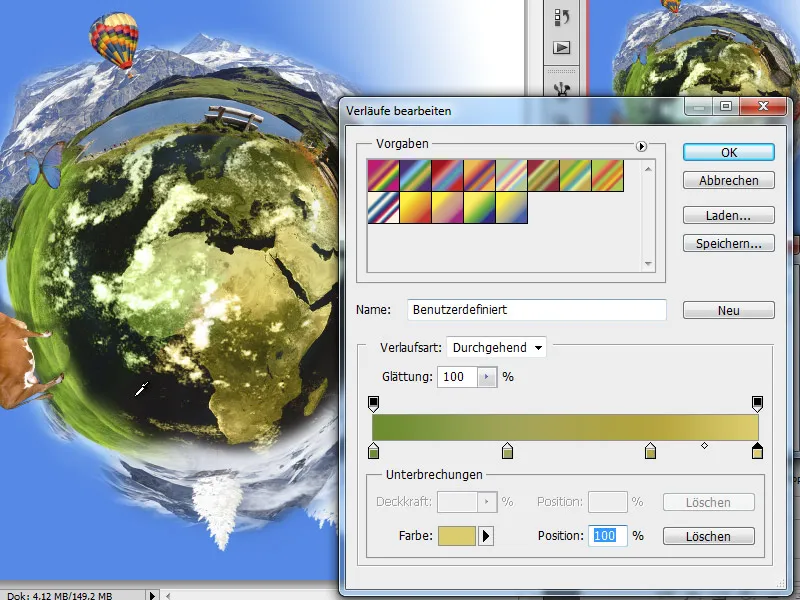
The adjustment layer created in this way is set to the Color mode.
Step 15 - Creating clouds
I want to add clouds to our image, which I must create first. I either use cloud brushes or use cut-out clouds from other images. I have incorporated both into my image.
First, I need a new, empty working layer that I color black and create a layer set - a folder in which these layers are initially gathered.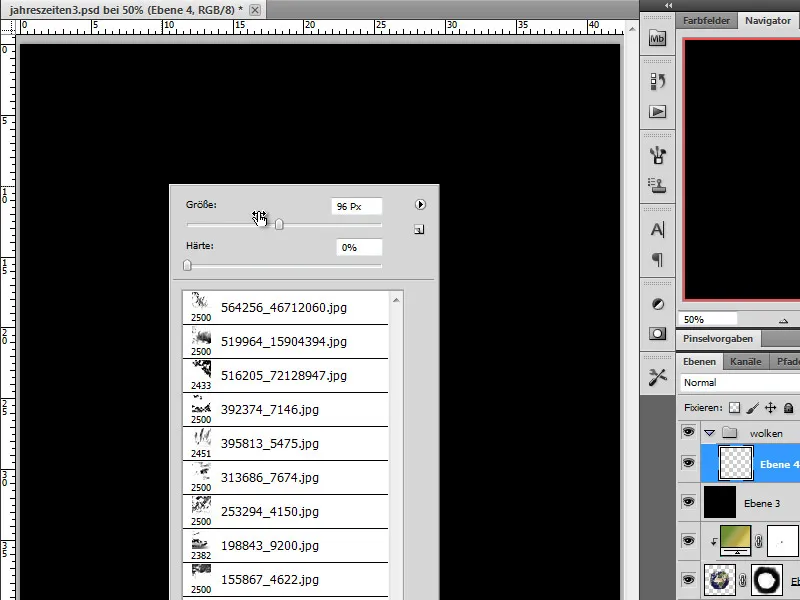
The cloud brushes are quite large, and I reduce them to a size that fits into my working document. Each cloud is drawn with 100 percent opacity on a new layer. If the opacity is not sufficient to achieve full coverage, it is recommended to click twice in the same spot with the brushes. This way, the clouds are applied more evenly.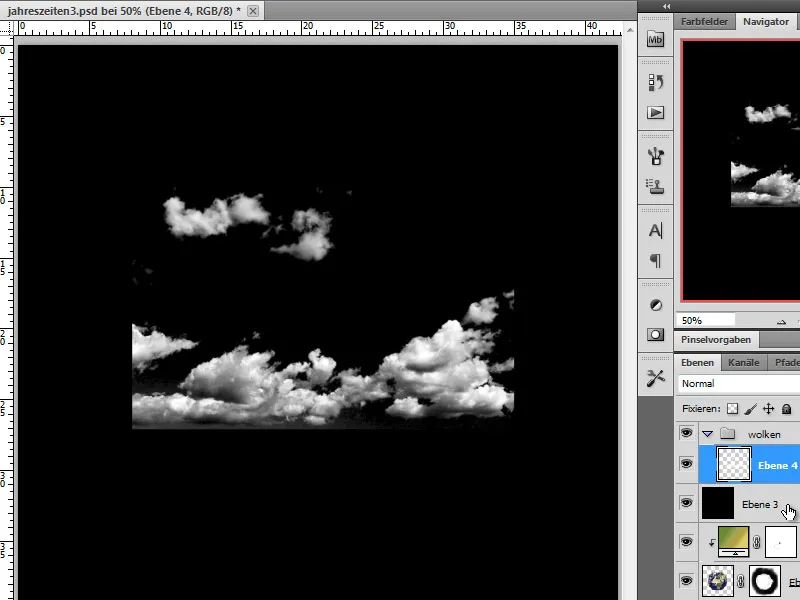
Once all clouds are created, it's time to place them in the image. I hide the black layer and move the clouds on my workspace. Multiple copies of the cloud layers can also be created. This provides many more options regarding size, etc., which can be further shaped using transformations and warping. I can edit hard edges with a layer mask or remove them with the eraser tool. Please try to always use soft brush tips for this.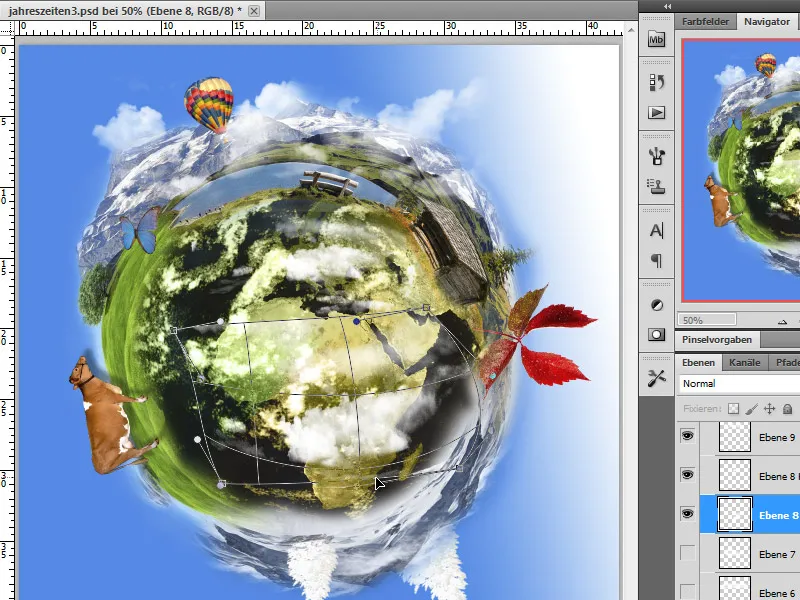
Step 16 - Arranging clouds and content, revealing details
After all clouds have been arranged, final touches are made.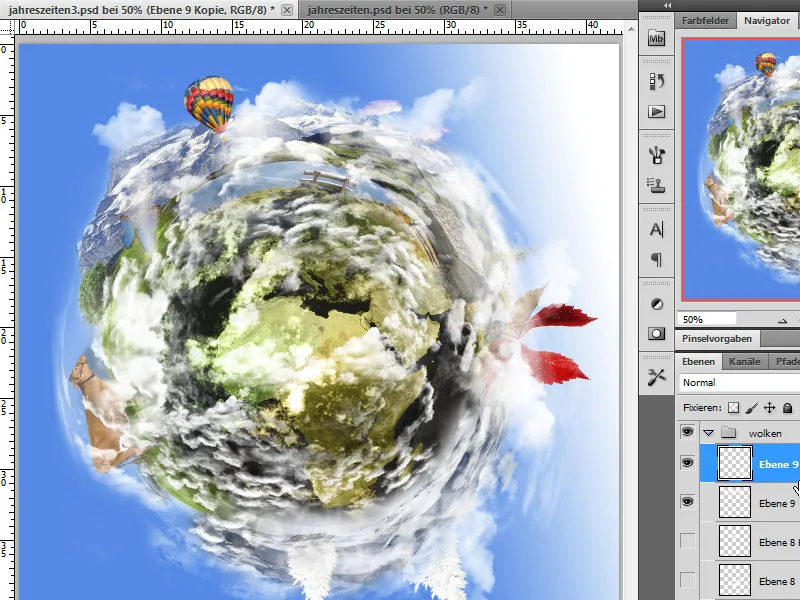
Next, for instance, I want to bring the cow further into the foreground of the image. By moving the layer, I achieve this. Ultimately, a clear layer name helps with relocating.
It is important that by arranging, we reveal details such as houses, benches, etc., of the circular landscape. Clouds can also be moved to the background.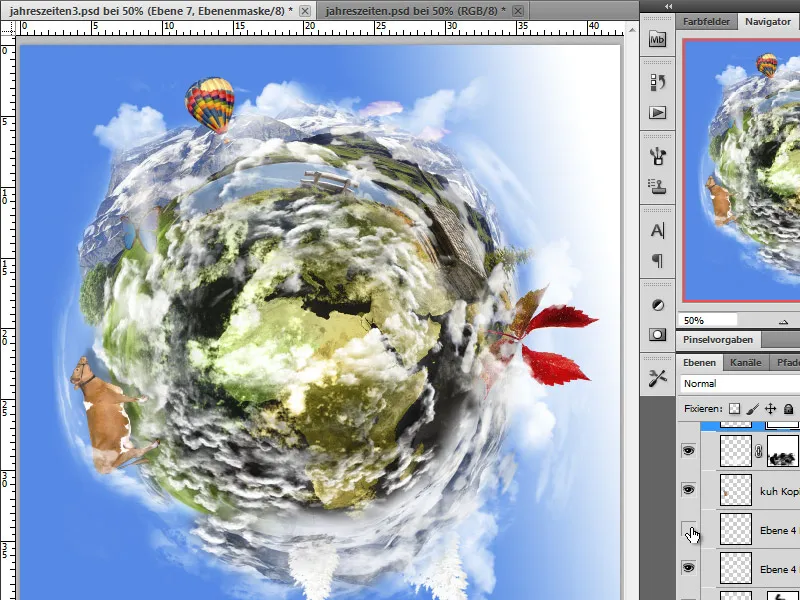
In addition, some clouds are given a layer style in the form of a drop shadow to add more depth to the structure. It is important that the drop shadows are not set in global light, but the orientation for the clouds is determined separately. Contrary to physical laws, this editing results in a better overall image. And in a fantasy world, shadows can also fall unusually.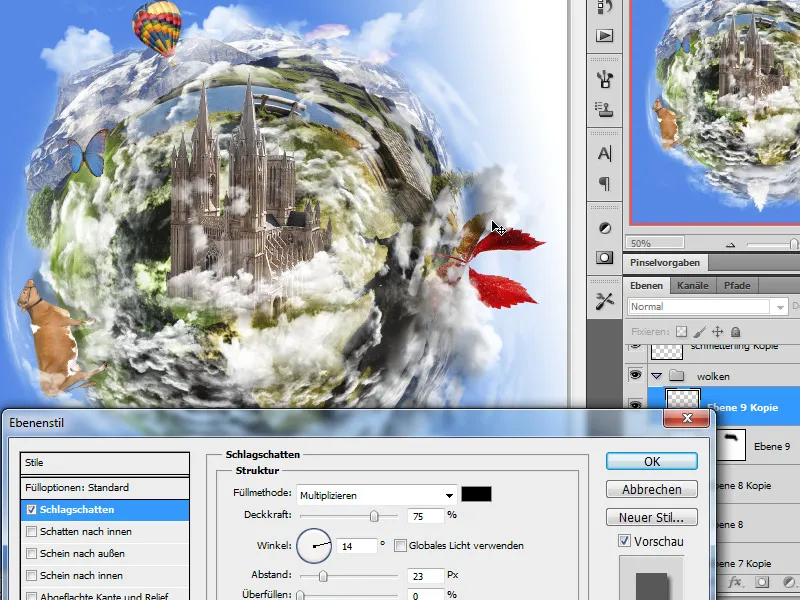
Step 17 - Setting highlights
The image is not necessarily boring. However, there is room for improvement. For this reason, I decided to incorporate a well-known structure into the image that ultimately emerges from the clouds. In essence, you can take anything, even plants for example...
First, I import my cut-out object into my working file.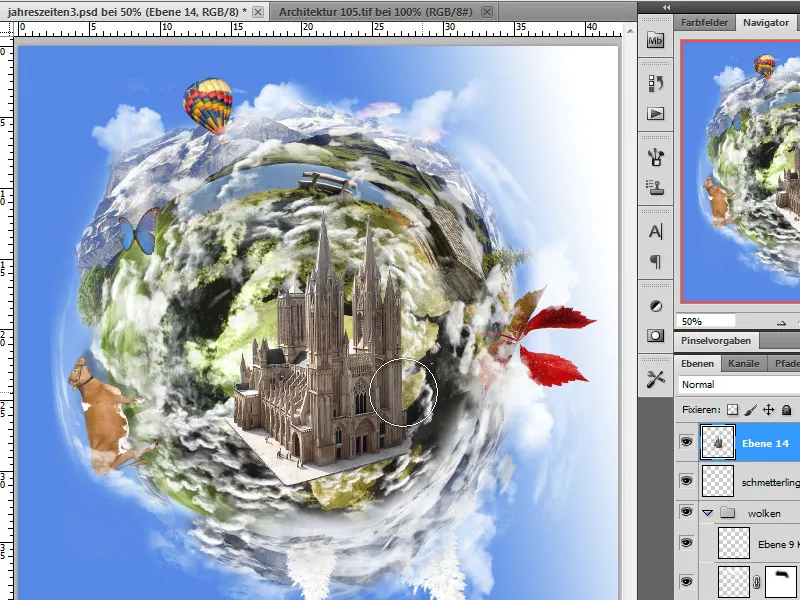
The cathedral still has the error in this position, that the light, which is supposed to come from the top right later, currently shines from the left onto it. We will change this by a horizontal reflection using the menu Edit>Transform.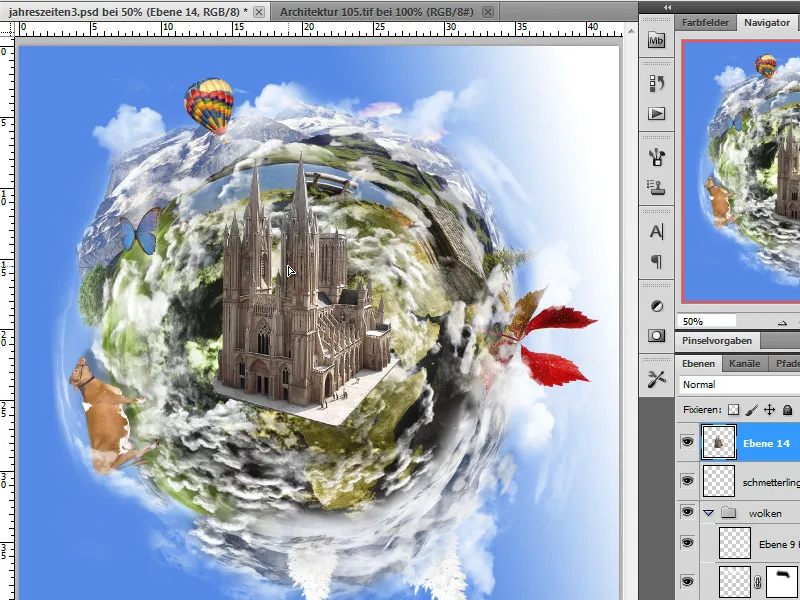
I duplicate this dome layer, as I would like to depict a part behind the clouds and one in front of them in the representation. The copy is temporarily hidden. The first dome layer is moved into the cloud stack.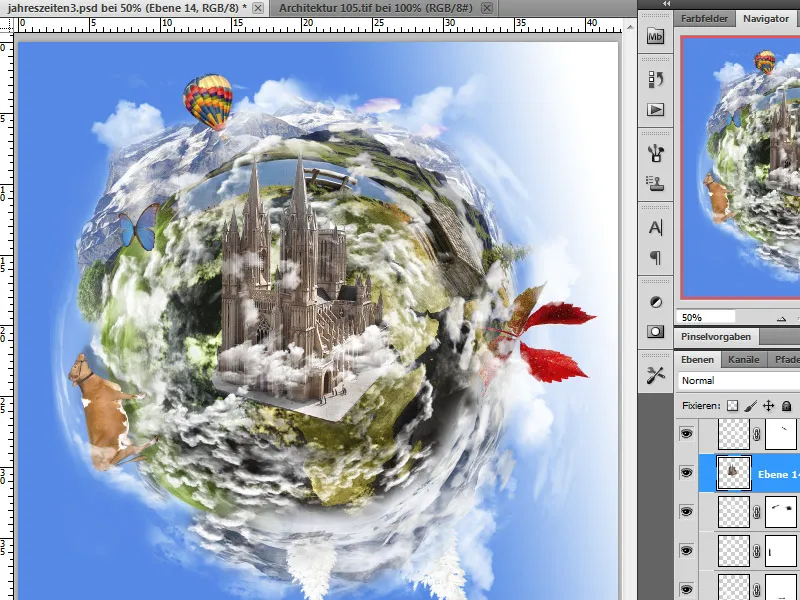
In order to create a harmonious overall picture, more cloud details are now displayed or edited so that the cathedral appears in a dynamic environment. Additionally, I hide the lower ground details on the cathedral and in the layer copy using a layer mask, so that it stands out better from the ground. The upper copy can be displayed if necessary.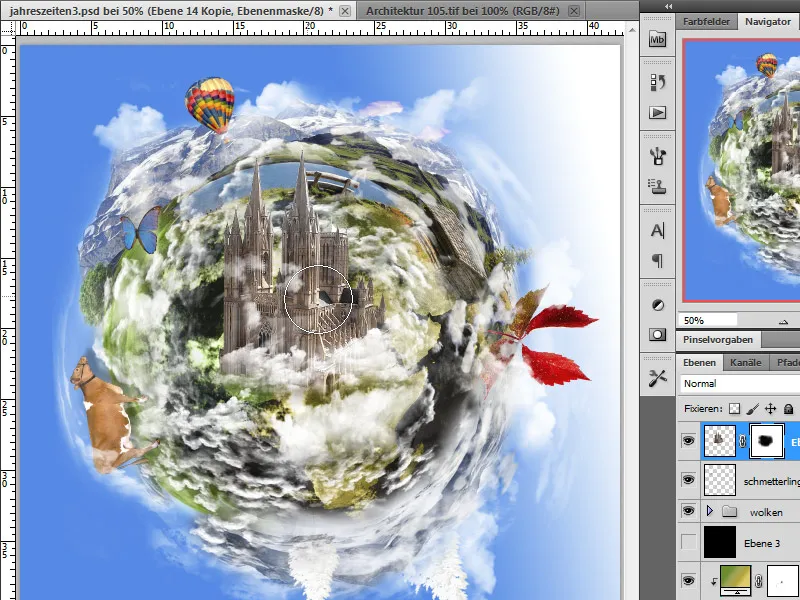
Step 18 - Creating Sunbeams
Now I want to bring the sun into the picture and import a graphic. Since it is quite large, I transform it so that the rays, starting from the center, reach the artificial earth.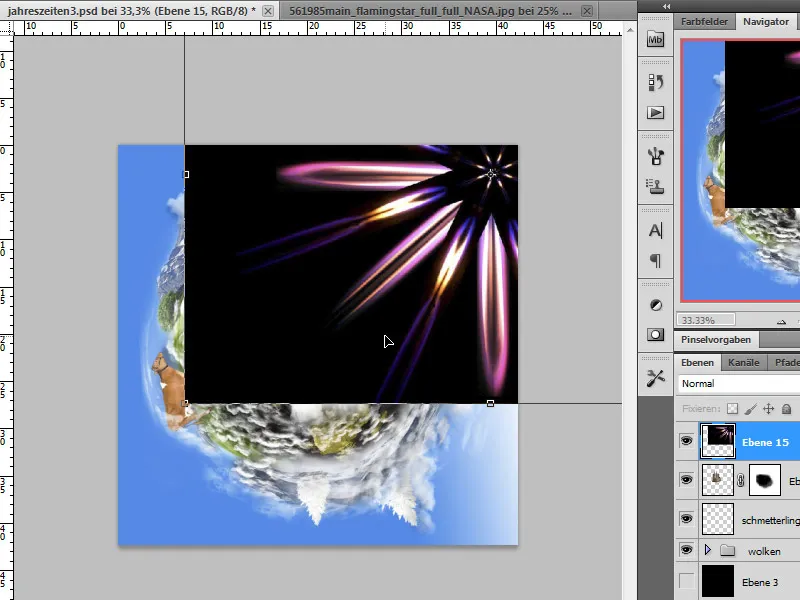
Next, I will create the fine sun rays. I achieve this by applying the radial blur to this image using a radial method, offset center, at best quality, and full strength.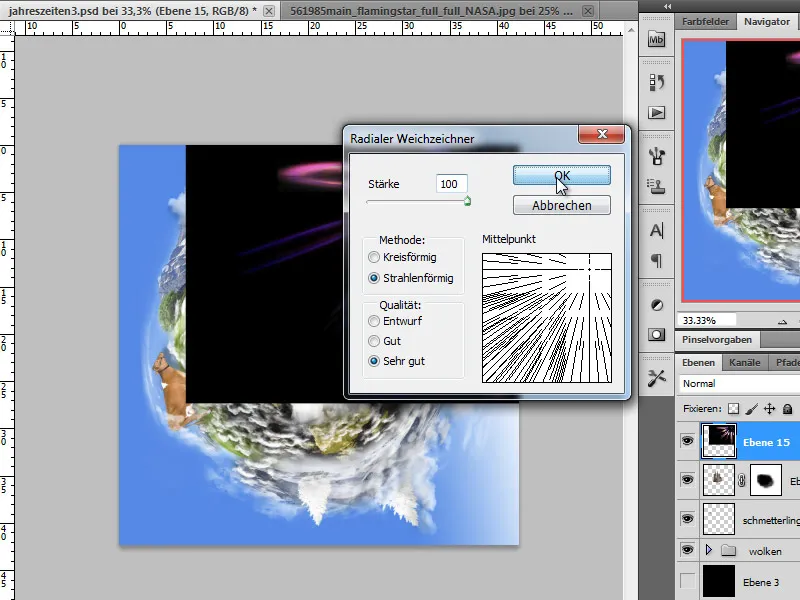
I repeat this step one more time. If the result meets my expectations, I set the layer to Negative Multiply mode.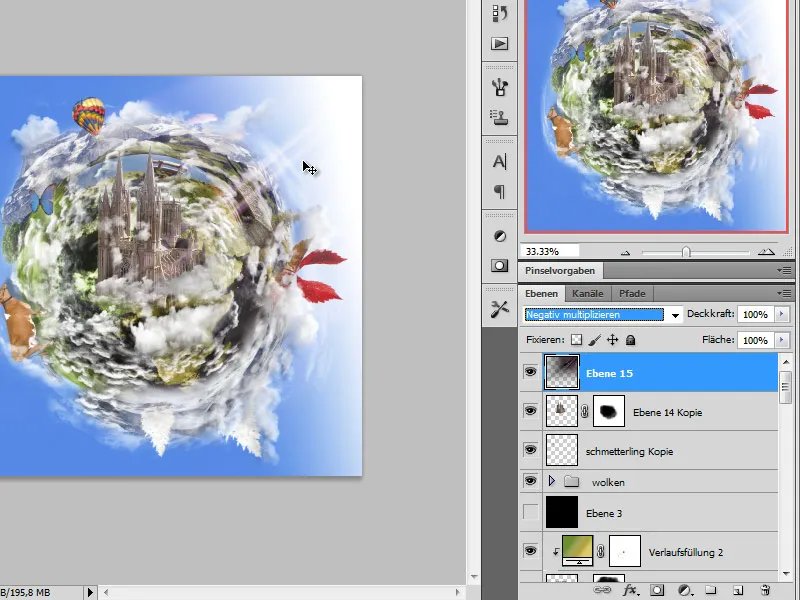
Step 19 - Inserting Aurora Borealis
While creating this artwork, I thought why not place a sort of aurora borealis in the winter mountain area as well. I found this idea exciting and realized it by inserting a nebula from the galaxy into my image. I moved it far down in the layer stack to make it appear more in the background.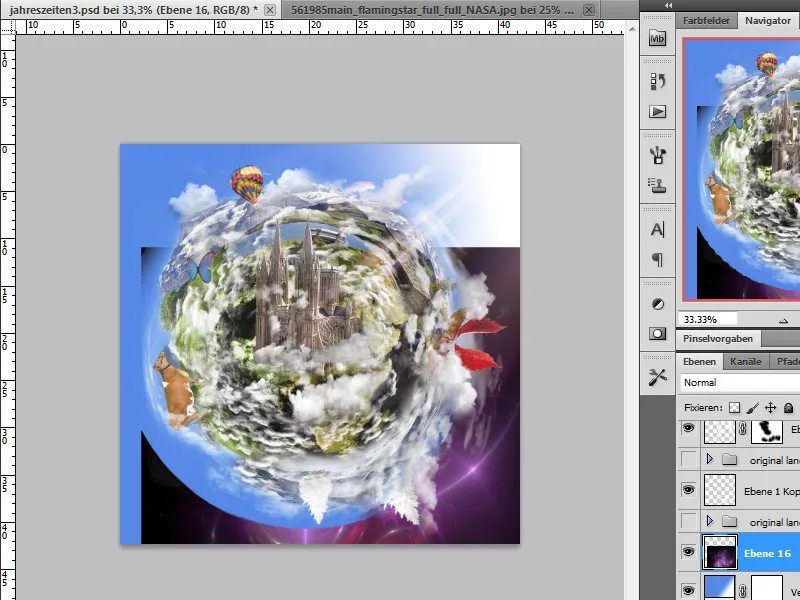
However, I still need to resize and reposition it. Additionally, I can vary the position in the layer stack. The layer is then set to Negative Multiply mode.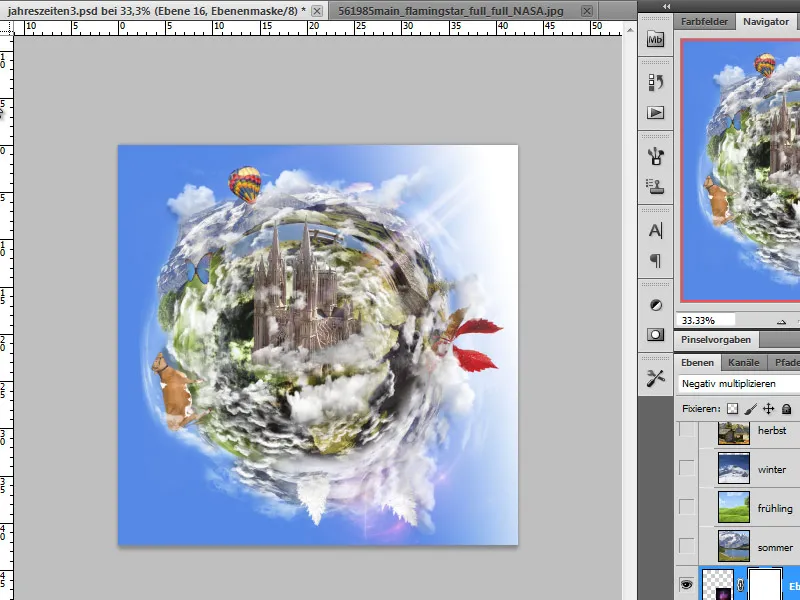
For refinements, I can also use elements to show or hide in the usual way using a layer mask.
Step 20 - Consolidating - sharpening
Ctrl+Alt+Shift+E helps us consolidate the layers and creates a new overall layer. I duplicate this overall layer and apply a filter - the High Pass filter - to it. The value for the Radius is around 0.4 pixels.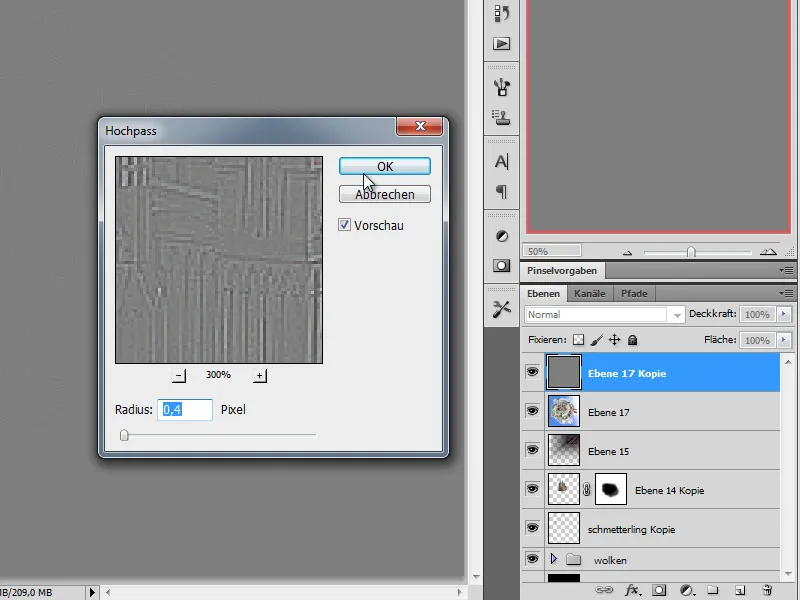
Once the High Pass filter has been applied as desired, we set the layer to Overlay mode. The Opacity of this layer can be reduced later if desired.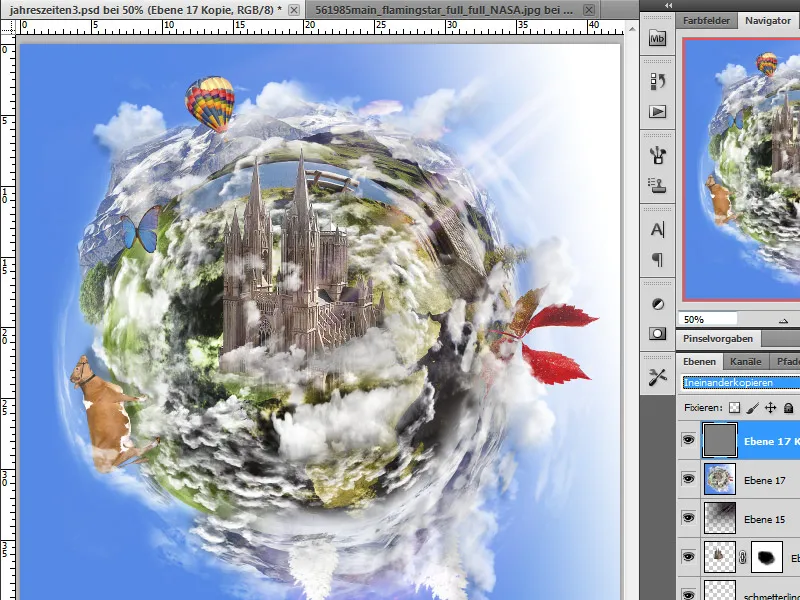
Final Result:
This is how our planet looks now: