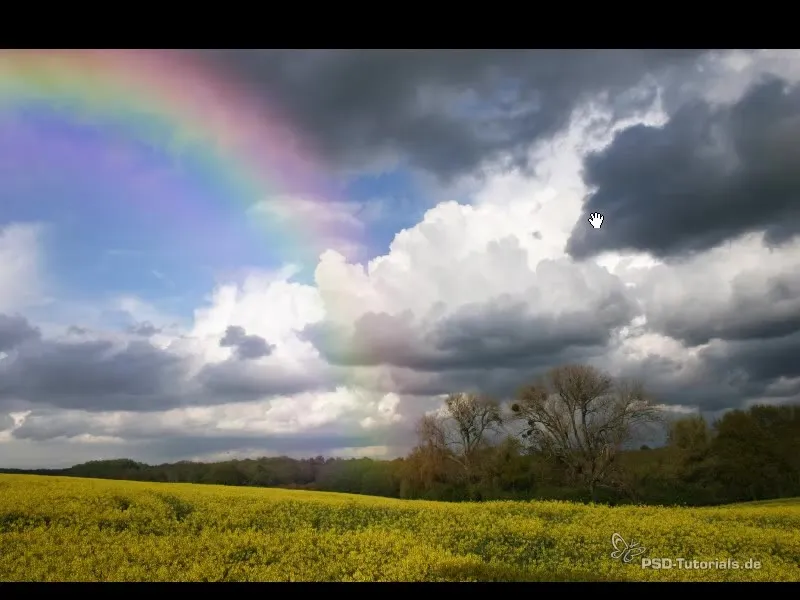
Adding natural phenomena to photos can give these regular shots a touch of magic. A rainbow is a particularly fascinating element that adds depth and color to any image. In this tutorial, I will show you step by step how to create and integrate a rainbow effectively into your photography.
Main insights:
- You can create a rainbow using radial gradients.
- The inner colors of the rainbow should be displayed brighter to make it appear more realistic.
- With a blurring technique, you can smoothly integrate the rainbow into the landscape.
Step-by-Step Guide
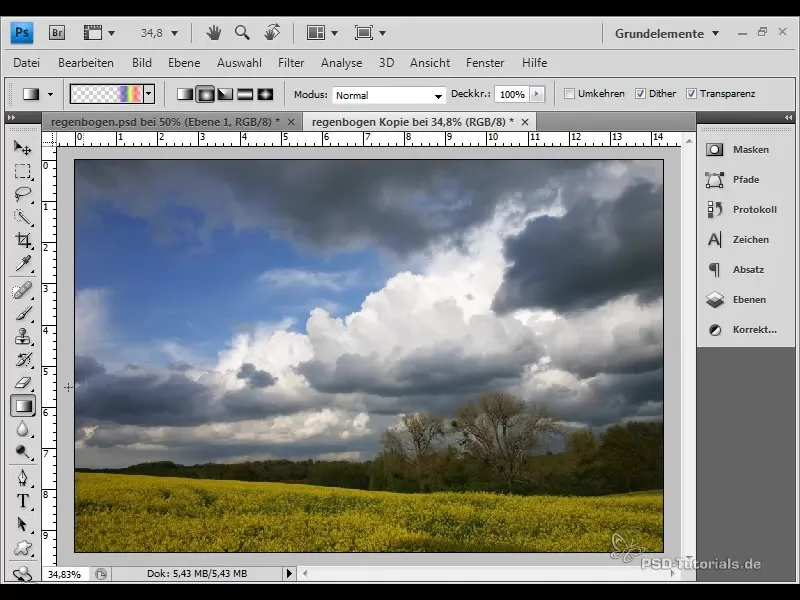
First, open your image in an image editing software that supports gradient tools.
1. Creating the Gradient
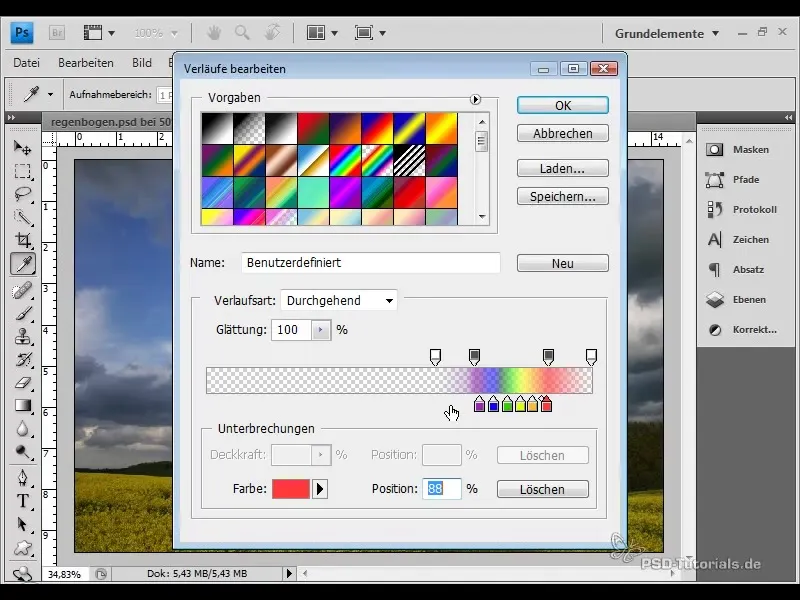
The first step is to create your own gradient. For this, select the gradient tool. You have the option to adjust the transparency of the entire gradient by setting the opacity using the sliders. Set the transparency of the rainbow area to about 80% while the outer area should remain fully transparent.
Now, add the colors of the rainbow: Start with violet and work your way through blue, green, yellow, orange, and red. Click on each color to adjust and possibly move them until you are satisfied with the gradient.
2. Creating and Applying Radial Gradient
Once the gradient is ready, confirm it. Then select a radial gradient in the layers palette and create a new layer. The gradient will be placed on this new layer, allowing you to create a nice round shape for your rainbow.
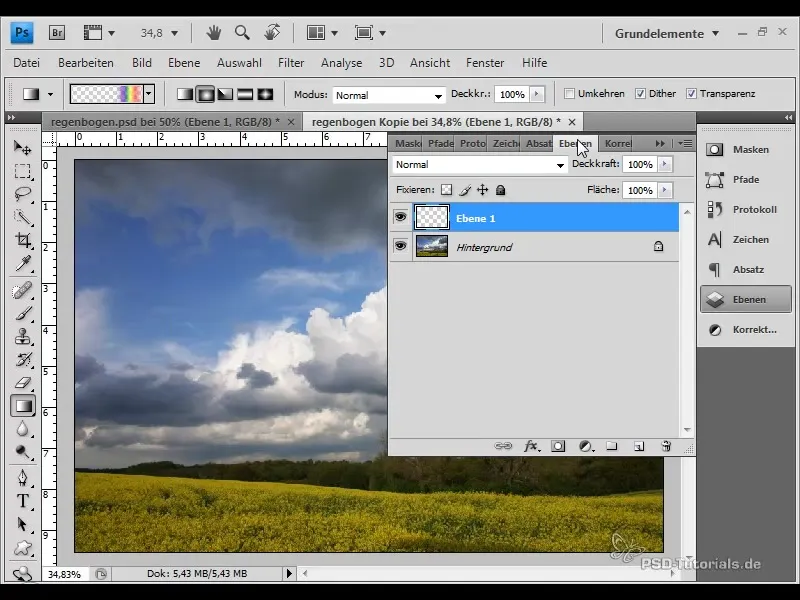
To further adjust the shape, hold down your mouse to drag the rainbow to the desired width. Then, move the rainbow to the desired location in the image.
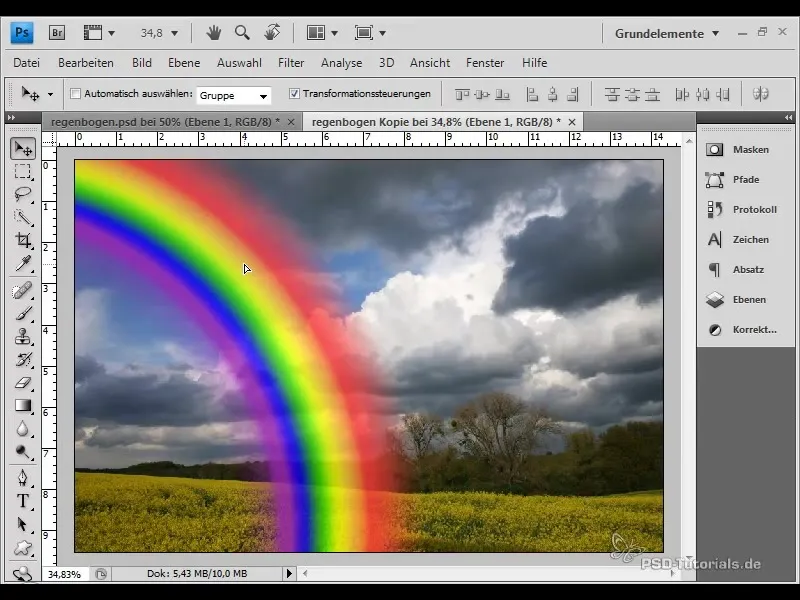
3. Adjusting Transformation and Blend Modes
To make the rainbow even more realistic, you can transform it. While holding the "Ctrl" key, press "T" to make the rainbow slimmer. Set the blend mode to "Negative multiply" to hide the black color information from the colors and create a translucent appearance.
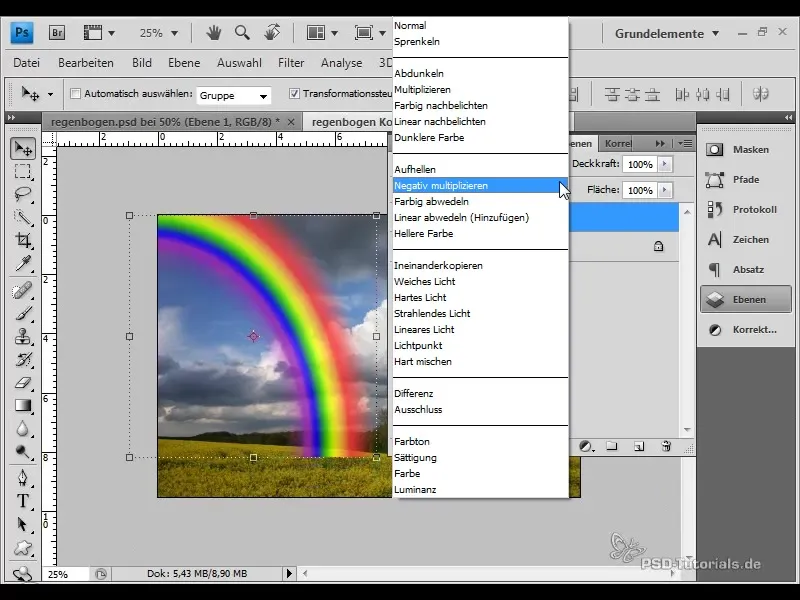
Now you will see that the rainbow looks almost finished. To optimize the transition, further reduce the opacity to 80%.
4. Blurring the Rainbow
To seamlessly integrate the rainbow into the image, you should blur it. Convert the layer into a Smart Object, go to "Filter," and select "Blur." A value around 40 pixels will ensure that the rainbow appears slightly blurred and therefore more seamless.
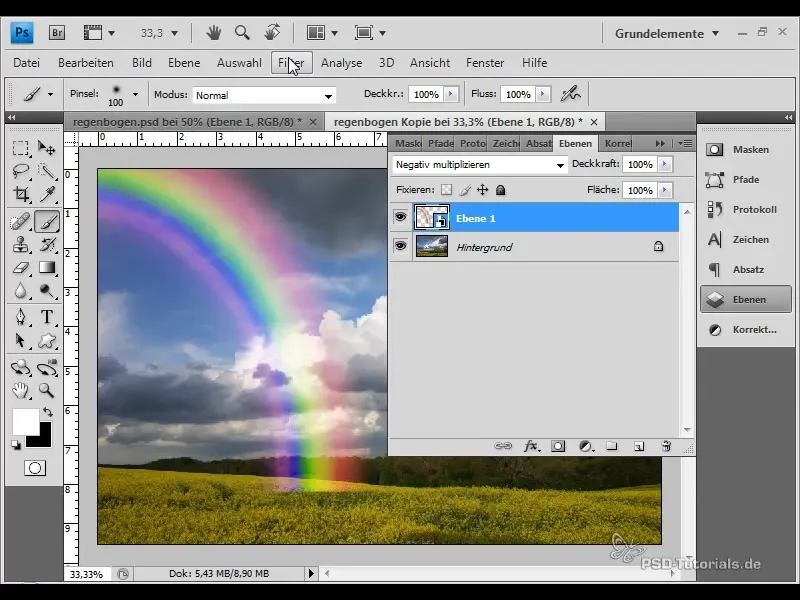
5. Adding a Layer Mask
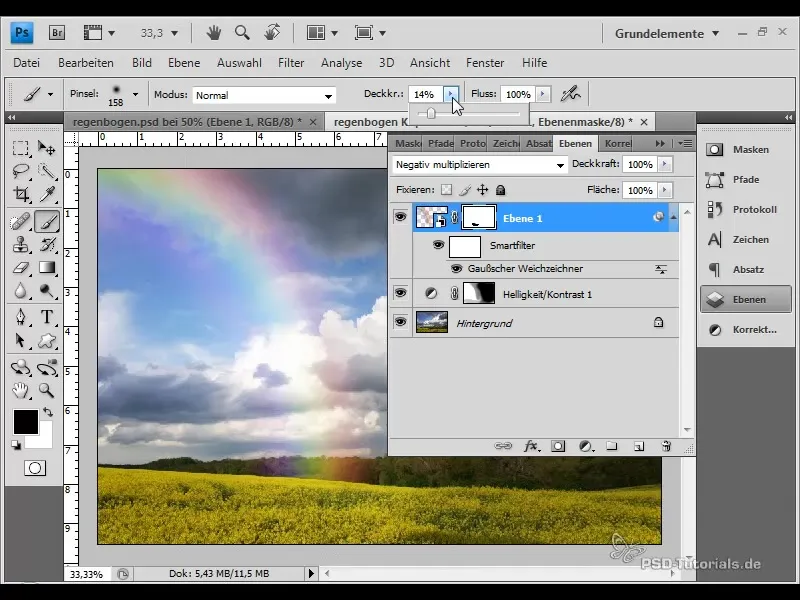
It's time to add a layer mask to optimally integrate the rainbow into the landscape. Using a black brush, paint along the rainbow edge to partially hide it. You may need to zoom in for more precise work.
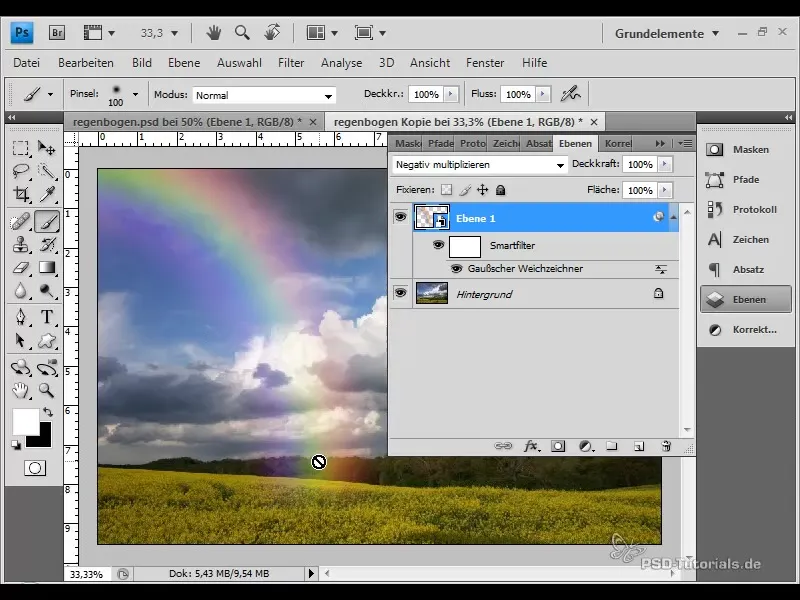
6. Adjusting Brightness
To display the inner area of the rainbow brighter, add a brightness and contrast adjustment. Set the increase to about 40%. Using a softer brush, reduce the brightness of the outer area to ensure a smooth transition.
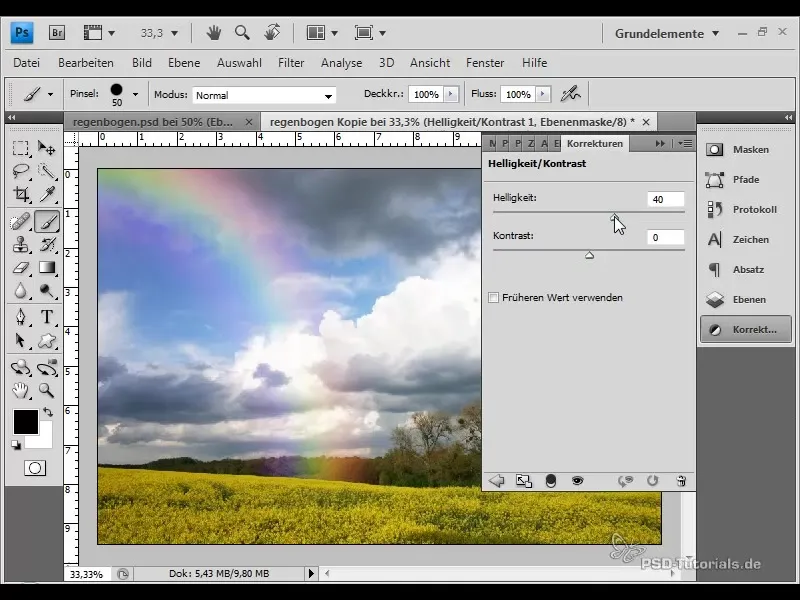
7. Fine-tuning of the rainbow
You can use this final step to round off the rainbow even more. Adjusting the opacity and working on specific areas with the brush ensures that the rainbow is seamlessly integrated into the image.
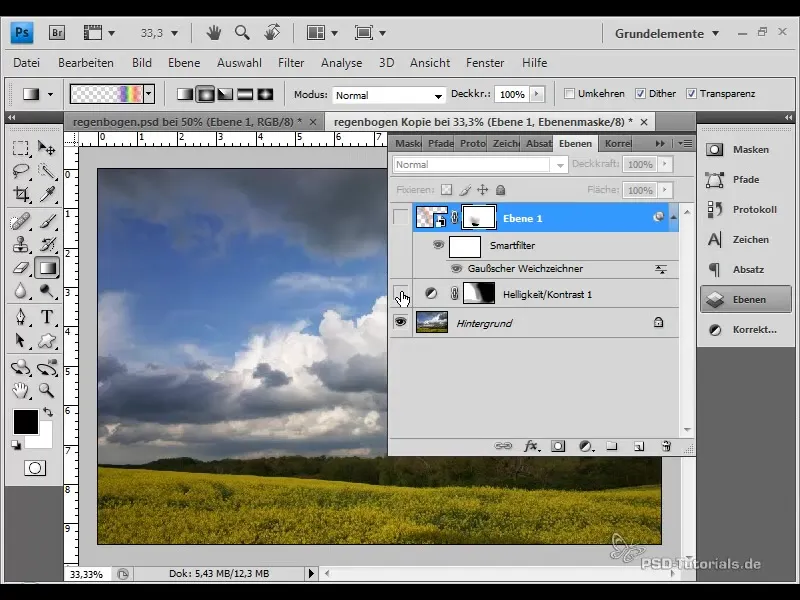
Now you can check the application of the rainbow. Turn off the layer to see a before-and-after comparison and to notice the difference.
Summary
In this tutorial, you have learned how to create a rainbow and realistically insert it into an image. The process consists of different steps, starting from creating the gradient, applying it in a new layer, and adjusting the brightness and blurring of the rainbow. With these techniques, you will be able to enhance your photos with the magic of a rainbow.
Frequently Asked Questions
How do I create a colored gradient for the rainbow?Use the gradient tool and add the spectral colors from violet to red.
Why should I blur the rainbow?To create a smooth transition into the landscape and make the overall image appear more realistic.
How can I adjust the brightness of the rainbow?Add a brightness and contrast correction and adjust the value.


