Editing YouTube videos can be crucial to optimize your content and provide your audience with higher quality. With the YouTube Editor, you have the possibility to make changes to already uploaded videos. This guide will introduce you to the functions and possibilities of the YouTube Editor and show you how you can effectively edit your videos.
Key Takeaways
- The YouTube Editor is suitable for minor adjustments and not as a primary editing tool.
- You can trim videos, add audio, blur areas, and insert end screen elements.
- Working with shortcuts can speed up the editing process.
Accessing the YouTube Editor
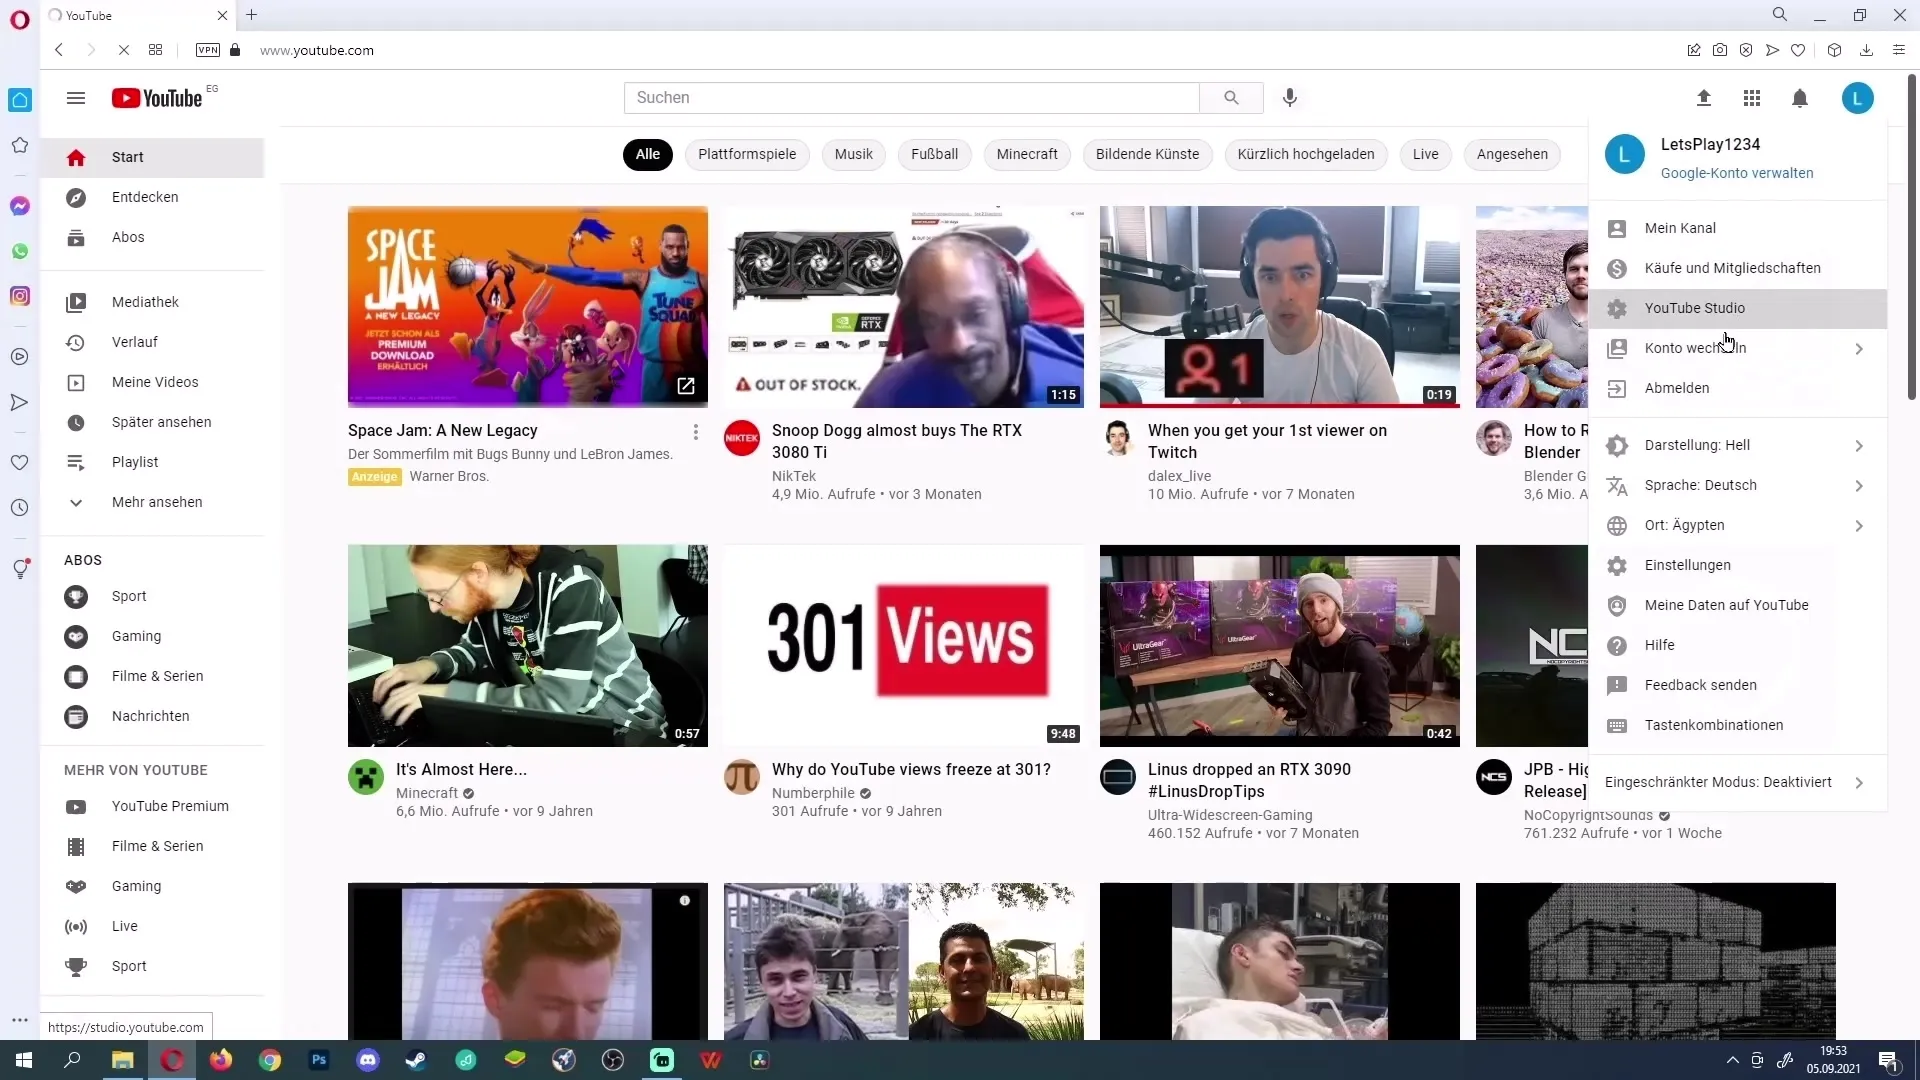
To use the YouTube Editor, follow these steps. First, log in to your YouTube account. At the top right of your channel, click on the icon to access your YouTube Studio. In the studio, select the "Content" option in the left menu bar. Here, you will see a list of your uploaded videos. To use the editor, simply click on the pencil icon next to the video you wish to edit.
Exploring the Editor's User Interface
Once you land in the YouTube Editor, you will get an overview of the functions available to you. Note that the YouTube Editor is primarily intended for post-editing changes. For extensive cuts and edits, I recommend using specialized editing software, as the YouTube Editor can be time-consuming.
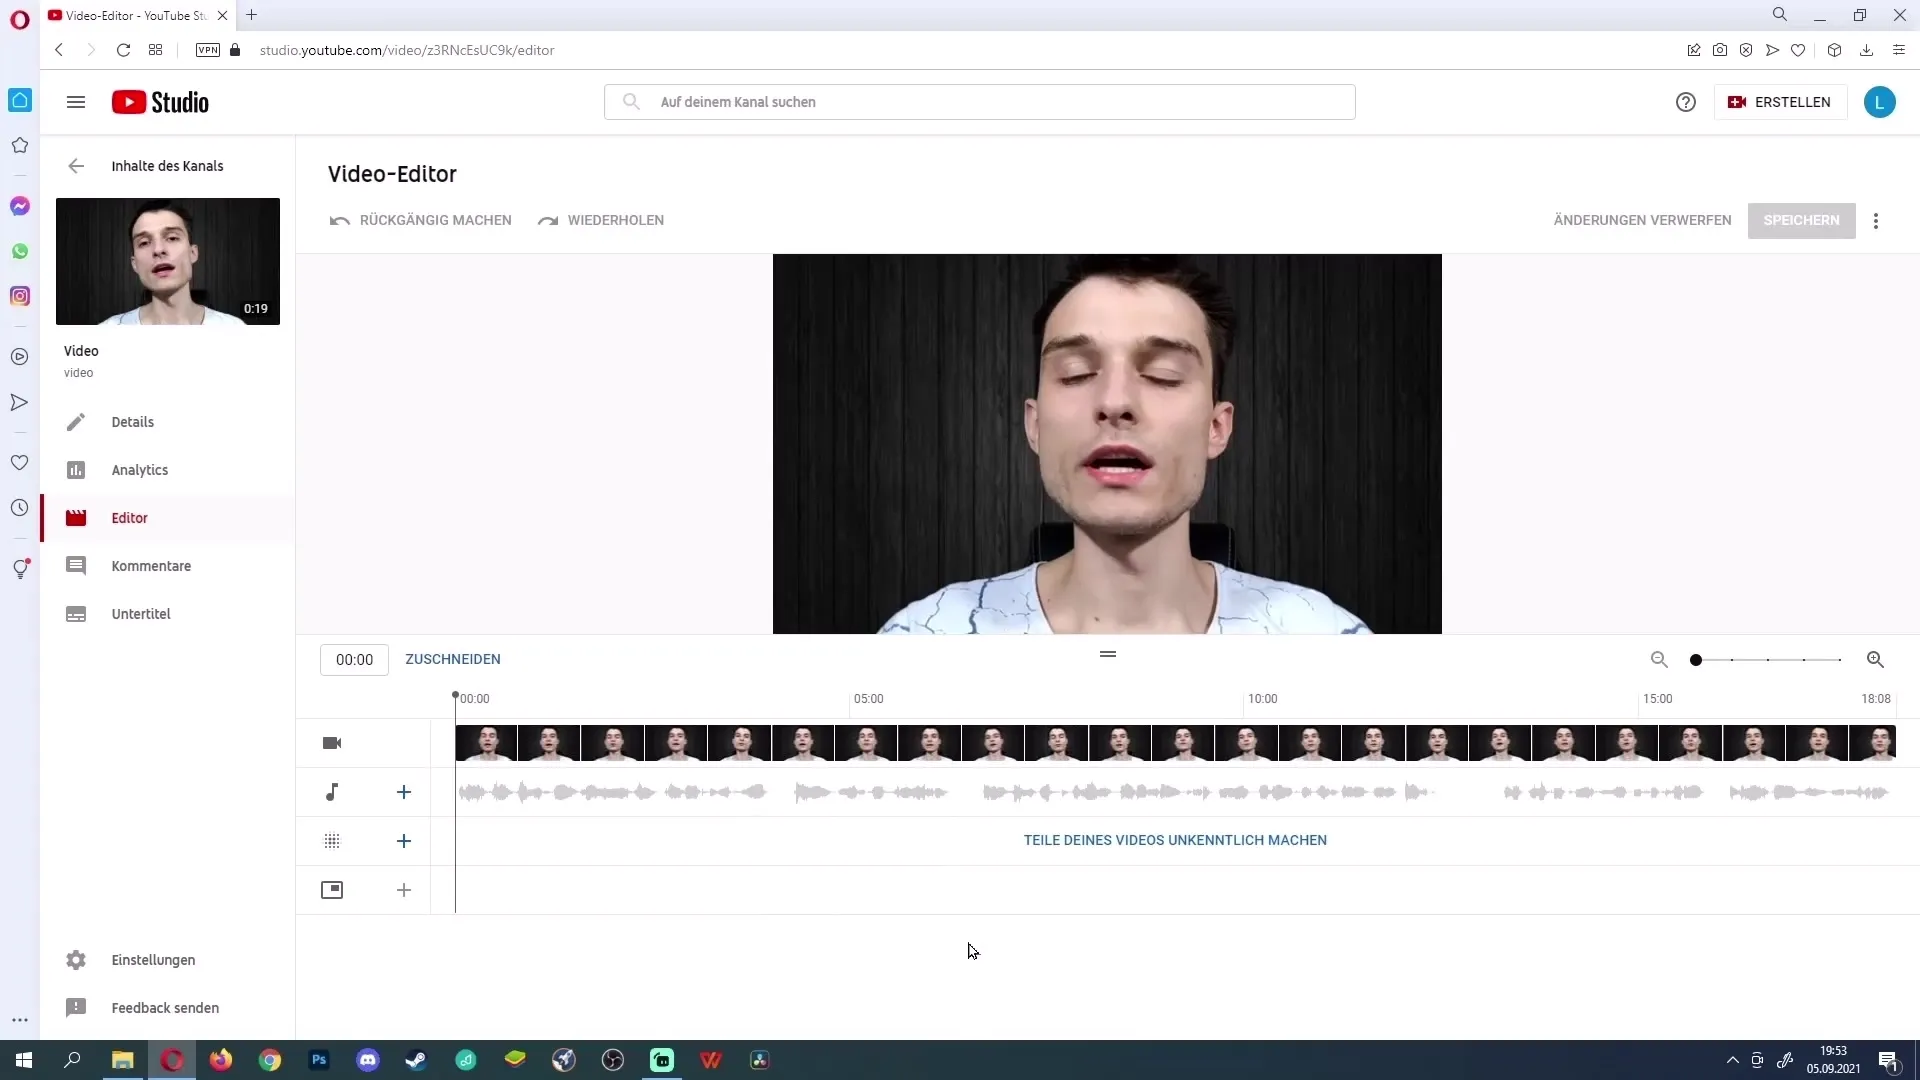
However, if you only want to make minor corrections, the editor offers you various possibilities.
Using Keyboard Shortcuts
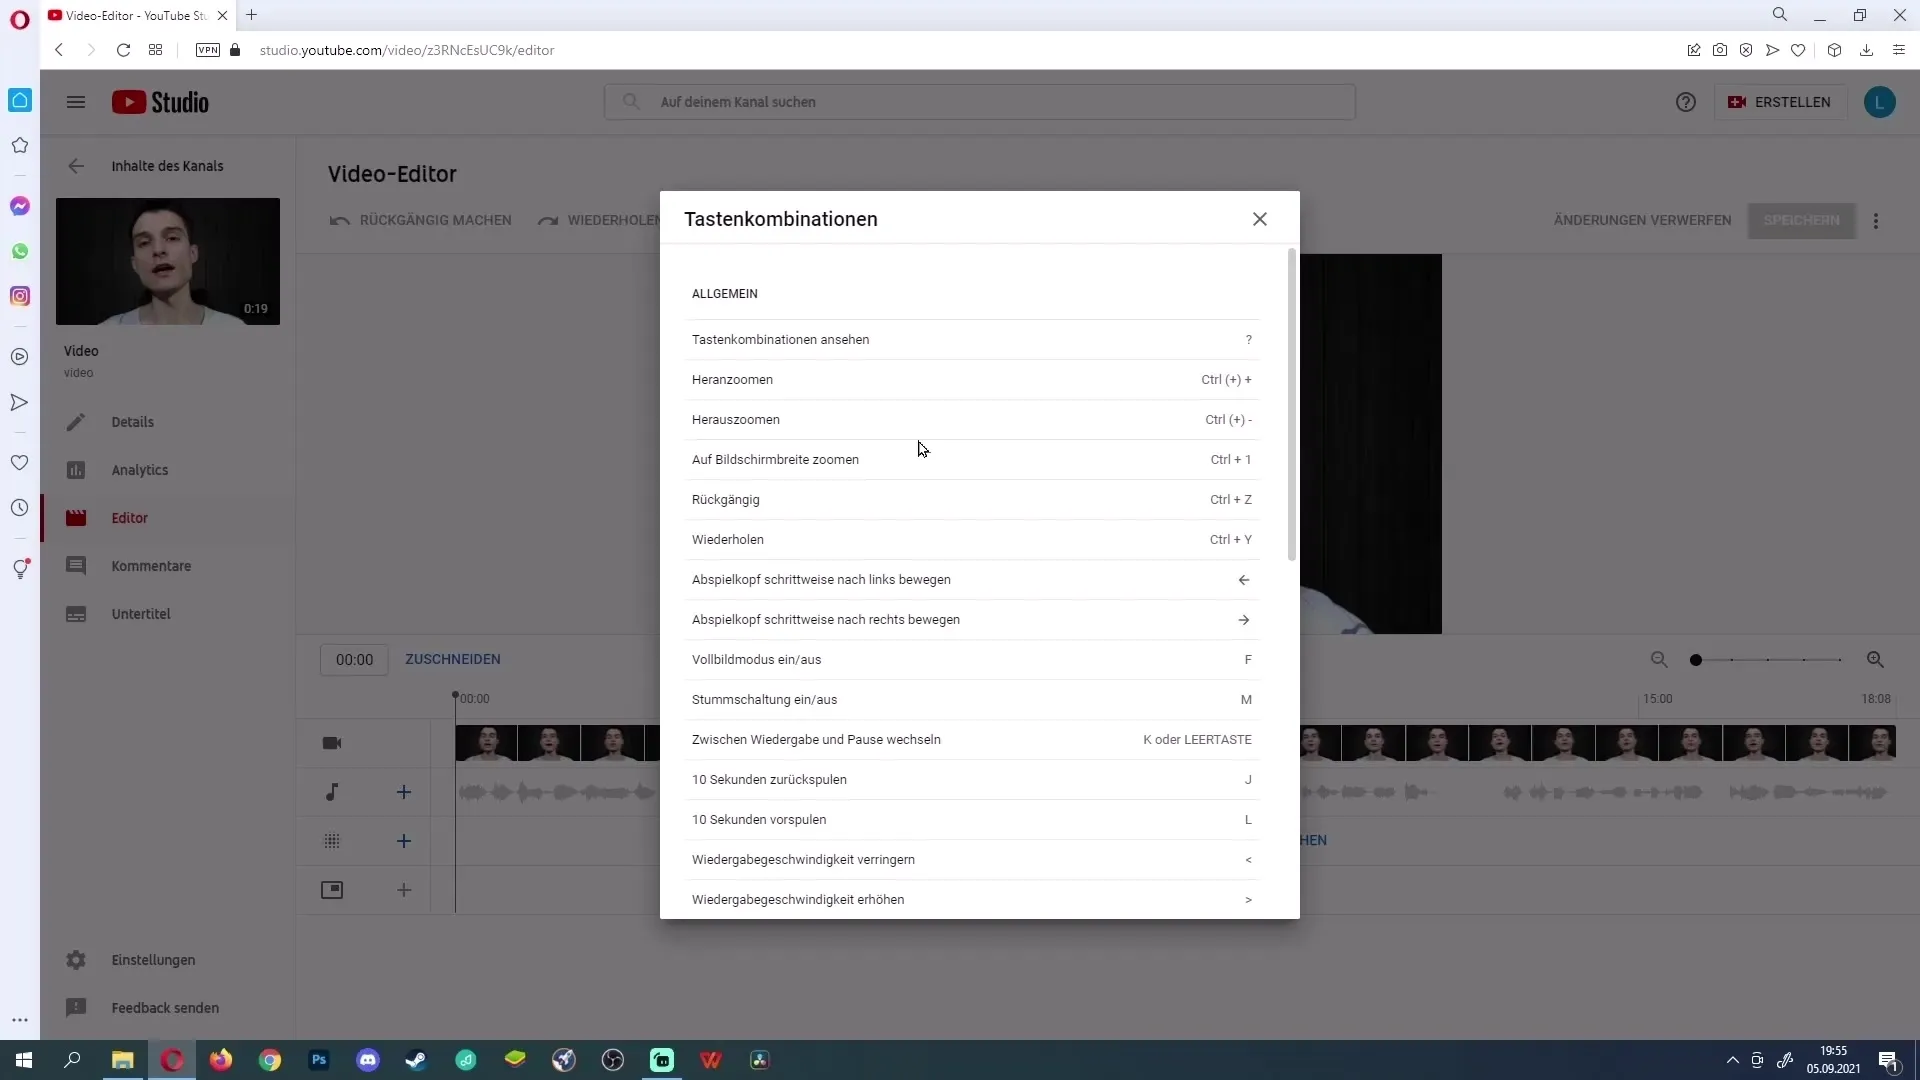
An important tool in the YouTube Editor is keyboard shortcuts. At the top right, you will find a menu with three dots. Click on it to see a list of available shortcuts. Examples include zooming in with "Ctrl" and "+," and zooming out with "Ctrl" and "-." These shortcuts can help you work more efficiently, so be sure to check them out!
Trimming Videos
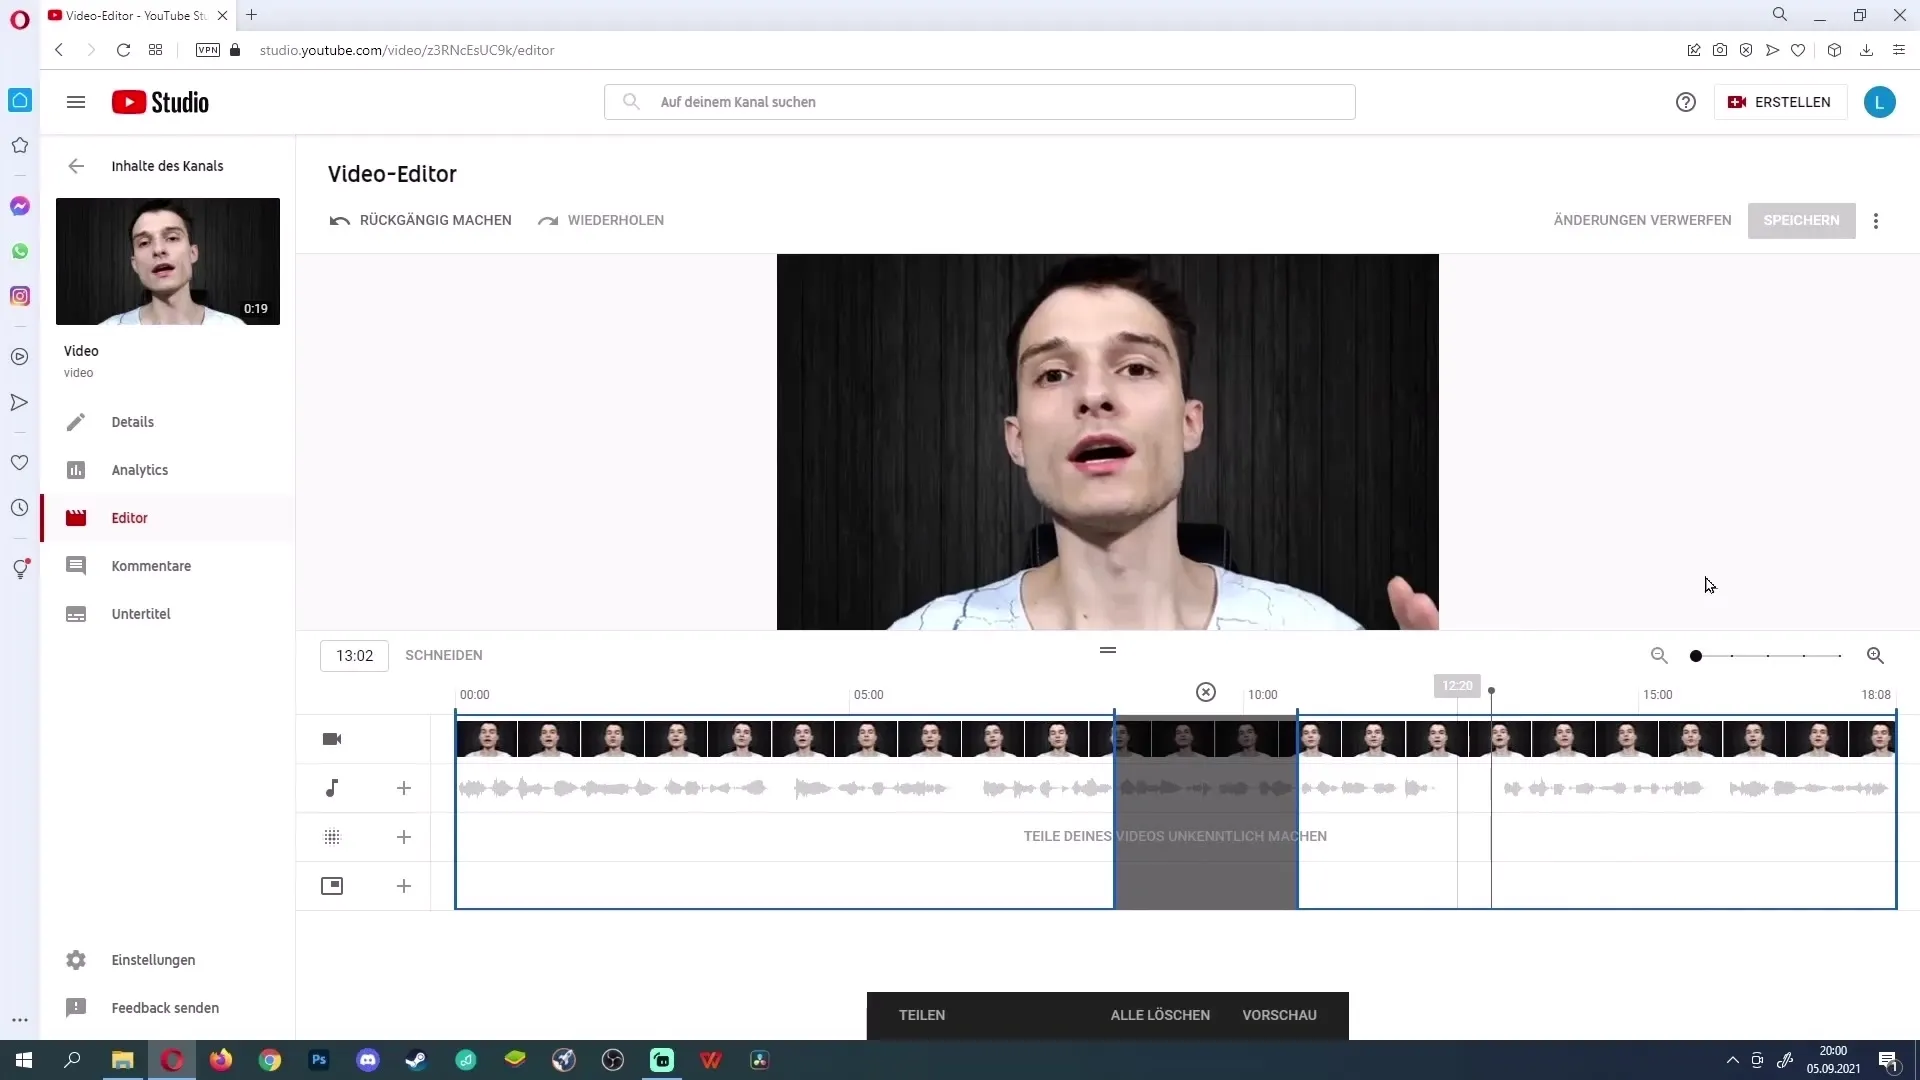
A central aspect of your editing will be trimming videos. To do this, go to the "Trim" tab. You will see a blue line at the beginning and end of your video. To shorten a segment, drag this line inwards, creating a grayed-out area that marks the section to be removed.
If you do not want to cut from the beginning or end, you can click on the desired point and then on "Split" to set a new cutting point. This allows you to remove specific segments. Zoom in if necessary to make precise cuts.
If you want to delete a section, you also have the option to click on the "X" or delete all areas. To ensure your edits are correct, it is advisable to preview your video.
Adding Music
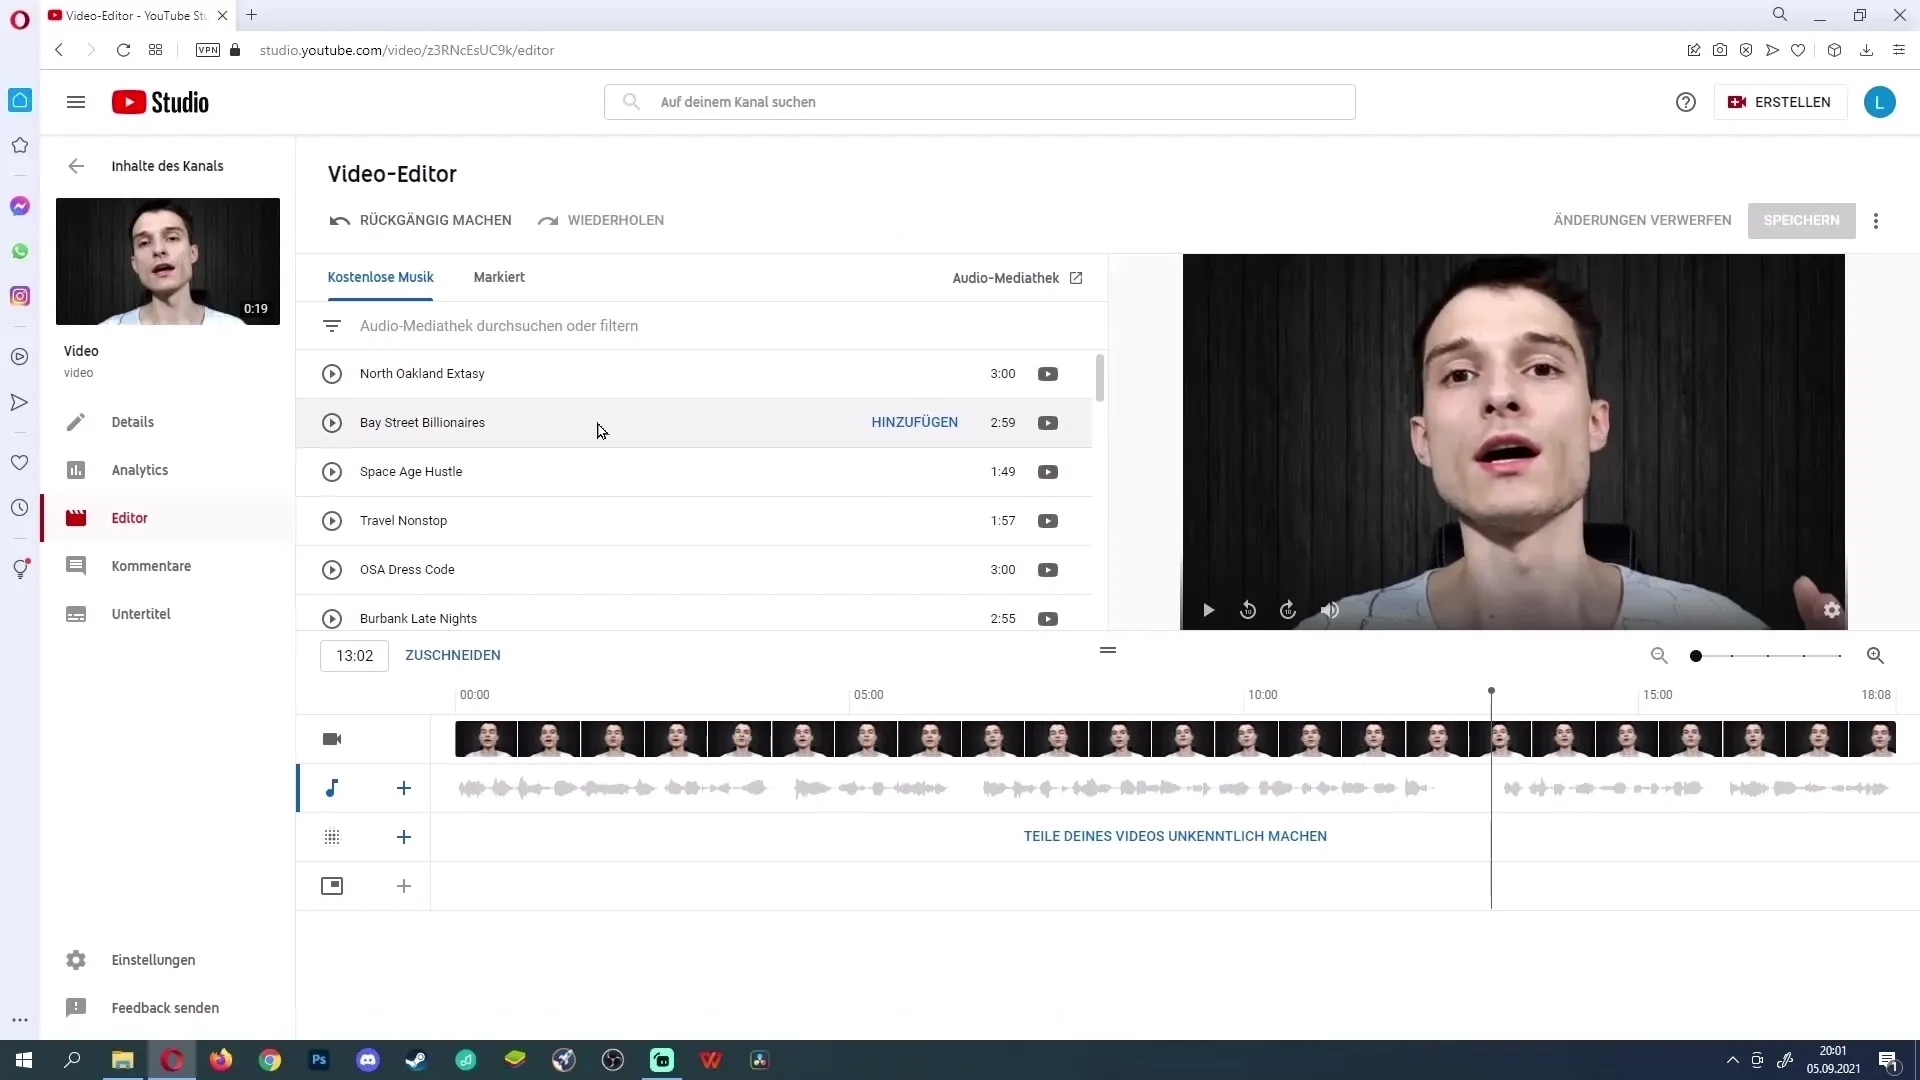
Another interesting feature of the YouTube Editor is the ability to add music to your videos. You can choose from a wide range of music in the library for free. Click on "Plus" and browse through the titles. If you like a melody, add it to your video. The music volume can also be adjusted to ensure your spoken content remains audible.
Blurring Areas
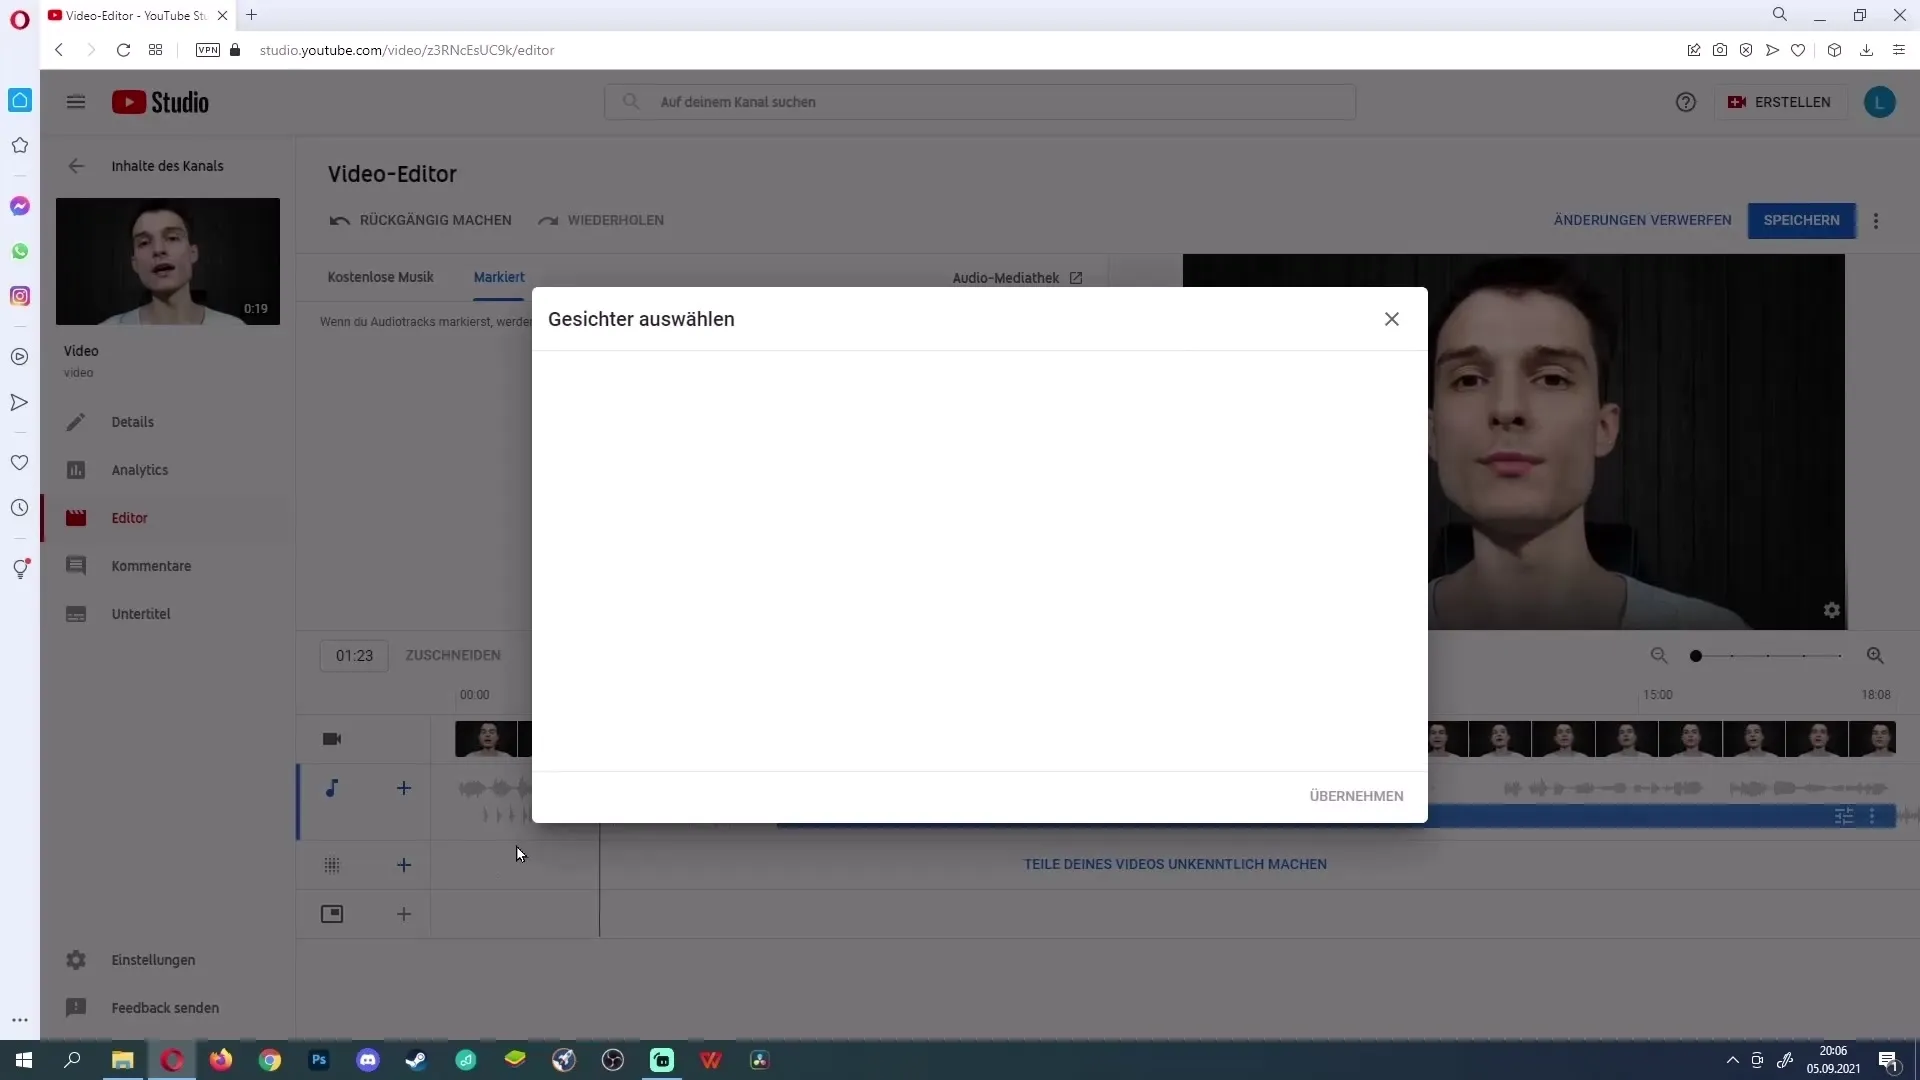
A special feature of the YouTube Editor is the option to blur certain areas. This can be useful if you want to remove faces or other sensitive information from your video. You can choose between automatic face blurring or custom blurring.
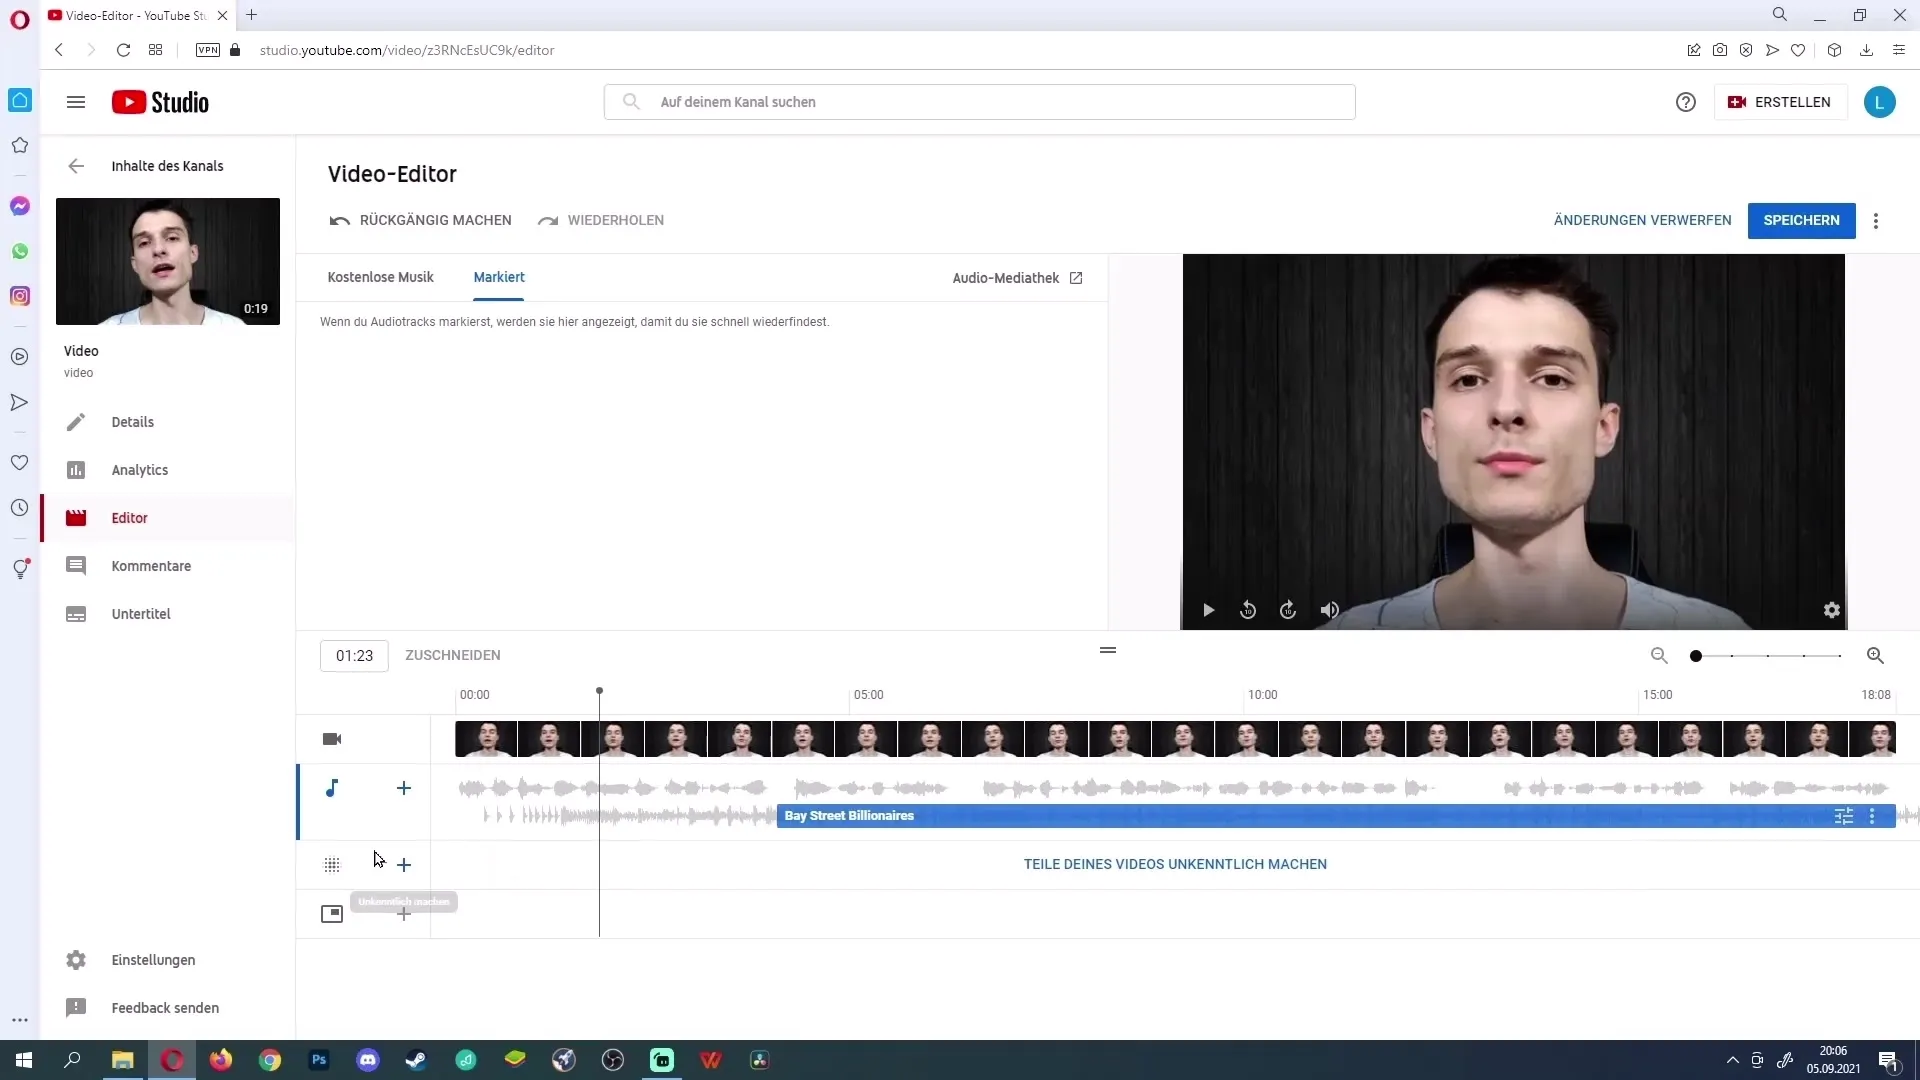
To select an area, go to "Blur" and then choose the type of blur you want to use. Then you can mark the relevant face or select an area to be blurred.
Add an outro
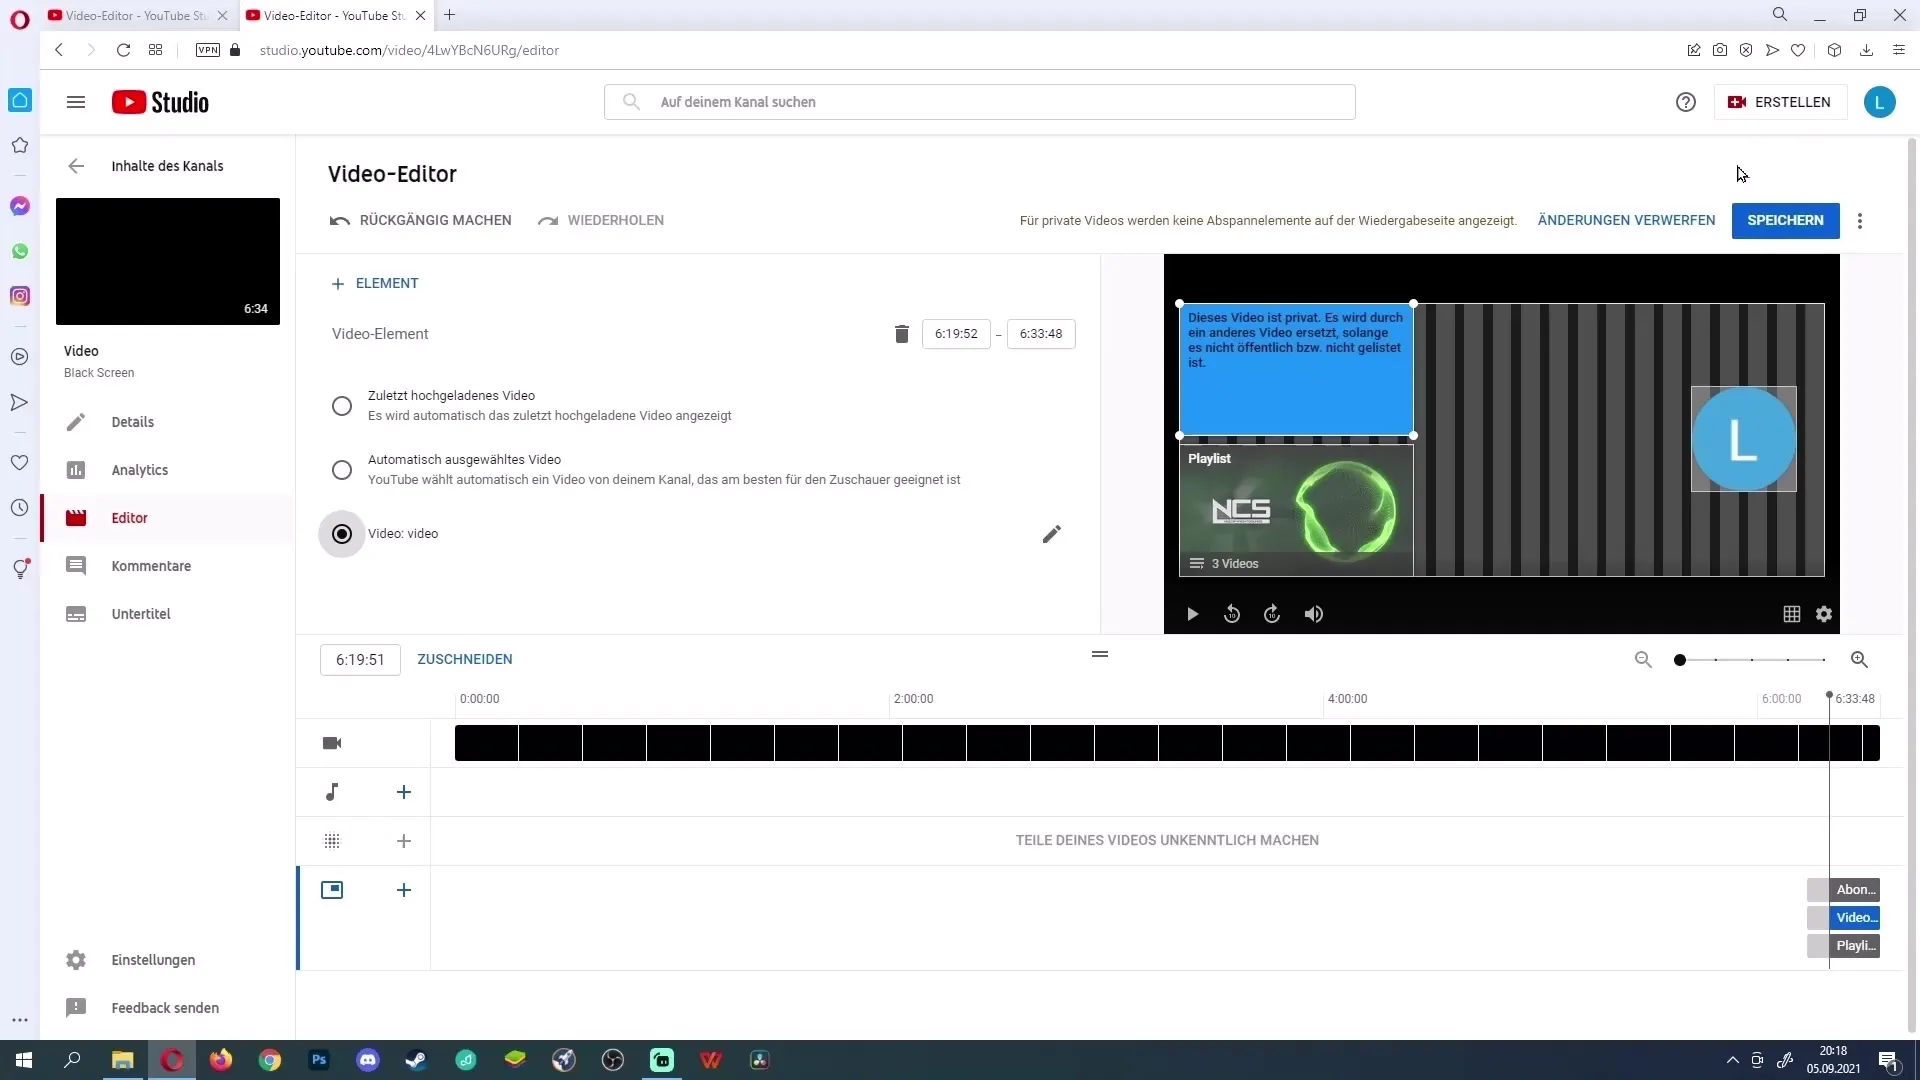
An important element is outros that you can add to provide your audience with additional information or encourage them to subscribe to your channel. You can add outros to videos that are at least 25 seconds long. Click on "Add an outro" and choose a template that you like. You can also add a link to a video, playlist, or your channel.
Save changes
Before finalizing your changes, make sure everything is correct. In the top right corner there is the "Save" button that saves all the changes made. Note that the video cannot be edited in the editor for a certain time after you have saved it.
Summary
In summary, the YouTube Editor is suitable for minor adjustments. The possibilities are diverse, ranging from trimming to adding music, outros, and blurring. However, for extensive editing, you should consider using separate software.
Frequently Asked Questions
How can I access the YouTube Editor?Go to your YouTube Studio, select "Content," and click on the pencil icon next to the video you want to edit.
Can I edit the video again after saving?No, after saving, you cannot continue editing for a certain time.
How do I add music to my video?In the editor, click on "Add" and choose the desired melody from the music library.
Can I pixelate faces in the video?Yes, you can choose automatic face pixelation or custom pixelation.
How do I add an outro?Click on "Add an outro" and choose a template. You can add links to videos, playlists, or your channel.
