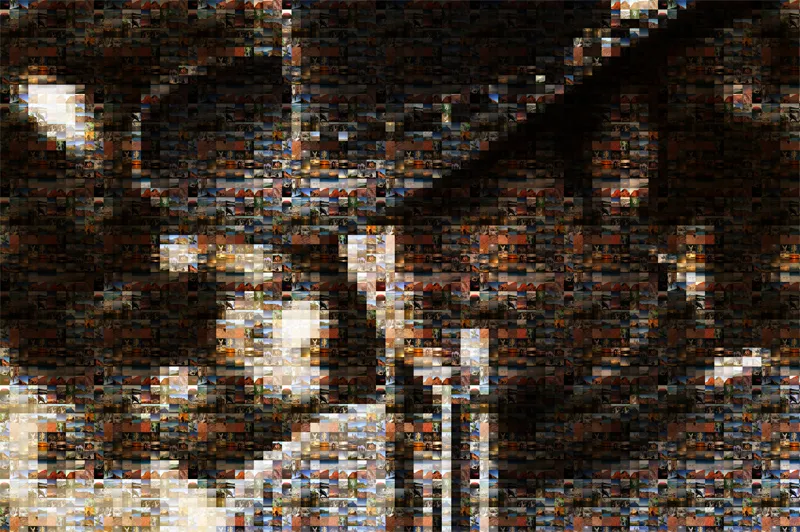
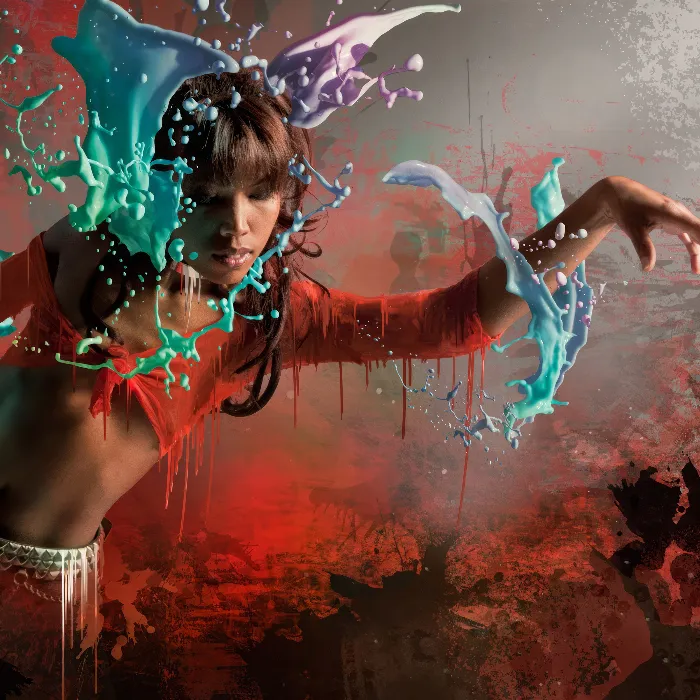
A photo mosaic is a fascinating way to create a large artwork from many small images. This effect combines creativity with precision and is perfect for posters, gifts, or digital presentations. With Photoshop, you can quickly and easily create a photo mosaic by arranging photos into a mosaic that forms a main image. In this tutorial, I'll show you step by step how to create an impressive photo mosaic - perfect for making your designs stand out. Let's get started!
Step 1: Resize Images for the Pattern
For the mosaic, I need a variety of images. The more images I have available for my pattern, the fewer repetitions there will be in the design. In this tutorial, we'll keep it simple and use 100 images to create the pattern. It's helpful to gather these images in a folder.
In the first step, I need to resize my 100 images to the correct size, which in this case is 50x50 pixels. The square pixel measurement ensures that I can later merge an accentuating mosaic effect over the filter with my pattern.
The first image that needs to be resized to 50x50 px is opened in Photoshop.
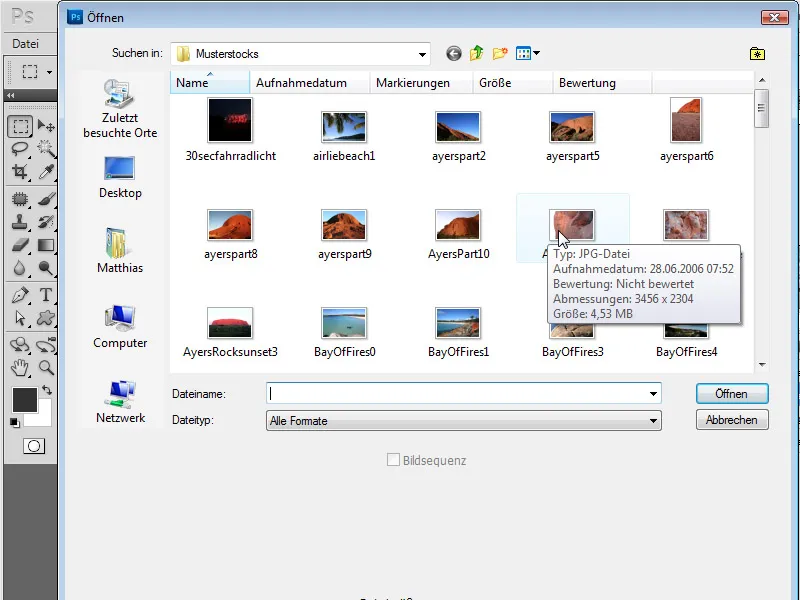
I open the Actions panel and create a new action named "Resize Image to 50px".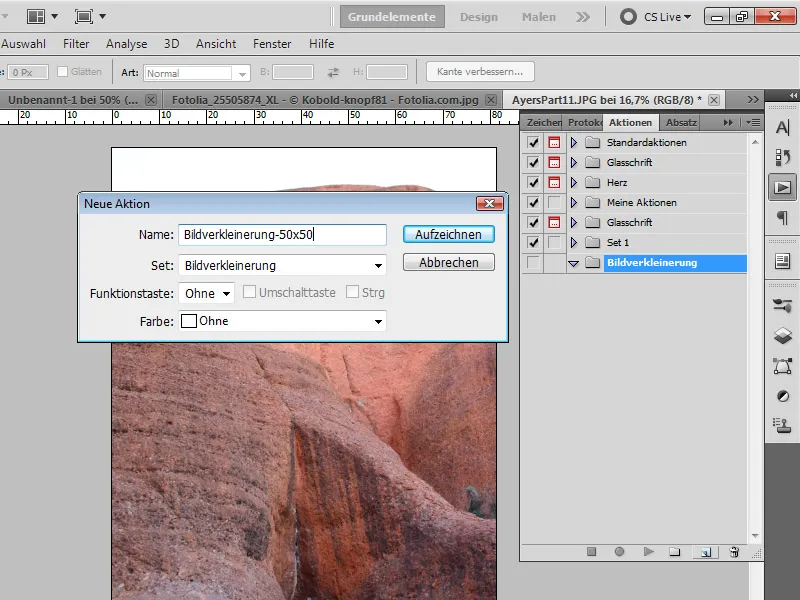
Using the shortcut Ctrl+Alt+I, I open the Image Size dialog. The Constrain Proportions checkbox is unchecked. Then, I input 50 px for both Width and Height, and confirm with OK.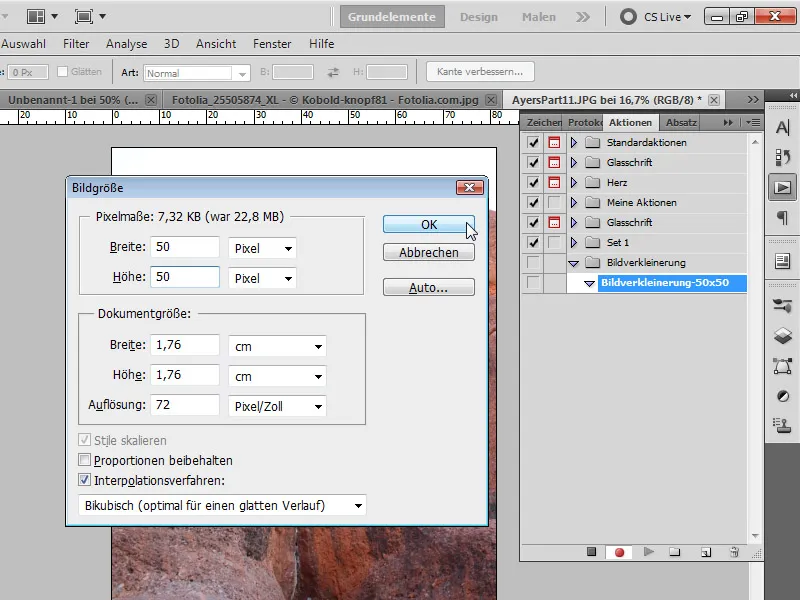
I finish the action by clicking on the stop icon (stop recording) in the Actions panel.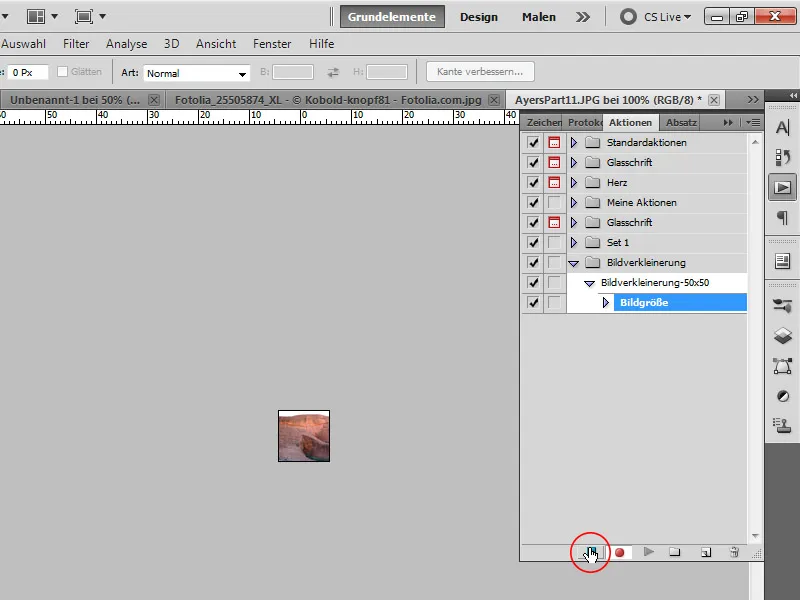
Next, I open the Image Processor via the menu File > Scripts. There, I can process all images in one go using the action I just created as a batch process.
I select the folder where my 100 images are stored. Save as format is JPG, Quality: 10.
In the Presets, I choose my newly created resizing action for batch processing. Then I click Run. My 100 images will now be resized and saved again.
The advantage of the Image Processor over the Batch Processing dialog is not only its intuitive use but also the fact that I don't need to confirm each image when saving, as this step was not included in the action.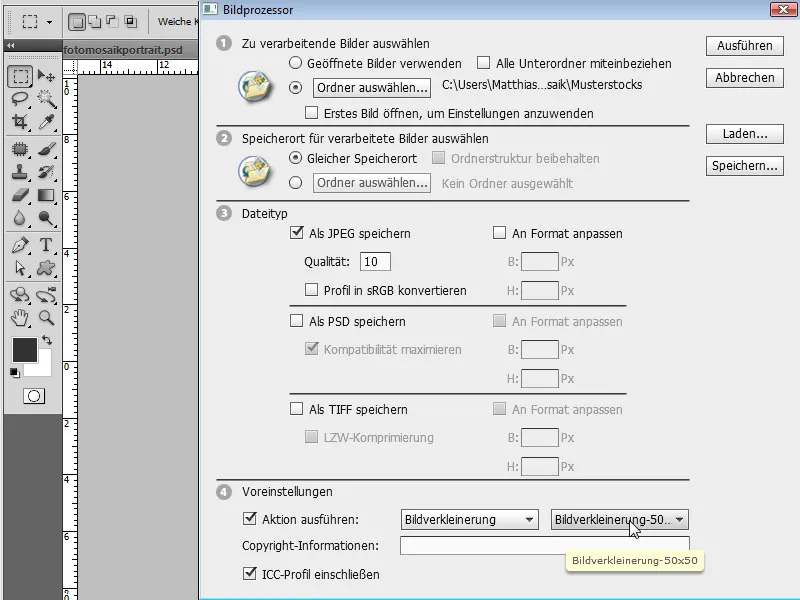
Now the 100 images have been resized and saved again. The Image Processor has created a new JPEG folder for this.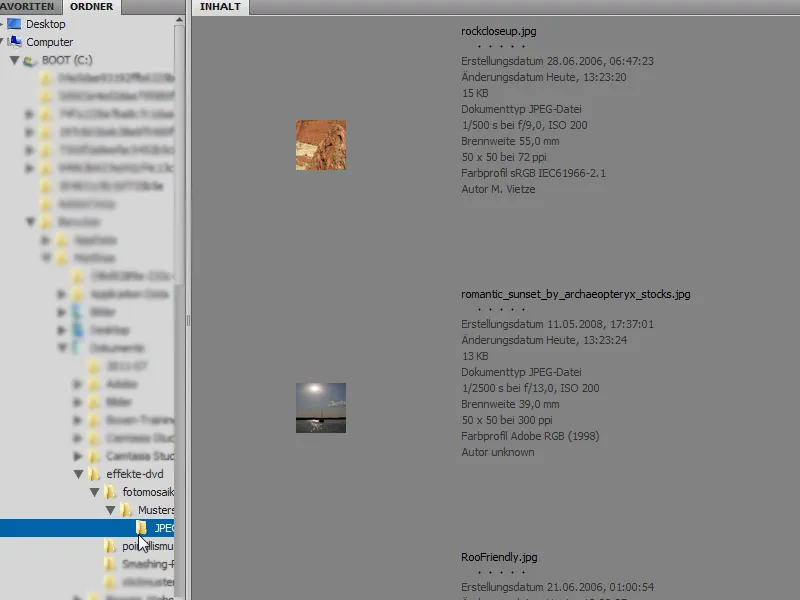
Step 2: Creating Resized Images as Pattern
2.1 The Path in Photoshop
If I stay in Photoshop, I can choose the following path to quickly arrange the images correctly for my pattern.
I select the menu File > Scripts and choose Load Files into Stack in the dialog that appears. In the dialog box, I click Browse and select the 100 previously resized images in the file browser. I confirm my selection with OK and load the images as a stack. The option to create a Smart Object remains unchecked.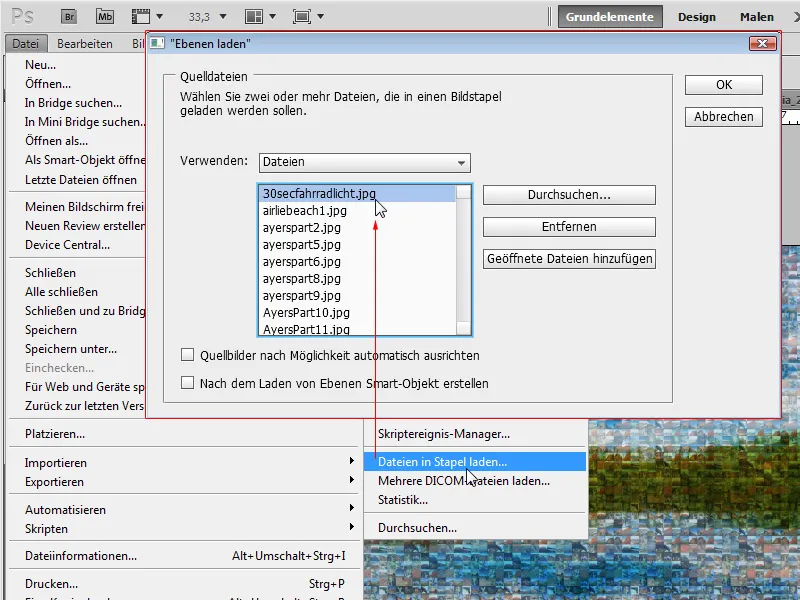
My 100 images are now loaded into a document as 100 layers.
Next, I bring up the Canvas Size dialog by using the shortcut Alt+Ctrl+C and set an enlargement of my document to 500x500 pixels.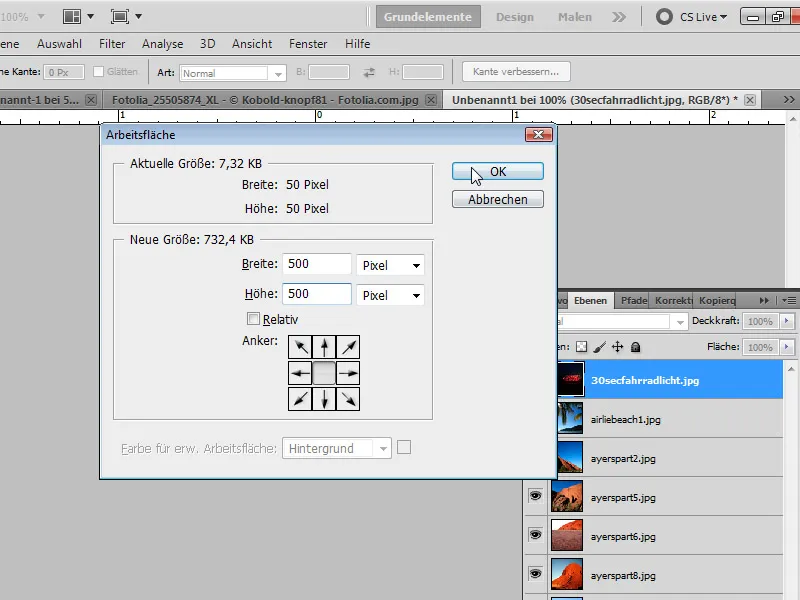
Now, with the Move Tool and the Auto-Select Layer checkbox enabled, I manually align the 100 layers.
A tip to speed things up a bit: In the Preferences (Ctrl+K) under the Guides, Grid, and Slices tab, I adjust the Grid to have a Gridline every 50 pixels - exactly the size of the small images.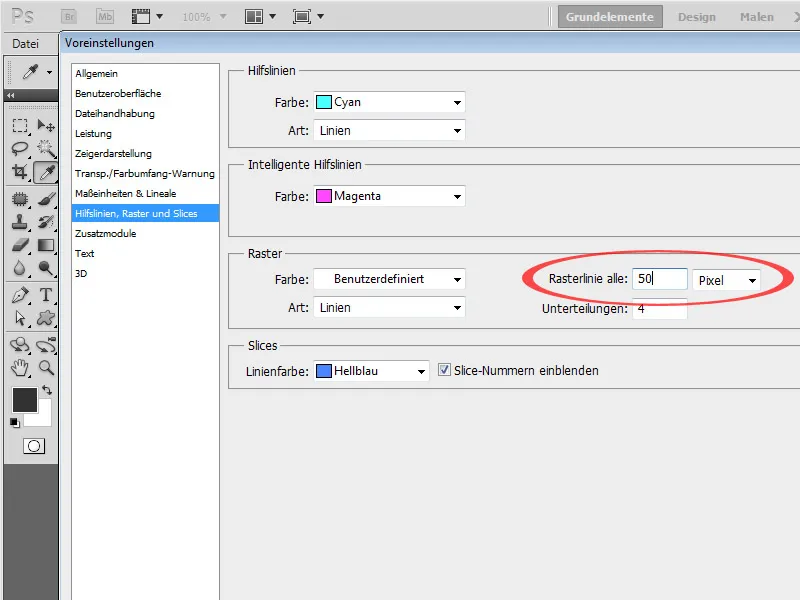
While moving, the gridlines act slightly magnetically, making it easier for me to align the layers. I can show the grid with Alt+Shift+Ctrl+, or through the menu View > Show > Grid.
Now let's start aligning the images using the Move Tool! Or I can take a shortcut through Adobe Bridge: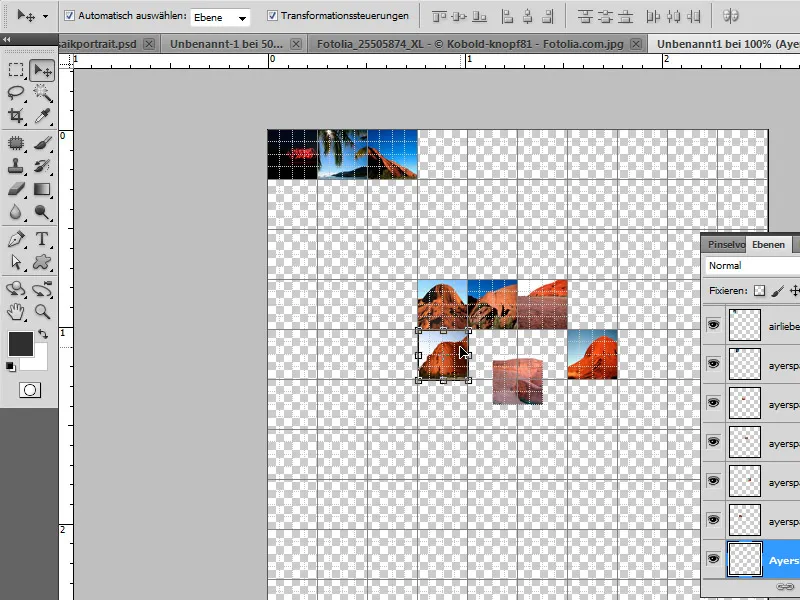
2.2. The shortcut via the Bridge
I call up the Bridge and there my folder with the 100 images that need to be seamlessly aligned for the pattern.
In the Output workspace, I have the option to generate PDF files.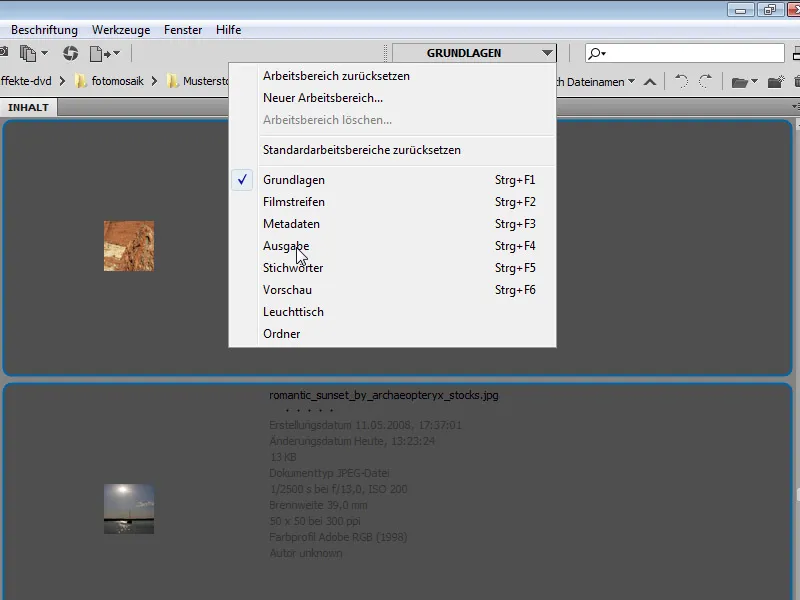
I select my 100 images and make the following settings in the Output field:
Document:
• Template: Custom
• Width and Height: 500 pixels
• Quality: 300 ppi
• Quality: 100 percent
Layout:
• Columns and Rows: 10
• The rest is nulled.
I can deactivate the checkbox for overlays.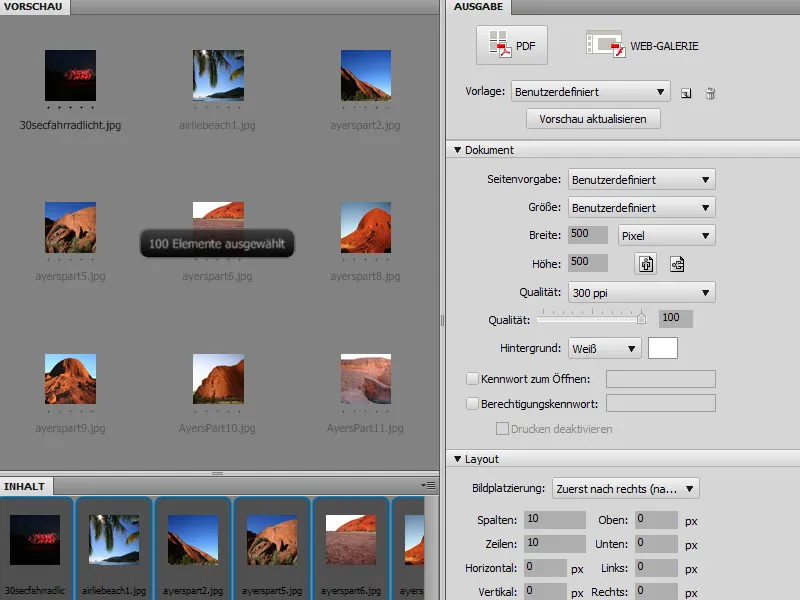
By clicking the Update Preview button, I can already display a draft to see if the pattern is correct. If it is, then I can save the PDF.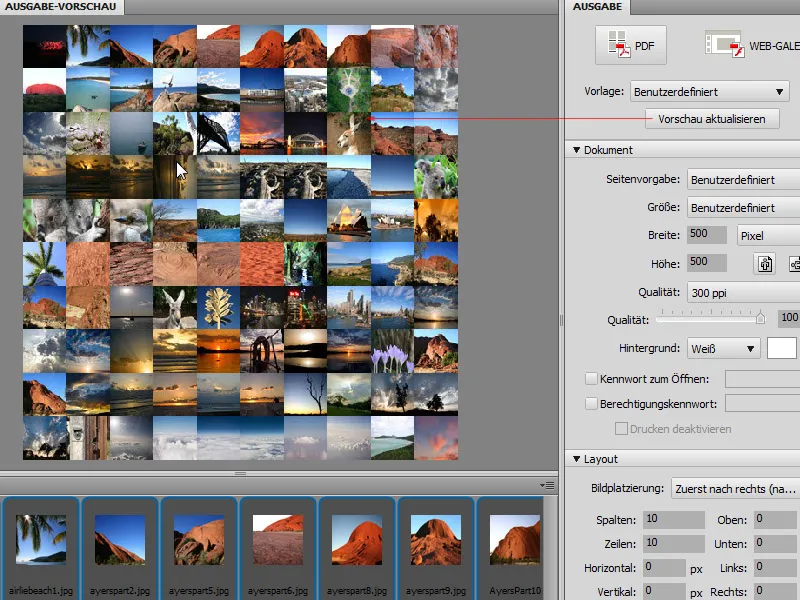
Step 3: Save my pattern
No matter which way I went, whether directly through Photoshop or the shortcut via Bridge, I must also set my pattern image as a pattern in Photoshop.
In the first option, the image is already in the document. In the second option, I open the PDF file in Photoshop. Now I save my pattern through the menu Edit>Define Pattern.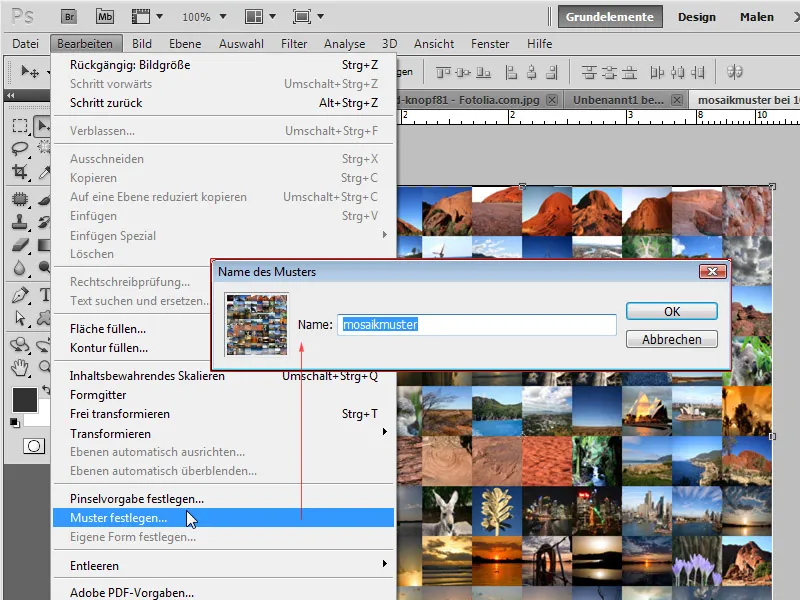
Step 4: Apply pattern
I go back to my original document with my forest lake. I create a new layer with the shortcut Ctrl+Shift+Alt+N and fill this layer with any color. Now I open the Fill Options and choose my previously created pattern in the Pattern Overlay section.
The advantage of the Pattern Overlay - compared to filling via the Fill Content (Shift+F5) dialog box - is that I can now scale my pattern.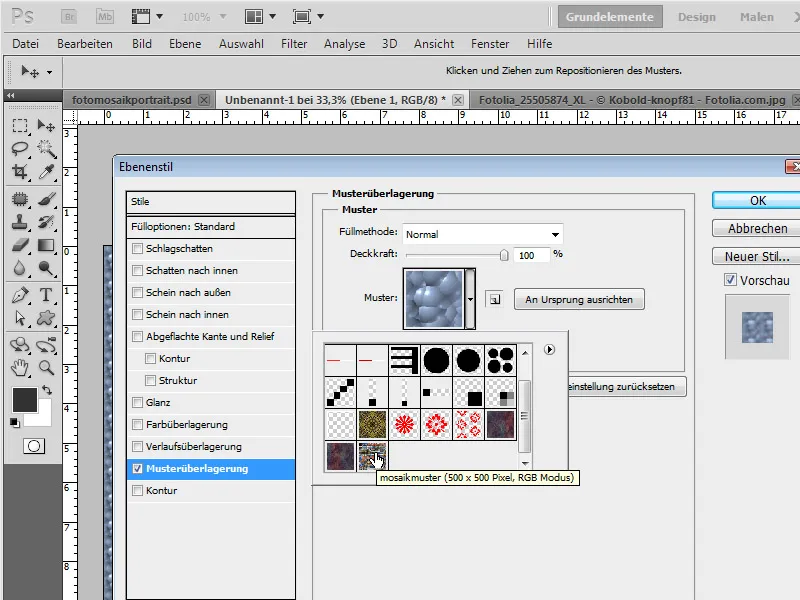
Step 5: Convert background layer into Smart Object and move it to top
I convert my background layer into a transparency layer with Double-click and move the layer to the top in the Layers panel.
Then I duplicate the layer with Ctrl+J. I can hide the duplicate for now.
I convert the first layer into a Smart Object and set it to Hard Light mode. This ensures a blending with the pattern layer while enhancing contrast. This way, both the pattern and the forest lake are visible.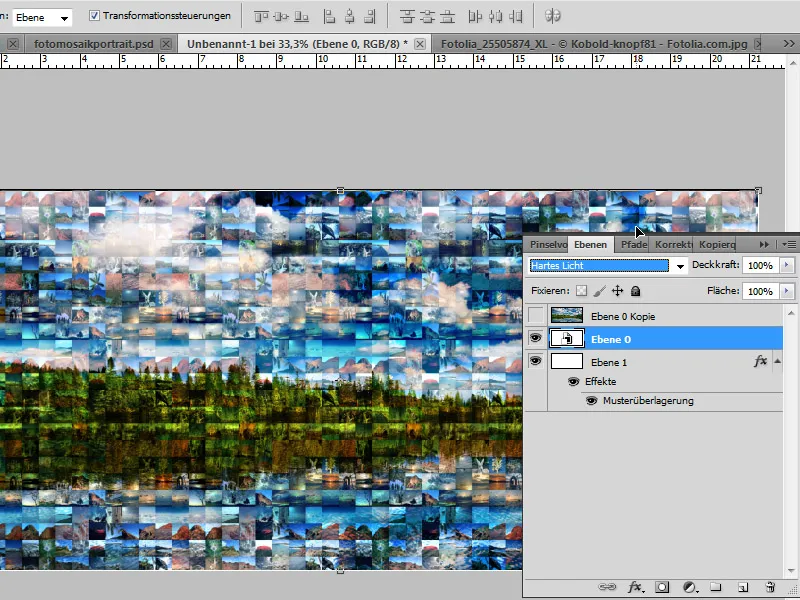
Step 6: Smart Filter Mosaic Effect
Now I apply the Mosaic Effect filter as a Smart Filter on my displayed Smart Object.
I choose a Size of 50 squares, so that the square elements from the filter align with my 50x50 squares from the pattern layer.
If I want to set smaller or larger squares for the mosaic effect, I just need to go to the pattern layer afterwards and scale the pattern accordingly in the Pattern Overlay to match the filter mosaics with the pattern elements. Therefore, as mentioned at the beginning, it is recommended to fill the layers with a Pattern Overlay.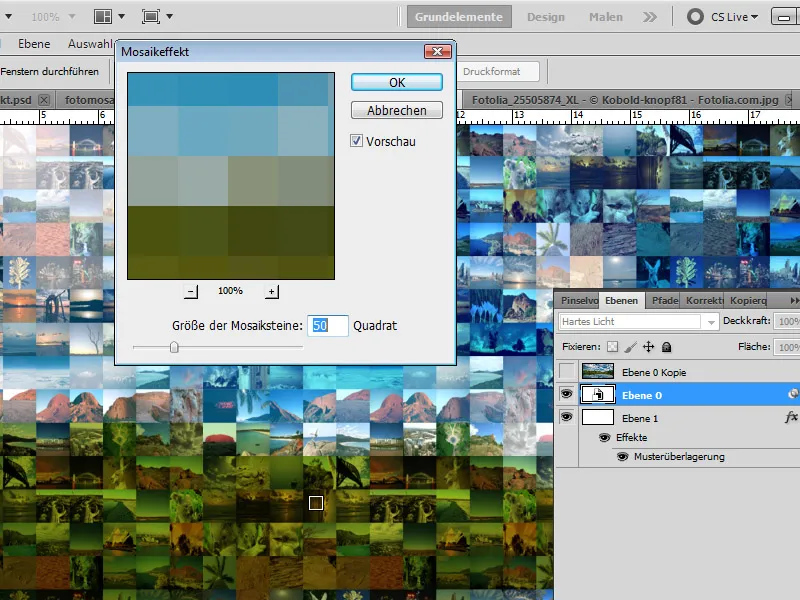
Step 7: Show duplicated layer again
Now I can show the duplicated layer again. I reduce the Opacity to 30 percent, so that some structures of the forest are brought back from the background.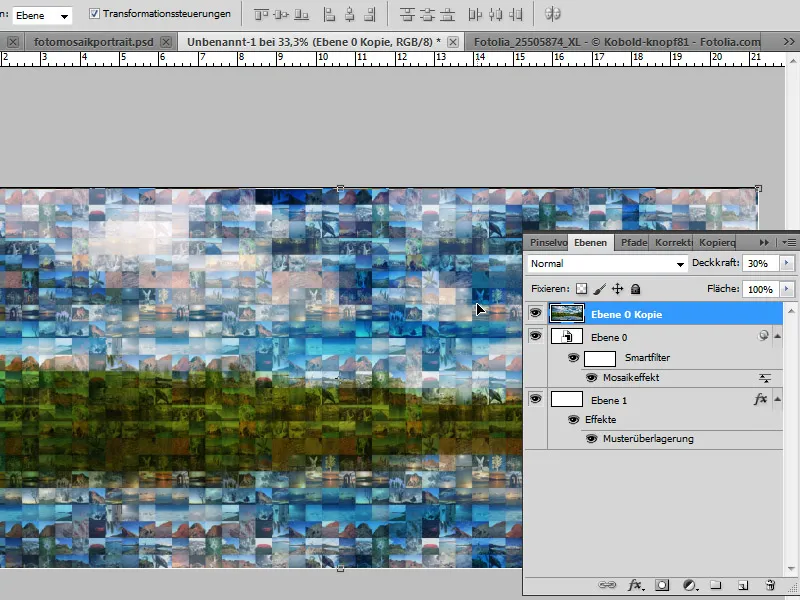
My mosaic effect is now finished.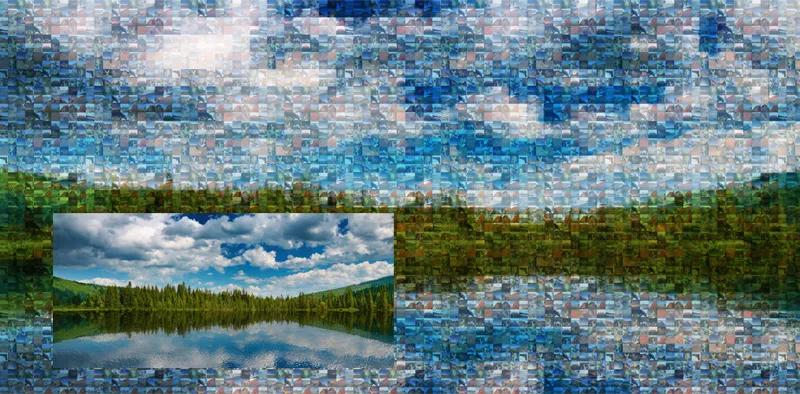
Application to other images
Since the pattern layer is already set, this effect can be quite easily applied to other images. In this case, I take a portrait photo in shades of brown.
Image Source: Fotolia.com - Colt © S.Kobold #25505874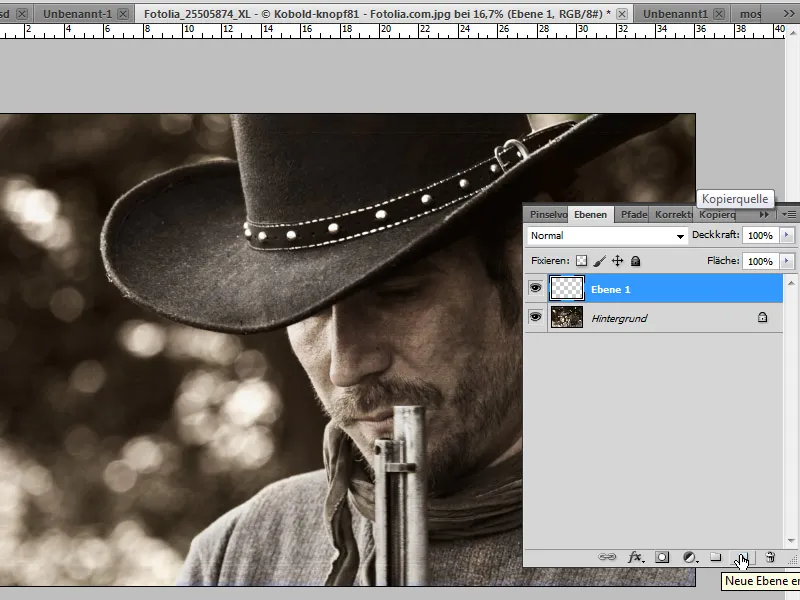
For this image, I also add a new layer with any color, which I then fill with my pattern via the Pattern Overlay. I move the image layer to the top and duplicate it. The first image layer with the Hard Light blending mode receives the Mosaic Effect Filter as a Smart Filter (convert the layer into a Smart Object beforehand).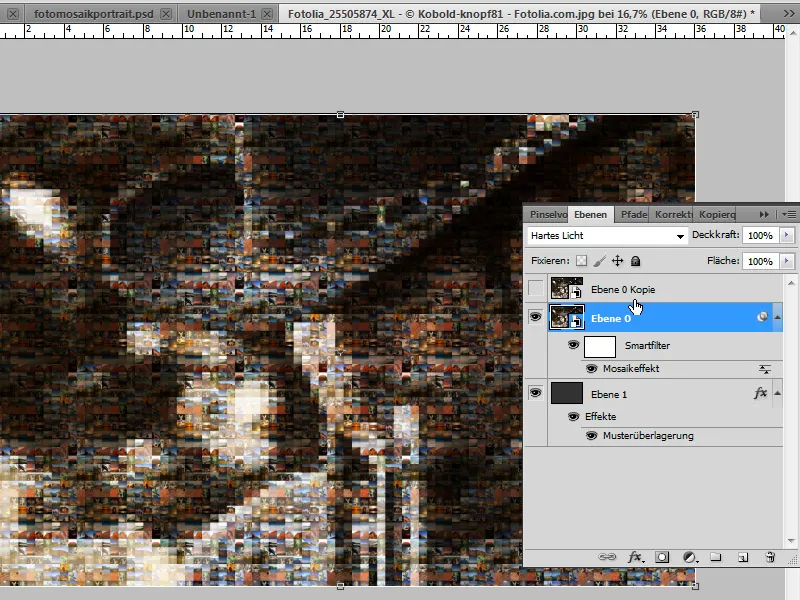
I reduce the Opacity of the duplicated layer to 30 percent. Now, it becomes evident that there is too much detail on the string of the hat.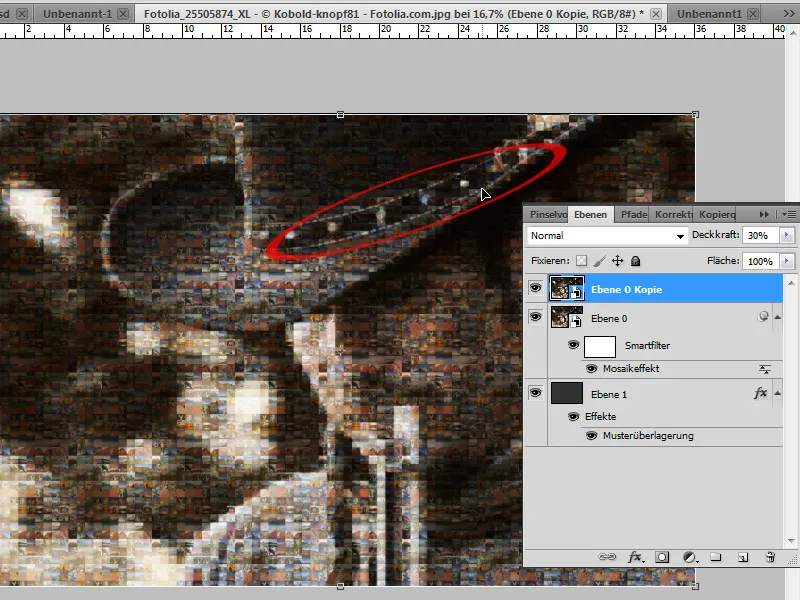
Therefore, a variation presents itself here. Instead of continuing to use the layer in Normal mode at 30% opacity, I delete it. Instead, I duplicate the layer that was set to Hard Light mode. My duplicate is set to the blending mode Soft Light at 40% opacity. This enhances the contrasts even further, which is very beneficial to the overall appearance of the effect. The previously excessive details on the cord now fit nicely into the image as mosaic pieces.
My mosaic effect is also complete in this image.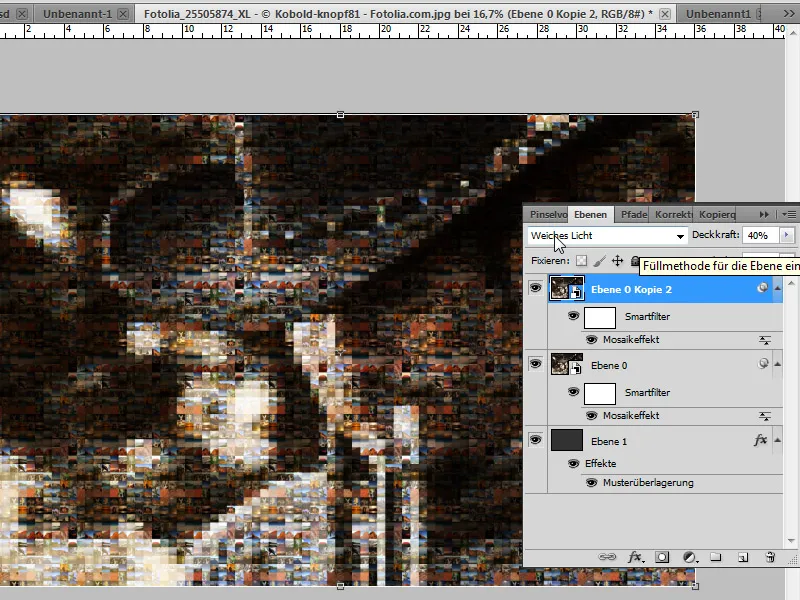
It becomes apparent that the technique fundamentally works very well, but depending on the specific image characteristics, some adjustments are always needed for the optimal look.