The quality of the microphone has a significant impact on the overall impression of a video. In this comprehensive tutorial, I will show you how to properly set up the microphone in OBS Studio. You will learn which filters are important to optimize the audio quality, and how you can test different settings to achieve the best results for your streams or recordings.
Key Takeaways
- A properly set up microphone is crucial for the audio quality of a stream or recording.
- The microphone levels should be in the middle yellow range to avoid distortion.
- There are four important filters that you should use in OBS: Gain, Noise Suppression, Noise Gate, and Compressor.
- Experimenting with the settings is essential to achieve optimal results for your specific microphone setup.
Step-by-Step Guide
Sit back and follow these steps to optimize your microphone in OBS.
1. Adjust Microphone Level
First, you should adjust your microphone's levels to an appropriate level. The target range for this is the middle yellow area. Make sure to hit this range while speaking, which you can easily observe through the display in OBS. Since I've found the perfect value for me in this guide, I'll show you how I did it.
If you see that your levels are too low, you can move the slider to the left to increase the level. For me, the ideal value is around -7.5 decibels.
2. Add Microphone Filters
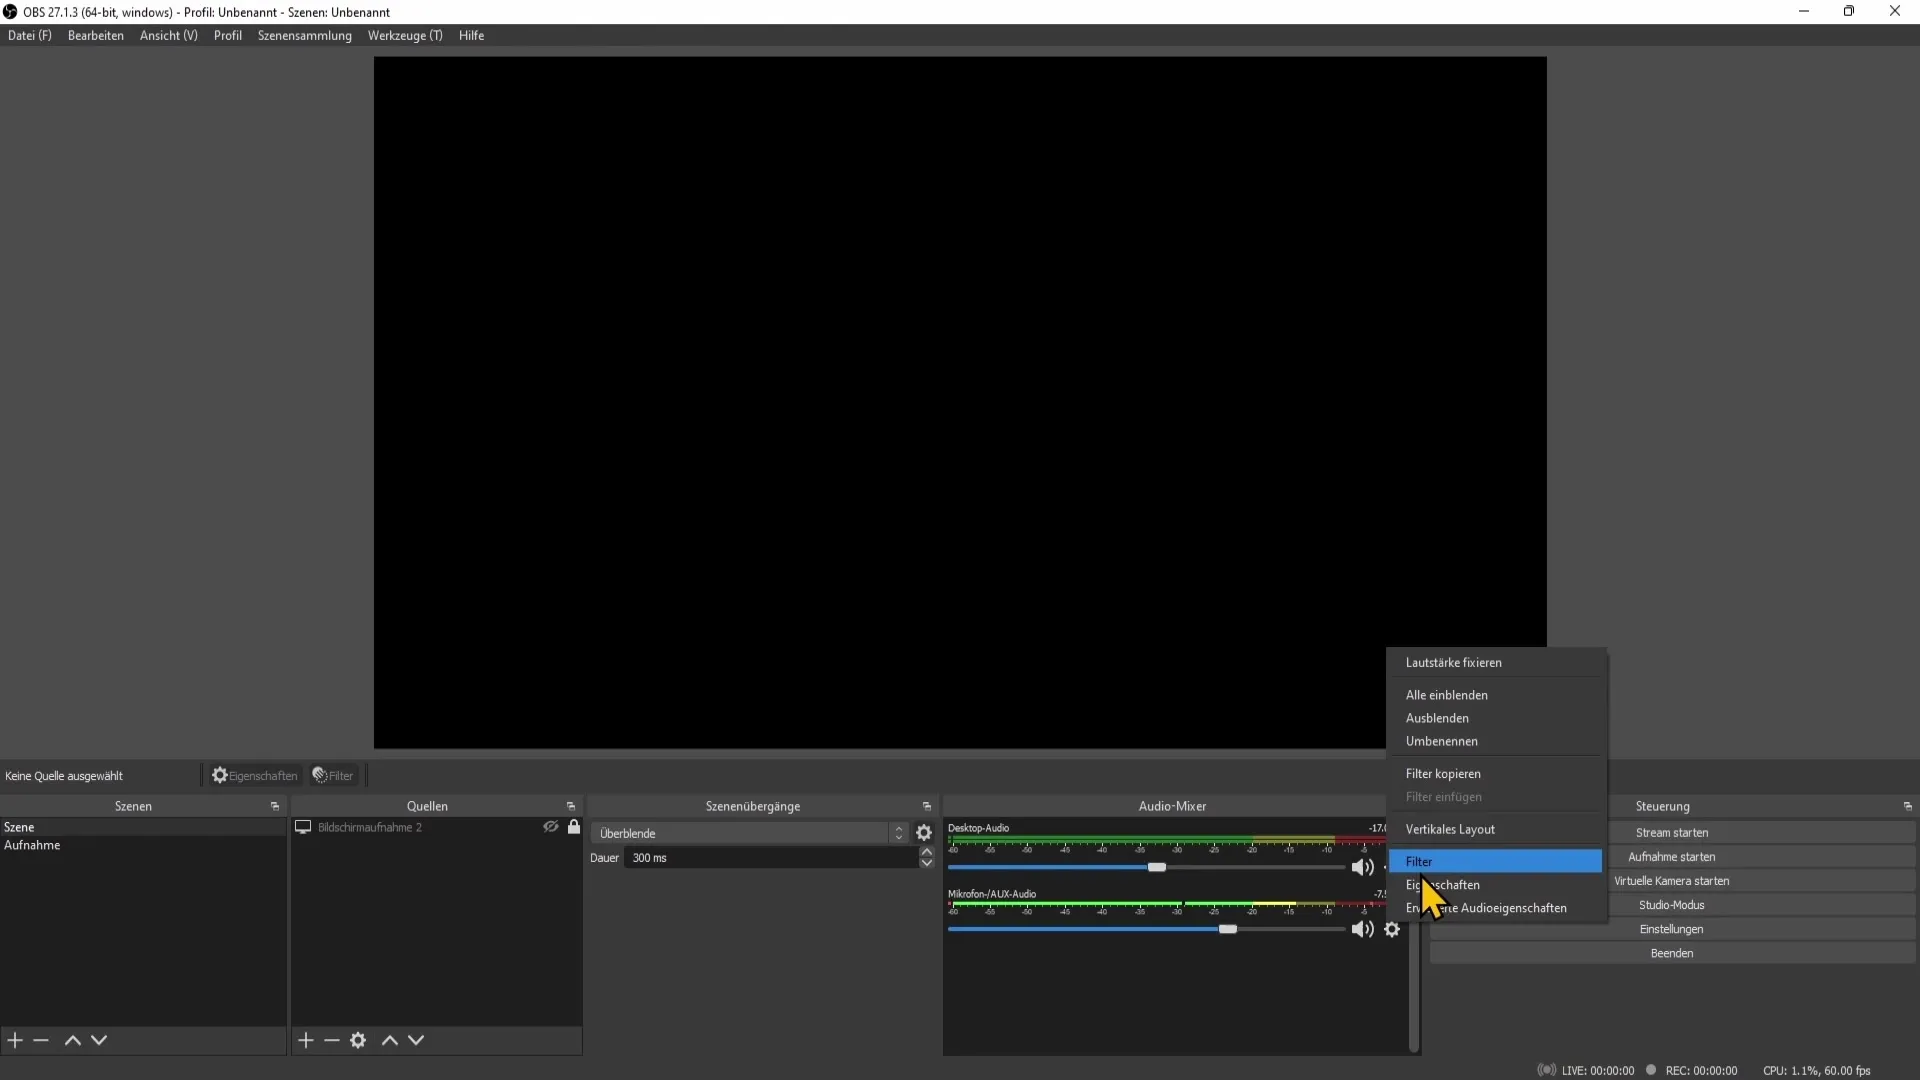
Now, let's take it a step further and add microphone filters to further enhance the audio quality. Click on the gear next to your microphone in OBS and select the filters.

Here you can see the options for the filters. I recommend adding the four most important filters: Gain, Noise Suppression, Noise Gate, and Compressor.
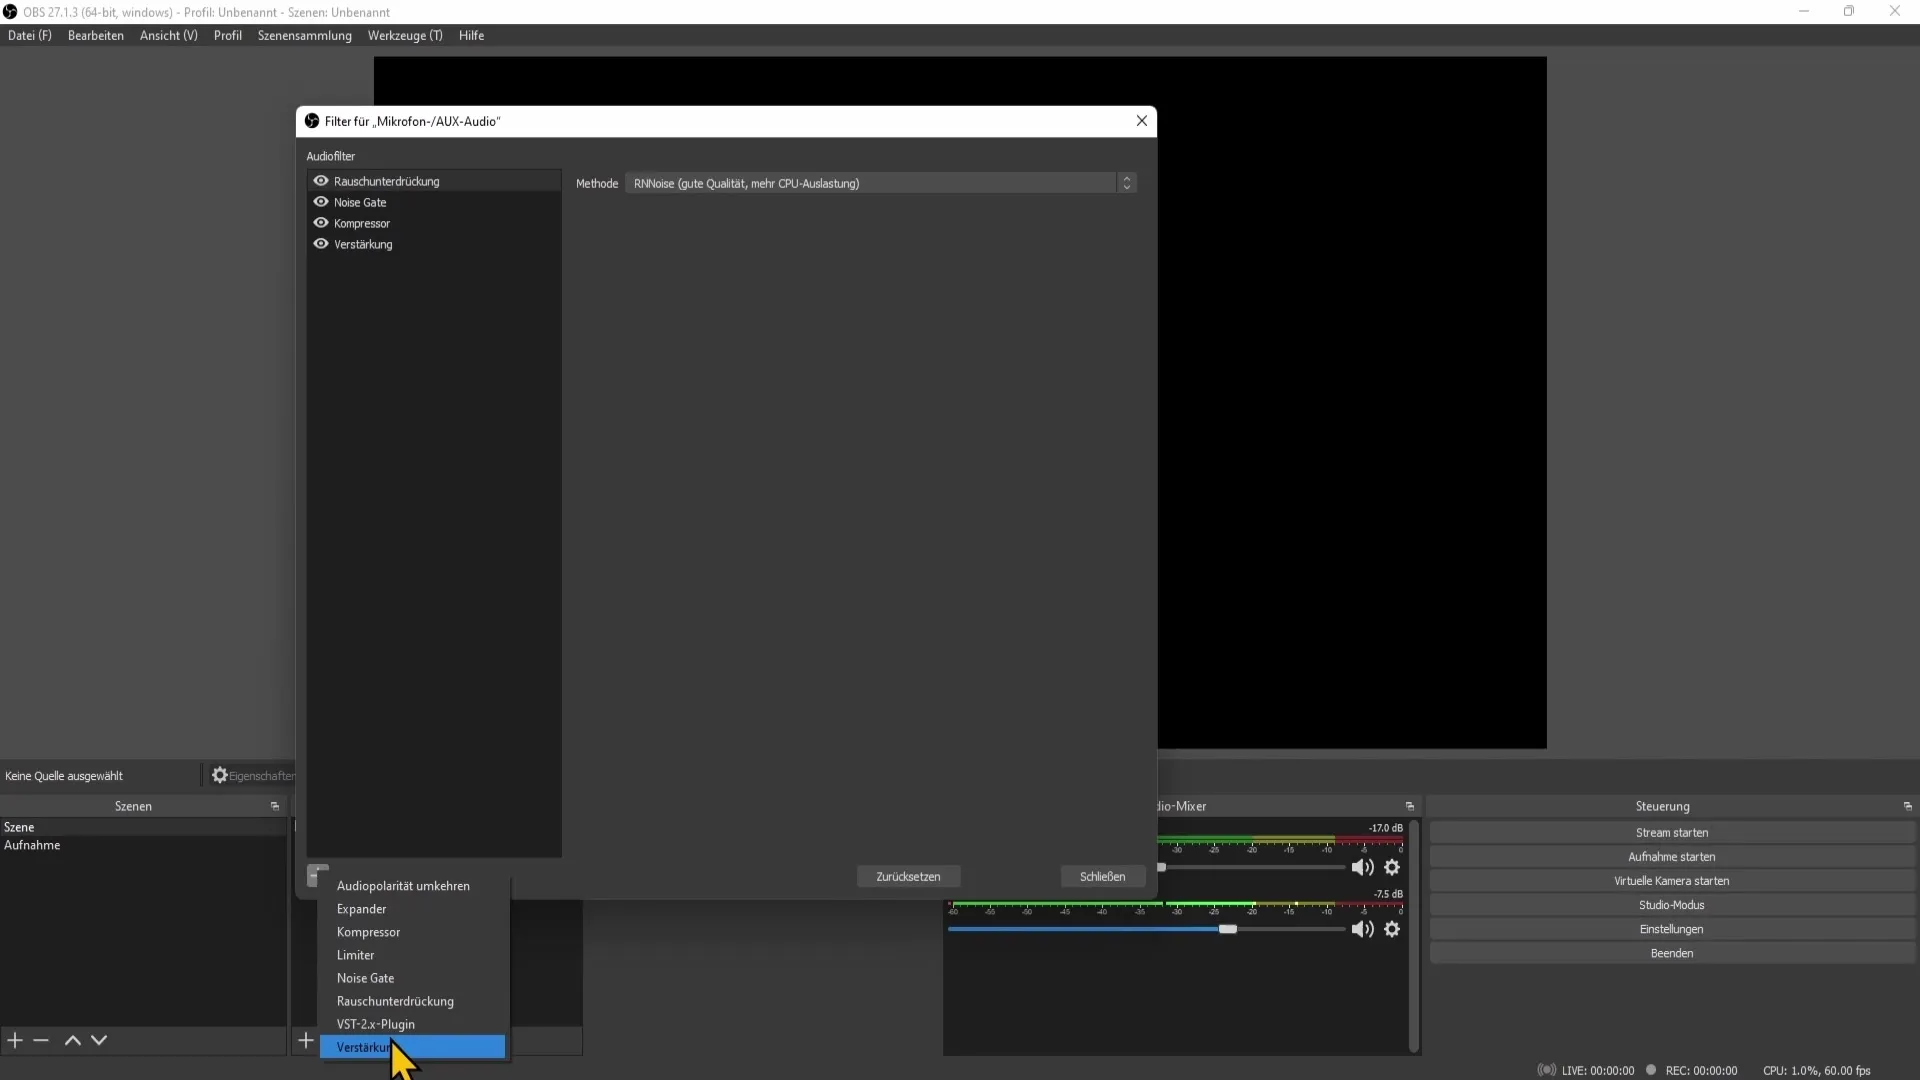
3. Add Gain Filter
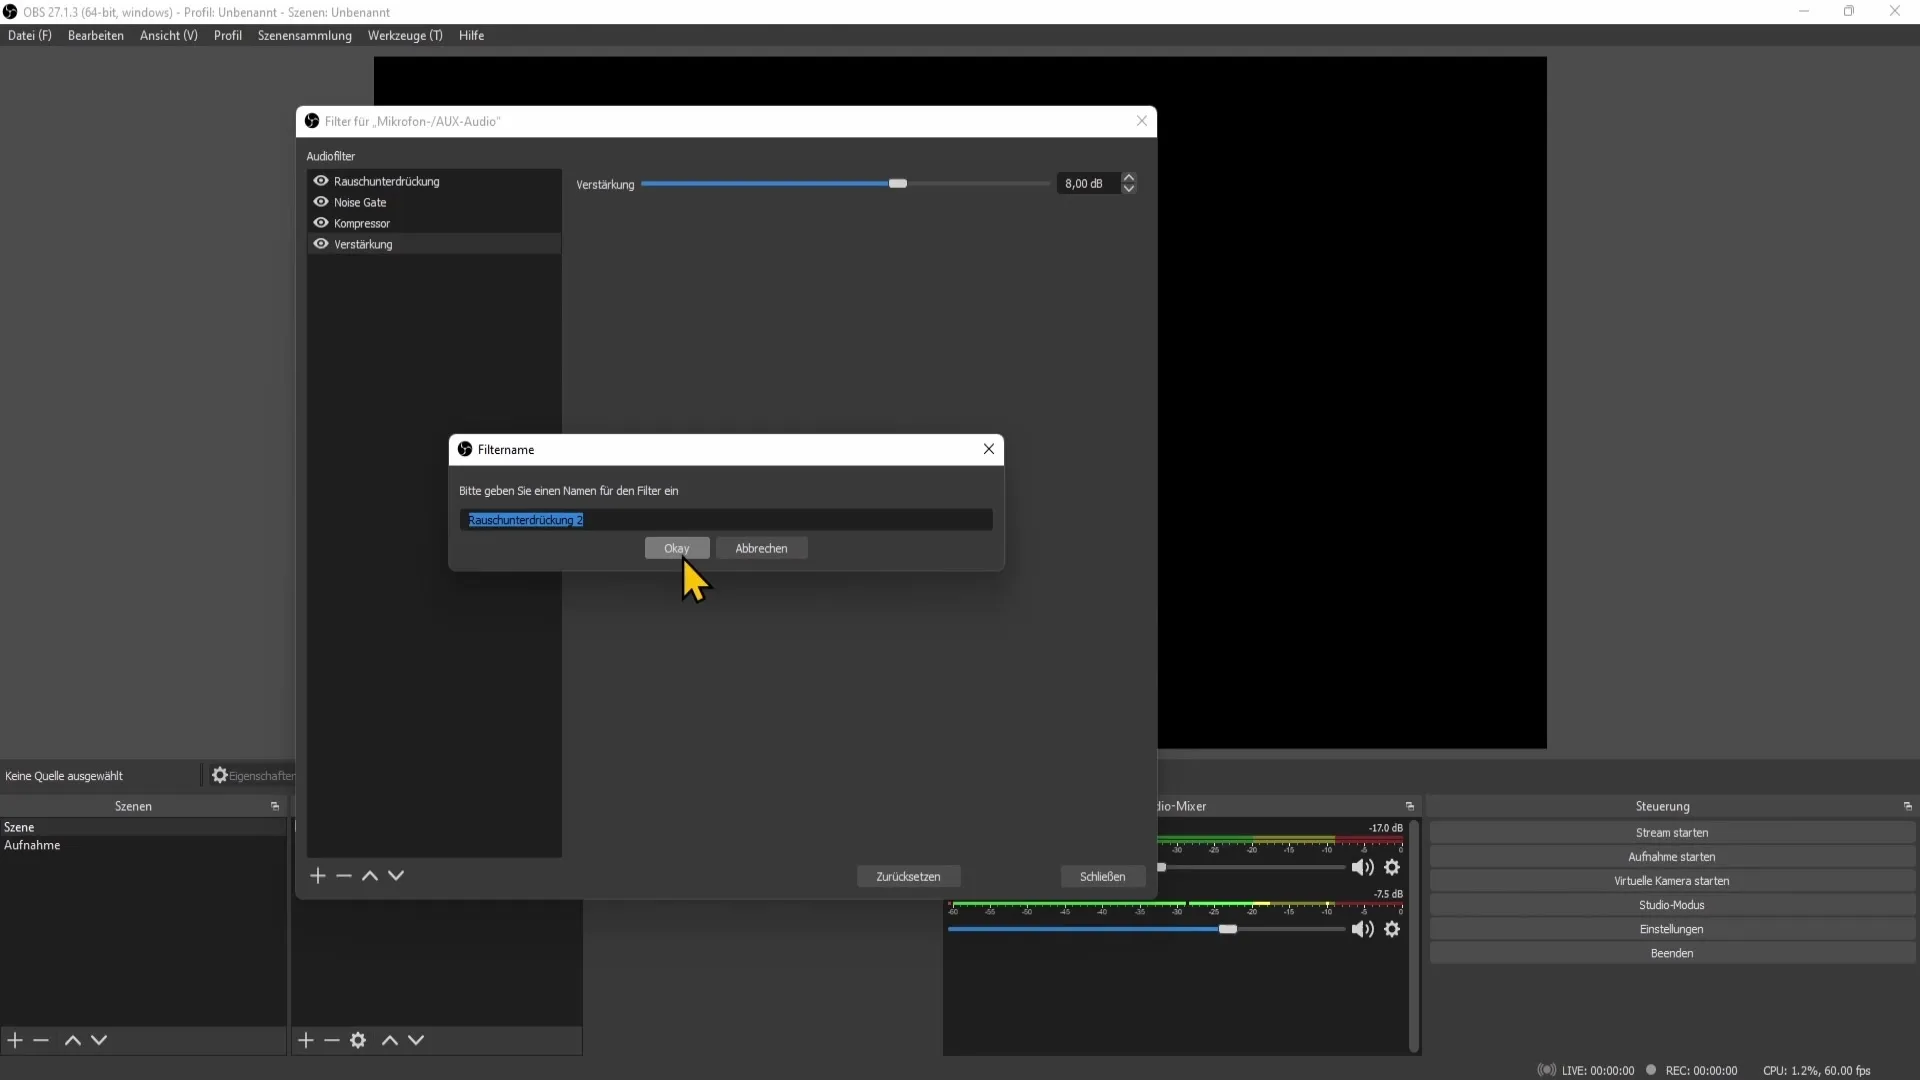
First, add the Gain filter. You can do this by clicking on the plus symbol and selecting the Gain filter. Give it an easily understandable name, for example, "Gain".

This filter allows you to further adjust the microphone volume. Make sure you can increase or decrease the volume as needed.
4. Activate Noise Suppression
The next step is Noise Suppression. This filter is crucial for minimizing unwanted background noise. Again, click on the plus symbol, select the Noise Suppression filter, and confirm it.

After adding the filter, you can choose a method that best suits your system. Make sure your computer can execute the selected method without any issues.
5. Adjust Noise Gate
Now comes the Noise Gate filter. Add it using the plus symbol as well. This filter determines when the microphone should be active.
You will now see two threshold values: the opening and closing threshold. Here, you only allow the audio level through when it is above the opening threshold and below the closing threshold. Experiment with these values to find the right balance between background noise and your voice level.
6. Add Compressor
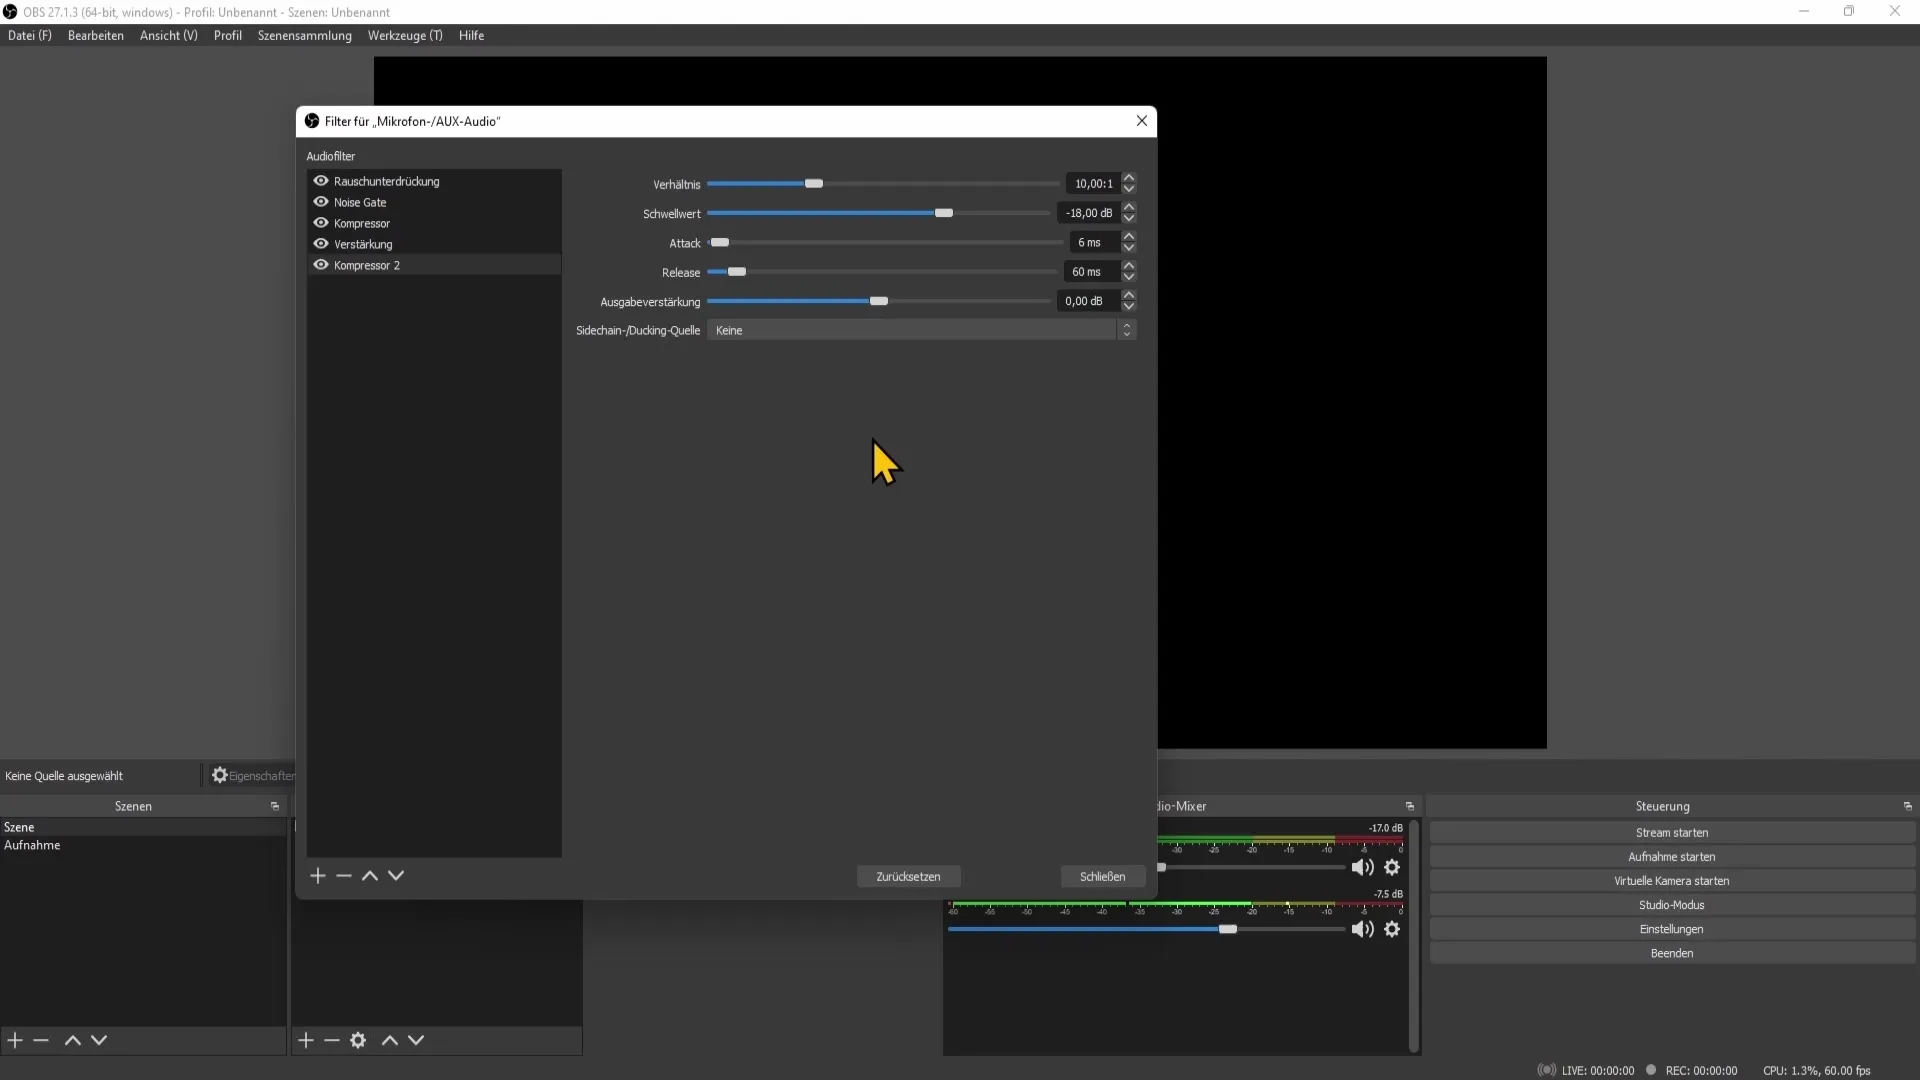
Lastly, we will add the Compressor. This filter helps reduce loud sounds and boost quiet sounds to achieve a balanced audio output. Click on the plus symbol again to add the Compressor.

Set the Compressor to operate at a threshold of -11 to -15 decibels. Experiment here with a ratio of 3:1 to 5:1. These input values will help significantly improve your audio quality.
7. Final Adjustments and Tests
After you have added all the filters, you should make some test recordings. Check if you sound choppy or if there are any unwanted background noises. Adjust the individual filters as needed until you are satisfied with the audio quality.
Make sure to try out different scenarios during your test recordings to ensure the consistent quality of the audio recordings.
Summary
By properly adjusting your microphone in OBS Studio, you can significantly improve the audio quality of your streams and recordings. A well-adjusted microphone provides a more enjoyable listening experience and makes you appear more professional. Invest the time to experiment with the different filters and settings - the result will be worth it.
Frequently Asked Questions
How do I find the right microphone level?Set the microphone level so that it is in the middle yellow range.
What are the most important filters for my microphone?The most important filters are Gain, Noise Reduction, Noise Gate, and Compressor.
How do I experiment with the microphone settings?Make test recordings and adjust the filter settings until you are satisfied with the audio quality.
When should I use the Noise Gate filter?The Noise Gate filter is useful for minimizing background noise when you are not speaking.
What is the best threshold for the Compressor?A threshold between -11 and -15 decibels is recommended.


