The use of a greenscreen has opened up a new dimension in the world of streaming and video production. With OBS Studio, you can quickly and easily remove or change your background to achieve professional results. This guide will show you how to remove a greenscreen in OBS Studio and give you some helpful tips for adjusting your video at the same time.
Key takeaways
- Removing the greenscreen is done using filters in OBS Studio.
- Choosing the right color type is crucial for optimal results.
- Additional settings like smoothness and opacity can refine the outcome.
- Inserting a new background is easy and quick.
Step-by-Step Guide
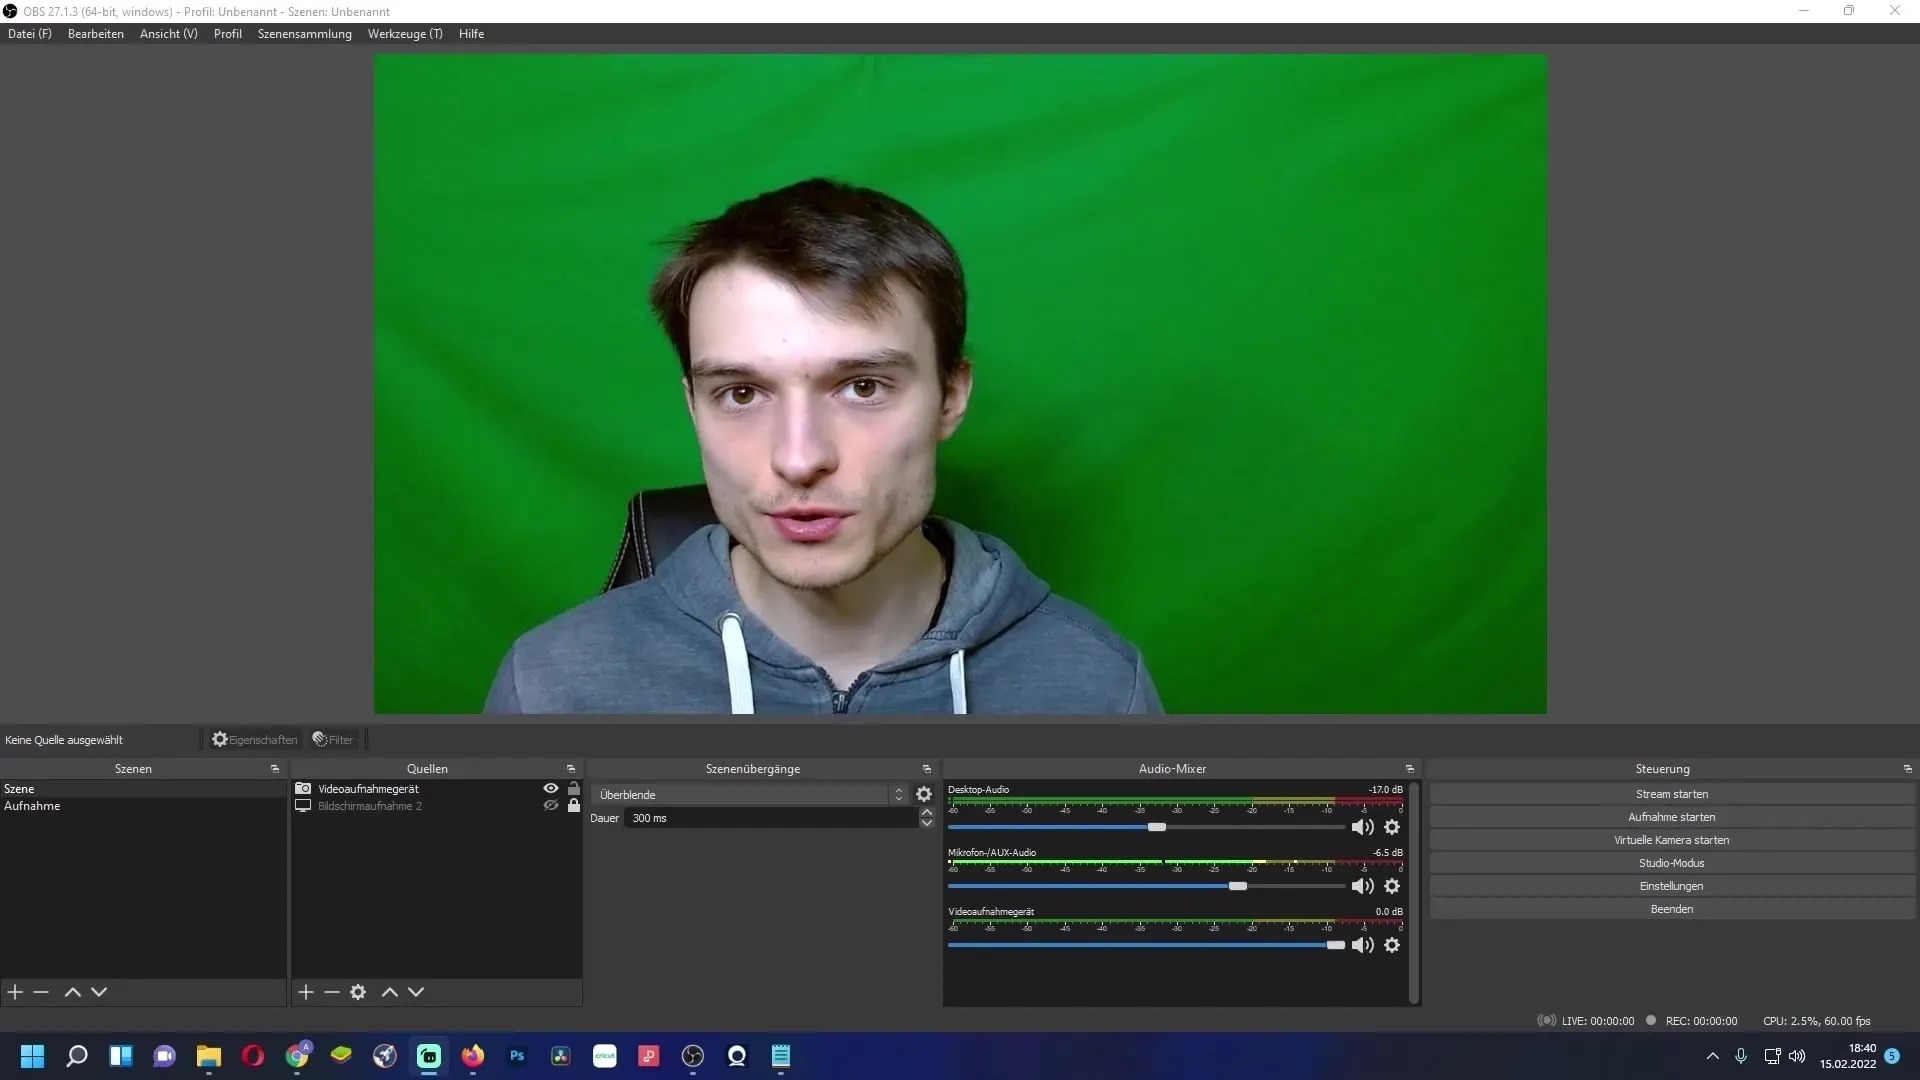
You should have OBS Studio open now. To remove your greenscreen, follow these steps.
First Step: Open the Filters
First, navigate to your sources. Right-click on your webcam source box. A menu will appear where you can select the "Filters" option.
Second Step: Add a Chroma Key
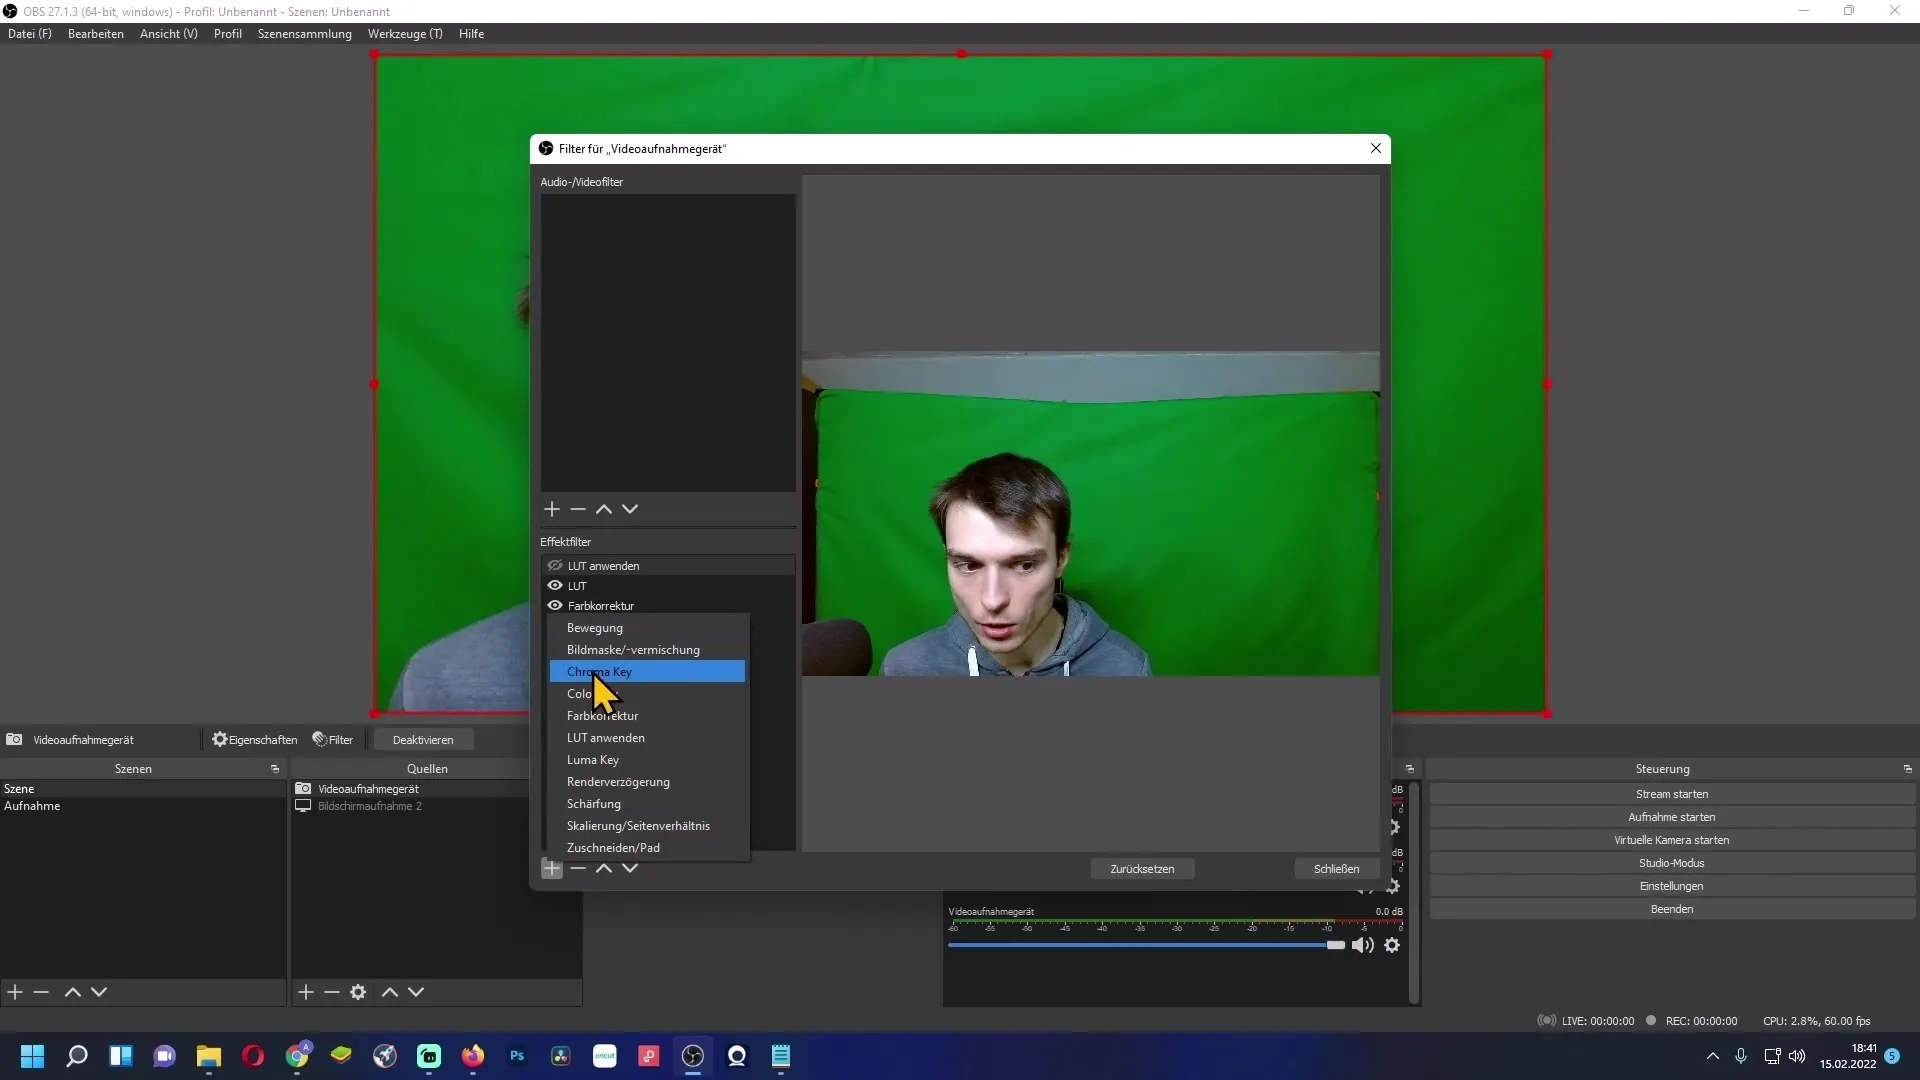
Once you are in the filters, click on the plus sign at the bottom left. Here, select "Chroma Key." You can also give it a custom name like "Greenscreen." Confirm with "OK."
Third Step: Select the Key Color
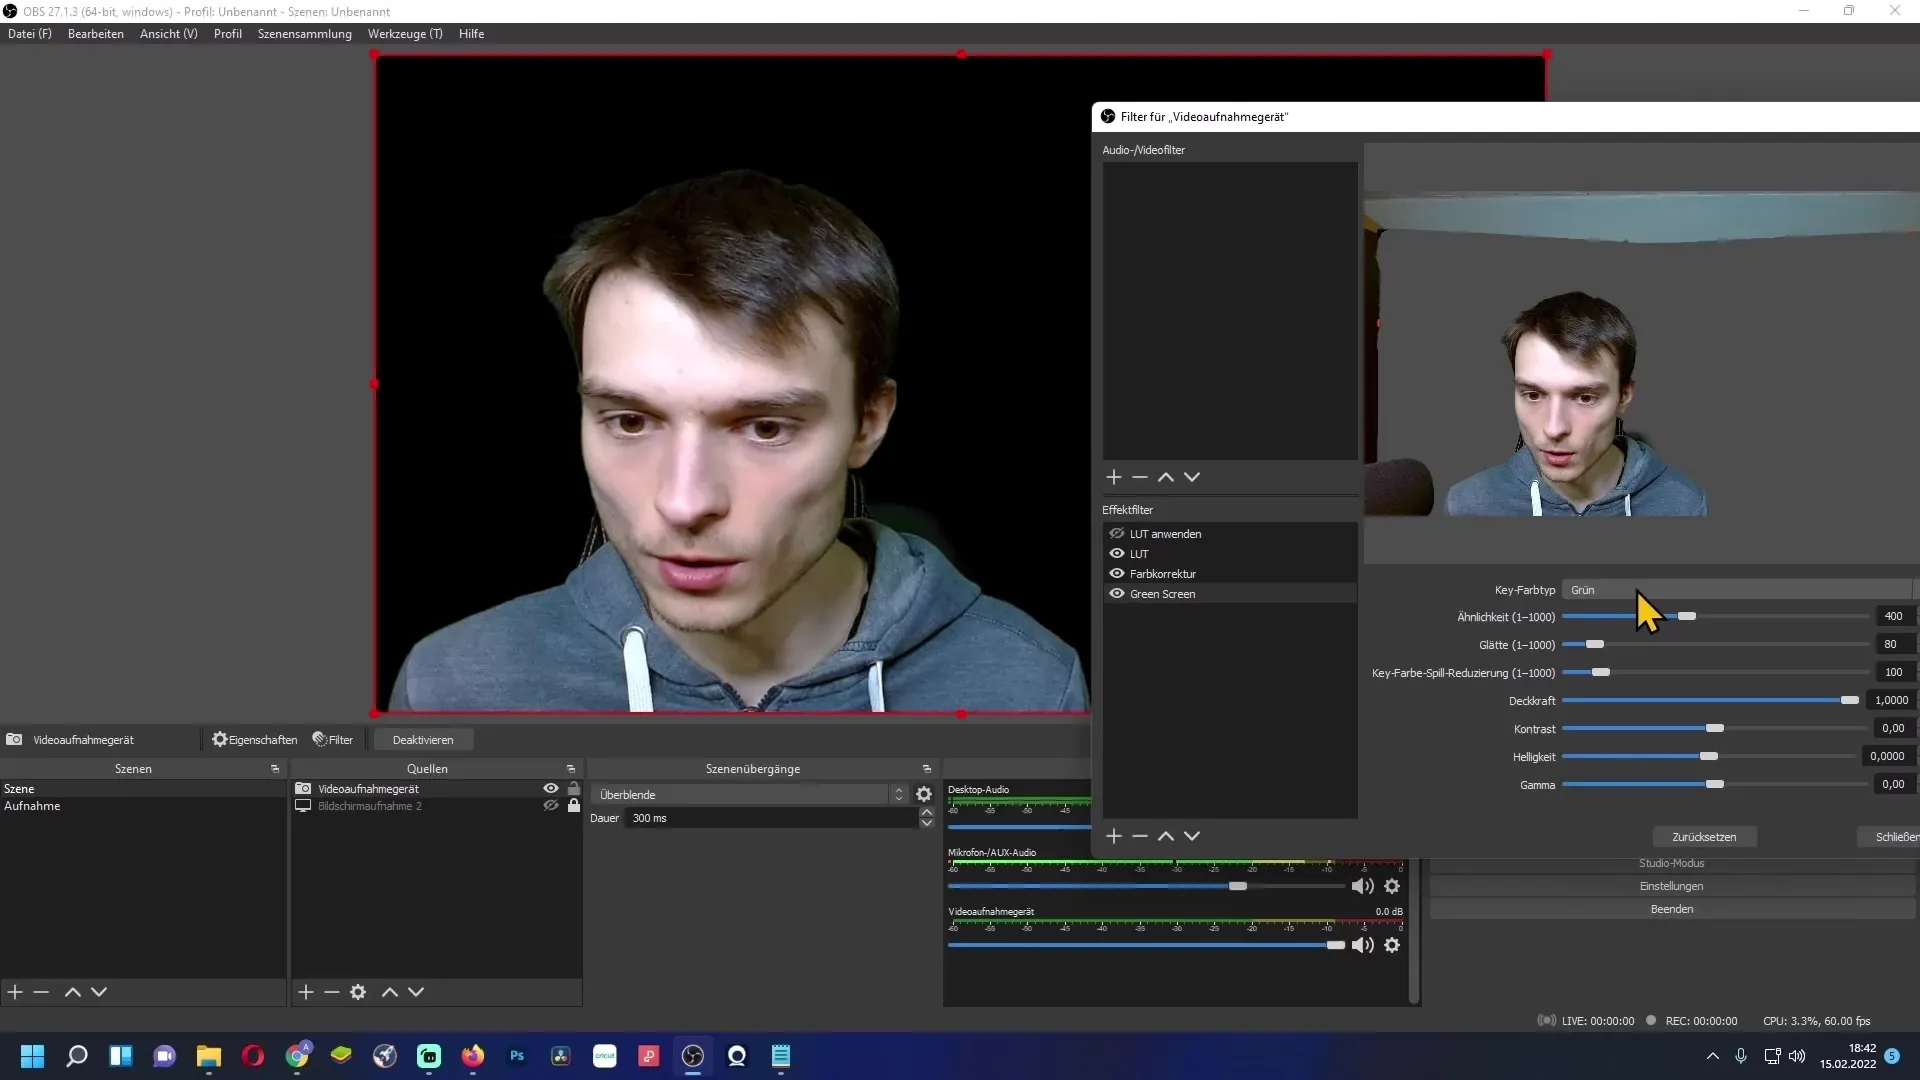
In the next window, you can select the key color. By default, the green color will be offered to you. You also have the option to choose other colors if, for example, you are using a blue background. However, when using a real greenscreen, it is advisable to select the green color.
Fourth Step: Fine-tune the Settings
If your greenscreen is not completely removed, you can increase the "Similarity." Move this value up until the green background is mostly gone. Be careful not to set the value too high, as you might become invisible in the recording.
Fifth Step: Using Smoothness
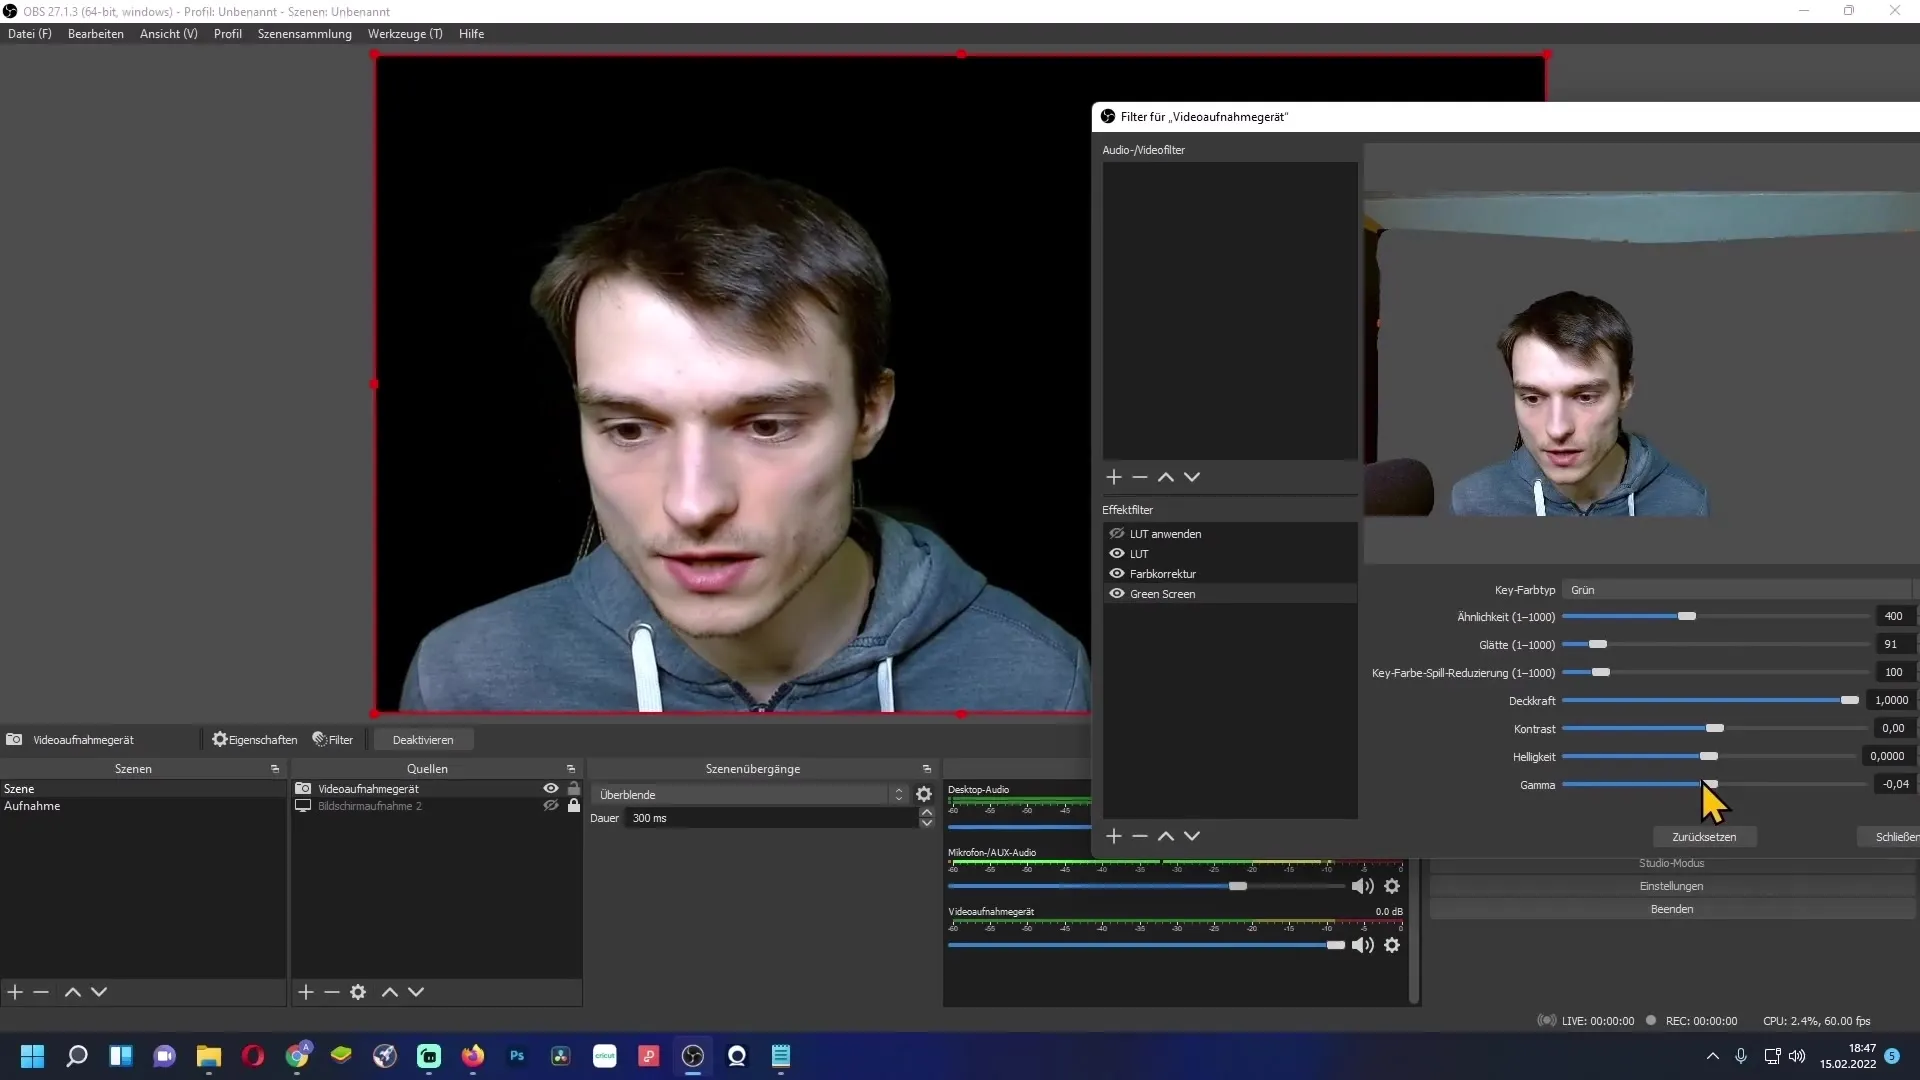
Under the "Smoothness" option, you can adjust the edges of your image. This helps to soften the edges and achieve a more flawless look. A value around 90 could be useful here.
Sixth Step: Consider Lighting
If some areas of your image are not well filtered out, it could be due to the lighting of your greenscreen. Make sure the background is well lit to achieve optimal results.
Seventh Step: Additional Settings
You also have the option to adjust the opacity, contrast, brightness, and gamma values. These settings help to customize the image to your preferences and lighting conditions. Experiment until you are satisfied with the result.
Eighth Step: Close the Window
Once you are satisfied with the settings, you can close the window. You have successfully removed the greenscreen.
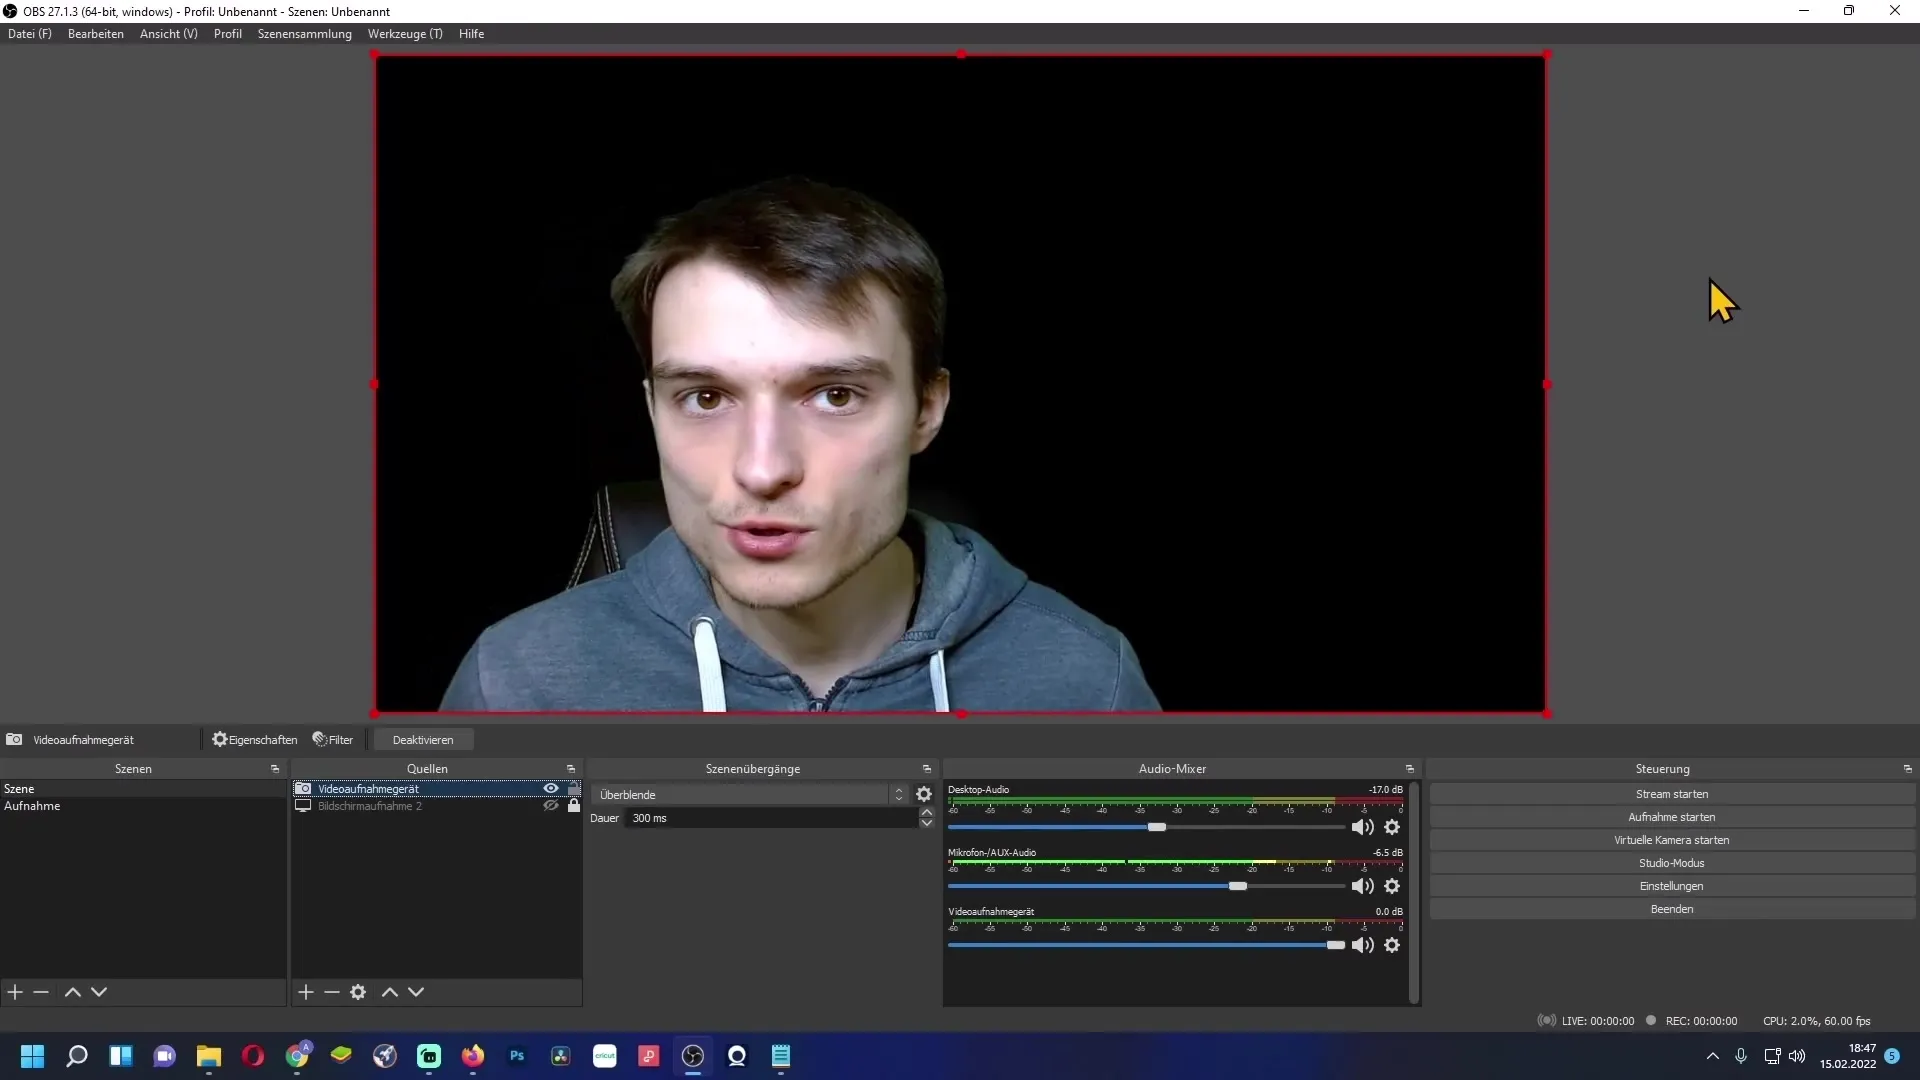
Ninth Step: Insert Background Image
Now it's time to add a new background. Go back to your sources and click on the plus sign. Select "Image" to add a new background image.
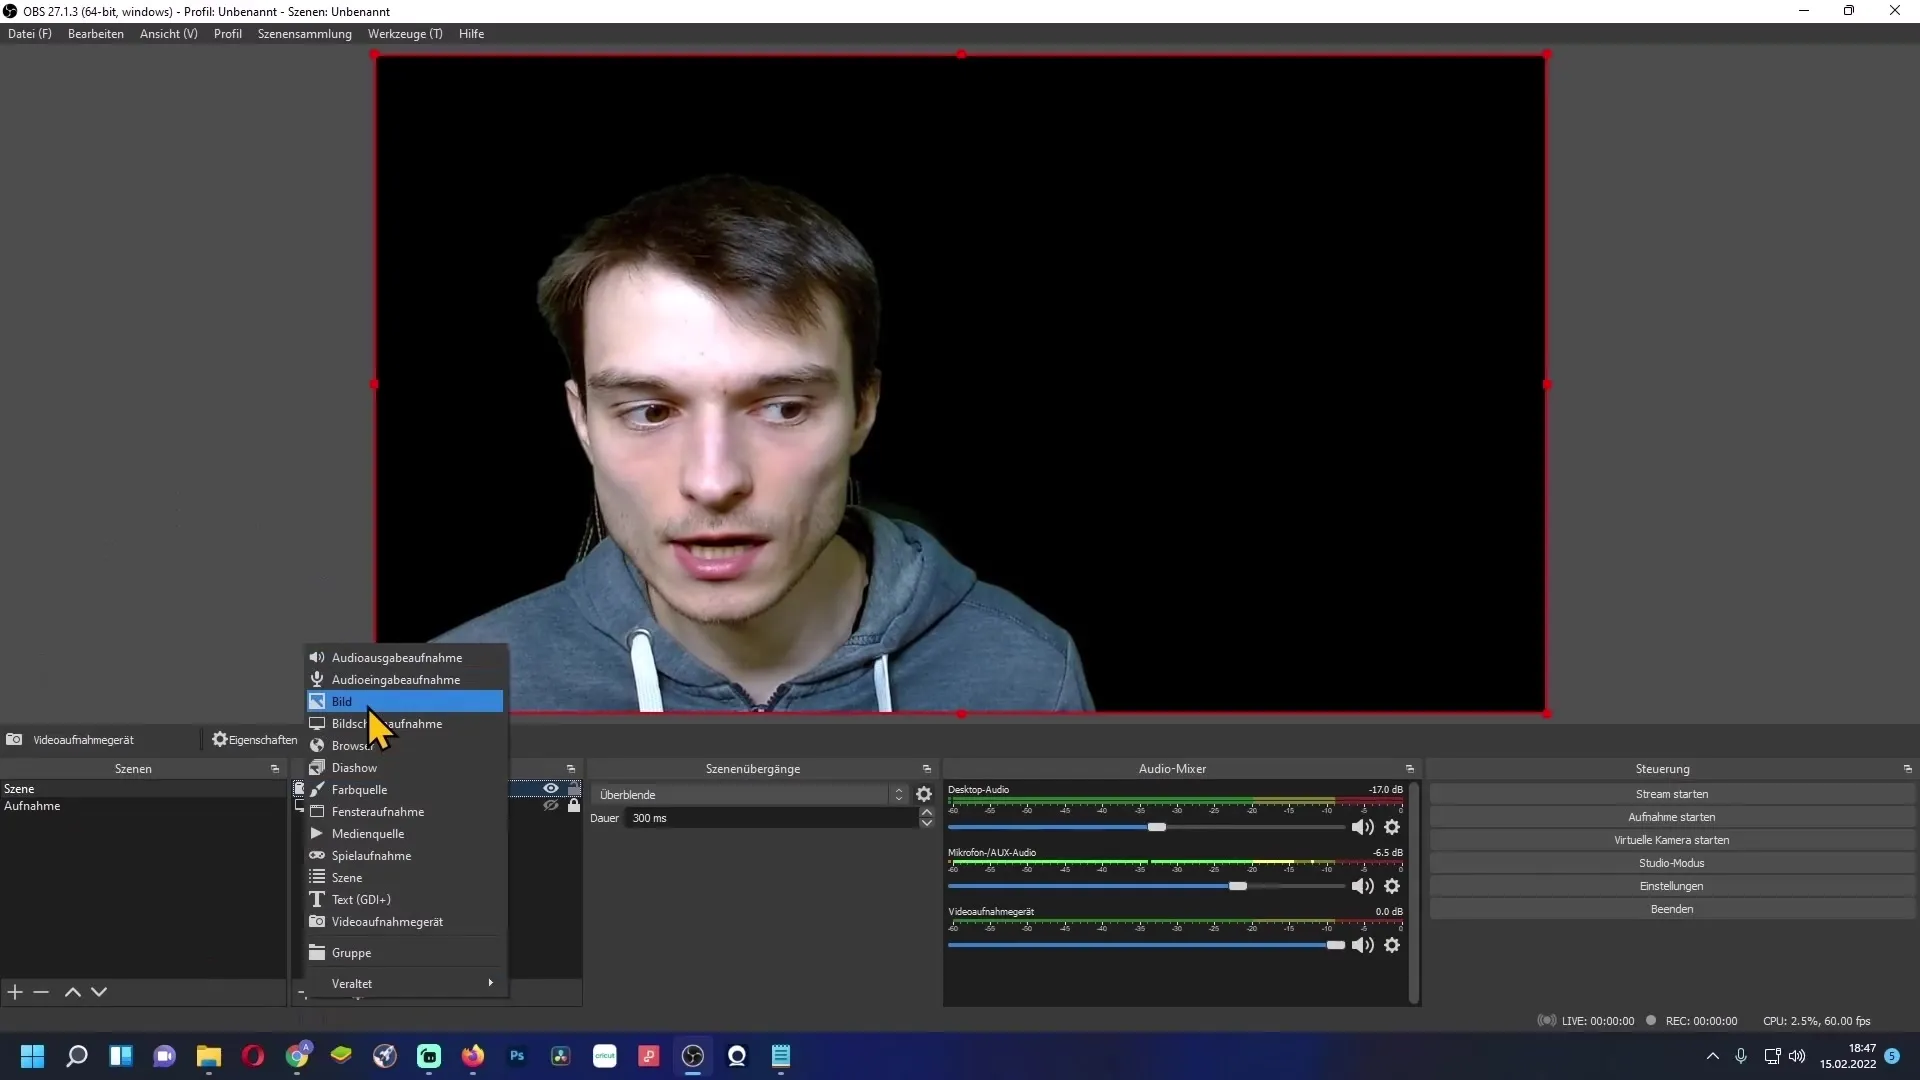
Tenth Step: Choose Image
You can give the image a name or simply keep it as "Image." Click on "Browse" to select the desired image file and confirm with "OK." Make sure to check the box for "Unload image" if you don't want the image to be displayed.
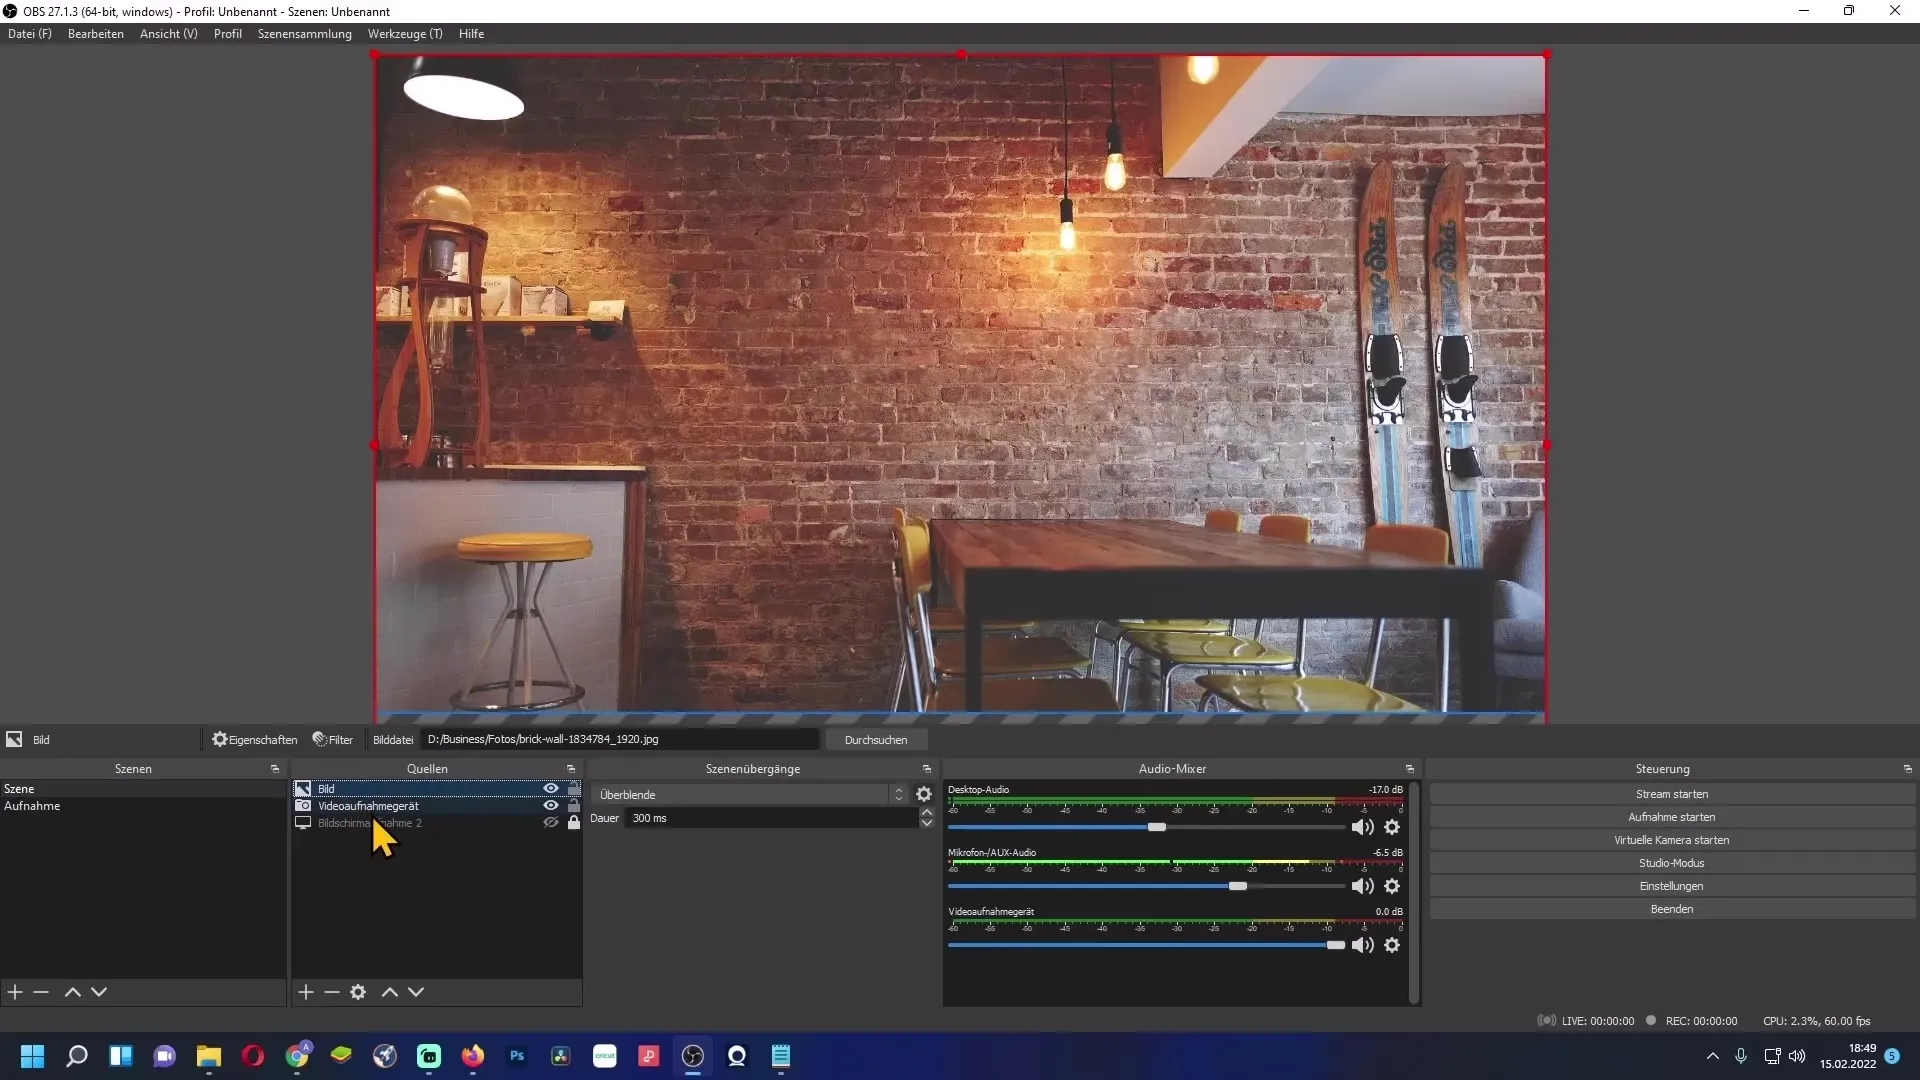
Eleventh Step: Positioning the Image
If you have your background image, you may need to arrange the image below your webcam source to be visible. Simply drag the image in the sources list under your video capture device.
Summary
With this step-by-step guide, you have learned how to successfully remove a greenscreen in OBS Studio and replace it with a new background. Adjusting the filter settings allows you to achieve a professional look and optimize your video content.
Frequently Asked Questions
How do I choose the color for the chromakey?Choose the color that matches your background. Typically, it is green by default.
What should I do if the greenscreen is not completely removed?Increase the similarity in the filter, but do not overdo it to avoid losing your image.
Could my lighting affect the result?Yes, poor lighting can result in the greenscreen not being filtered out optimally.
How can I add a new background?Add a new image in the sources and position it below your webcam source.
What is the optimal smoothness setting?A value of around 90 is often ideal for rounding off sharp edges.


