To set up your webcam optimally in OBS Studio, some basic steps and settings are required. This guide will show you how to connect your webcam and adjust the best possible image quality. Whether for live streams or recordings, with the right configuration, your webcam becomes a powerful tool.
Main Insights
- Connect your webcam to the PC and select it in OBS Studio.
- Set the resolution and frame rate correctly for the webcam.
- Optimize brightness, contrast, saturation, and other video settings.
- Save your settings for future use.
Step-by-Step Guide
Before we begin the setup, make sure your webcam is connected to the PC. Once connected, you can start directly in OBS Studio.
Adding Webcam in OBS
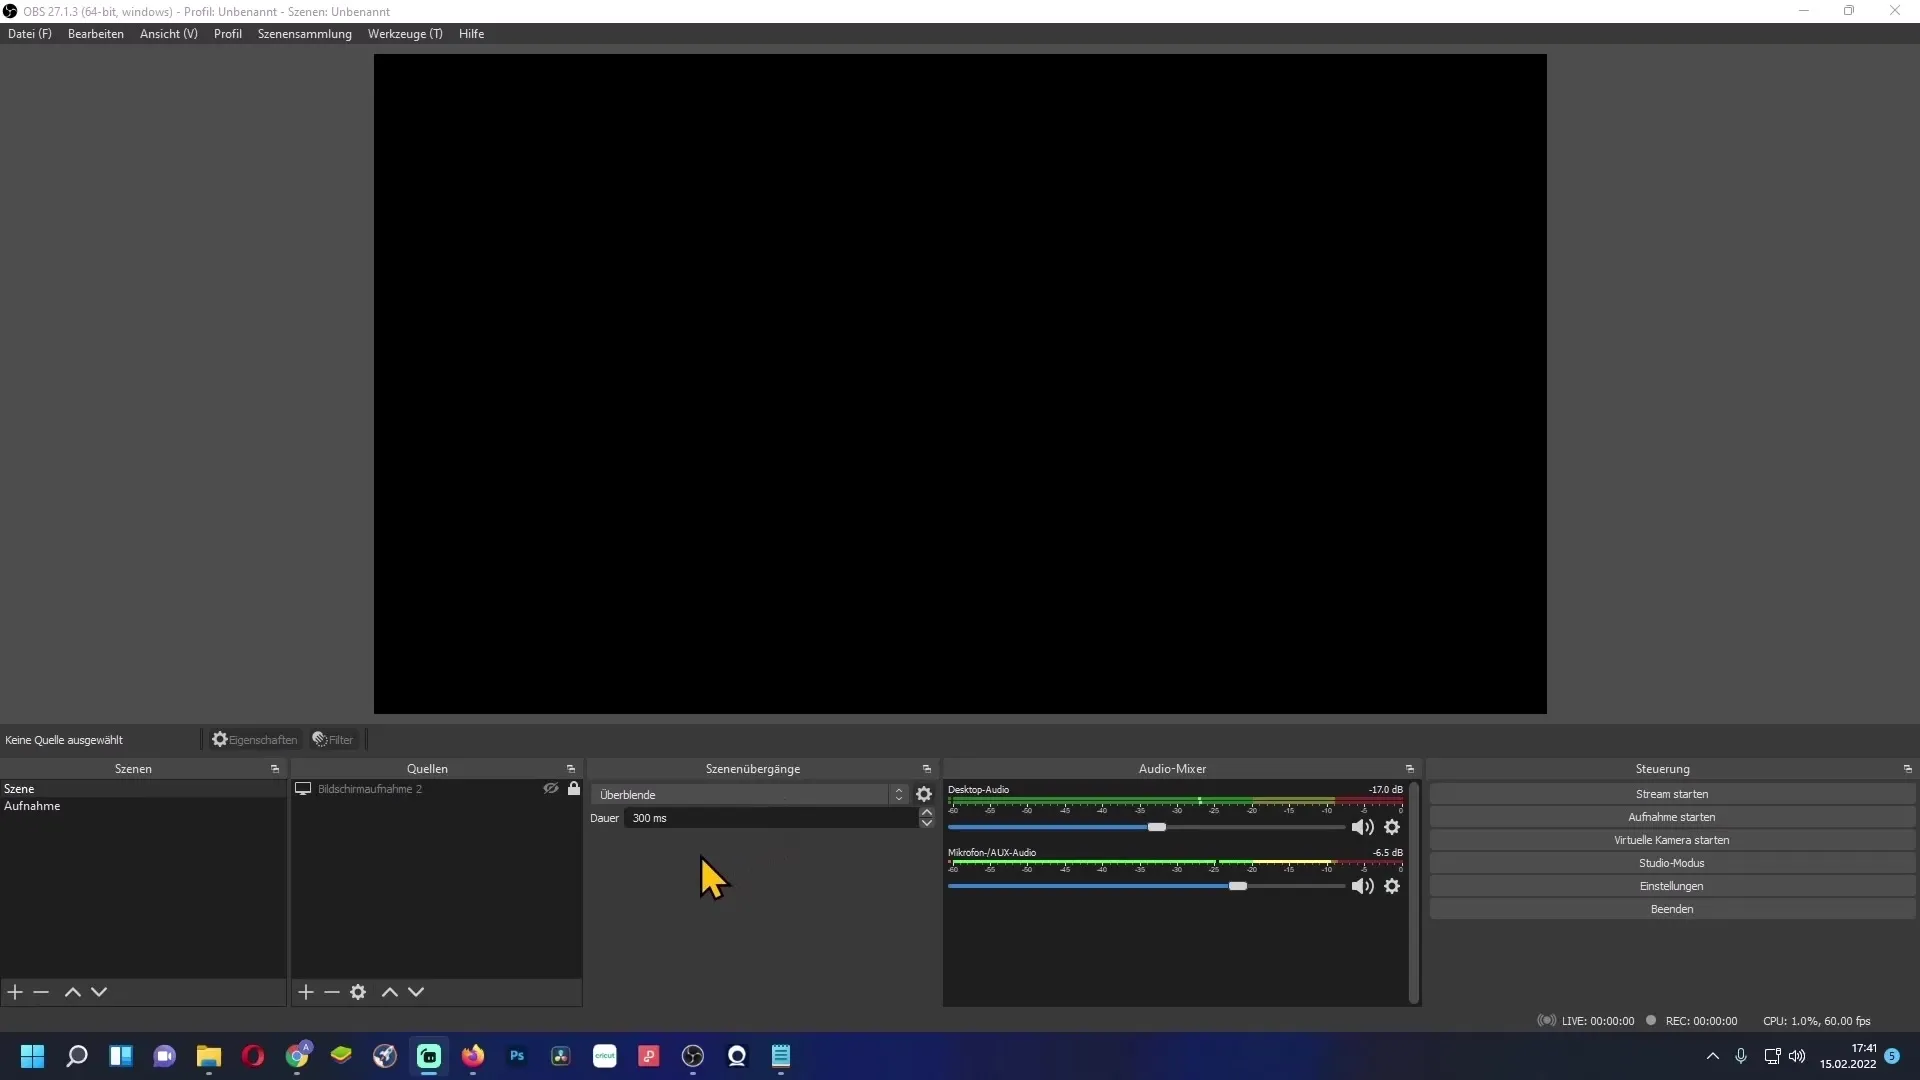
First, open OBS Studio. In the main interface, select a scene to which you want to add the webcam. Click the plus symbol at the bottom of the Sources section to add a new source.
Then select "Video Capture Device" from the list of available sources.
Give the webcam a name or leave it as the default name "Video Capture Device." Click "OK" to proceed.
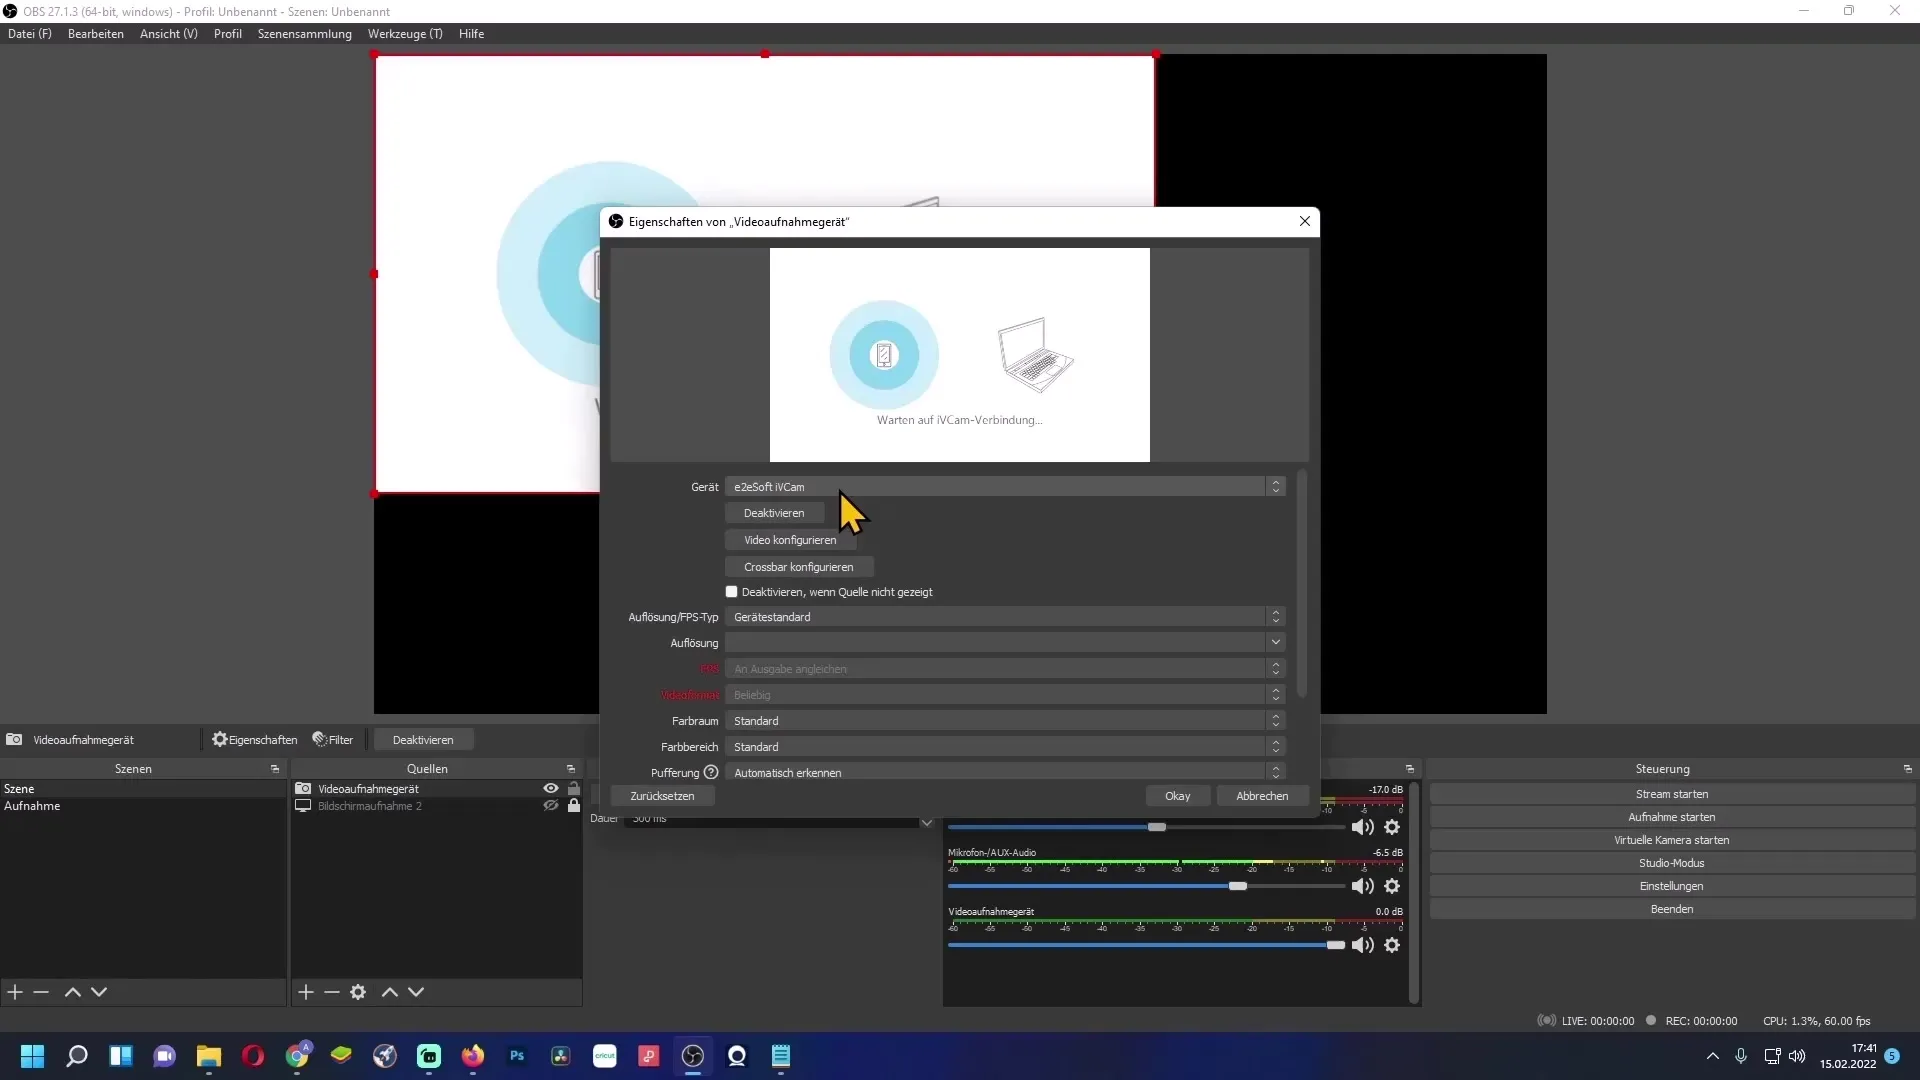
Now you have the option to select your webcam device. Look for your webcam in the dropdown list and select it.
You should now see in the preview how your webcam image is being captured in OBS. To optimize the image, we need to make some settings.
Adjusting Resolution and FPS
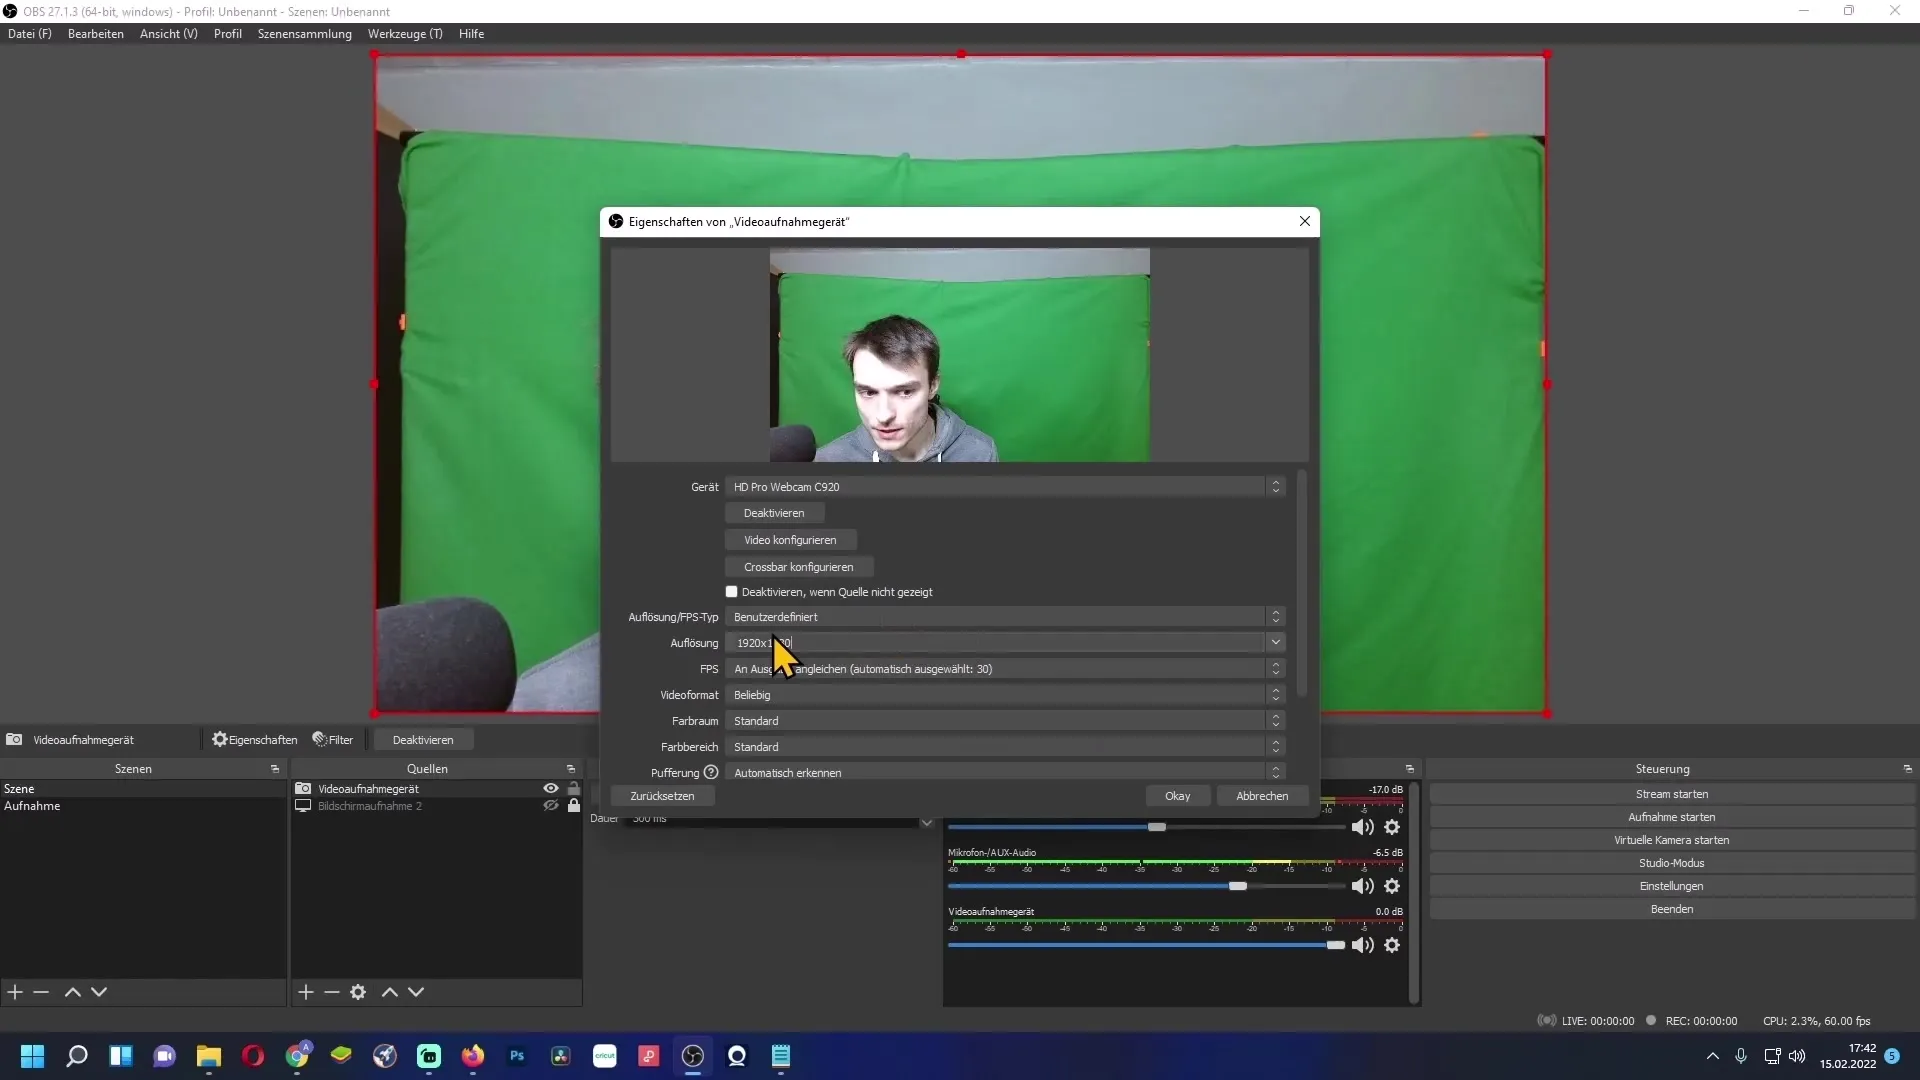
In the webcam device settings, under "Resolution and FPS Type," you can select the "Custom" option. This allows you to set the best values for your webcam.
Set the resolution to 1080p as most modern webcams support this.
For the FPS (frames per second), choose the maximum frame rate of your webcam. For many webcams, this is 30 FPS.
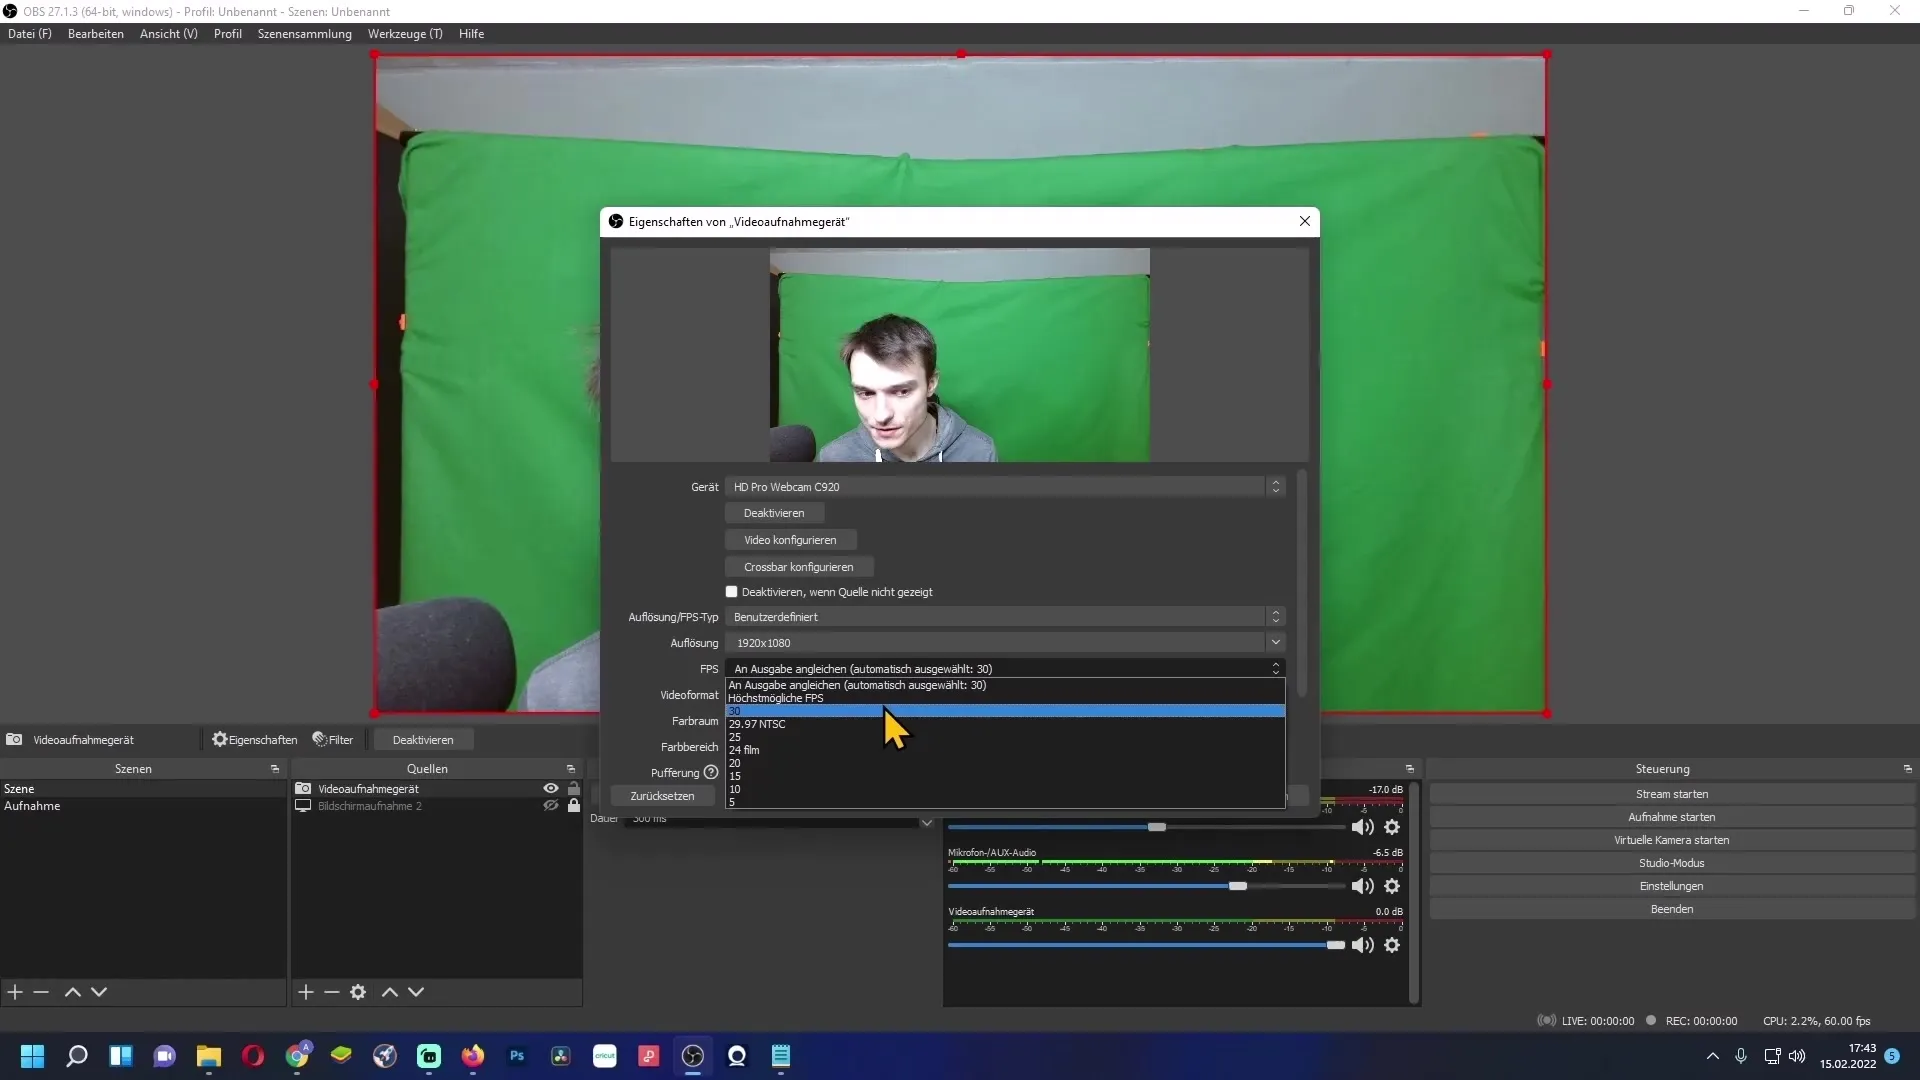
It may be helpful to check the technical specifications on the packaging of your webcam to confirm the exact values.
Video Format and Color Range
Next, you will set the video format. It is advisable to choose MJPEG. For color space, select "709" to ensure you are utilizing a wide color range.
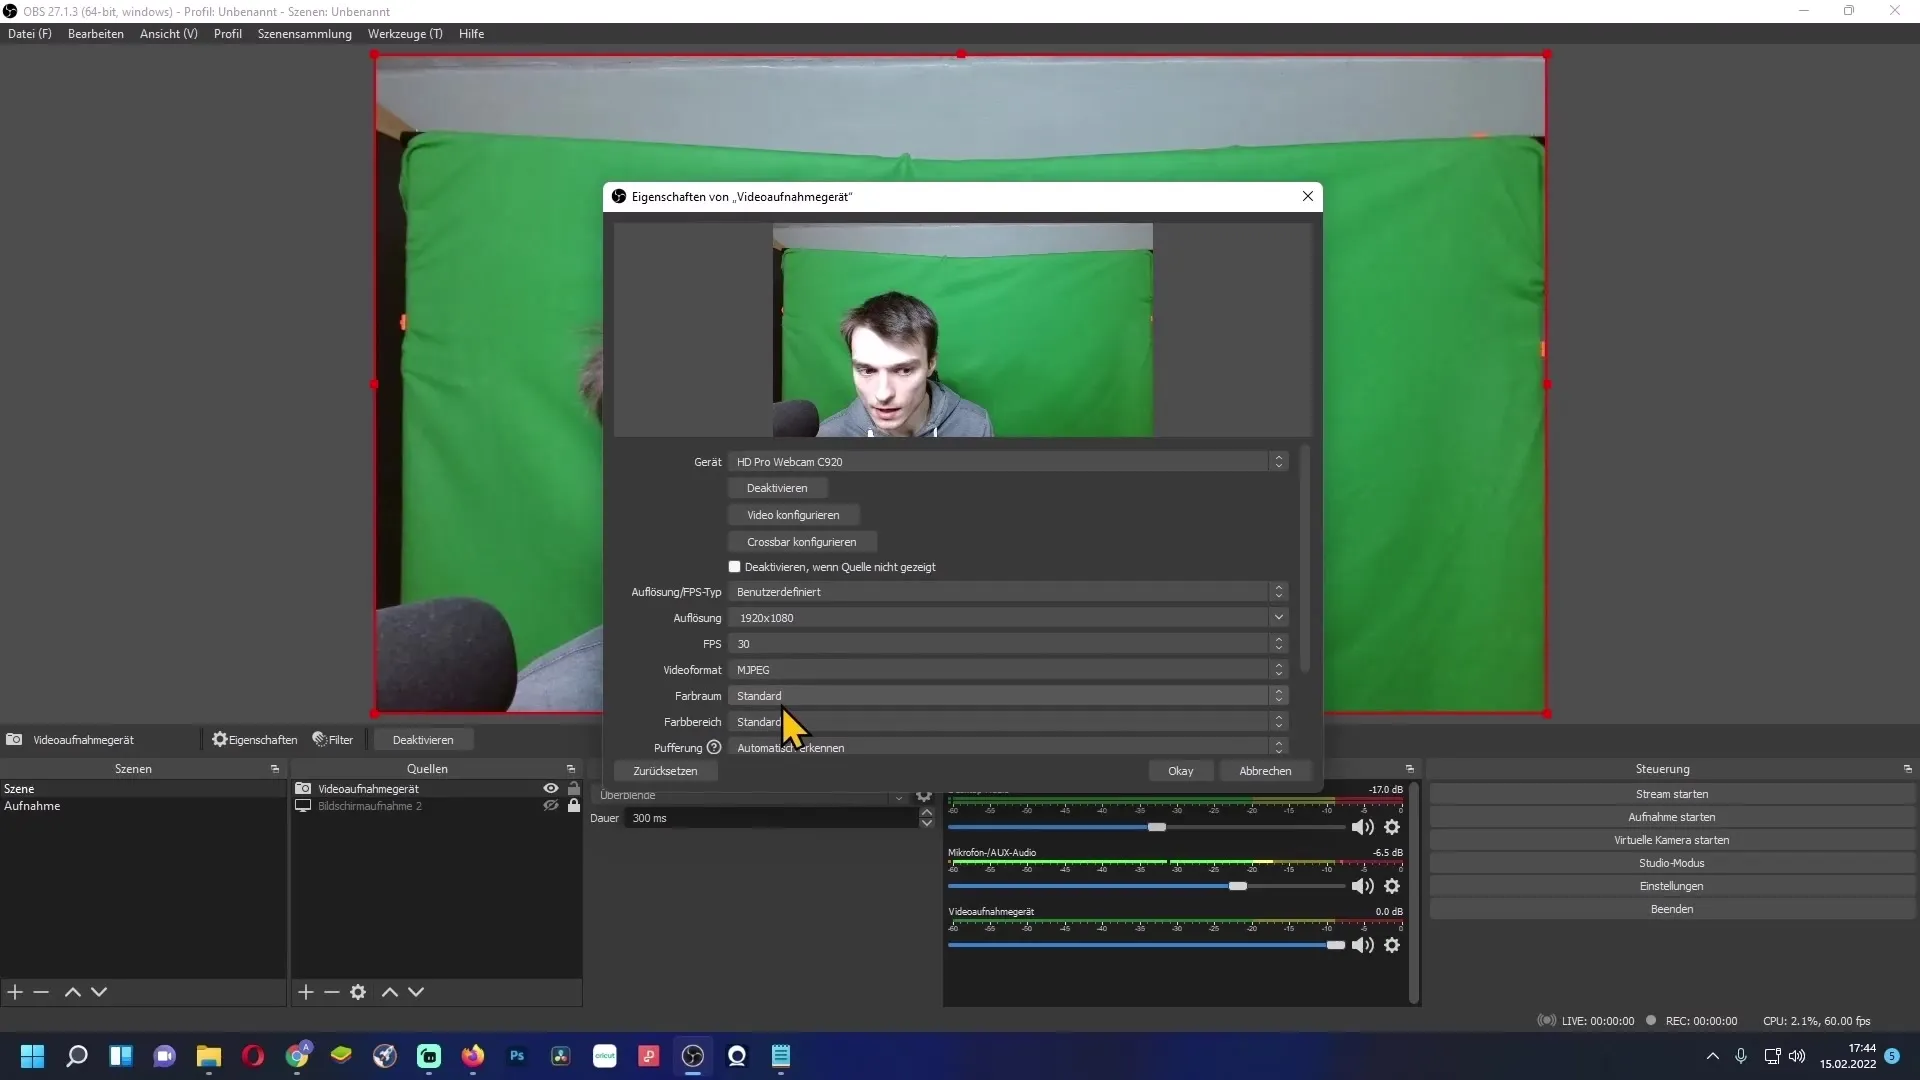
For color range, the setting should be "Full" to maximize the full range of colors.
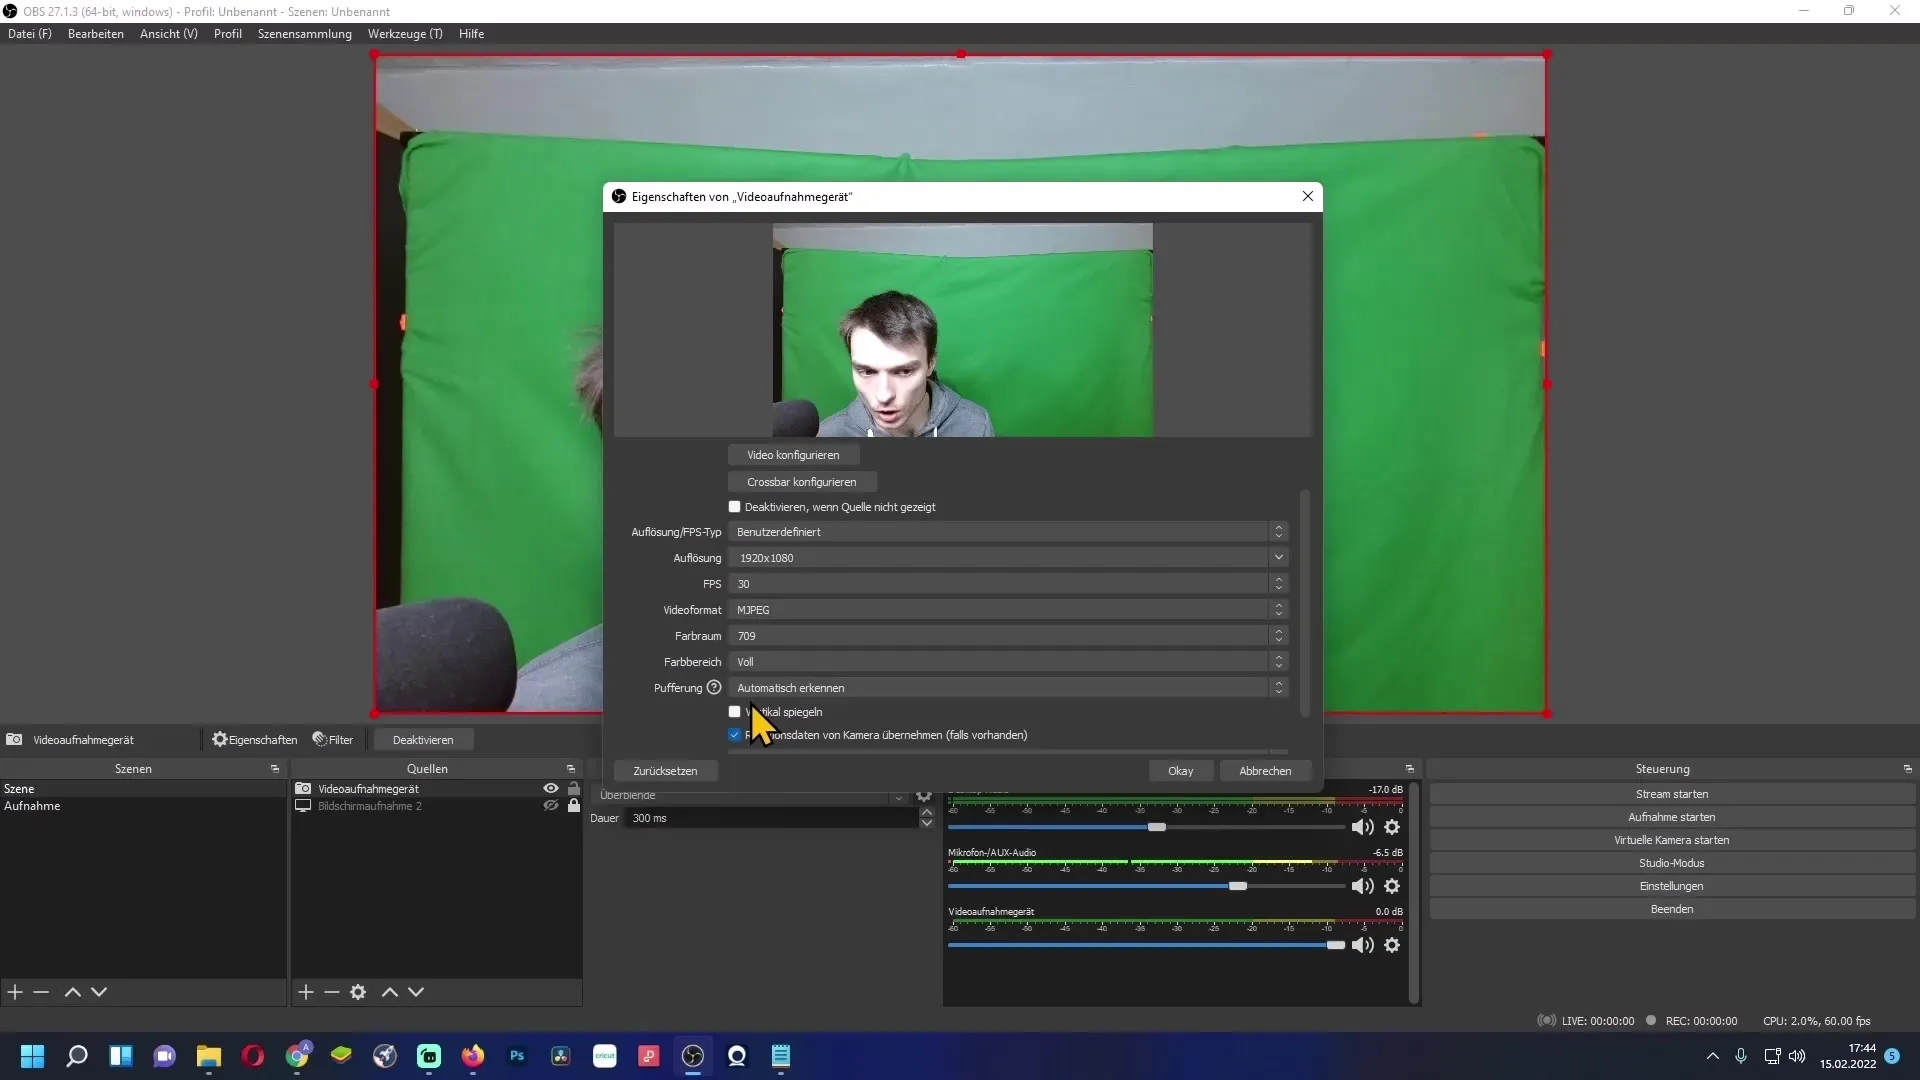
Image Configuration
Click on "Configure Video" to further optimize the image quality. A separate window may open at this point, which can be found in the taskbar if needed.
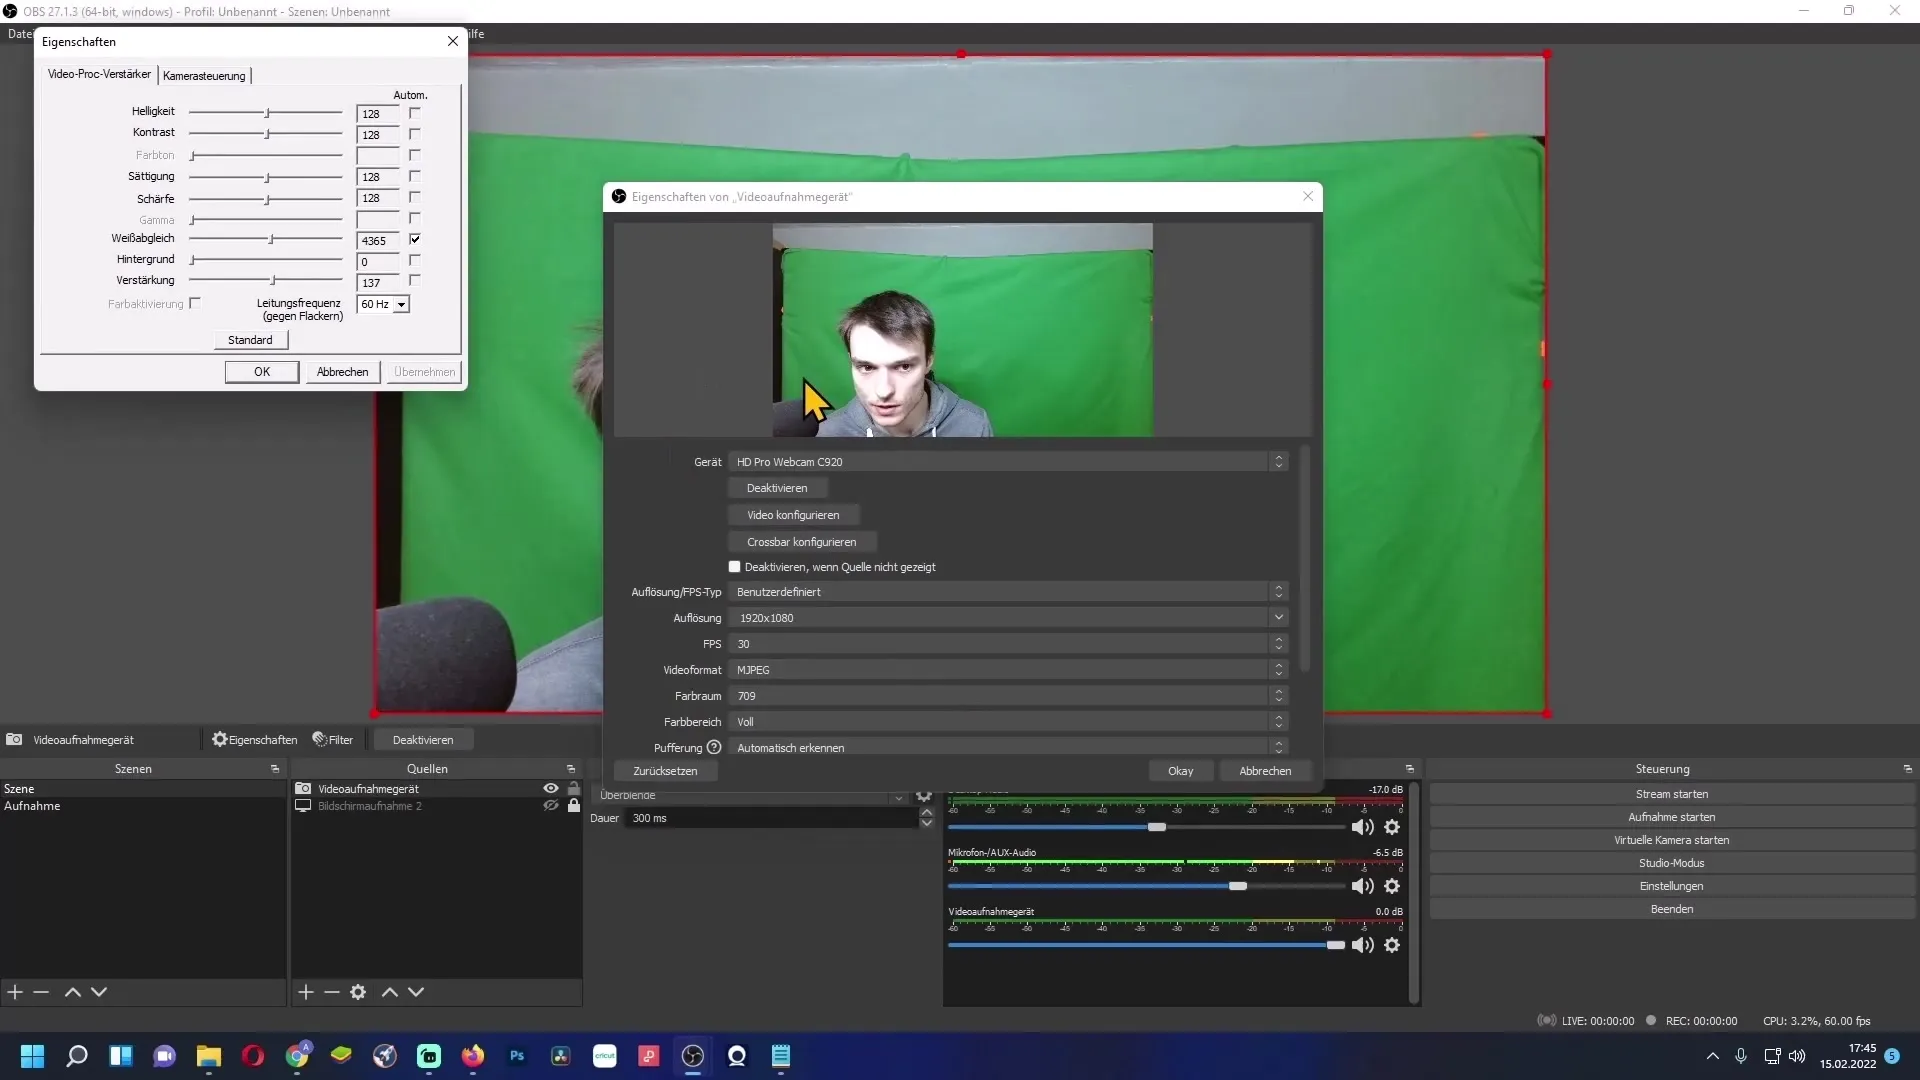
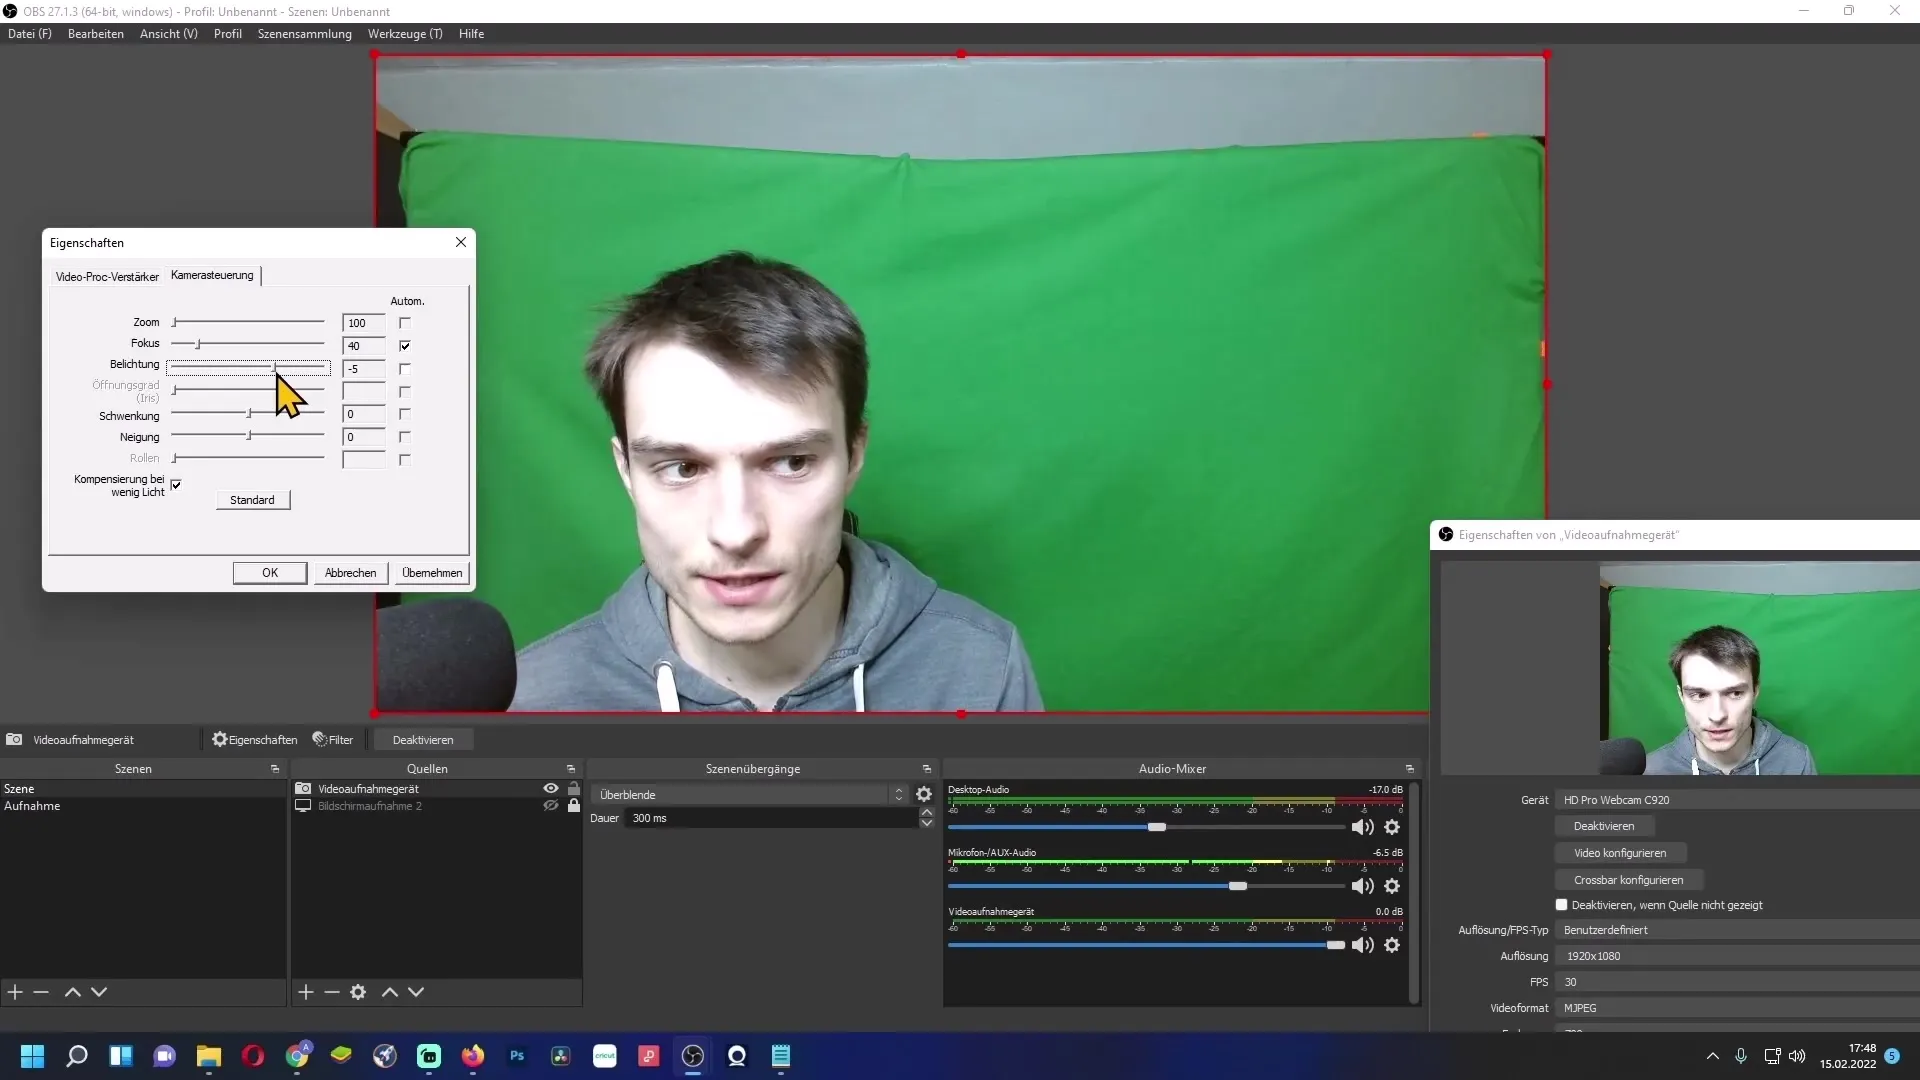
Make the most important adjustments at this point. Uncheck most automatic adjustments, except for focus. Leave automatic focus enabled to ensure you are always in focus on the screen.
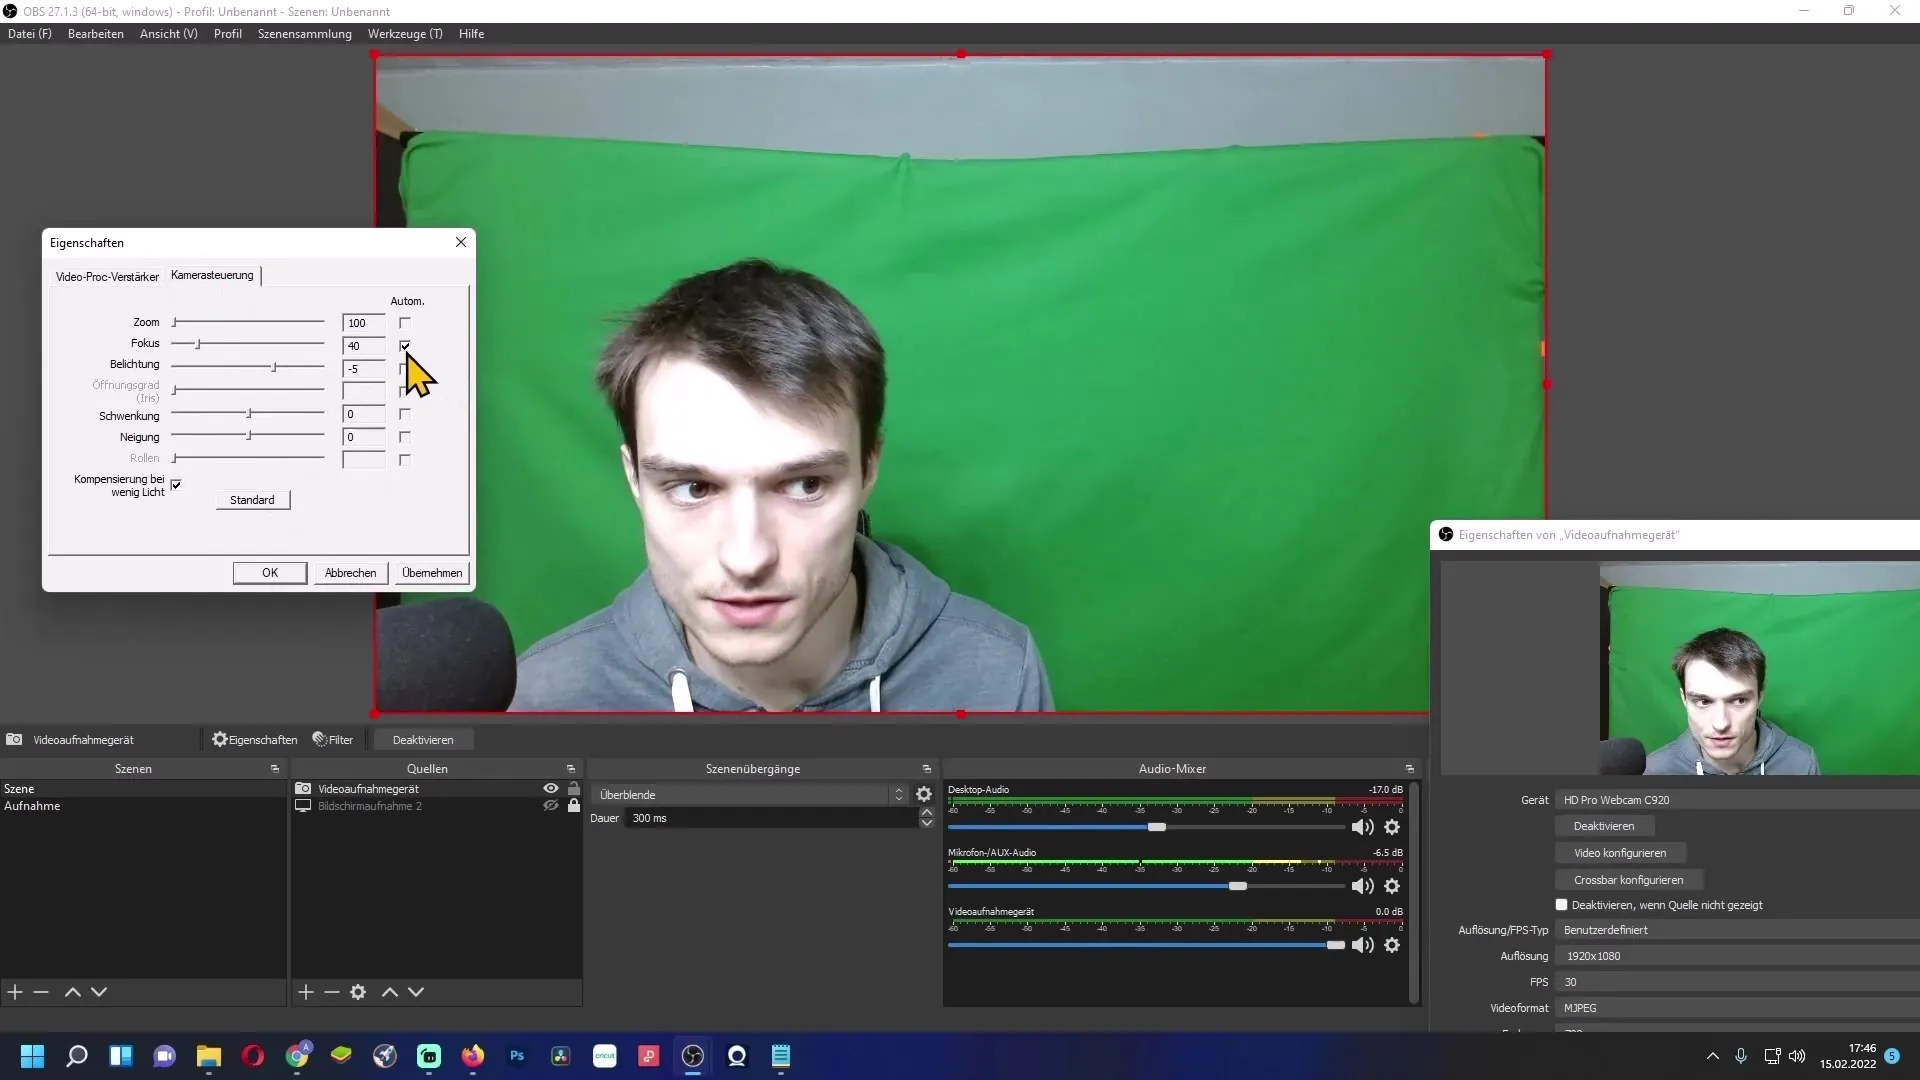
Exposure and Lighting Conditions
Adjust the exposure according to your lighting conditions. Start with -5 and adjust the value as needed to ensure that the image is neither too dark nor overexposed.
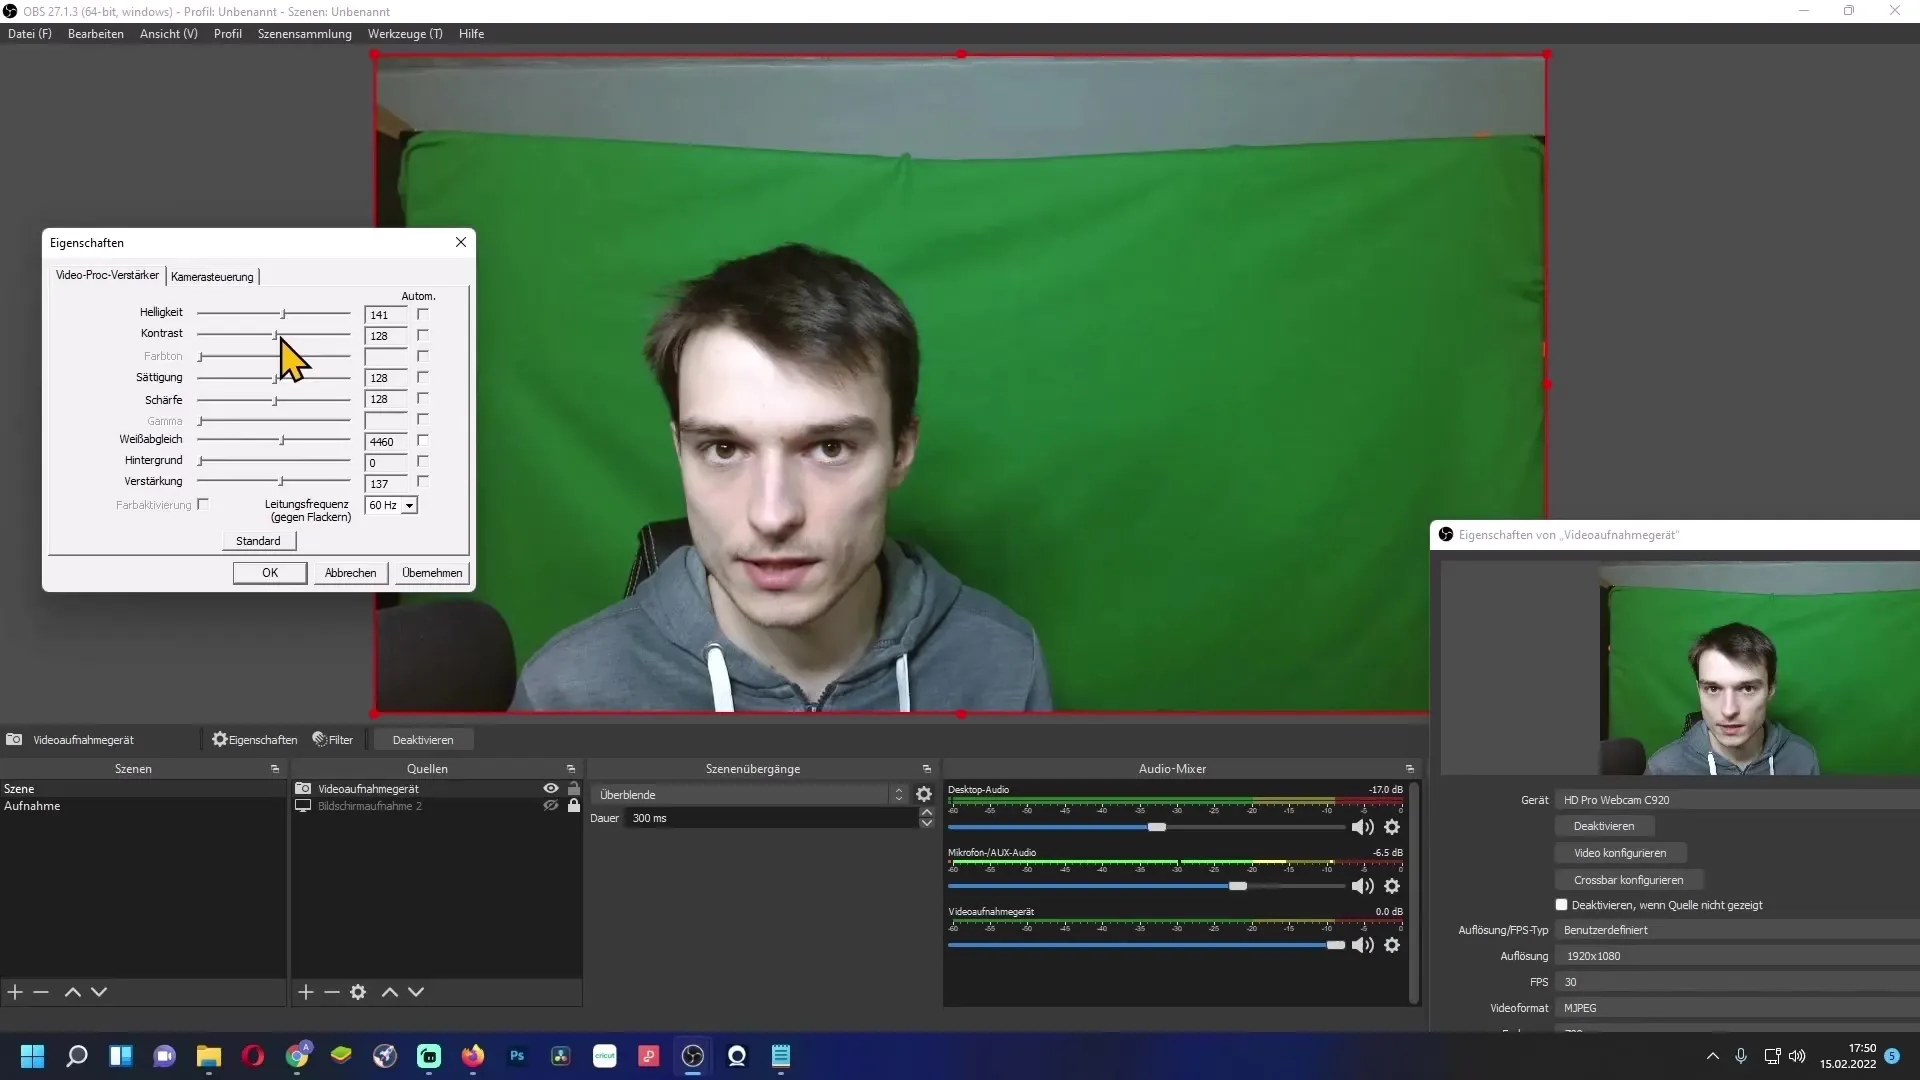
It is also useful to adjust the brightness and contrast to create a pleasant image. The regulation of brightness and contrast is done through sliders in the same settings window.
Adjusting Colors and Sharpness
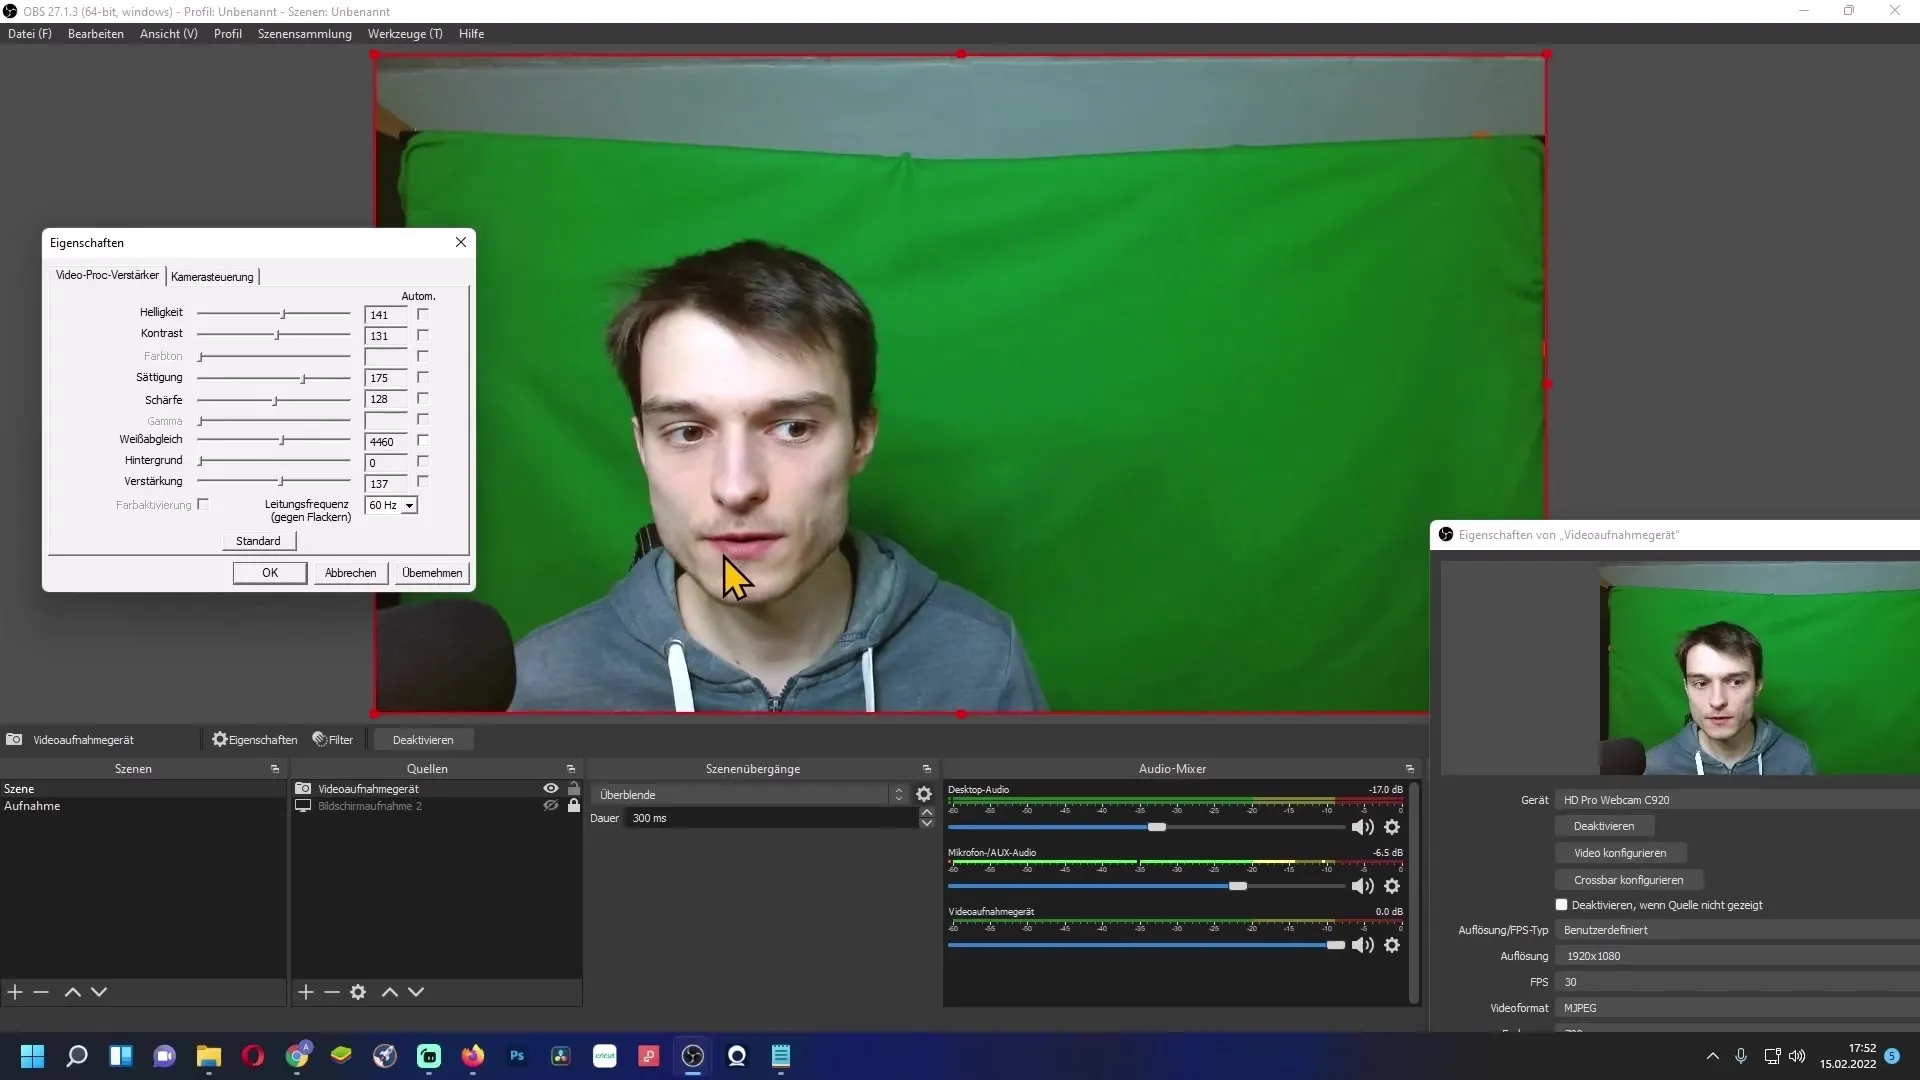
With saturation, you can adjust the color intensity of your webcam. Make sure not to reach exaggerated values to maintain a natural look.
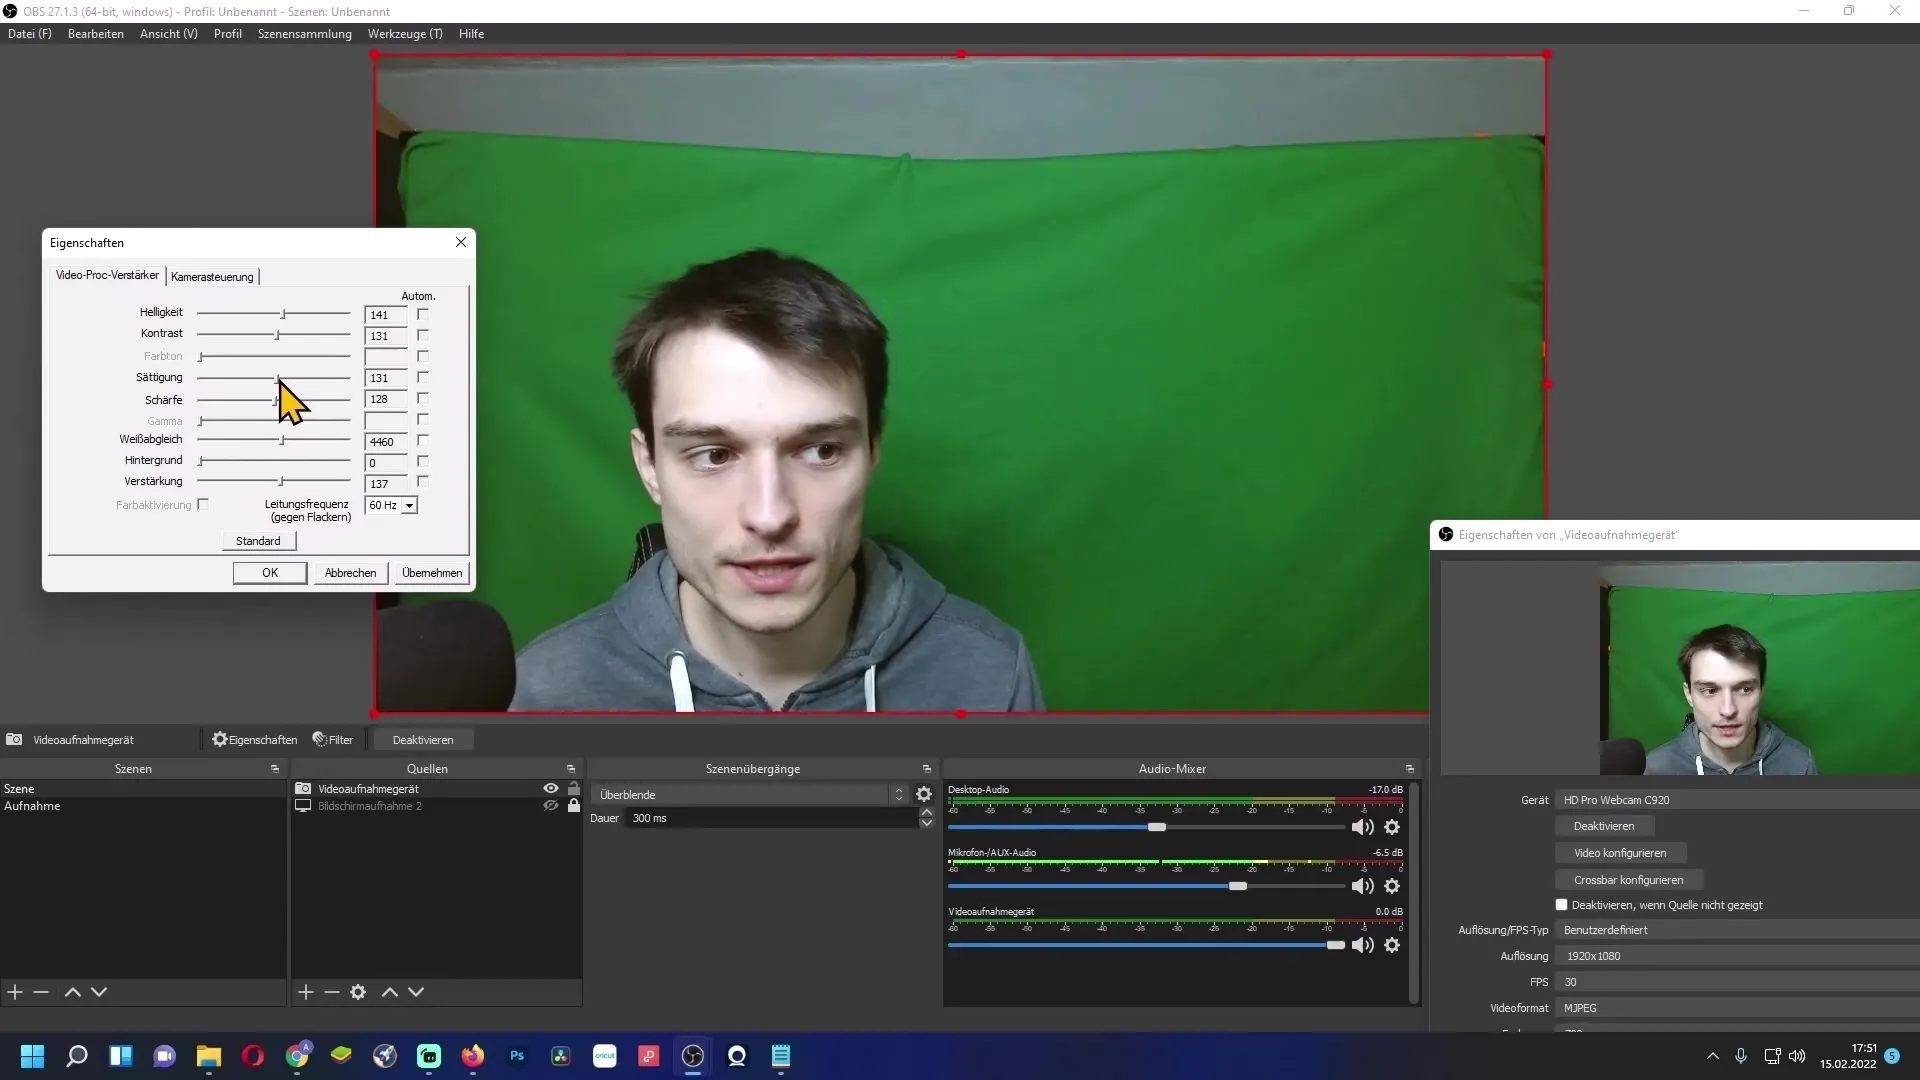
Sharpness adjustment can also help make the image clearer. Start with a moderate adjustment and increase gradually until you are satisfied with the result.
Line Frequency and Saving Settings
If you notice flickering images, change the power frequency to 50 Hz to ensure image stability.
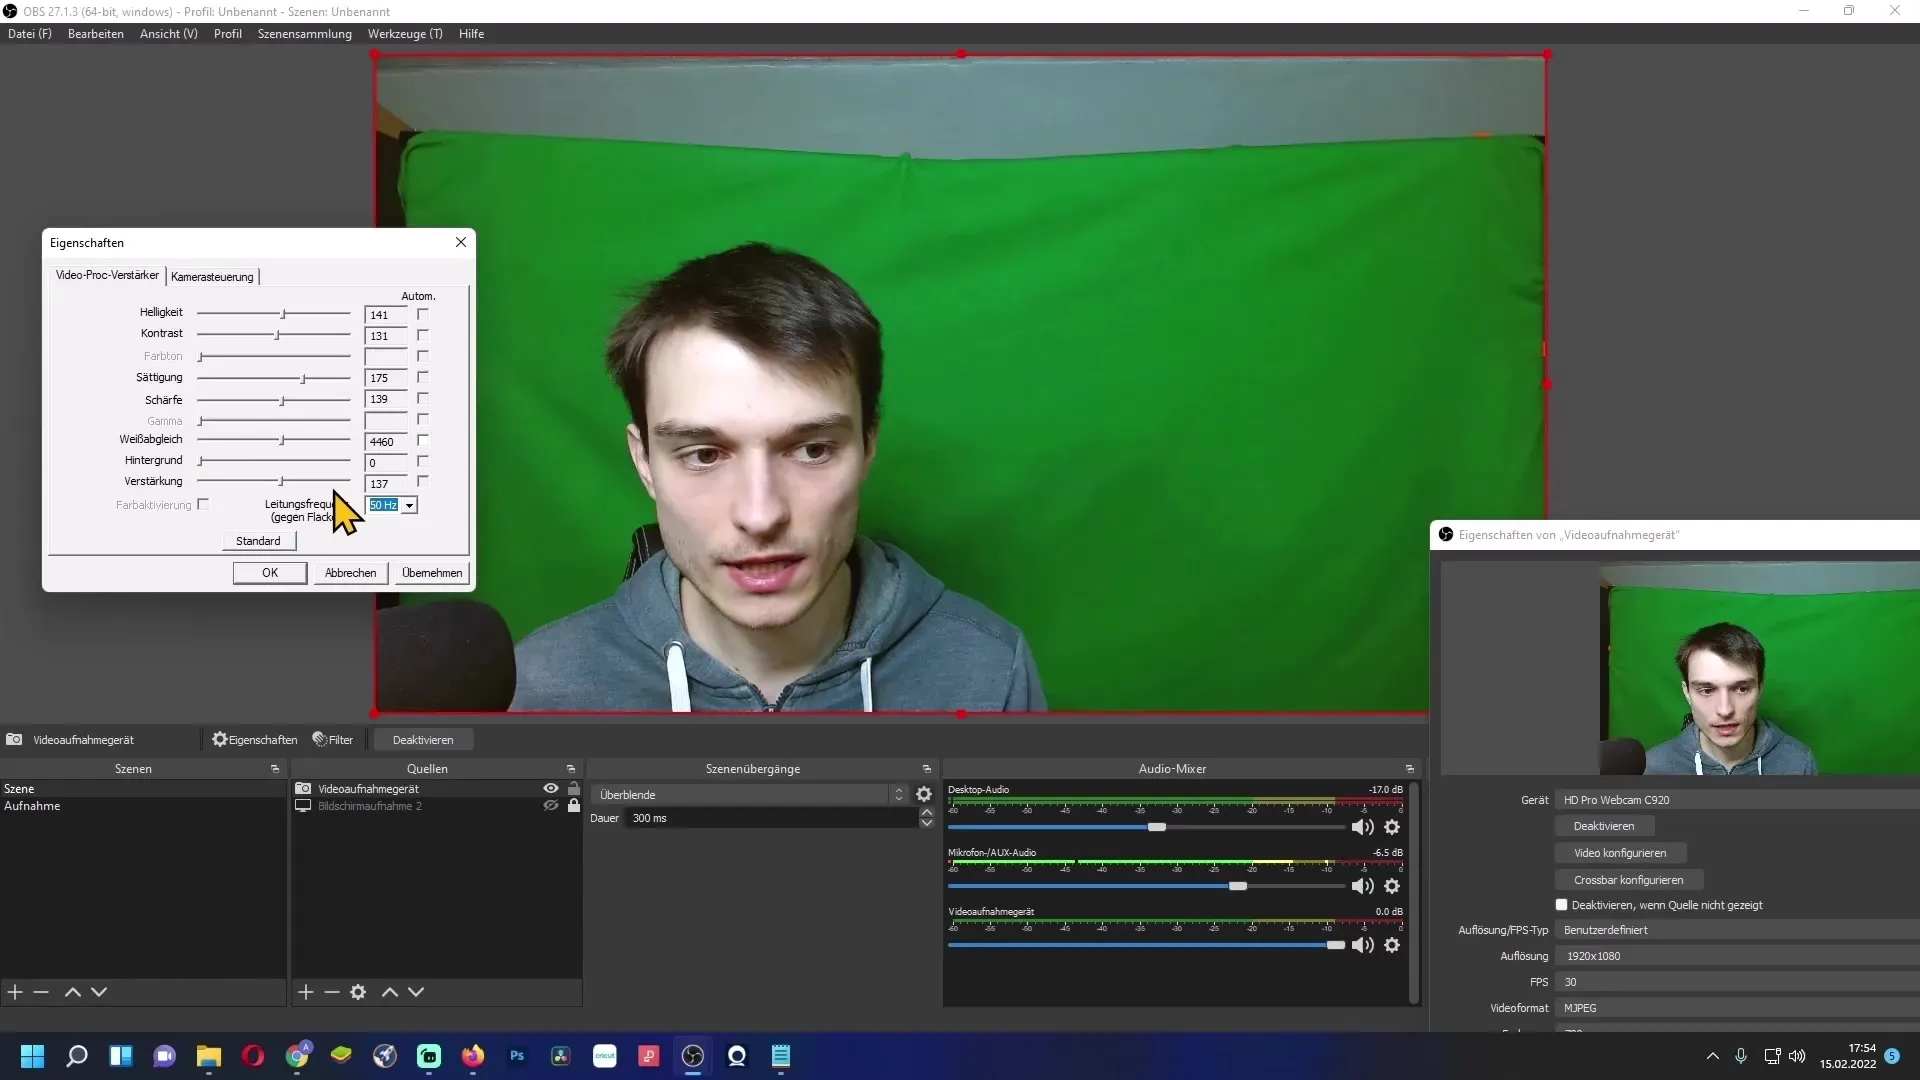
Don't forget to apply your settings by clicking on "Apply" and then "OK".
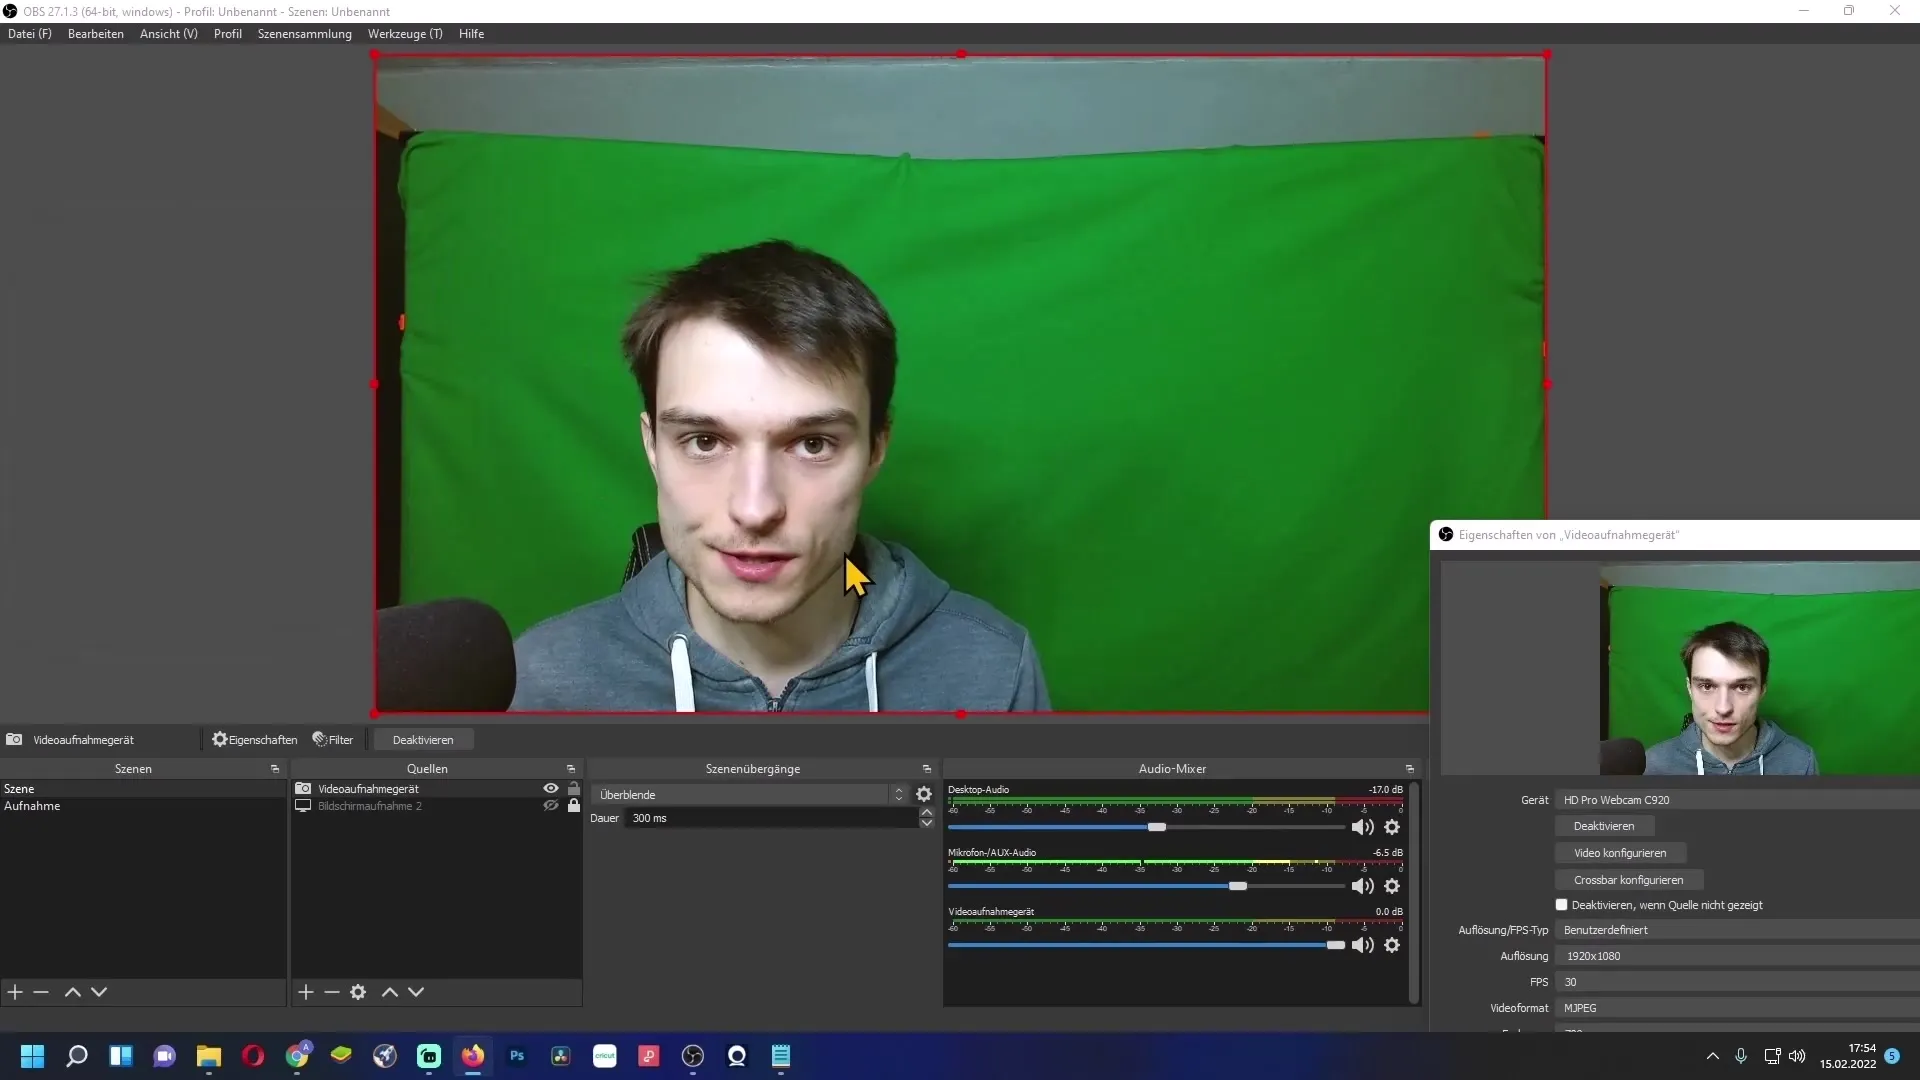
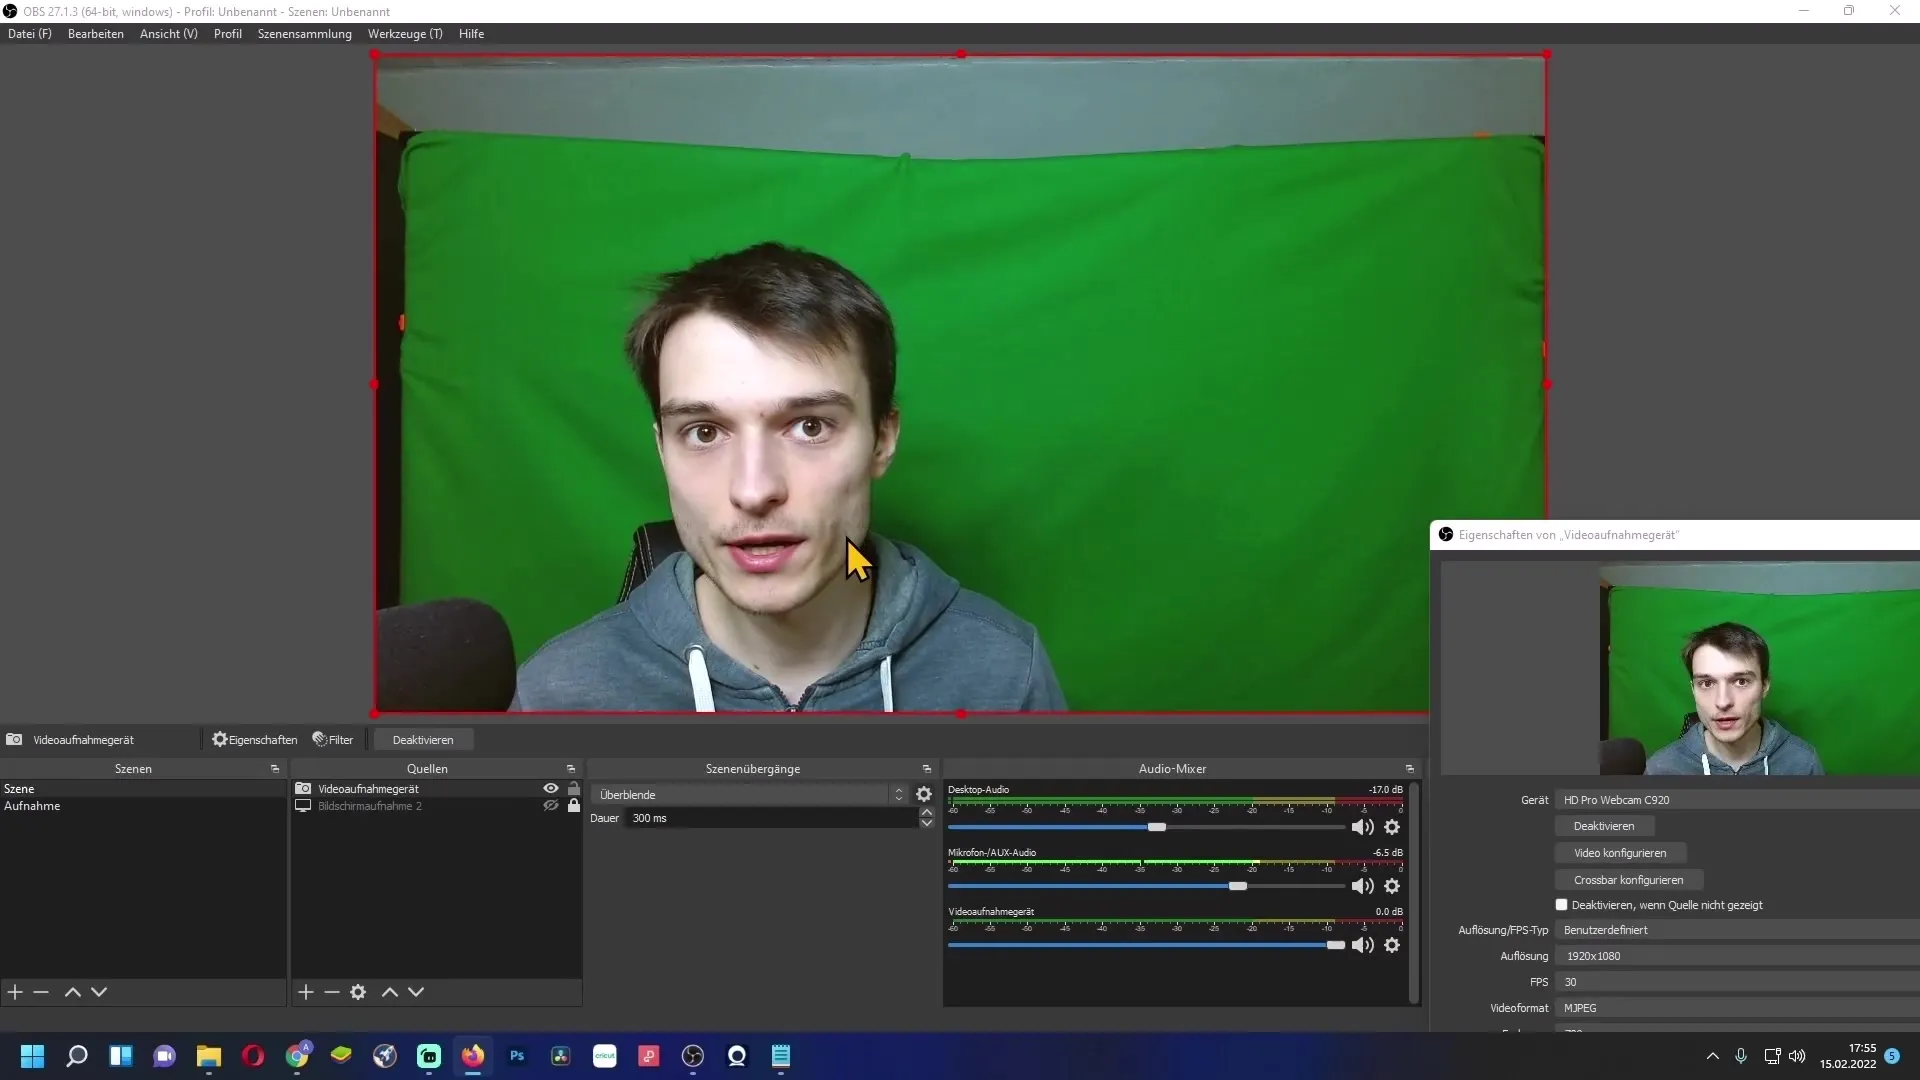
Since webcam settings may be lost at next computer startup, it is advisable to use a small program to save and quickly restore these settings.
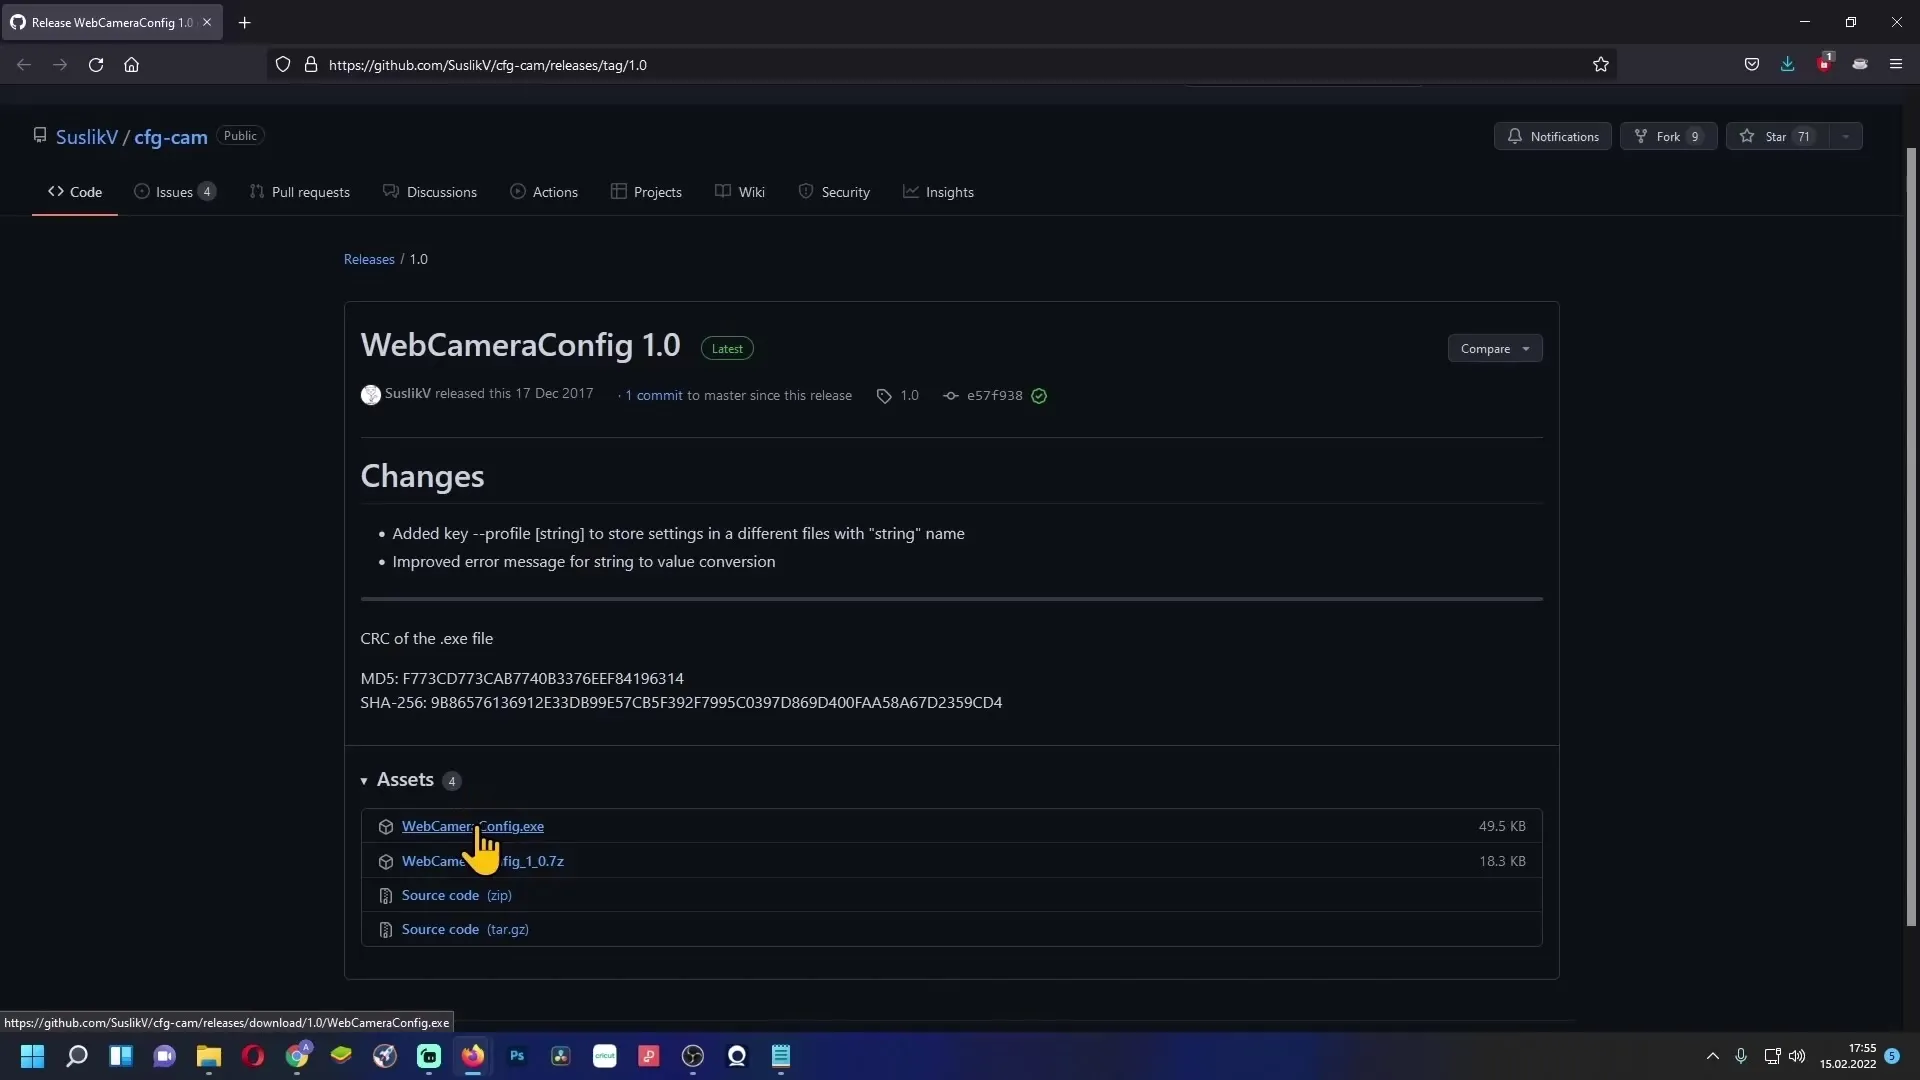
Saving and Restoring Camera Settings
Download a small tool that allows you to save your camera settings. This file can then be easily loaded when needed to retrieve your settings.
It is also a good idea to save the current configuration in an Excel file for easy editing.
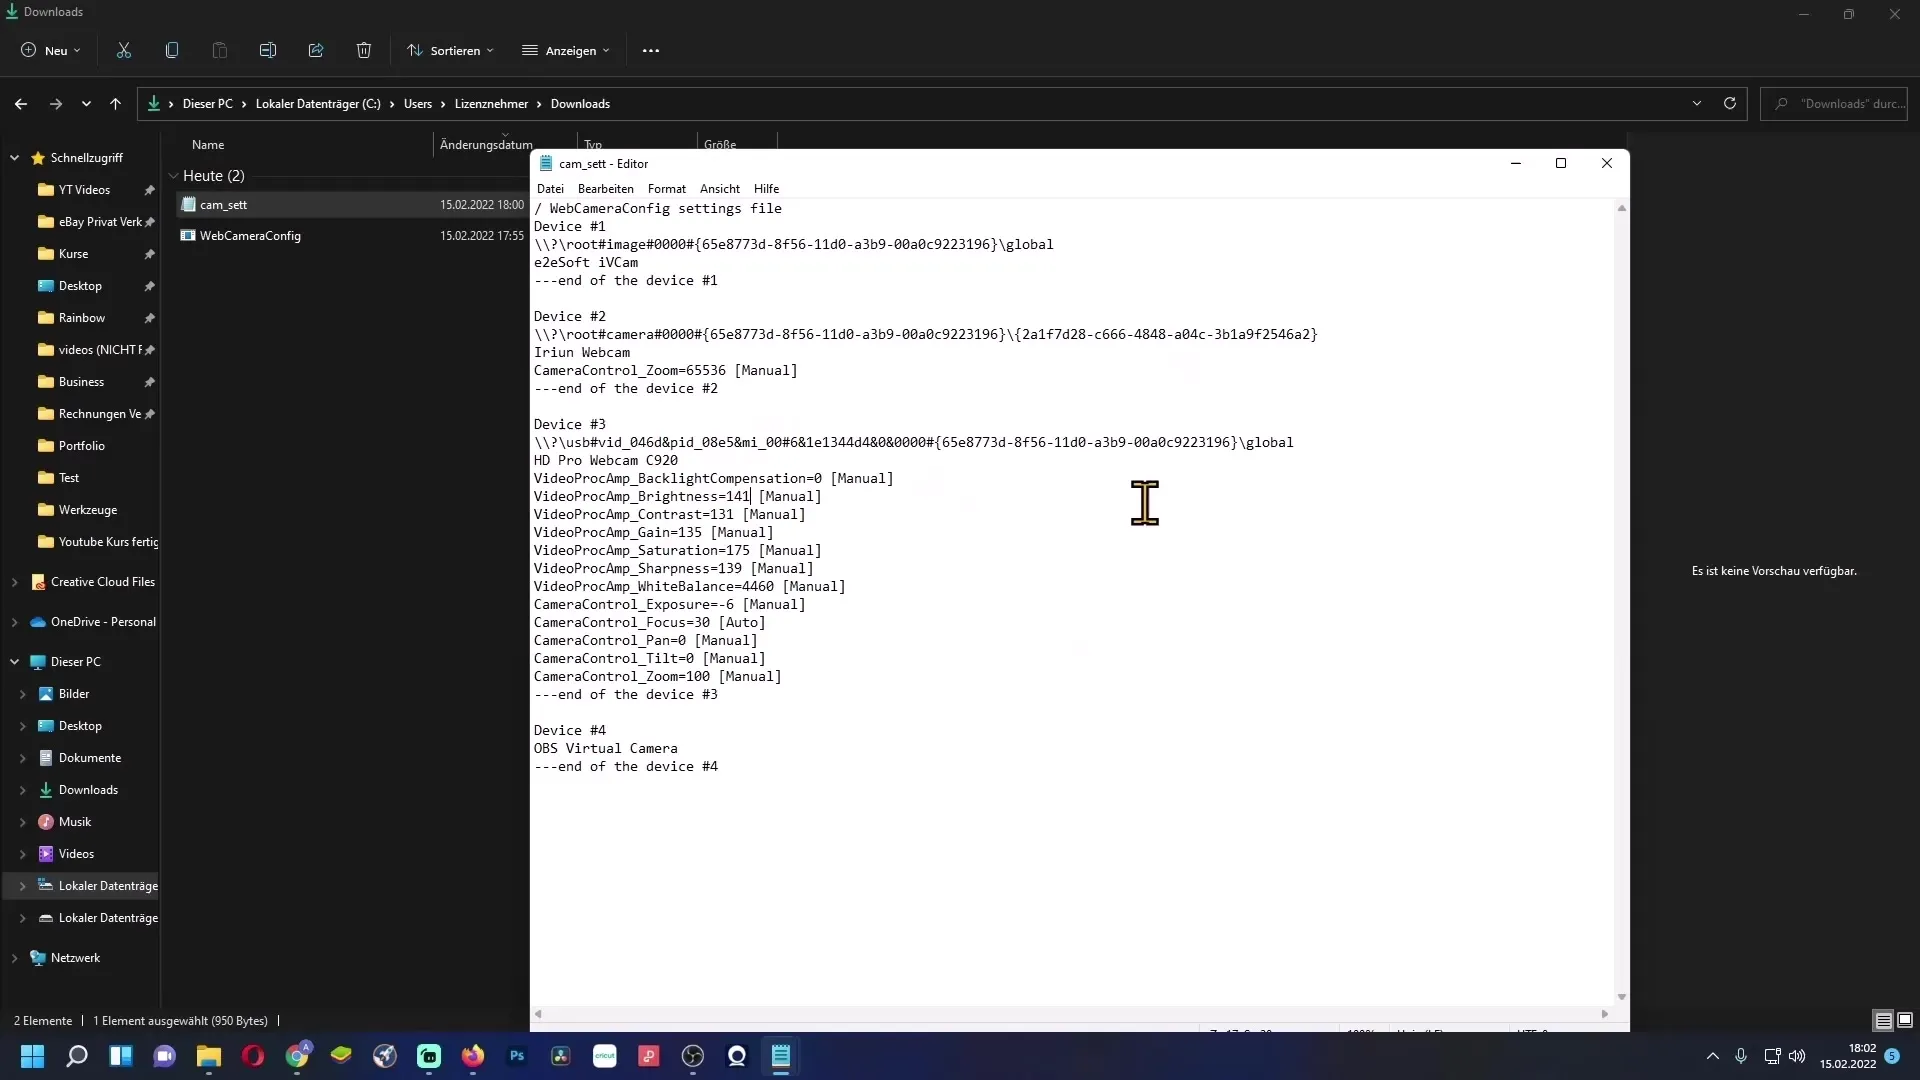
Image Cropping and Transformation
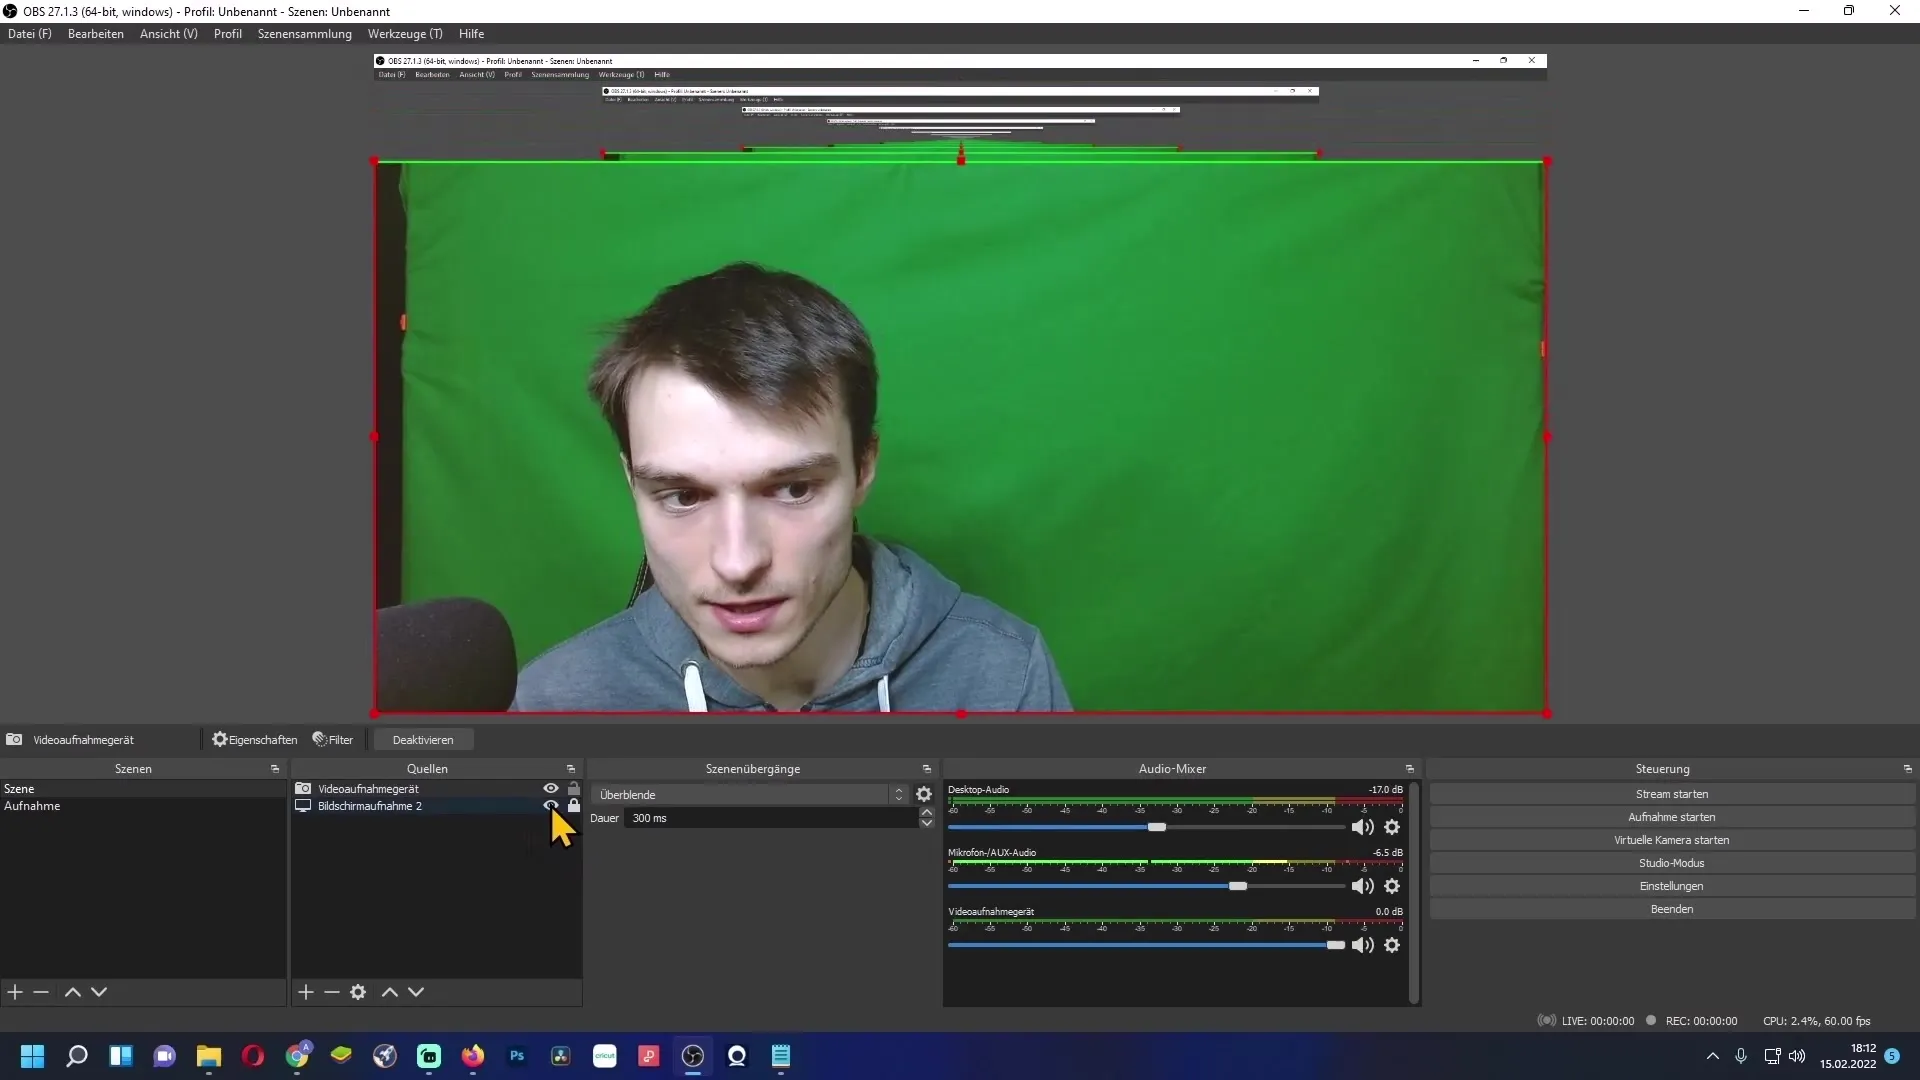
If you want to crop or transform your webcam image, you can do so after inserting it into OBS. Hold down the ALT key to drag and adjust the edges of your webcam image accordingly.
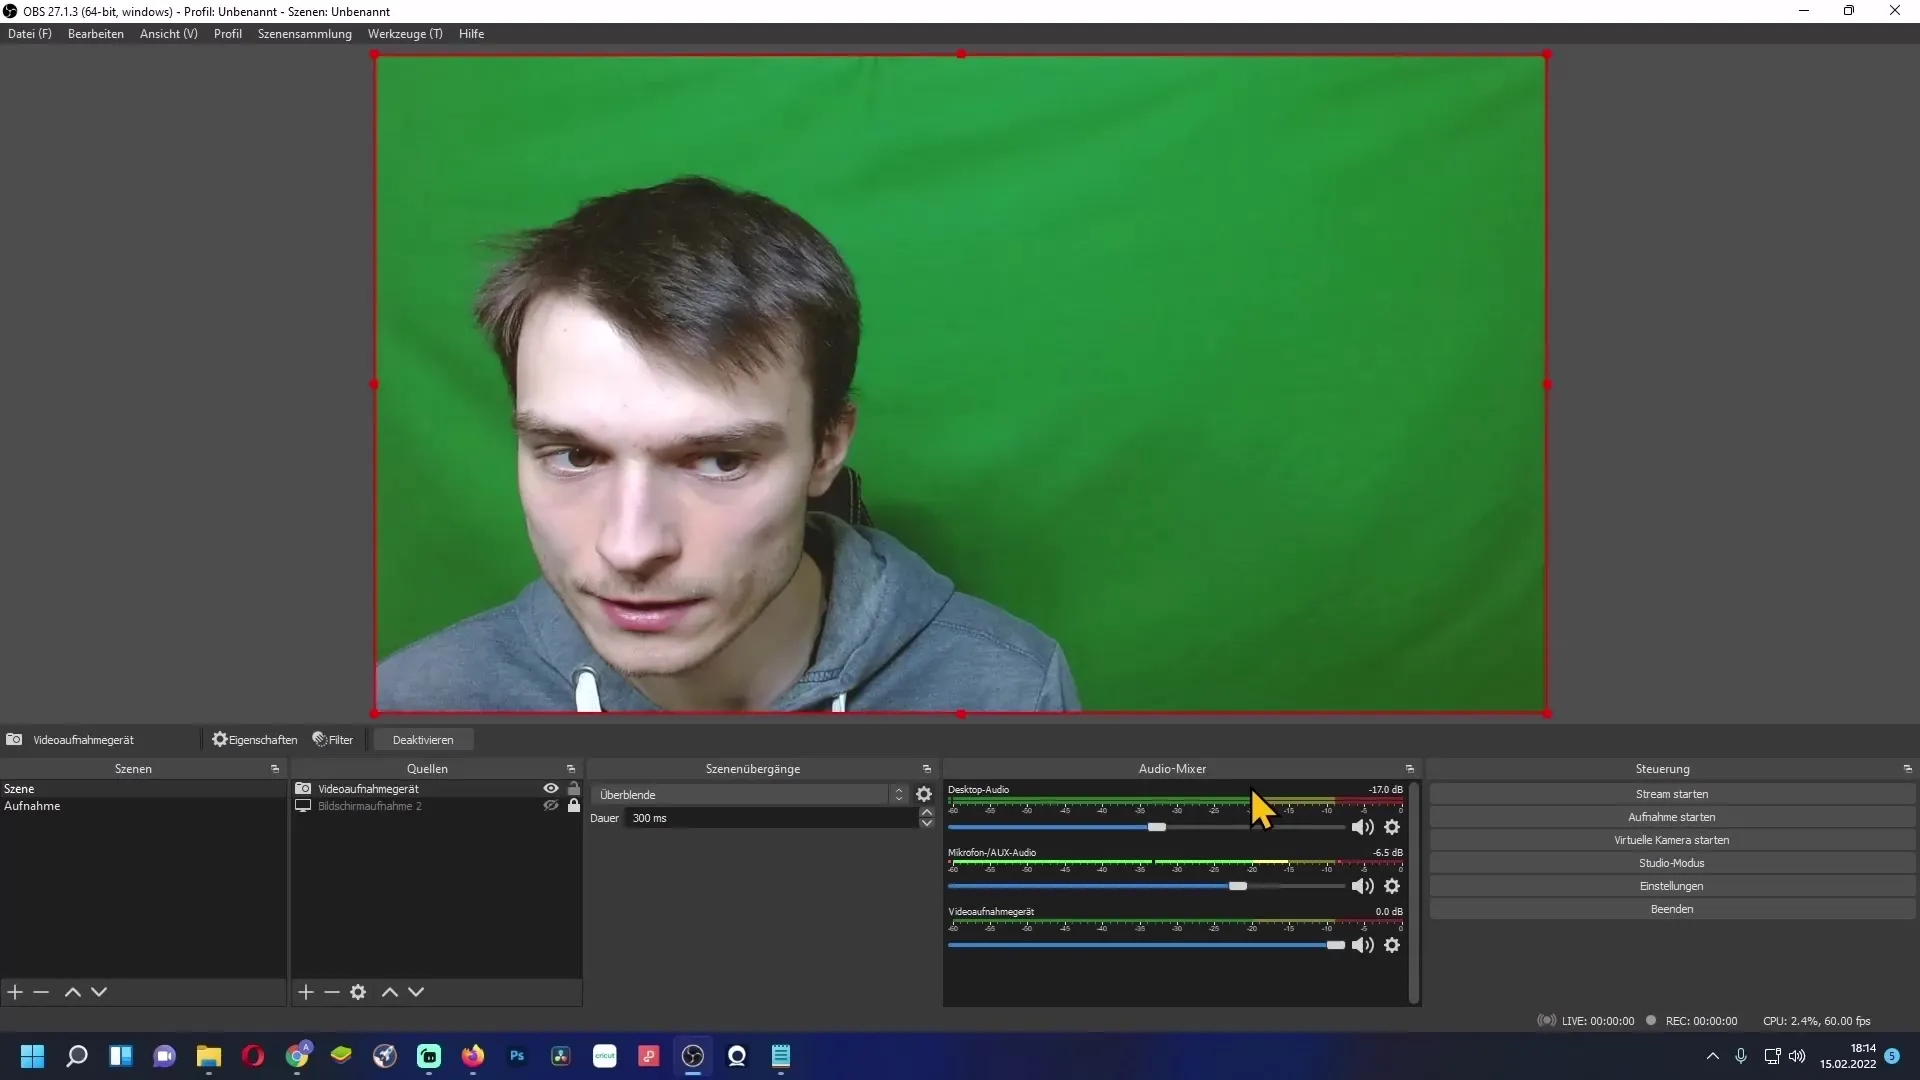
By right-clicking on the webcam image, you can also select transformations such as "Stretch to Screen" to adjust the image to fit the entire screen.
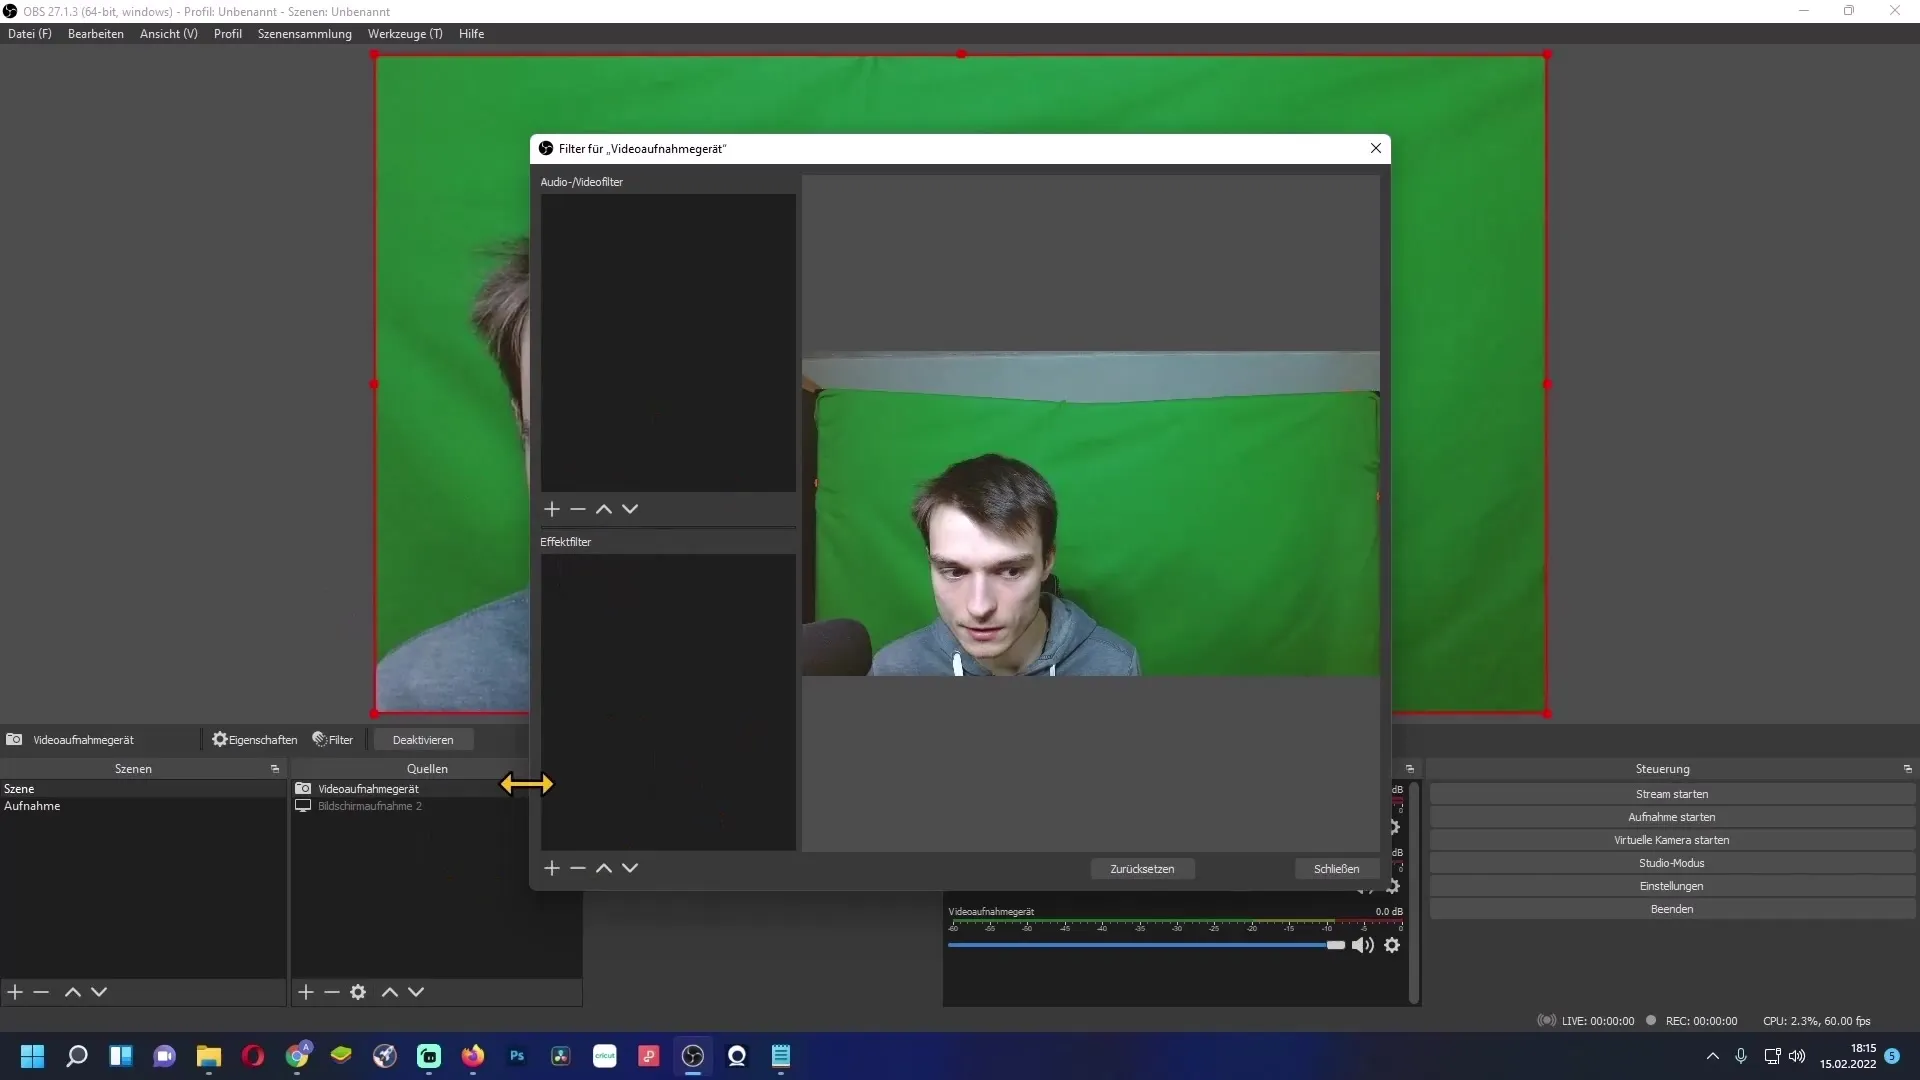
For additional creative possibilities, you can add various effects under "Filters" to give your webcam image a special look, similar to filters in social media.
Summary
This guide has brought you through the steps to set up your webcam in OBS Studio and explained important settings to maximize image quality. By making all these adjustments, you ensure that your webcam works optimally for streams or recordings.
Frequently Asked Questions
How do I connect my webcam to OBS Studio?Connect the webcam to the PC, open OBS, and add it as a video capture device.
What is the recommended resolution for webcams?The common resolution is 1080p, if the webcam supports it.
How can I change the frame rate?In the webcam settings, you can adjust the FPS indicated in the technical specifications of the webcam.
What are the best video formats for OBS?MJPEG is recommended for most webcams to ensure the best performance.
How do I save my camera settings?Use a small program or an Excel file to save your settings and easily restore them.


