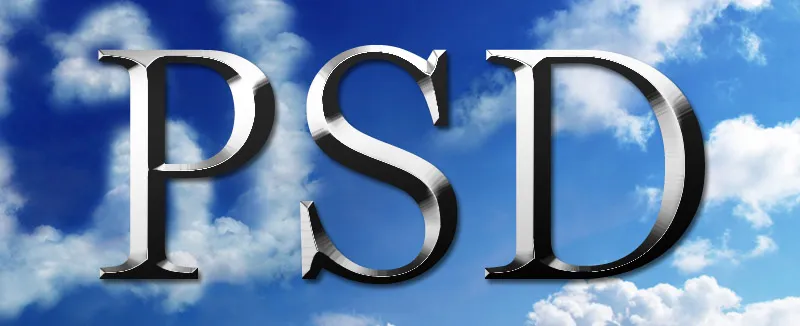
Metal and chrome effects give texts and textures a shiny and noble look that is perfect for logos, posters, or digital art. With Photoshop, you can create these effects realistically by combining layer styles, gradients, and light reflections. In this tutorial, I will show you step by step how to create impressive metal and chrome effects that give your designs a high-quality and futuristic vibe. Let's get started and add shine and glory to your projects!
Creating Brushed Metal Texture
The basis for many metallic effects is brushed steel. This can be easily created in Photoshop through a few filter settings. In a new document sized 800x600 pixels, I add a black-white-black gradient using the Gradient Tool.
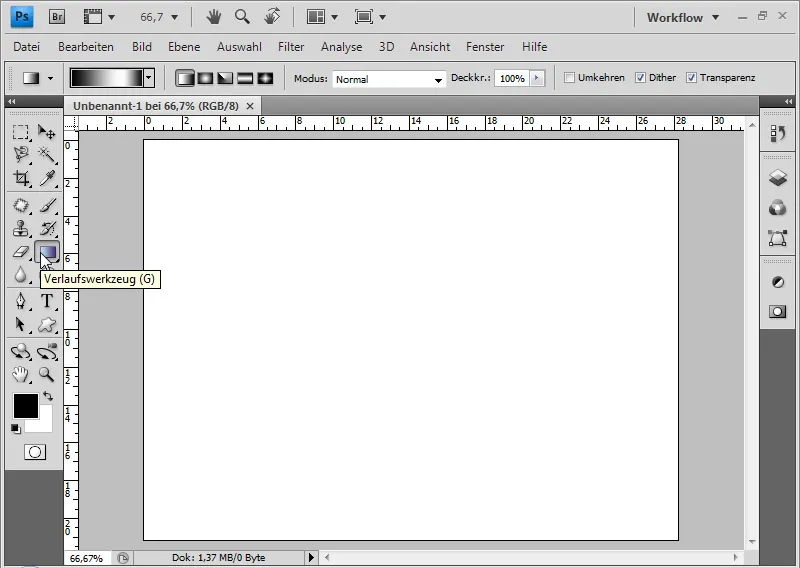
I either create this myself by adding three color stops, with black on the outer sides and white in the middle.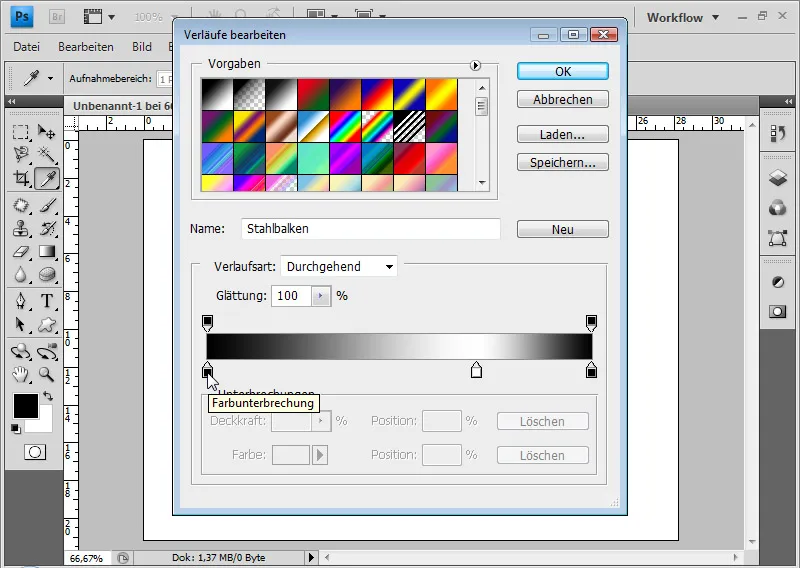
Or I use one of the existing presets in Photoshop, specifically the Gradients set "Metal". It includes the "Steel Bars" gradient, which also contains a black-white-black gradient.
Diagonally, I drag my gradient into the document using the Gradient Tool.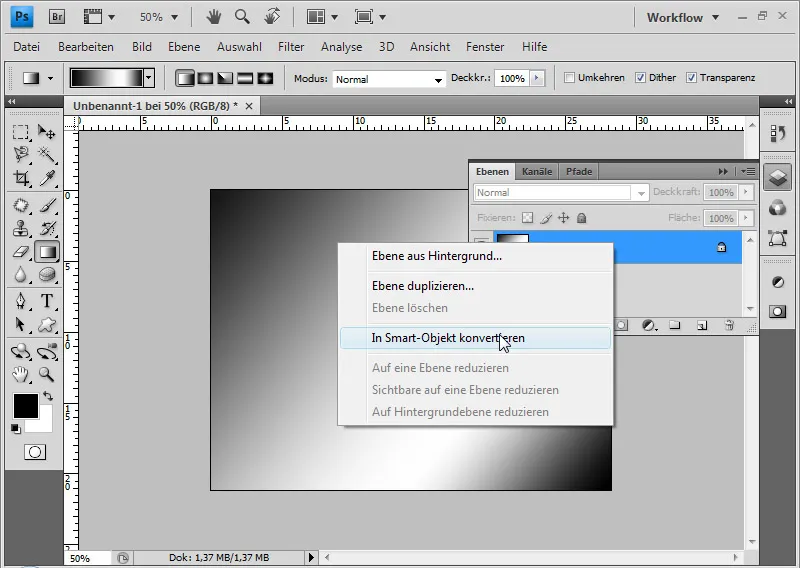
Now, I convert my background layer into a Smart Object by right-clicking on the layer > Convert to Smart Object. This allows me to apply all filters as Smart Filters. Changes to filter settings, blending modes, and opacity can be done non-destructively. The first Smart Filter I apply is the Noise filter Add Noise at 50% strength in Gaussian Distribution with the Monochromatic checkbox ticked.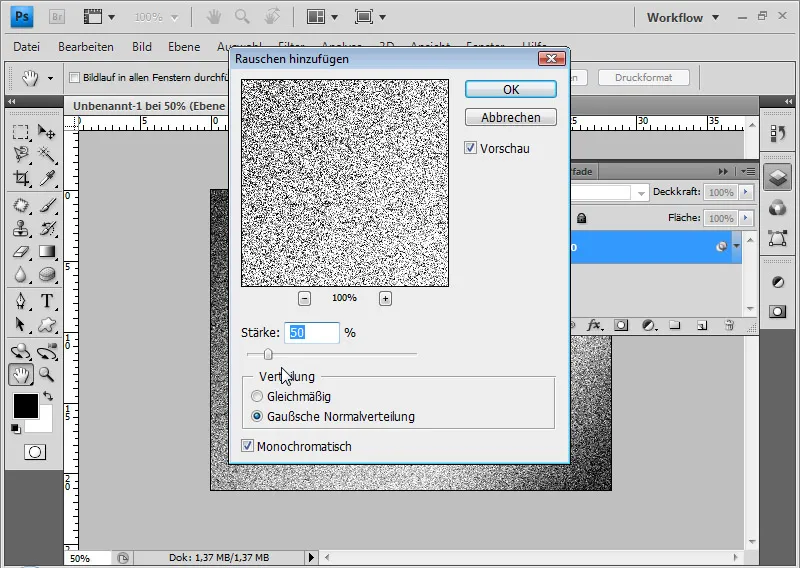
The next Smart Filter is the Blur filter Motion Blur. At 0 degrees and 50 pixels distance, I achieve the brushed look from the noise effect.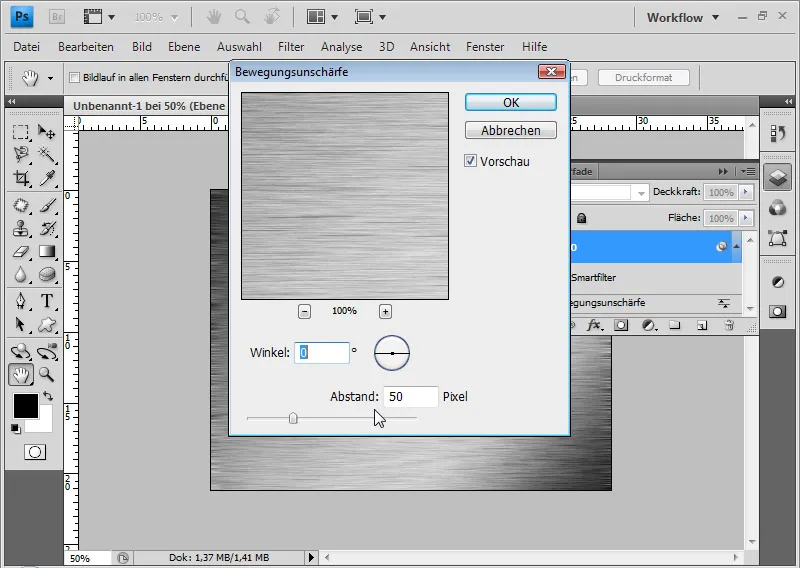
Since the last filter caused rough edges, I press Ctrl+T for Transform and widen the layer from the corners by about 10% each to the right and left. As the layer still contains the gradient that was processed with the Smart Filters, the gradient appearance will persist while the Smart Object is transformed.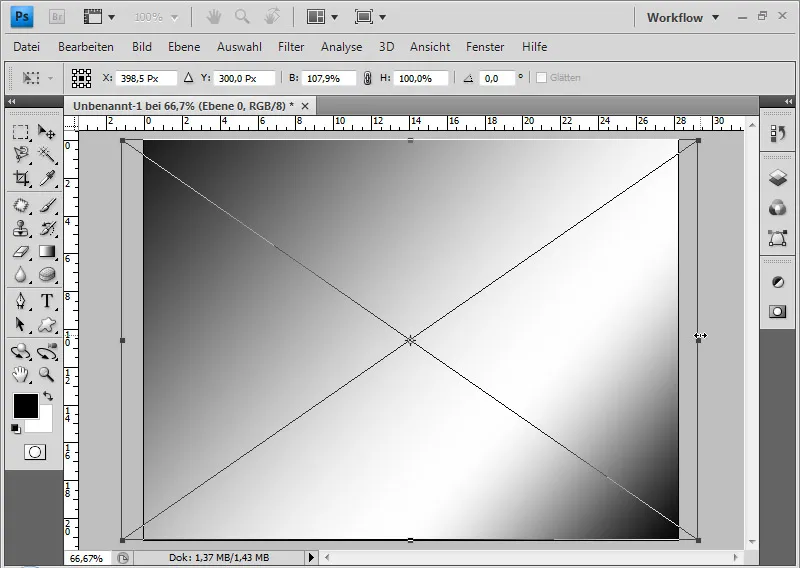
This texture serves as a good base for applications and variations of metal and chrome effects.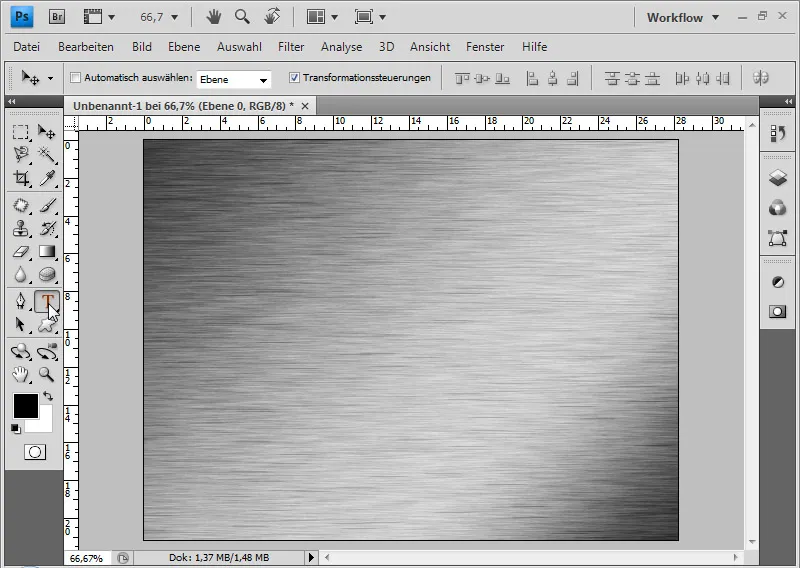
Creating Metal Letters
I write the letters PSD in 350-point Futura LT Medium in black color in my document.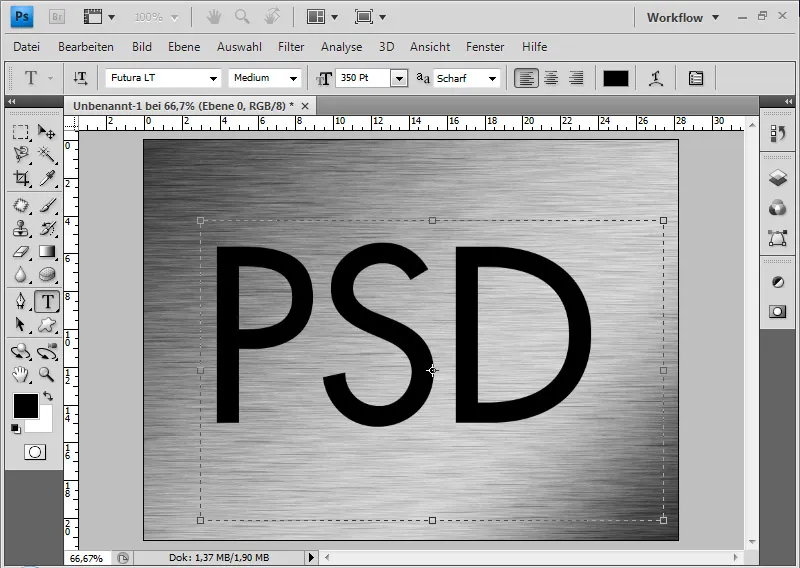
I place the text layer below the texture layer. Additionally, I create a new white layer and a new black layer, which I position at the bottom. These two new layers are used to compare the effect optimally on different backgrounds. Now, I add a Clipping Mask to the texture layer by pressing Ctrl+Alt+G with the text layer selected.
I open the Fill settings of the text layer by double-clicking on the layer in the Layers Panel. My text receives a 60% opacity Drop Shadow.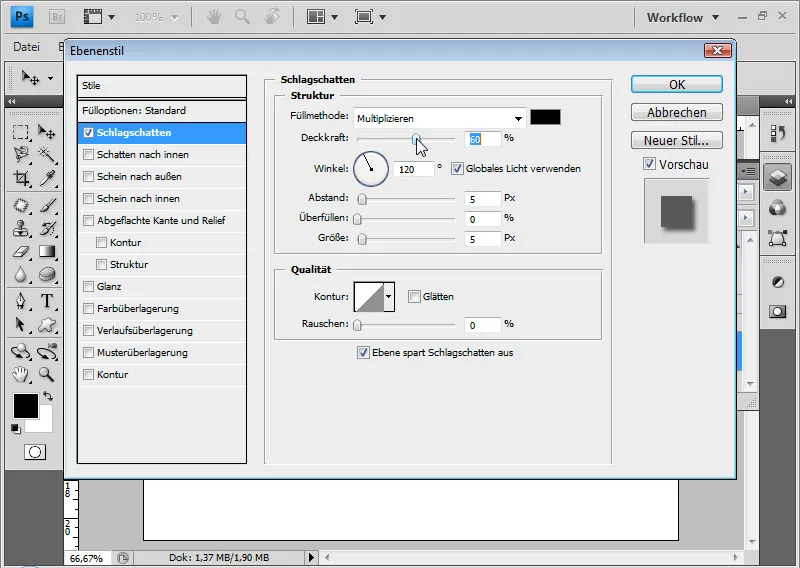
The effect is as follows - in this image with a 30-degree Angle set in the Motion Blur Smart Filter: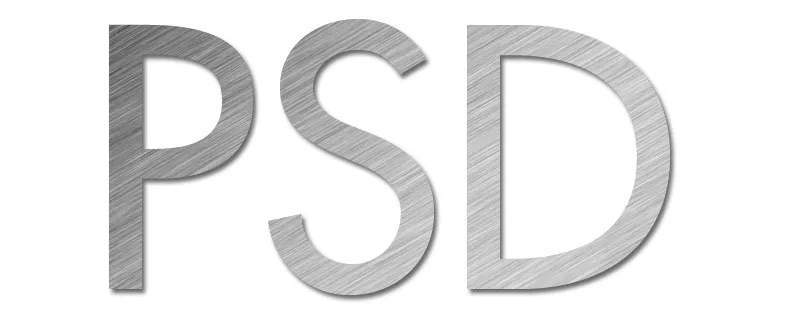
Furthermore, I add a semi-rounded, smoothed Contour and a flattened Edge with a Ring Gloss Contour to the text.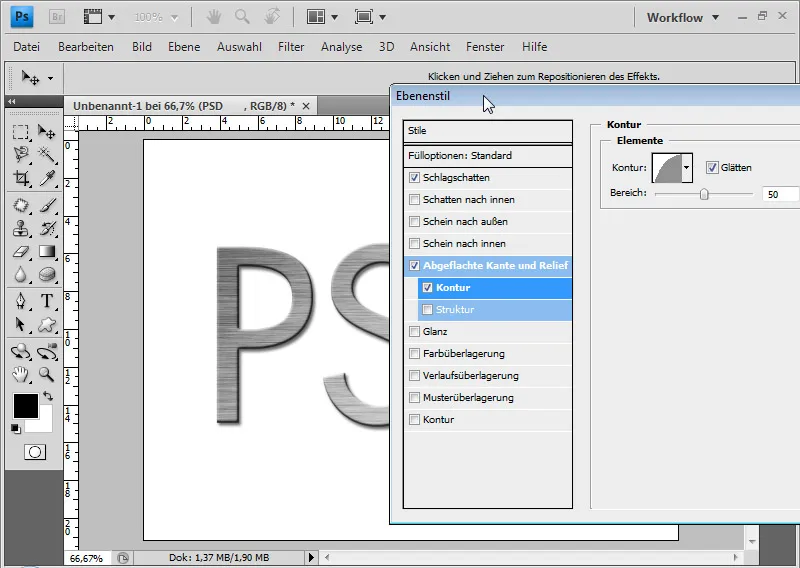
A Gloss Contour in Gaussian Distribution is also nice. It all depends on the desired result; hence the Gloss Contour varies too.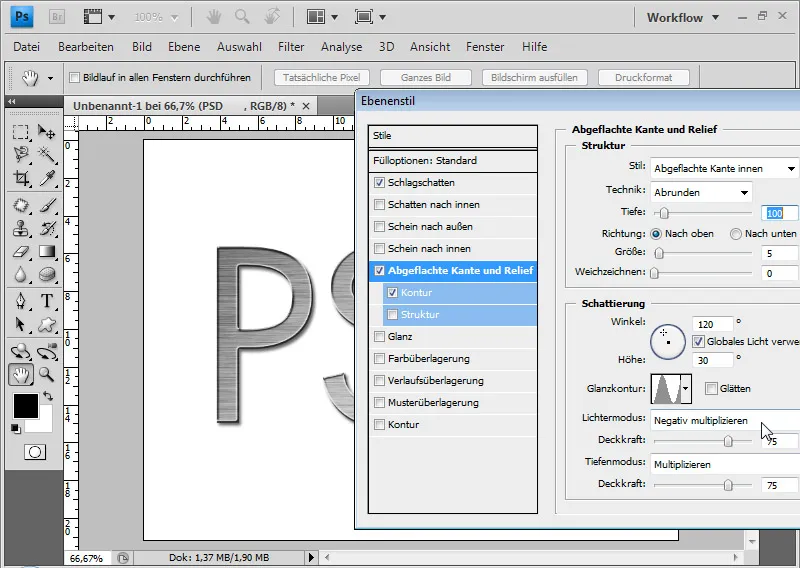
Depending on preference, I can also adjust the Depth and the Size, as well as change the Style. This allows for additional plasticity in the text.
With the Render filter Lighting Effects, I can enhance my texture with a light spot. I adjust this to my desired metal look. I make the following settings (see image):
This is what the effect looks like with a white background: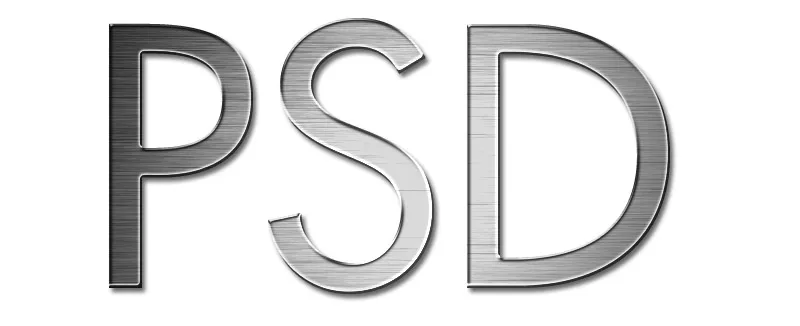
And this is with a black background: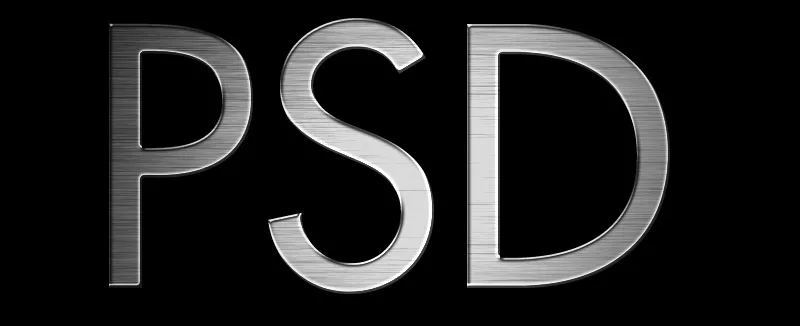
If needed, I can easily enhance the effect with an adjustment layer Curves . For example, a simple downward S-curve can increase the contrast and accentuate the light point of the lighting effects Smart Filters .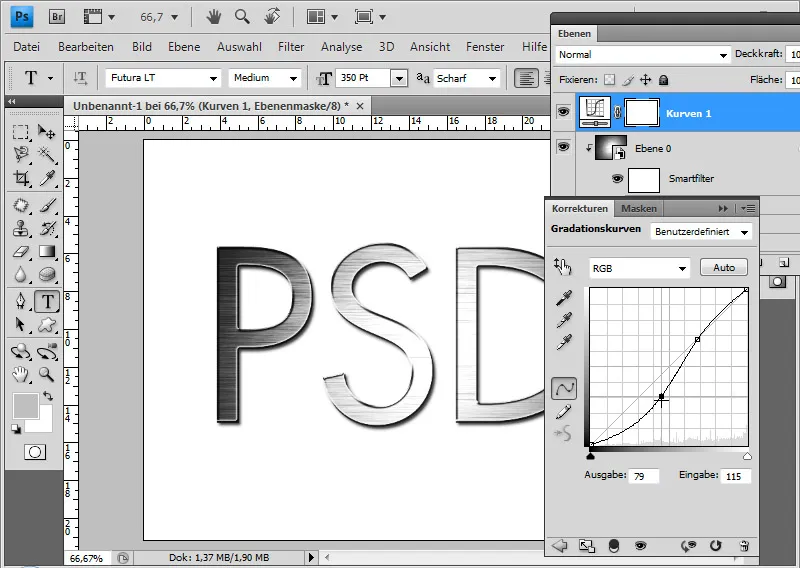
Applying Metal Texture to Shapes
With this metal texture, I can fill shapes as well as letters. I use the Custom Shape Tool (U) to draw the telephone shape and link it to the texture layer by applying the texture layer as a Clipping Mask to it.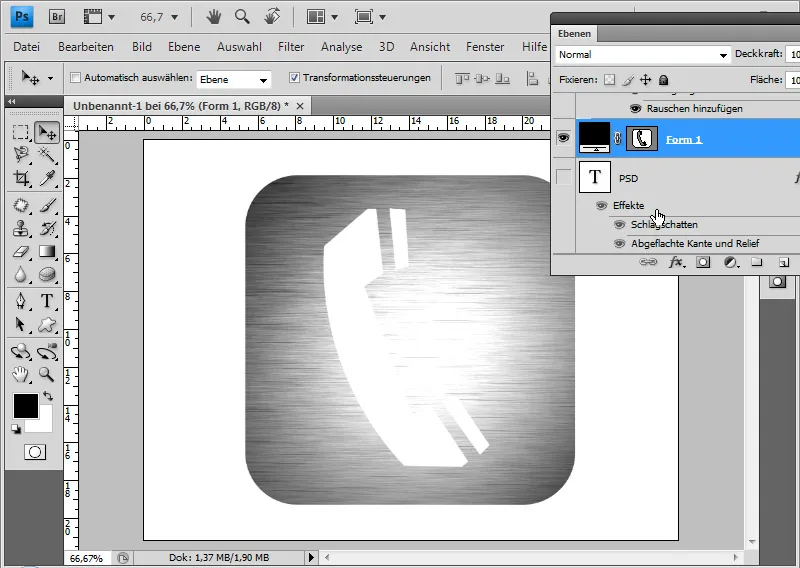
In the Fill Options for the shape layer, I adjust the Gradient Overlay's size (3 pixels) and the shine contour (Gaussian blur distribution).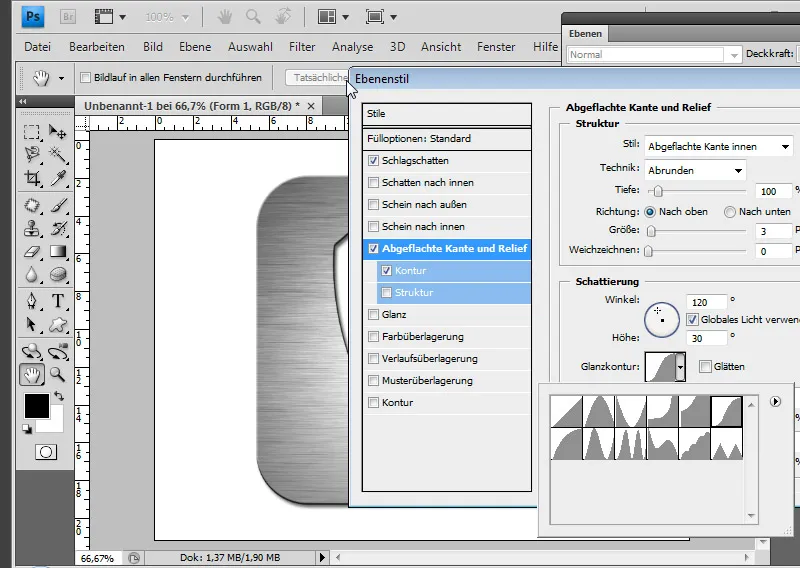
The advantage of Smart Filters is that, for instance, I can non-destructively change the angle of the brushed stripes at any time. I simply call up the Motion Blur Smart Filter and vary the angle. Since the light effect here hits a larger area, it appears a bit too strong. I select the Smart Filter Fill Options and reduce the Opacity slightly.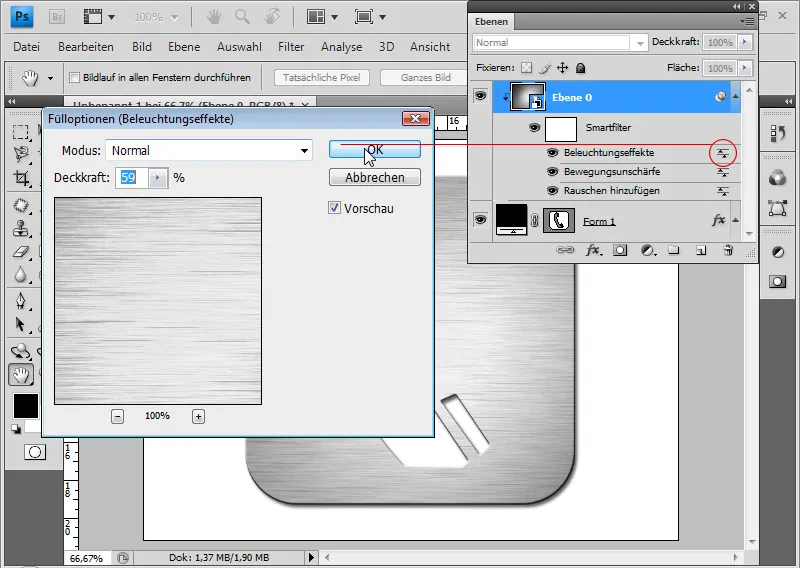
My texture shape is now complete.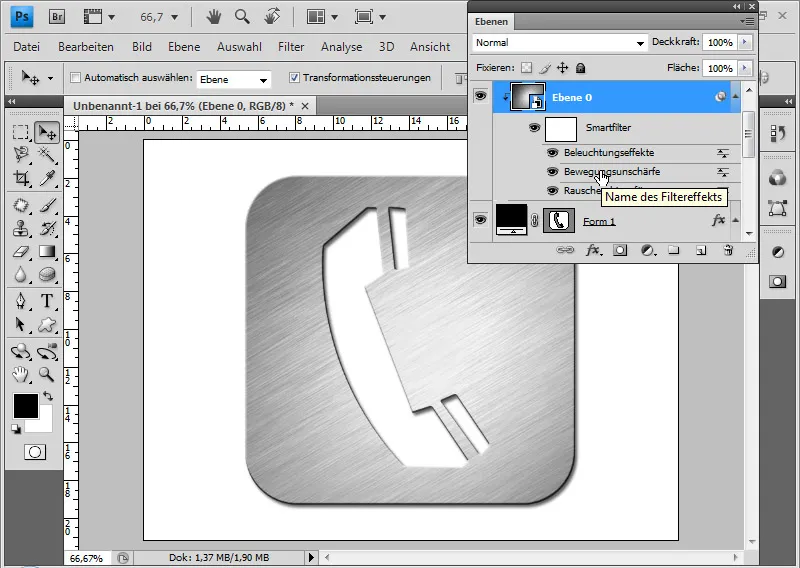
With the adjustment layer Curves , I can slightly lower the red channel. The effect is that my metal shimmers titanium blue.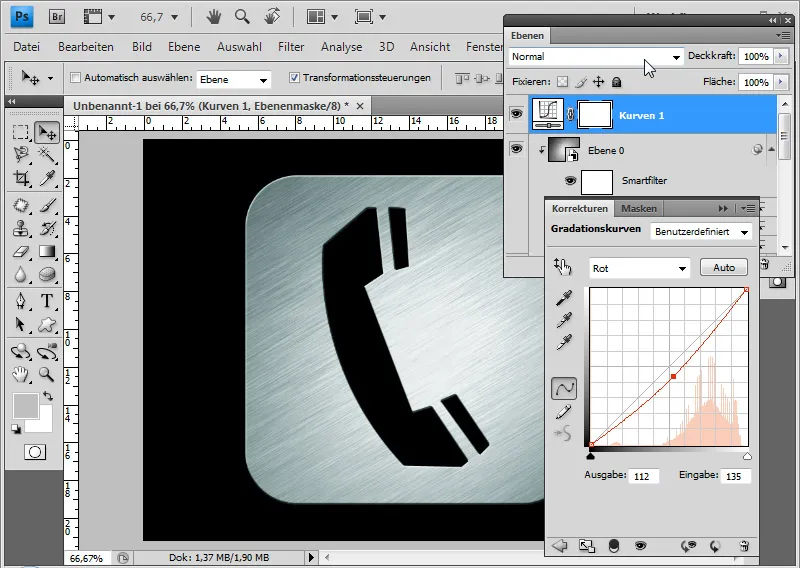
Creating Plain Metal/Chrome
Not all metals are desired brushed. The metallic look can also be created in a plain style through a different method. Using the Text Tool , I write the letters PSD in 350-point Futura Medium in black or simply duplicate the existing text layer. Two Fill options for Drop Shadow and Bevel and Emboss are already activated there. I achieve my effect through the Fill Options which I access by double-clicking on the layer in the Layers panel. NOTE: The following values are dependent on the font size and must be adjusted accordingly if using a different font size! First, I set up a Gradient Overlay with a nearly horizontal gradient (94 degrees) that includes the colors black-white-black. In the preset gradients, I find the same ones as in the Gradient Tool 's Gradient menu. I can then activate the Steel Bar Gradient again.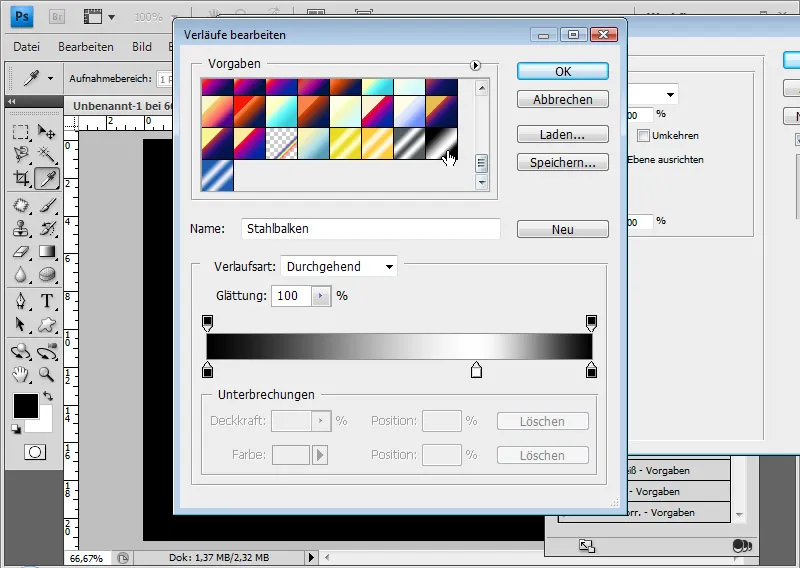
I set the angle of the gradient to 94 degrees to make it slightly diagonal. Additionally, I scale the gradient to 120 percent.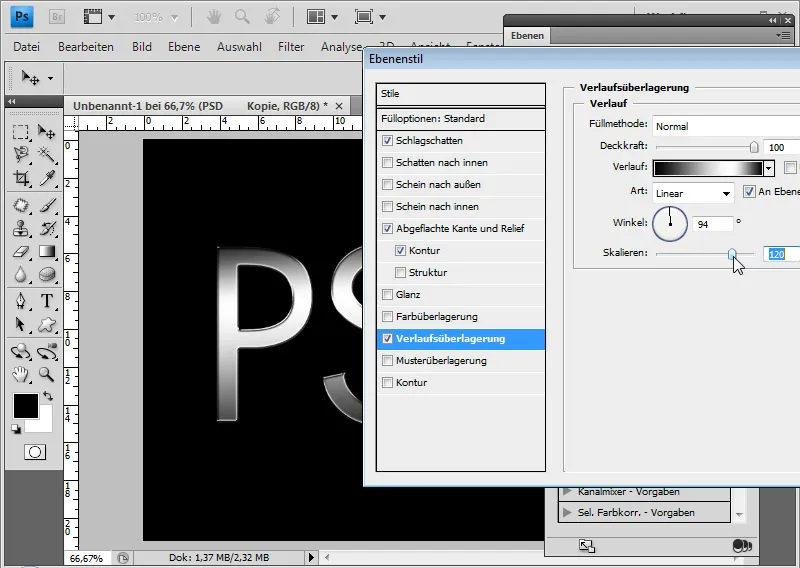
A 60% Drop Shadow at 5 pixels Offset and Size helps round off the text outward view. Now comes the important part that will define the metal effect: Bevel and Emboss . First, the settings under Bevel and Emboss : Style: Inner Bevel , Depth: 200 percent, Size: 5-8 pixels, Highlight at 120-degree angle and 32-degree altitude with a Ring gloss contour .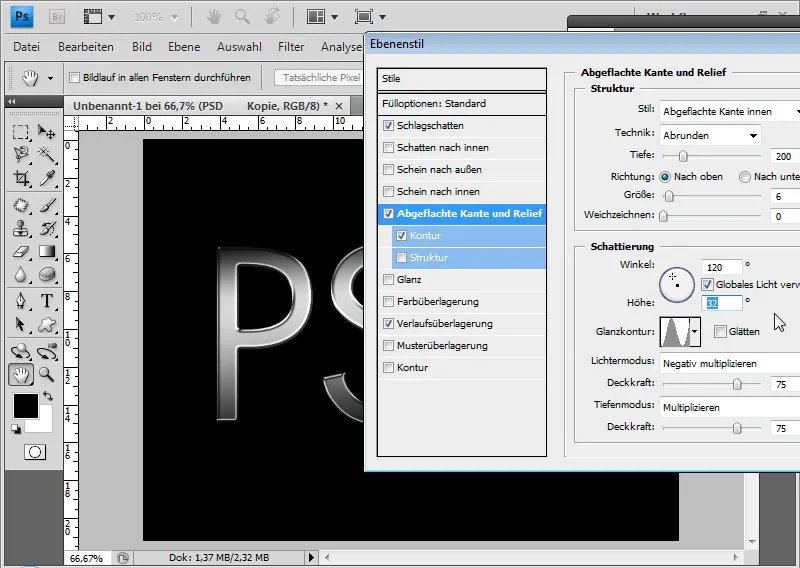
The contour is set to Half Round in a range around 35 percent.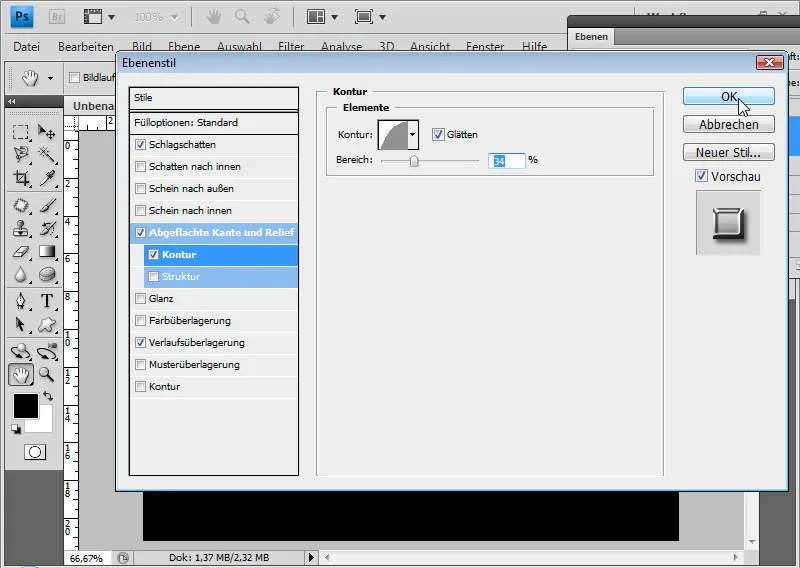
Now the effect is metallic and plain - here on a black background.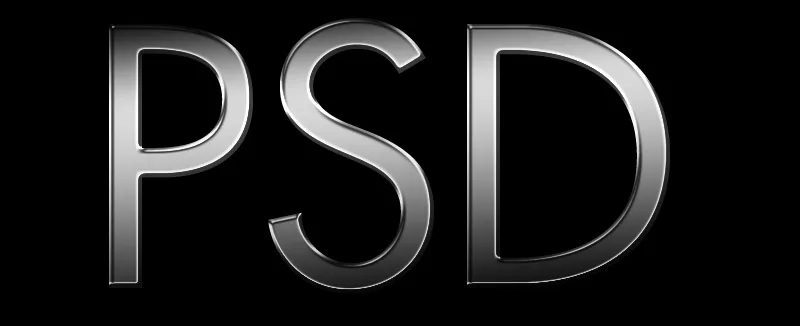
And here on a white background.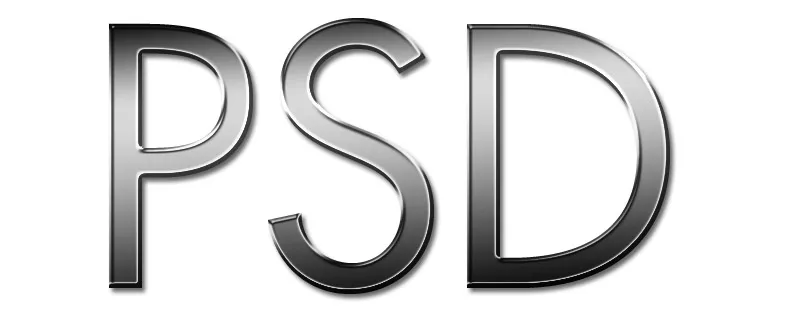
Adding Reflection
Blank metallic surfaces typically reflect parts of the surroundings. This can further enhance the metal effect. Therefore, I insert a photo as a new background. Image source: Andreas Fischer@Fotolia.de. So far, the gradient in the text was directly added through a Gradient Overlay in the Fill Options . This prevents me from simply integrating a reflection of the environment into the metal through a Clipping Mask of the duplicated photo layer, because the Clipping Mask cannot take effect as long as a 100 percent opacity gradient is applied in the layer styles. Therefore, I create a new layer and apply a black-white-black gradient that matches the gradient in the Fill Options . From this gradient layer, I create a Clipping Mask so that it affects my text again. Above this, I can place - also as a Clipping Mask - a duplicate layer of the photo layer. First, I set the opacity of this layer to 0 percent.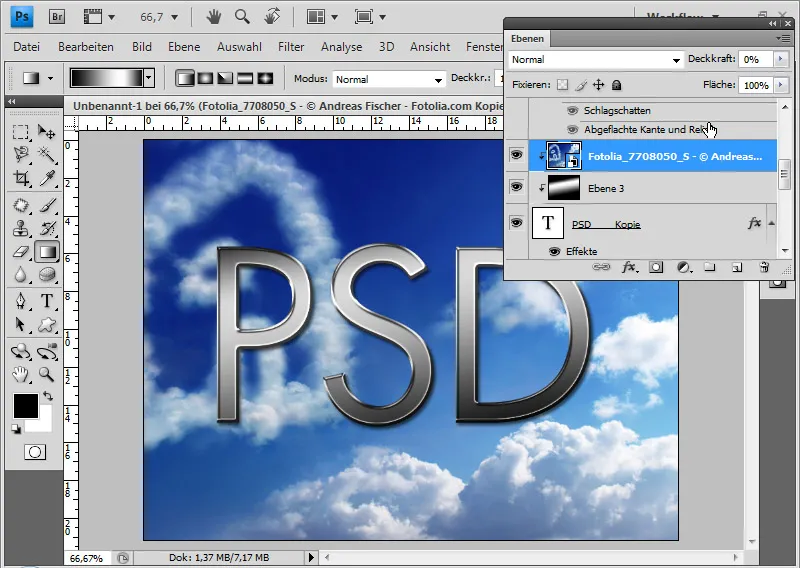
I slowly increase the opacity of the photo layer until the photo contents shimmer in the metal. To ensure that the reflective structures in the metal are not too harsh, I apply the Gaussian blur filter to the photo layer.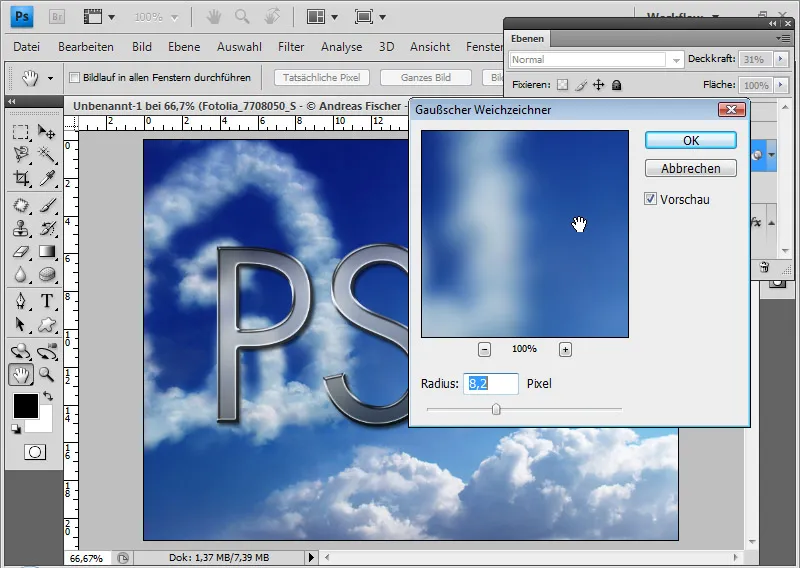
With this reflection, the metal effect appears much smoother, almost like chrome. This effect can be further varied using different fill methods. For example, Color Dodge and Linear Dodge, as well as Hard Light work beautifully.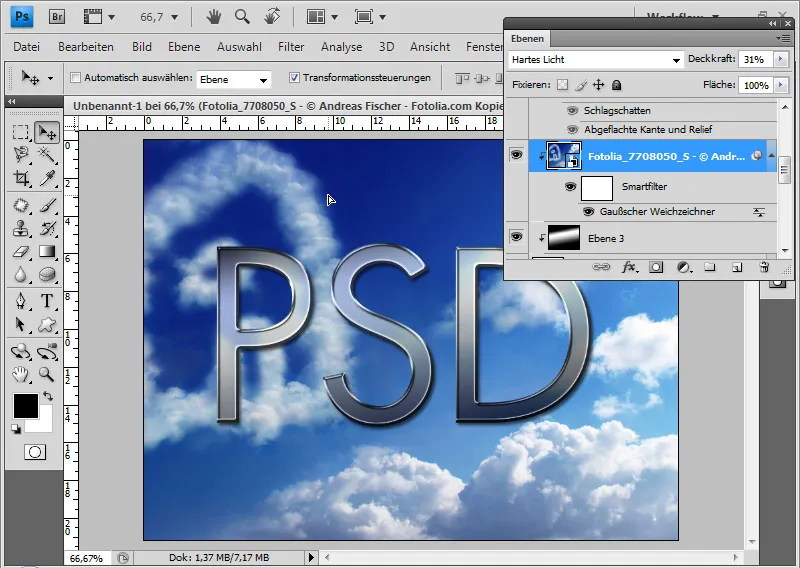
The metal effect can be easily edited by simply changing the blending options. I can also change the font to a different one (here: Georgia). The effect is compatible with other fonts and sizes, but if there are significant deviations in the text appearance, adjustments may need to be finely tuned in the blending options.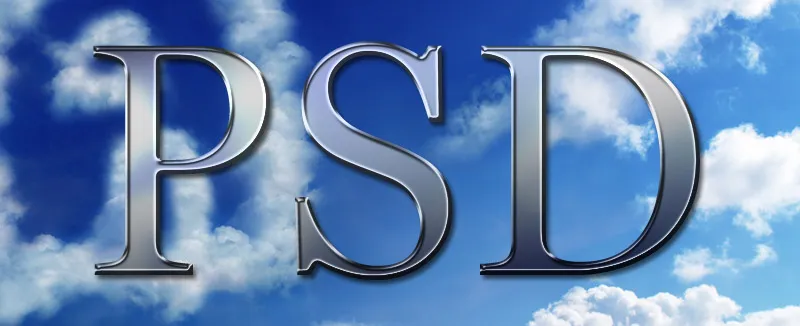
Variation: Beveled Metal Look
If I want to give my metal structure a completely new appearance, I choose the technique of hard chisel instead of flattened in the Bevel and Emboss dialog. I adjust the size to 27 pixels. I change the highlight mode to Cone and increase the opacity in Deep Mode to 85 percent.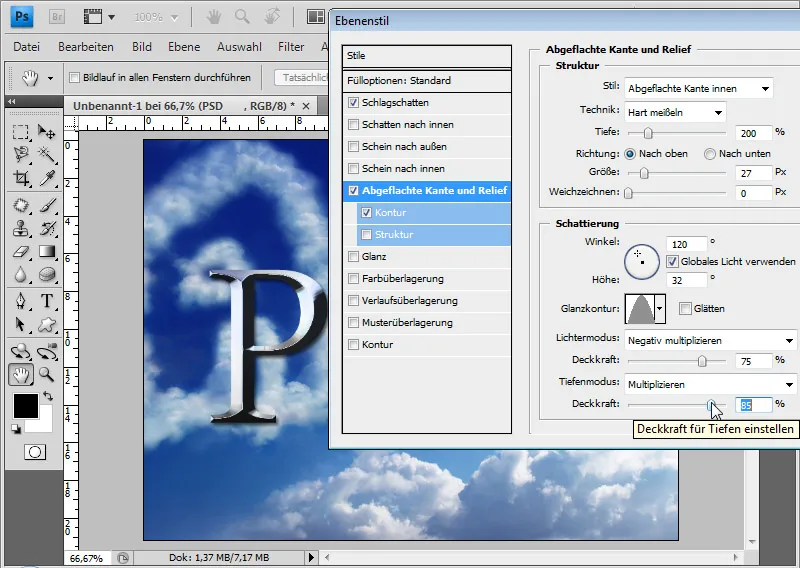
I reduce the half-round contour to a 30 percent range.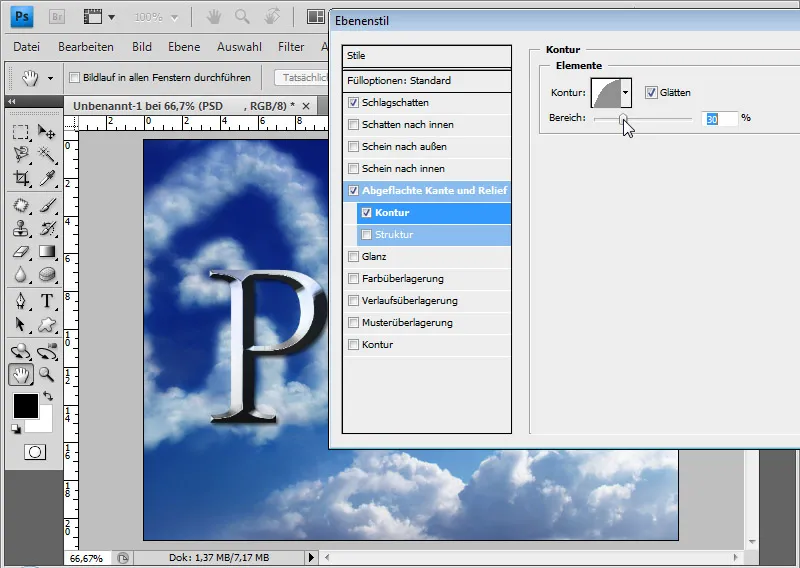
This way, I have quickly and easily generated a beveled look. The environmental reflection has also integrated nicely.
The effect can be easily and quickly varied in brightness and contrast using a adjustment layer called Curves. If I want the metal effect to be a bit crisper, I simply drag the curve down to achieve a stronger look. If I want to add some texture to the metal, for example in a brushed effect, I just choose Pattern Overlay in the blending options around 30 percent, and apply various predefined patterns. This results in very nice variations like burnt metal (as seen on some kitchen knives), dull/matte metal, dirty metal, etc. In this example image with the "Dirt" pattern from the default patterns Rock Patterns with an opacity of 25 percent in the Linear Dodge fill mode without environmental reflection.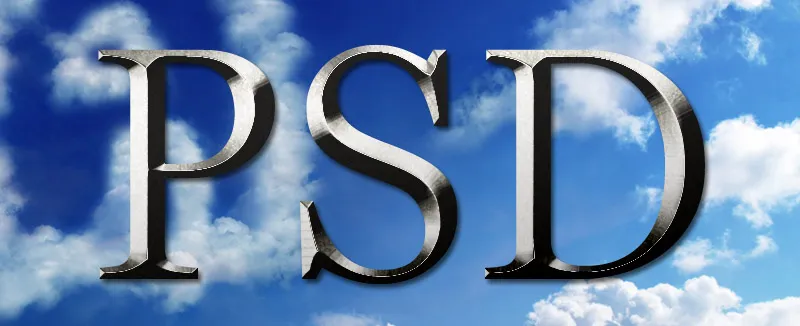
Save and Use Layer Styles as Styles
Since these basic effects are based on layer styles, the settings can also be saved as style presets. There are already numerous predefined styles for all imaginable metals. To save styles, I simply choose New Style in the blending options and give the layer style a name. In this case, "Beveled Metal Effect".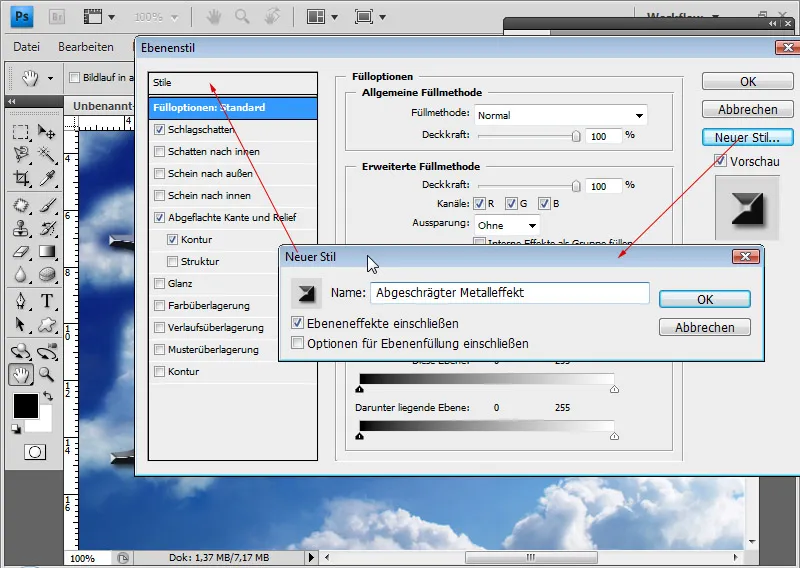
The styles can be accessed via the Styles Panel or directly through the blending options.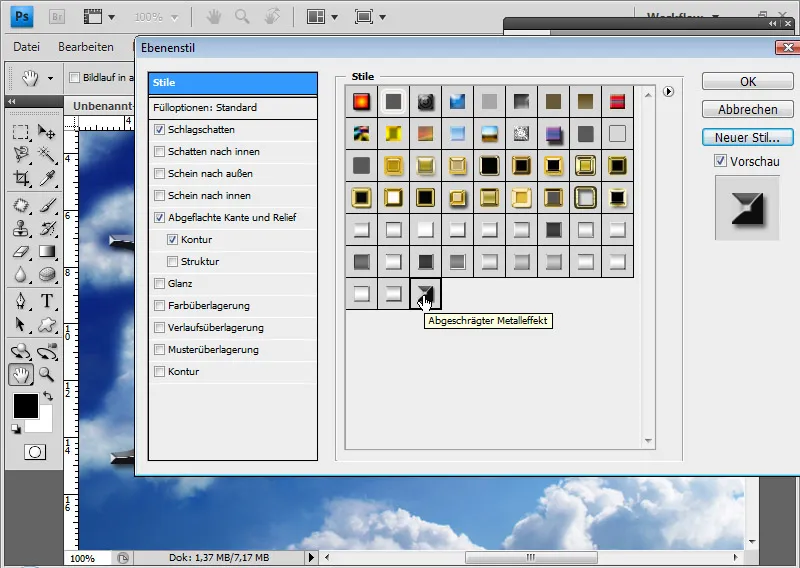
An own category for metals, including gold, copper, chrome, rusted metal, etc., is available on TutKit.com. There, numerous predefined styles are readily available. This allows easy access to a large number of preset options, which may only require slight adjustments based on the font, shape, and size.
Finally, the beveled metal effect without reflection of the environment image: