Here we go: Steps 1-10
Step 1
This tutorial is about cropping with the backgrounderaser tool. Normally, it is always better to work non-destructively with masks, adjustment layers or smart objects so that the original pixels are not lost.
But the background eraser tool has so much power that it would be a shame not to explain it here. Because sometimes it really is superior to other tools. Especially because you can protect the foreground color when clipping.
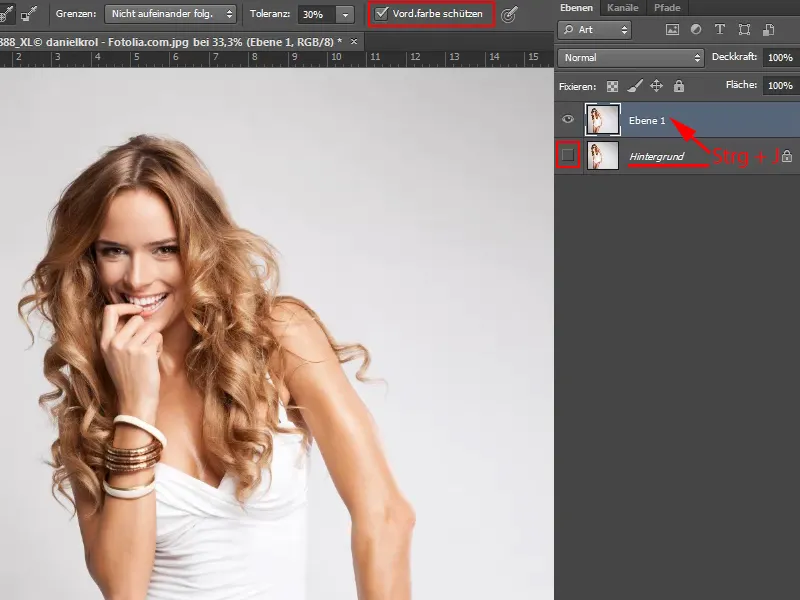
To work at least halfway non-destructively, you should first activate the background layer and then duplicate it with Ctrl+J.
I can then also hide the "Background" layer.
Step 2
I now want to crop the person in front of the slightly gray background and you can see all those fine hairs that make cropping so difficult in general. But with the background eraser tool, this works really well.
You can find it in the toolbar directly below the eraser tool.
If you select it, you will see some setting options at the top of the bar: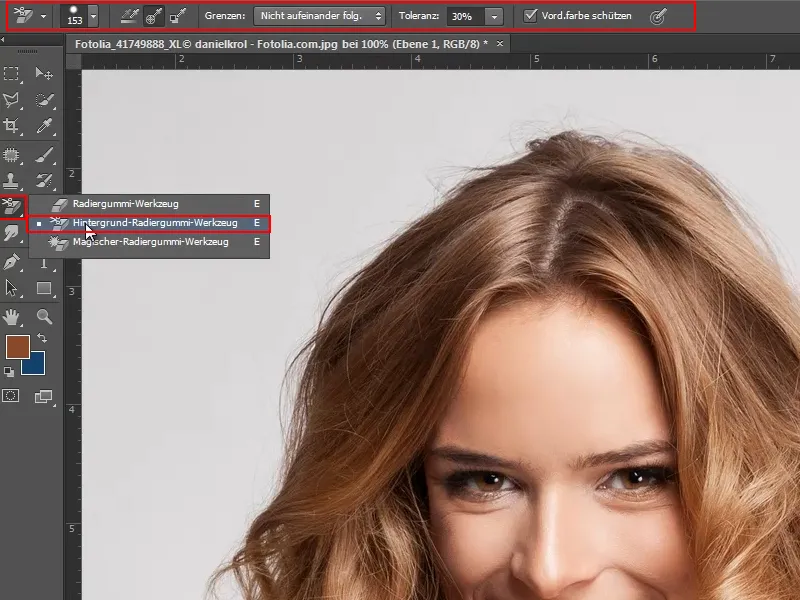
Let's take a look at the settings ...
Step 3
On the left, I can set the size of the tool, just like with the brush.
And there are three icons next to it. They control the setting of the tool with regard to the reference point:
The first, Recording: Continuous, sets my tool to erase everything I move over with the mouse button pressed. It adjusts itself continuously to the background..webp?tutkfid=75240)
By the way: The checkered pattern that then appears means transparent, because there is no layer underneath that could show through.
Step 4
The middle symbol, Recording: Once, remembers the reference point or color when clicked.
For example, if I want the gray removed, I click once in the background and Photoshop remembers the gray under the cross. If I hold down the mouse button and continue dragging, only the gray is erased.
You can see that the hair is not erased here because it has a different color..webp?tutkfid=75241)
Step 5
You always have to try a bit with the borders, but the option of my choice is usually Not consecutive.
If I set the tolerance to 100%, you will see that the skin is also partially removed in the image because it is perhaps a little similar in terms of color tone and brightness.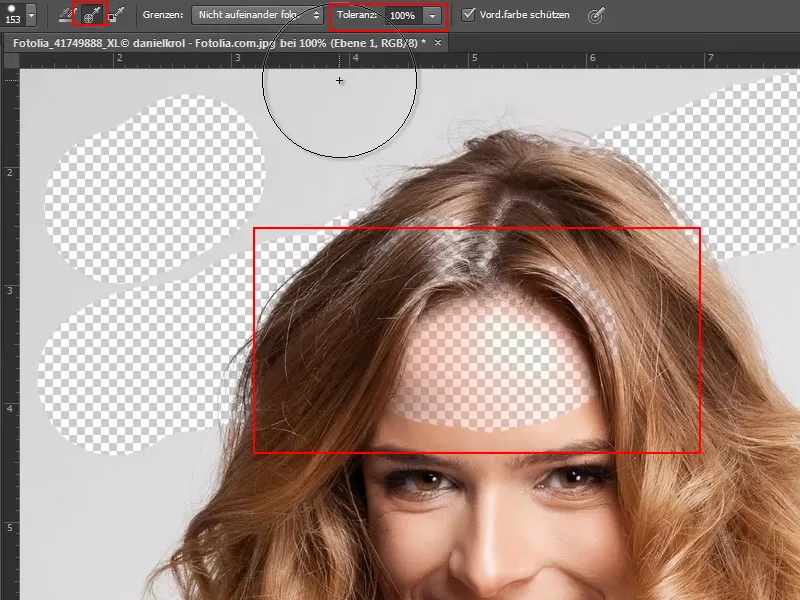
That's why I only set the tolerance to about 20%, then this doesn't happen. You just have to practise a little with this.
Step 6
It is very important to check the box next to Protect foreground color(Vord.farbe schützen). Then I can use the eyedropper to pick up the color of the face as the foreground color and I have already protected the face..webp?tutkfid=75243)
Step 7
Enough of the long words, I start and go in with a tolerance of 50% and a size of about 104 px. It is important that I place the first click in the gray. Keeping the mouse button pressed, I drag over the entire background.
The hair is perfectly cropped. Of course, the problem is that the pixels are gone forever. But luckily I still have my original background layer, so it's not quite so bad.
It works really, really quickly, and in places where it could be more difficult, I can simply readjust the foreground color. If I use the eyedropper tool (or hold down the Alt key) to pick up the color of a strand or the T-shirt again, it is protected and I can continue.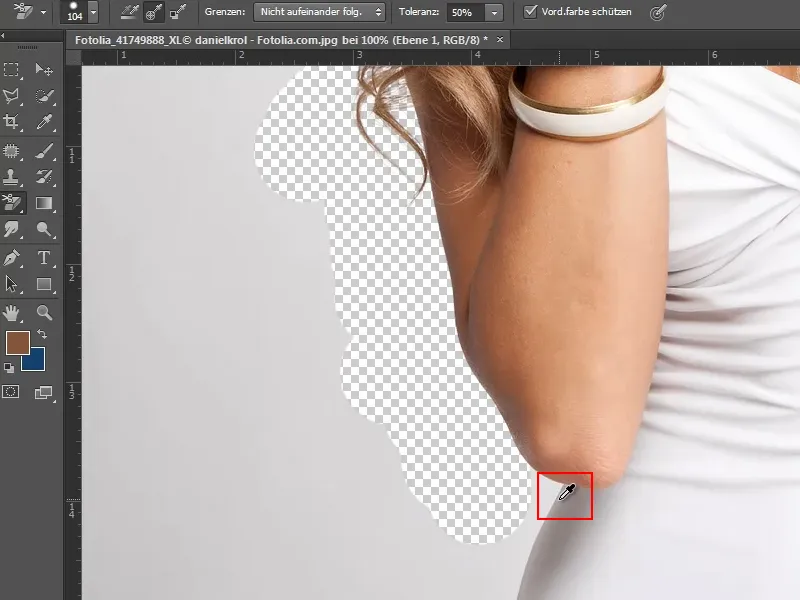
Step 8
At this point, the white and the gray are very, very similar. Of course, this makes it difficult and I go even further down with the tolerance.
I also reduce the tool size a little.
And then I use the eyedropper tool (holding down the Alt key) to pick up the white again as the foreground color and it works.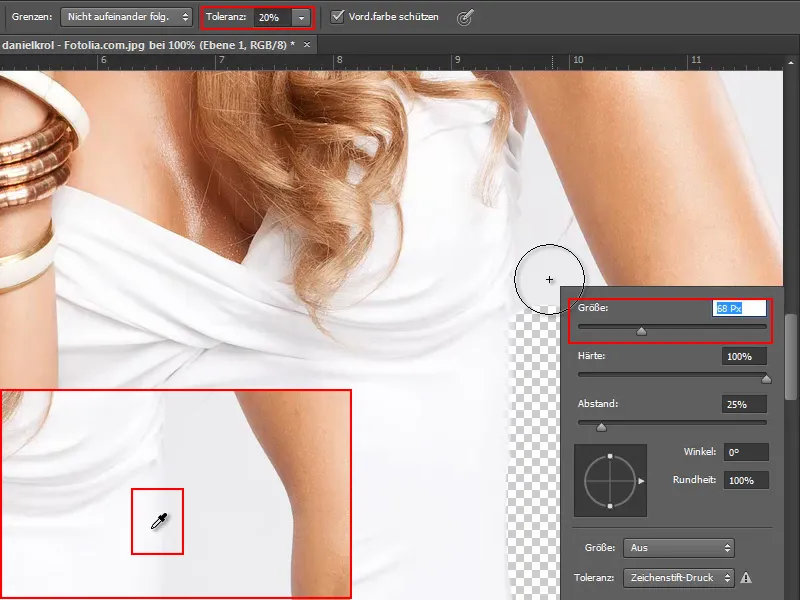
Step 9
Alternatively, I could of course simply combine clipping tools. There are no hairs or strands to watch out for at this point, so I can simply click in the area with the Magic Wand tool and this area is selected (left).
Some areas were selected too generously, so I reduce the tolerance to 6% and correct the details with the lasso tool (right).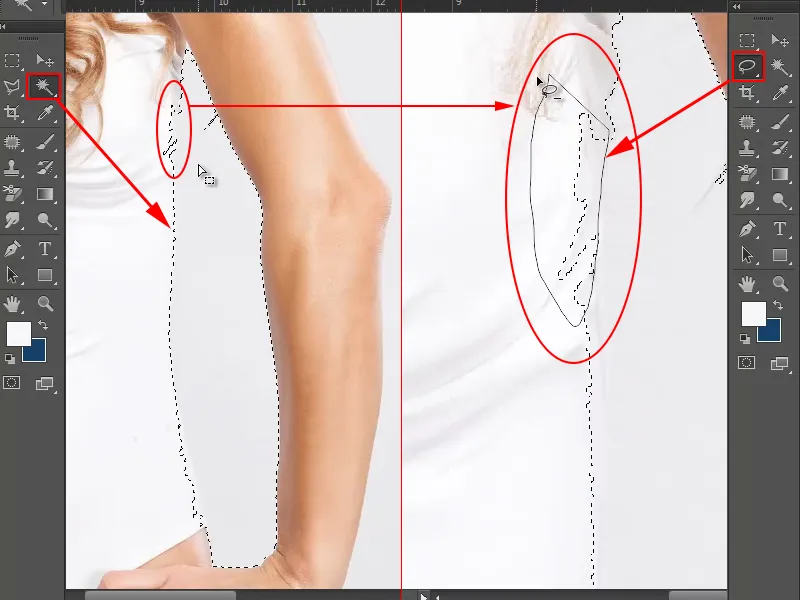
Good to know:
- Zoom: Alt key +turn mouse wheel
- Add places to the selection: hold down the Shift key
- Subtract places from the selection: by holding down the Alt key
Step 10
If you look closely, you will notice a few hairs behind the arm that should also be cropped (left).
So I use the lasso tool and hold down the Altkey to subtract the upper area from the selection (center). I then want to treat this separately.
Then I press the Delete keyand get my transparent check pattern for the lower part (right).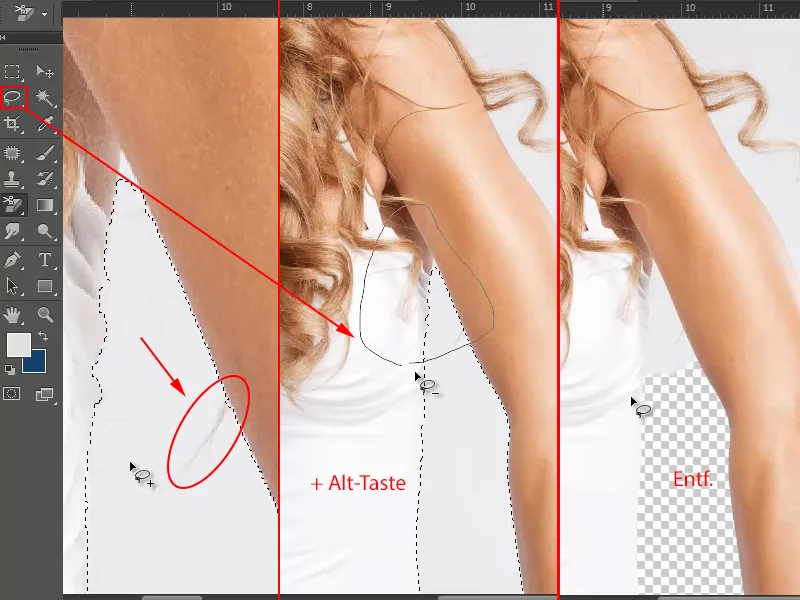
Steps 11-20
Step 11
And then I continue with the background eraser tool.
I zoom in a little closer and, holding down the Alt key, first pick up the white of the shirt so that it is protected as the foreground color (1).
I set the tolerance slightly lower, to approx. 16 %.
And then I simply erase the background with the eraser (2).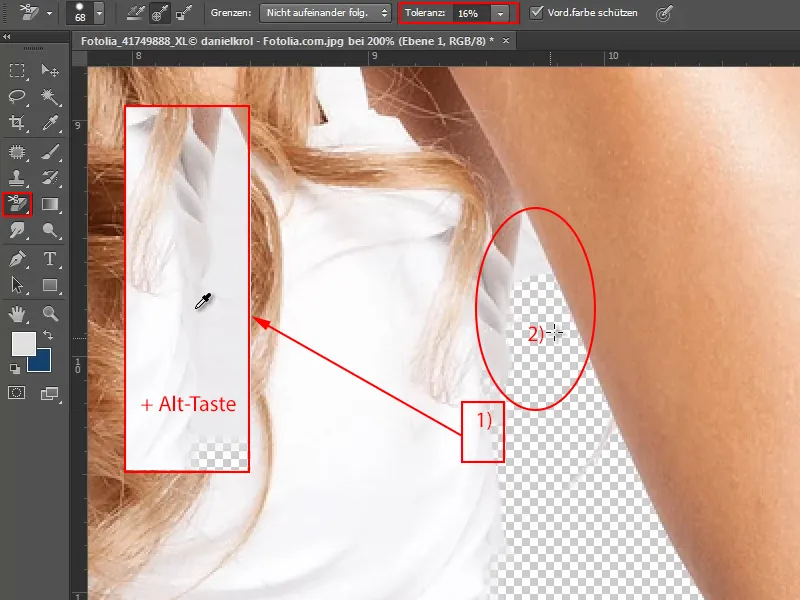
Step 12
A little too much of the T-shirt has now been erased. But that's not a problem, because I can restore it with the protocol brush.
To do this, I open the Protocol settings panel via Window (1 ) and select the relevant step by simply clicking on the hidden field (2).
Then I select the protocol brush from the toolbar (3) and set its size as I need it, in this case to about 16 px (4).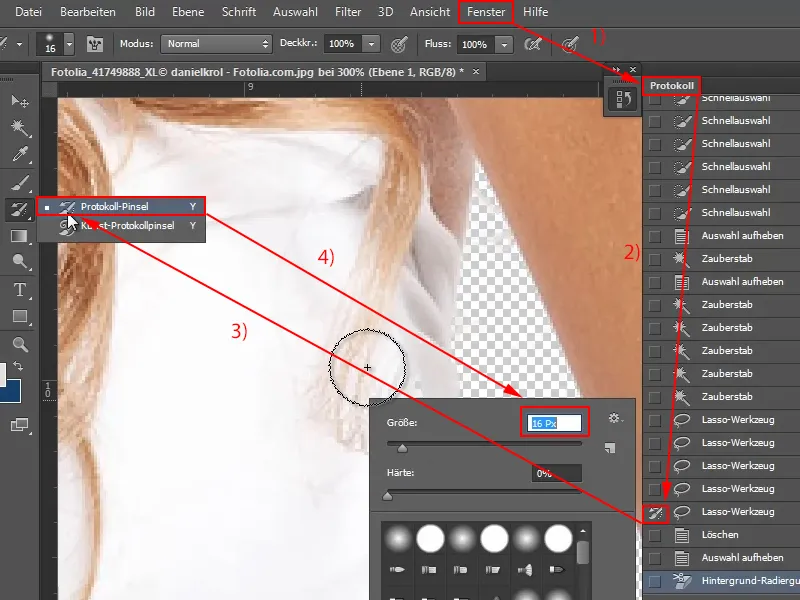
Step 13
With this setting, I now go over the areas that have been erased too much and restore them.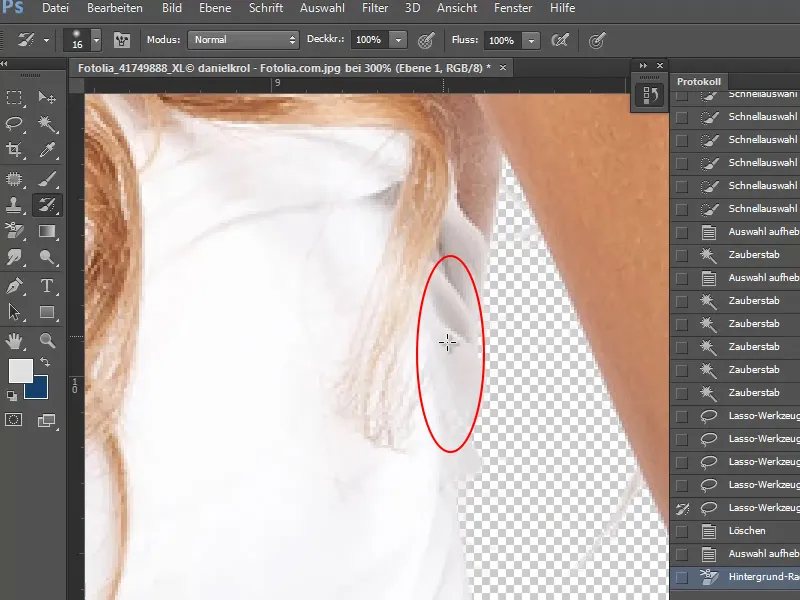
Step 14
In the upper right half, I work again as normal with the background eraser tool and protect the colors of the arm or hair accordingly.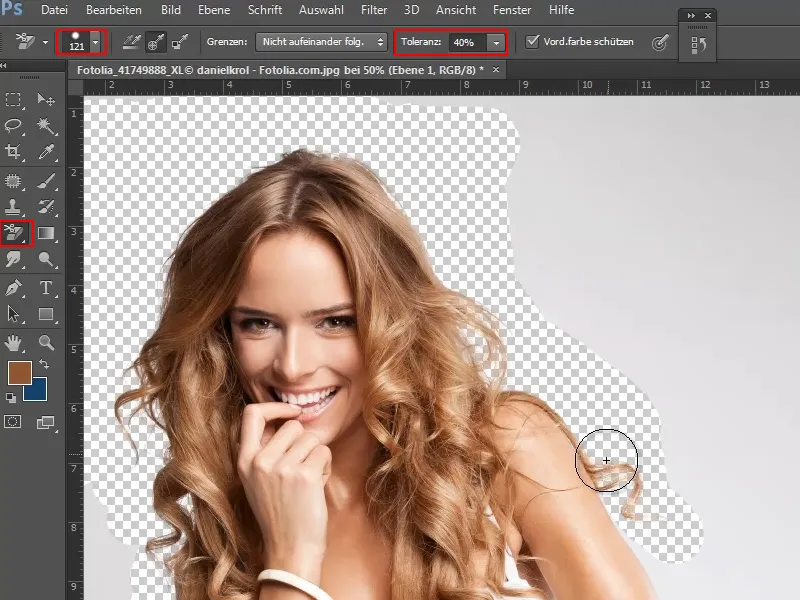
Step 15
I use the quick selection tool to select the rest by clicking in the gray background and dragging the selection accordingly.
The same applies here too, of course:
- Add places to the selection: by holding down the Shift key
- Subtract places from the selection: by holding down the Alt key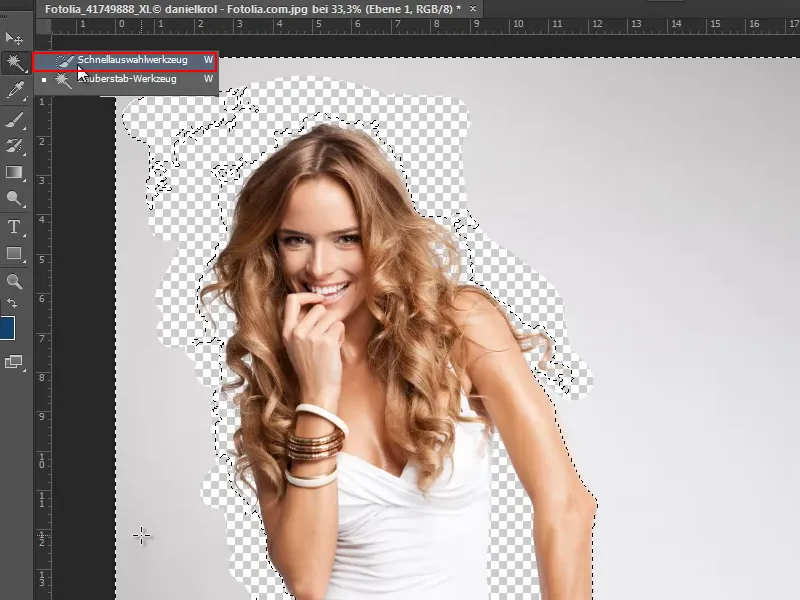
If I have selected everything correctly, I just press the Delete keyand have already cropped the model very well.
Step 16
The best way to see how well the model has been cropped is, of course, to insert it in front of a different background.
To do this, I open a texture from the texture pack via File>Open, and as they are all seamlessly tileable, I want to take advantage of this and save it as a pattern:
I select everything with Ctrl+A. Then I save the selection as a pattern via Edit>Set pattern.
Step 17
The pattern should now become the new background. To do this, I create a new layer below the cropped model (1).
Then I select the fill tool from the toolbar (2) and set it from Foreground to Pattern (3). From the pattern selection to the right, I select the pattern I created in the last step (4).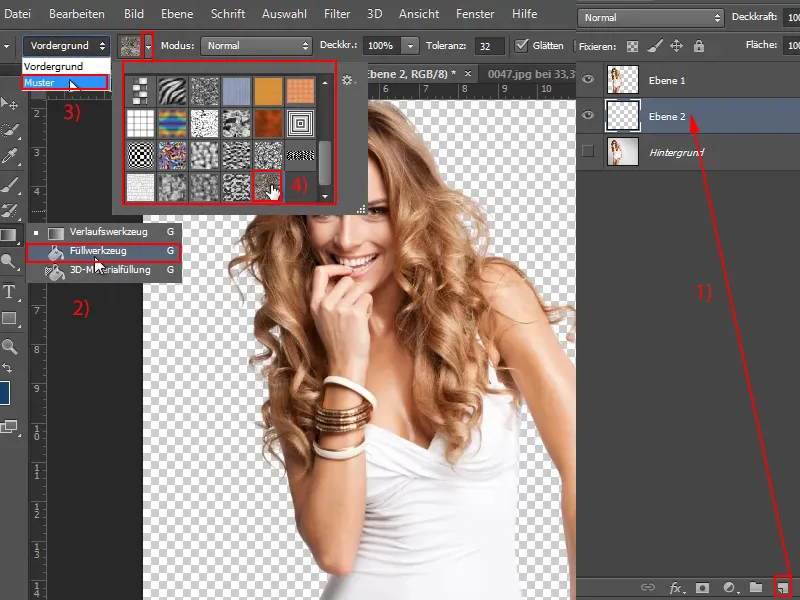
Step 18
Now just click with the left mouse button and the pattern is filled into the new layer. Now we can see that the model is already very well cropped. Only in a few places is the original gray still showing through..webp?tutkfid=75255)
Step 19
We can easily correct these - again with the background eraser tool, of course.
I select it, set the size and tolerance and protect the hair or skin color in the corresponding areas with the Alt key. Then run the tool over it and simply erase the remaining background gray.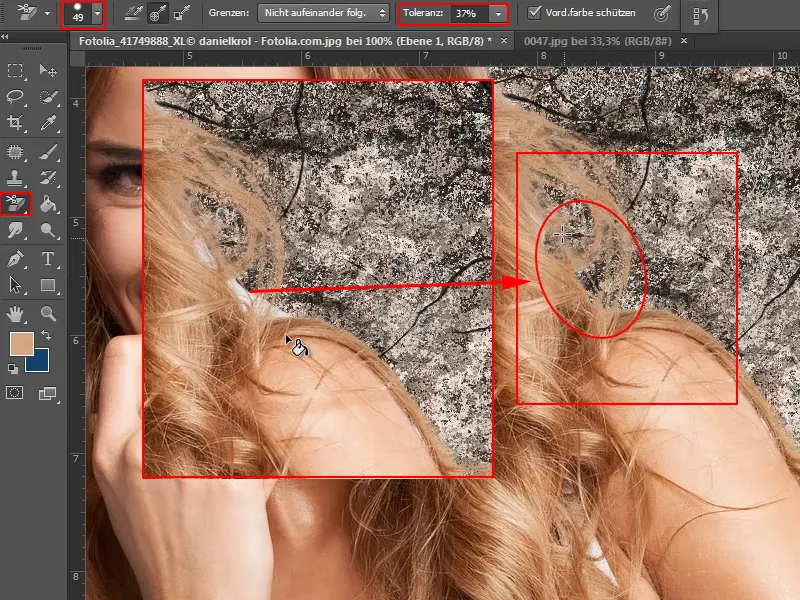
Step 20
Admittedly, this is a relatively simple example because the original background is almost monochrome, stands out very well from the model and the clipping works quite well.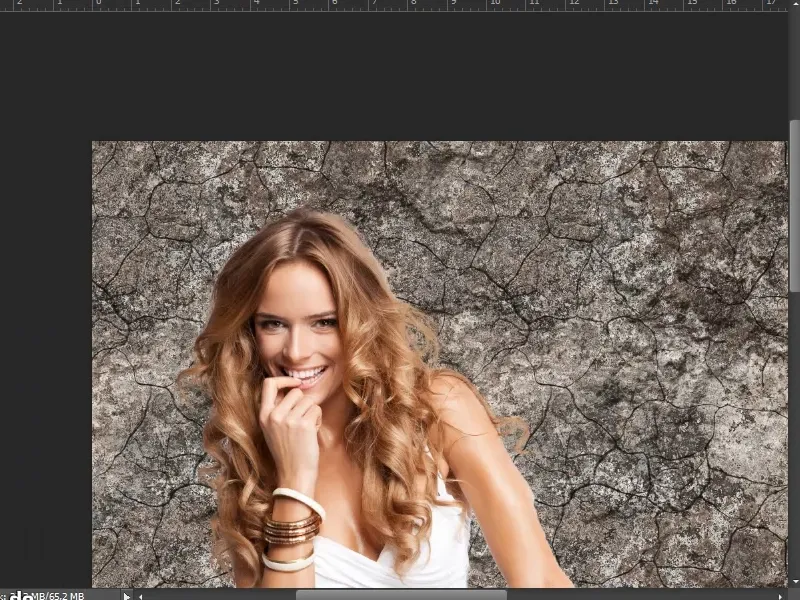
Let's continue: Steps 21-30
Step 21
I would now like to show you a trick for achieving this result non-destructively and reasonably quickly.
I can simply duplicate the "Background" layer again with Ctrl+J (1) and then activate a selection of the clipped "Layer 1" (click on "Layer 1" while holding down the Ctrl key) (2).
Then, with the "Background copy" layer selected, click on the mask symbol (3).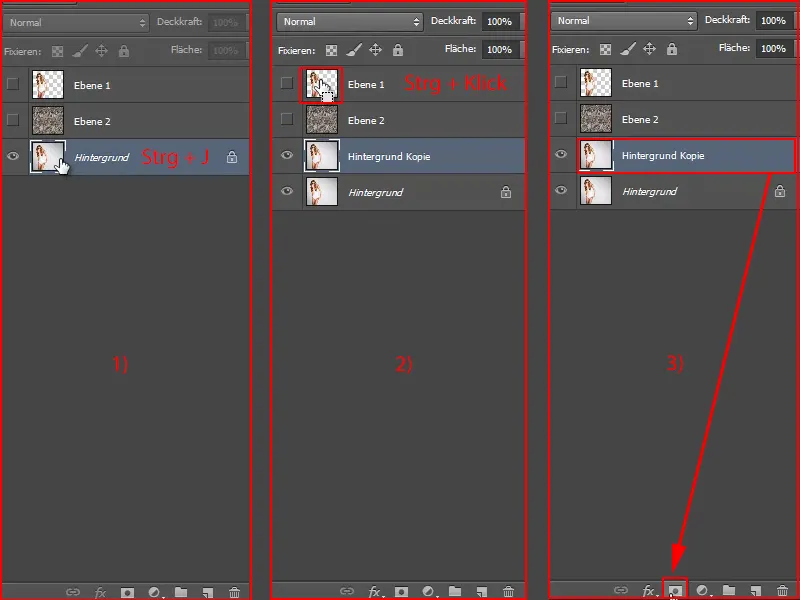
Step 22
Now I just sort the layers in order and hide the model ("Layer 1") that has been cropped with the background eraser tool.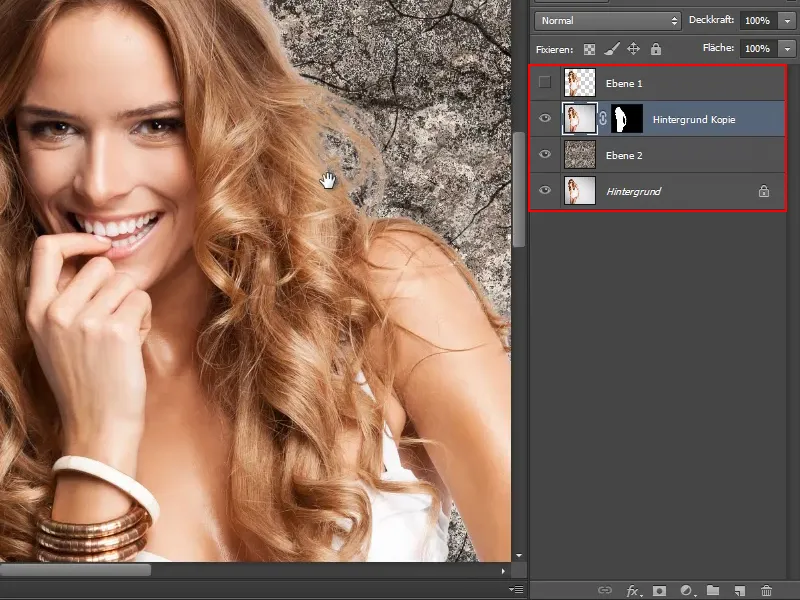
By transferring the mask, I have cropped almost exactly the same way. That's a good thing, of course.
Step 23
I can see from the arm that there is still too much. But now that I have a mask, I can simply change the whole thing in the mask.
To do this, I activate the mask, select the brush and the foreground color black. This allows me to adjust the mask to the contour of the arm.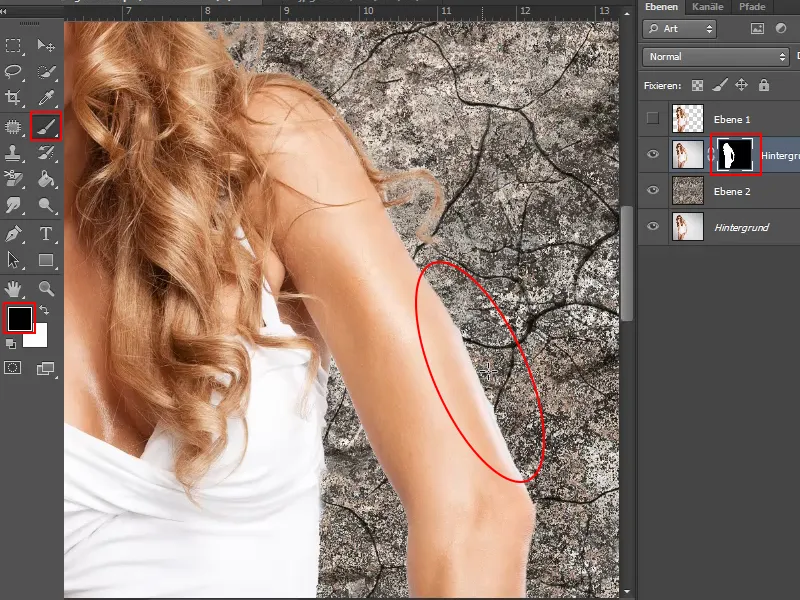
These two techniques can therefore be combined very well. When I have irrevocably deleted something with the background eraser tool, I save the object I have removed as a selection and then, as I have just shown, as a mask.
So without having to fiddle around with channels, I can crop quickly and easily in this way.
Step 24
But what happens if the background of an image is a little more irregular?
It's still reasonably easy with this picture, although the difference between the brightness of the hair and that of the background is not too great.
But here, too, it's a good idea to duplicate the "Background" layer first with Ctrl+J.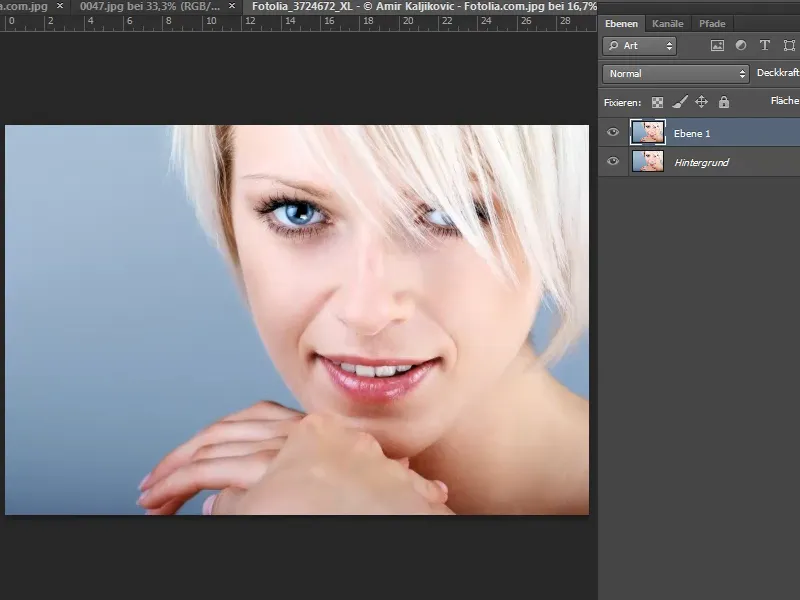
Step 25
Then I select the background eraser tool again and set the size and tolerance.
Before I erase, I hold down the Alt keyagain and click on the model's hair to select the color to be protected as the foreground color and make sure that the check mark is set for Protect foreground color.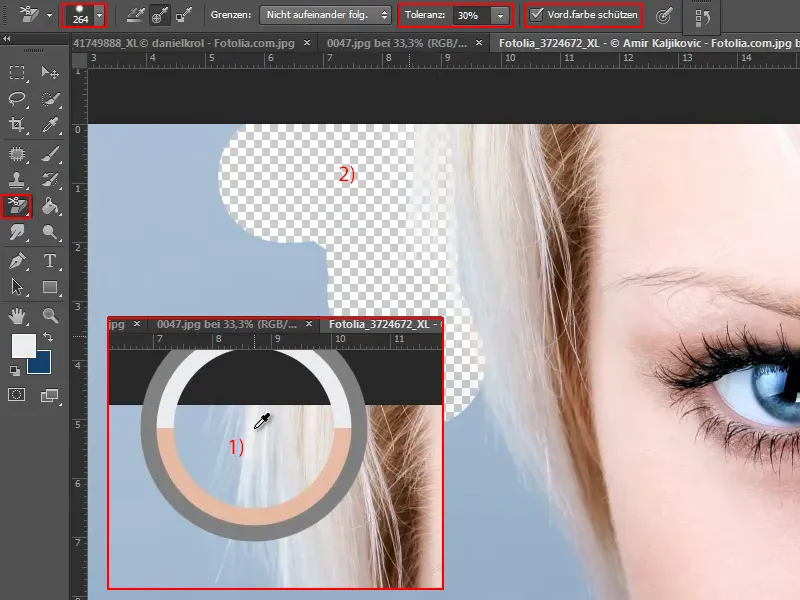
Step 26
Then I erase downwards along the hair.
In between - on the face and hands, for example - I repeatedly press the Alt keyto pick up the new protected color and continue erasing. This works quite well. I select the remaining blue area on the left with the quick selection tool and then press the Delete key.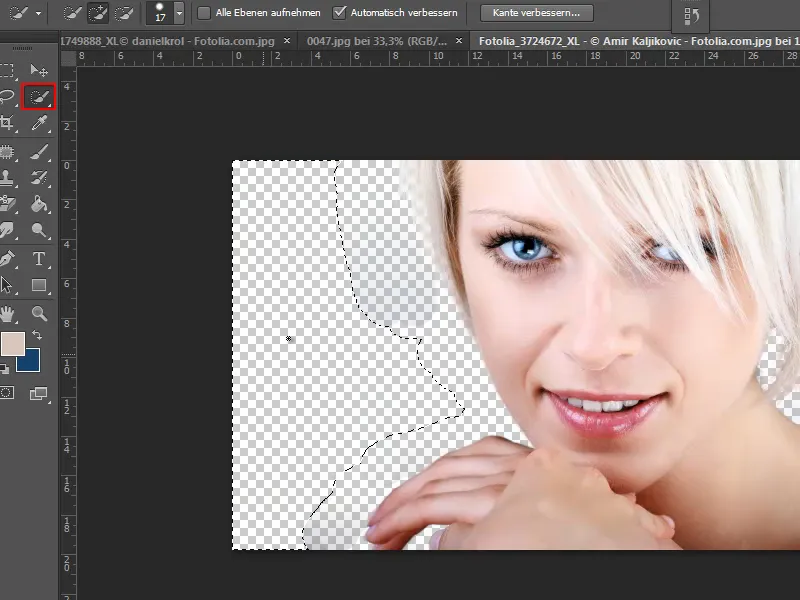
Step 27
A few messy areas remain. To remove them, I simply erase them with a tolerance of 100%.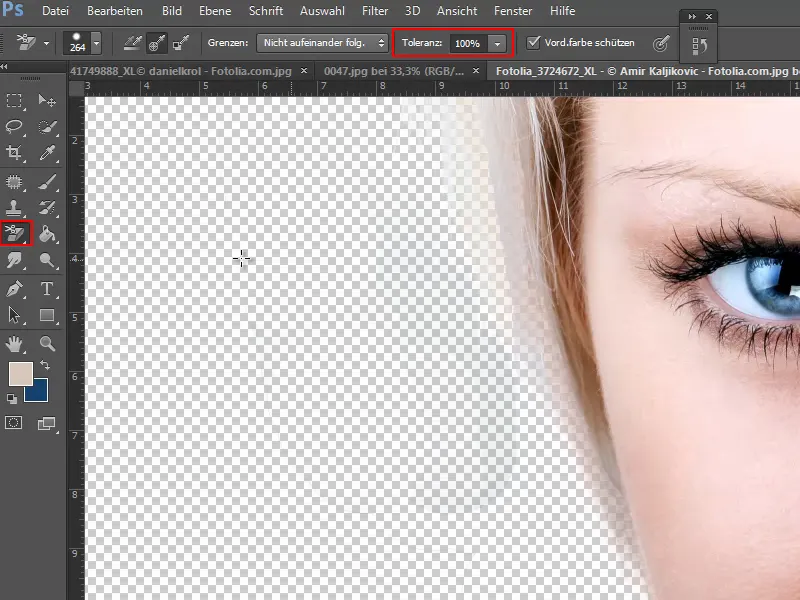
Step 28
Then, holding down the Ctrl key, I add a new layer below the current one.
To check the clipping result, I now add the texture as a pattern to this new layer using the fill tool.
Now I can see that the hair is really nicely clipped and shines through as it should. So we have achieved a good result very quickly with the background eraser tool.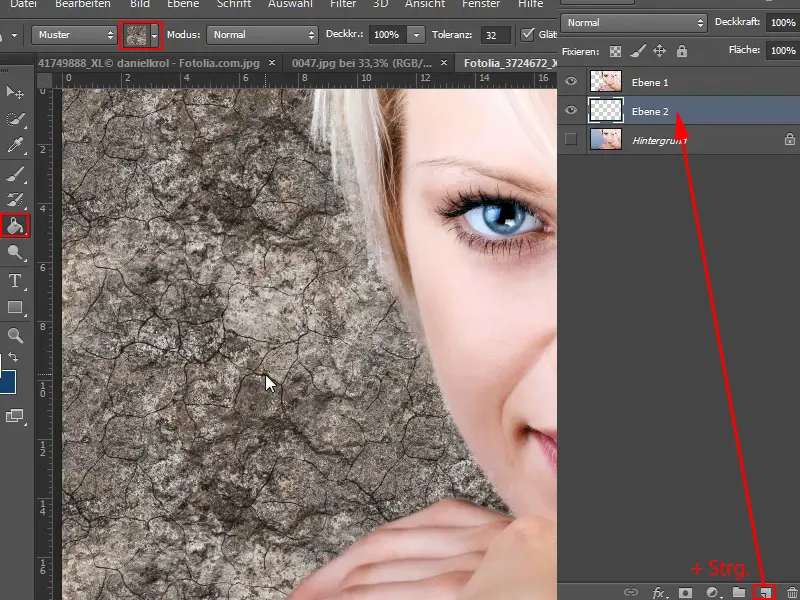
Step 29
Again, I copy the "Background" layer (1) with Ctrl+J.
Holding down the Ctrl keyand clicking on "Layer 1", I activate the selection in the layer in which I have irrevocably deleted the pixels (2).
Now I move the "Background copy" layer to the position above the pattern layer ("Layer 2") and click on the mask symbol (3).
I hide "Layer 1" (3).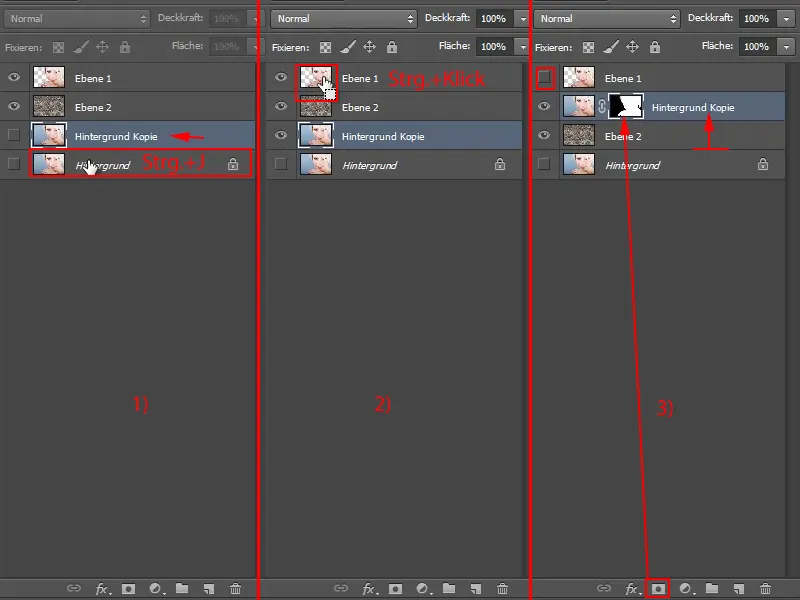
Step 30
The result looks almost as good and I have a non-destructive solution where I can change the mask at any time and bring back the pixels.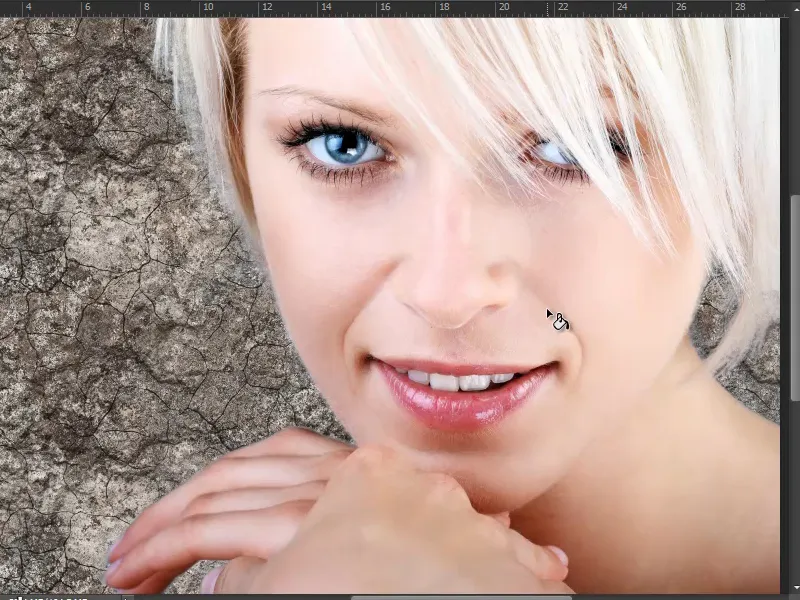
Steps 31 to 40 follow
Step 31
Of course, you can also choose a different gradient instead of the texture. For example, from white to gray. I save this as "New gray gradient" ...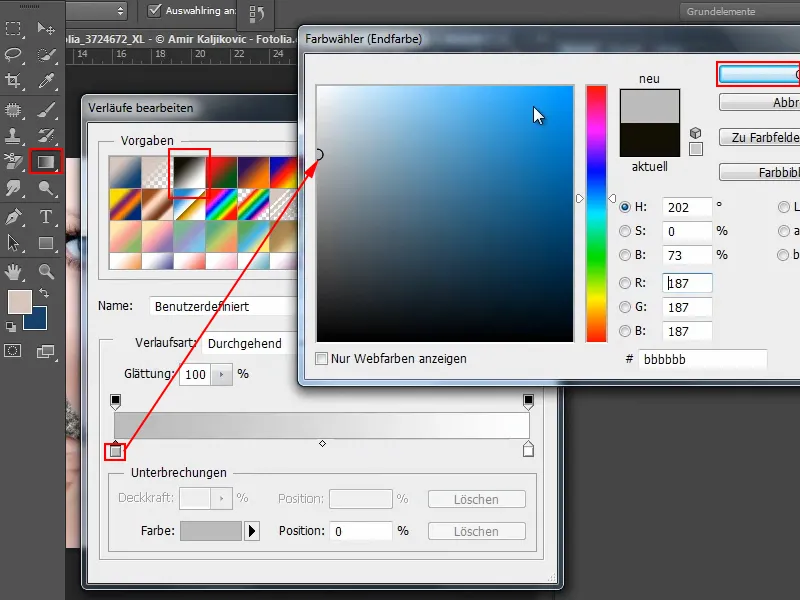
Step 32
... and drag it in as a radial gradient.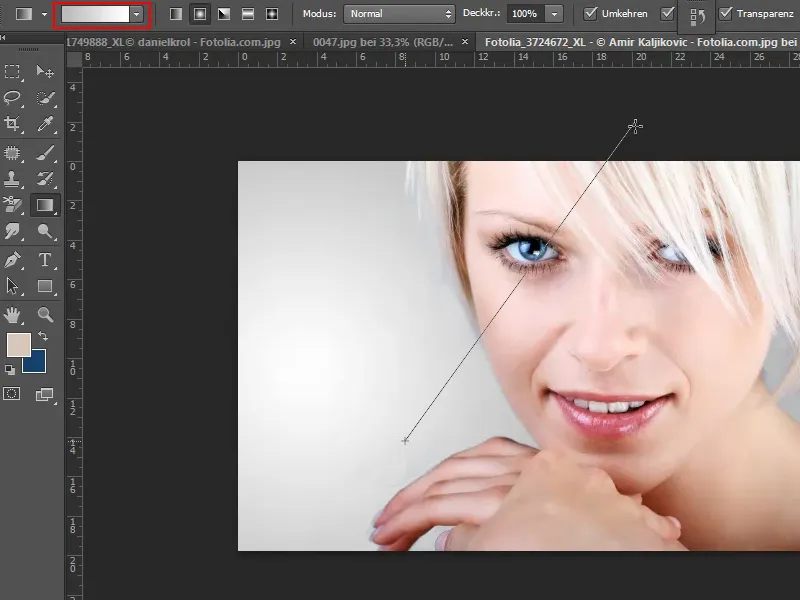
Step 33
I can see that there are still a few imperfections. But thanks to the mask, I can correct them later with a brush and black paint.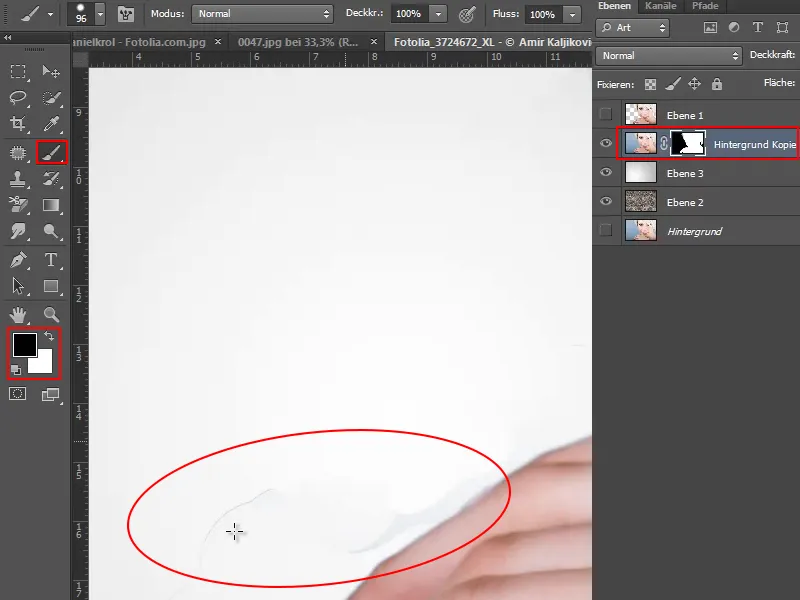
Step 34
If you really want to be sure that the clipping is perfect, you can always try it out with several gradients and colors.
Another tip: If there is any blue left in the hair - this can happen with blonde hair in particular - I create a Hue/Saturation adjustment layer ...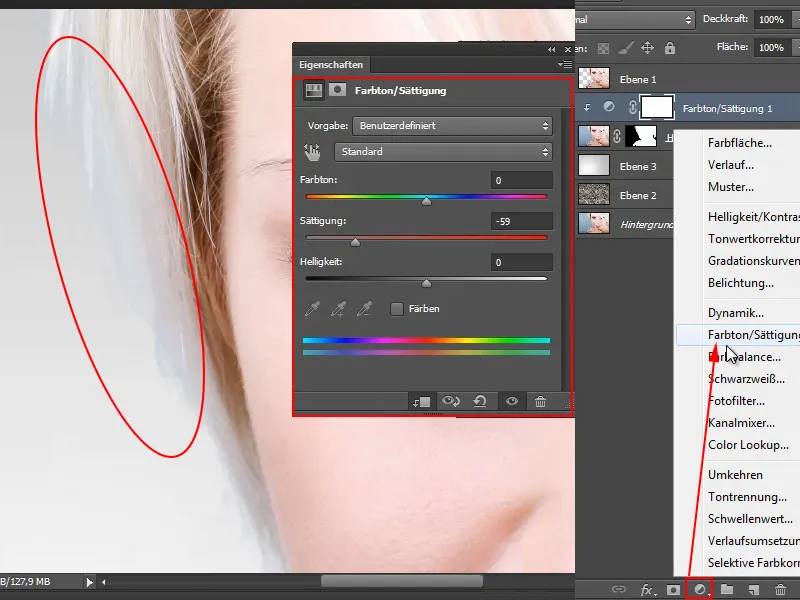
Step 35
...and reduce the saturation a little.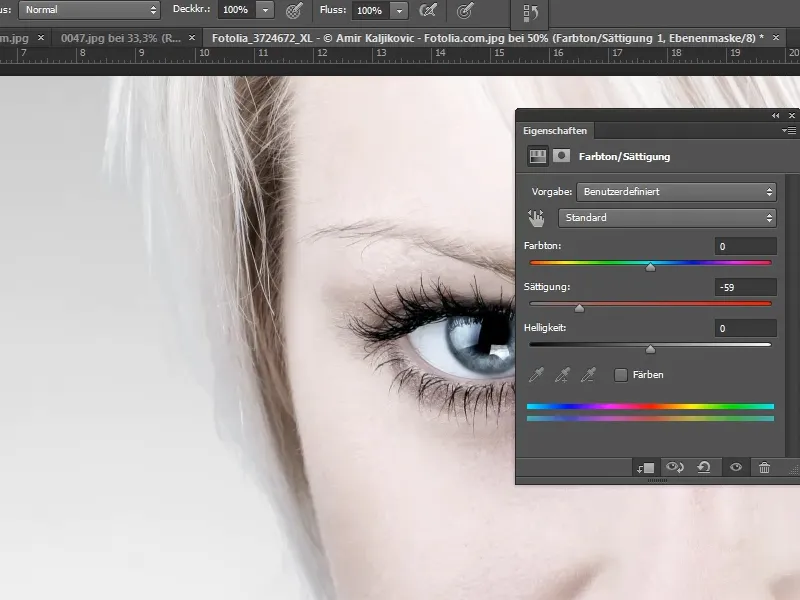
Step 36
I have now entered this as a clipping mask. If this is not the case for you, then simply hold down the Alt keyand click between the two layers, this will only affect the layer below.
I then press Ctrl+E, which means that the Hue/Saturation adjustment layer does not take effect.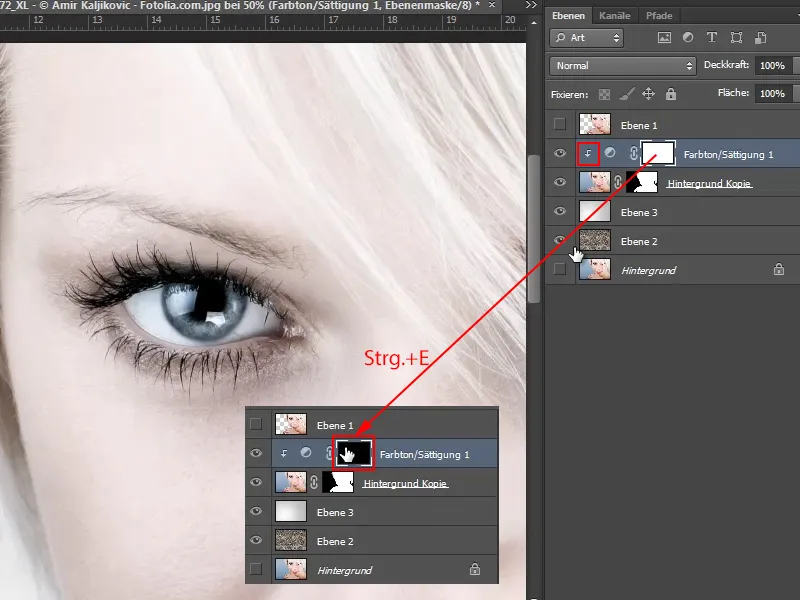
Step 37
By going over the blue areas of the hair with a brush and white paint, I can determine exactly where the adjustment layer should be applied and the saturation reduced.
If this is not enough, I can double-click on the adjustment layer at any time to open the adjustment window. There I can then reduce the saturation even further, set a different color tone, etc.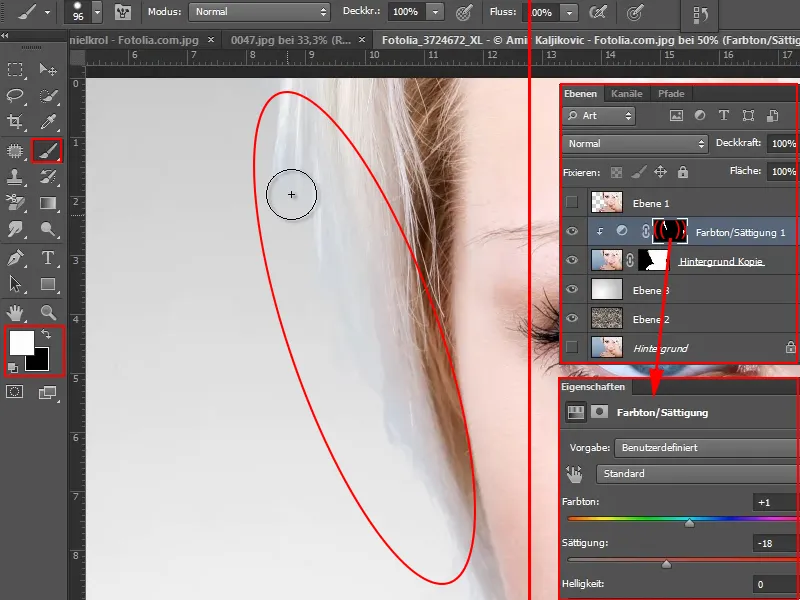
Step 38
But how do I proceed with an image with a very irregular background like this one?
Basically, this can be done quickly, as it's mainly about cropping the hair. Everything else is pretty good in terms of contrast. That's why I can use several tools here.
First, of course, I duplicate the "Background" layer.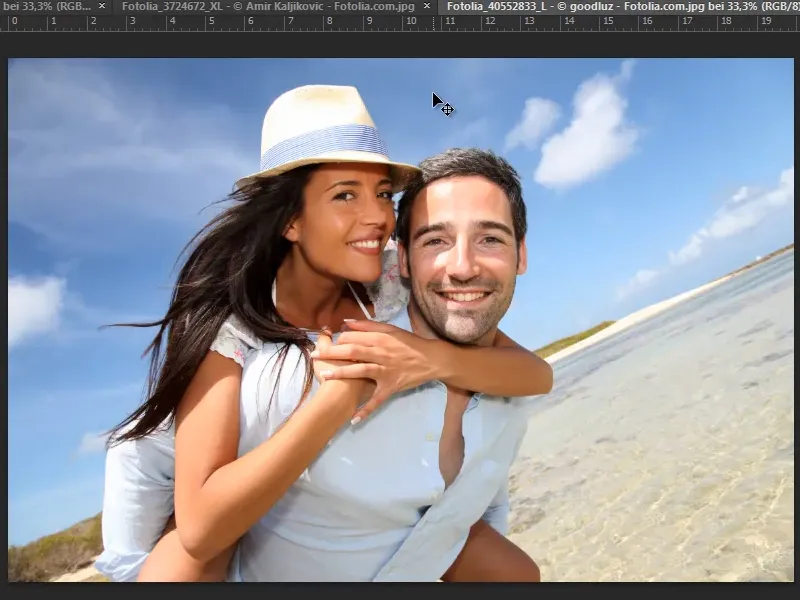
Step 39
Then I release the lighter areas first. I do this with the Magnetic Lasso tool.
I can also use it to draw very roughly around them, as I'll be doing this later with the background eraser tool anyway.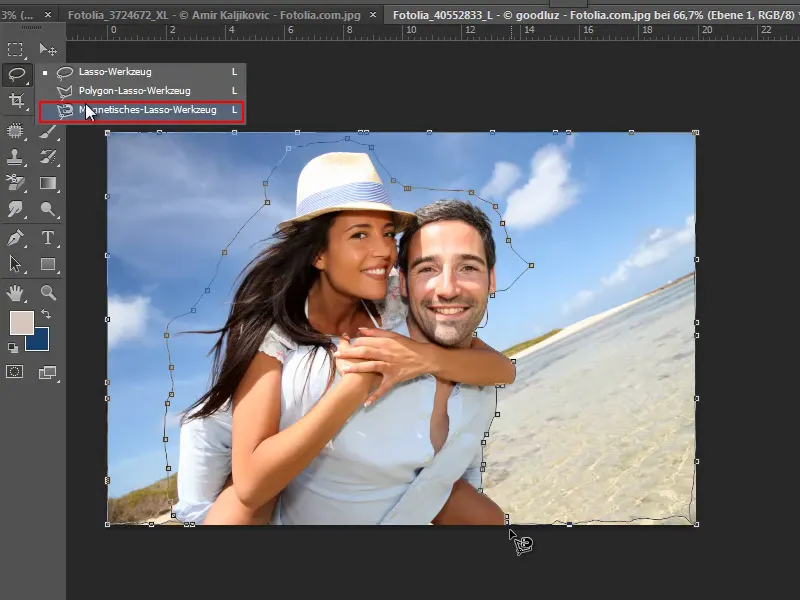
Once I have defined the area, I press the Delete keyand have already removed the roughest part.
Step 40
Now it gets a bit more challenging because the sky has different gradients in it this time. But it still shouldn't be too difficult.
I select the background eraser tool again, check the Protect front color box and set the size and tolerance.
I use the Alt keyto select the color to be protected and then I erase.
If the tolerance is set too low, an unsightly border remains. So sometimes I have to adjust it a little. If - as here - there is still a blue haze, I either have to go over it several times or adjust the tolerance.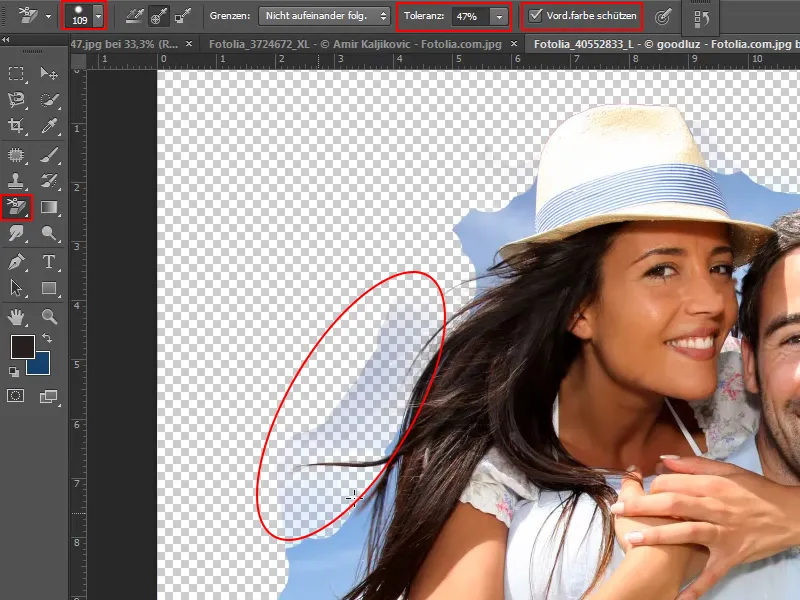
The last steps
Step 41
If it doesn't work quite so well in some places, I can also use the lasso tool, for example.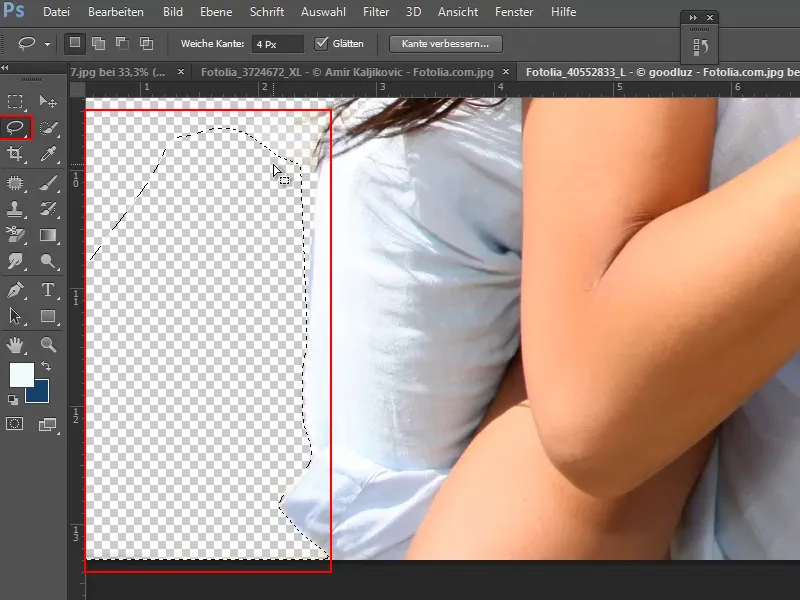
Step 42
Once I have cropped everything, I use File>Place to bring a different background into the picture.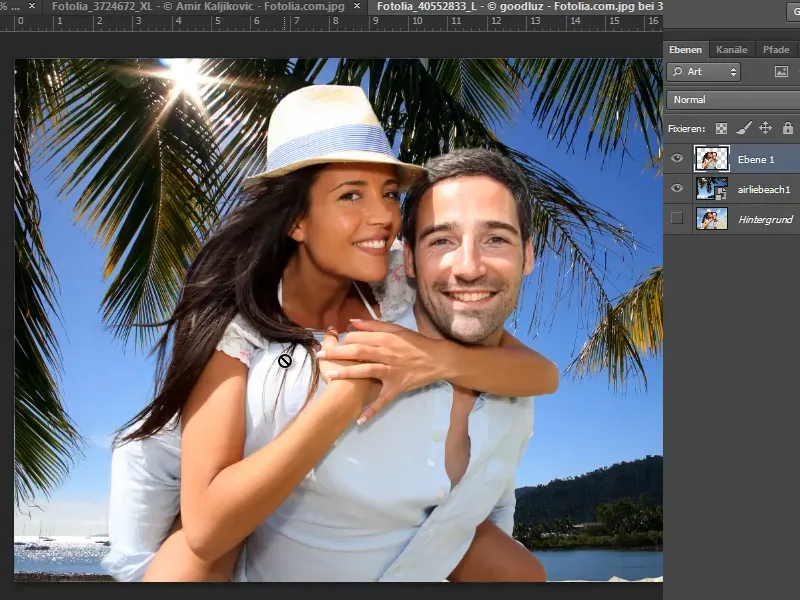
Step 43
There is still some of the background left on the right-hand side. I can quickly remove it with the lasso.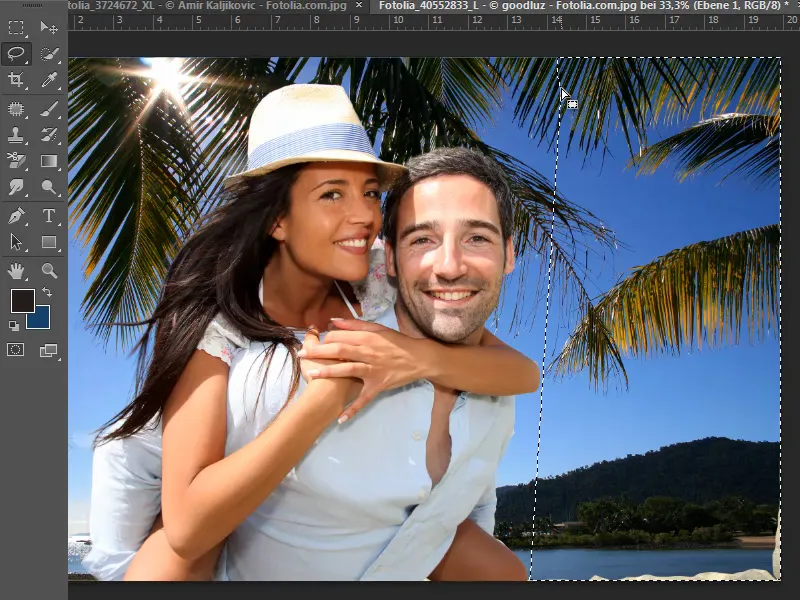
If there are still mistakes, I can of course correct them quickly. Either with the protocol brush, with which I bring out pixels again, or, if there is still a slight haze left, I have to go back to it with the background eraser tool.
Step 44
That went relatively well after all. Finally, let's take a very difficult picture.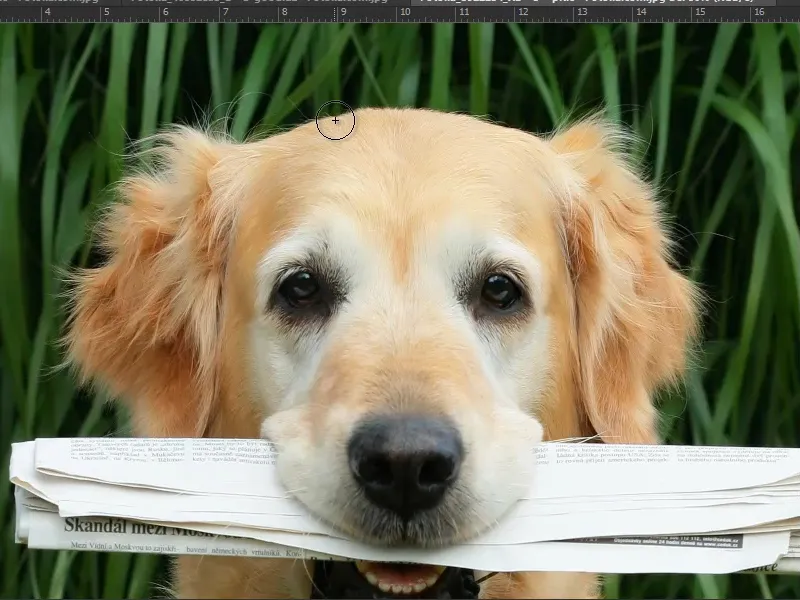
The background eraser tool can also produce a good result here because the dog's hair color stands out clearly from the background.
Step 45
First, we duplicate the "Background" layer again.
Then we select the background eraser tool and set the size and tolerance. We use the Alt keyto specify which color is to be protected and then we erase the background.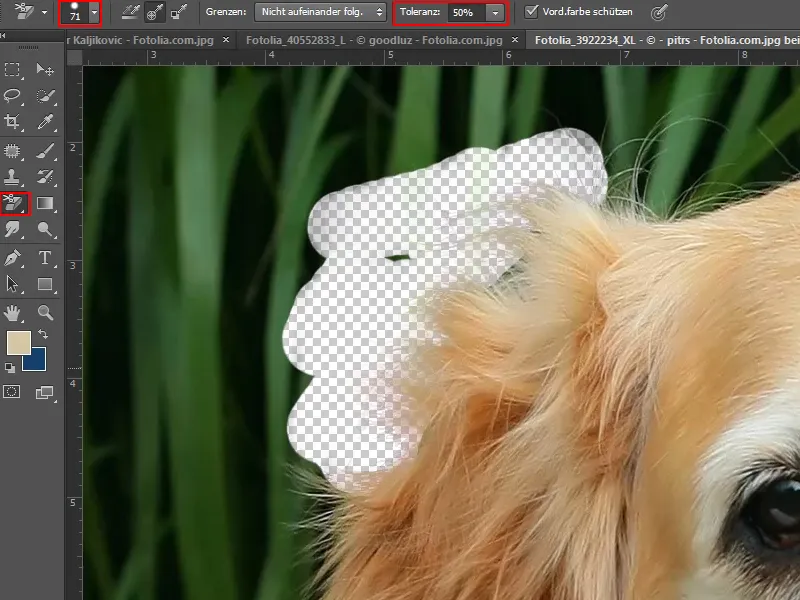
Step 46
I can also create a new layer here as a test and fill it with the pattern using the fill tool. This makes it easier and quicker to see what the result looks like.
The problem here is that I have to keep reapplying the eraser because there are so many different shades of black and green in the background.
It's a lot more work in this case, but of course it works.
And if there is still green in the hair, as I've already said, you can use the Hue/Saturation adjustment layer to get a handle on it.
Step 47
A real hardcore project would be this picture here. It's very difficult because the hair and background are very similar in color.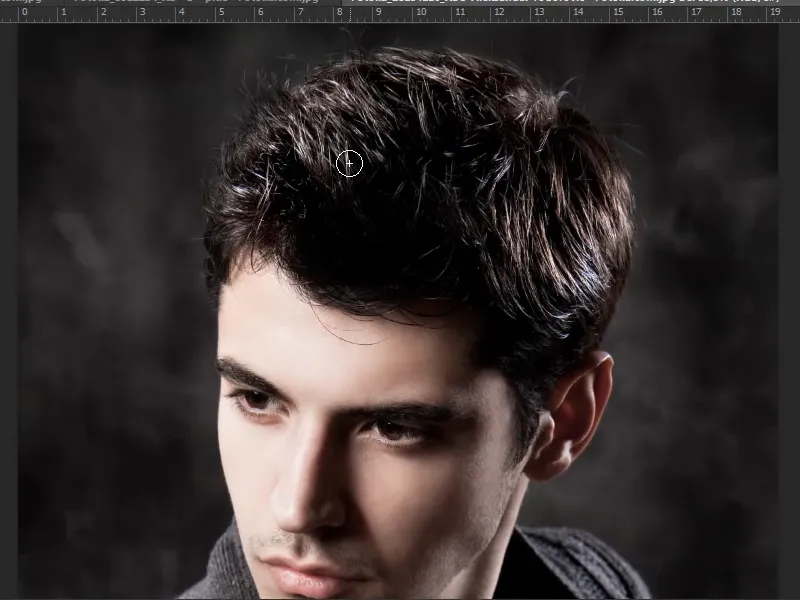
It might help to duplicate the layer and then use the tone correction or gradation curve to emphasize this a little. You can then save it all as a mask, but that would be a bit too much for this tutorial. It would probably take me 20 minutes to create a perfect cut-out with the background eraser tool.
I hope you were able to do something with this tutorial. I've already shown you elsewhere how to crop fireworks, for example, and the background eraser tool works very, very well here.
Just try it out, then activate the result as a selection and save it as a mask. Then you also have it non-destructively.


