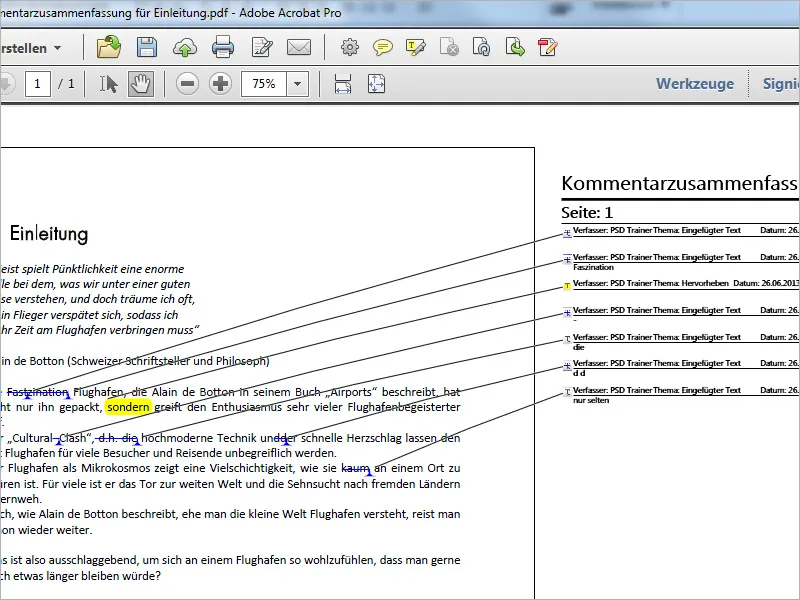
Graphic markers
In addition to the annotation tools, Acrobat also offers tools for graphic markups. You will find them in the Graphic markers category once the comment bar has been displayed.
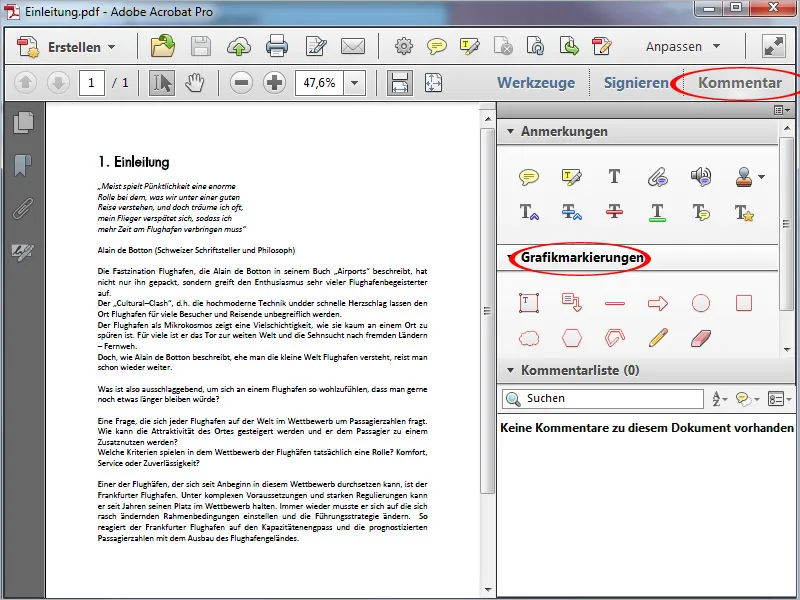
The icons of these tools in the annotation bar already indicate which shapes can be drawn with them. A short description of the marking tool is also displayed on mouseover.
In the top row, you will find tools that can be used to create closed shapes such as rectangles, lines, arrows and ellipses.
You can use the tools in the row below to create your own shapes.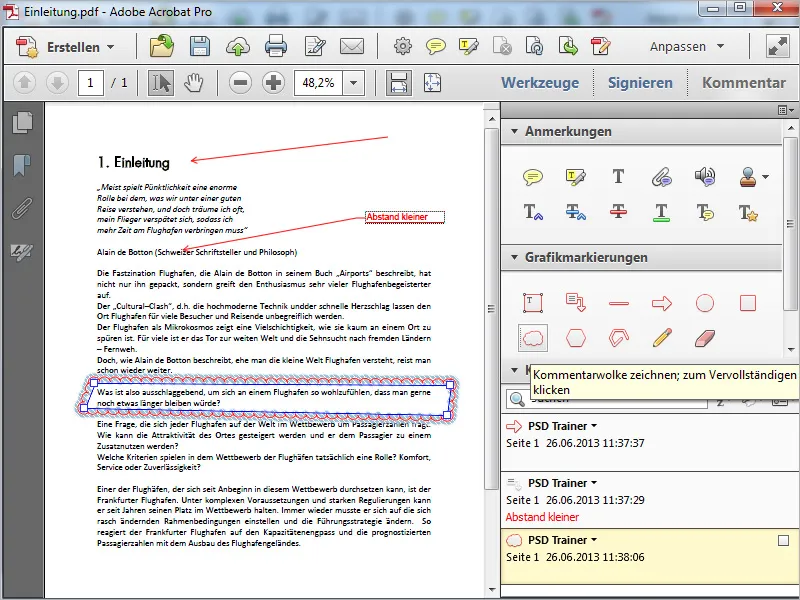
You can use the drawing pencil to sketch free shapes (this is a little awkward with the mouse - but it works much better with a graphics tablet) and make corrections with the eraser to the right.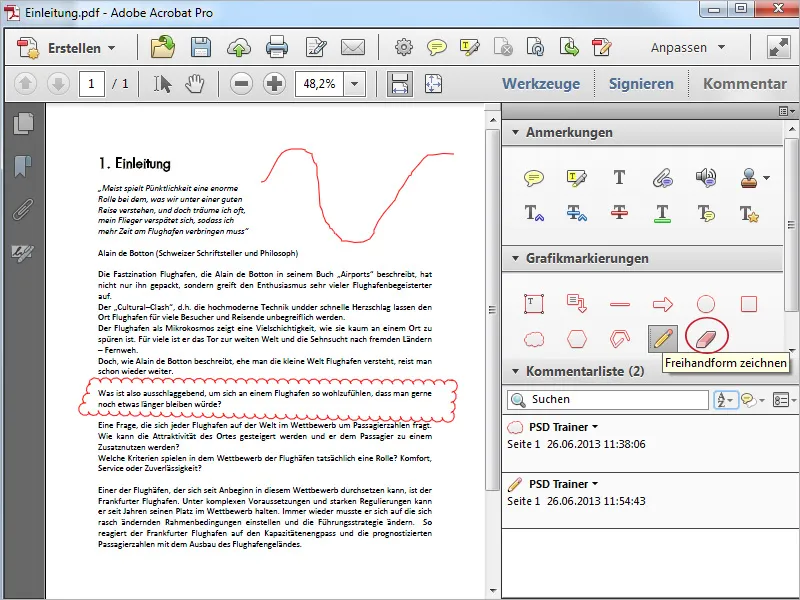
You can also mark graphic markers later using the selection tool. They are then given a position frame that can be moved and scaled.
Double-click on it to open a note window in which you can write a comment.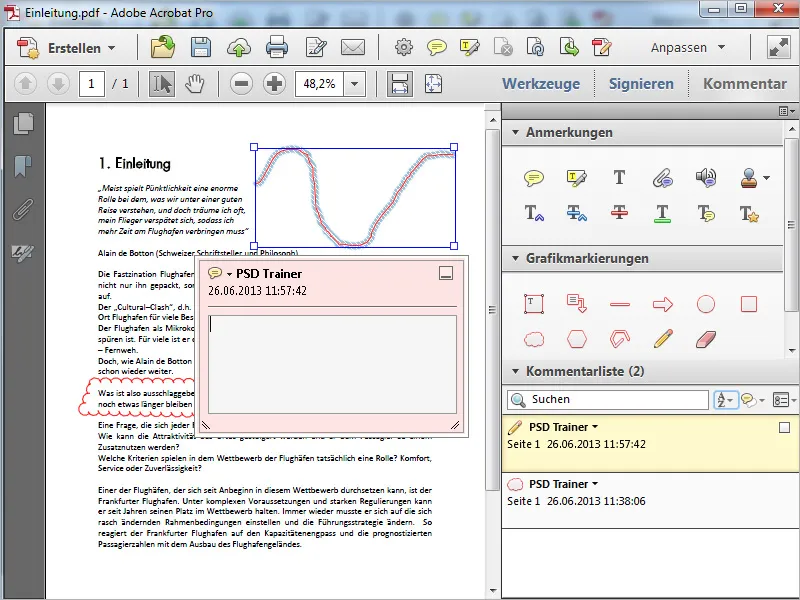
After minimizing the note, it is added to the shape as a mini note symbol. The comment is displayed on mouseover.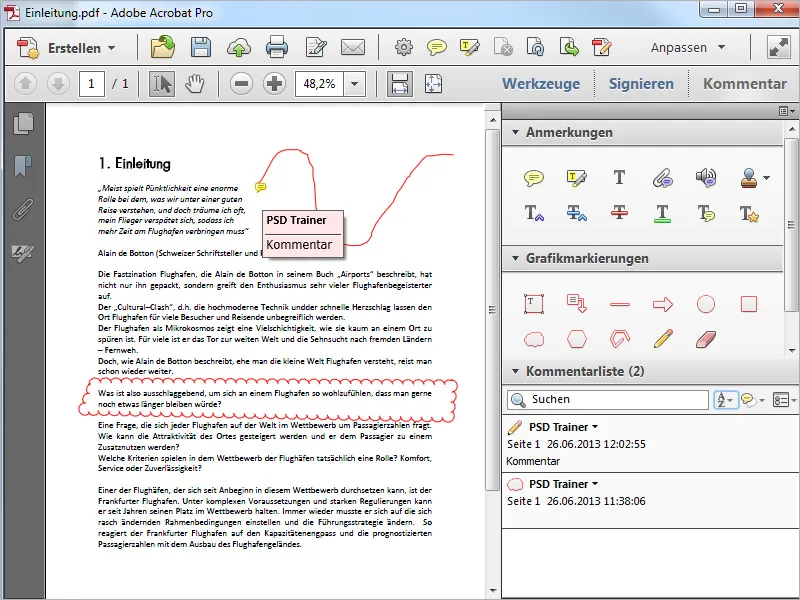
Sorting and filtering the comment list
All comments and graphic markers are stored in the comment list in addition to the page. For a perfect overview, the tool used (e.g. pencil or text replacement), the name of the author (which is very helpful if there are several contributors), the page of the respective comment in the document and the timestamp are displayed.
At the top of the comment list there is a field for entering a term by which the comments can be searched. By clicking on the small sort symbol, you can adjust the logic of the order in which the comments are displayed in the list.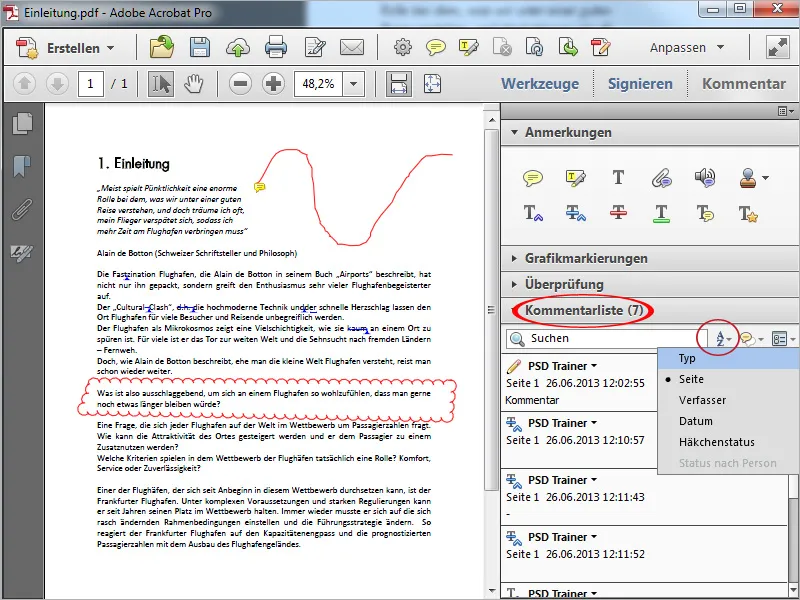
By clicking on the small icon to the right, you can also filter comments according to criteria such as type (this refers to the different comment and marking tools), reviewer and status to get a quicker overview.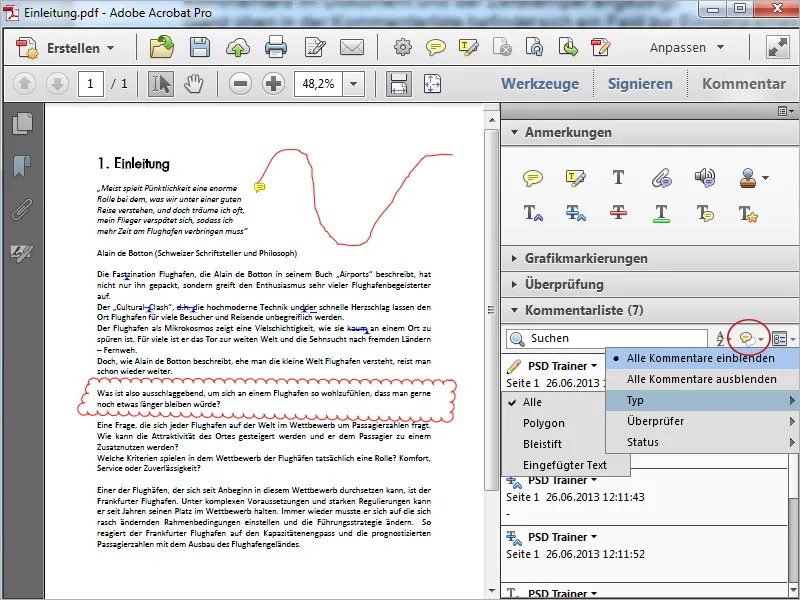
Exporting comments
There is a small options button at the top right of the comment list. Clicking on it opens a menu with further commands. With the Export all to data file entry, you can create an FDF file containing only the comments and markers of the current document. You can use this file to exchange comments with other users if sending the complete document would be too unwieldy, e.g. due to the file size.
The recipient imports this file into their uncommented document in the same way, whereupon all comments are available to them.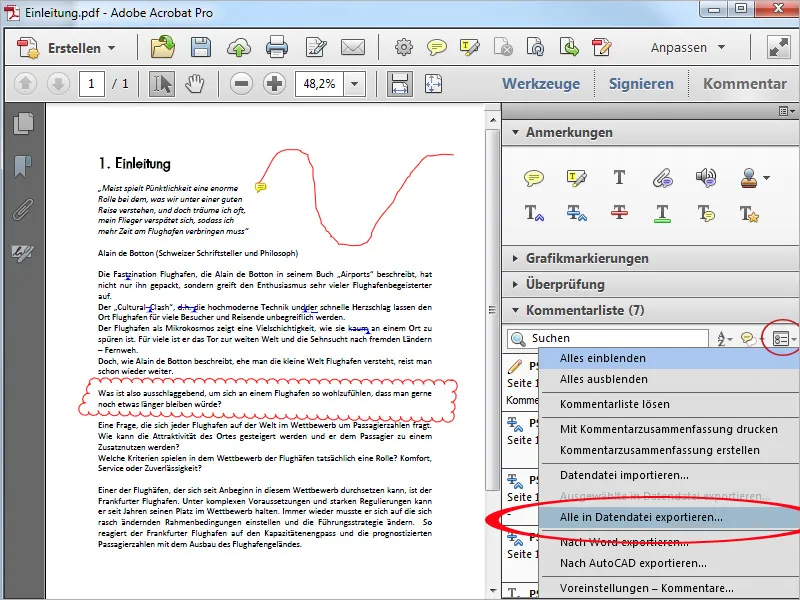
If the source document on which the PDF is based is a Word file, Acrobat's Export to Word function offers a significantly enhanced collaboration function between the two programs, similar to Word's Revise mode.
This means that corrections made with certain text commenting tools in the PDF can be imported and applied directly to the Word file without having to make them manually.
To do this, click on Export to Word in the options menu of the comment list.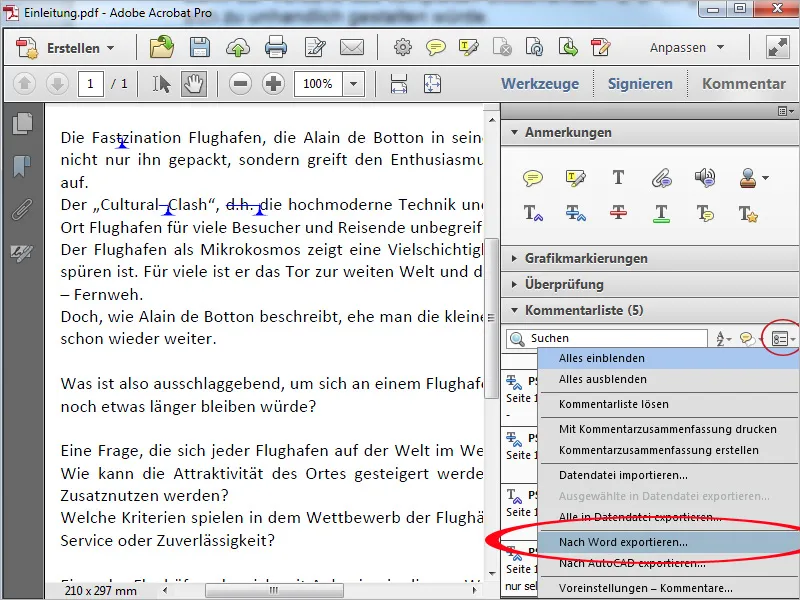
This opens a window with instructions on how to import comments from a PDF to a Word file.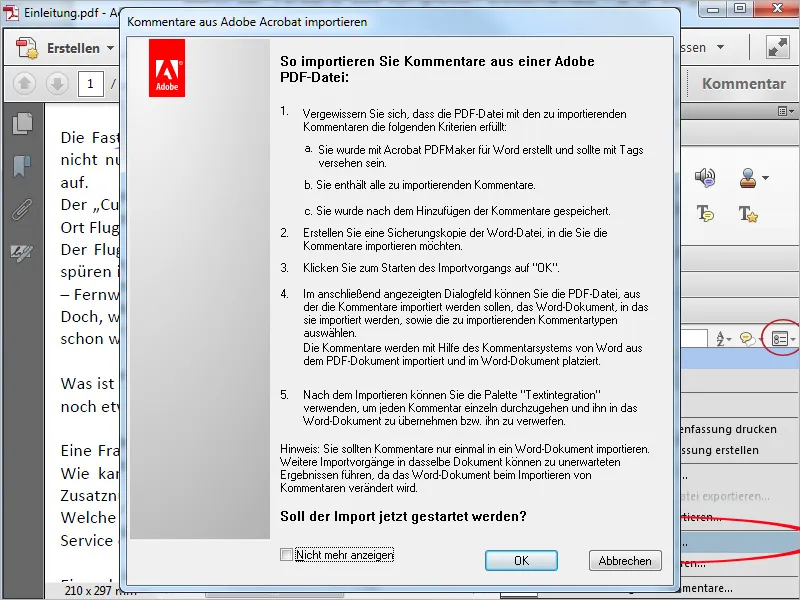
After clicking OK, an import dialog from Word opens. First select the Word source file using the Browse button. (If it is in the same folder as the PDF file, it is already entered in the Word file for comment import field).
In the Select comment types for import area, you can set a filter for the comments to be imported if required. Then click on Continue.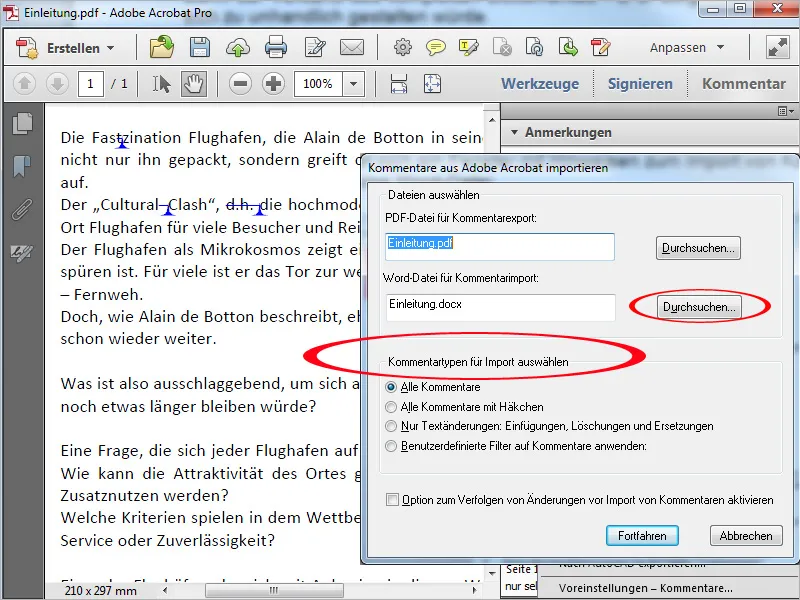
The Word source file is now opened and the comments are imported. They are again presented in a separate bar on the right-hand side and refer to the relevant places in the text with dashed lines. The successful import is confirmed in an overlaid window and a summary is displayed.
To apply the corrections made in Acrobat, click on Integrate text changes.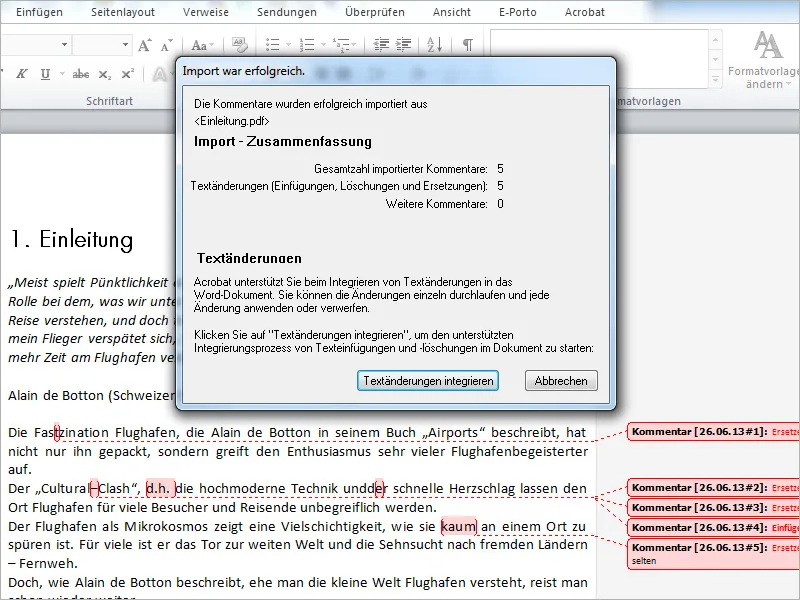
The program now jumps to the first correction and you can apply the change in a new window by clicking on Apply.
If you want to check the corrections individually, click on Next and then on Apply or Discard. If you check the Automatically continue checkbox, Word will automatically jump to the next comment.
If you are sure that all correction suggestions should be applied, click on Apply rest. After confirming a confirmation prompt, all corrections will be applied at once.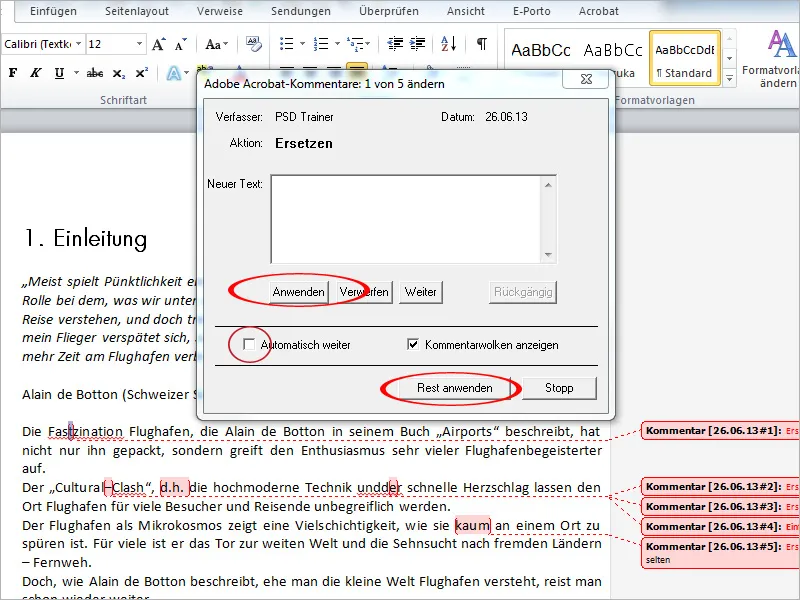
Marks and comments in the PDF file that do not initiate text corrections cannot be transferred directly to the Word file. They remain visible in the Word review bar for manual reworking.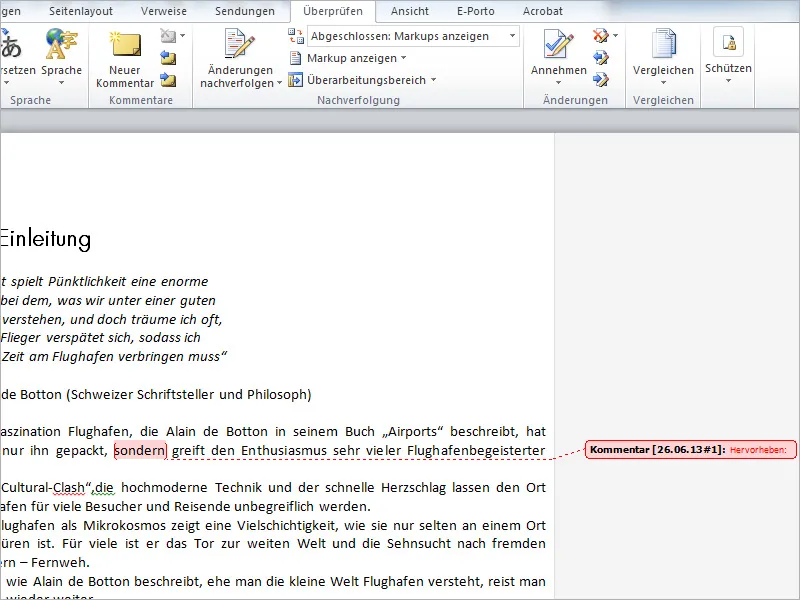
Creating a comment summary
To create a summary of comments for the respective places in the document, click on the Create comment summary entry in the options menu of the comment list.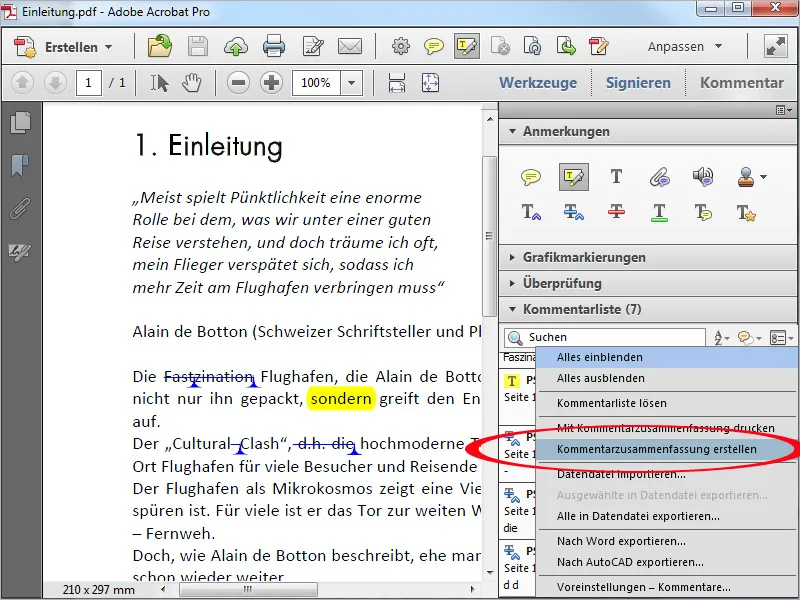
In the window that opens, you can make various settings for the output of the synopsis, such as joint or separate output of document and comments, format, font size and color.
After clicking on Create comment summary ...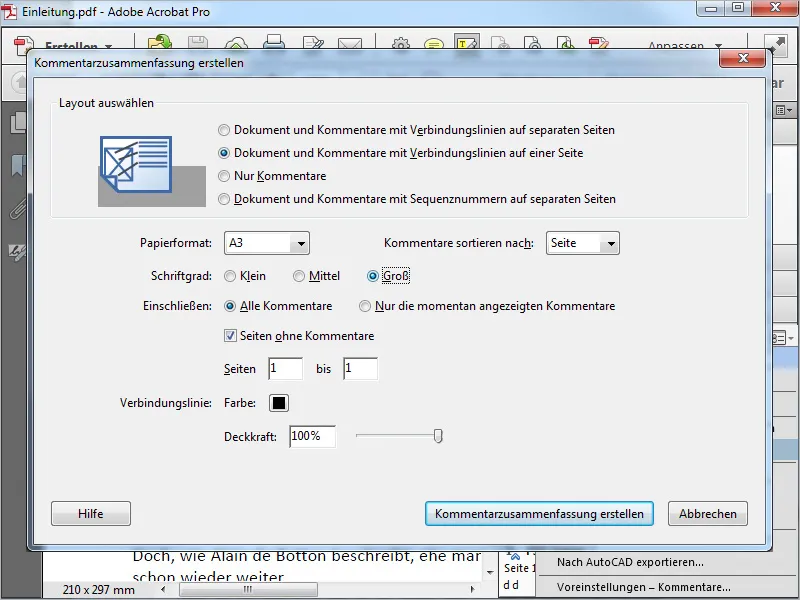
... it opens in the previously defined form as a new PDF document and can be printed out if required.