Now we want to install our finished text animators. The nice thing about the animators is that we can simply take them and apply them to something else.
Another little tip: I would like to see all the text animators, but it looks confusing here because absolutely everything is expanded (1). If I hold down the Ctrl keyand click on the arrow (1), everything is collapsed (2).
If I then click on the arrow normally (2), only the first layer is expanded (3). And if I then expand again with Ctrl (3), everything is expanded again (1).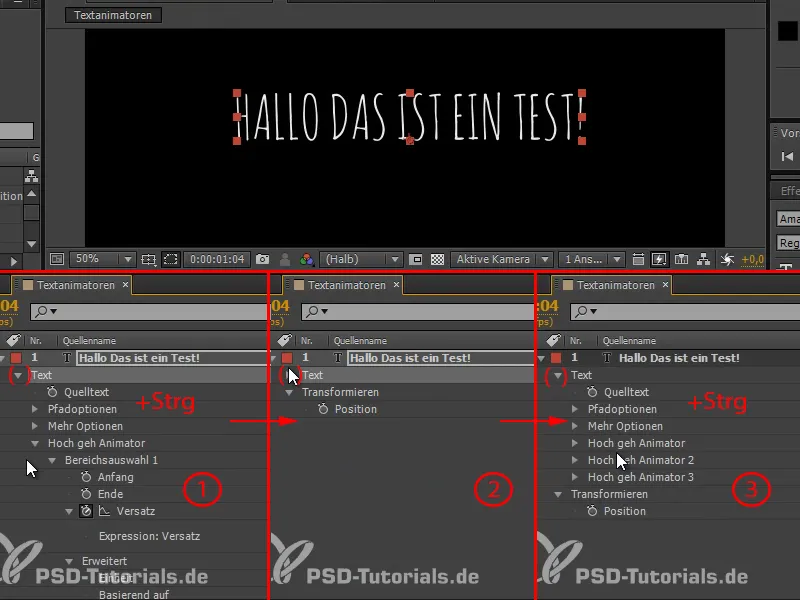
Step 1
Let's rename the two layers \"Go up Animator 2\" and \"Go up Animator 3\" to \"Overshoot 01\" and \"Overshoot 02\".
We can take these three, copy them and paste them onto the text that we want to appear here.
However, we first have to write in and adapt this text: \"And why?\".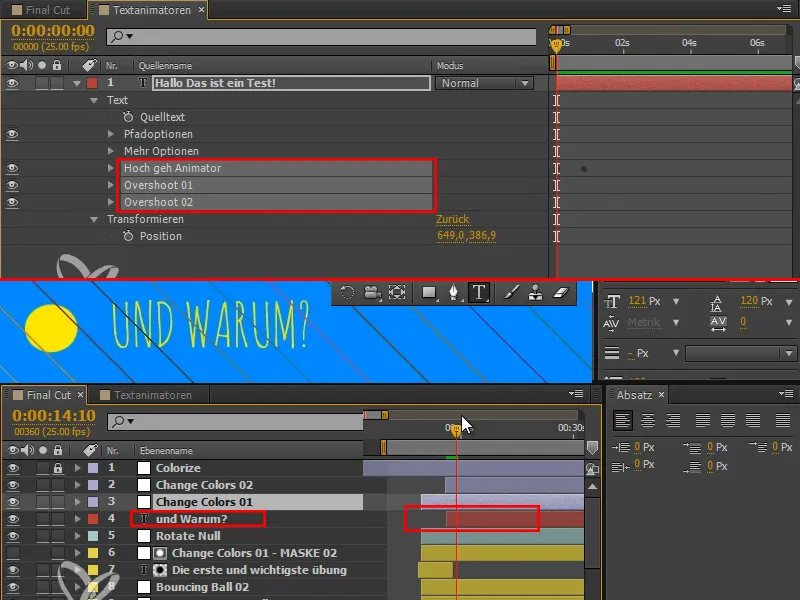
Why is this the most important exercise? Because it gives you a feel for animation and because it's the best thing you can do to develop an eye for it.
Step 2
Now, let's apply our text animator with Ctrl+V.
I don't want to influence the opacity of the "Go up animator", so I delete it. I reduce the rotation to 56.
For \"Overshoot 01\" I also reduce the rotation a little , to about -21.
And for \"Overshoot 02\" I set the rotation to about 4. The rotation should be a little more subtle.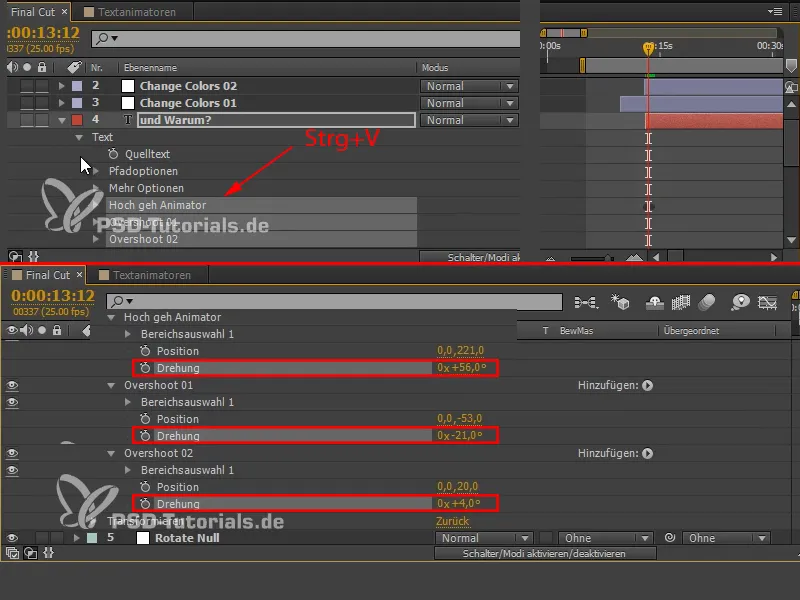
Step 3
The whole thing is still in the wrong place, it's too early. And the font must of course be exactly on a line where the ball lands.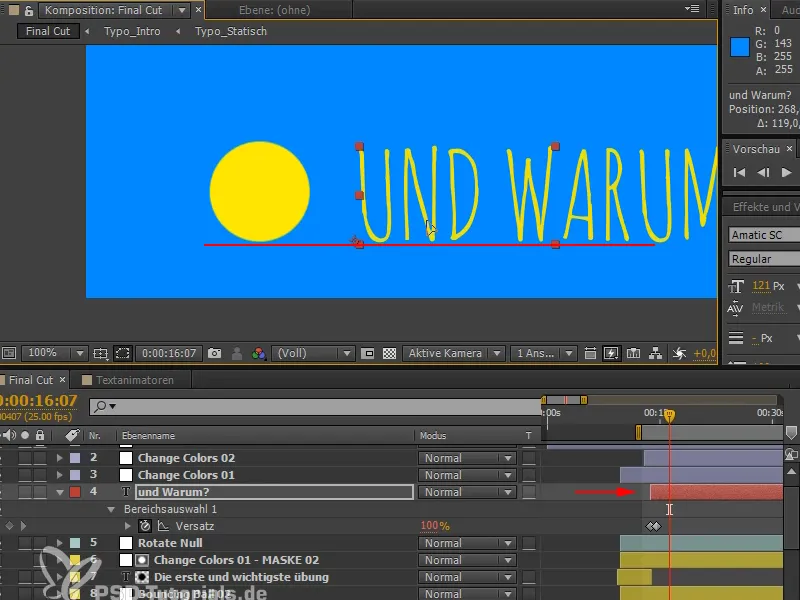
Step 4
This already looks very good, but it's still too far down for me. I would like to move the text and ball a little further up.
I can simply move the text upwards (1), but I have to adjust the ball again.
It is the \"Bouncing Ball 02\", which we have to move as a whole from the point where it lands. We take all the frames we have here (2) and go to the last one (3). It is only important that we are exactly on one of the keyframes in order to move the property.
We have accidentally selected the first frame here, but we don't need it as it is too early. So we take it out of the selection again with Shift+click(3).
Now we move the x position (4) while everything is selected and we are exactly on one frame.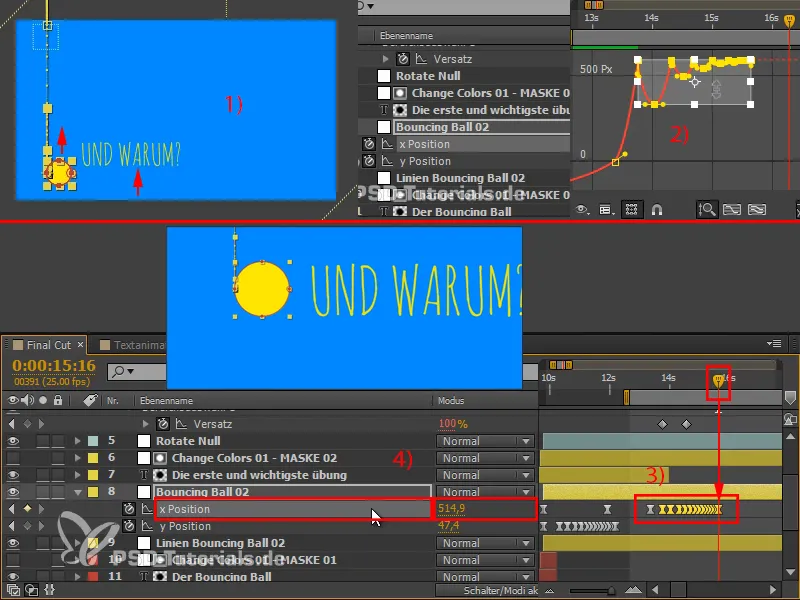
Step 5
When I look at it, I realize that there is still too much rotation. That's why I set the rotation at \"Go up animator\" to 20, at \"Overshoot 01\" to -8 and at \"Overshoot 02\" to 3 or 4. This is a very subtle rotation and I like it very much.
Another tip: When working with positions, try to work with rotations along the axis of movement. This works very well here. You no longer really notice the rotation after the reduction, but the text no longer appears so stiff. That's what the rotation is all about - using it subtly to break up the form a little.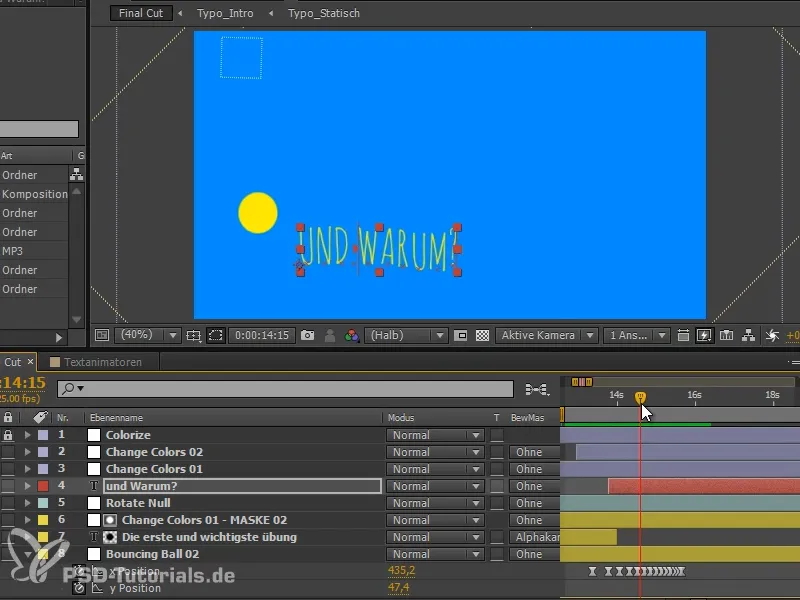
We've now learned a bit about text animators and how to incorporate overshoots with multiple animators running over the text. We've also learned how to work with expressions to simplify this.
The text animators are a cool thing and later I'll show you another option that you probably haven't even thought of yet. You can animate something completely different with text animators.
Continue in the next part of the tutorial series \"Text animators - fine-tuning and transition\".
