To speed up certain frequently used work steps when editing documents and to make work easier for the user, Acrobat offers an action wizard, similar to batch processing in other programs such as Photoshop, InDesign or Illustrator etc.. In addition to the actions already included, such as optimizing scanned documents or for mobile devices etc., you can also define new actions yourself.
To do this, click on the Create new action entry in the toolbar when the action wizard is open.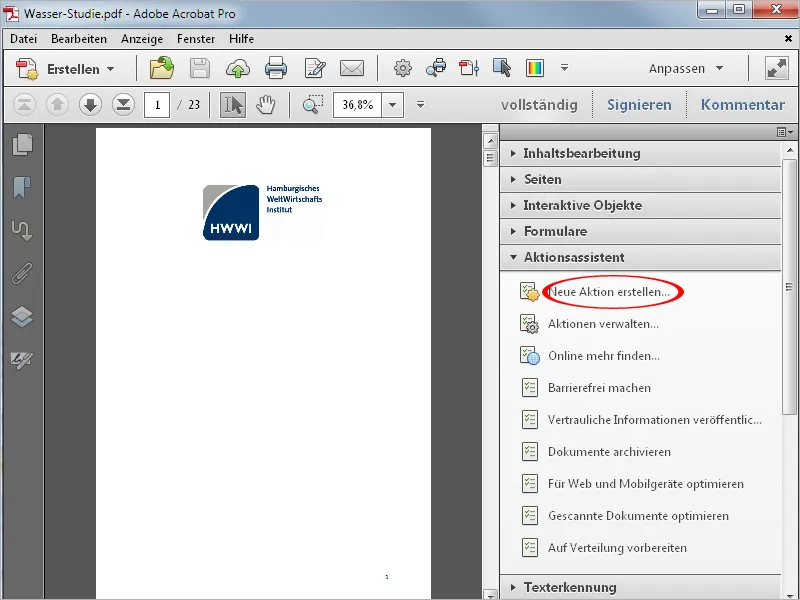
In the wizard that then opens, select the required tools or commands from the sections on the left-hand side and copy them to the action bar on the right-hand side using the arrow button in the middle.
To demonstrate this using an example, I will create the action for creating a title page for the uniform appearance of internal company documents, i.e. all documents with which this action is carried out will receive an additional title page with an image and a title to be defined in each case.
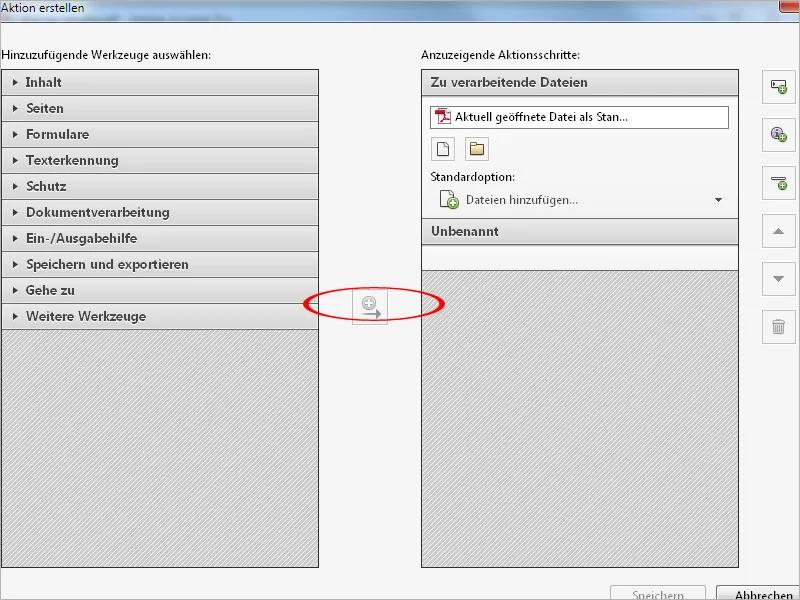
To do this, I first open the Pages category , select the Insert blank page entry and copy this command to the right-hand side using the button in the middle. The checkmark in the User prompt checkbox is removed, as no user intervention is required at this point.
Then click directly above the entry Specify settings.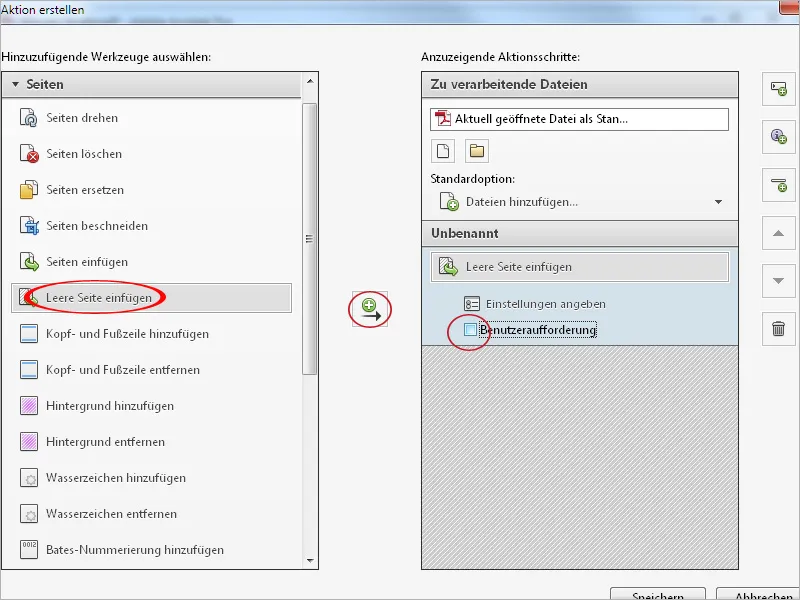
Here you can specify the position of the blank page to be inserted. In this case, it should be inserted before the first page. Then click on OK.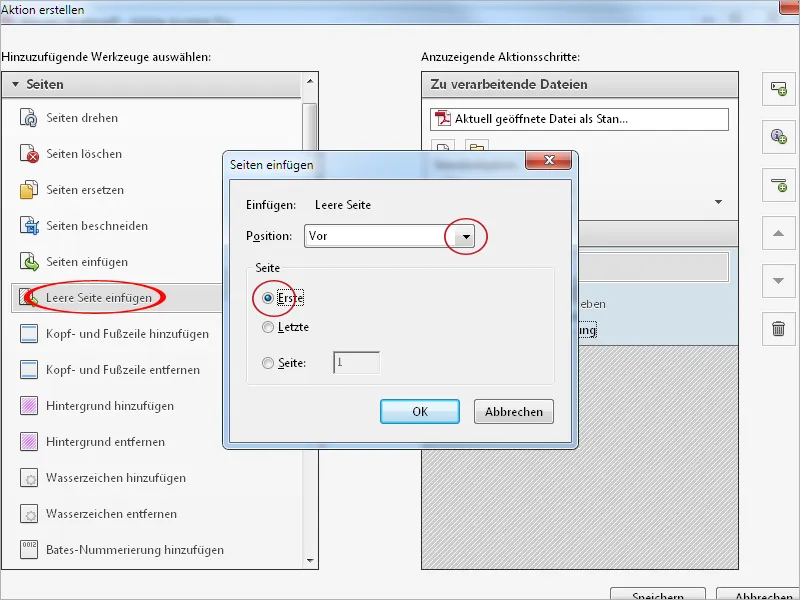
The next step is to add a background to the blank page. To do this, click on the entry of the same name in the Pages category and copy it to the right-hand side using the button in the middle.
After unchecking the box for the user prompt, click on Specify settings again.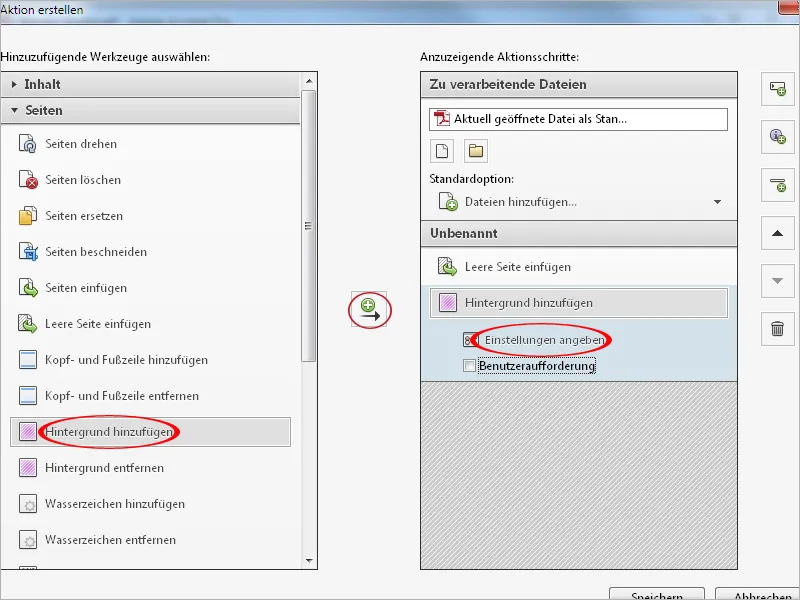
In the window that now opens, you can select either a color or a graphic or image file for the background. If required, you can adjust the opacity and scaling or - e.g. for a logo - set the horizontal and vertical spacing and thus the exact position.
Click on the Options for page area link at the top right.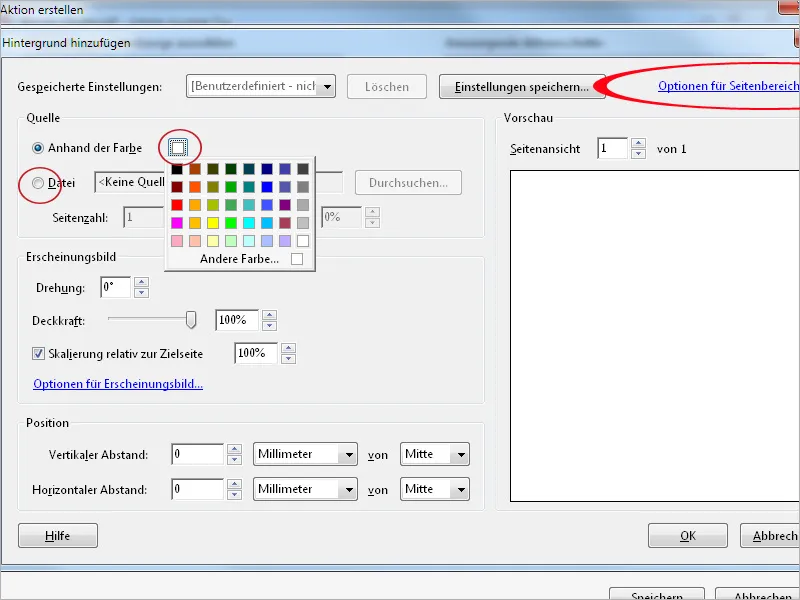
Only the first page is now set here - otherwise all pages of the document would have this background - which may of course be the intention, e.g. with a small logo. Then click on OK - likewise in the Add background window.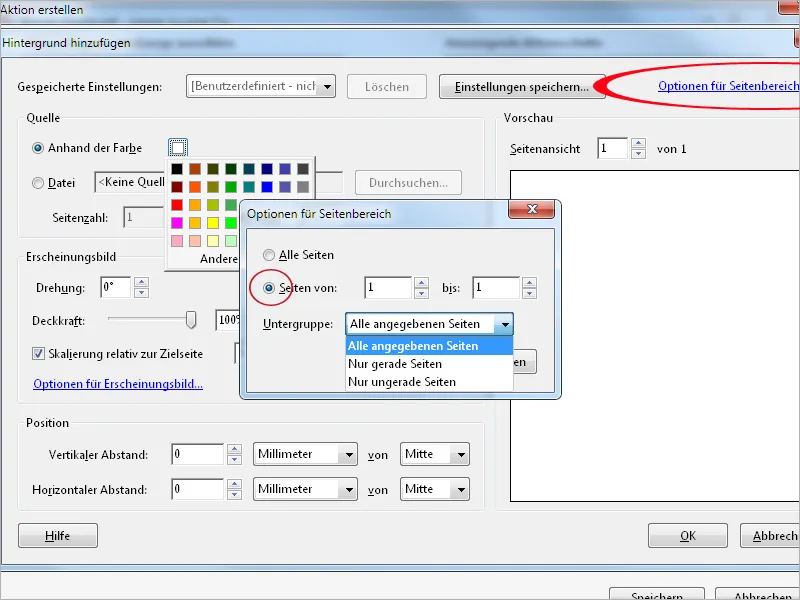
In order to be able to assign an individual title for the different documents, select the Add watermark entry on the left-hand side and copy it into the command list on the right-hand side.
This time, the User prompt checkbox remains activated, as this title must be assigned by the user. Then click on Specify settings again.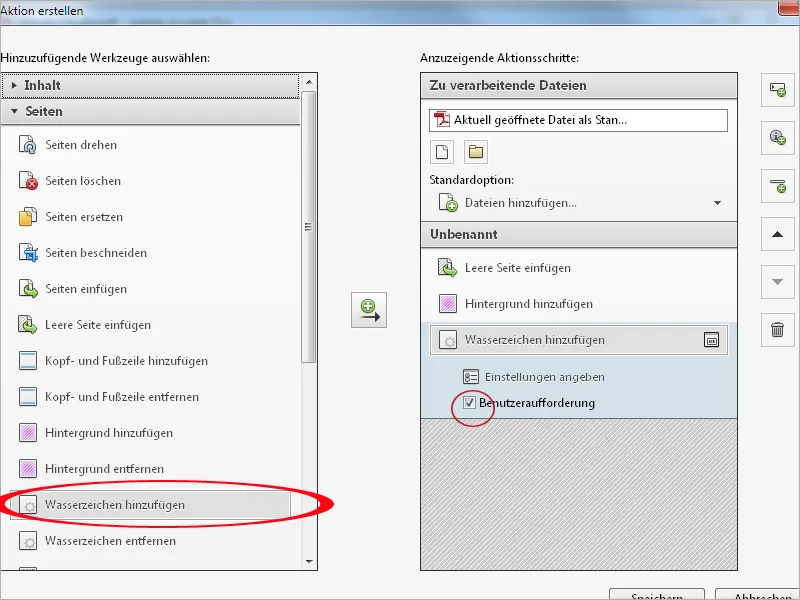
Then enter a placeholder text in the Text field as a prompt to the user. This can be formatted in any font, size, color, alignment, etc. and positioned on the page.
Then click on the Page range options link at the top right again and set only the first page of the document so that only this page receives a title bar. Then click on OK.
Now click on Save, enter a title and, if necessary, a description for the action and save this information.
If the action you have just created does not appear in the list of the action wizard, you must first edit the tool group currently in use and copy the entry from the list of tools to be added to the right into the user-defined list. Then click on Save.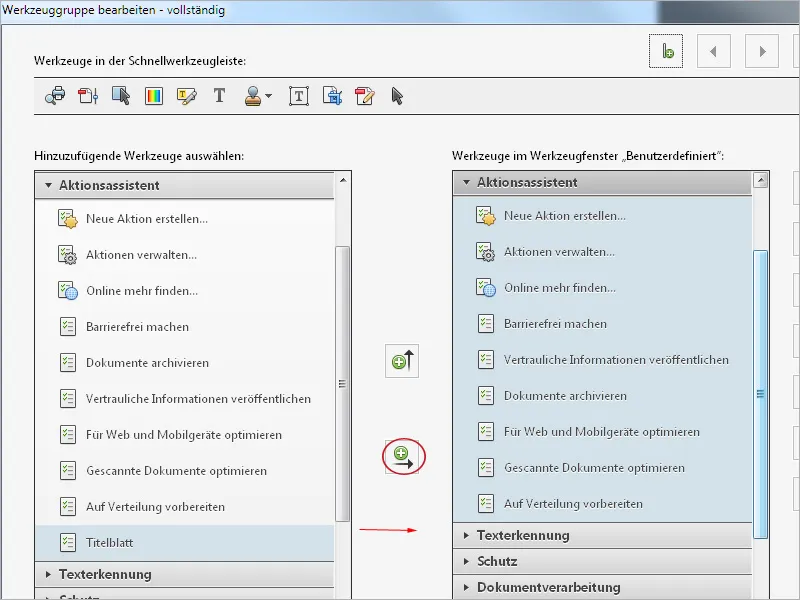
The action is now available in the action wizard and can be triggered with a click.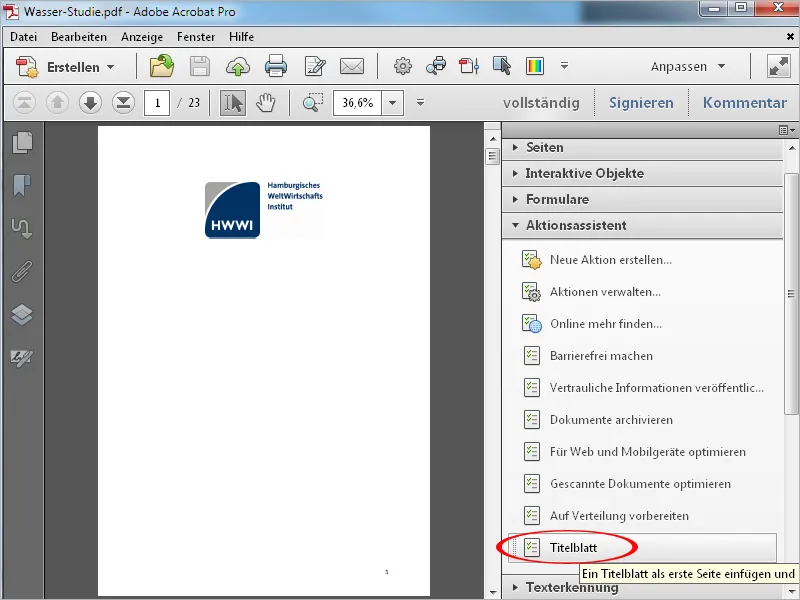
After clicking on the action, an action bar appears instead of the toolbar, in which the individual steps are displayed. To initiate the process, another click on the Start button is required.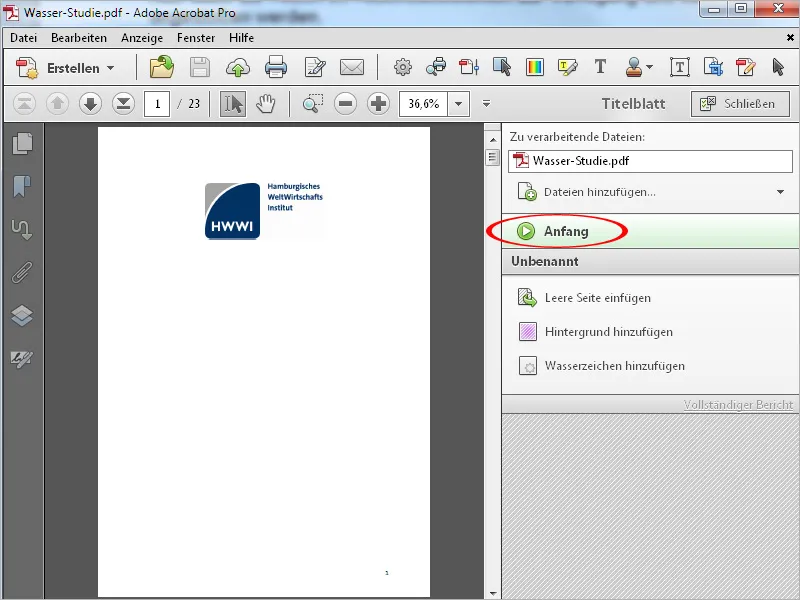
The commands are now processed automatically; the process stops at the point where a title needs to be entered.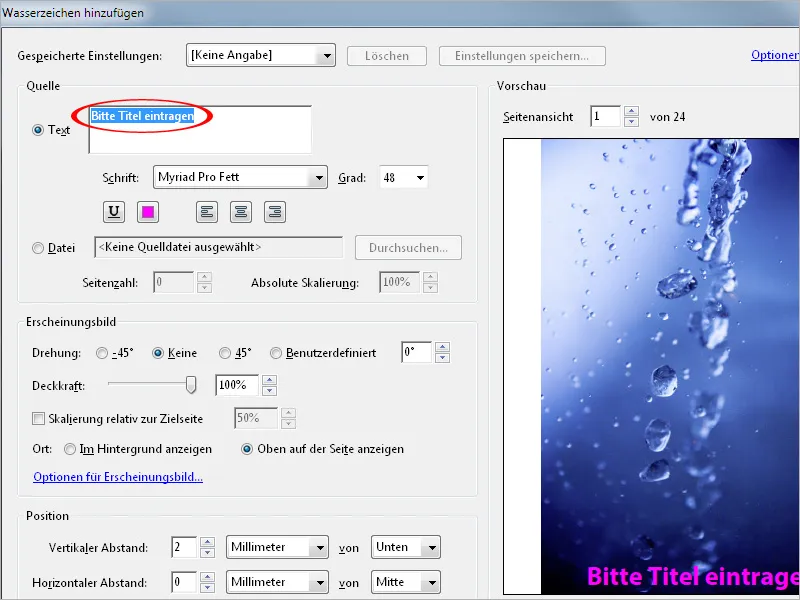
After editing the title and clicking OK, the document appears with the new additional title page. Correct completion of the individual steps is confirmed with a green tick in the action bar on the right-hand side.
By clicking on Close, the action bar disappears and makes room for the toolbar again.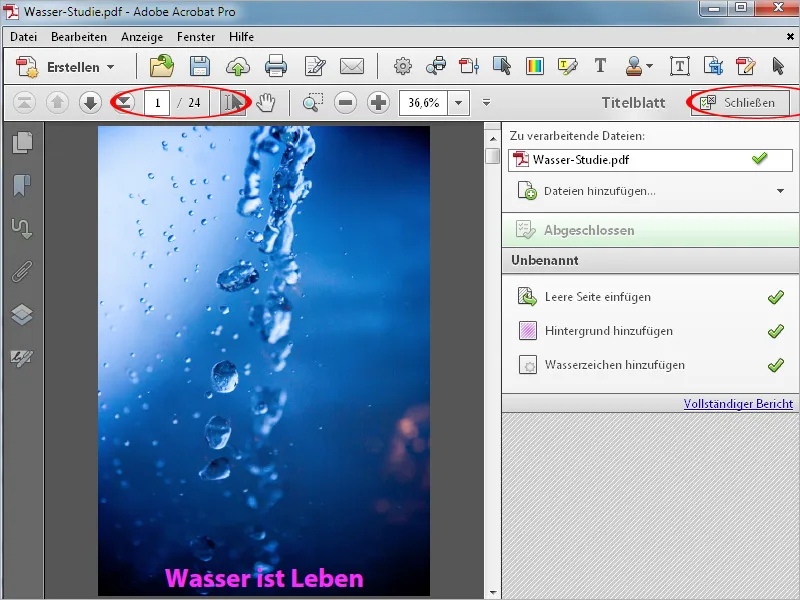
If you want to make subsequent changes or adjustments to the action, this is no problem. To do this, click on Manage actions and then on Edit.
You can now change the order of selected work steps using the arrow buttons on the right-hand side, delete commands, modify them or add new ones.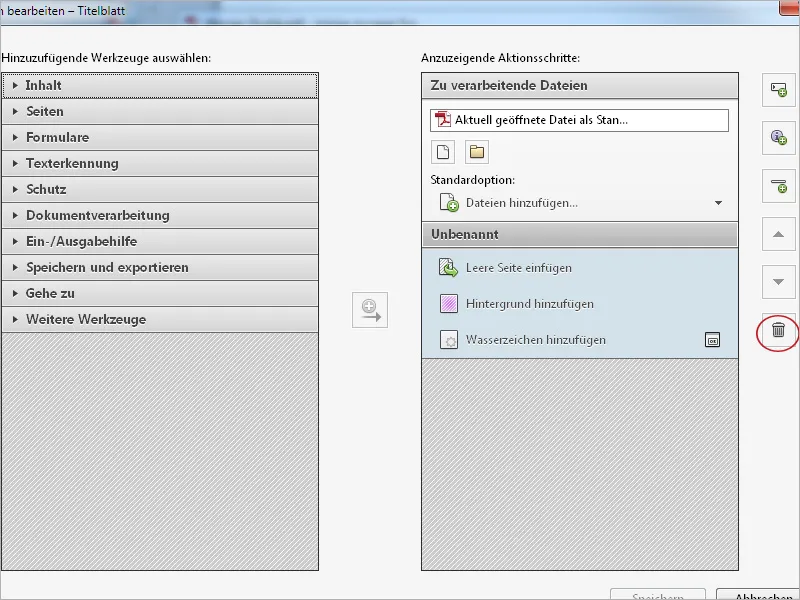
To make actions created in this way available on other workstations, you can export or import them. To do this, click on Manage actions and then on Export. After selecting a storage location, a sequ file with the name of the action is created, which can be imported to the target computer in the same way and then also used there.


