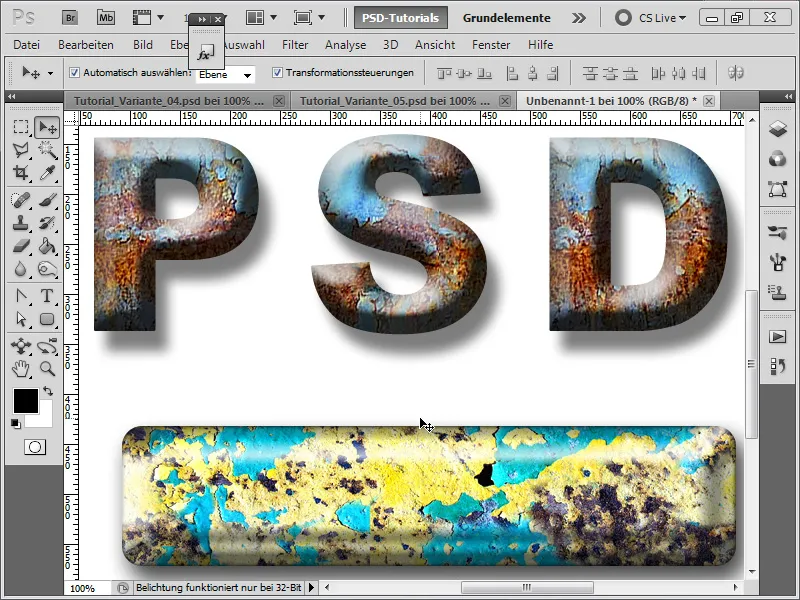
A rust effect gives your texts and layouts an authentic, rough, and industrial look. Whether for vintage designs, posters, or creative projects - with Photoshop you can create rust in different ways. In this tutorial, I'll show you six creative variants on how to create rust textures and rust texts. From realistic metal corrosion to abstract, artistic interpretations - here you will find the suitable technique for every style. Let's get started and give your designs a rustic touch!
1. Variant for Creating Rust Textures
Step 1:
First, I create a new document; the size doesn't matter. I choose a very small size of 800x600 pixels. If you want to print this effect, the unit of pixels should be changed to cm and the resolution from 72 to 300 pixels per inch.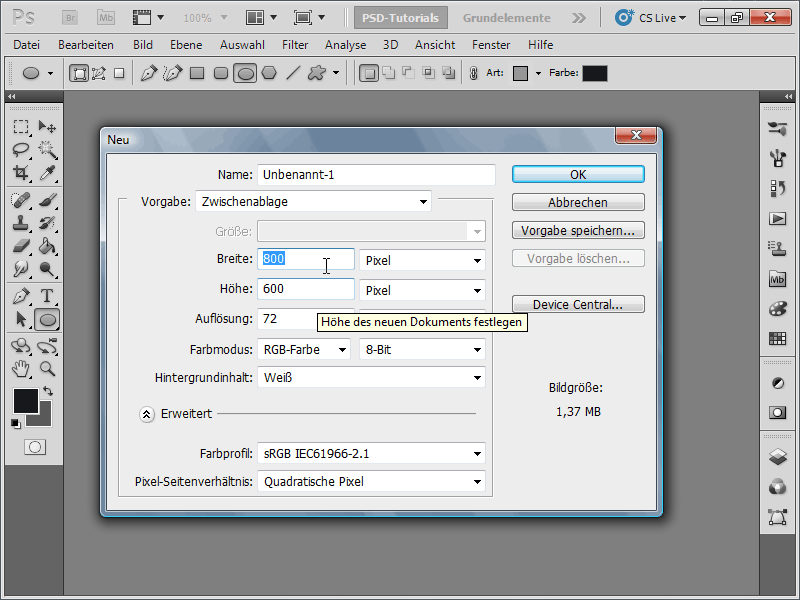
Step 2:
Now I choose white as the foreground color and orange as the background color. Then I apply the cloud filter under Menu>Filter>Render Filter>Clouds.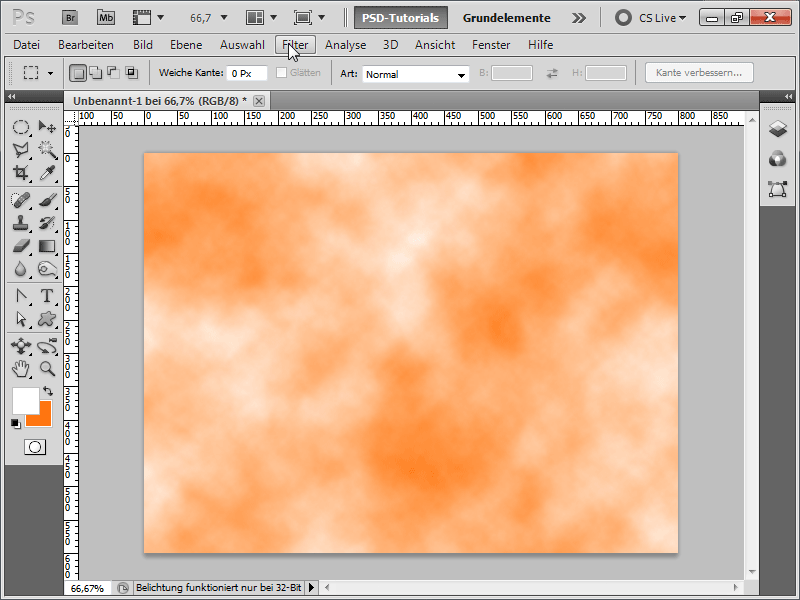
Step 3:
Now, under Menu>Filter>Stylize Filter>Emboss I apply these settings: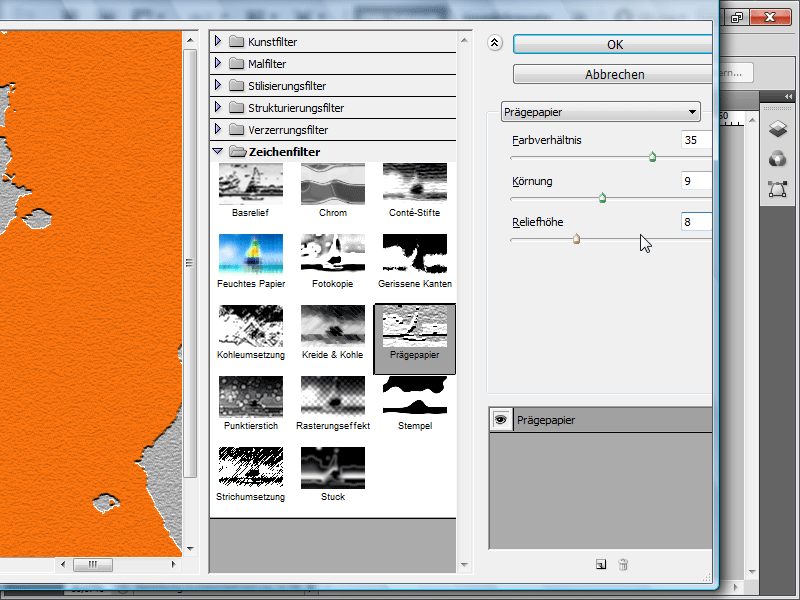
Step 4:
I create a new layer with Ctrl+Shift+Alt+N and then apply Menu>Filter>Stylize Filter>Clouds.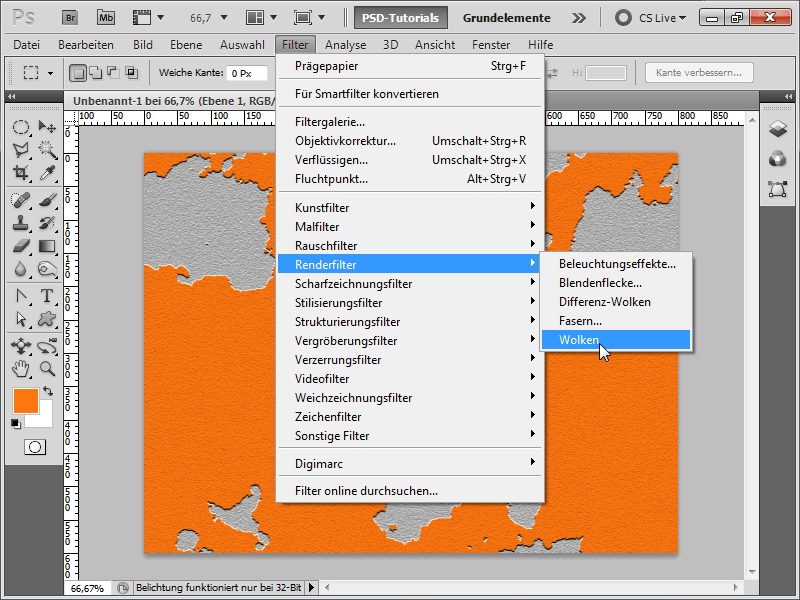
Step 5:
Under Menu>Filter>Stylize Filter>Chalk and Charcoal I set these values: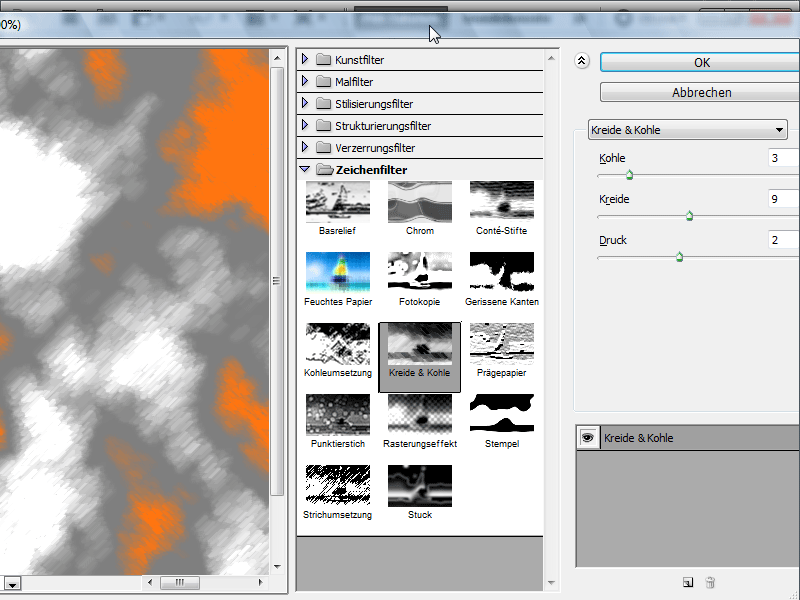
Step 6:
Next, I set the opacity of my top layer to 50%.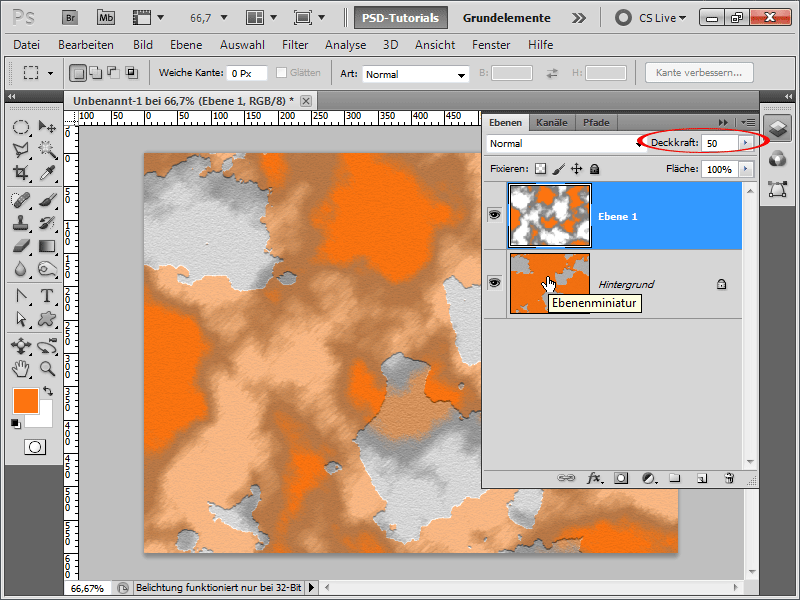
Step 7:
With Ctrl+E I merge the layer with the background layer, then create a new layer, fill it with white, and move it down.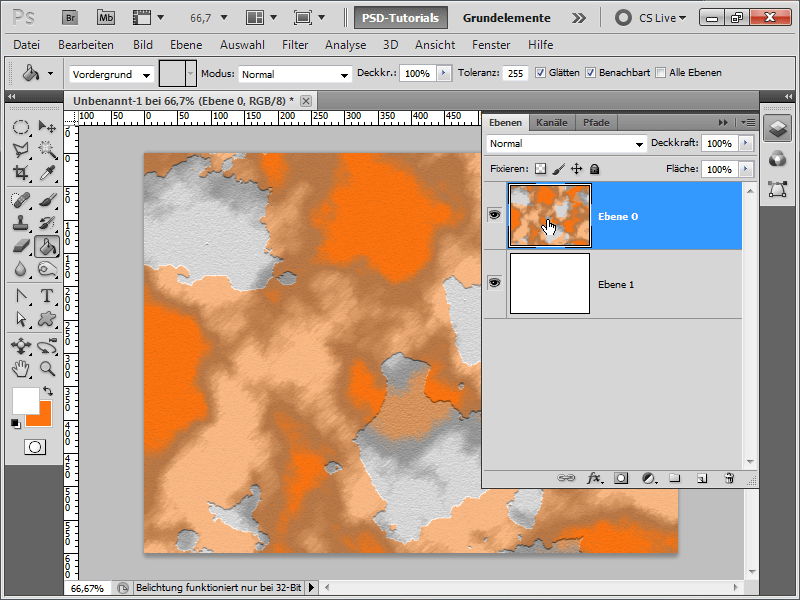
Step 8:
Now I create a text, the color doesn't matter.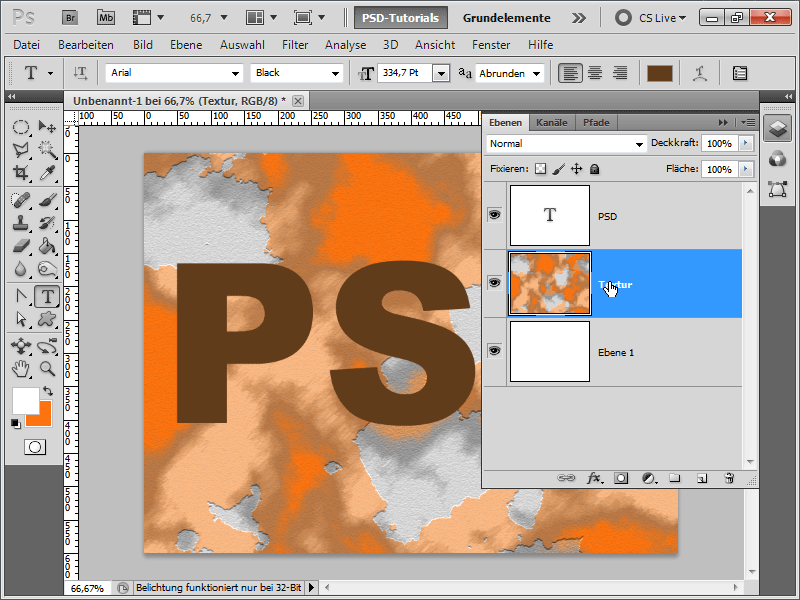
Step 9:
Next, I move the texture layer up and then click between the two layers with the Alt key pressed to create a clipping mask.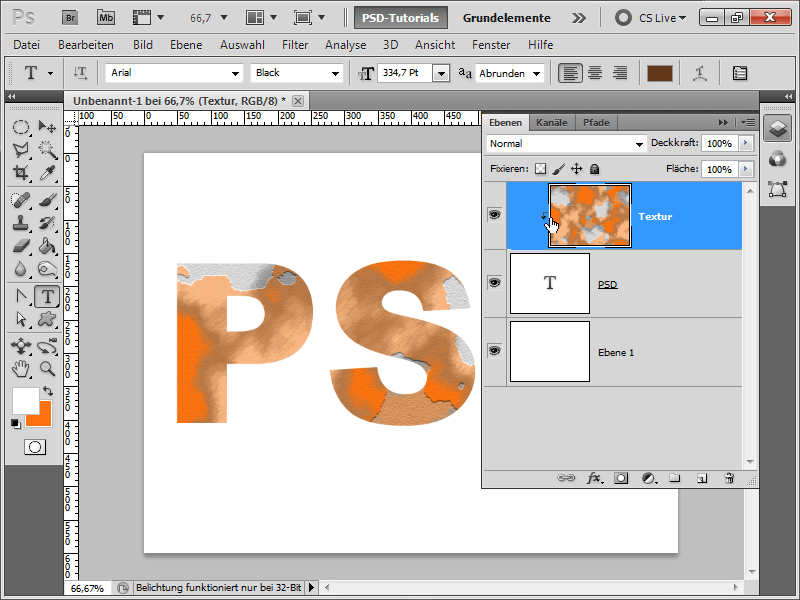
Step 10:
Now I can add some layer styles to my text.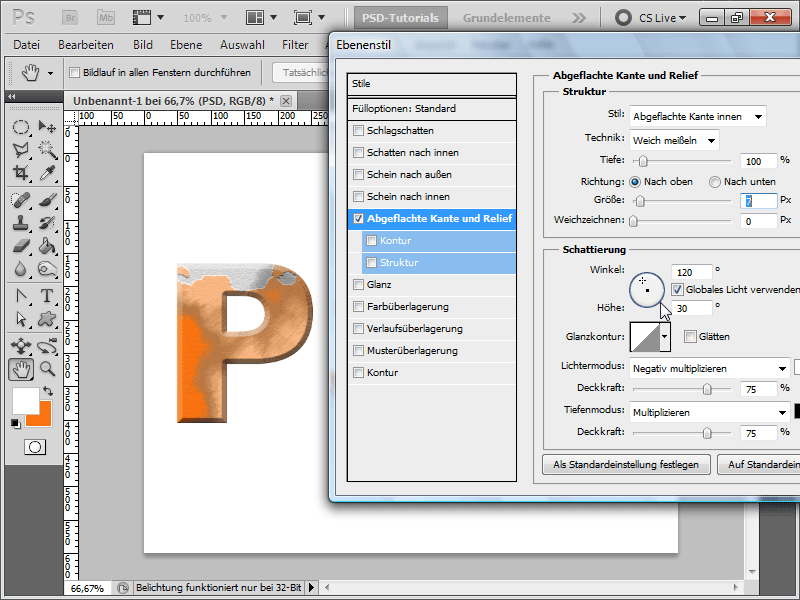
Step 11:
A subtle drop shadow can also enhance the effect.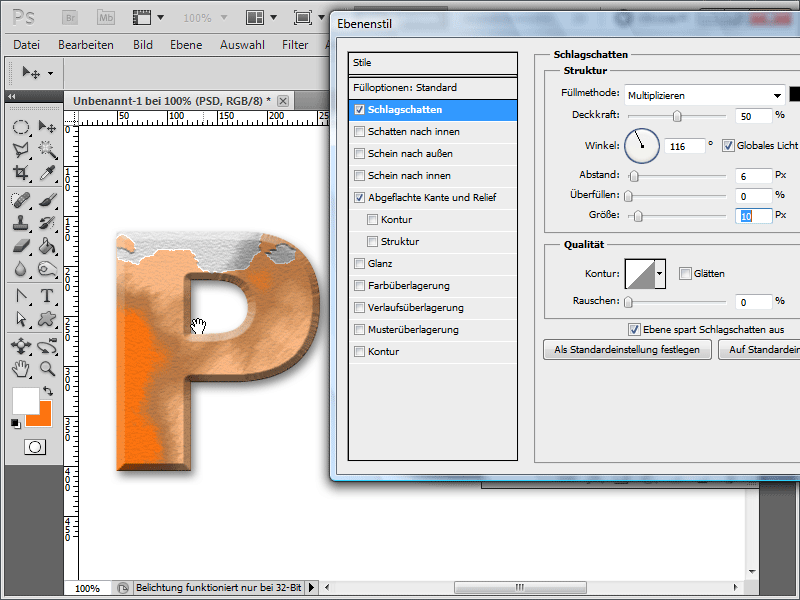
Step 12:
In the background, I add a radial gradient from dark blue to light blue, and then my result looks like this: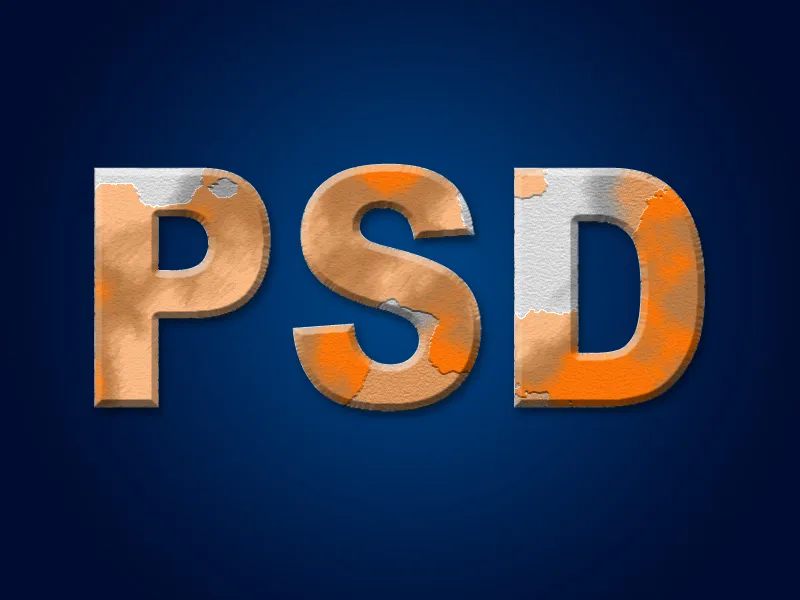
Step 13:
The great thing about the clipping mask is that I can change my text at any time and the effect will be retained.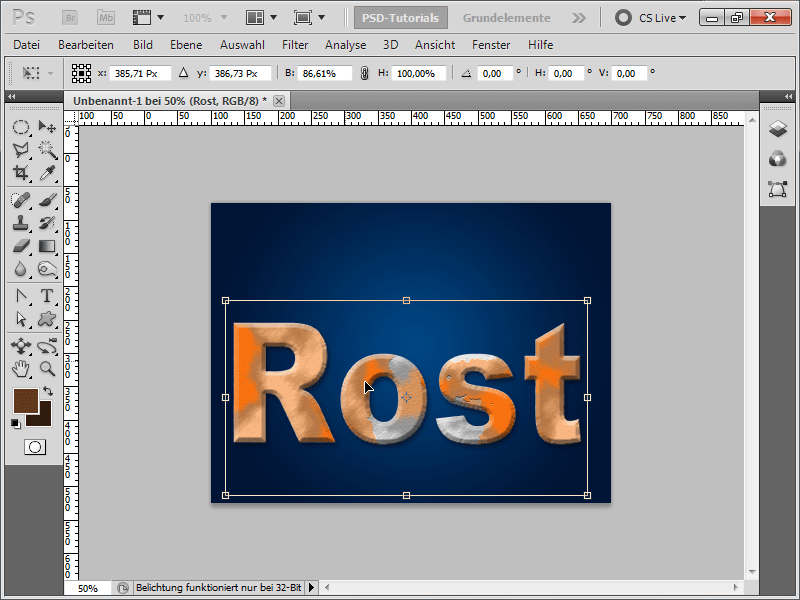
2. Variant for Creating Rust Textures
Step 1:
First, I create a new document; the size doesn't matter. Then I change the foreground color to brown and the background color to dark brown. Then I apply the cloud filter again.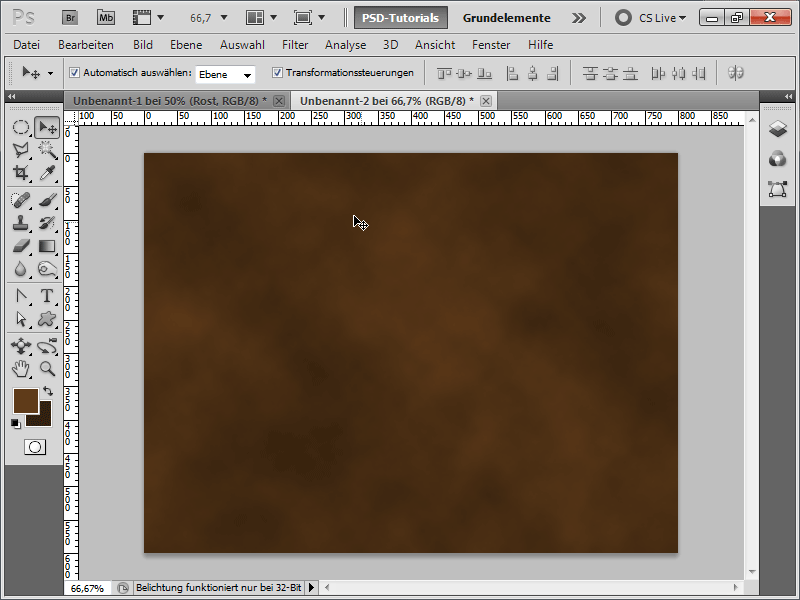
Step 2:
Next, I apply the grain filter under Menu>Filter>Texture Filter.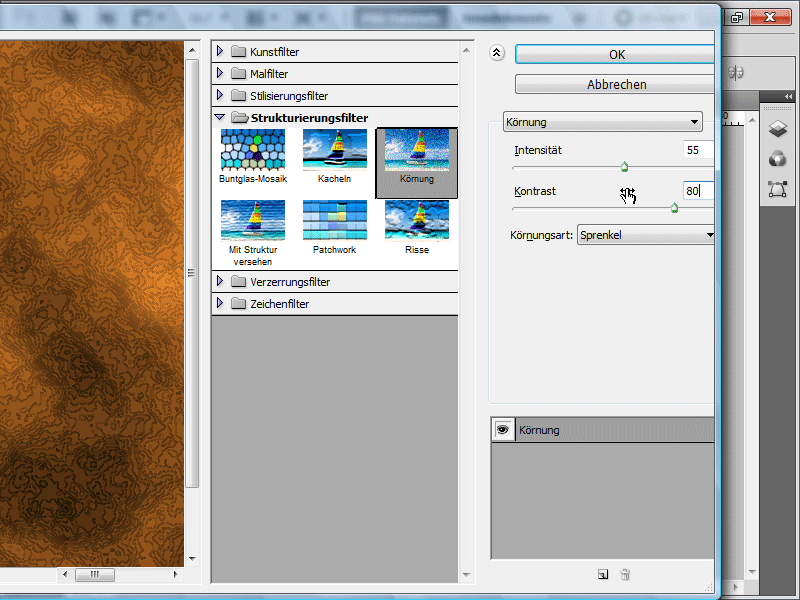
Step 3:
Afterwards, I select the Unsharp Mask filter under Menu>Sharpening Filters.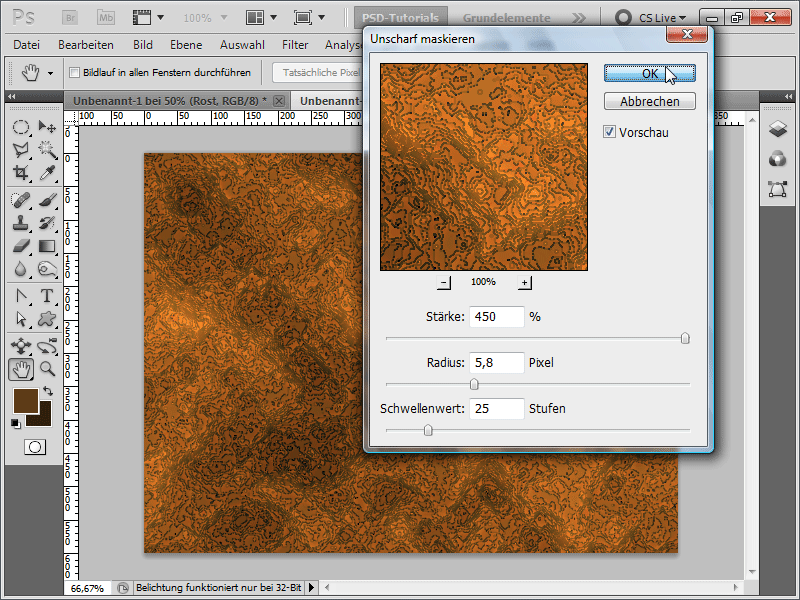
Step 4:
And another filter, namely Coarse Painting, found among the Artistic Filters.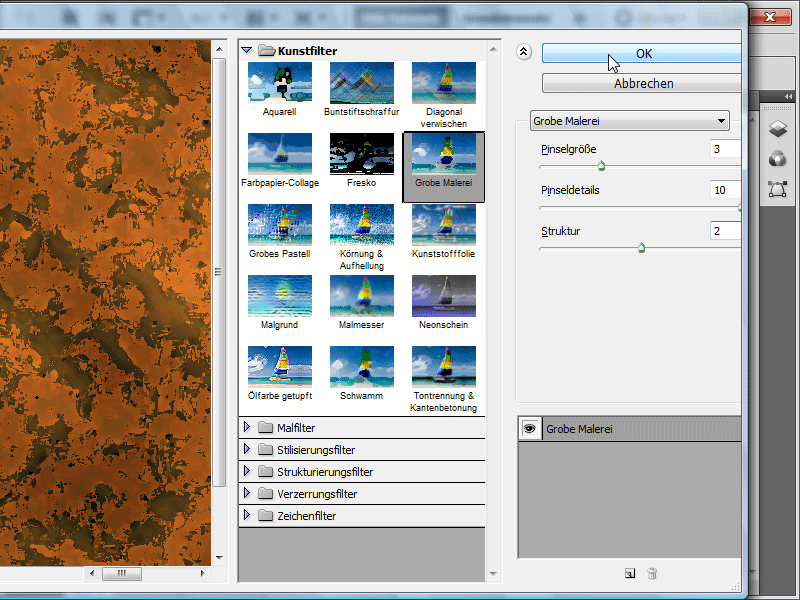
Step 5:
Almost there: Now quickly add the Add Noise filter, found under Menu>Filter>Noise Filter.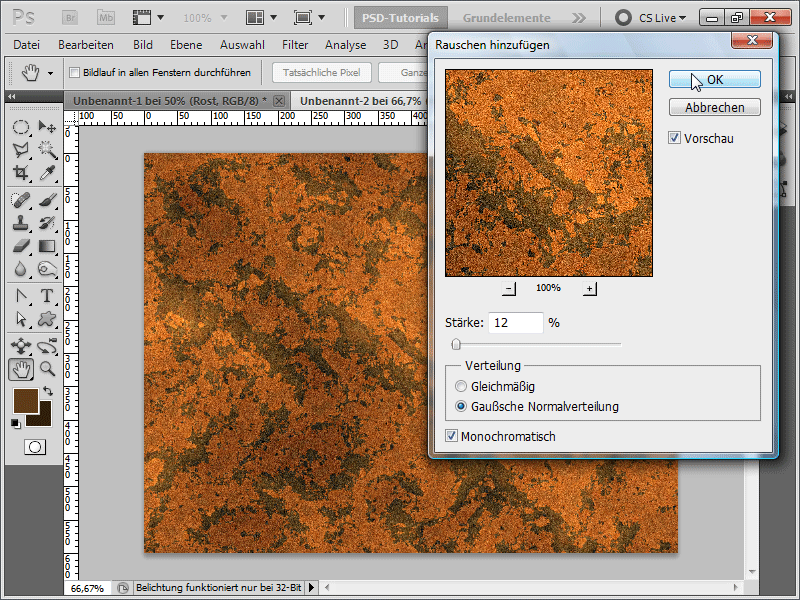
Step 6:
Finally, Coarse Pastel (also under the Artistic Filters). I roughly adjust the settings as follows, where one can also set a Scaling of 100-200%.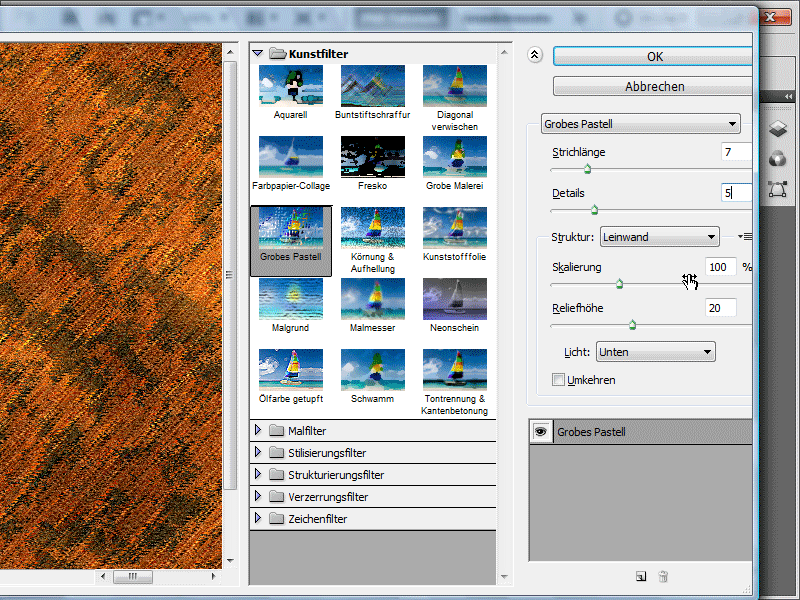
Step 7:
Now I select everything with Ctrl+A and save it as a Pattern.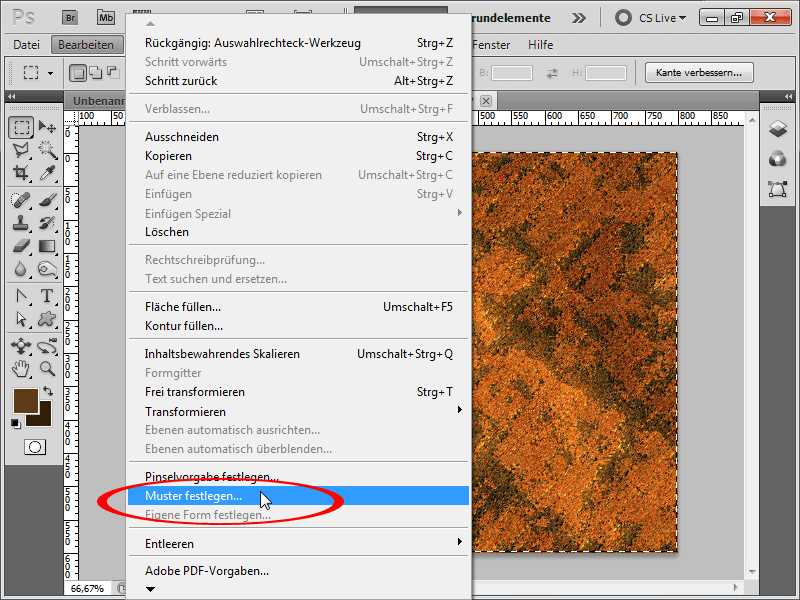
Step 8:
Now I can hide the layer and apply a beautiful radial gradient. Then I create a text and activate the Pattern Overlay in the fill options with my previously saved pattern.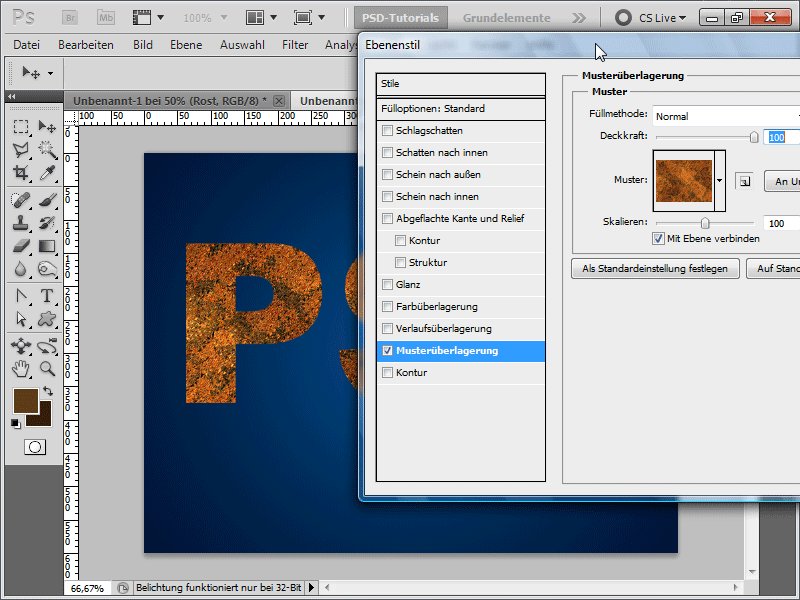
Step 9:
Next, I add a Beveled Edge and a subtle Drop Shadow. Additionally, as a small optimization, I set a Stroke that has no color, but a Pattern with a 1px size (some random rock pattern).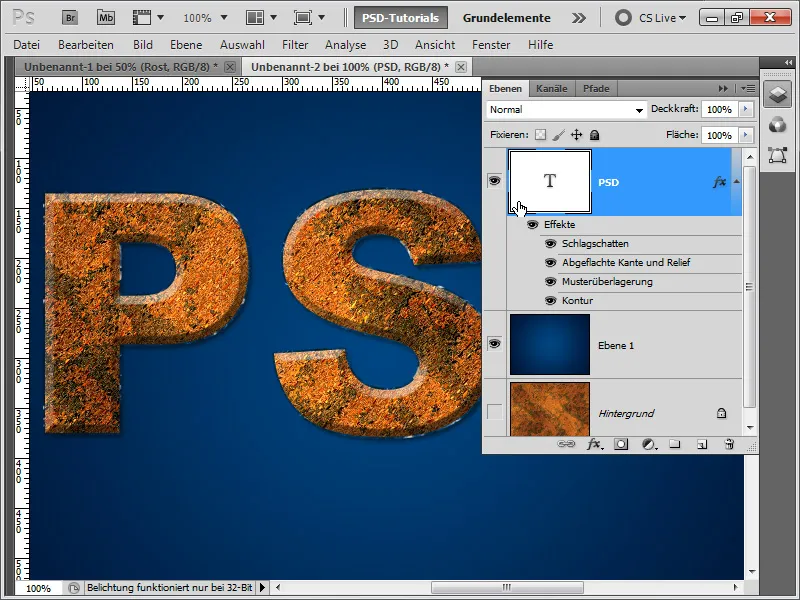
Step 10:
If I had added Noise to my previously saved pattern at the end, the result would look like this: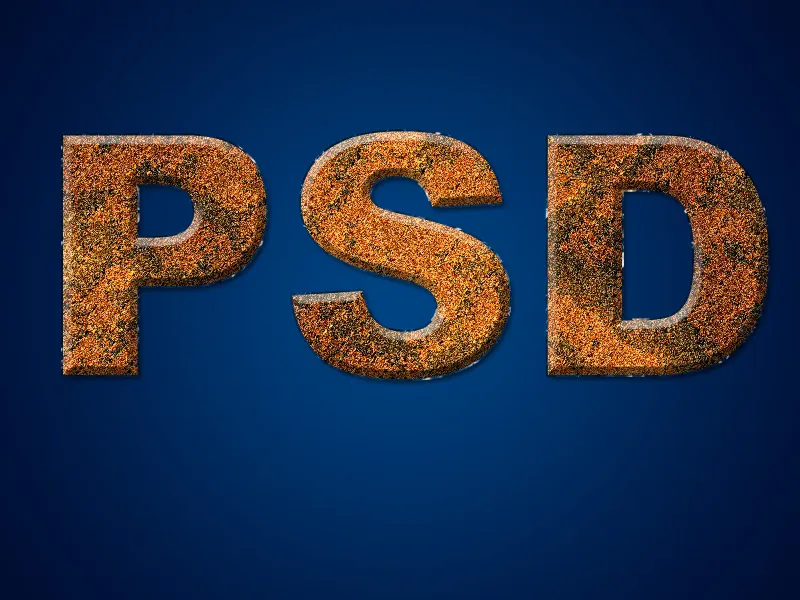
Variation 3 for Creating Rust Textures
Step 1:
First, I create a new document; the size doesn't matter. Now I open my Actions Panel and in the small Options Menu I load the Texture Actions Library.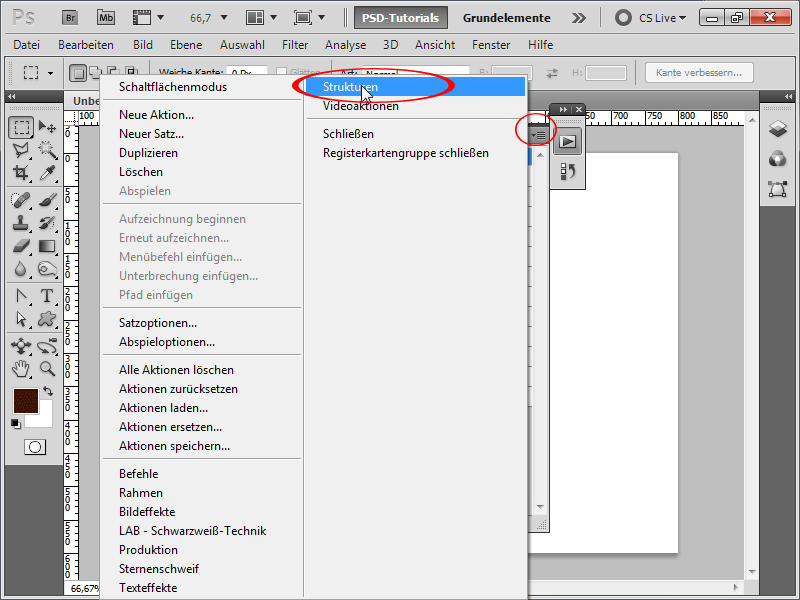
Step 2:
I click on Rusty Metal and then press the Play button to run the action. A beautiful Rust texture is created.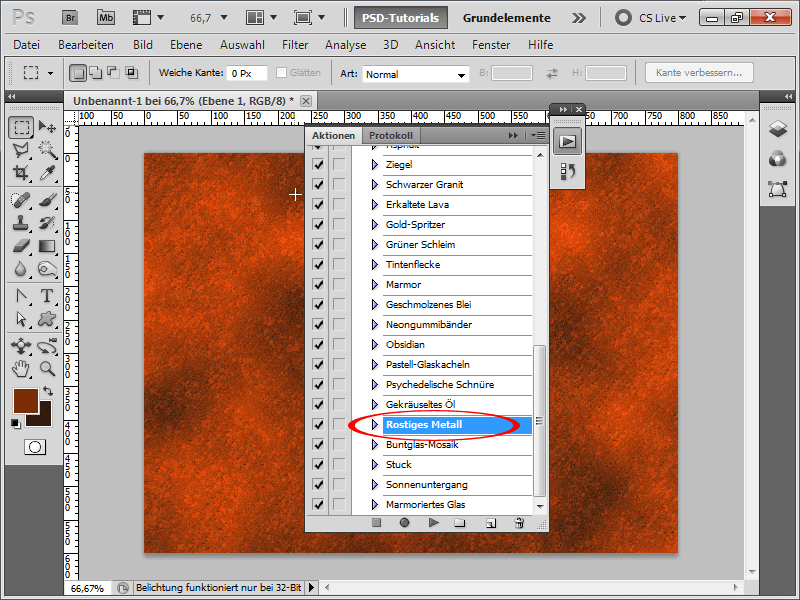
Step 3:
As in the other two variations, I can now either save the texture as a Pattern or use it as a Clipping Mask. Alternatively, I duplicate the blue channel and invert it with Ctrl+I.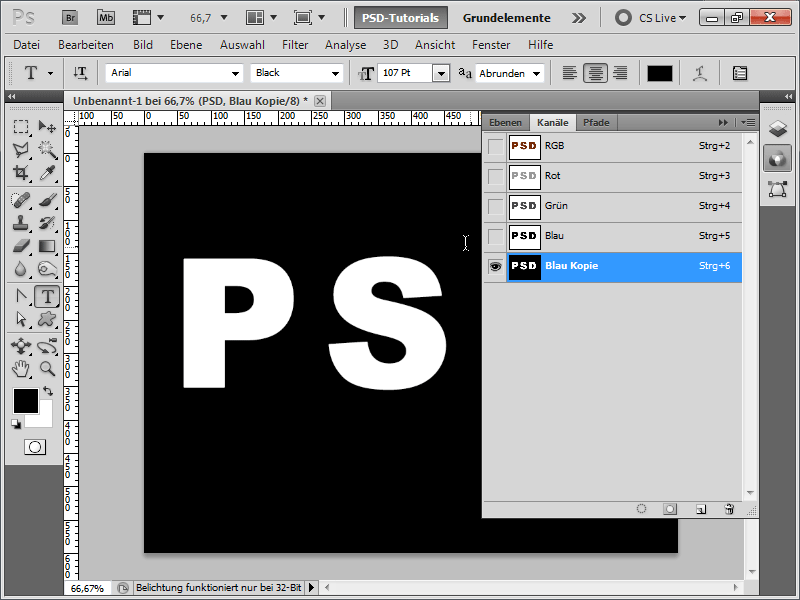
Step 4:
Then I soften the channel.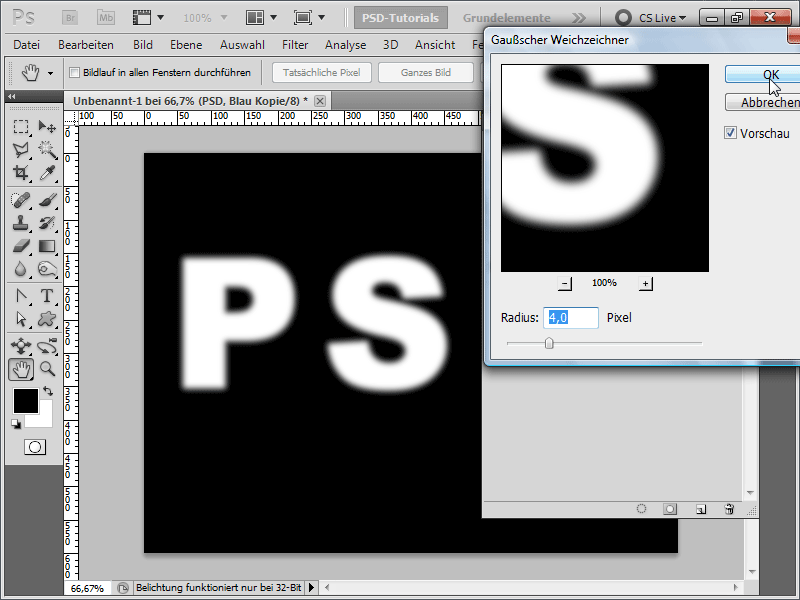
Step 5:
Now I go back to my Layers panel, click on the rust texture, then under Menu>Filter>Render Filters choose Lighting Effects and set my Blue Copy under Relief Channel. I can rotate the light in the preview window as desired.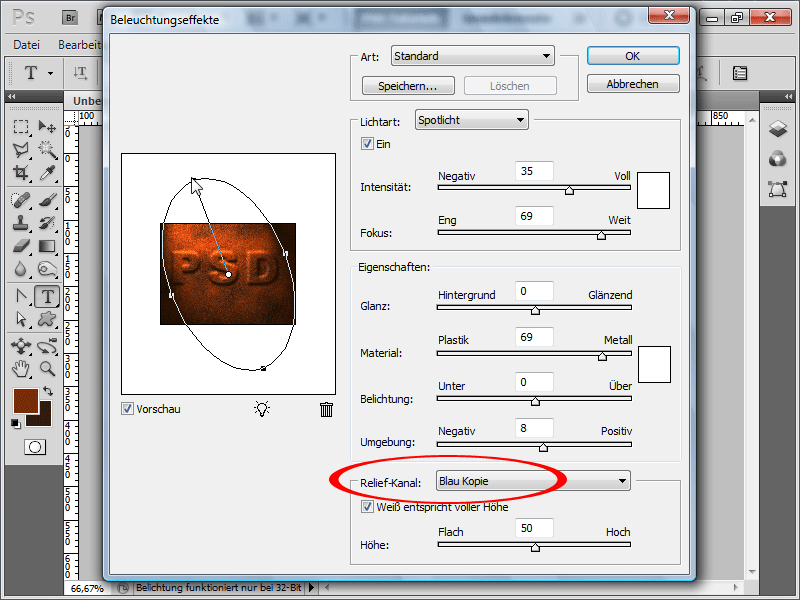
Step 6:
The result looks like metal letters pressed out of the metal.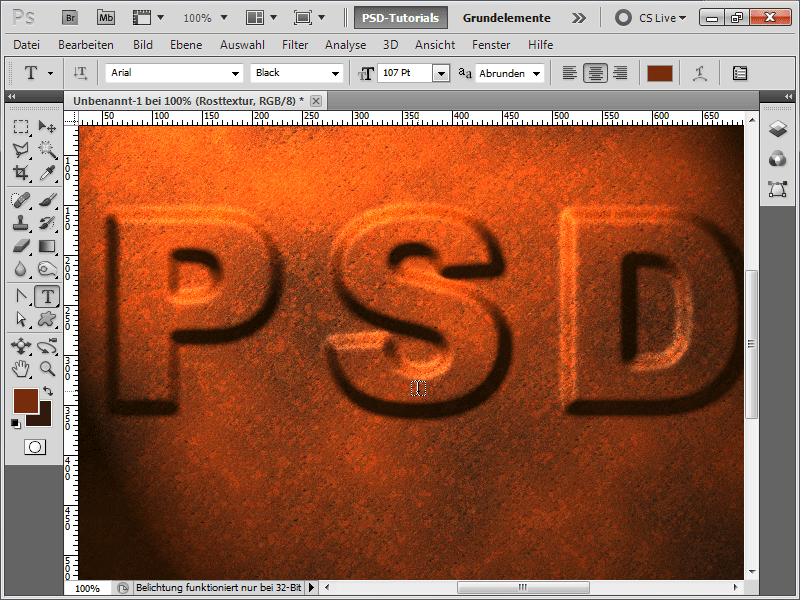
Step 7:
I now click with the Ctrl key on my hidden text layer to create a selection. Then I copy this area in my rust texture with Ctrl+C and paste it as a new layer with Ctrl+V. Now I can move the content anywhere.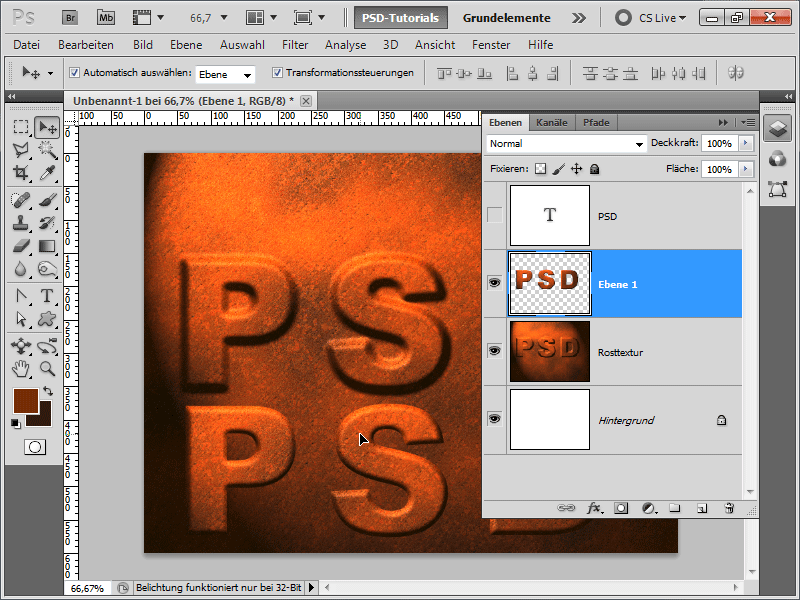
Step 8:
If I now add Flattened Edge as a filling method, the result looks like this: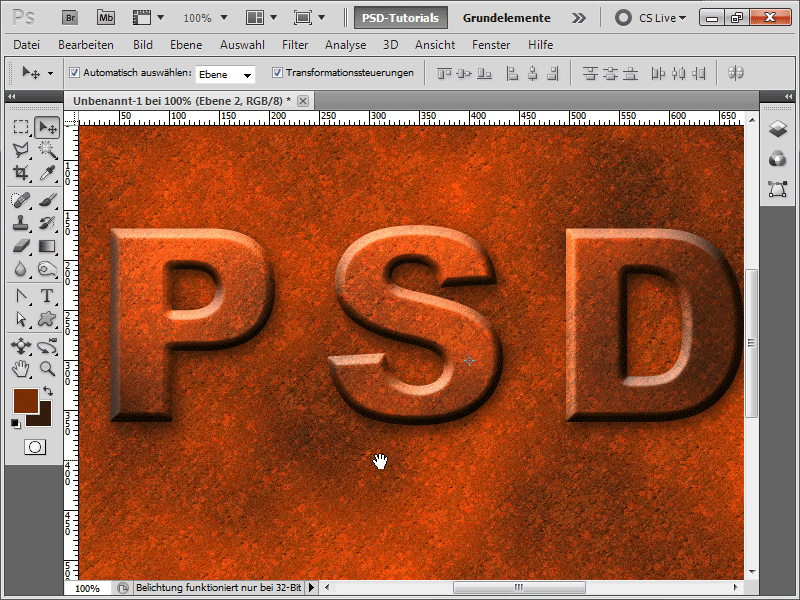
Step 9:
Of course, I can also use Texture+Text as a Clipping Mask again. With a different background, it looks like this: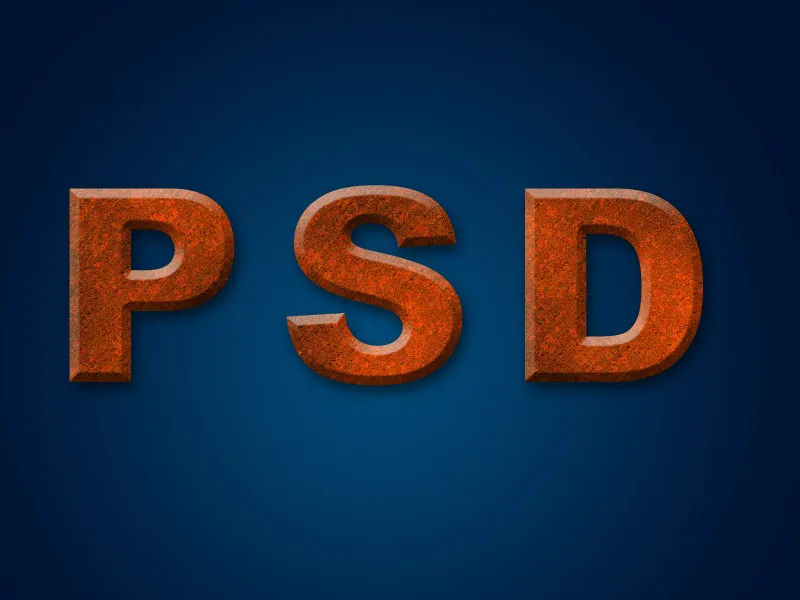
4. Variant for Creating Rust Textures
Step 1:
First, I create a new document; the size doesn't matter. Now I create a text layer and another empty layer above it. Then I set the foreground color to black and the background color to white.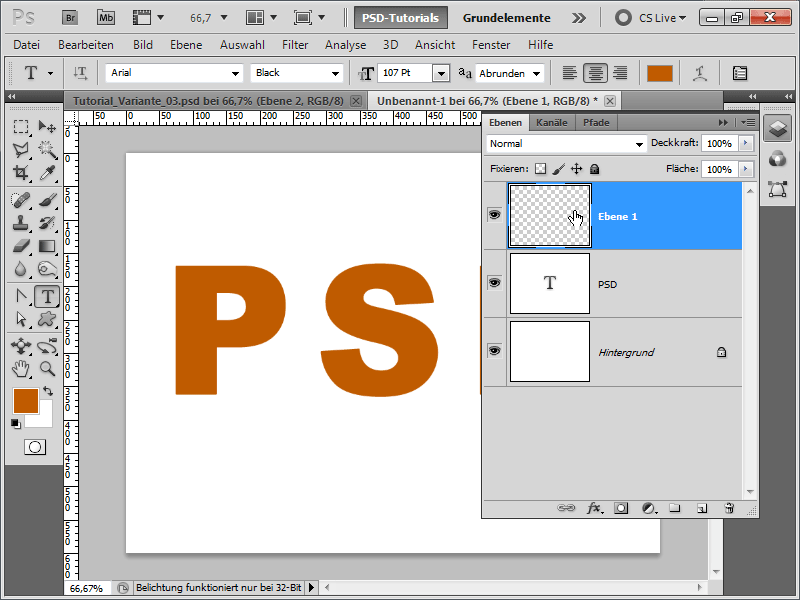
Step 2:
Now I apply the Cloud Filter. Then I change the foreground color back to brown, grab the Brush, and go to the Brush Control Panel. There, I choose the following values under Brush Shape: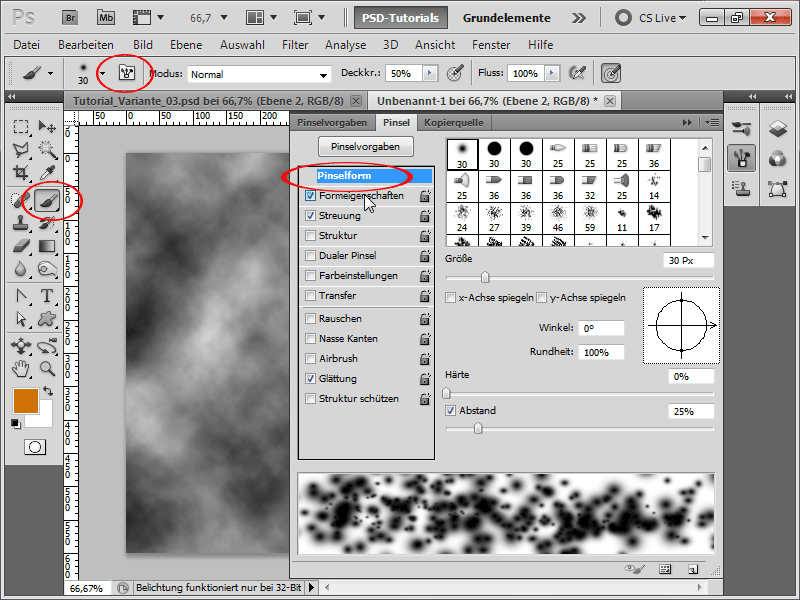
Step 3:
In the Shape Properties, I use these values: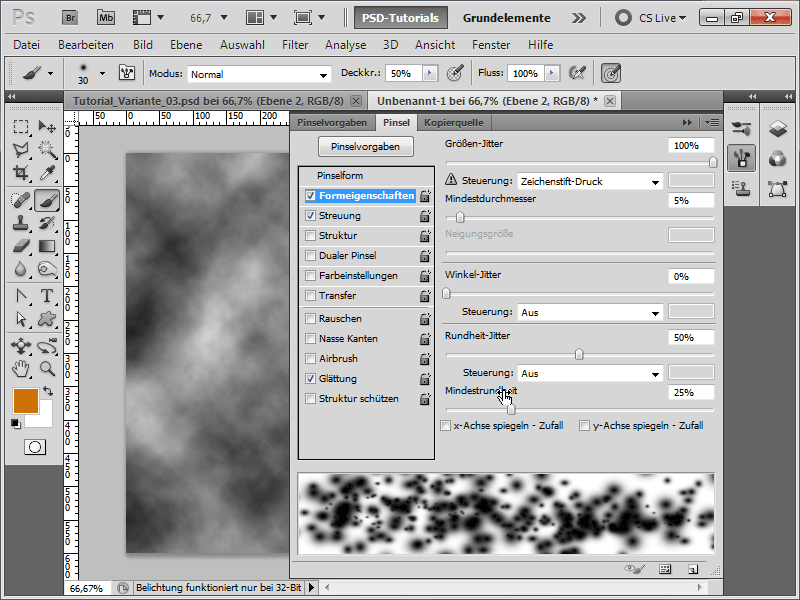
Step 4:
For the Scattering, I set these values: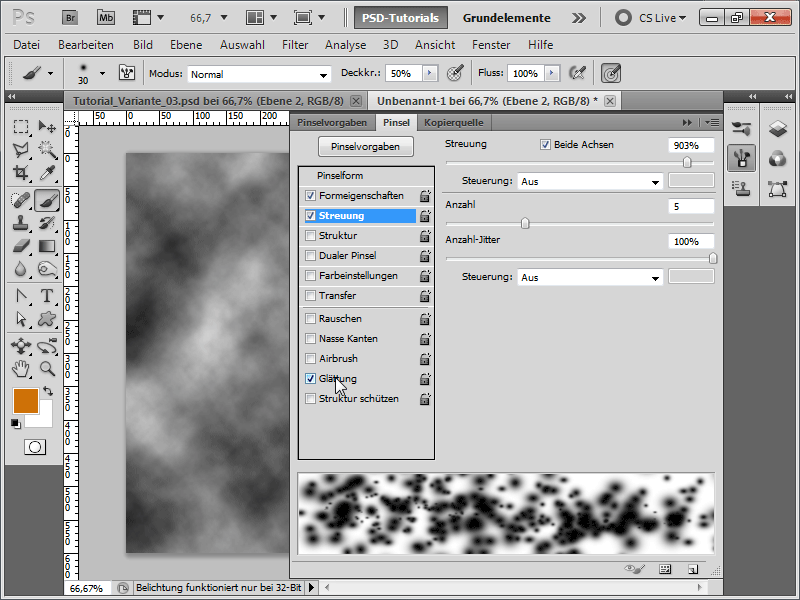
Step 5:
Now I paint around with low Opacity and also change the brush size once or twice.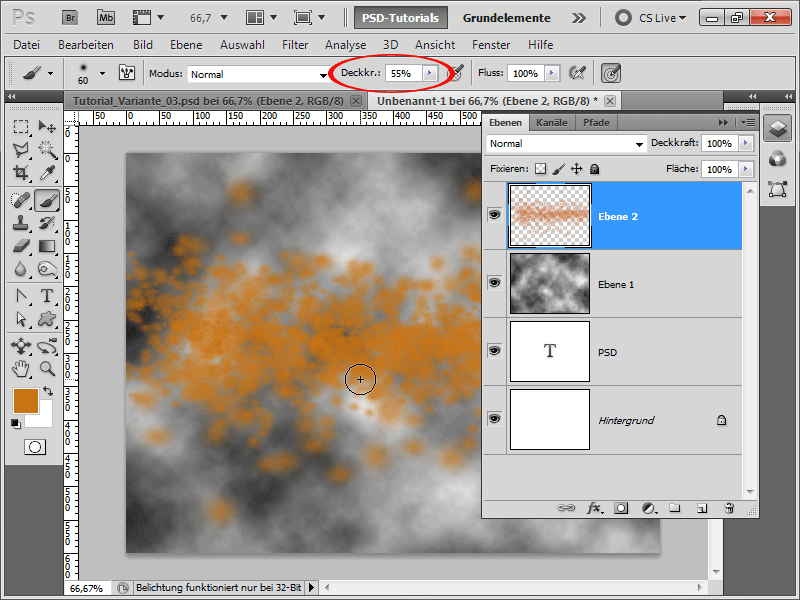
Step 6:
Using Ctrl+E, I merge both layers in the Layer Control Panel and then add Noise.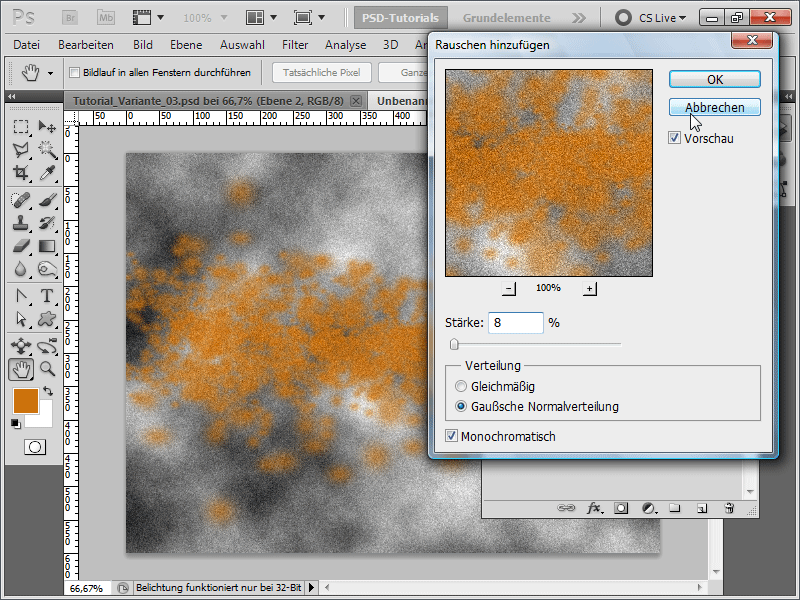
Step 7:
To enhance the effect even more, I blur my texture a bit.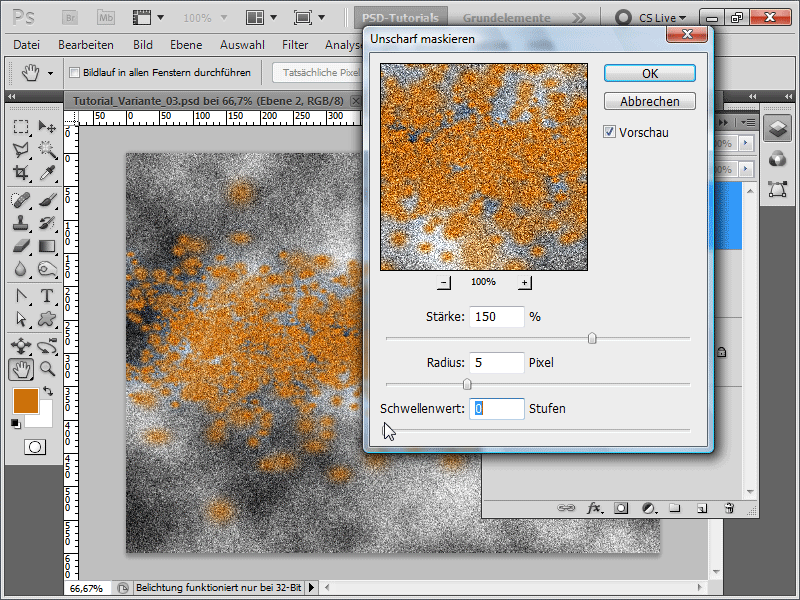
Step 8:
Now I create a text layer beneath my texture and convert the texture between the two layers into a Clipping Mask by holding the Alt key, so it only appears on the underlying text layer. Then I add a Drop Shadow, a Flattened Edge, and a Gradient Overlay with the following setting on my text layer: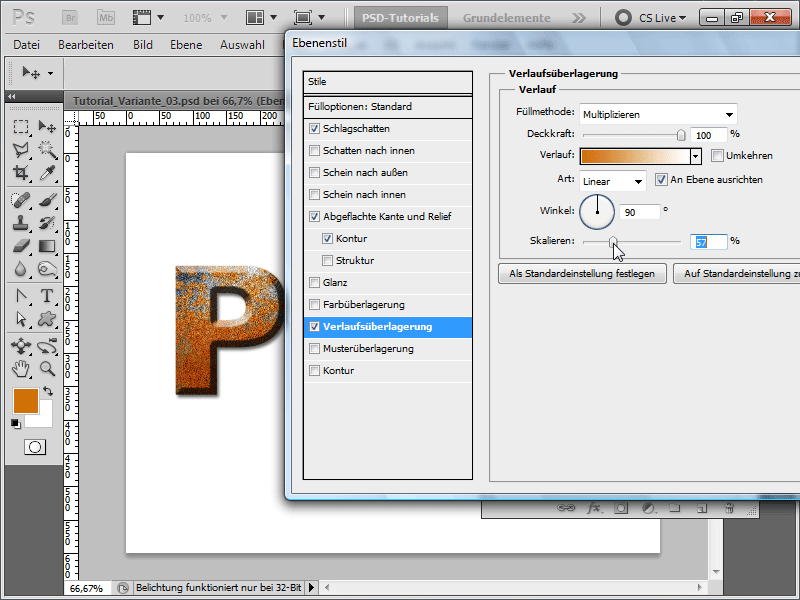
Step 9:
My result with a radial blue gradient then looks like this: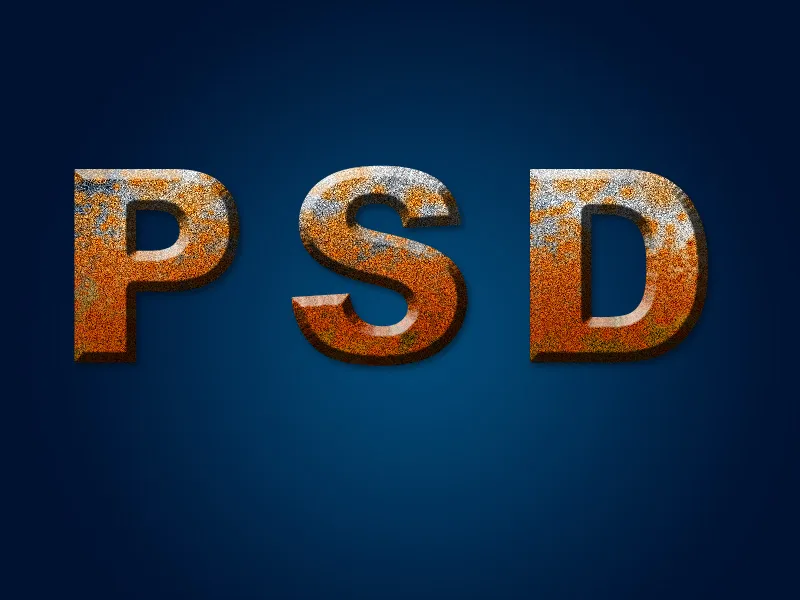
5. Variant for Creating Rust Textures
Step 1:
Now I open my Action Control Panel and record a new action. To do this, I click on the New Icon. Then I create a new document, where the size doesn't matter.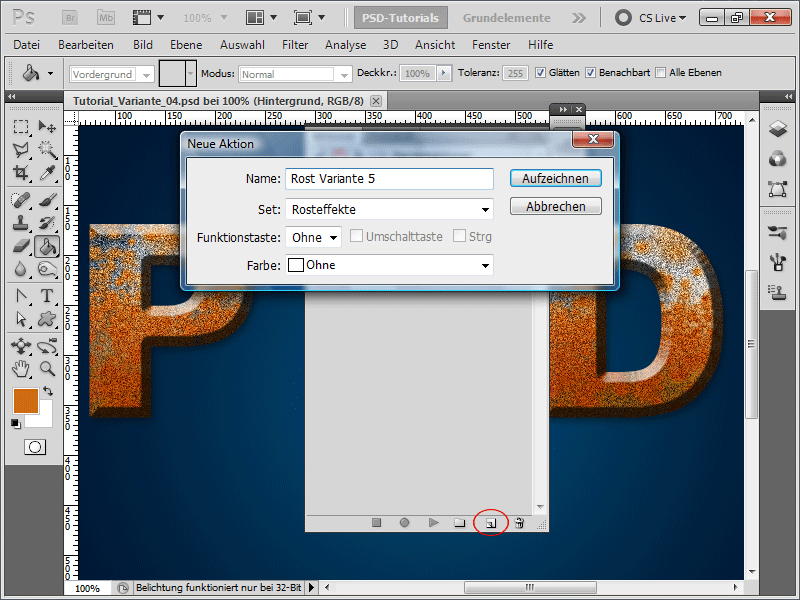
Step 2:
Next, I fill my background layer with brown and then apply the Grain Filter.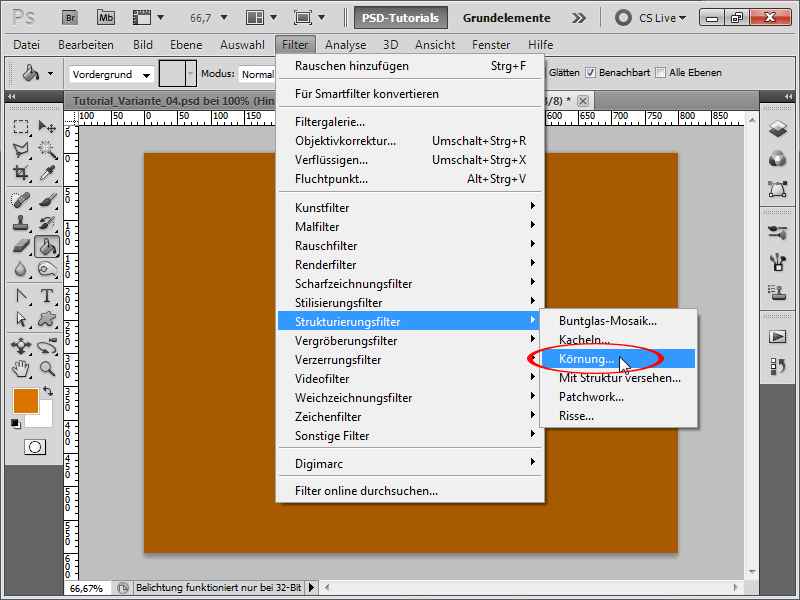
Step 3:
In the Grain Filter, I set these values: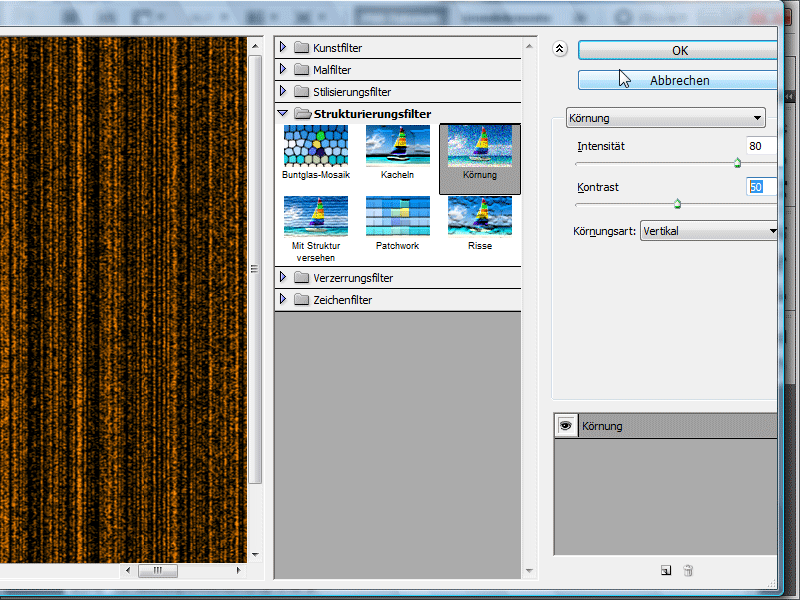
Step 4:
After that, under the Paint Filters, I apply the Splatter Filter.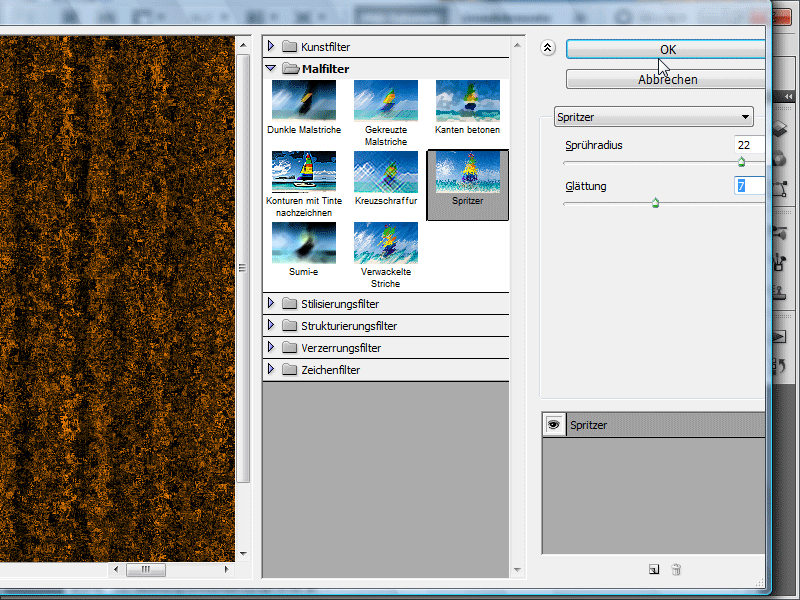
Step 5:
Now add Noise.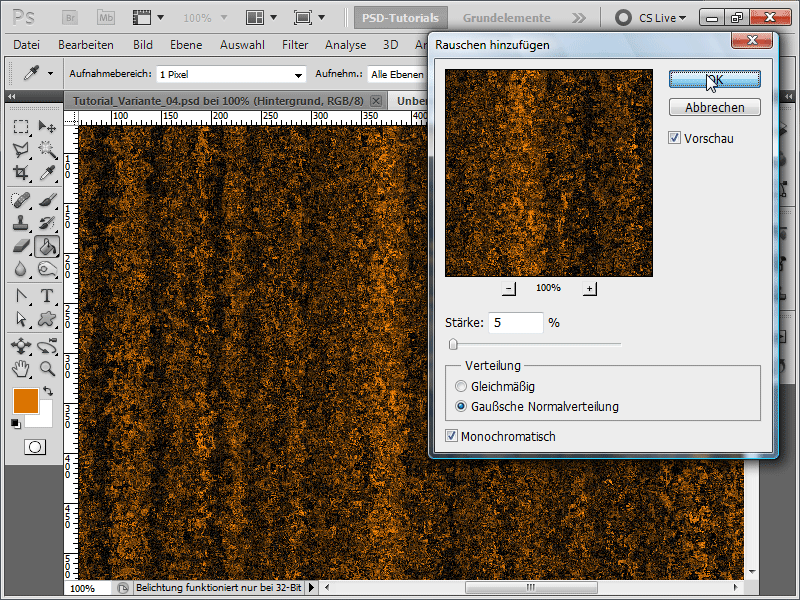
Step 6:
Now I can open my Action Panel again and press the stop symbol. After that, I activate the dialog function in front of the entry "create" so that the same resolution is not always used when playing my action.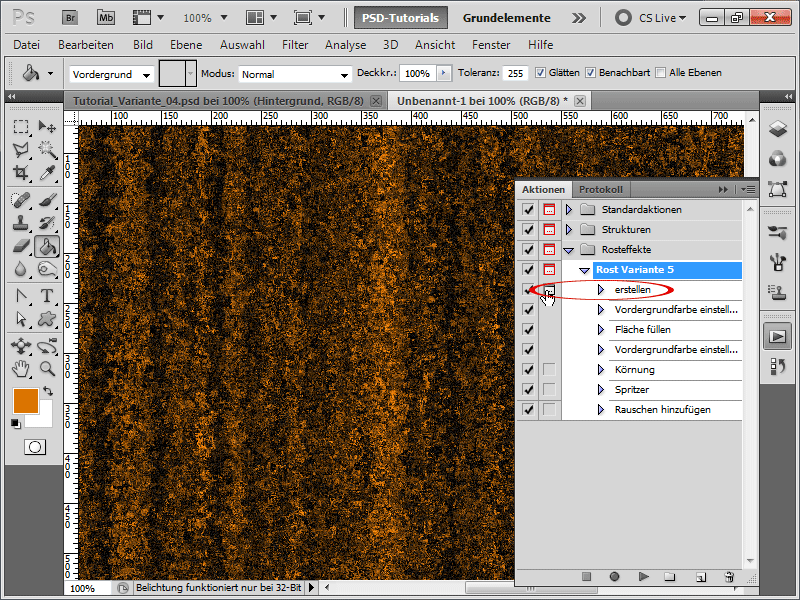
Step 7:
With a little drop shadow and a slight flattened edge, the result looks like this: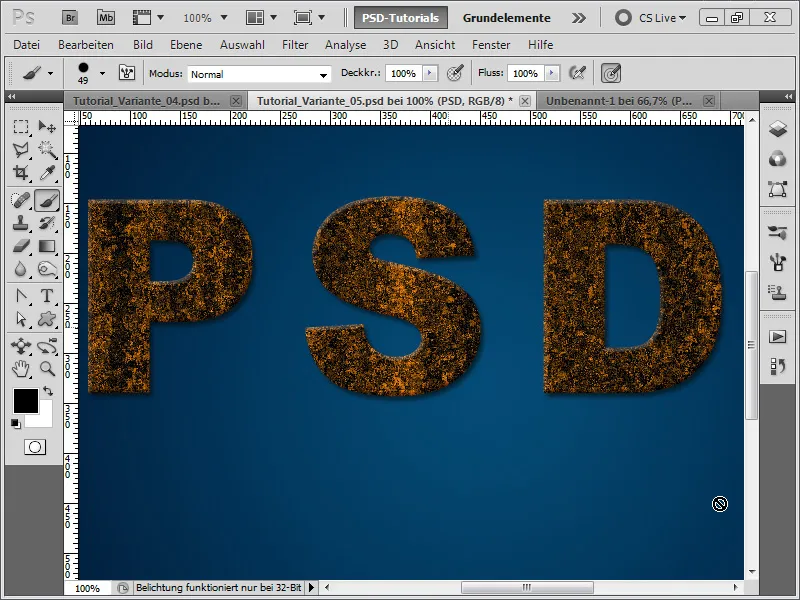
Step 8:
Now it's getting freaky: I create another layer within the clipping mask and apply a cloud filter to it. On my top texture layer, I create a mask. Then I activate the splash brush.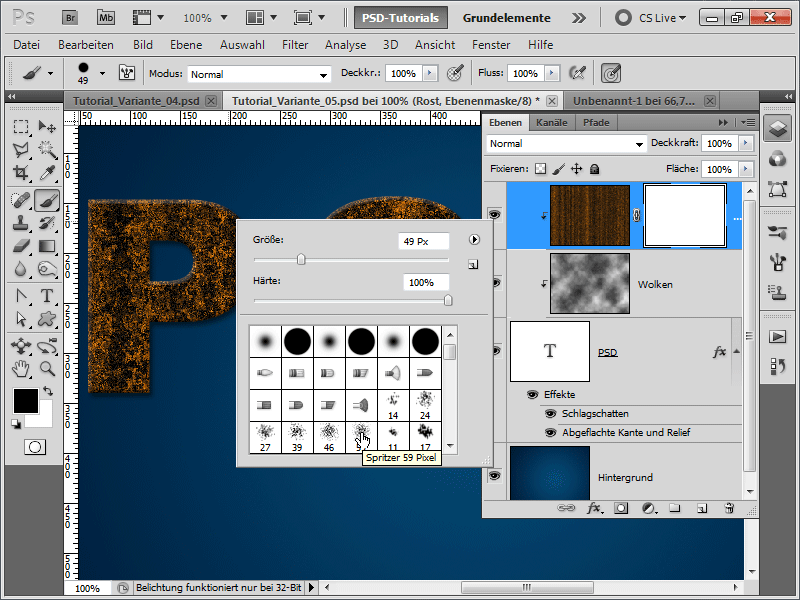
Step 9:
Now I quickly go to my brush panel (F5) and increase the spacing.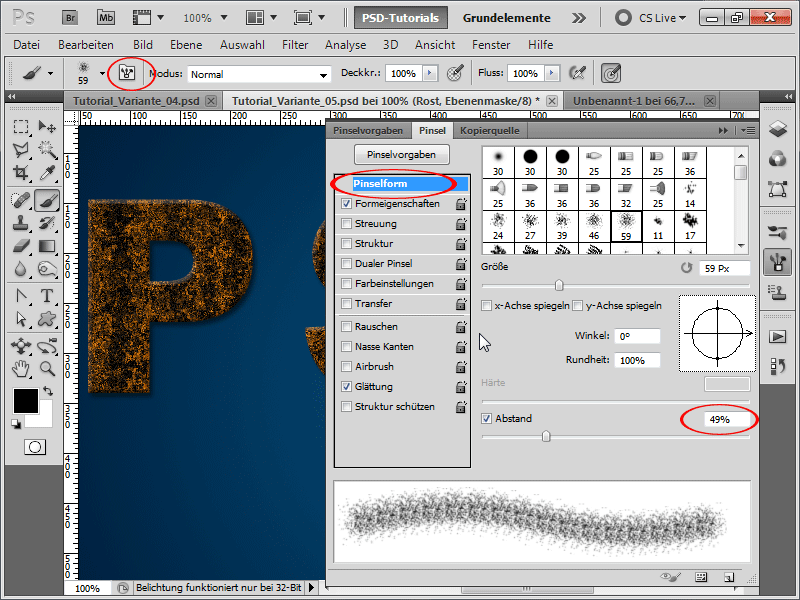
Step 10:
Then I click around in the layer mask with black color a few times, and I already have this cool effect: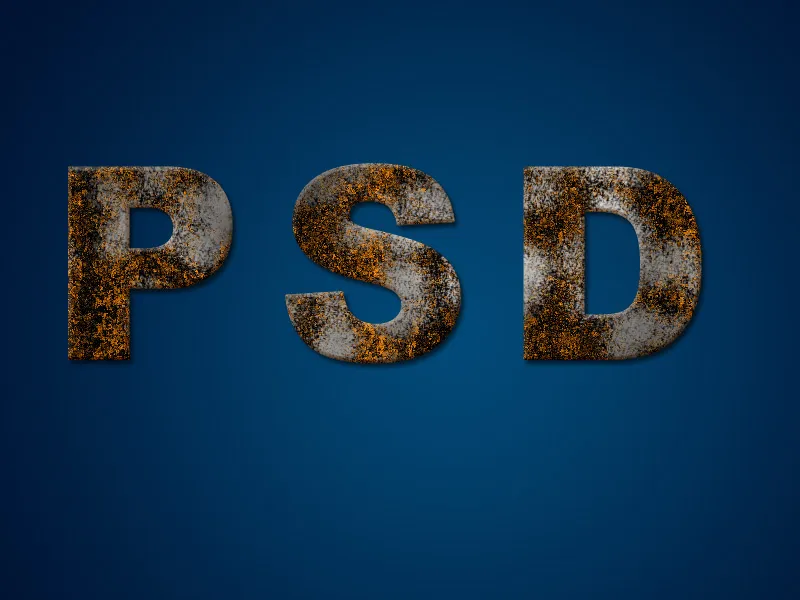
6th Variant for Creating Rust Textures
Step 1:
This method is intended for very lazy users: I simply download ready-made styles from www.psd-tutorials.de (enter "rust" in the search). I once downloaded some from Mosh. It is important to set the scale to 100% for the pattern overlay. For me, they were oddly preset to 250% and quite blurry.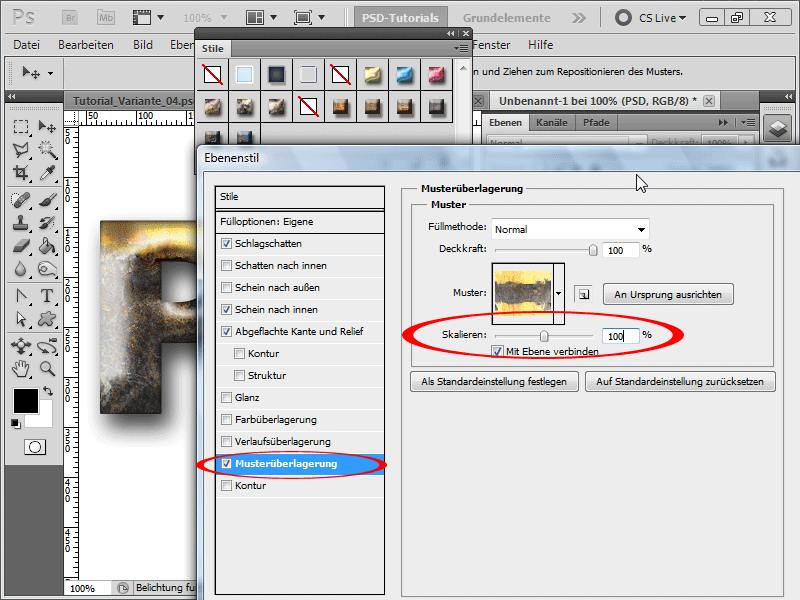
Step 2:
I really liked this rust style. However, I reduced the flattened edge a bit more.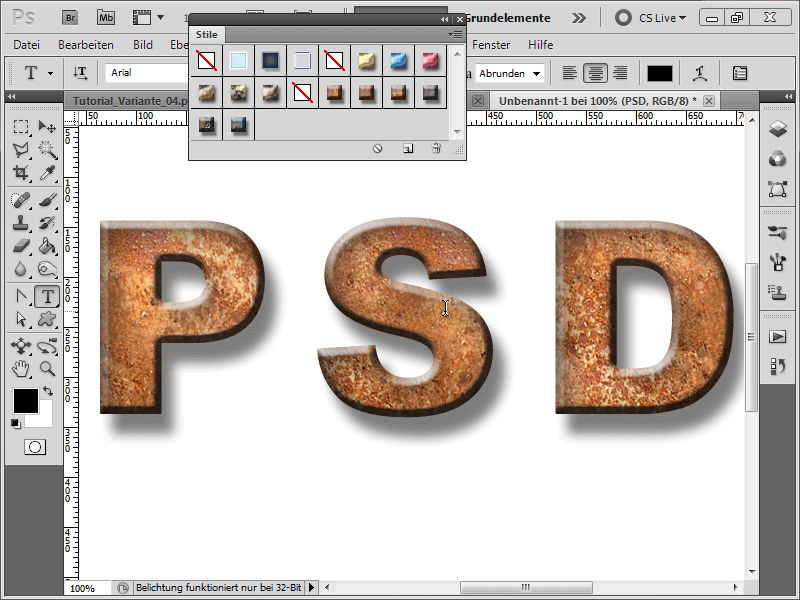
Step 3:
If I want to quickly change the color of the pattern, I activate the color overlay with the blending mode hue.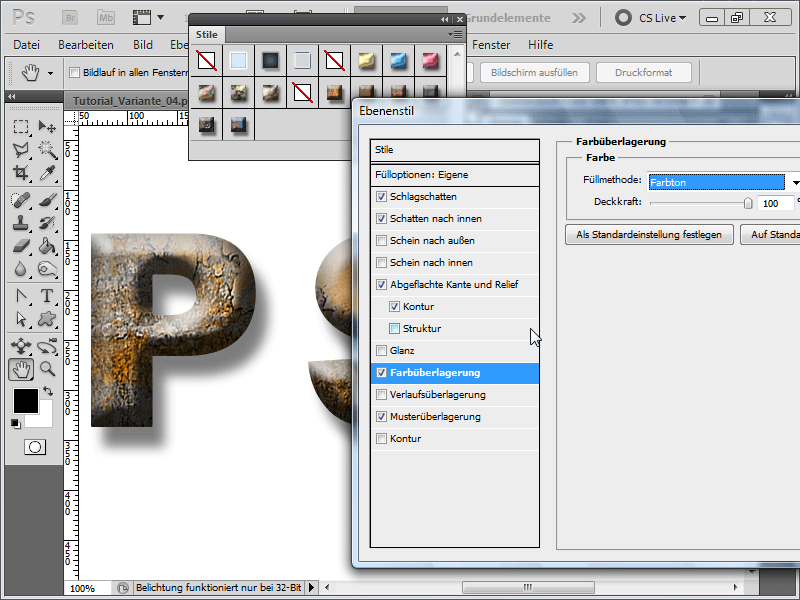
Step 4:
Of course, I can apply the styles to all shapes and not just to text.