The art of music production can initially seem overwhelming, especially when it comes to finding the right elements for your tracks. The Drummer in Logic Pro X is an excellent tool for quickly creating diverse and creative drum grooves. In this guide, you will learn how to use the Drummer and come up with your own rhythmic ideas. Let's dive straight into the exciting world of music production.
Key Takeaways
- You can quickly generate complex drum grooves in Logic Pro X with the Drummer.
- The parameters of the drum grooves are easily customizable.
- It's possible to create different drummer regions in a project to bring variety and dynamics to your music.
- You can select various sounds and genres from the library to find the ideal groove for your project.
Step-by-Step Guide
Step 1: Create a New Session and Drum Track
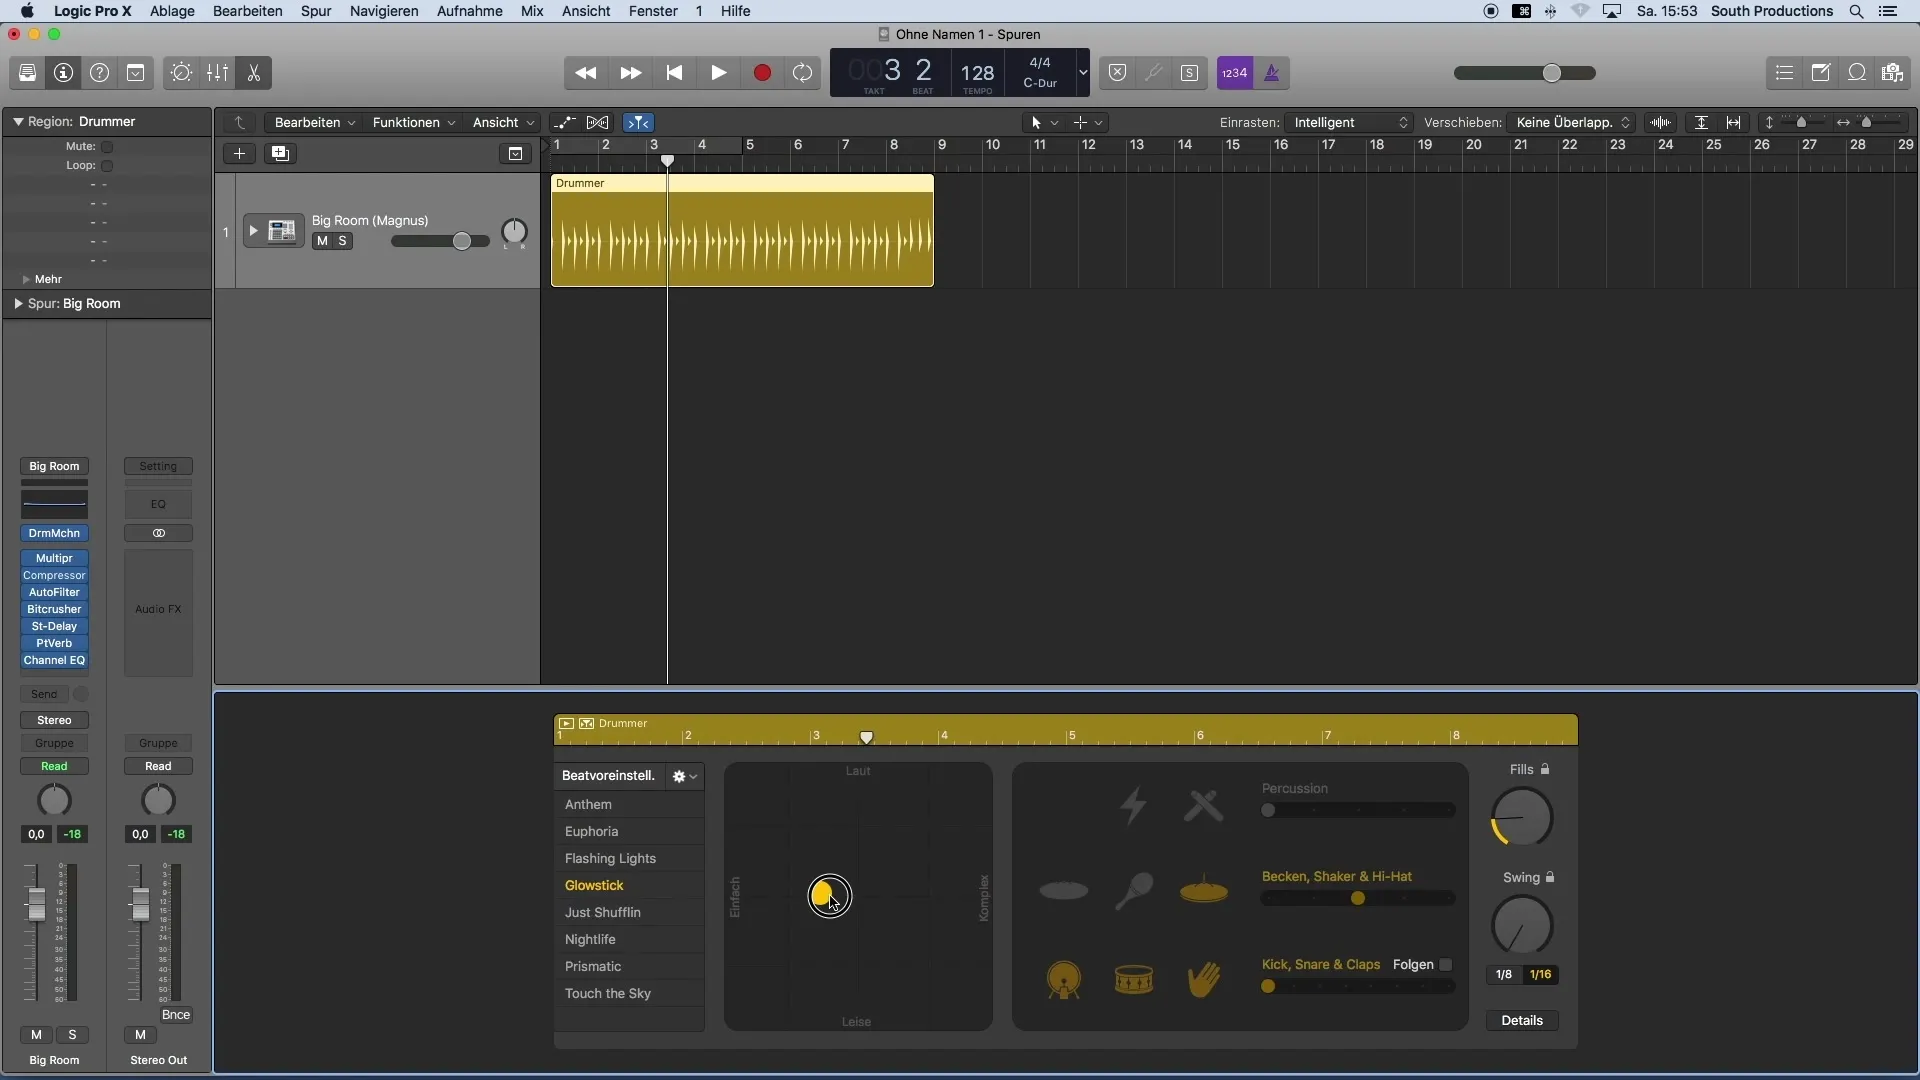
To begin, open Logic Pro X and create a new session. Select "File" and then "New". Next, create a new drum track already prepared for the Drummer. Simply click on "Generate" to create a drum region in your project.
Step 2: Customize Drum Groove
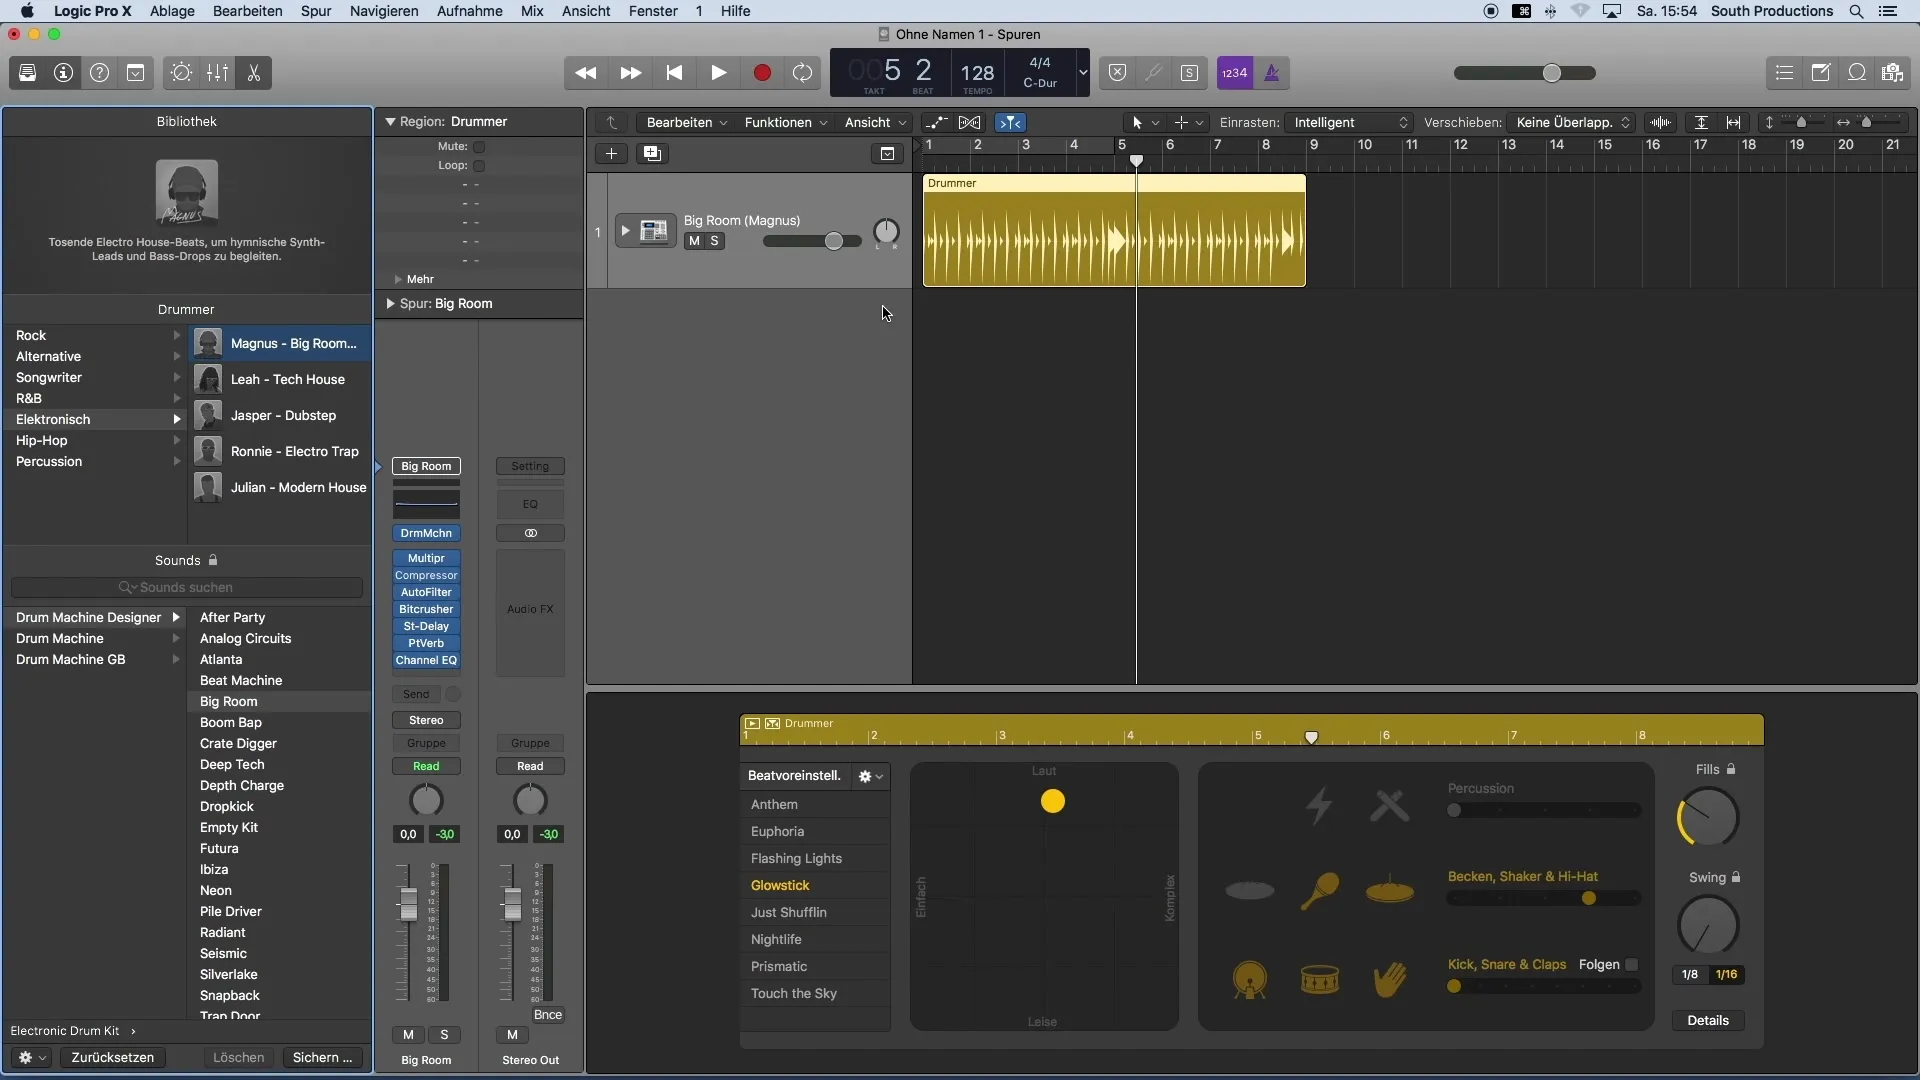
Once your drum track is created, you can edit the drum region. On the left side of the window, you'll find sliders that allow you to adjust the drum groove to your liking. Slide the slider up for a louder groove or down for a softer one.

Step 3: Choose Presets that Suit the Theme
An excellent way to customize your groove is by using presets. In the settings, you can alter the intensity of the groove. Additionally, you can increase the number of kicks, snares, claps, or even shakers to make the groove more dynamic.
Step 4: Select Genre and Sound
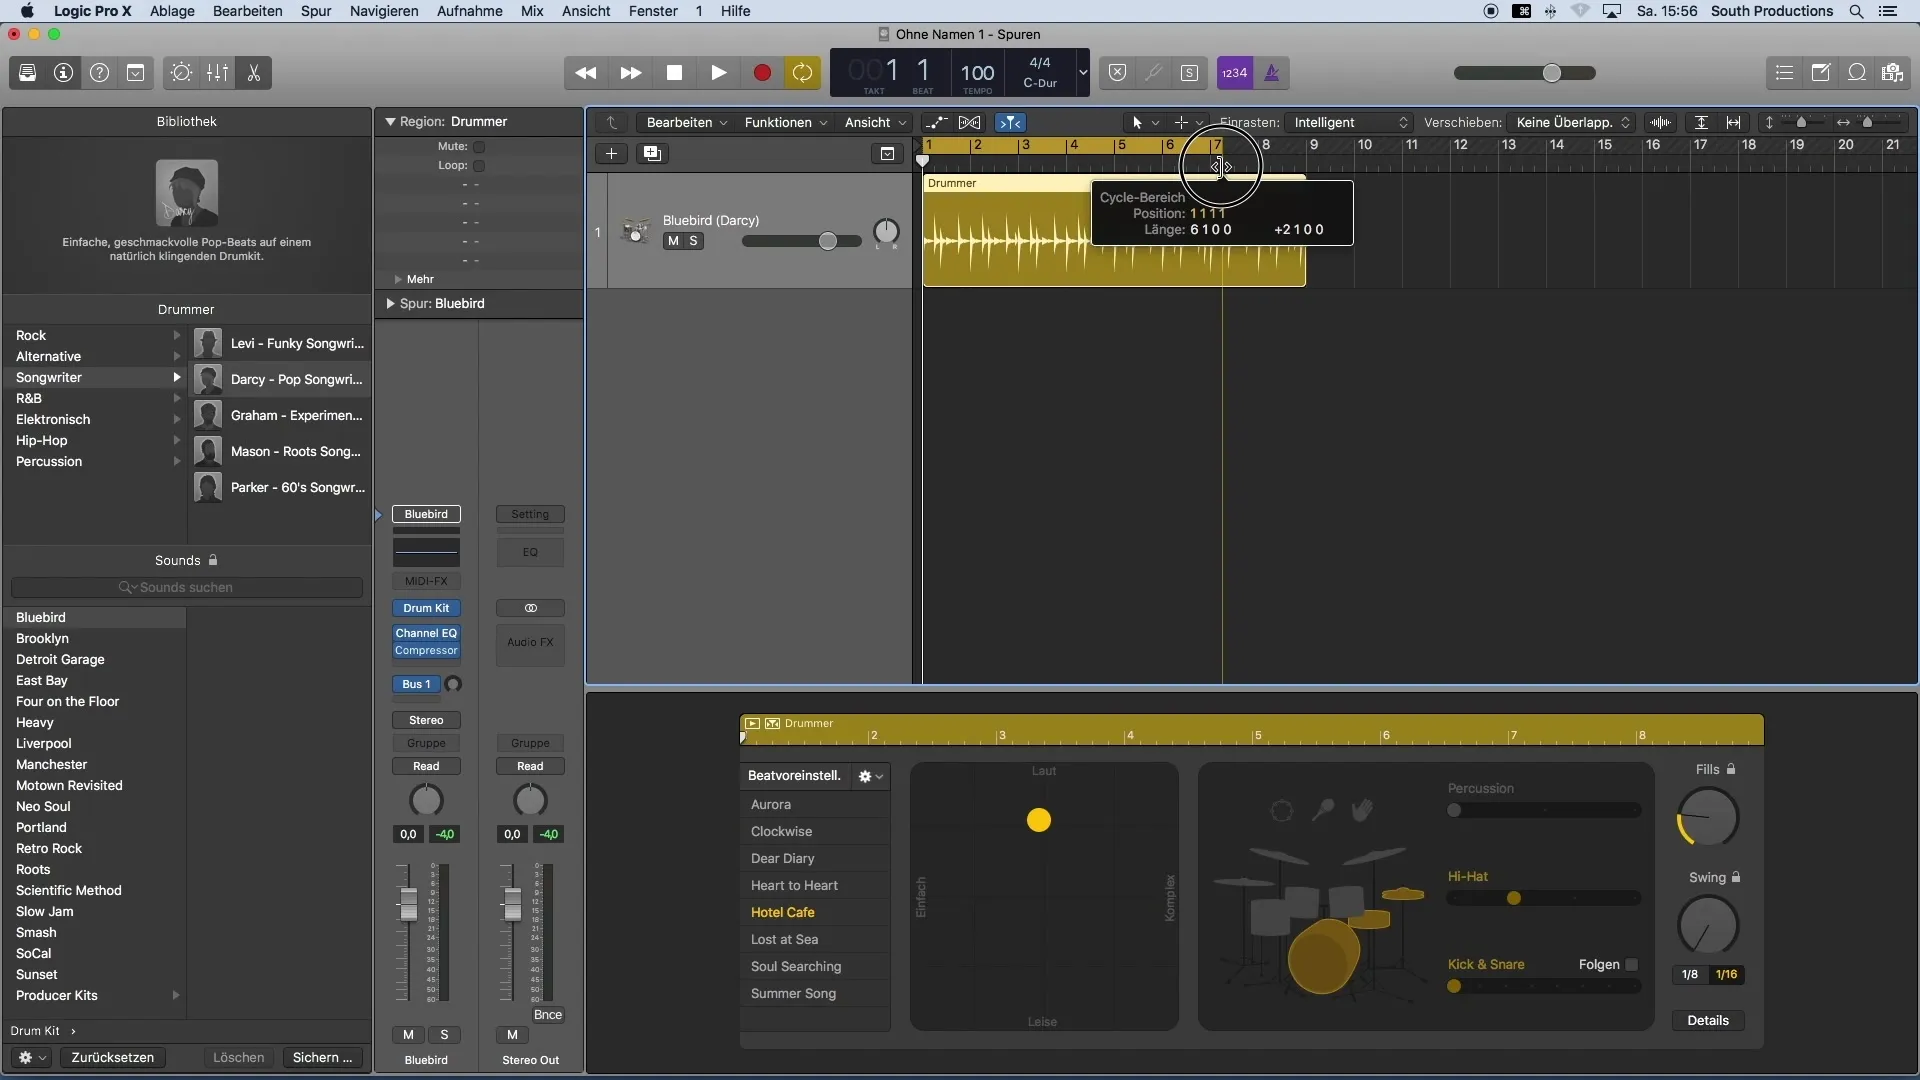
Open the library to explore the available genres and sounds. There, you can specifically search for a suitable drum sound that fits your project. For a pop project, you might choose acoustic drums that support a catchy rhythm.

Step 5: Enhance Rhythm with Loops
To ensure your groove remains catchy, apply a loop to the drum region. Click on a spot in the region, drag a loop, and play the area regularly. This way, you can listen to changes live without constantly switching between playback and stop.

Step 6: Create Different Regions
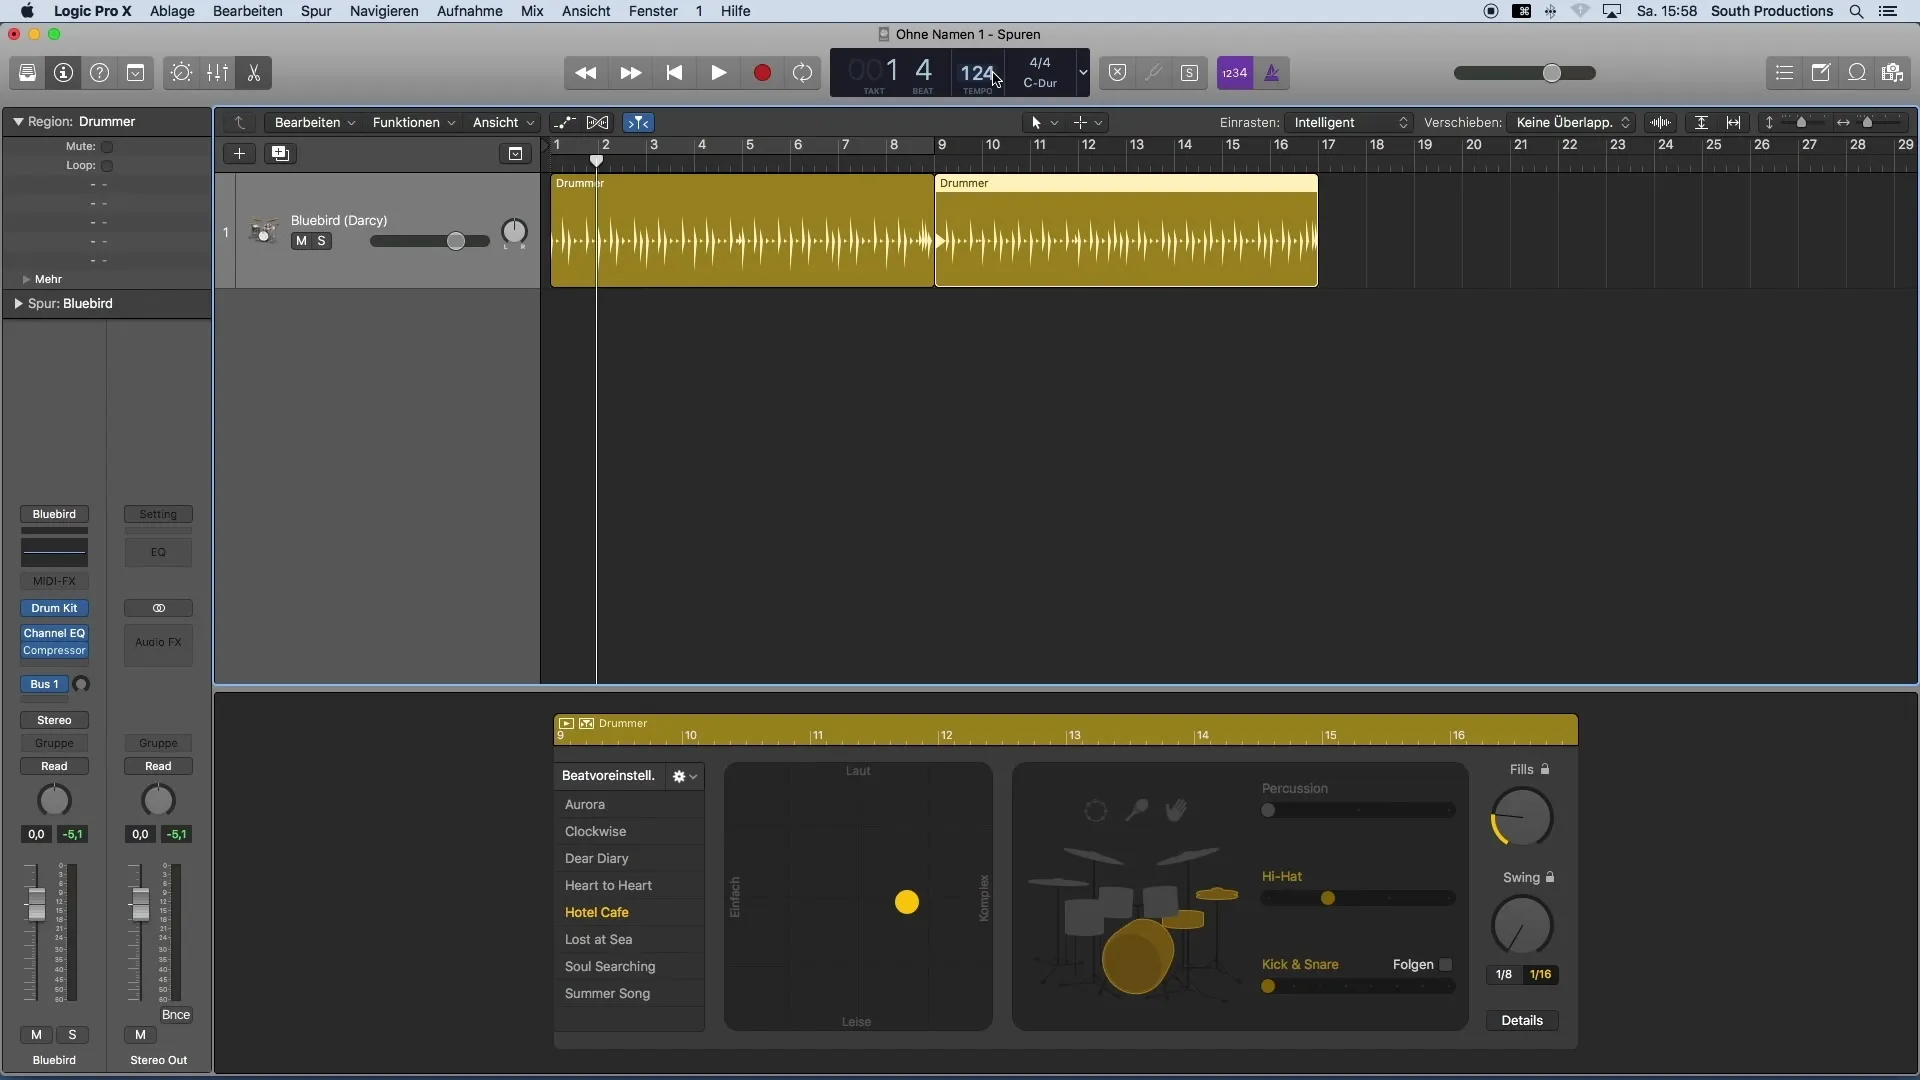
Another advantage of the Drummer is the ability to create unlimited regions. This allows you to design different drum passages for various parts of your song, adding variety and making the song more interesting.
Step 7: Adjust Tempo
Check the tempo of your song. You may want to increase it to create a more dynamic atmosphere. Set a standard tempo of around 124 BPM to boost the energy.

Step 8: Perfect Transitions
When you have different regions, ensure that the transitions between the parts are harmonious. You can adjust the sound of individual drums honestly and explore different complexities and playing techniques.
Summary
With Logic Pro X and the Drummer, you have a powerful tool to enhance your compositions with creatively designed drum grooves. With a few simple steps, you can perfectly tailor the drum accompaniment to your personal style and your music's structure.
Frequently Asked Questions
How do I create a new drum track in Logic Pro X?You can create a new session through "File" and then create a drum track by clicking on "Generate."
Can I customize the drum groove?Yes, you can slide the sliders up or down to adjust the volume and complexity of the groove.
What can I do with the library?You can select different genres and drum sounds from the library to find the right mood for your project.
Why should I use a loop?Loops help you hear changes in your groove in real-time without constantly stopping and playing.
Can I have multiple drum regions in one project?Yes, you can create as many regions as you want, each designed differently.


