After completing a musical project, the question often arises of how to make the song louder before releasing it. To get the most out of your sound, you can use the limiter plugin available in Logic Pro X. Here's how to showcase your production optimally without compromising quality.
Key Insights
- The limiter is an effective tool to increase the volume of your audio outputs.
- Make sure your signal does not go beyond 0 decibels to avoid distortion.
- Set the output level to -0.2 decibels to prevent the sound from clipping during export.
- Monitor the signal reduction to ensure your material sounds good and is not overly compressed.
Step-by-Step Guide
To make your music loud and high-quality in Logic Pro X, follow this simple guide.
1. Load Limiter Plugin
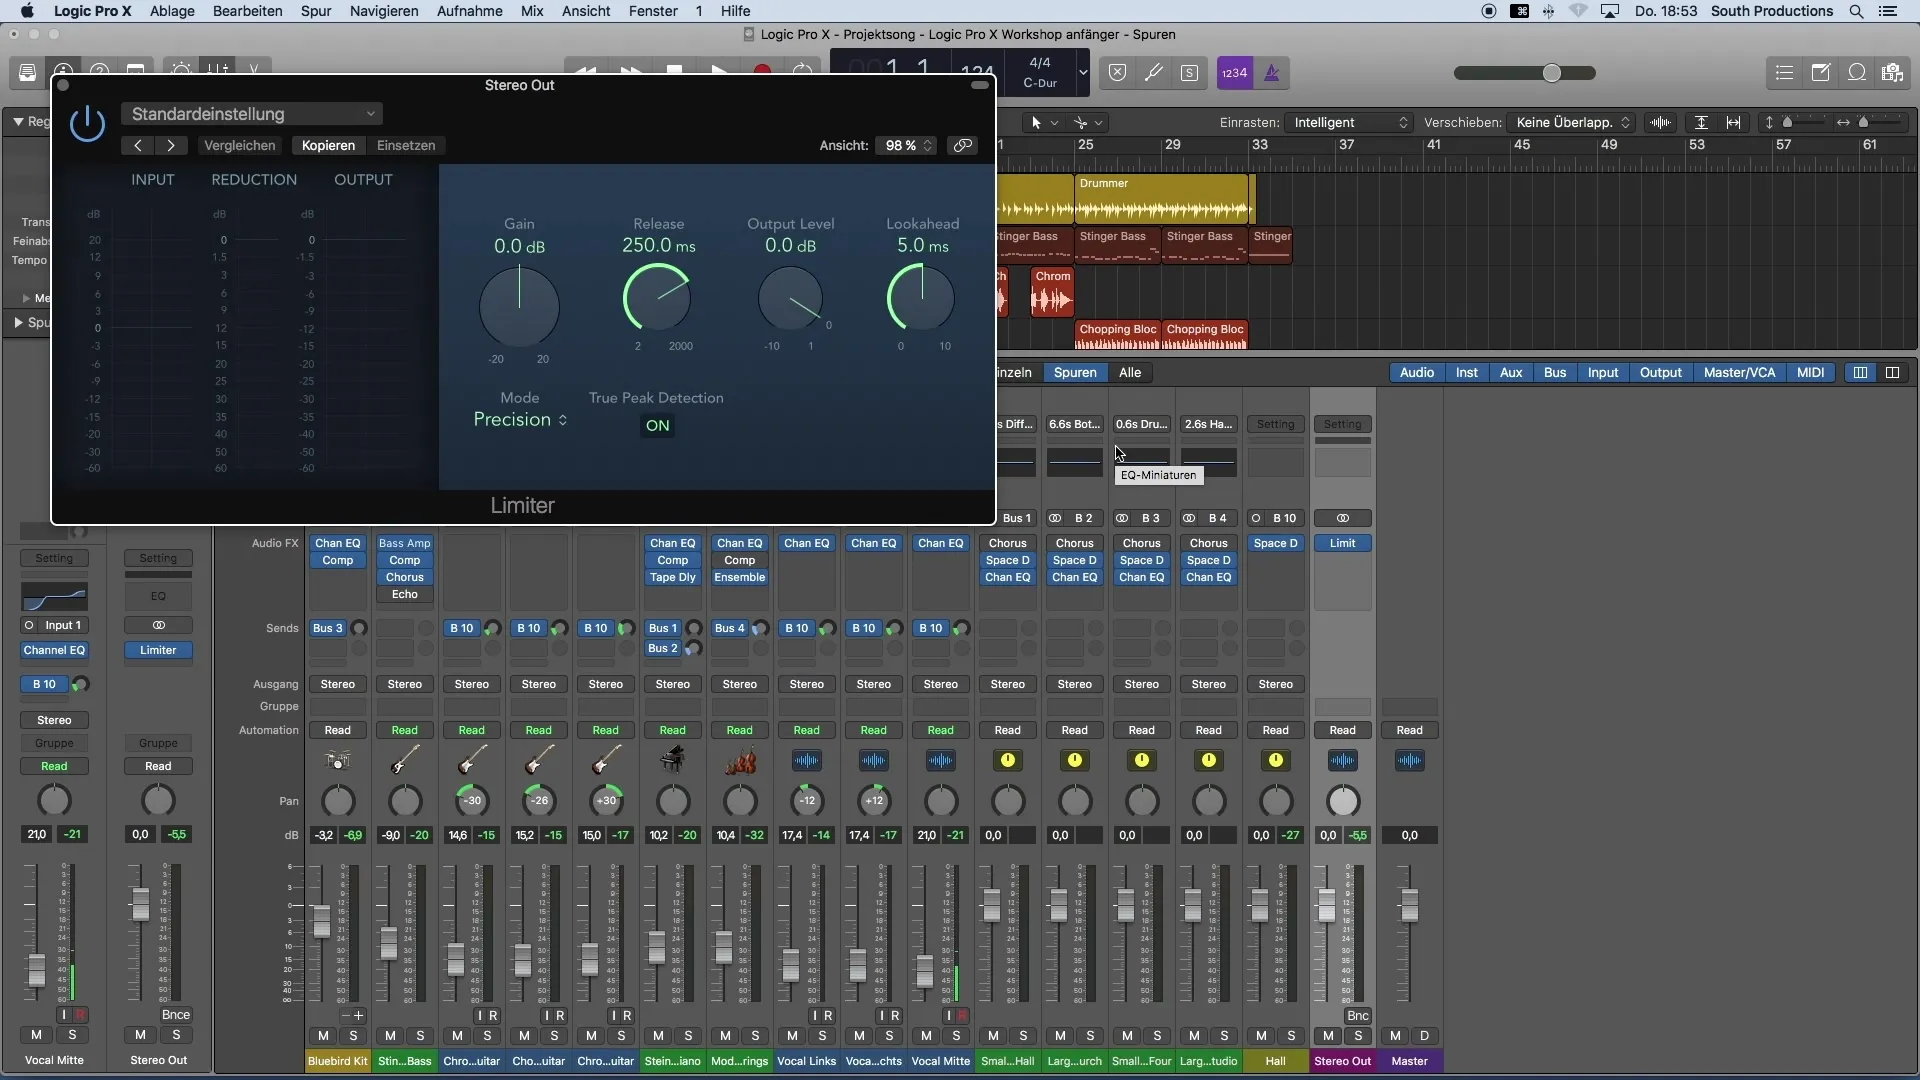
Before exporting your song, you need to load the limiter plugin on the master track of your project. This can be done in the mixer, where you will find the Audio FX section. Here, you can select the limiter under the Dynamics.
2. Adjust Basic Limiter Settings
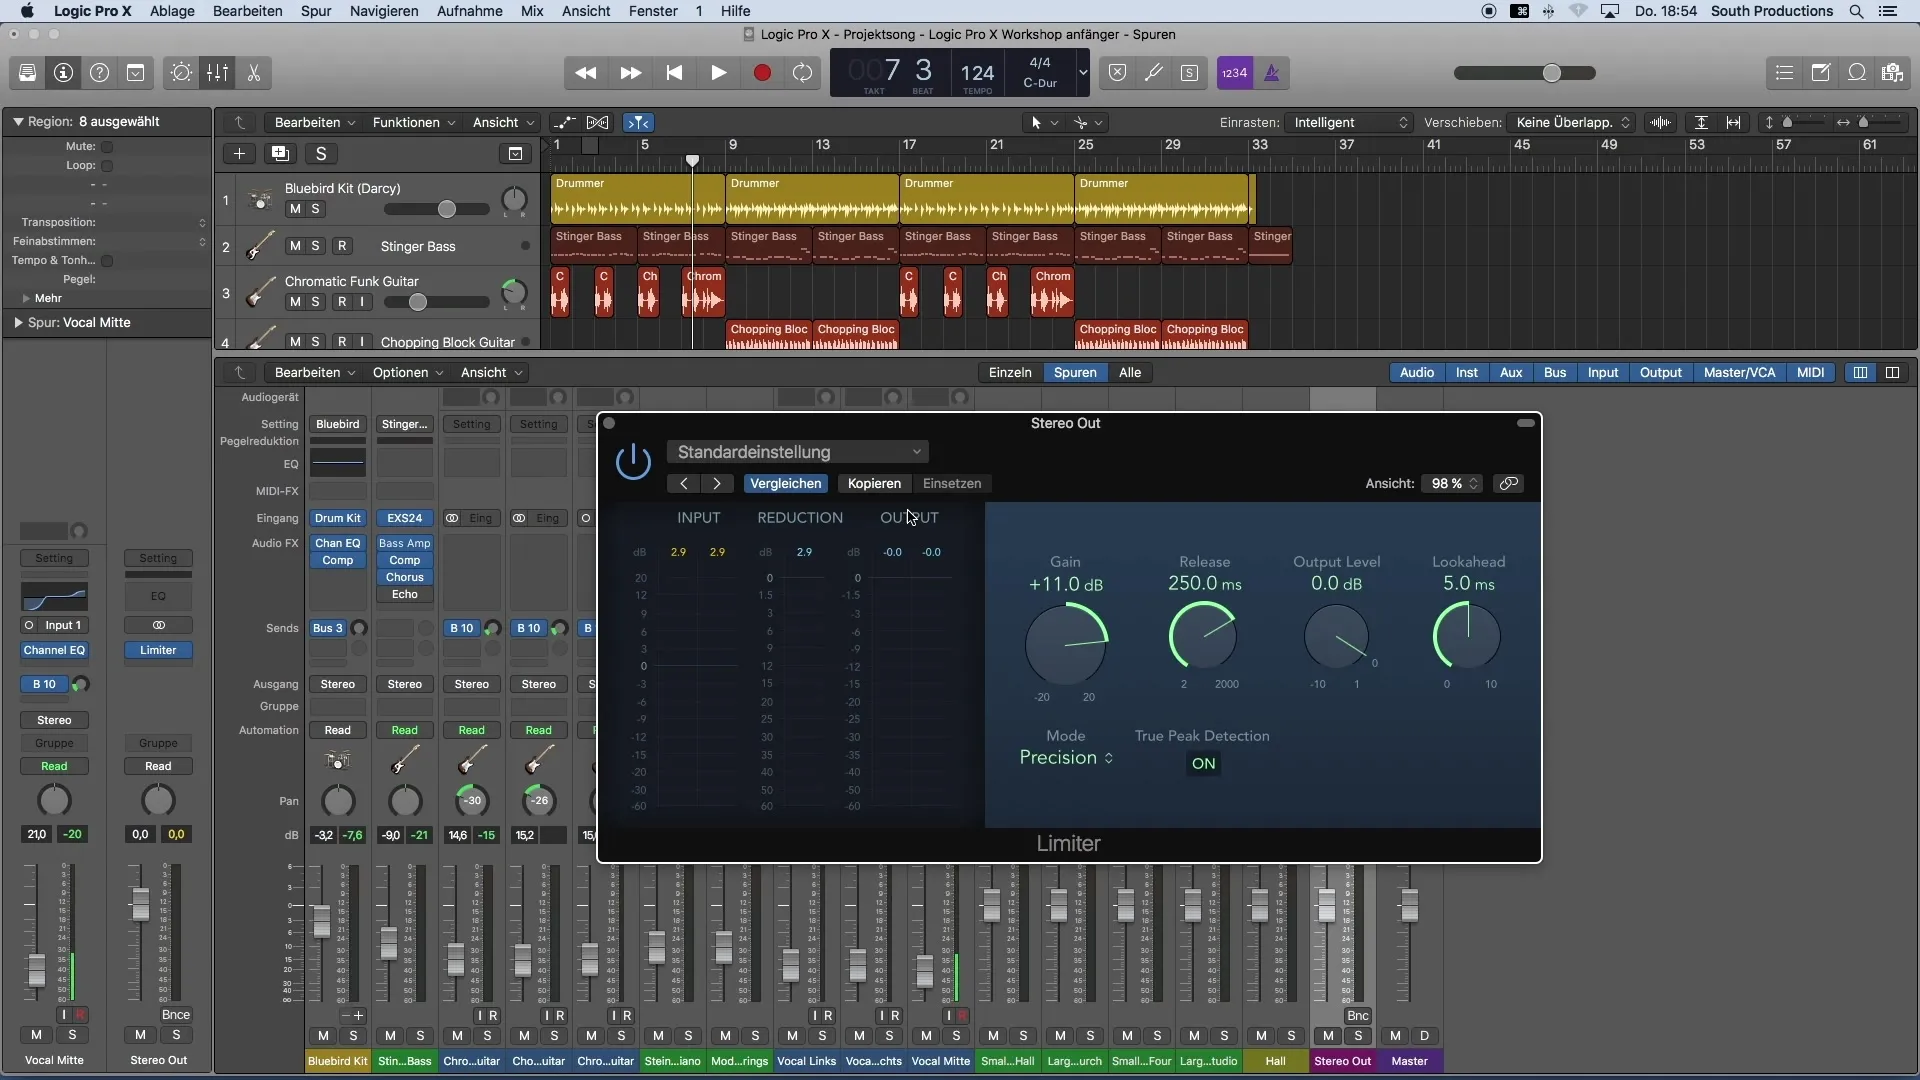
Once the limiter is loaded, the first setting you should adjust is the Gain control. With this control, you can increase the volume of your signal to ensure your song is loud enough without being clipped.

3. Monitor Input and Output Levels
As you adjust the Gain control, monitor both the input and output levels. You will also see a metric called Reduction, which indicates how much the signal is being reduced to comply with the 0 decibel limit.

4. Find Maximum Volume
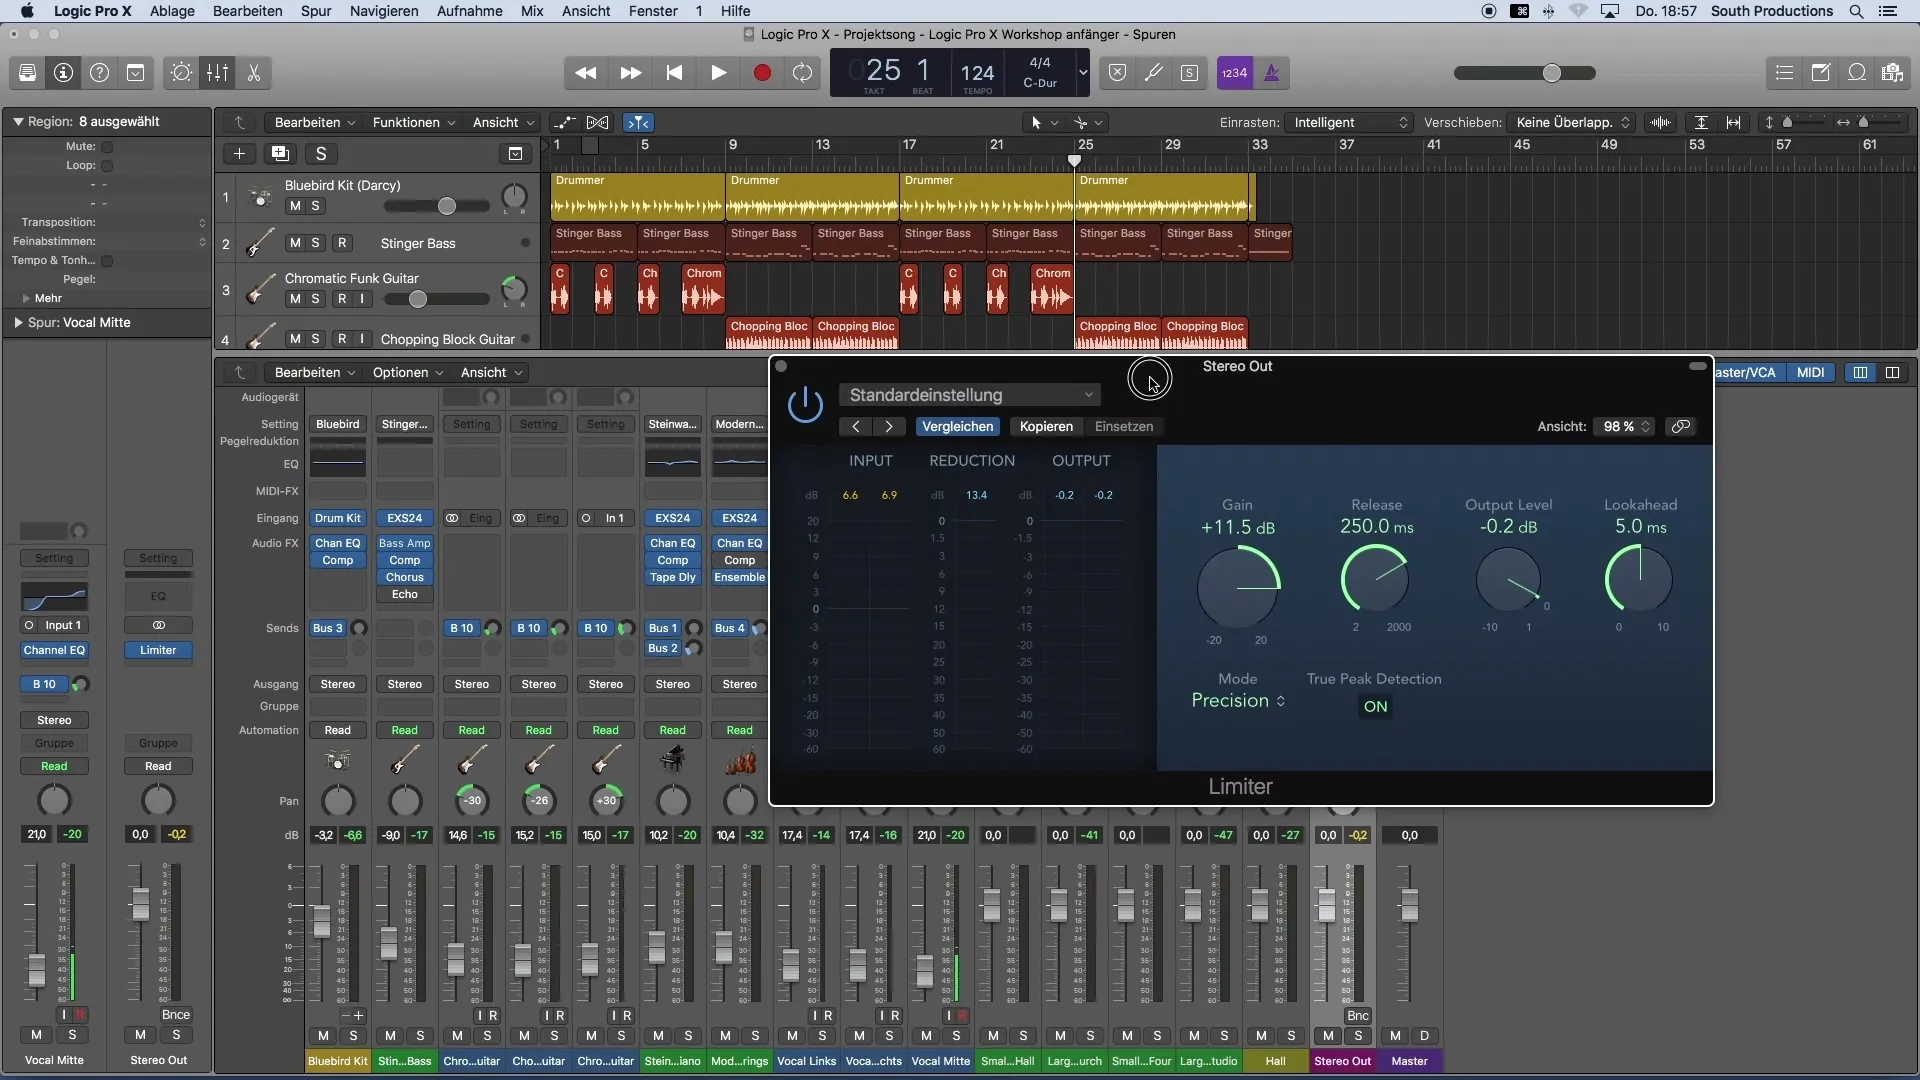
It is important to know that you cannot work endlessly loud, as the material will be compressed at a certain point and lose quality. Find the balance between maximum volume and good sound quality. Ensure the sound remains clear and dynamic.
5. Set Output Level
Another important step is setting the output level to -0.2 decibels. This precaution protects against clipping when exporting and importing your production.
6. Fine-Tuning
After maximizing the volume, it may be necessary to adjust some elements in your mix. For example, it can be helpful to lower the volume of certain instruments, like the kick drum, to prevent the limiter from working excessively.

7. Possibly Increase Volume Further
Once you ensure everything sounds good, you may potentially increase the volume further. Always keep clear sound in mind.

8. Compare with References
Finally, it is advisable to compare your production with professional reference tracks. Even if you may not achieve the same volume, you will get a sense of how close you are to professional quality.
Summary
By properly applying the limiter plugin in Logic Pro X, you can make your music production loud and high-quality. Make sure to follow all the steps mentioned above to achieve the best results.
Frequently Asked Questions
How do I load the limiter plugin in Logic Pro X?Go to the mixer, open the Audio FX section of the master track, and select the limiter plugin from the Dynamics.
What does the Gain control do on the limiter?The Gain control allows you to increase the volume of your signal without risking clipping.
What should the Output Level on the limiter be set to?The Output Level should be set to -0.2 decibels to avoid clipping.
What should I do if my kick drum is too loud?Lower the volume of the kick drum slightly to ease the signal and reduce the workload on the limiter.
Why is comparing with reference tracks important?Reference tracks help you gauge the volume and quality of your production compared to professional standards.


