Recording vocals and instruments is an essential skill for any music producer. Logic Pro X offers numerous tools to help you create high-quality audio recordings. In this guide, you will learn step by step how to effectively shape your audio recordings.
Main Insights
- Audio recordings require the correct track settings and input management.
- The level should be between -12 and -16 decibels to avoid distortion.
- Doubling tracks increases richness and depth of sound.
Step-by-Step Guide
Step 1: Save and Prepare Project
Before you start recording, you should save your project in Logic Pro X to ensure all changes are saved. You have already opened a project and created two instrument tracks to establish a solid foundation for your vocals. These instruments serve as a base on which to build your recordings.
Step 2: Create Audio Track
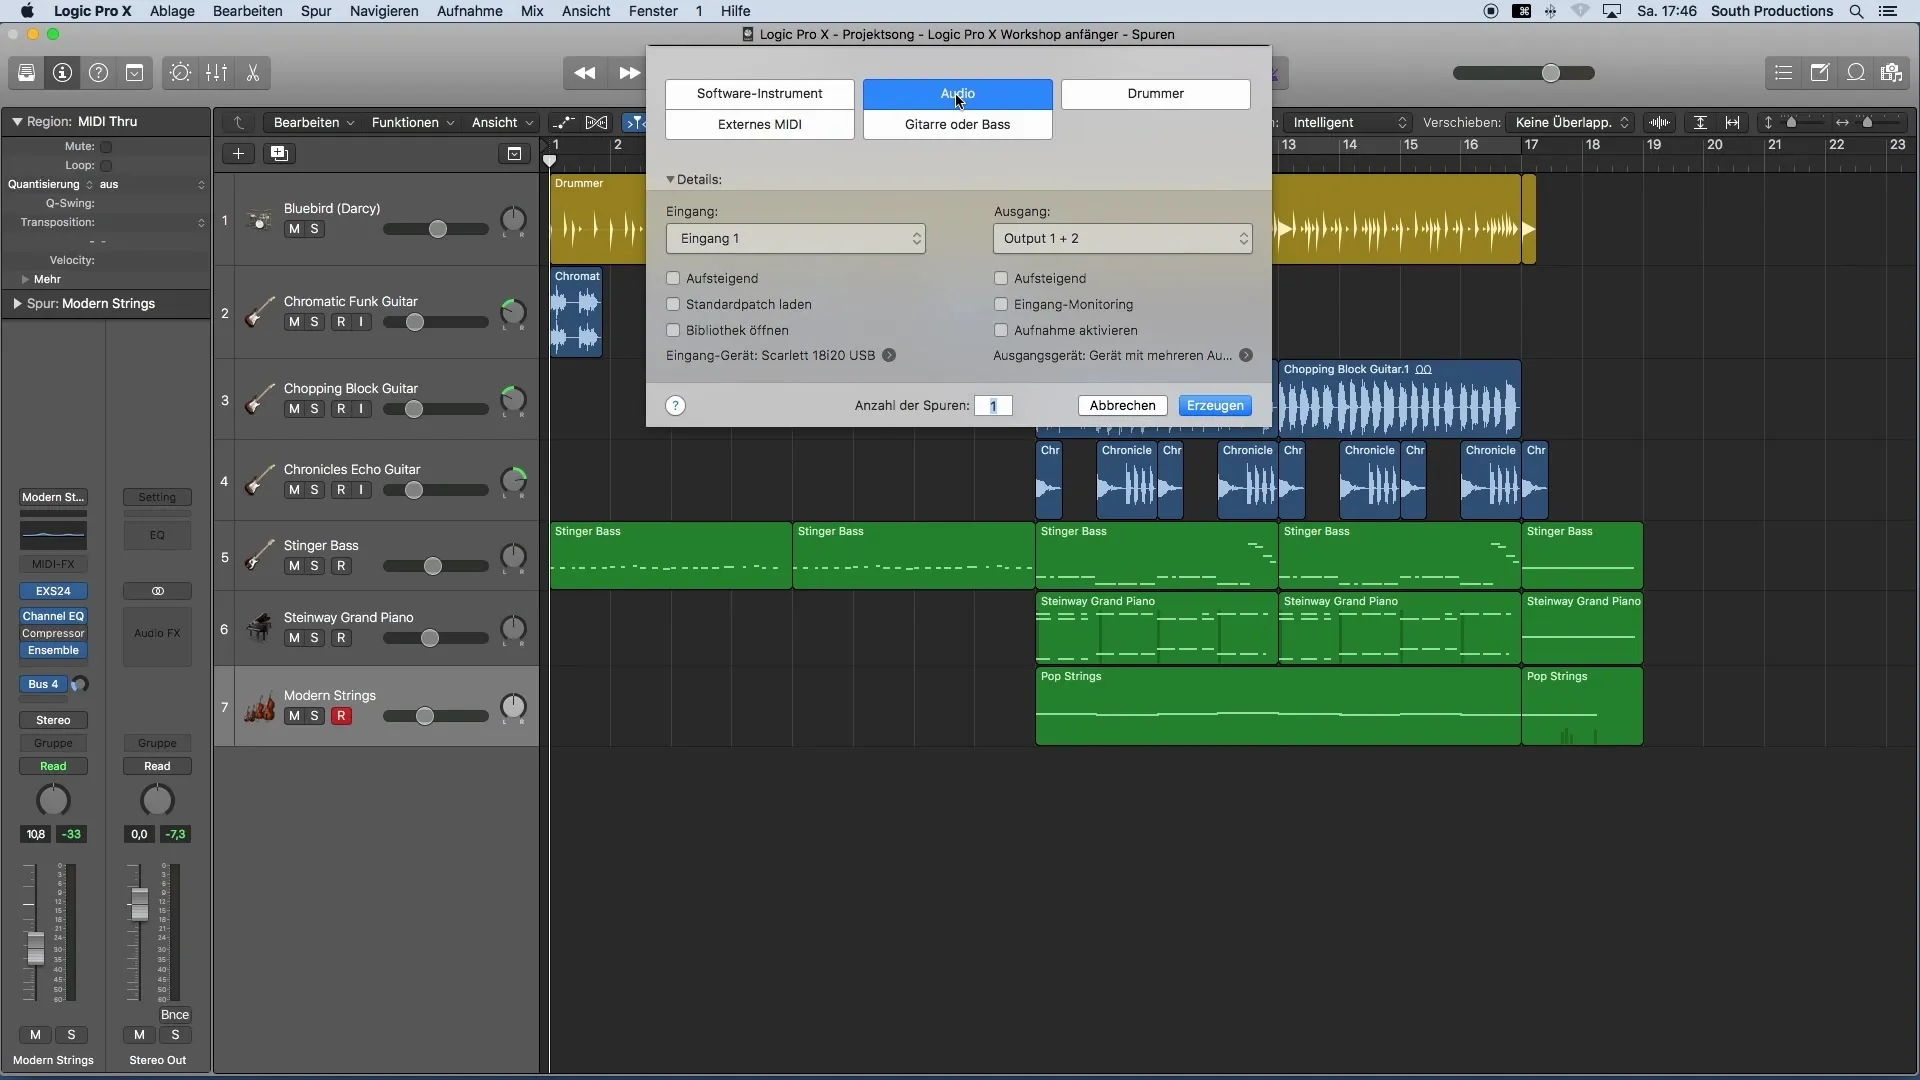
To begin recording your vocals, you need to create an audio track. Go to the menu and select the option to create a new track. Make sure to differentiate correctly between software instruments and audio tracks.
Step 3: Set Input
Make sure the correct input for your microphone is selected. Generally, you need an audio interface and a microphone for recording. Choose the desired input on your interface and leave the output at default settings.
Step 4: Activate and Monitor Track
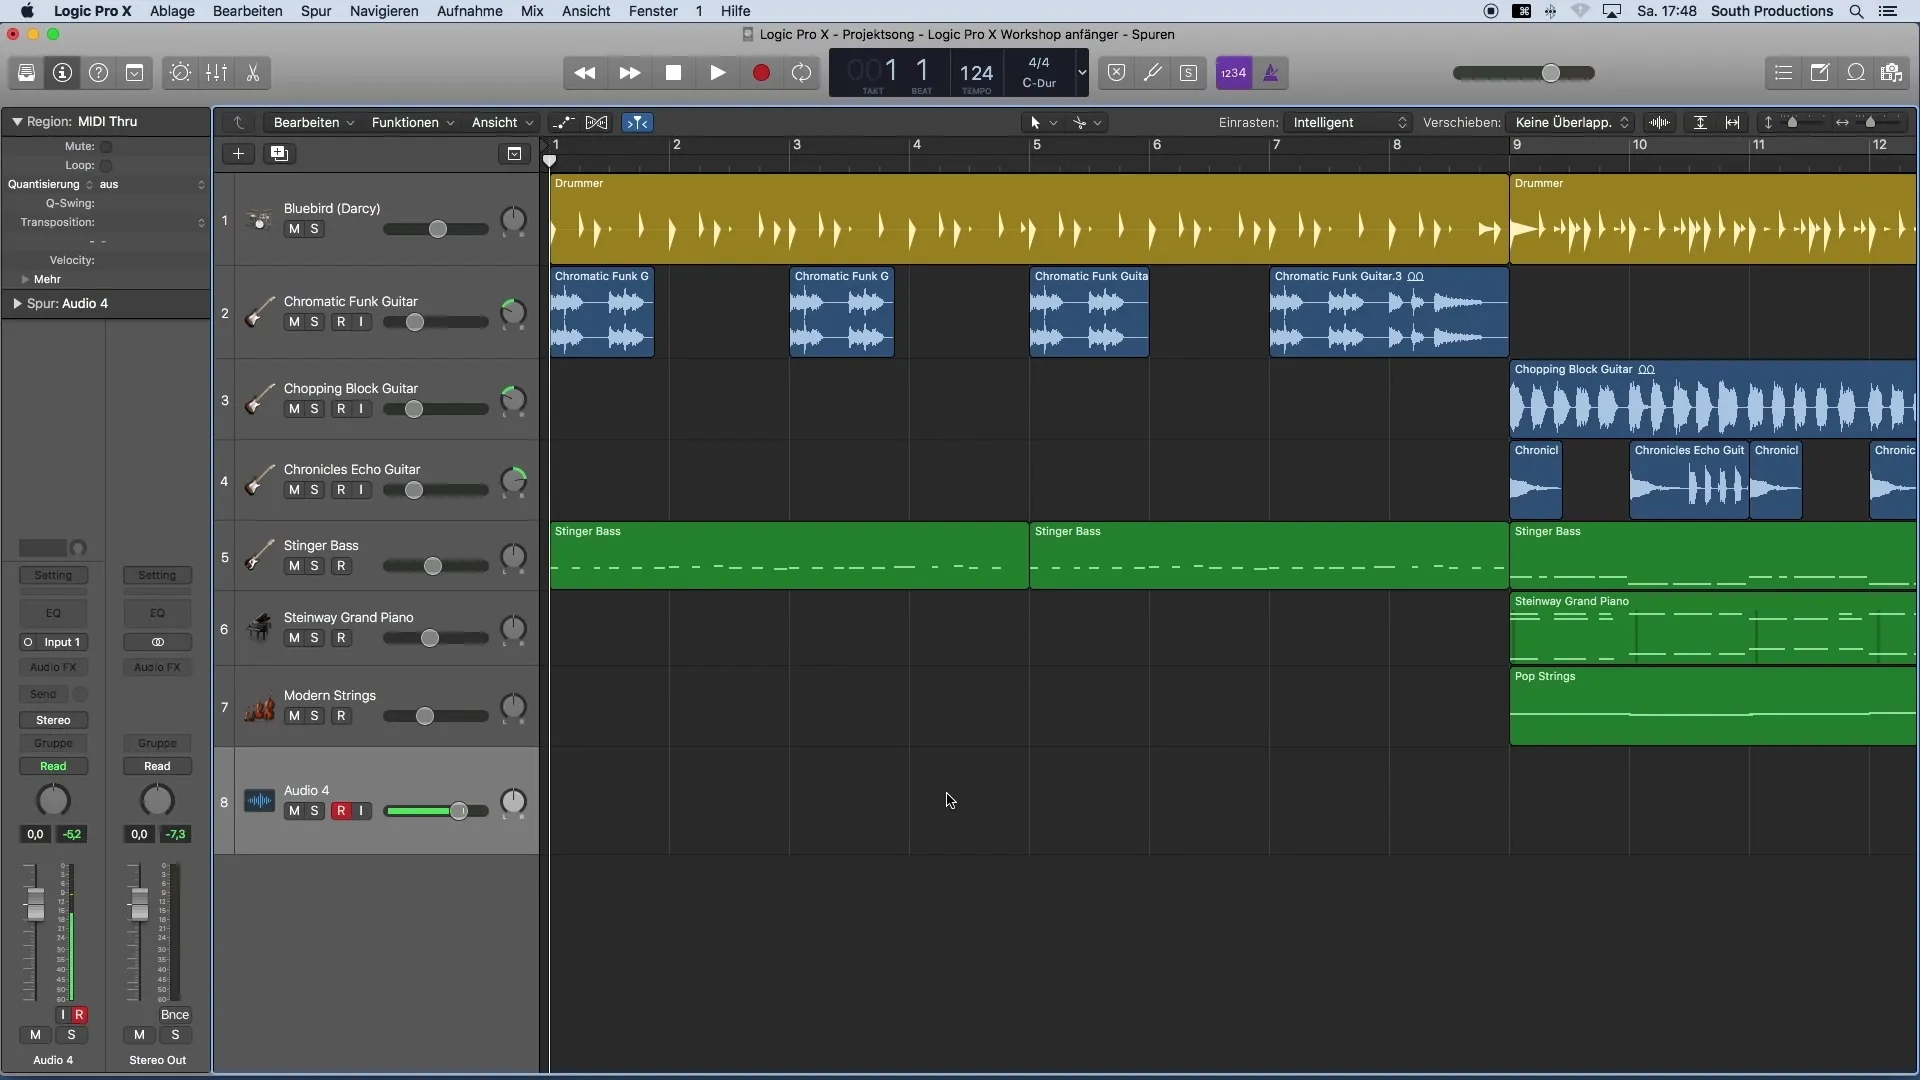
Activate the track for recording by clicking the Record button. This ensures Logic is ready to record. Also, activate the Input Monitoring button so you can hear your voice during recording.
Step 5: Set Levels
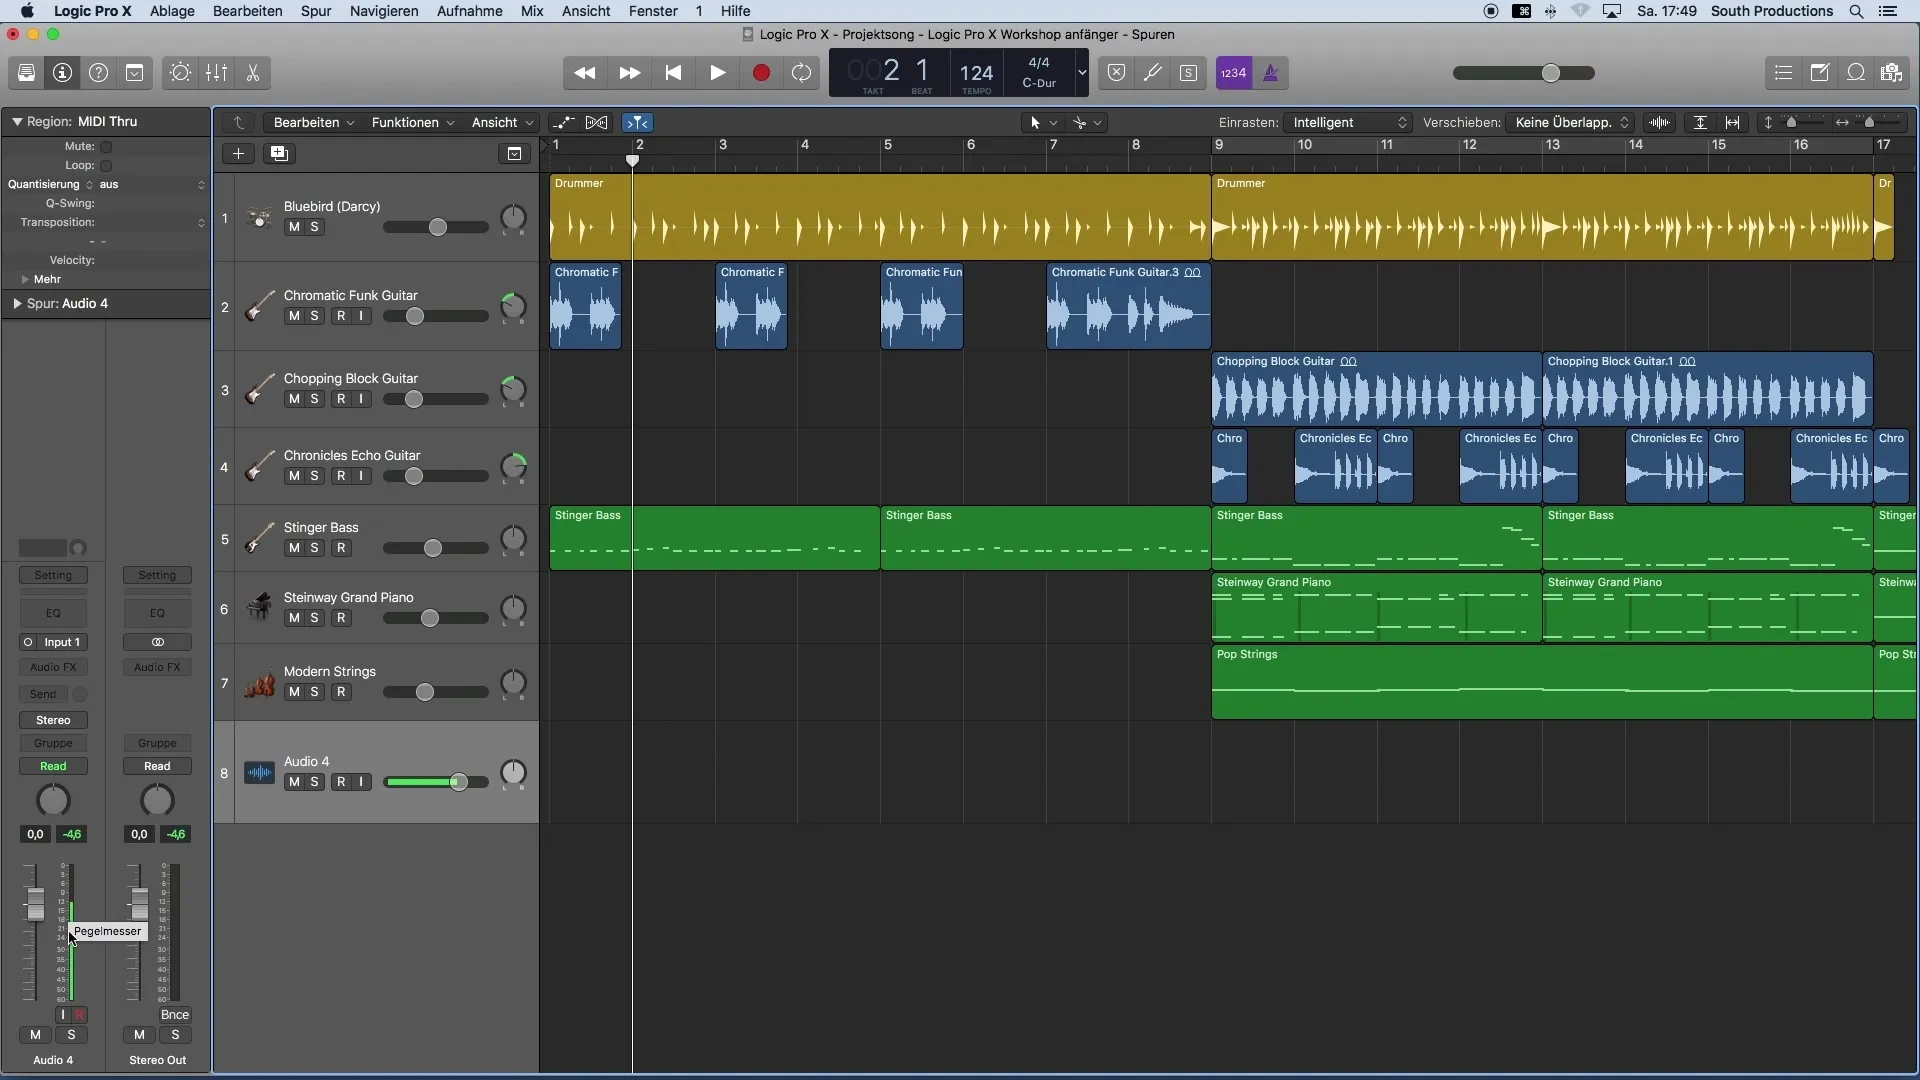
Before pressing Record, check the level of your microphone. It should be between -12 and -16 decibels. Proper level control prevents distortion and ensures clear recording. Make sure not to exceed the level.
Step 6: Start Recording
Now you are ready to start recording. Click the Record button in the menu and begin singing or speaking your vocals.
Step 7: Verify Recording
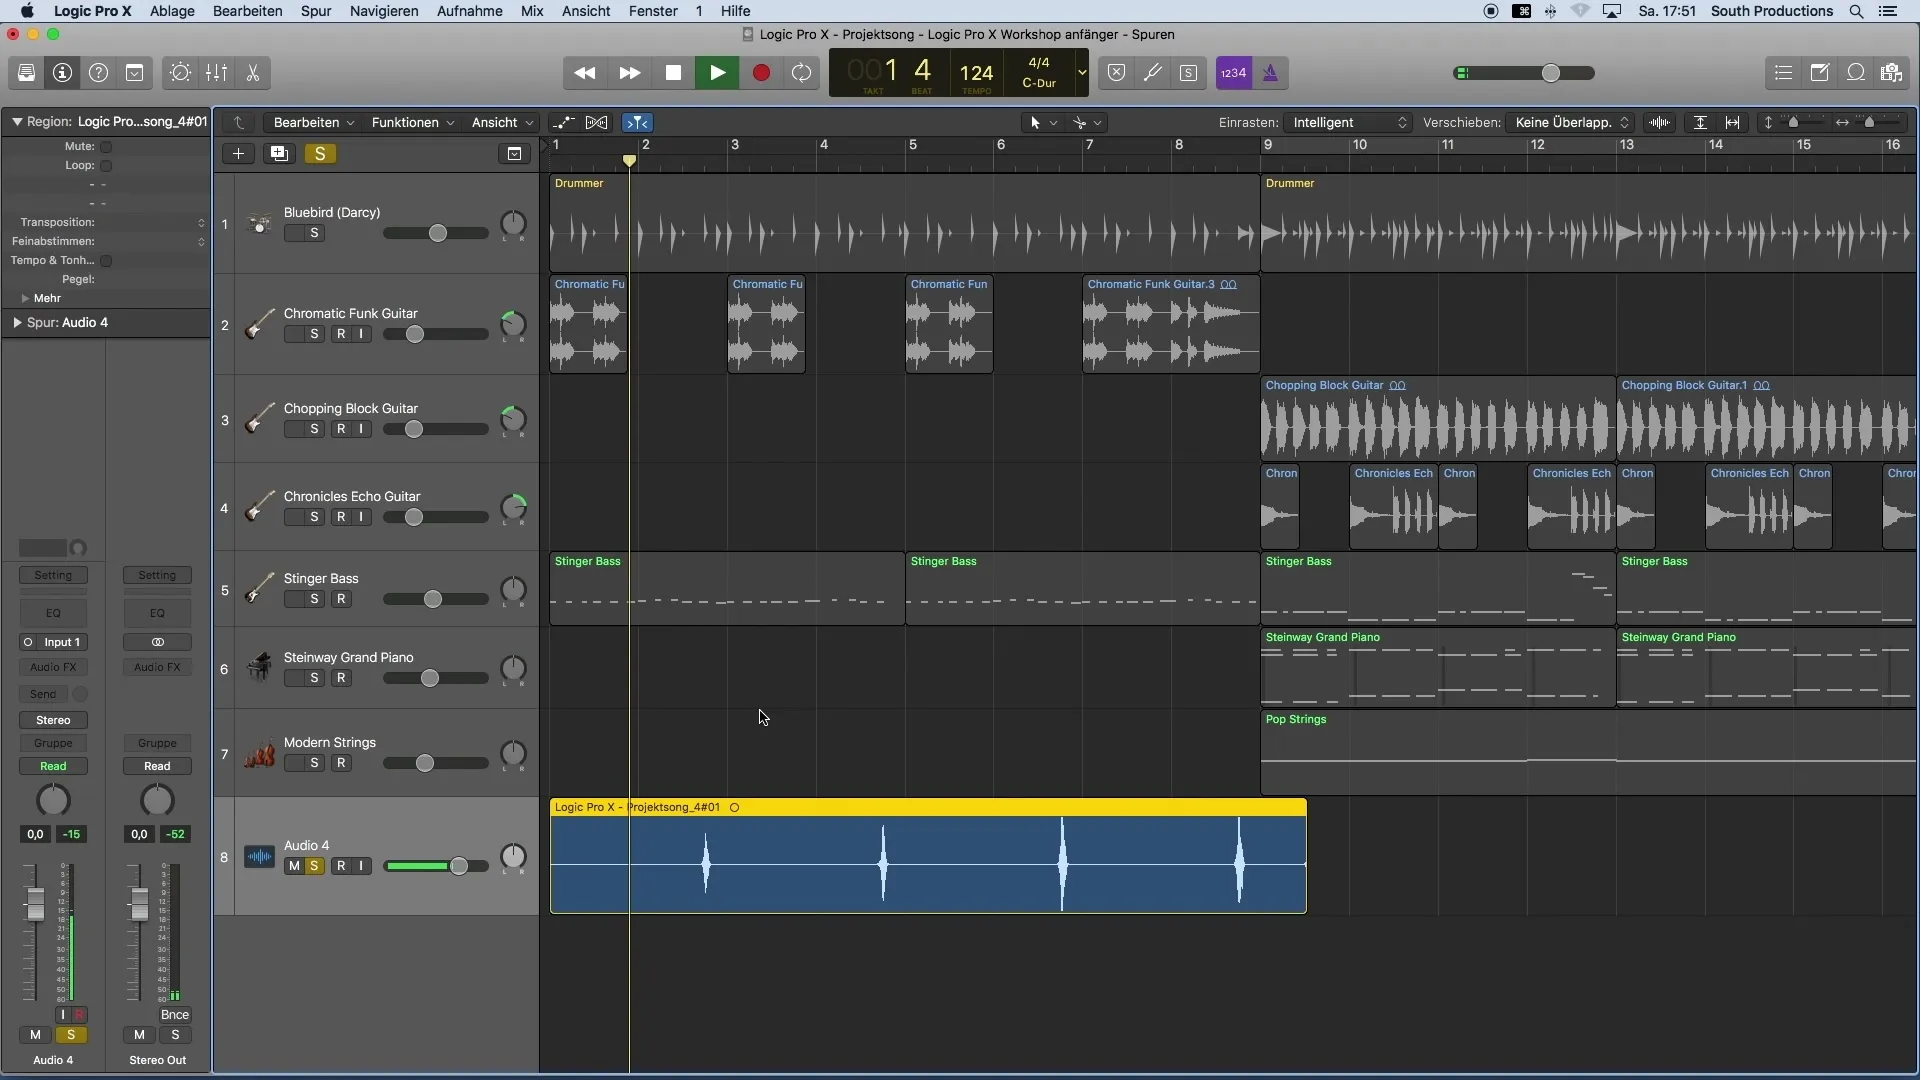
After recording, you can listen to the track solo to verify the quality of your recording. Ensure the recording sounds clear and without distortions.
Step 8: Edit Parts of Recording
If you wish to make certain parts of your recording more consistent, you can copy and paste parts. Highlight the desired section, press Command + C, and then paste it where you want to repeat the recording.
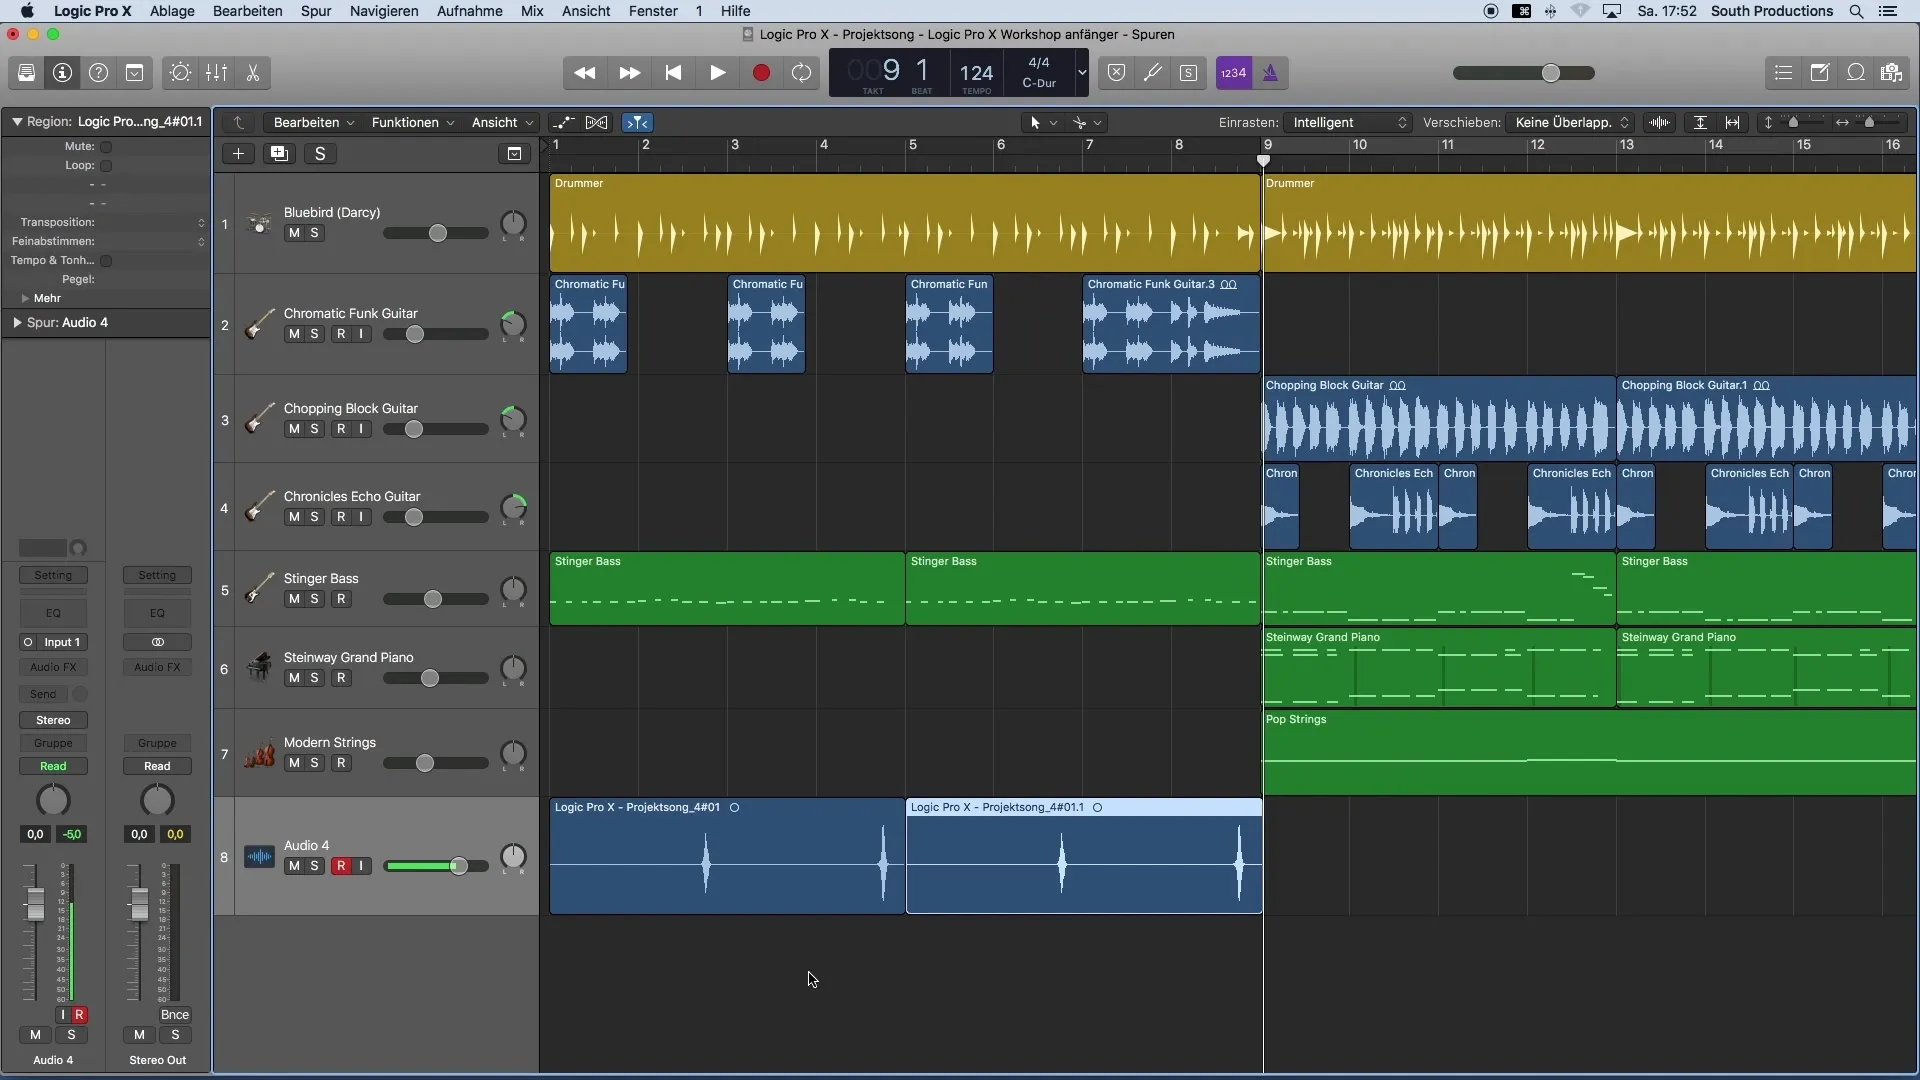
Step 9: Duplicate Vocals
To create a fuller sound, it is recommended to duplicate the vocal tracks. To achieve this, duplicate the track and make a new recording. Ensure to maintain expression in your recordings for a consistent result.
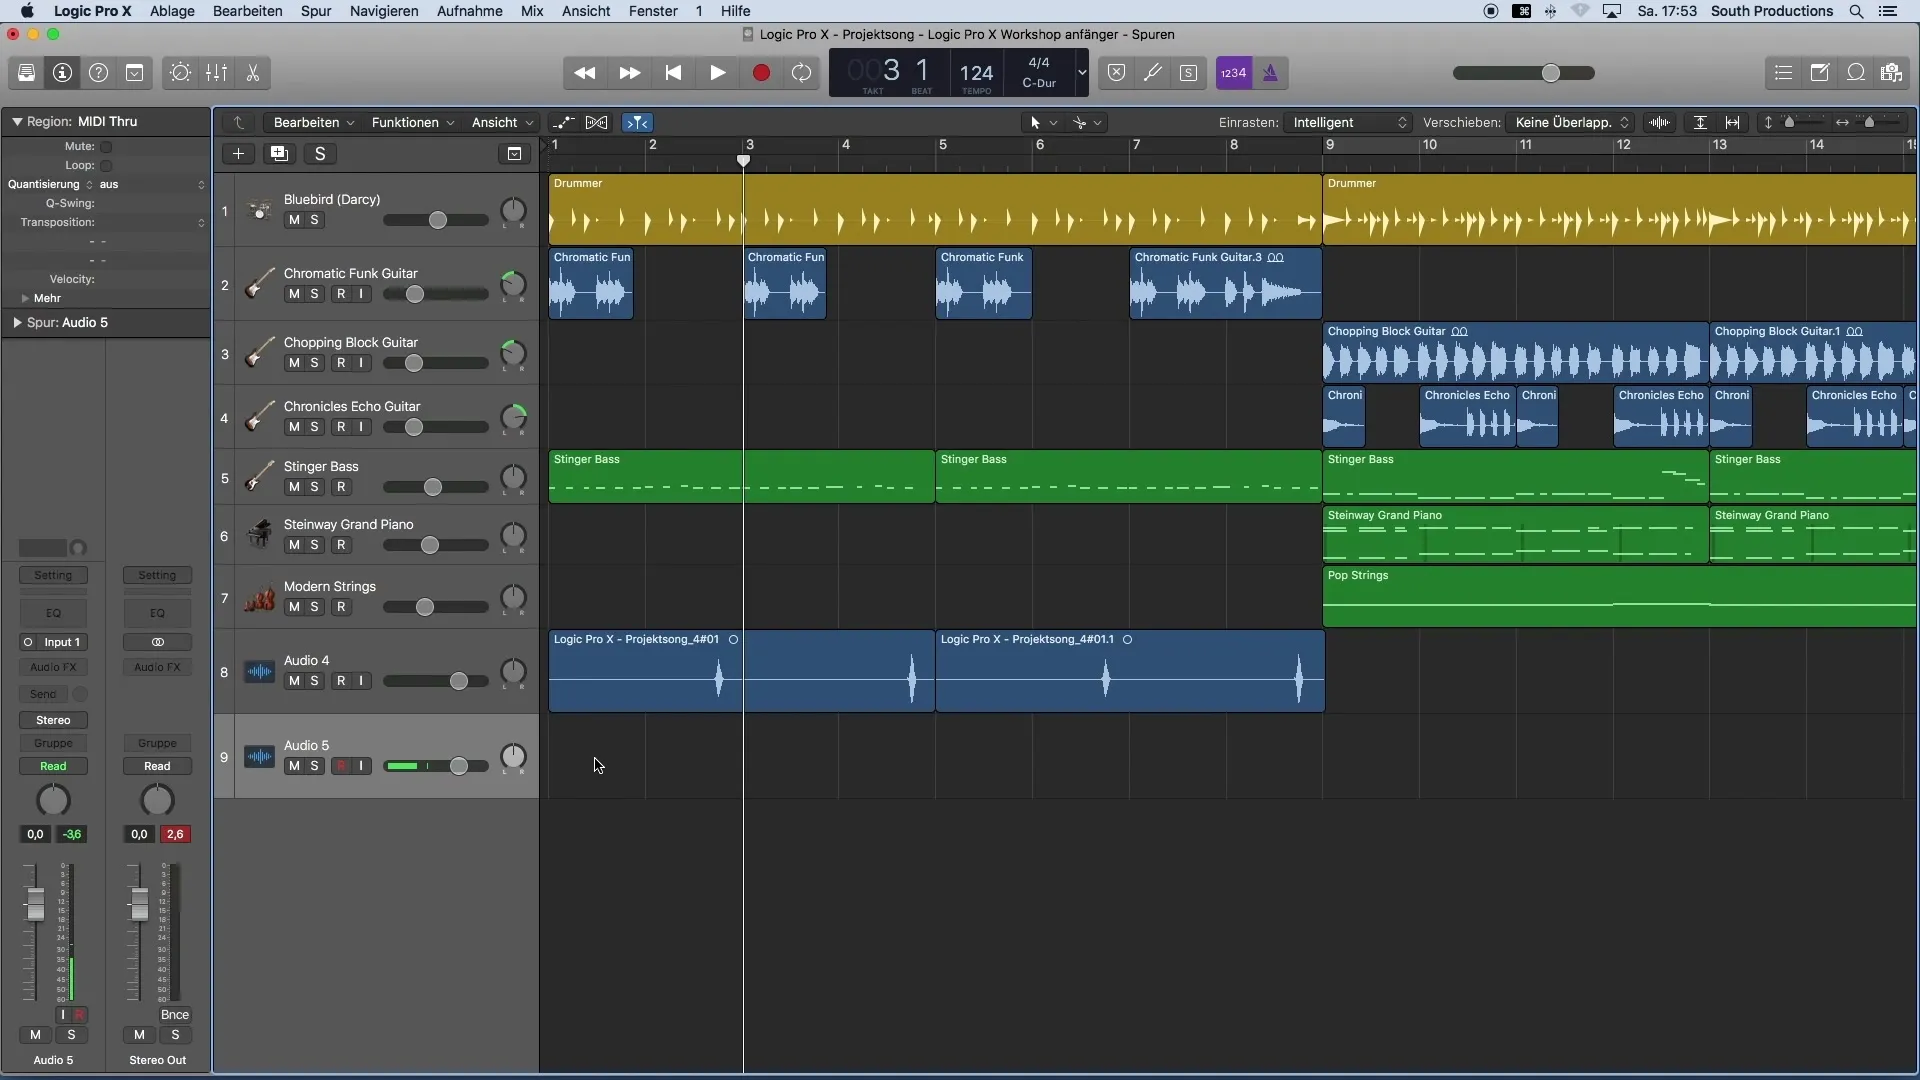
Step 10: Distribute Panorama
To achieve a broader sound, you should distribute your tracks in the panorama. Click on the Pan control in the track and set it to the right and left for the duplicate tracks to create a full sound image.
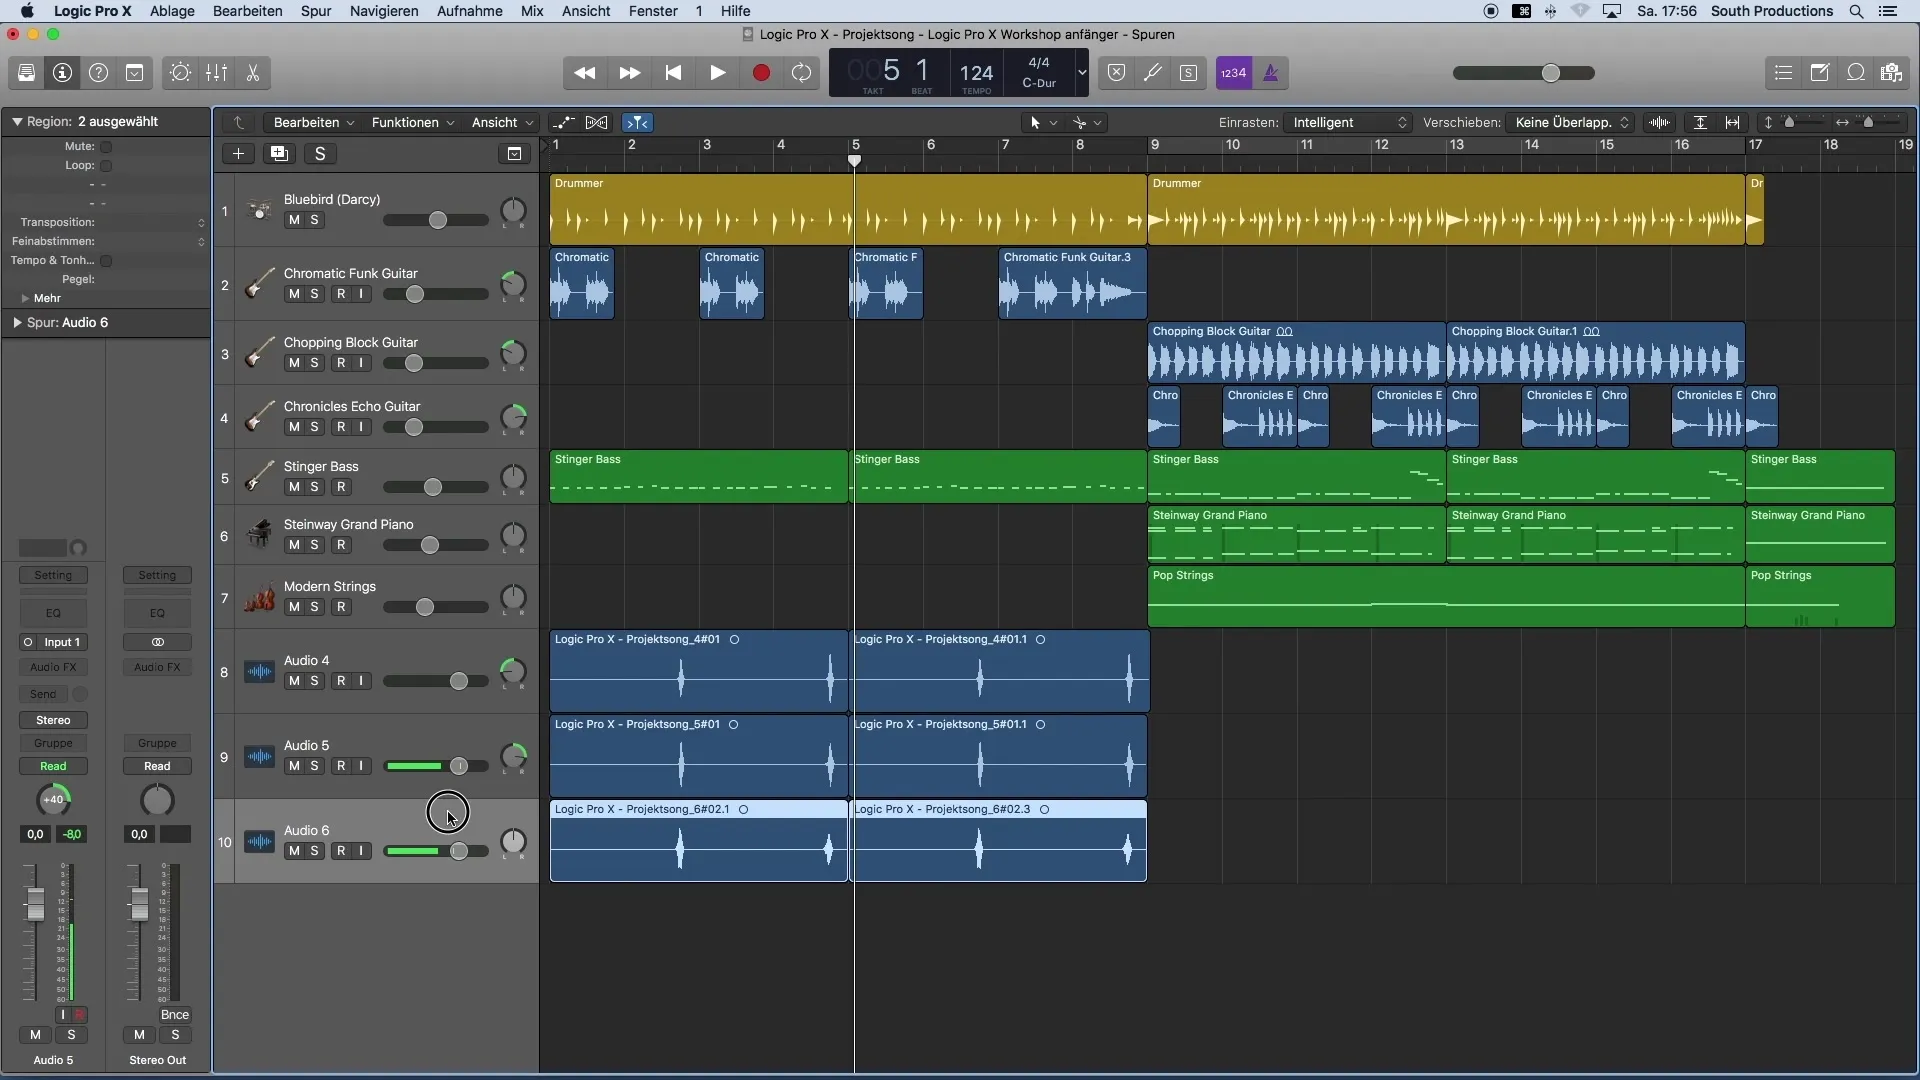
Step 11: Naming Tracks
A clear naming of your tracks is crucial for organizing your project. Name your tracks accordingly, e.g. "Vocal Center," "Vocal Right," and "Vocal Left," to keep a better overview. Double click on the track name and use your keyboard to do this.
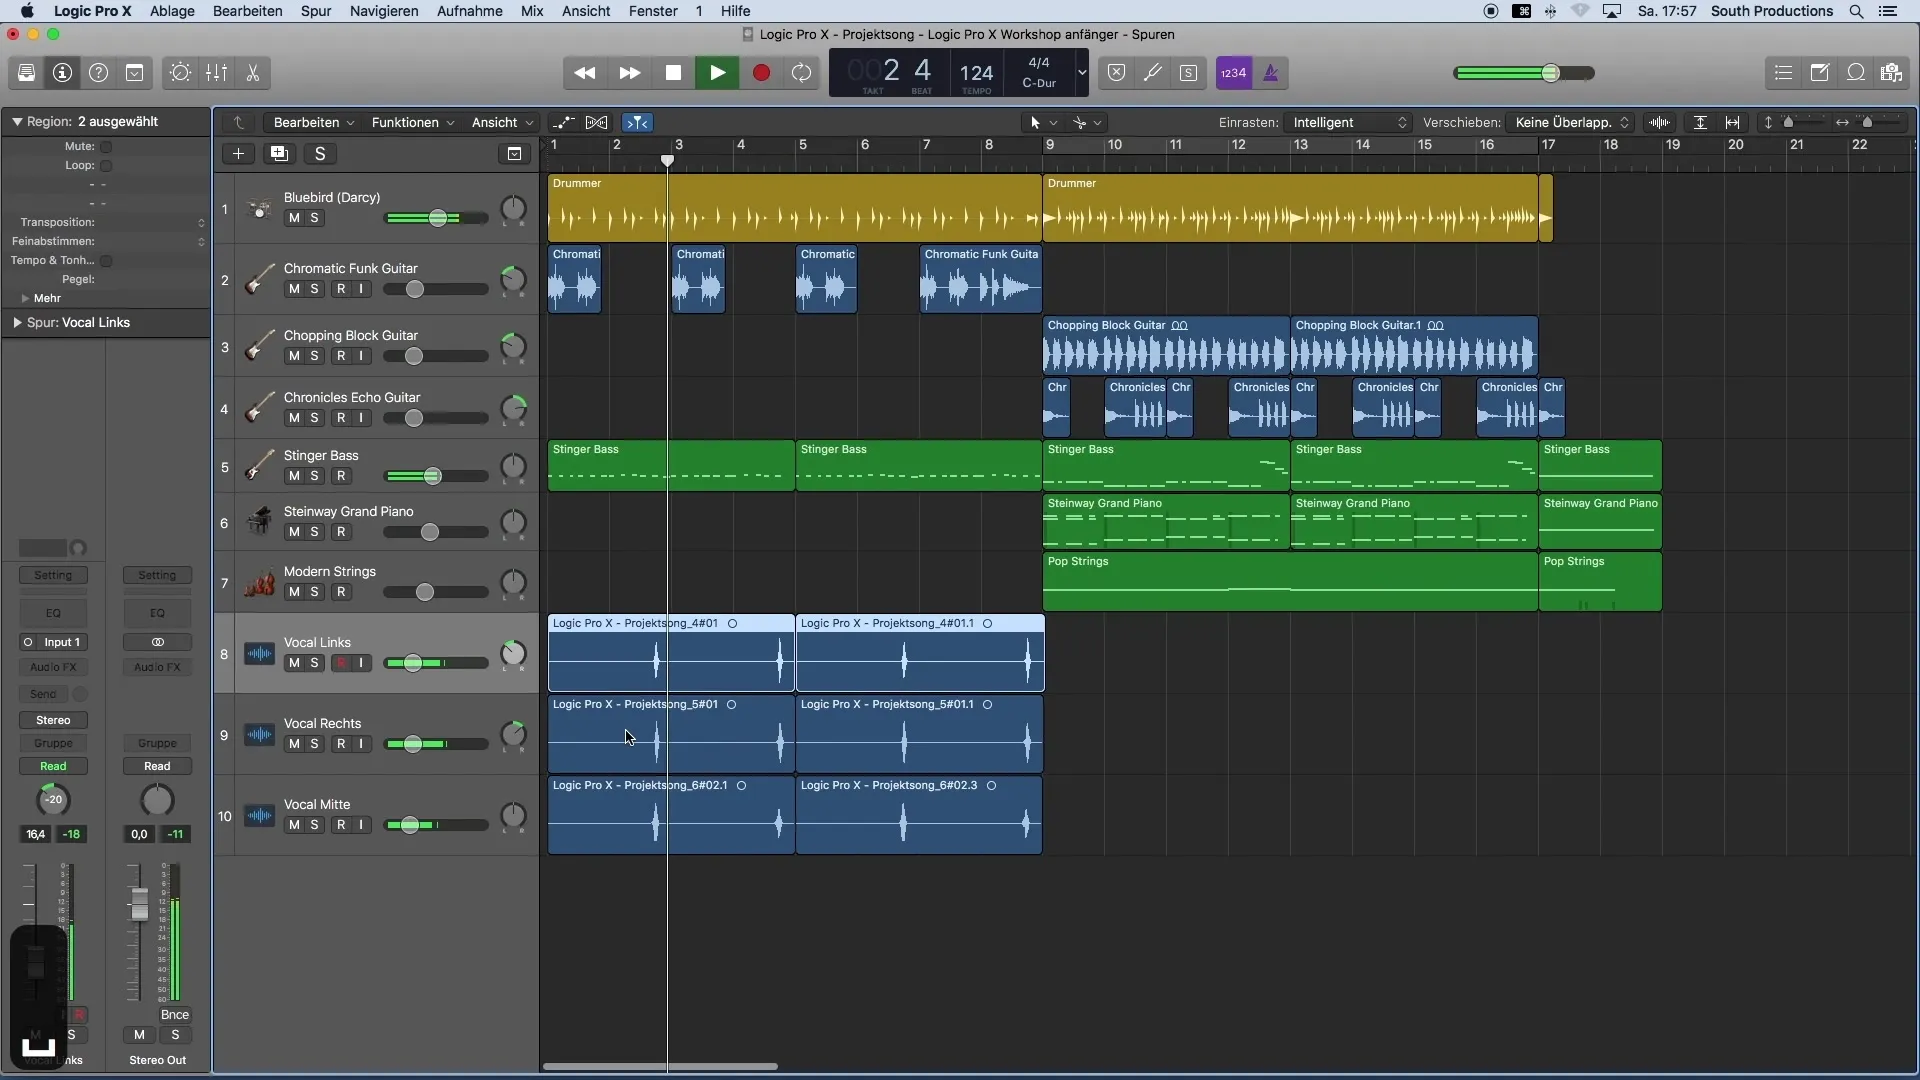
Summary
Recording vocals in Logic Pro X is a creative process that leads to impressive results with the right preparation and technique. With this guide, you have learned the necessary steps to effectively create your own audio recordings.
Frequently Asked Questions
How can I ensure that my recordings sound clear?Pay attention to the correct level between -12 and -16 decibels.
What should I do if my recording sounds distorted?Reduce the input level of your microphone and check the connections.
Do I need an audio interface for recording?Yes, an audio interface helps to record high-quality audio with your microphone.
How can I organize my tracks more easily?Name your tracks clearly to keep a better overview of your project.
