Exporting your production can have a crucial impact on the quality and distribution of your music. In this guide, you will learn how to successfully export your project in various formats such as WAV and MP3 using Logic Pro X. Whether you are preparing your music for a CD or want to share it online, this step-by-step guide will walk you through the entire process.
Key Takeaways
- Define the export area in Logic Pro X.
- Understand the pop-up options for export.
- Properly configure WAV and MP3 formats.
- Choose the correct storage location for your exported project.
Step-by-Step Guide
Define Export Area
Before starting the export process, you need to determine which section of your production you want to export. Let's say you only want to export bars 1 to 35. To do this, you need to instruct Logic Pro X to export this range. You can achieve this by setting up a loop or by selecting the entire range.
Access the Bounce Window
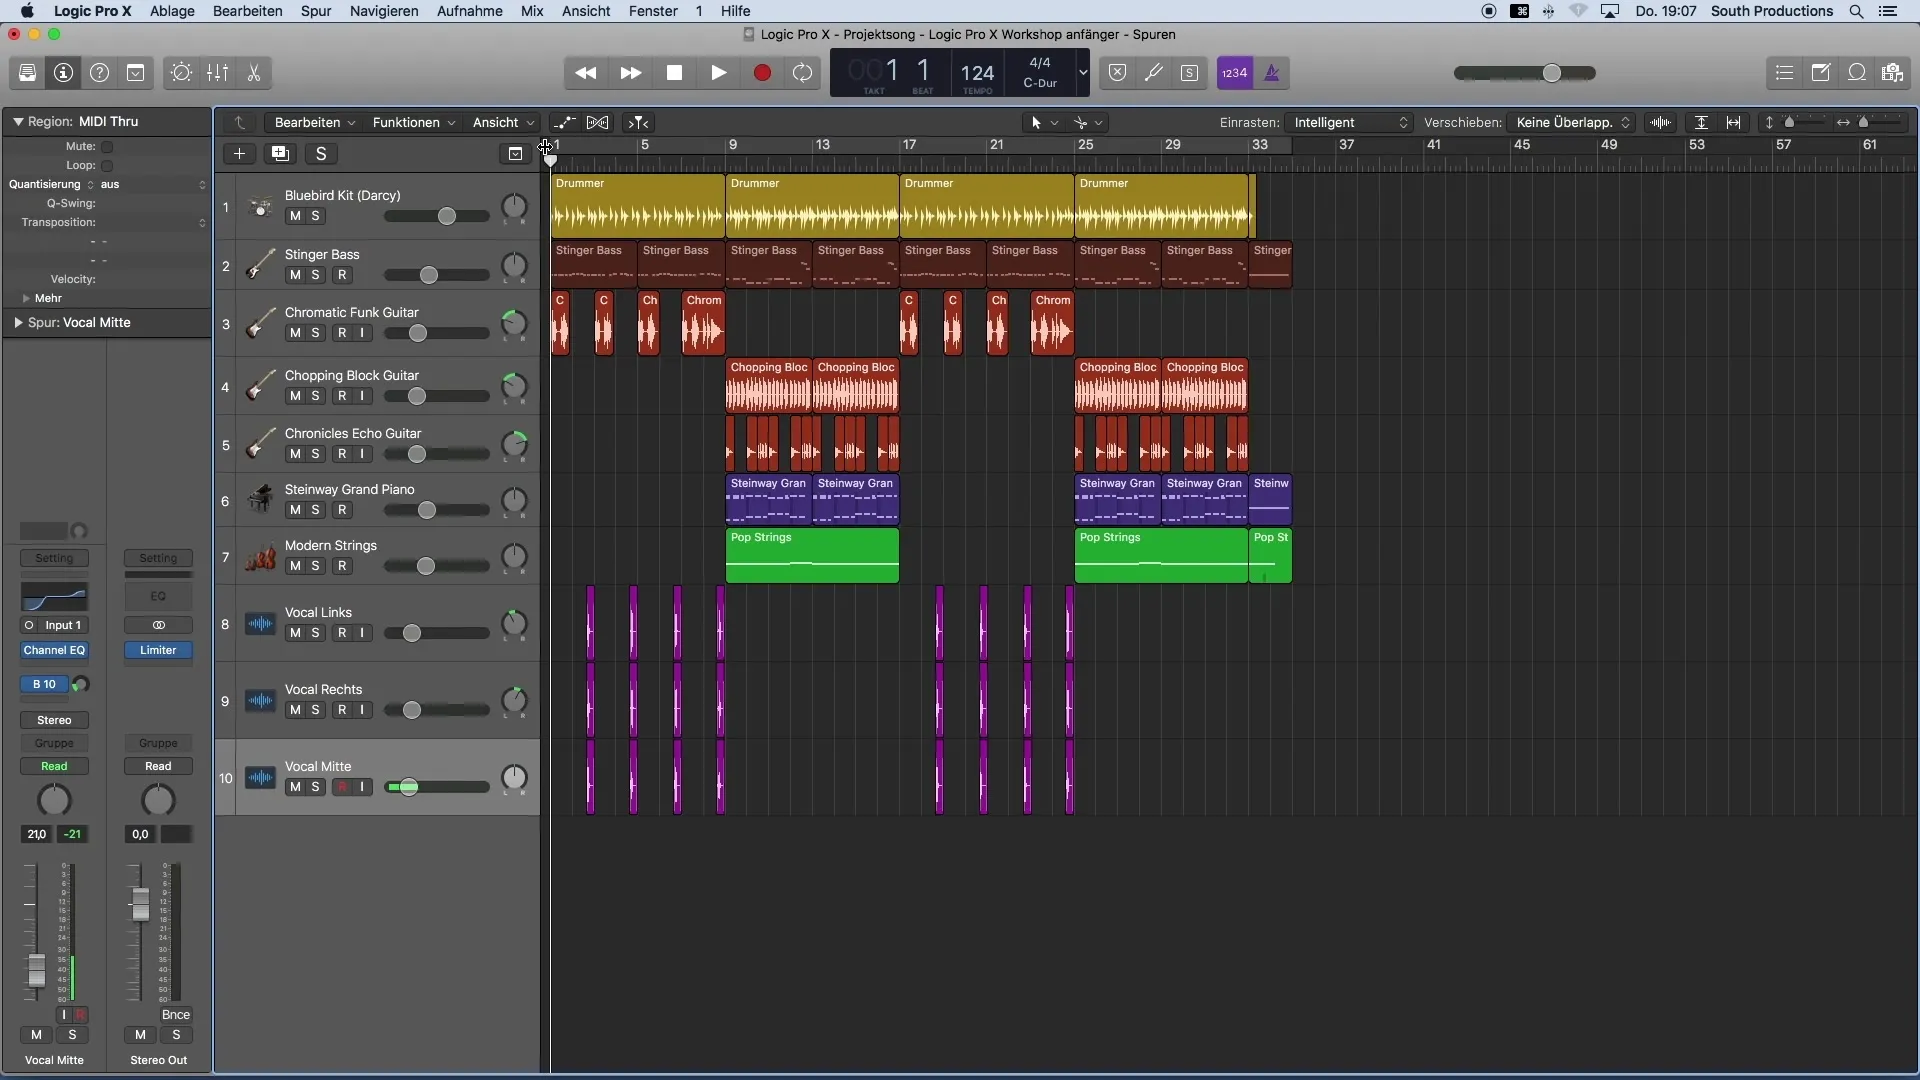
Once the desired section is selected, go to "File" and choose "Bounce." Make sure not to choose "Export," as this is intended for exporting individual tracks. Instead, you want to export all tracks into a single track. During the selection process, the so-called Bounce Window will appear.
Choose PCM Format
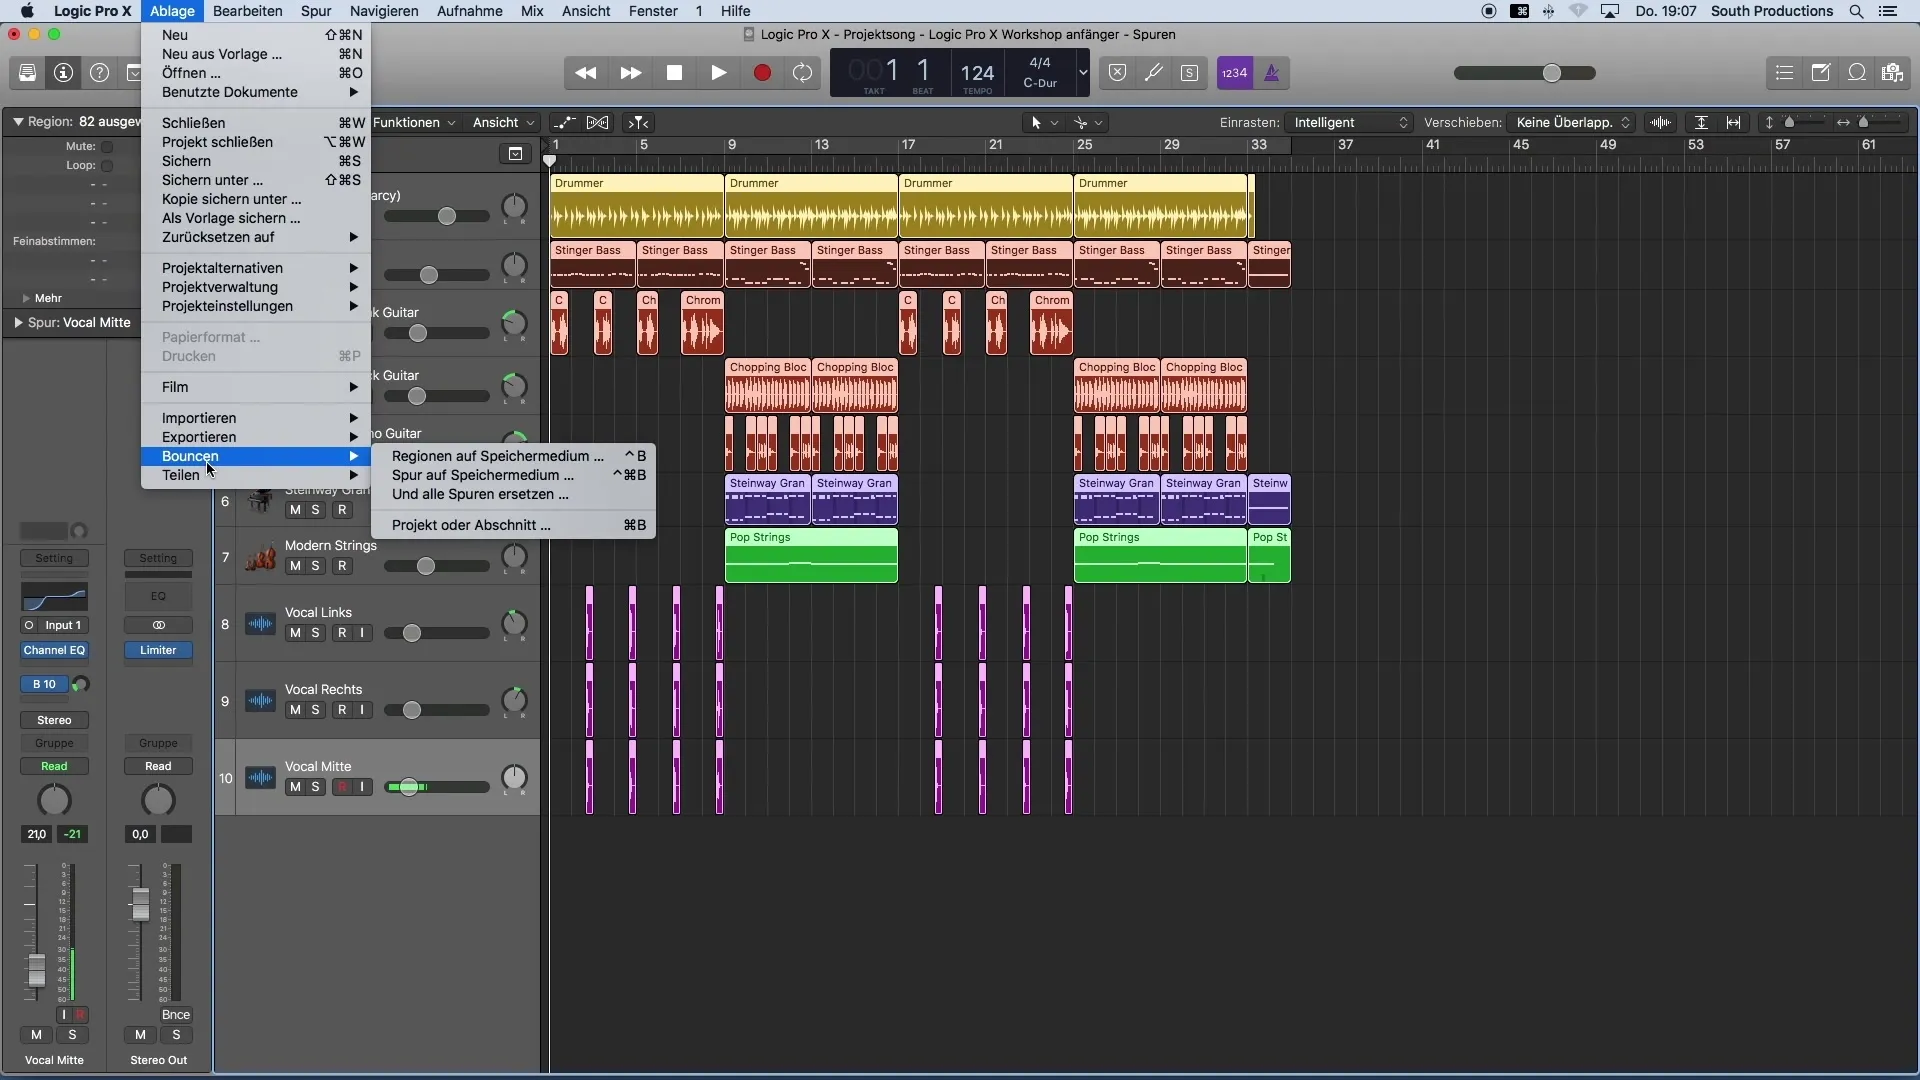
In this window, you have the option to choose between different export formats. To export to a CD-compatible format, select PCM. This will allow you to export in a 16-bit resolution Wave file. The sampling rate should be set to 44.1 kHz to ensure optimal quality.
Set File Export Settings
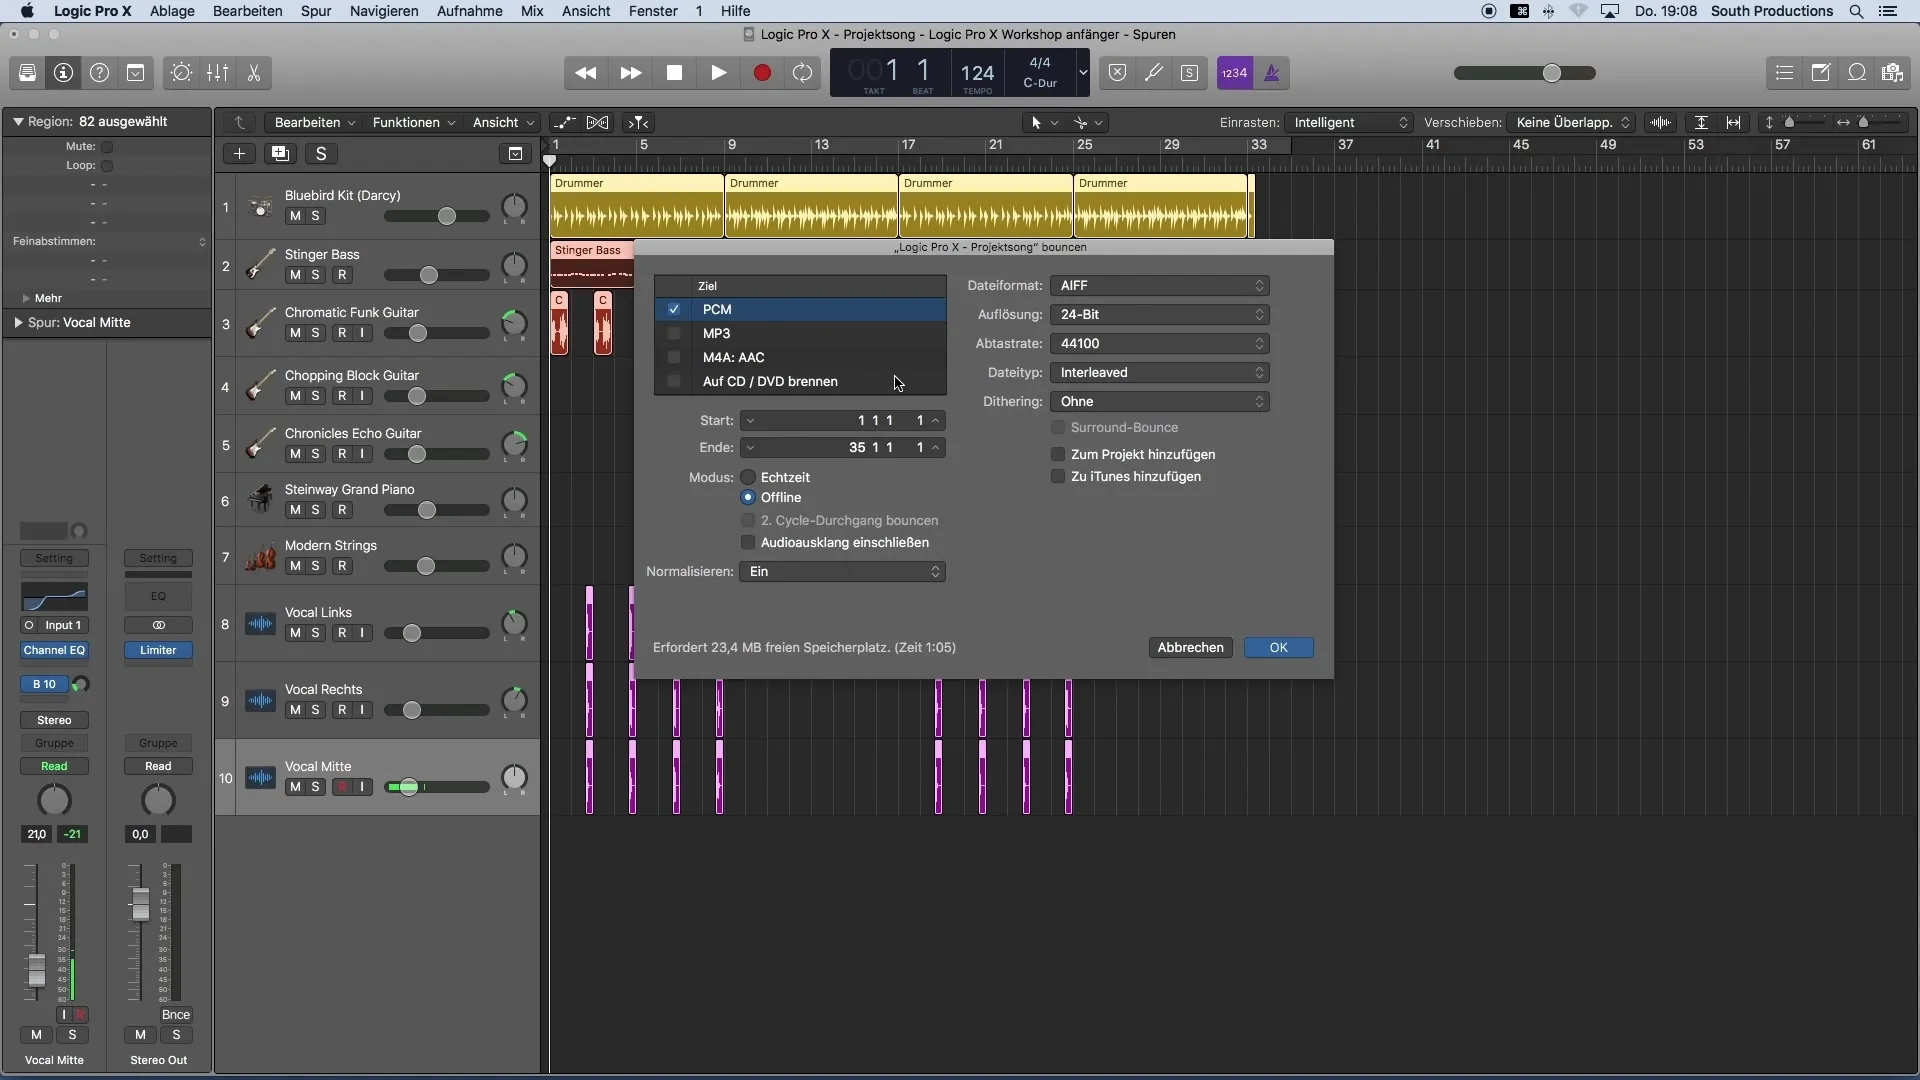
Before finalizing the export, review the file type settings. It is advisable to set the file type to Interleaved. Another important setting is dithering, which you should both activate and adjust correctly to maximize audio quality.
Check Export Settings
Ensure the mode is set to Offline. This way, you don't have to wait in real-time for your project to be exported. This significantly speeds up the process. Also, make sure normalization is turned off. With normalization, Logic would adjust the volume of the entire project to a specific value, which you may have already done through an earlier limiter setting.
Generate MP3 as Well
At this stage, you can also generate an MP3 file of your project. Here, you can set the MP3 quality settings. I recommend choosing the highest quality of 320 kbps. The stereo mode should be set to Normal. You can usually leave the other settings unchanged.
ID3 Tags and iTunes Integration
If you wish, you can also embed information about ID3 tags directly into the MP3 file. Additionally, you can add the song directly to iTunes, but this can also be done later on.
Set Storage Location for Exported File
After reviewing all settings, click OK. Now you can choose the storage location for the exported project. In this example, I'm saving the file to the desktop. You can customize the storage location according to your preferences.
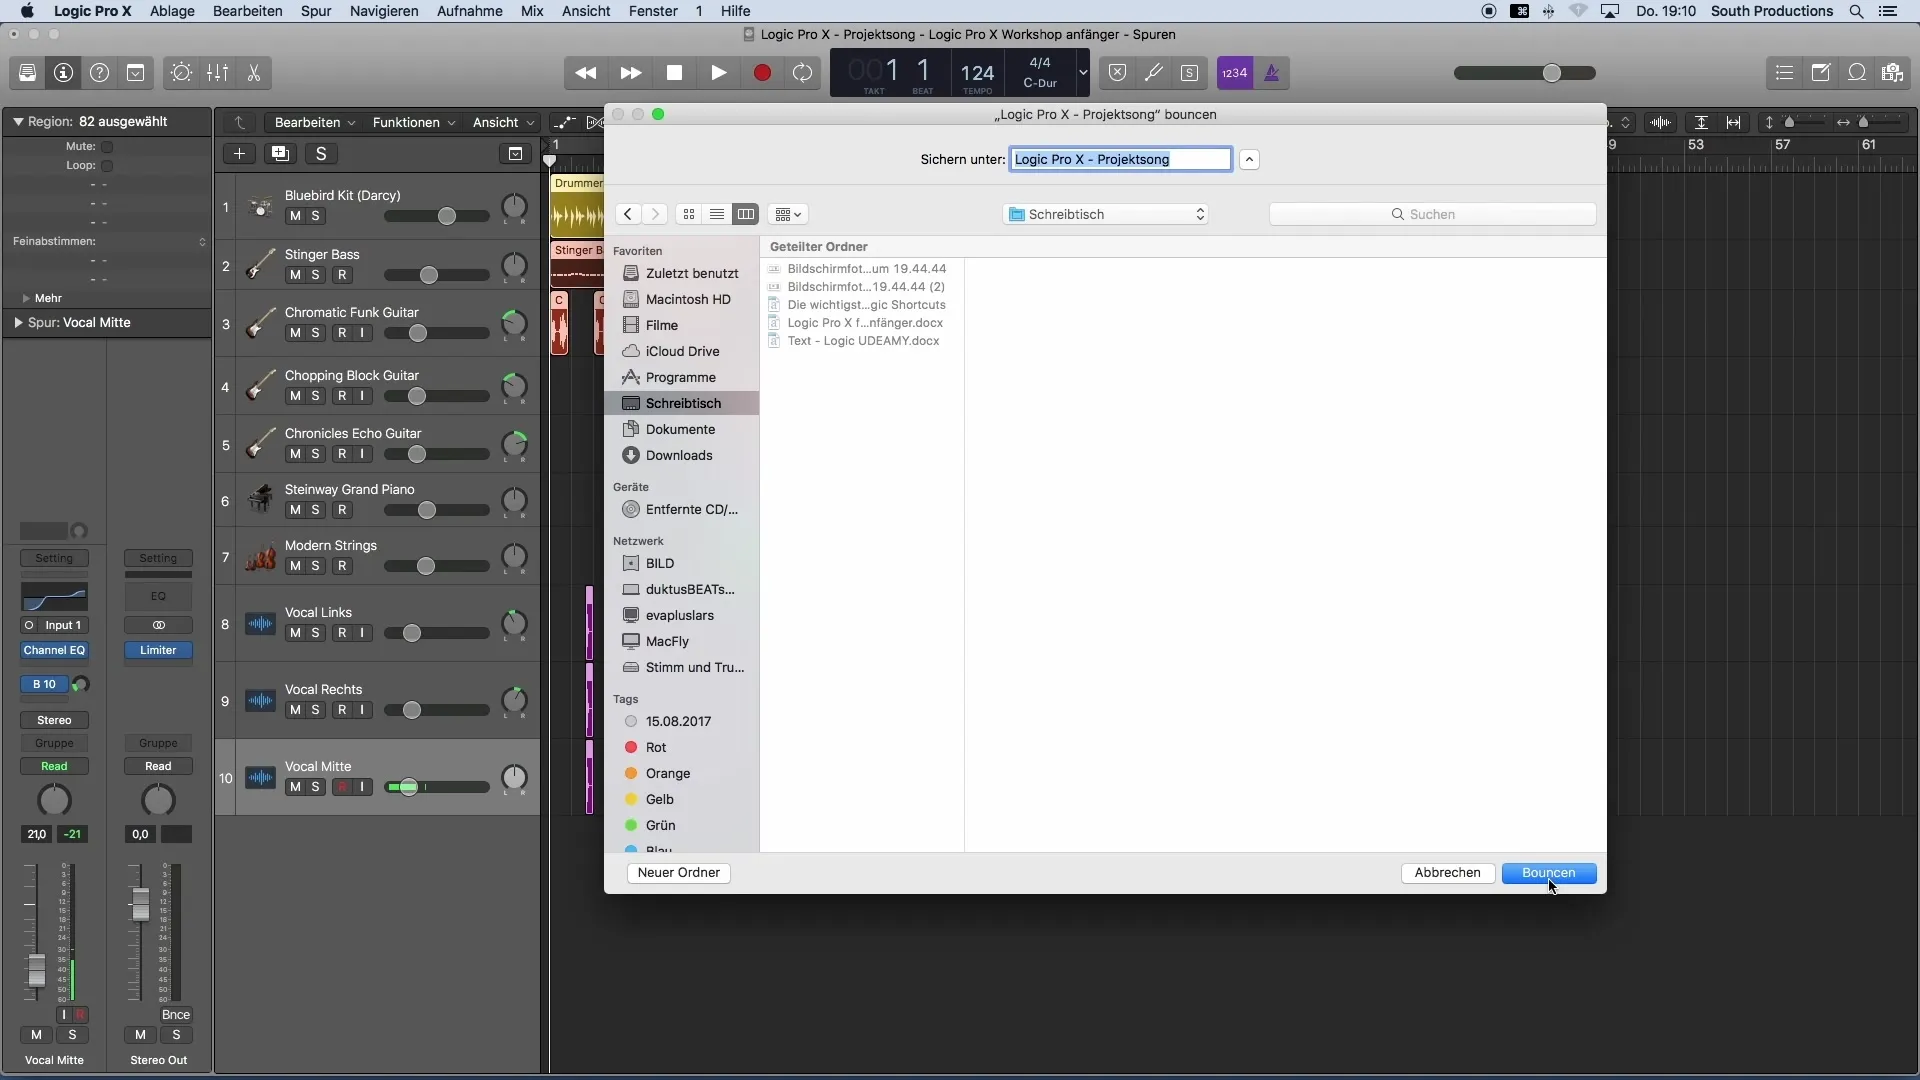
Finalize Export
A final click on "Bounce," and your project will now be exported. In a few seconds, you'll find the finished file where you saved it – in this case, on the desktop.
Summary
In this guide, you have learned all the essential aspects of exporting your music production in Logic Pro X. From defining the export area to the final settings for WAV and MP3, you now have the necessary steps to professionally export your music and make it available for distribution.
Frequently Asked Questions
How do I export only a certain section of my production?Select the desired area and go to File > Bounce.
What format should I use for a CD?Use the PCM format and select a WAV file with 16-bit resolution.
What is the recommended stereo mode for MP3 files?The stereo mode should be set to Normal.
How can I ensure fast export?Set the mode in the Bounce window to Offline.
Could I add ID3 tags later?Yes, you can also add ID3 tags after the export.
