Microsoft Project is a powerful tool for project management that helps you effectively plan and monitor projects. However, before you start planning a new project, it is important to have a solid understanding of the user interface. The user interface of Microsoft Project may seem overwhelming at first, but it offers numerous features that make project management easier for you. In this guide, you will learn everything you need to know about the user interface, its elements, and how to make the most of it.
Key Takeaways
- The user interface of Microsoft Project resembles that of other Microsoft Office products.
- There are various tabs and elements to help you manage created projects.
- Special features such as the timeline and Gantt chart are essential components for project management.
Overview of the User Interface
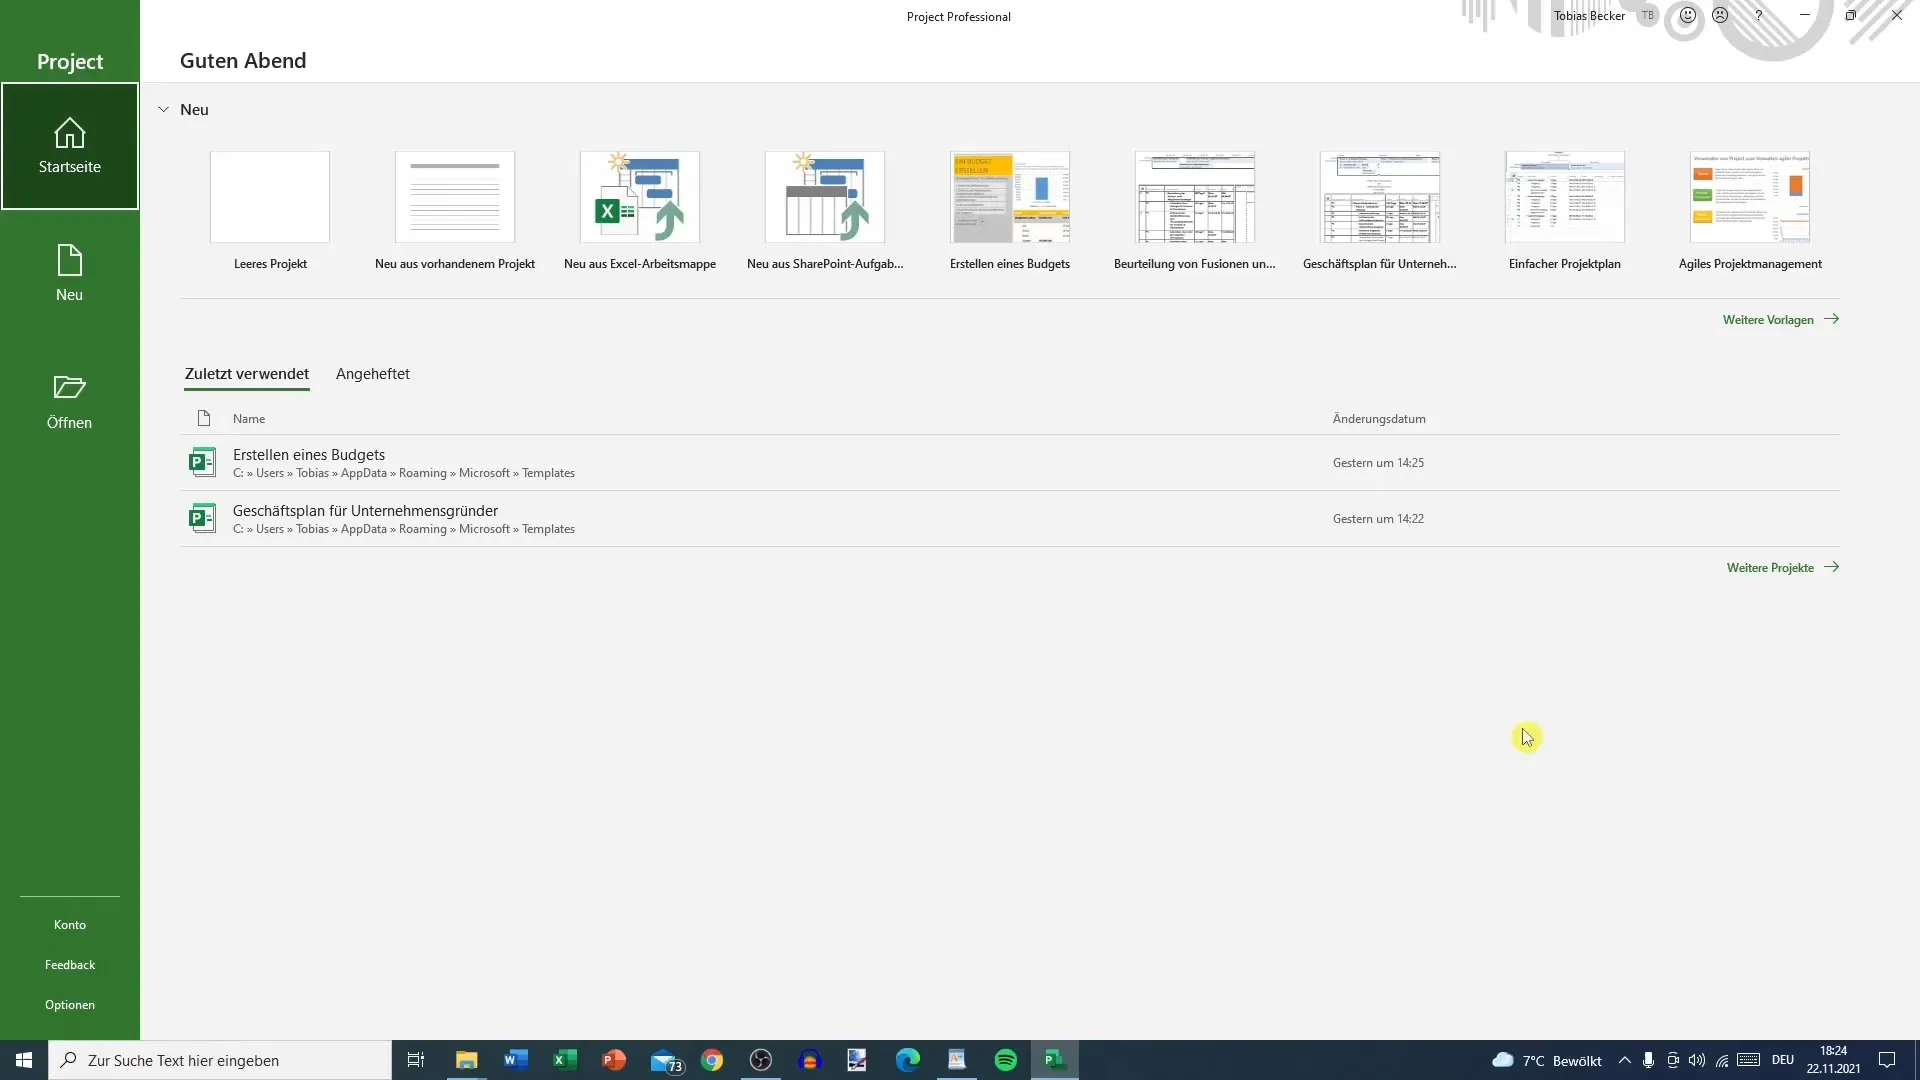
The first step to familiarize yourself with Microsoft Project is to launch the software. You can access Microsoft Project either through your computer's Start menu or use the web version. Once you open the application, the main window appears.

If you have worked with other Office products such as Word or Excel, you will notice that the layout is similar. On the left side, you will see the startup interface with options like "New Project" and "Open." Here you can load existing projects, create new projects, or manage your Microsoft account.
At the very bottom, you will find the option to provide feedback, which is particularly important for continuously improving the software. The basic settings options can also be found here, which we will explore in a later video.
Main Menu and Tabs
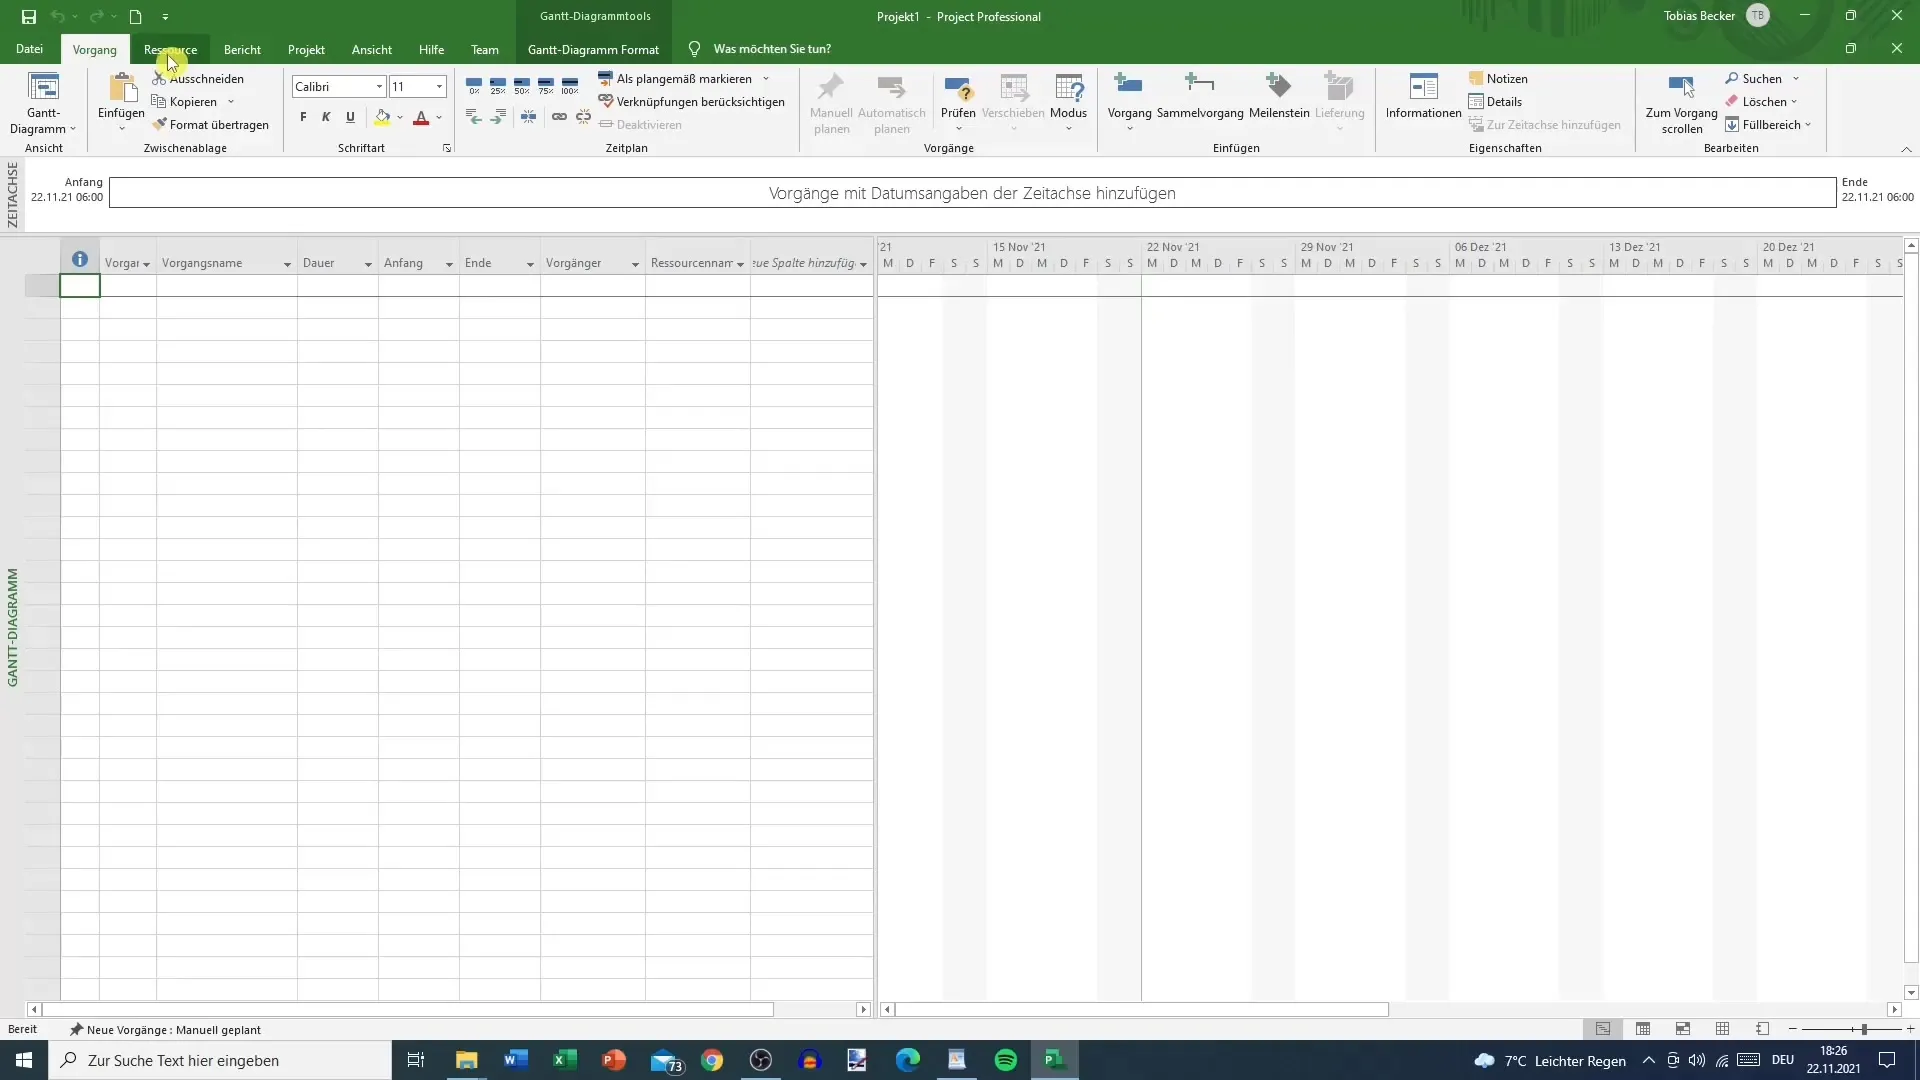
At the top of the user interface, you will find various tabs, including "Task," "Resources," "Report," and "Project View." This taskbar is central to navigating within the software. It is advisable to familiarize yourself with these tabs as many of your future tasks will be carried out through these tabs.

The default view shows the "Task" tab. Here you can add new tasks, set the duration, and enter additional details about the tasks. This tab-based system ensures that you can quickly navigate to the required functions.
Working with the Timeline and Gantt Chart
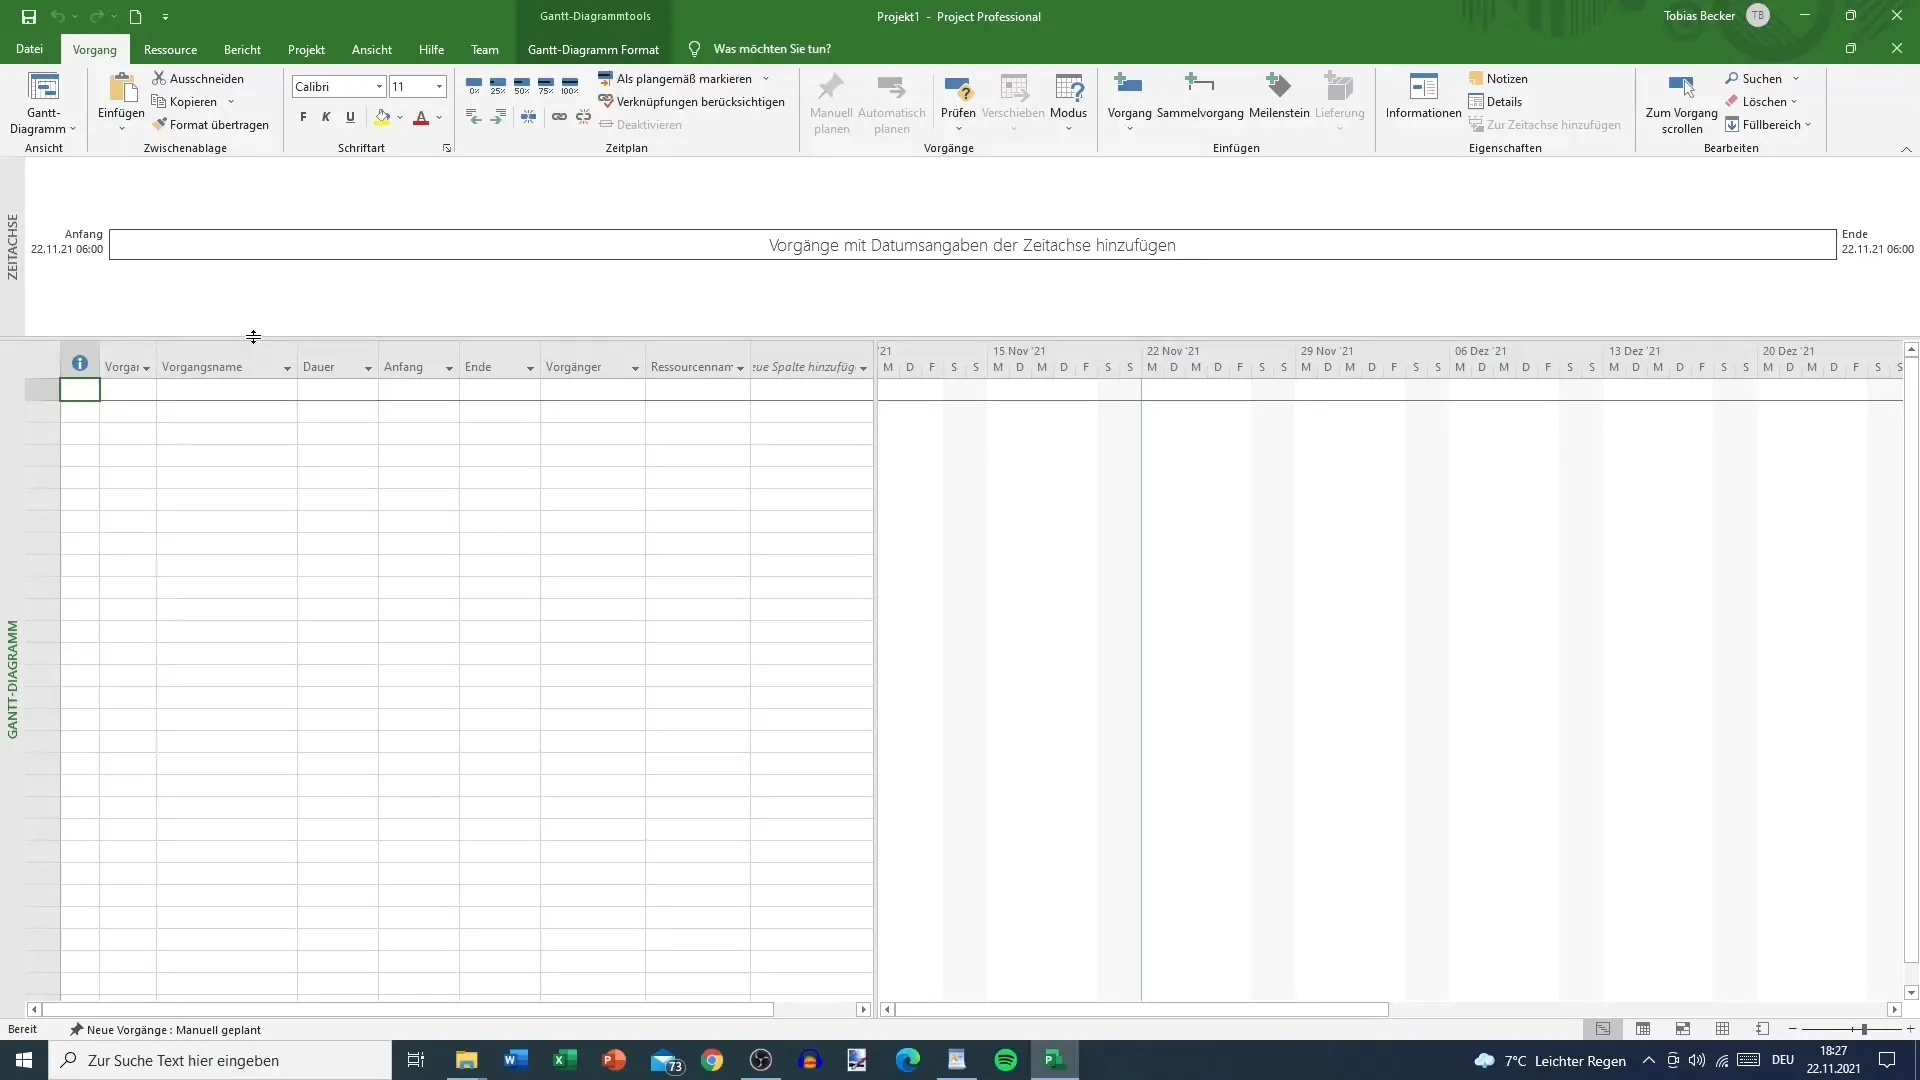
An extremely useful element in Microsoft Project is the timeline. It is located in the lower half of the window. With the mouse, you can adjust the size of the timeline by clicking on the divider between the task list and the timeline. By holding down the left mouse button and dragging, you can move the view up or down.

The timeline gives you a visual overview of the individual stages of your project and their duration. A particularly relevant element is the Gantt chart, which provides a graphical representation of the project plan. It is important to work with these tools to monitor the progress of your project.
Additional Useful Features
In addition to the timeline and Gantt chart, you can also activate the view toolbar, which provides another way to switch between different views. The view toolbar is especially helpful for quickly navigating between the timeline, network diagram, or Gantt chart.
You can also customize the layout of the Gantt chart by selecting different colors and styles to better visualize your data.
Conclusion: Getting Started with Microsoft Project
You now have a solid understanding of the user interface of Microsoft Project. You should be able to start a new project, utilize the basic functions, and navigate within the software. In the next step, we will set up the basic settings and kick off with a small test project.
Summary
You have gained an overview of the key aspects of the user interface of Microsoft Project. We have learned about the structure of the software, discovered its main functions, and familiarized ourselves with useful tools. This prepares you well to efficiently plan your projects.
Frequently Asked Questions
What is Microsoft Project?Microsoft Project is a software tool for planning, monitoring, and managing projects.
How do I open a new project?You can create a new project through the homepage on the left side of the window.
Where can I find the Gantt chart?The Gantt chart is displayed in the right window, based on the tasks you have defined.
Can I customize the view?Yes, you can customize the color schemes and layouts of the timeline and Gantt chart.
How do I provide feedback on the software?You can send feedback through the respective option in the user interface at the bottom of the window.


