The design of websites is often enriched by creative elements that captivate the attention of visitors. A fantastic tool for this purpose is the animated headline in Elementor. This feature allows you to highlight specific words or passages, making your content more lively and engaging. In this guide, you will learn how to insert and customize an animated headline with Elementor.
Key Insights
- The animated headline offers various style options, including text highlights, rotations, and animations.
- You can customize both the animated text and the associated headline individually.
- The effect of the headline can be enhanced by different types of animations such as "Typing," "Flip," or "Drop-in."
Step-by-Step Guide to Creating Animated Headlines
Step 1: Accessing the Elementor Editor
Start your WordPress admin area and go to the page or post where you want to add the animated headline. Click on "Edit with Elementor" to open the Elementor editor.
Step 2: Selecting the Widget for the Animated Headline
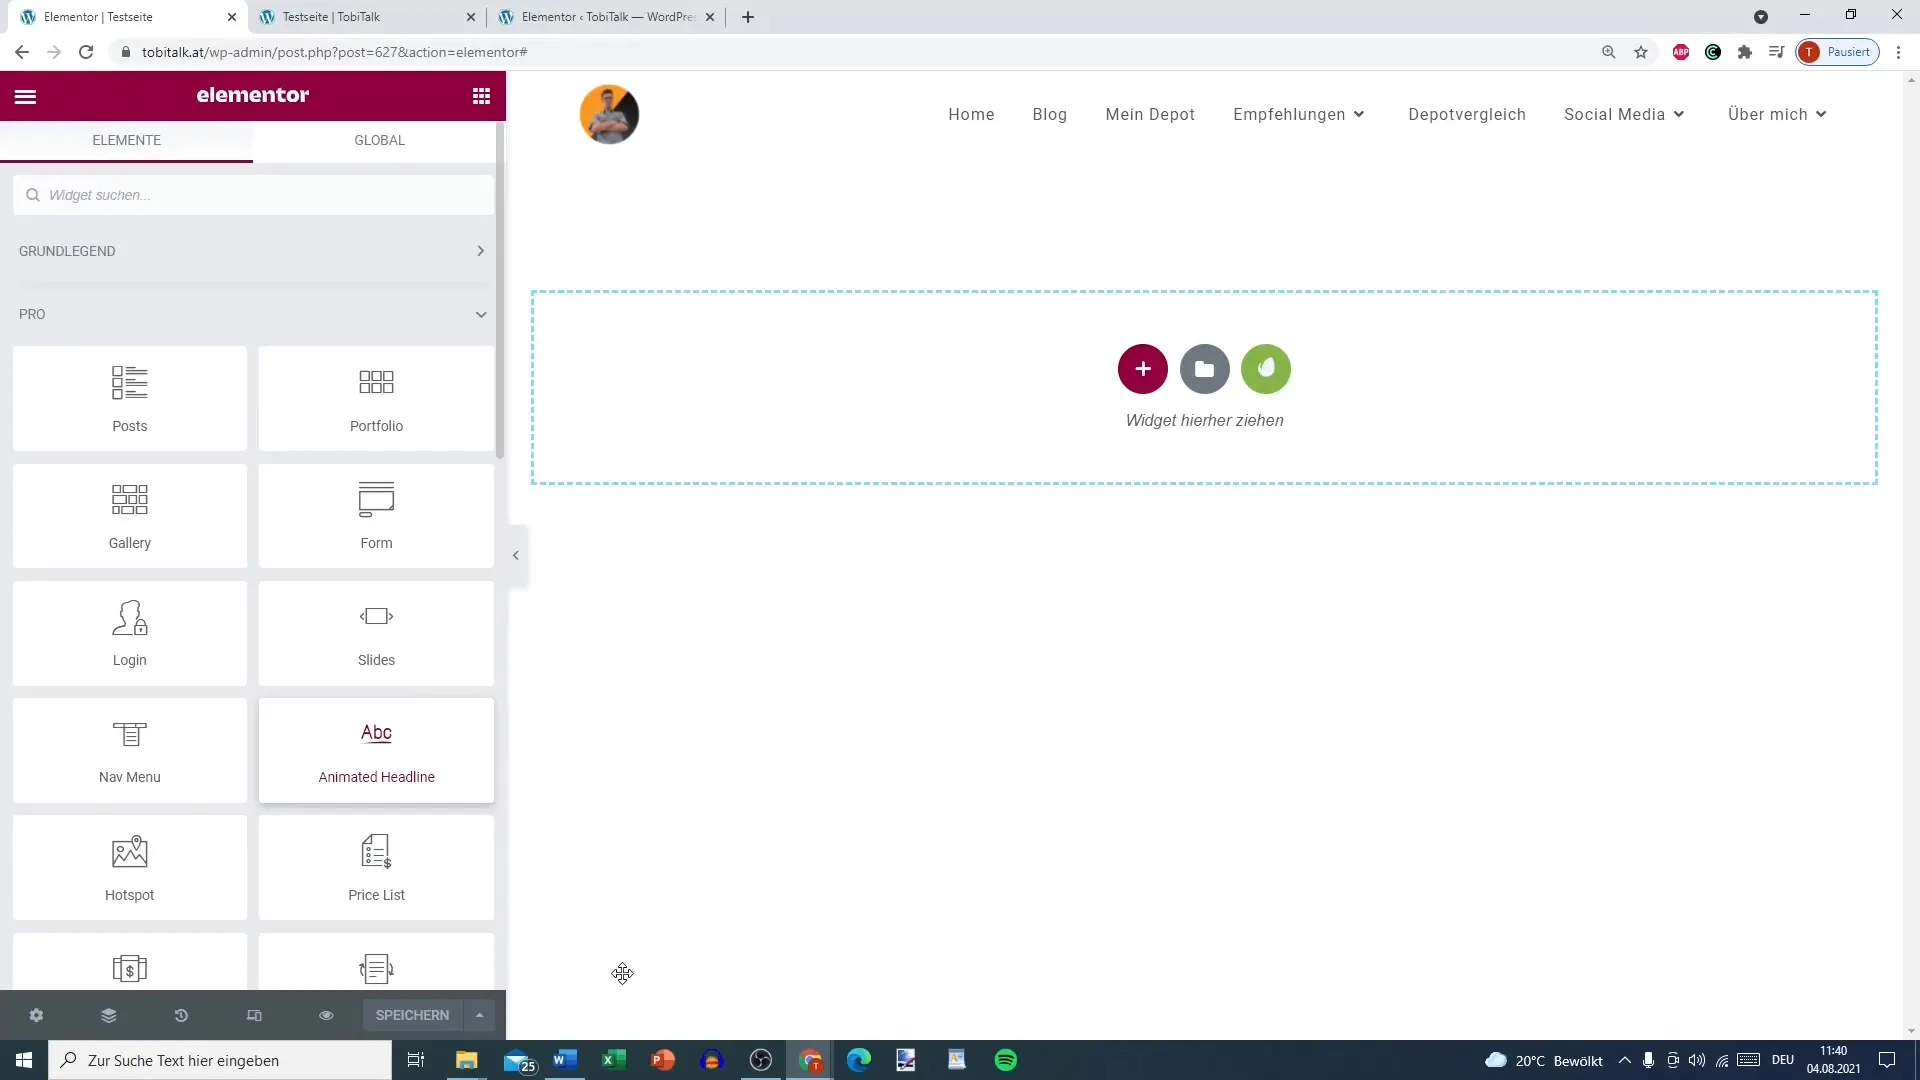
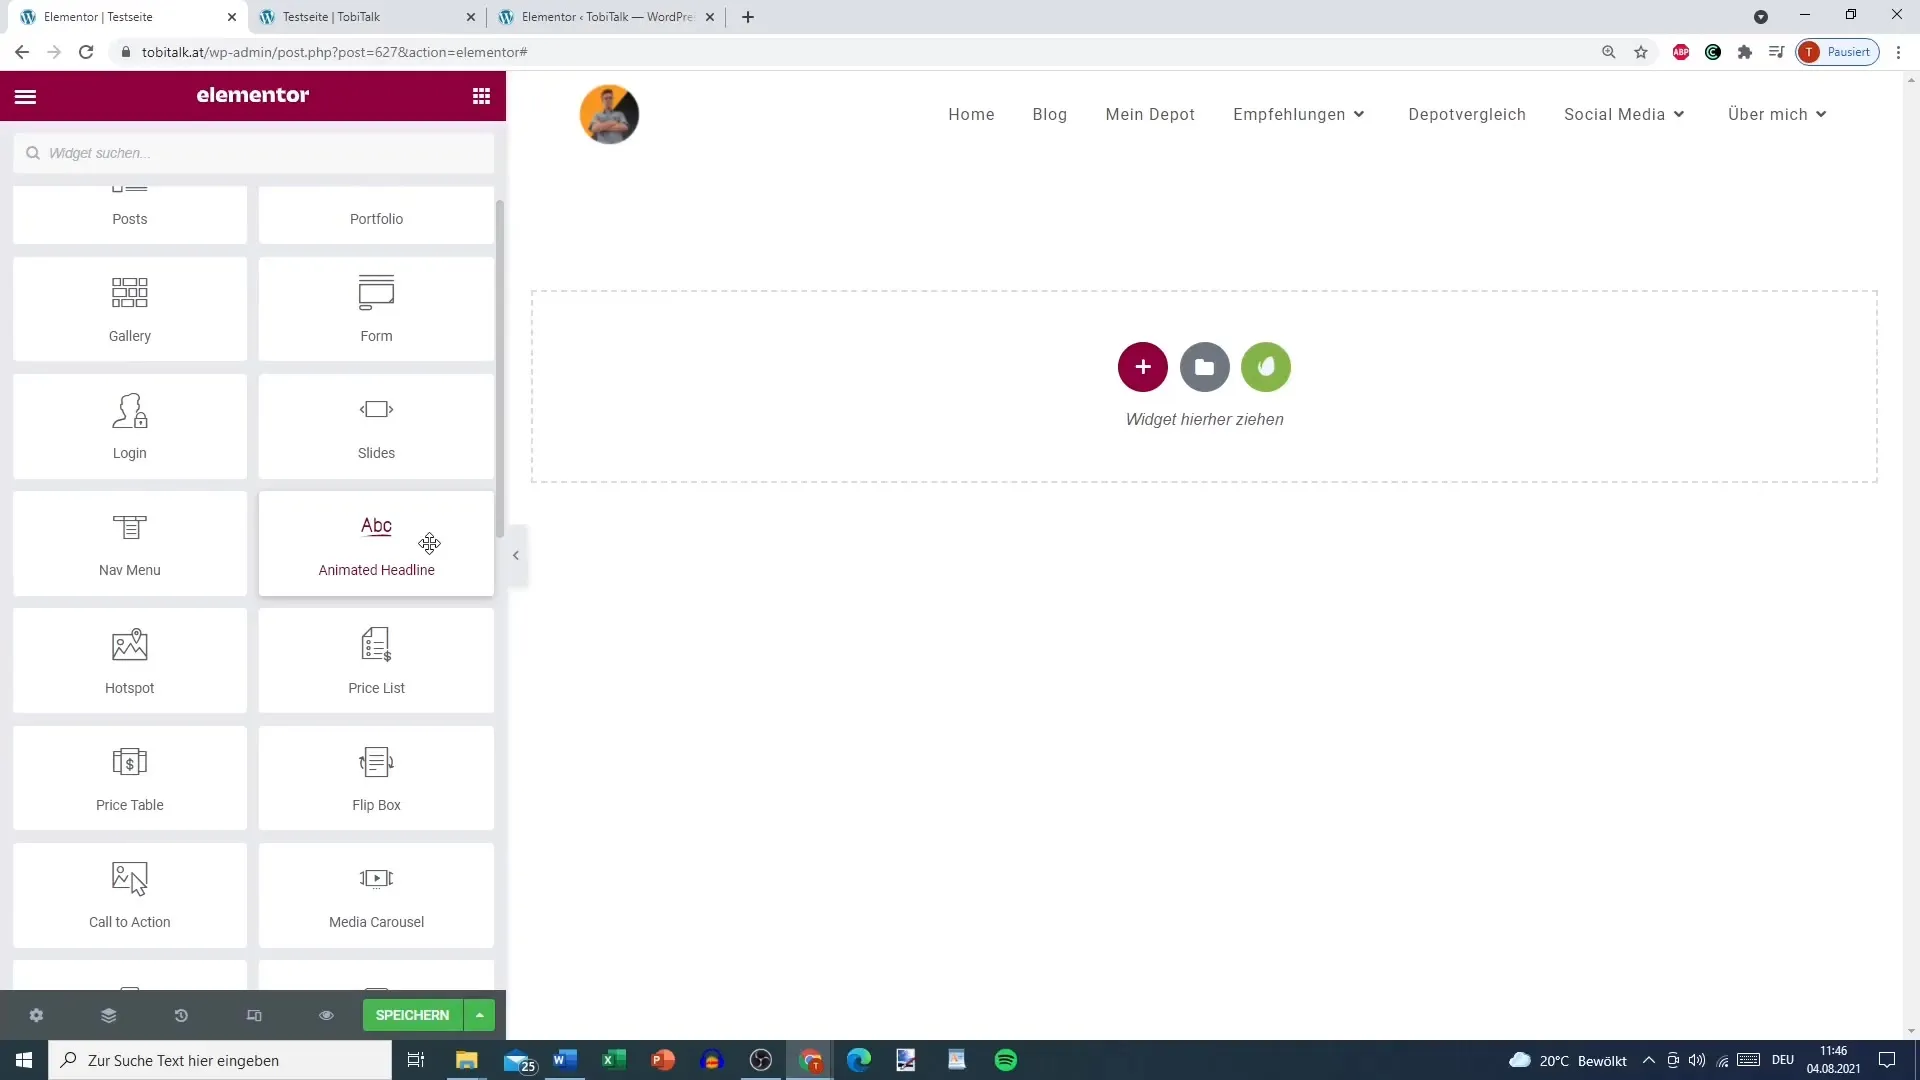
In the left sidebar of Elementor, look for the widget "Animated Headline." Drag and drop it into the desired area of your page.
Step 3: Entering Your Static Text
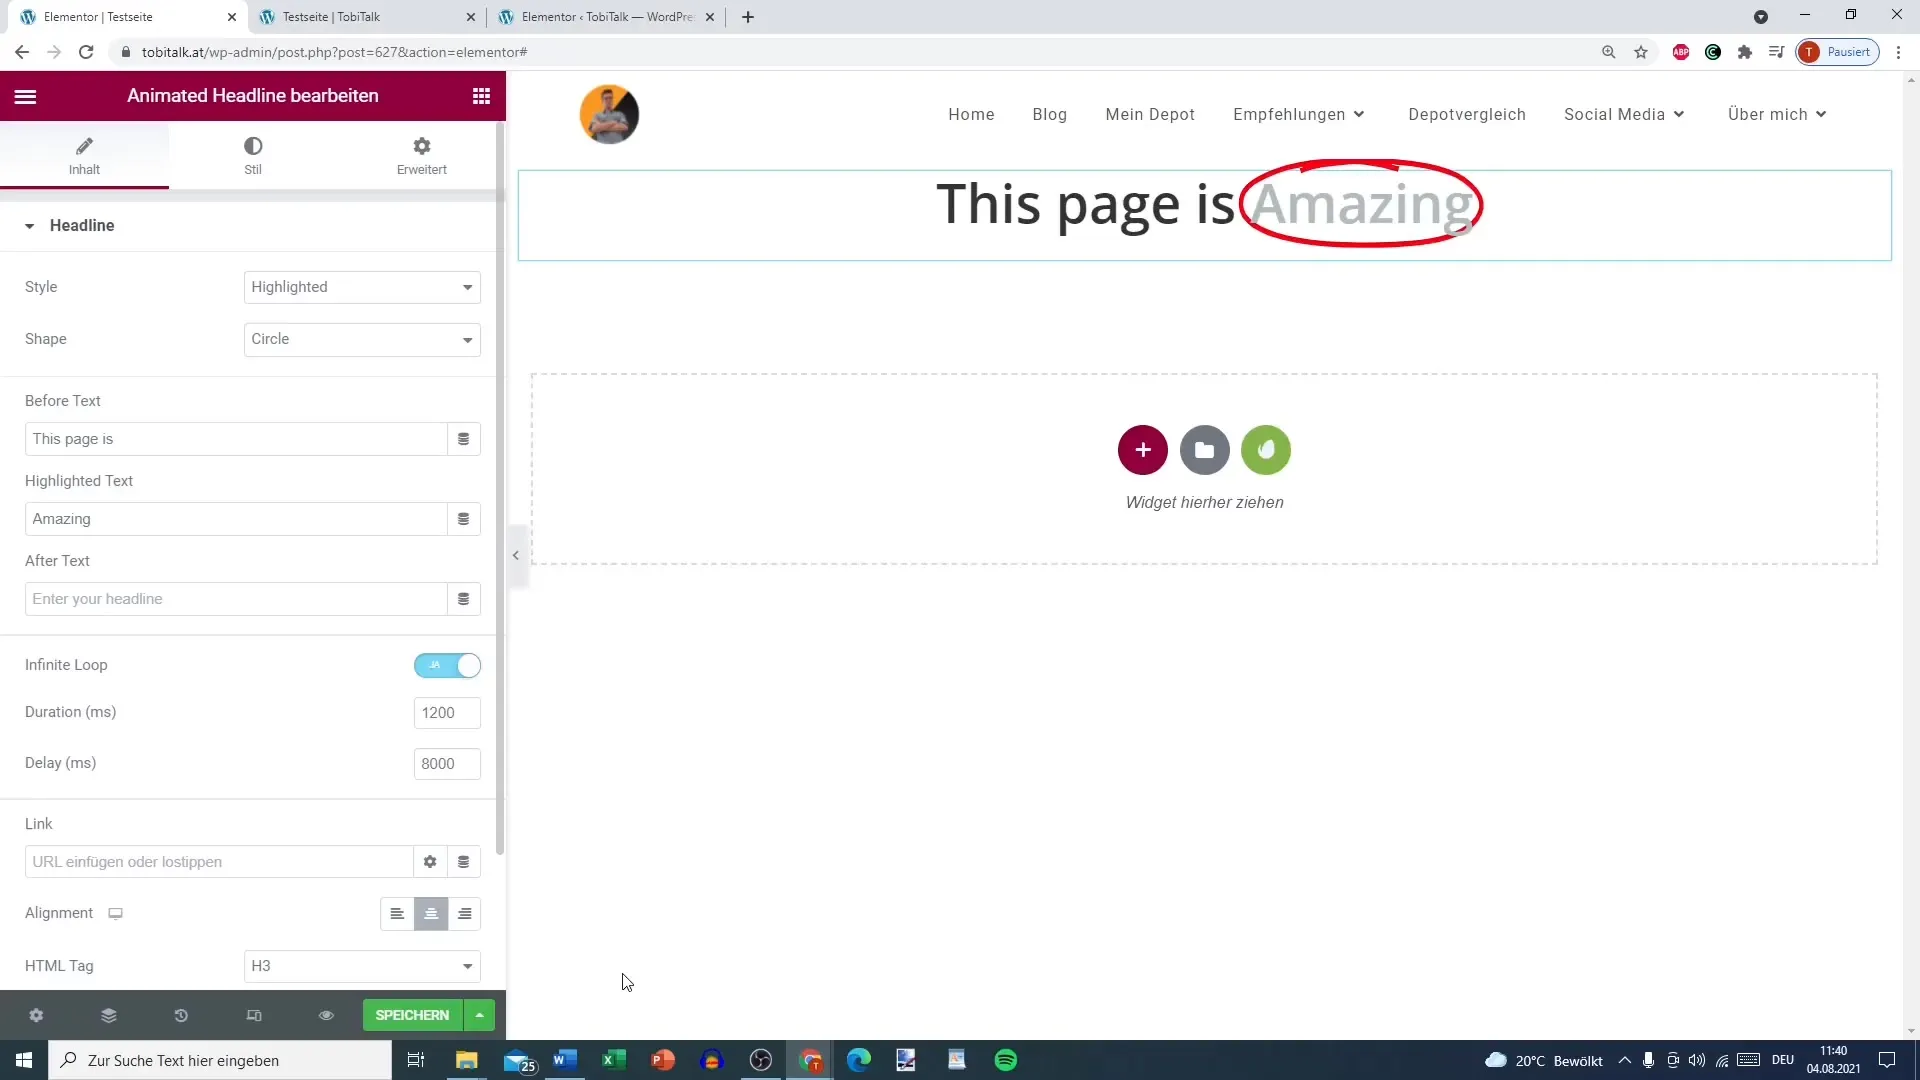
After adding the widget, enter your static text in the "Main Headline" field. This is the text that remains fixed while the animated text changes. For example, you could enter "This website is".
Step 4: Defining the Animated Text
Go to the "Animated Text" section and insert the words or phrases you want to highlight in rotation. These could be words like "great," "perfect for," "beginners," and "your go-to place number 1."
Step 5: Customizing the Style
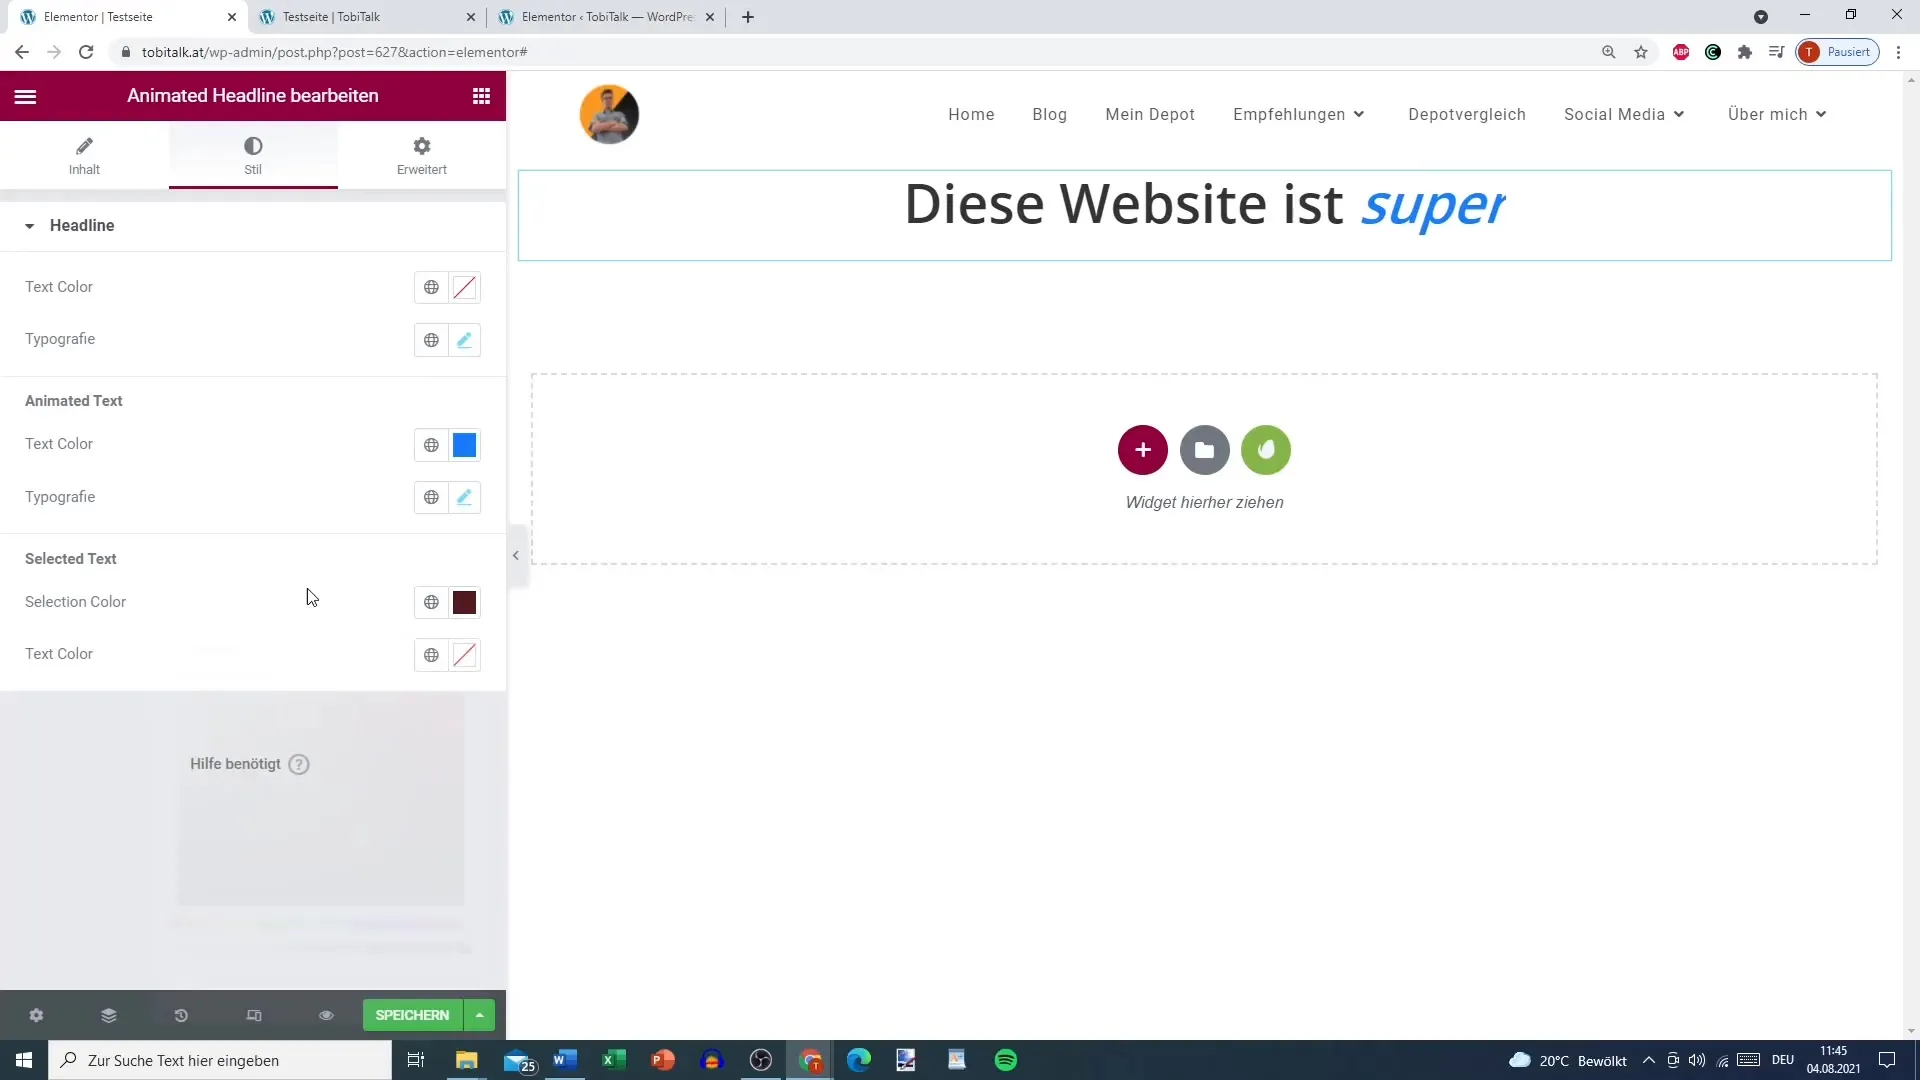
Under the "Style" tab, you can adjust the styling of the headline and animated text. Here, you can customize the text color as well as the background shape. A popular choice is to give the background a red color, but you can also choose black or green.
Step 6: Activating Animation Effect
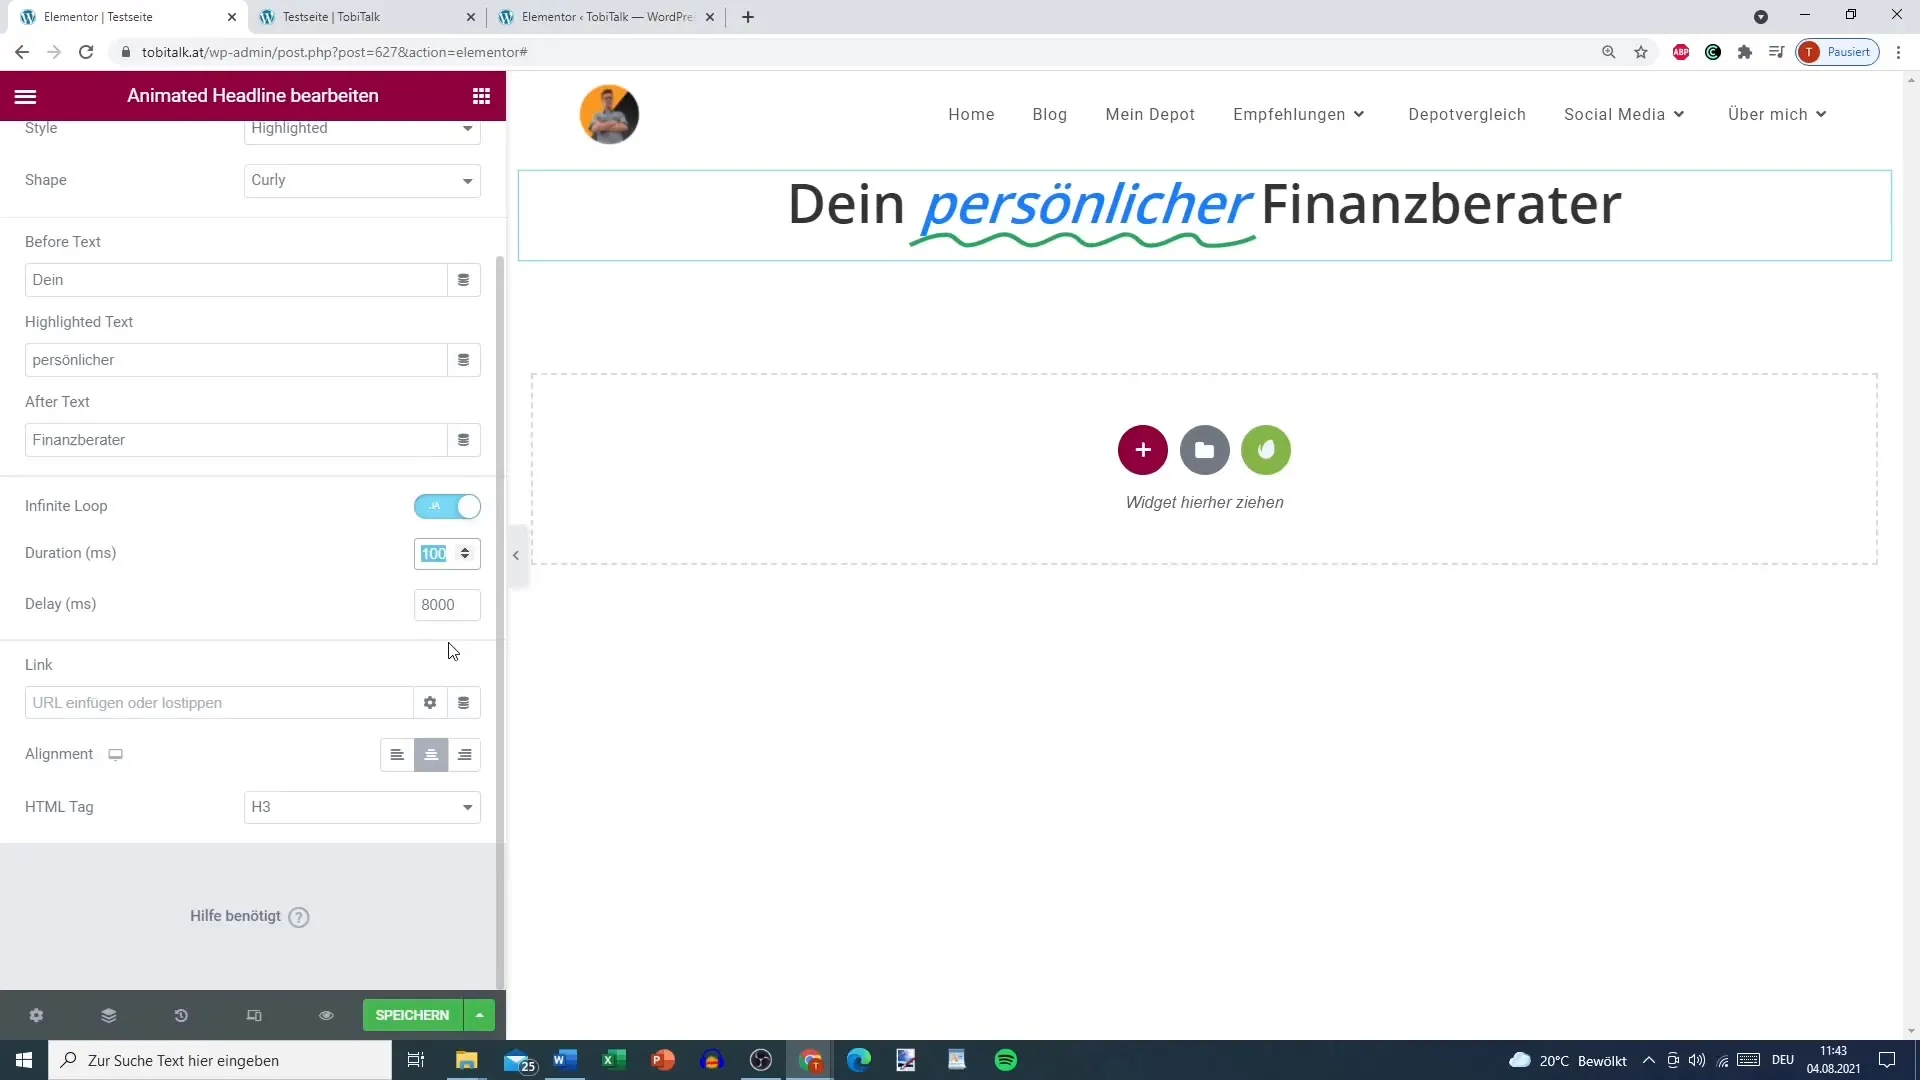
In the "Animation Effects" section, you can specify how the animation should work. Do you want the animated text to have an "Infinity Loop" so that it is constantly repeated? Adjust the settings for the duration and delay of the animation accordingly.
Step 7: Selecting the Animation Type
In the dropdown menu, choose the desired animation type. Available effects include "Typing," "Flip," or "Drop-in." The "Drop-in" effect is particularly appealing, but the "Typing" effect also has its own charm.
Step 8: Preview and Adjustments
Use the preview function to see how the animated headline looks in the live view of the website. Here, you can make adjustments such as changing the text size or spacing to optimize the layout.
Step 9: Final Adjustments Before Publishing
Before saving the page, double-check all settings. Ensure that the fonts and colors harmonize with the rest of the website. If everything looks good, click "Publish" to make the changes to your website live.
Summary
With this guide, you have gone through the basic steps to create an animated headline in Elementor. You can use the features and customization options to give your website a dynamic touch and capture the attention of visitors.
Frequently Asked Questions
How can I change the color of the animated text?You can adjust the color in the "Style" tab for each text field.
What should I do if the animation is not working correctly?Make sure all settings have been correctly applied and test the preview for any changes.
Is it possible to use multiple animated headlines on one page?Yes, you can add as many animated headlines as you like, but ensure readability.
Are there limitations to the animations?There are a variety of animations, but some may not display optimally on certain devices or browsers.
