For people with visual impairments or other disabilities, special features are required for the usability of a PDF file. The basic prerequisite for barrier-free usability is the structure of the file. In this structure, the various elements such as heading level 1, 2 etc., paragraph, image with a short description, table or decorative elements are each recorded as such and thus facilitate navigation (e.g. with the keyboard instead of the mouse) and orientation for the user. These structural elements are referred to as tags. Using these tags, the content of a PDF file can be logically controlled via the voice output.
In addition to clear language assignment and standardized character encoding, a clear content sequence and navigation aids in the form of bookmarks should be defined in longer files.
Another option for barrier-free usability is the dynamic adjustment of line breaks at a higher zoom factor, as may be necessary for visually impaired users, but also when reading on smartphones or tablets. In Acrobat, this display is called reflowing and an appropriately structured file is also advantageous here.
Optimal conditions for creating accessibility are given if the source file, such as Word or InDesign, already uses style sheets. This structure can then be transferred to the PDF file and Acrobat can generate tags from it.
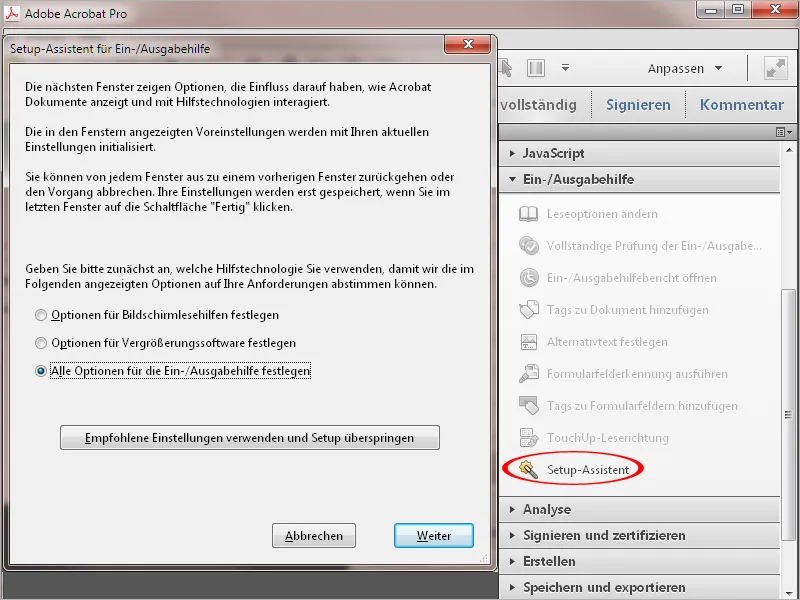
The tools relevant for editing the structure can be found in the Input and output help category of the toolbar. Basic settings for the view on the user side can be made using the setup wizard.
On its second screen, for example, particularly high-contrast colors can be set for text and background if required. For certain visual impairments, these can be colors other than black and white.
The color of form fields can also be adjusted here.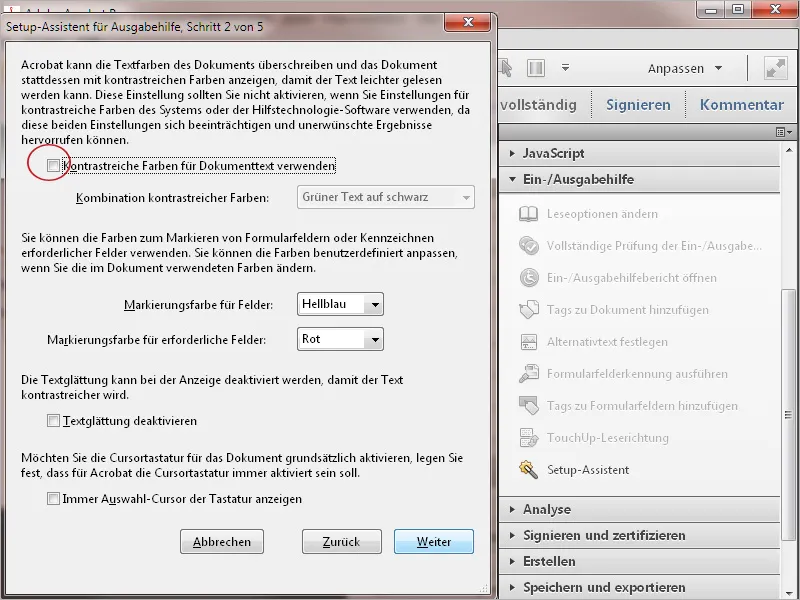
After clicking on the Next button, you can make settings for the reading direction in the next step. In contrast to the recommended standard of deriving this from the document, you can also make a different setting for this.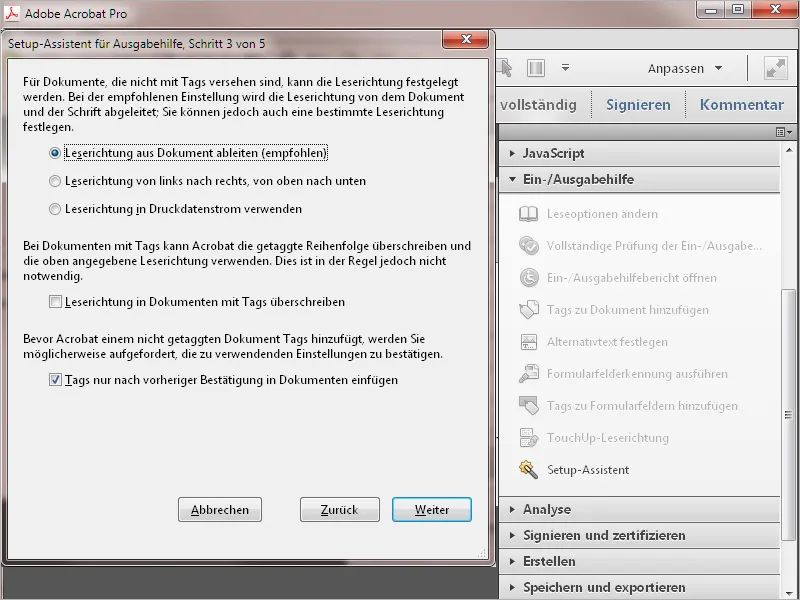
After clicking Next, you can specify in step four whether only the visible pages or the entire document should be accessed when reading aloud using a screen reader.
Basic settings can also be made here for displaying the page layout as single or double pages or for scrolling.
If you want to preset the zoom to a fixed factor, activate the Override document zoom checkbox and select the desired value from the drop-down list.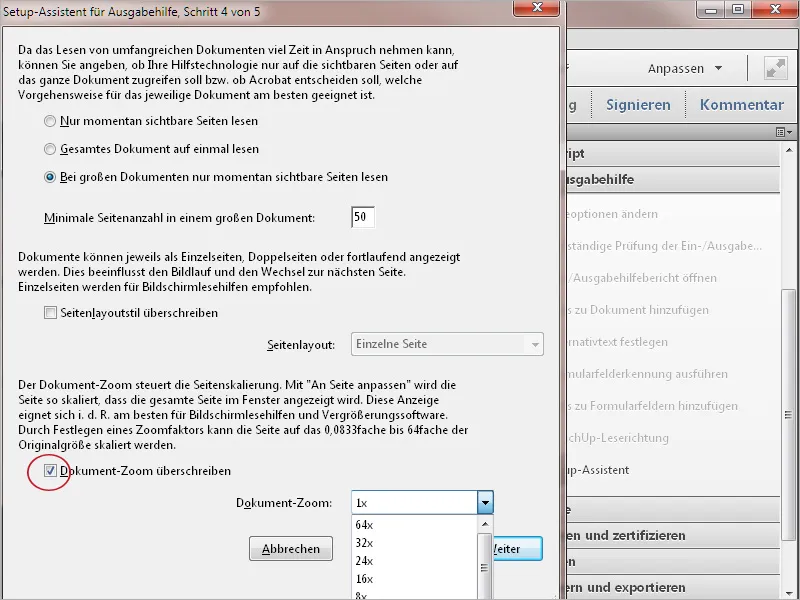
The last step of the setup wizard is about automatic saving - this must be deactivated when using a screen reader, as otherwise the document will be reloaded each time it is saved and the reading process will start again from the beginning.
The checkbox in the middle is a helpful option: If it is activated, Acrobat opens a document with the page on which the document was last closed. This means that you can continue reading from the right place immediately and do not have to search for the connection in longer documents.
Click on the Done button to save these basic settings.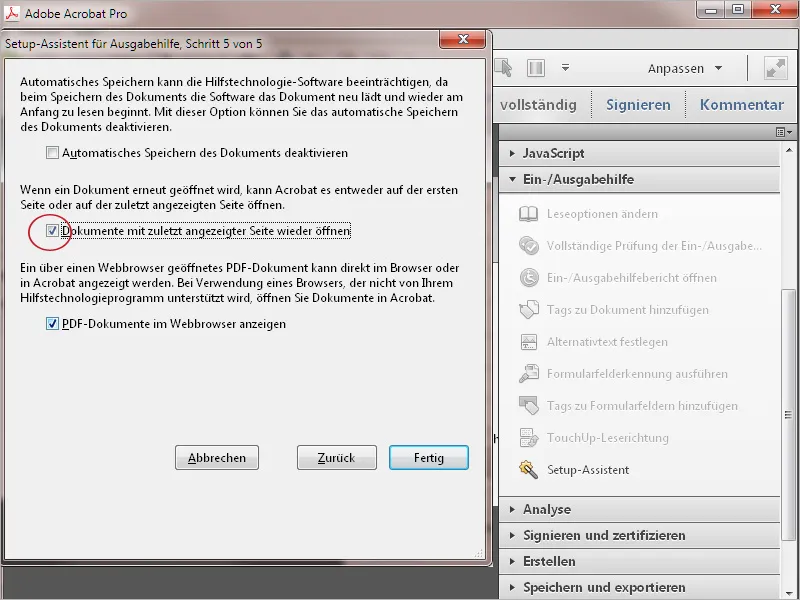
To check the accessibility-relevant properties of an open document, click on the Complete check of input and output help entry in the toolbar.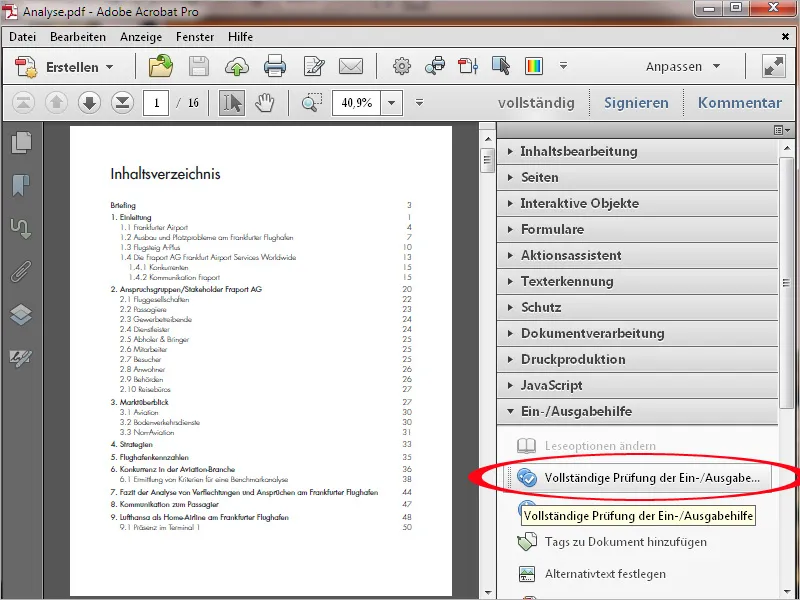
Before starting the check, you can specify various details such as the location of the output report, the pages to be included or the category to which the check should refer (page content, forms and tables, alternative text and headings or the entire document).
Then click on Start check.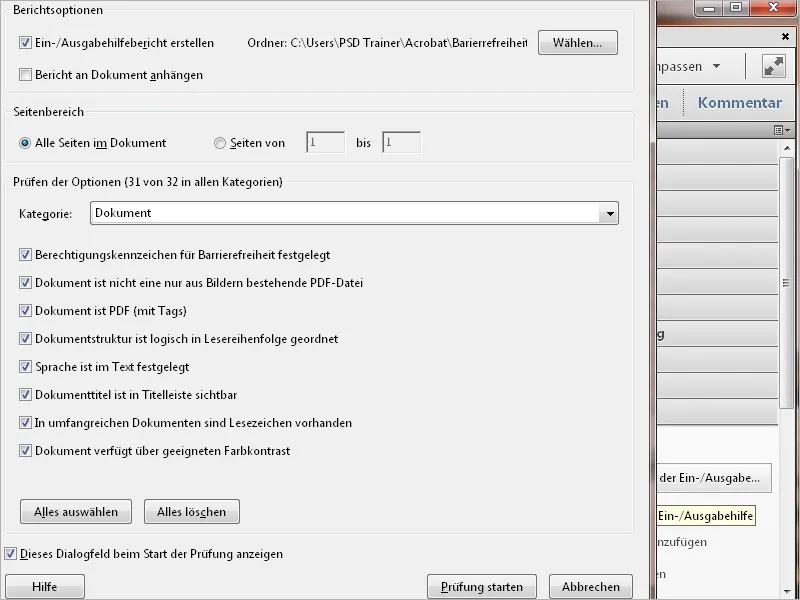
Acrobat now analyzes the current document and displays the result on the Accessibility check navigation tab on the left-hand side of the screen in the form of a tree structure. This overview is divided into categories such as document, page content, forms, alternative text, tables, headings etc., which can be opened by clicking on the plus sign in front of them.
In the opened category, you can see the checked details and the respective result of this check.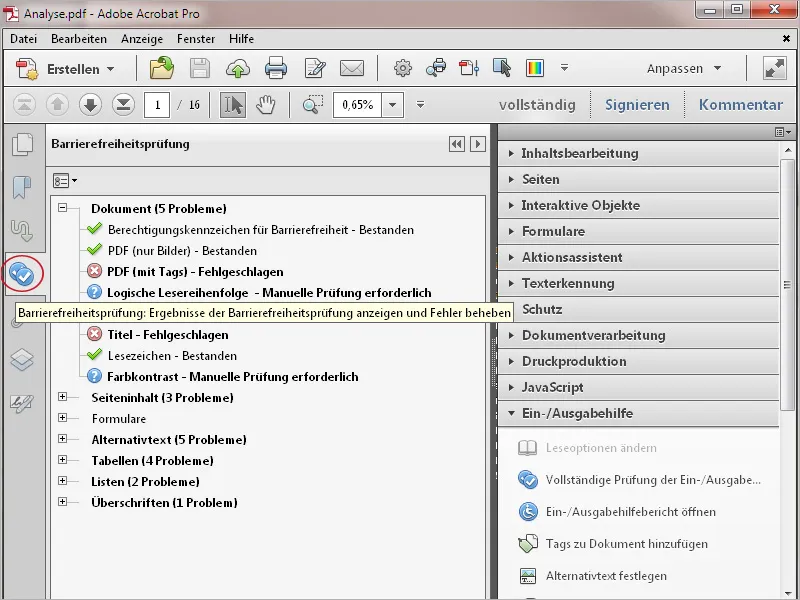
As an alternative to this overview, you can also display the output help report by clicking on the icon for the context menu.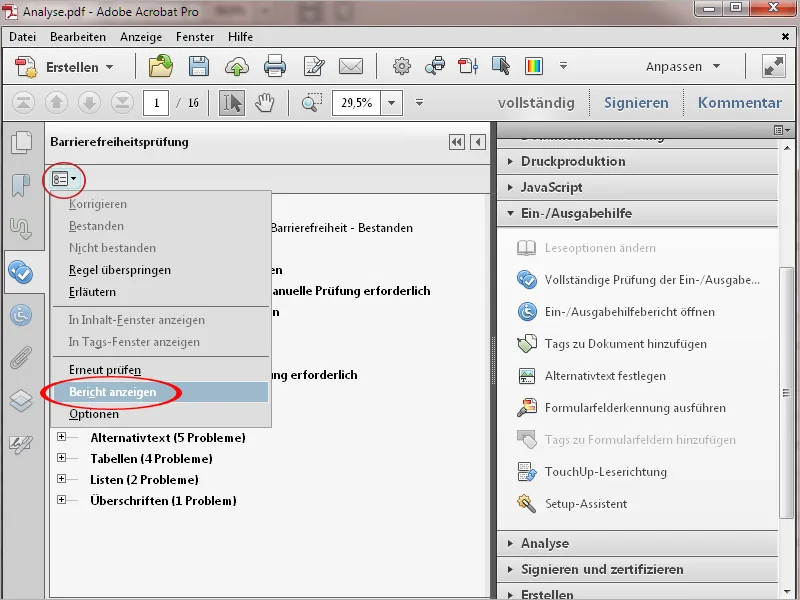
The rules according to which the document was checked, a short description of the rule and the result of the check are displayed in a table. The rules are linked to help pages from Adobe, ...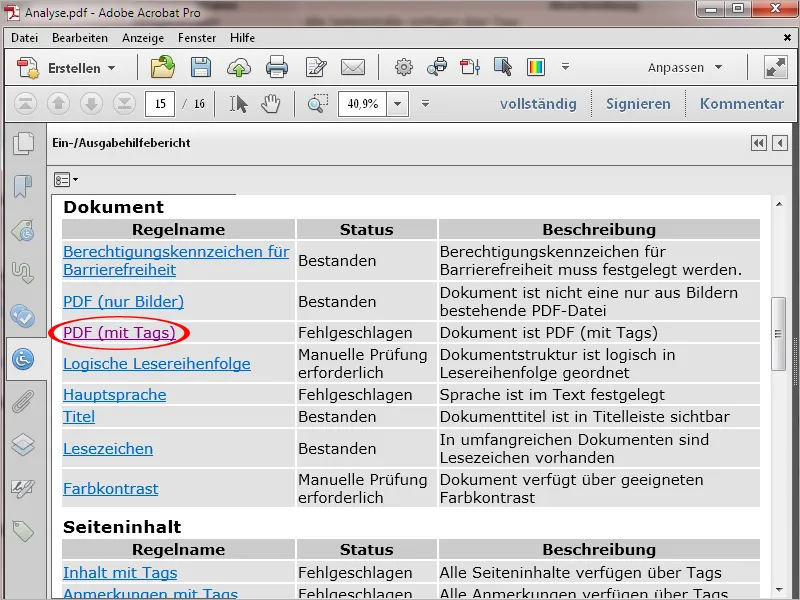
... which describe exactly how to proceed in the event of a failed check.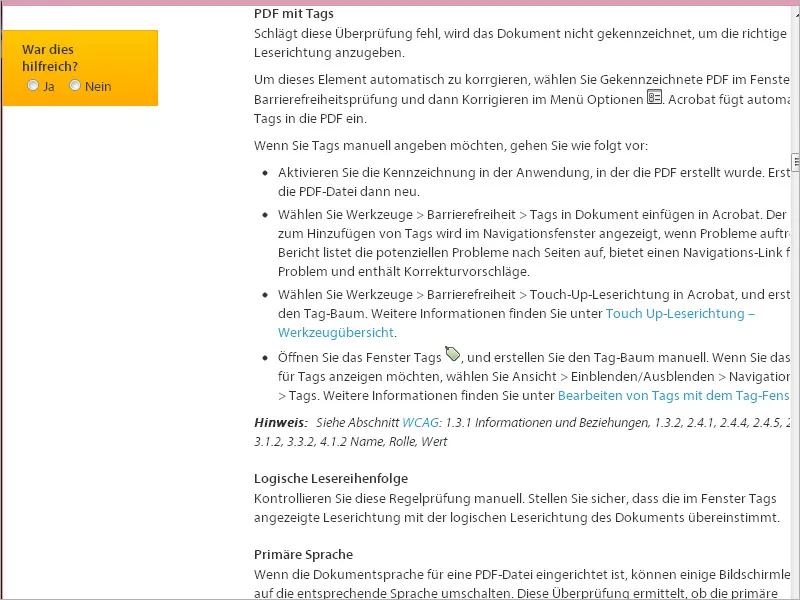
In the options of the output help report, you can also attach it to the PDF document (e.g. to have the document processed by another user) or open it as an HTML file.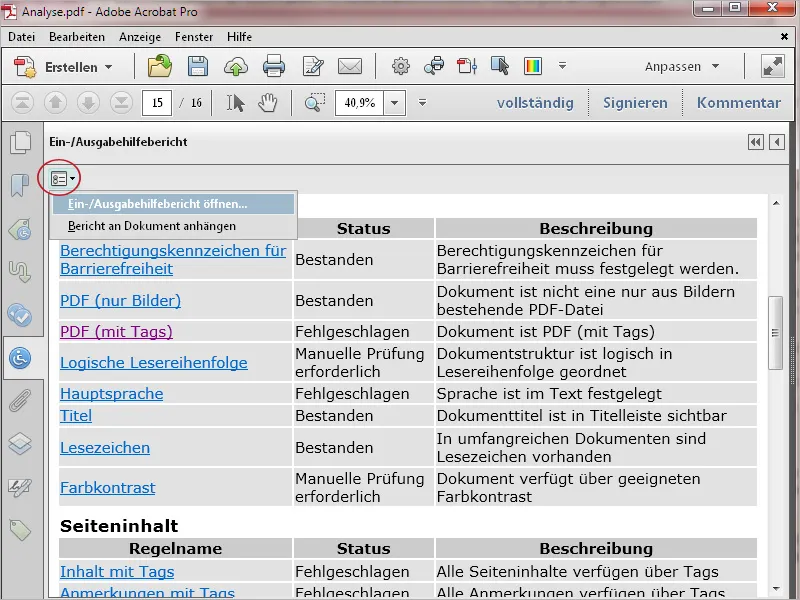
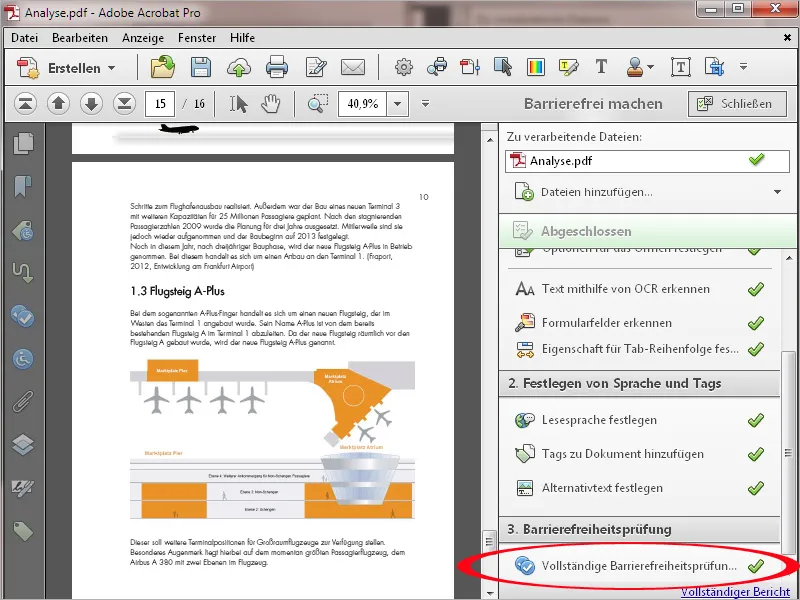
A more convenient way to check the suitability of a file for accessibility is to use the Make accessible action supplied with the standard installation, which is available in the action wizard. After clicking on it ...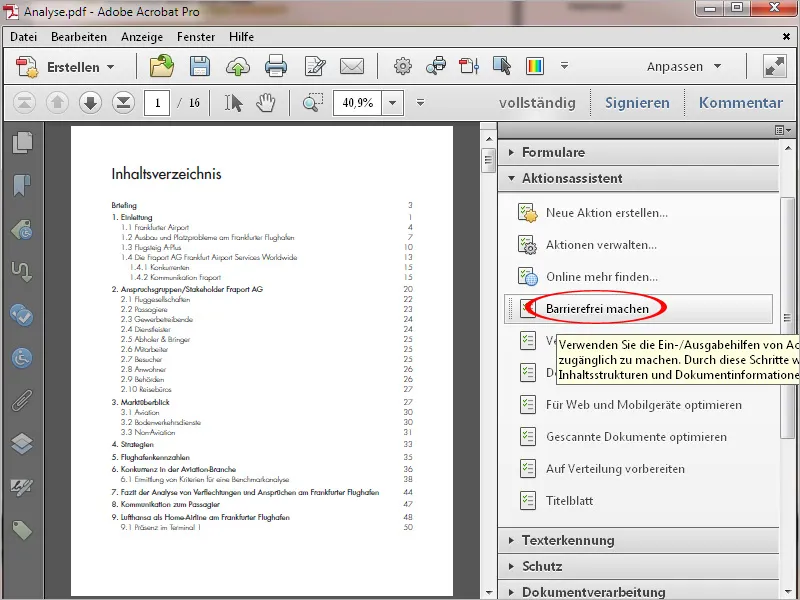
... the action wizard opens and guides the user step by step through the individual tasks, from entering the title, subject and author to indexing the images found in the document and identifying language and tags to the final accessibility check.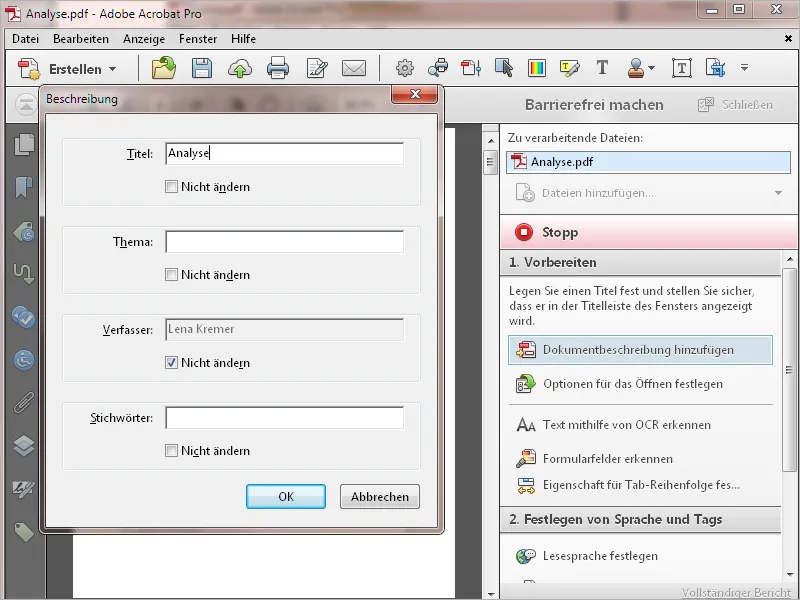
In this way, even less experienced users can convert a PDF file into an accessible document.