Step 1: Image analysis
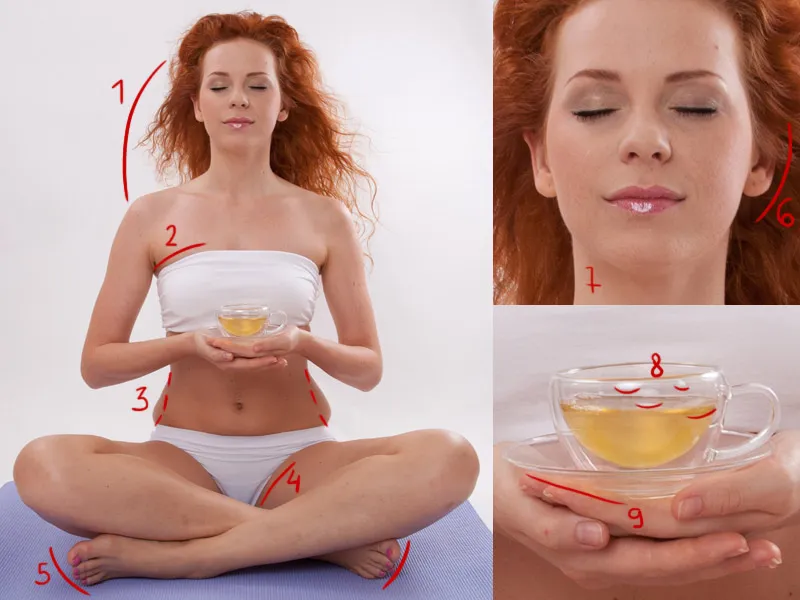
- The hair on the left side (as seen from us) doesn't look good, so I'll replace it with new hair.
- The top is a bit crooked, so I'll shape it and color it.
- I'll make the woman a little slimmer in those areas and sculpt the whole body a little.
- I don't like the creases in the panties, which I will also correct and color in.
- The color of the toenails looks intrusive, they also need to be dyed a neutral color.
- The right ear (as seen from us) will have the same shape as the left ear.
- Skin retouching
- Disturbing lightning spots must be removed
- All edges of the cup must be repainted.
Step 2: Adding the hair
The hair on the right-hand side is selected with the lasso tool and mirrored using Copy>Free Transform>Mirror Horizontally. I call this layer "Hair on the left" and reduce the opacity so that the bottom layer shows through. This helps me to adjust the layer with the hair correctly. When I'm happy with the result, I set the opacity back to 100% and create a black mask by holding down the Alt key and clicking on the mask symbol. I paint my hair with white paint. To make the hair transitions soft, I use a brush with a soft edge and for the transition between the hair and the body, I use a hard brush.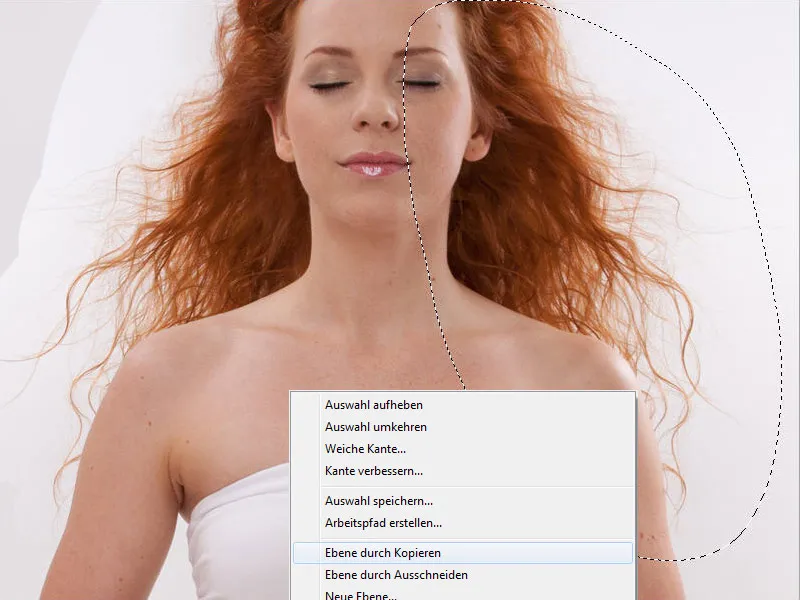
Step 3: Adjust the ear
We do the same with the ear; the procedure is exactly the same as for the hair. It was a great fit, but now it looks cut out. The area is lighter and more contrasty than it should be.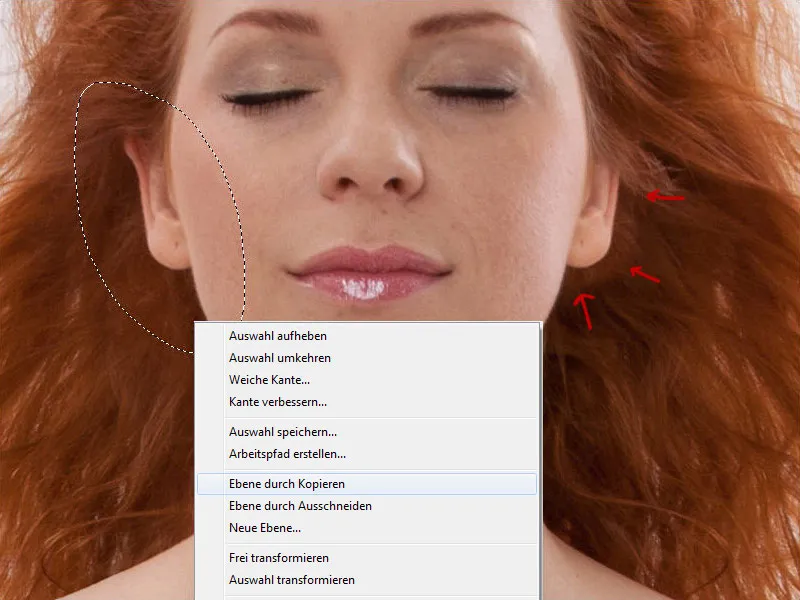
I open the gradation curves and create a clipping mask so that the changes are only applied to the layer with the ear. In the gradation curve, I reduce the mid tones, grab the curve in the middle and drag it downwards. Then I go to Hue/Saturation and reduce the saturation slightly to -9.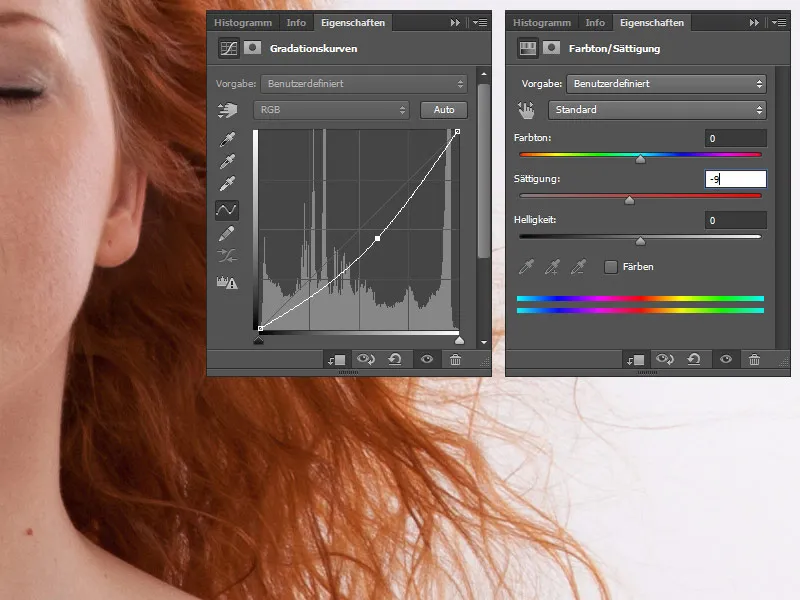
Step 4: Liquefy filter
Now the entire body is brought into shape. Use the shortcut Ctrl+Shift+Alt+E to reduce all layers to one. We call this layer "Transform". Now go to Filter>Liquefy and use the drag tool to shape the hair, arms, legs, hips and top. In the tool options, adjust the brush size for each body part.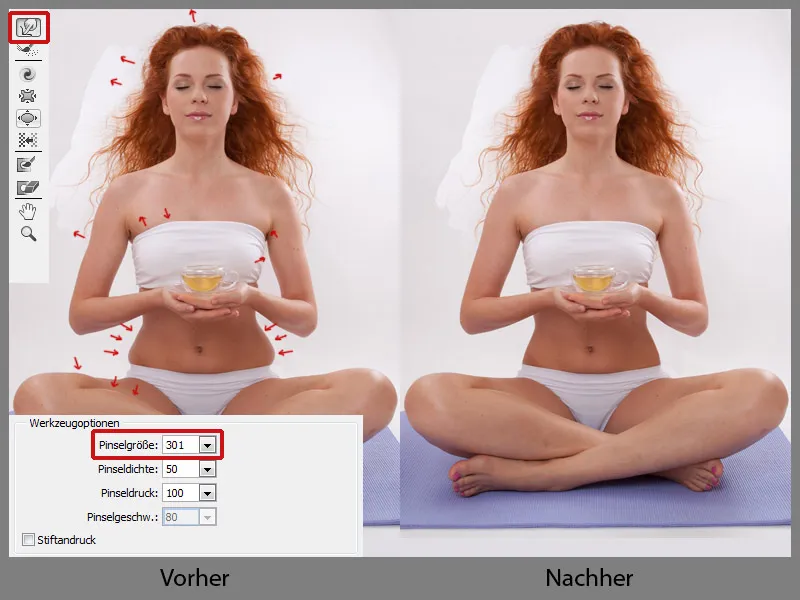
Step 5: Toes
The toes of the left foot (as seen from us) look nicer than those of the right foot. I'm going to change this by selecting the toes with the lasso tool and then selecting Layer>New>Copy Layer>Free Transform>Flip Horizontal. I call the layer "Toe" and reduce the opacity so that the bottom layer shows through. Once I have adjusted everything, I set the opacity back to 100% and create a black mask by holding down the Alt key and clicking on the mask symbol. I paint the toes in white. We combine all the layers into a group by clicking on the icon at the bottom; we call the group "Preparation".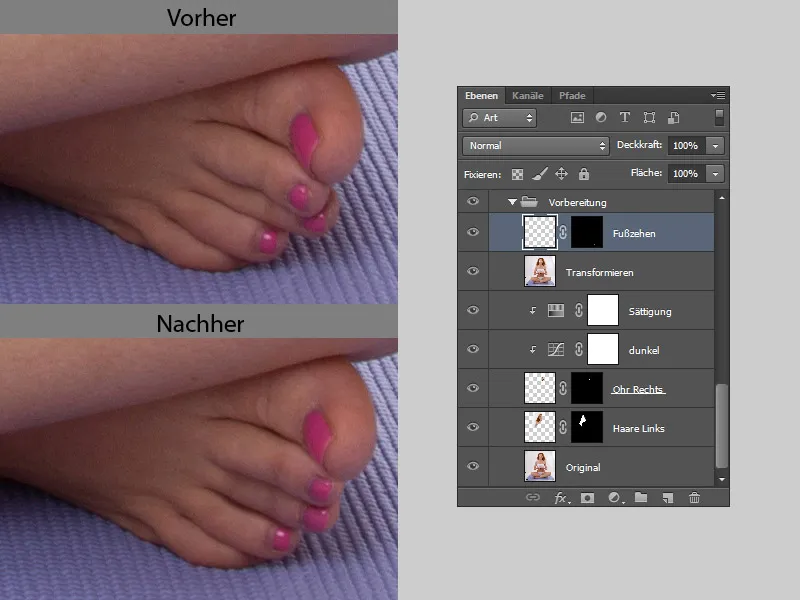
Coloring the toes
Colored toenails are distracting, so we'll color them in a neutral color. First, I'll create a new folder and name it "Color toes".
- Color
I create a new layer with the Color blend mode. I pick up the skin tone color with the pipette and paint over the toenails with a soft brush.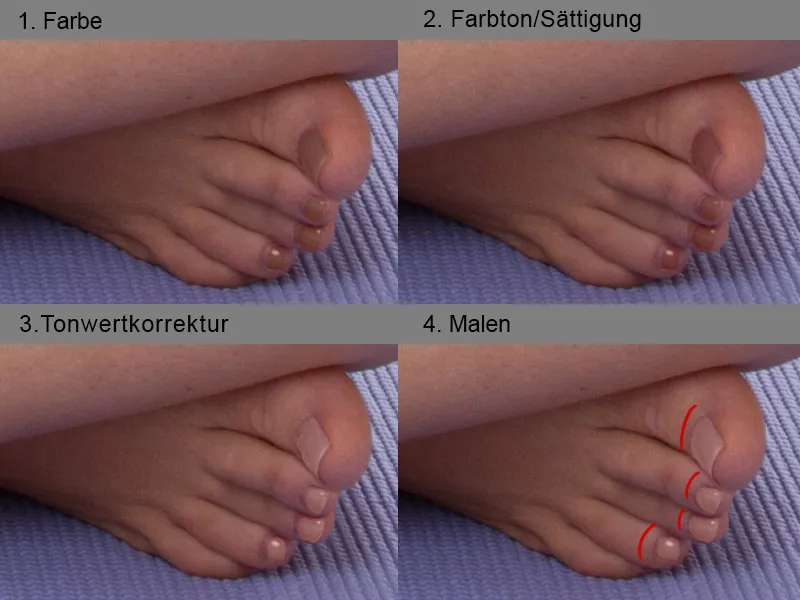
- Hue/Saturation
I click on the mask icon and carefully paint over the toenails with a soft brush, then click on the mask icon again. Now our toenails are selected and we reverse the selection with the shortcut Shift+Ctrl+I. Now I go to Hue/Saturation to change the color a little. For Hue, I move the slider to -8. - Tone correction
The rather dark color is lightened a little with the help of the tone correction; I set the middle slider to 1.70. So that the change is only applied to the toes, I create a clipping mask and slightly reduce the opacity to 78%. - Painting
I'm happy with the color of the toenails, but I don't like the edges. I create a new layer and use a slightly hard brush to carefully paint the areas. I keep picking up the paint with the pipette. Now the toenails look neatly painted.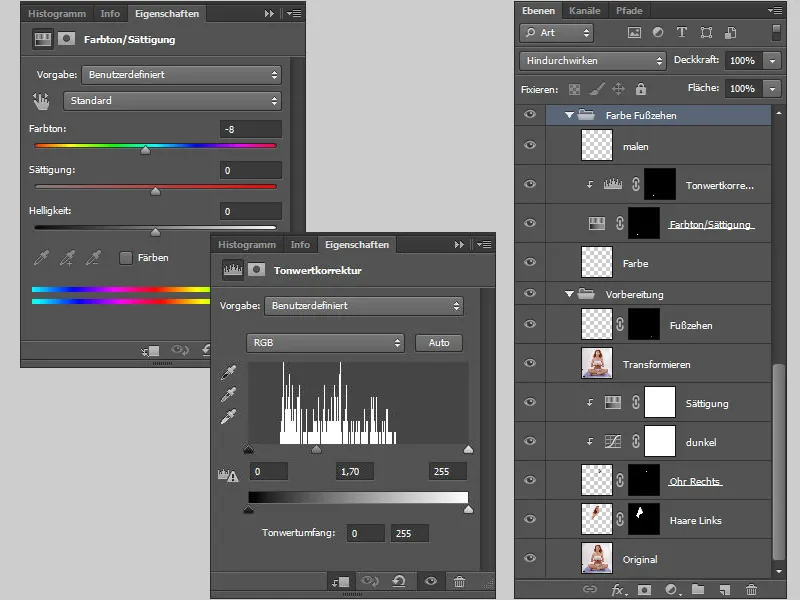
Step 6: Remove impurities and powder the skin
I do the skin retouching on a new layer. All the layers are combined into a new one using the shortcut Ctrl+Shift+Alt+E.
I use the repair brush tool to remove all blemishes, spots etc. from the layer. It is important to setthe hardness of the repair brush to100% to achieve a perfect skin texture.
A new layer is created with the shortcut Ctrl+Shift+Alt+E, I duplicate the layer twice. On the top layer I will use a filter from Topaz Labs Clean: http://www.topazlabs.com/clean/.
The filter is very helpful for full body shots when I need to do it quickly, but I don't use it for portraits or high-end retouching.
I go to Filter>Topaz Labs>Topaz Clean. The filter opens in a new window. On the left-hand side, I select Skin Even from the presets offered. On the right-hand side, I can change my settings as I like and then confirm the change with OK.
I Blender this layer with a black mask and use a white brush to paint in the areas where I want powdered skin.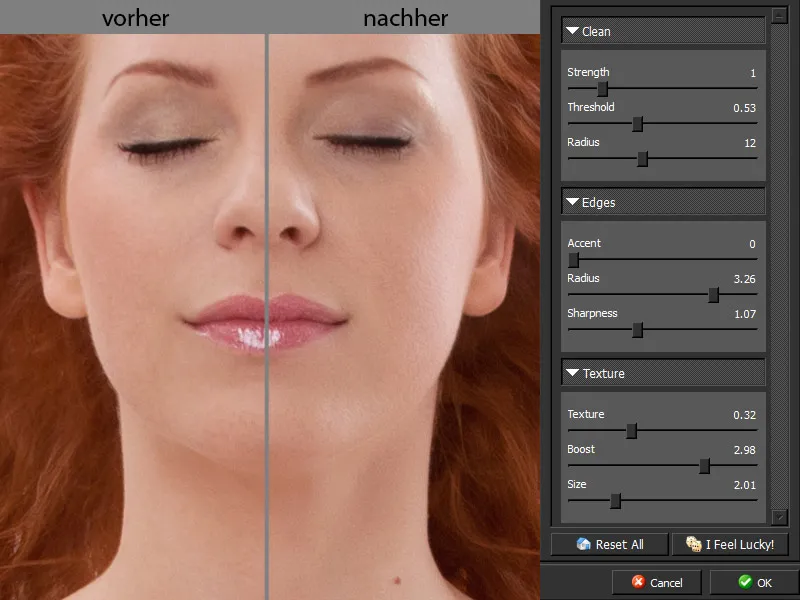
This is what my mask looks like.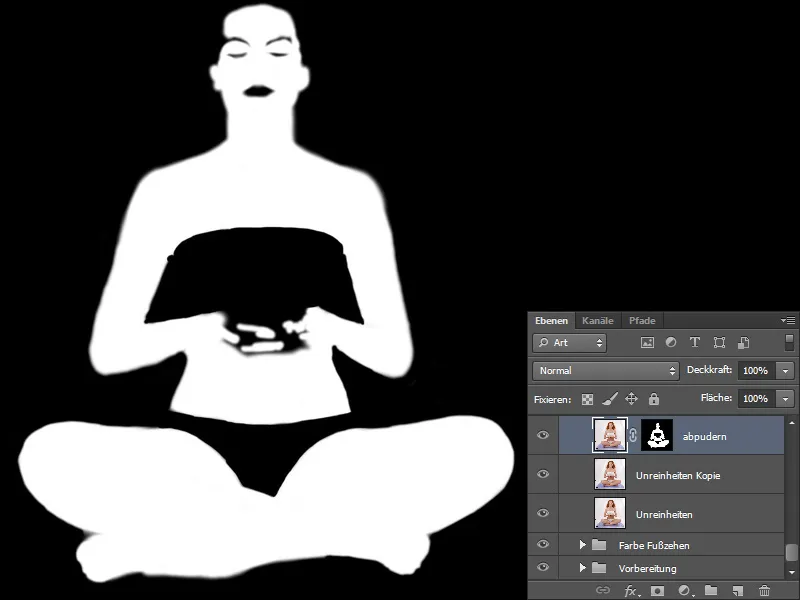
Step 7: Coloring the skin
Now I will adjust the skin color. Copy all the layers to a new one using the shortcut Ctrl+Shift+Alt+E.
I use the eyedropper tool to pick up the lightest color, which is always light reflections, e.g. on the nose. I click on the background color and select the darkest area, which is always shadows.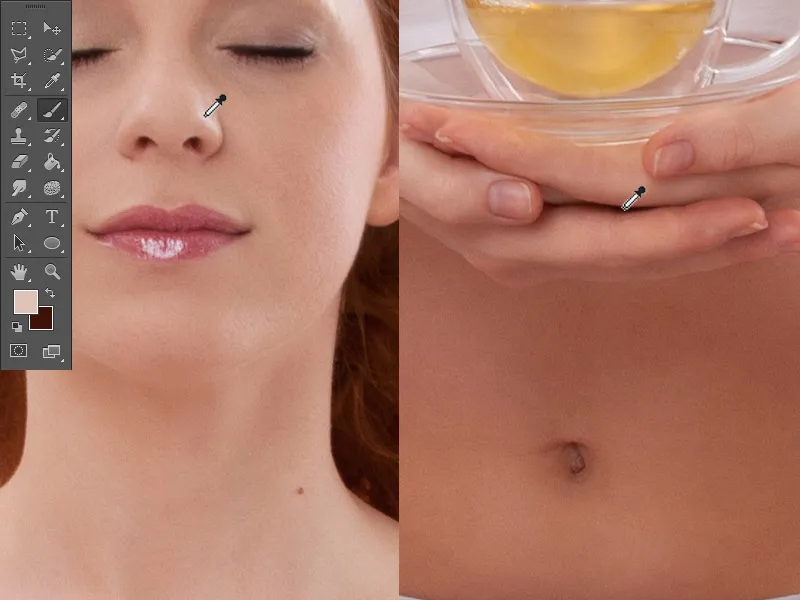
Then I go to Image>Corrections>Conversion. In the dialog box, I select Invert and confirm with OK. I select Color for the fill method.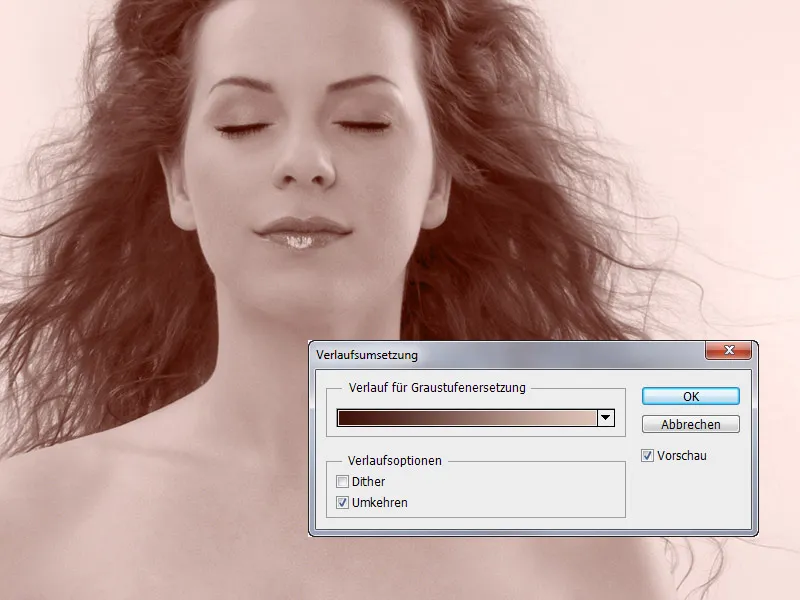
However, the color tone does not correspond to the skin color of a person and I change this via Color Balance and Gradation Curves. The color of the skin must not have a grey cast.
I Blender the layer using a black mask by holding down the Alt keyand clicking on the mask symbol. Using a brush with a soft edge, I set the opacity and flow to about 20% and paint over the woman's skin.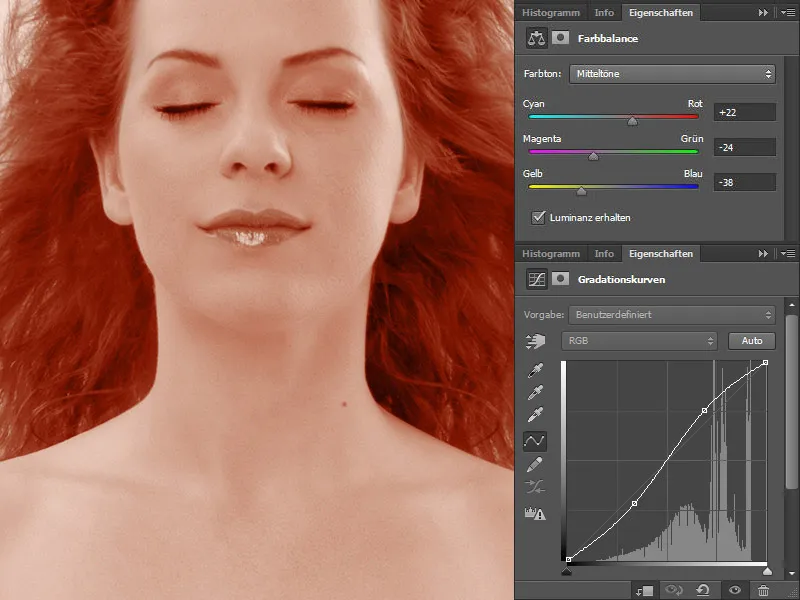
I paint on the areas where I want an even skin color. These are dark circles, shadowy areas and reflections from other objects.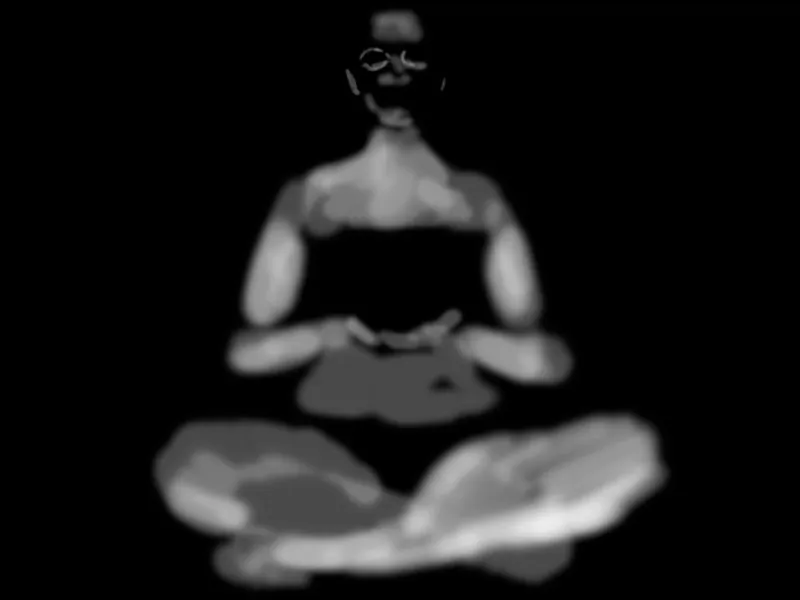
Step 8: Even out the color on the legs
There were strong color reflections from the matte on the legs and I had to color these areas well. This gave the color more intensity than in other areas. I correct this using hue/saturation.
I click on the mask symbol and paint over the legs, click on the mask symbol again and invert the selection with the shortcut Shift+Ctrl+I. I go to Hue/Saturation and reduce the saturation to -15.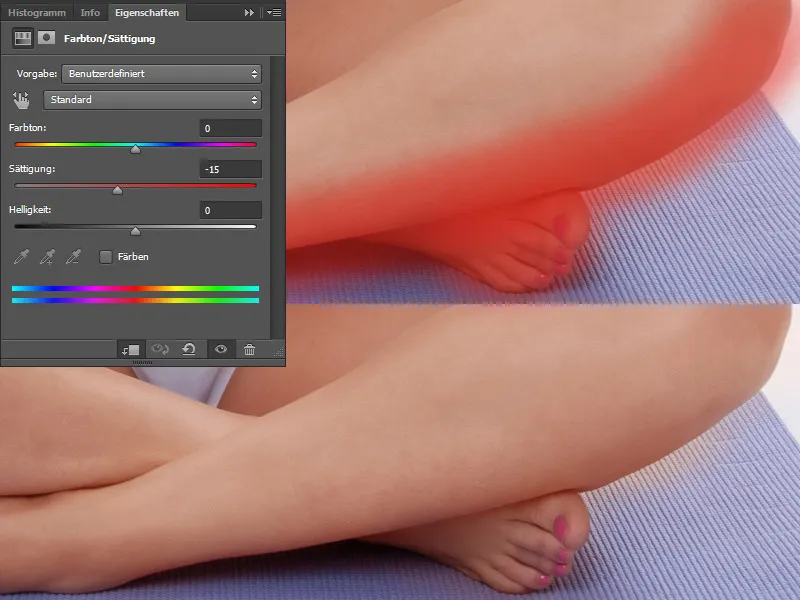
This is what it looks like in the before/after comparison.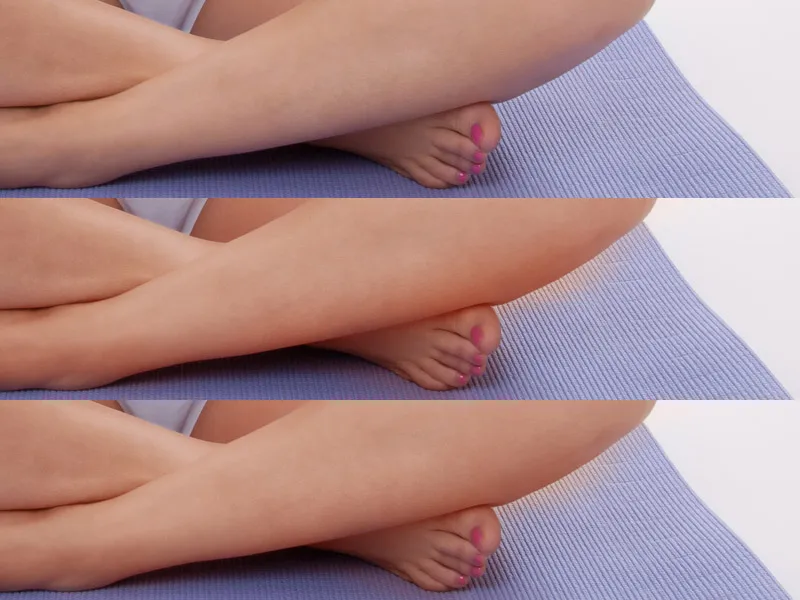
Step 9: Coloring the hair
There is also a color difference in the hair: the hairline has a gray cast that I will correct. The process is the same as for the skin. I take the foreground color from the light areas and the background color from the dark areas. Then I go to Image>Corrections>Transition. In the dialog box, I select Invert and confirm with OK. I select Color for the fill method.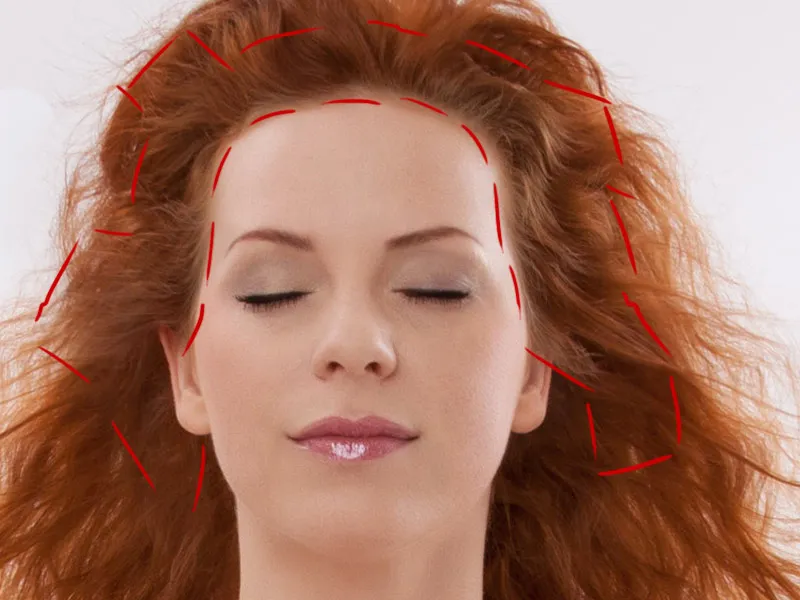
I correct the color via Color Balance. I Blender the layer with a black mask by holding down the Alt keyand clicking on the mask symbol. Using a brush with a soft edge ( I set the opacity and flow to approx. 20%), I paint over the hair.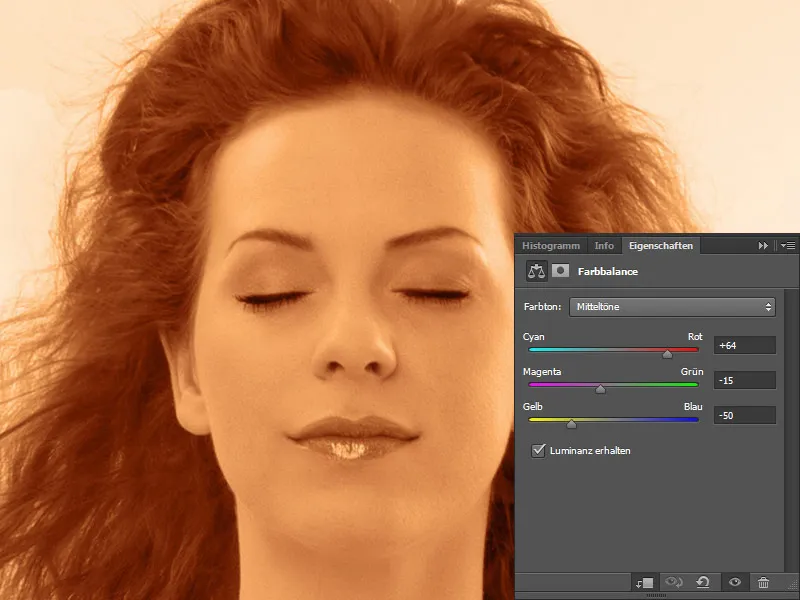
This is what my mask looks like ...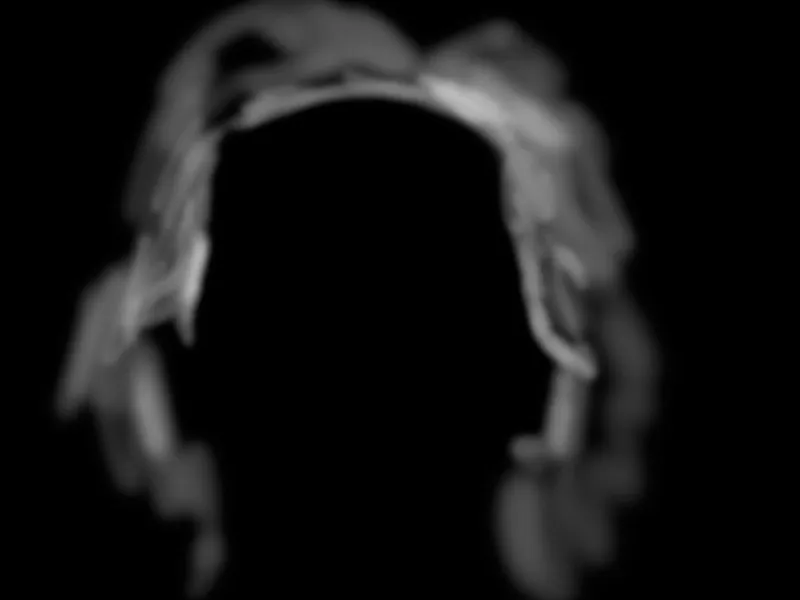
... and this is the result: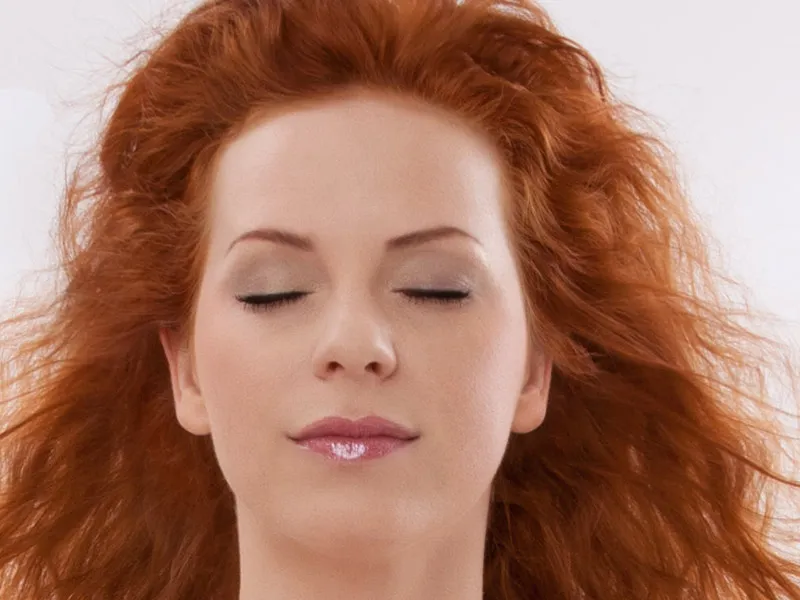
Step 10: Final correction
The coloring has given the whole picture a slight red cast, which I will correct using Selective Color Correction.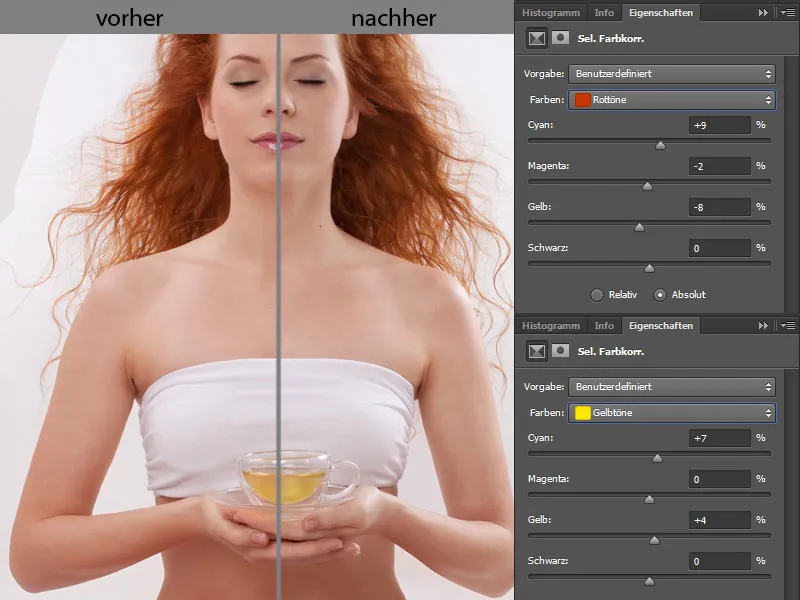
Here is my layer palette: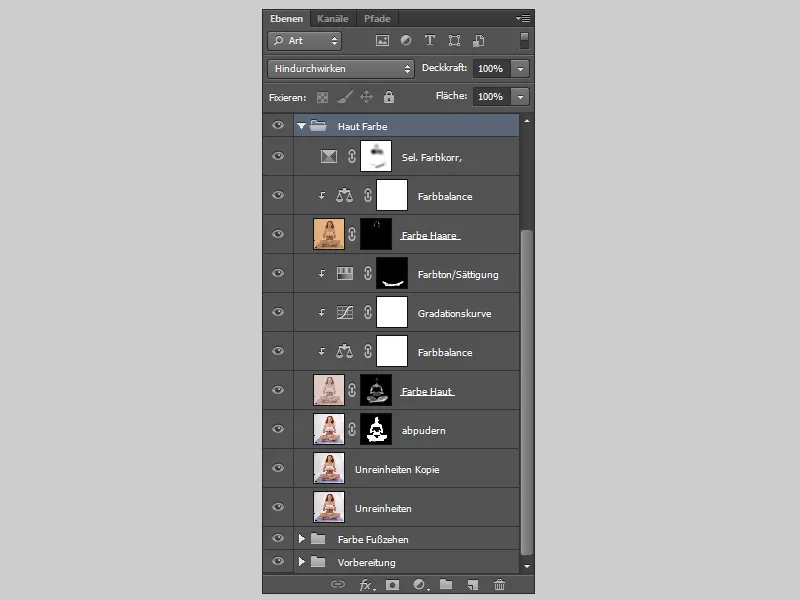
Step 11: Retouching
For the retouching, I create a new layer in Soft Light mode and select the Fill with neutral color option for Soft Light mode (50% grey).
I paint on the layer with a soft brush and set the opacity and flow to approx. 10%. I lighten the dark areas and darken the light ones. To make the spots on the skin clearly visible, I go to Channel Mixer and select the Monochrome option. I move the sliders so that my image is rich in contrast, where I can easily recognize the spots. When retouching, it is important to keep enlarging and reducing the image. What looks good at 100% may not look good at 33%. And you can quickly lose track of the proportions.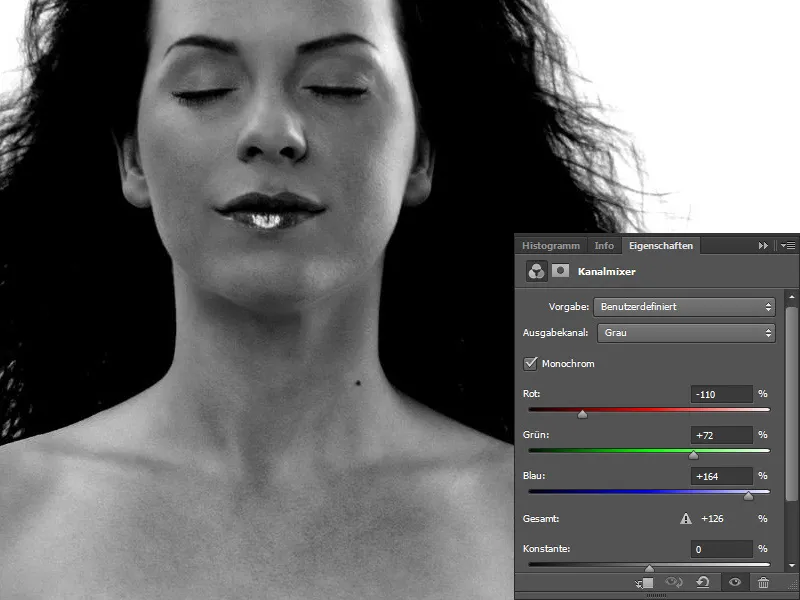
I put the three layers in a folder and call it "Retouch".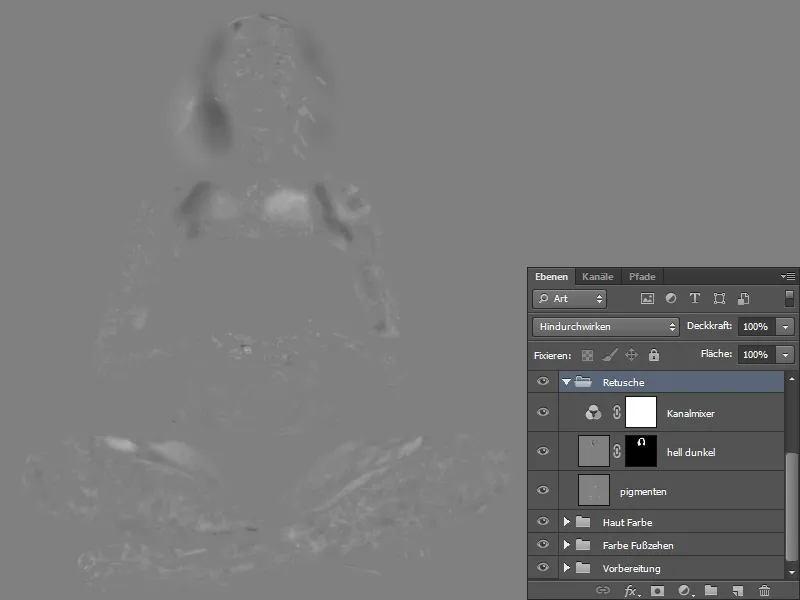
Step 12: Shape the clothes
Copy all the layers to a new one using the shortcut Ctrl+Shift+Alt+E. Now I'll create a new empty layer on which I'll blur the creases in the panties using the smudge finger tool. I set the strength to 50%, check the box next to Include all layers and carefully blur the creases. I call the layer "smudge finger".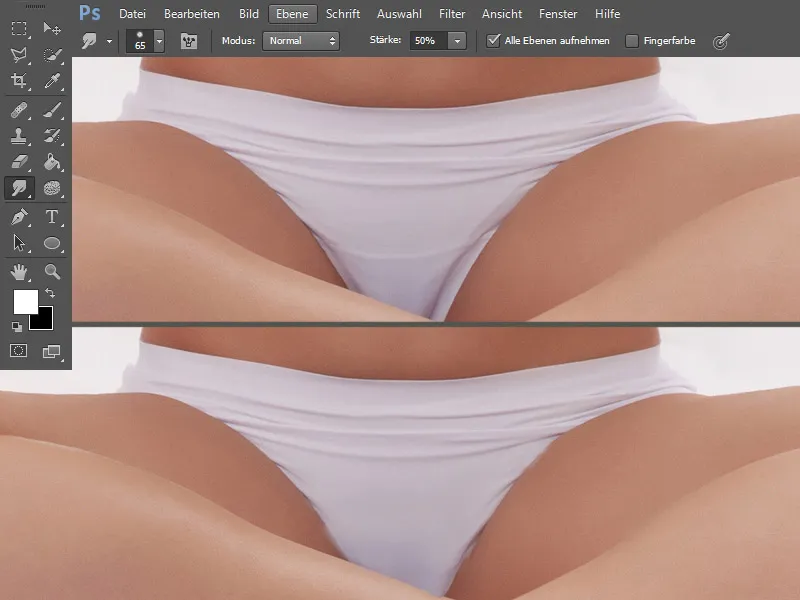
Step 13: Coloring
Coloring the panties
I create a new empty layer in Linear Burn mode , select a shade of green and color in the panties. I call the layer "Panties".
The coloring has created unsightly edges, which I remove using the copy stamp tool. I also do this on a new layer, which I call "Copy stamp". I choose a slightly smaller size for the copy stamp and keep the opacity and flow at 100%.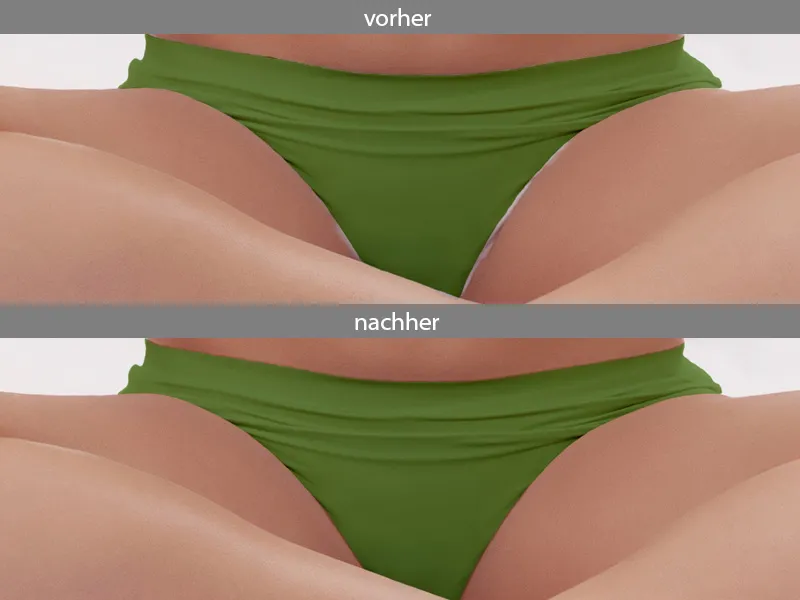
Coloring the upper part
Now I create a new layer for the upper part in the same mode and the same color. I mask the layer with a black mask by holding down the Alt key and clicking on the mask symbol. I paint the color with white paint. As the teacup is made of glass, the green color must also show through. I take a soft brush, set opacity and flow to 15% and paint carefully where there is glass.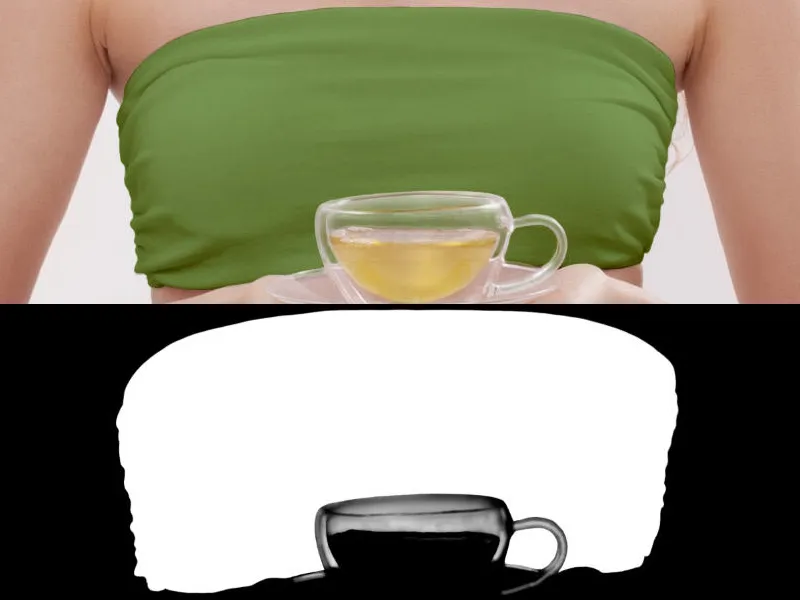
Step 14: Top - light reflections
On the new layer, I paint the light reflections with a hard brush with low opacity and flow. I carefully paint the folds. The color is a very light green.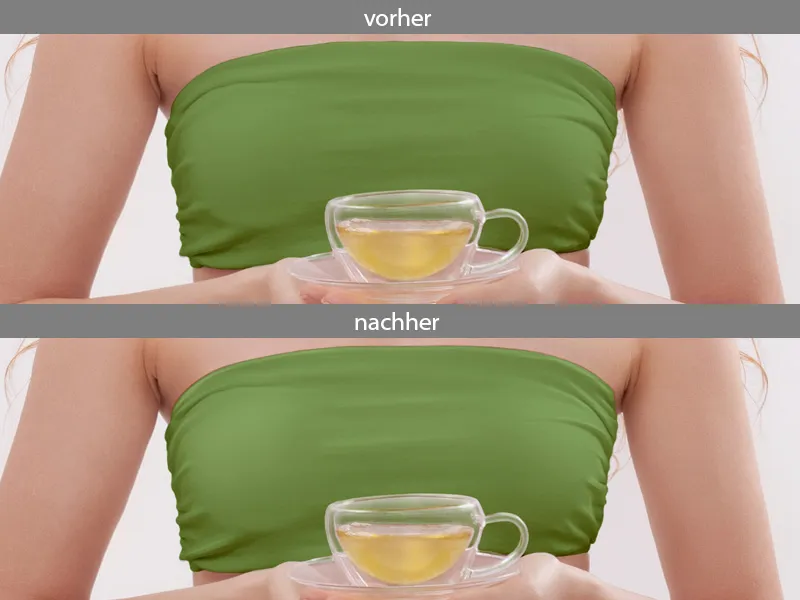
Here is my layer palette again: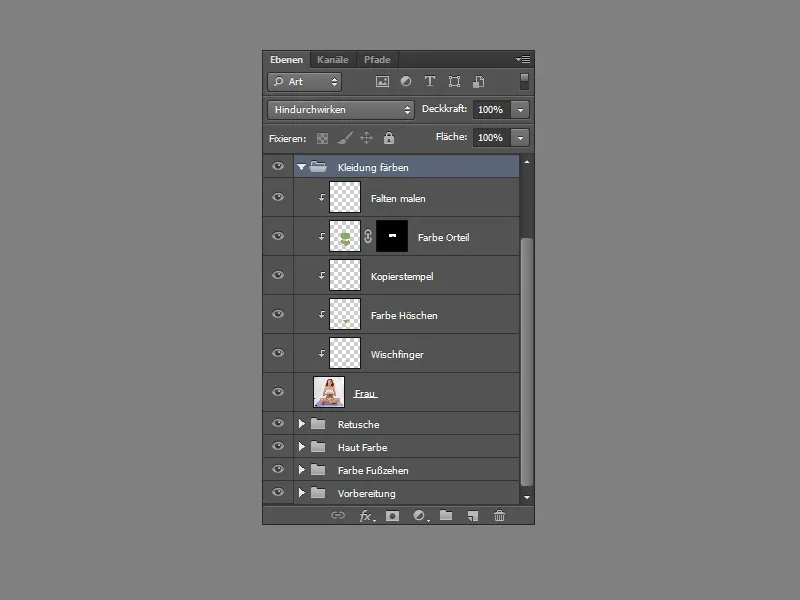
Step 15: Contrast
Use the shortcut Ctrl+Shift+Alt+E to copy all the layers to a new one. Duplicate this layer again, set the mode to Soft Light and the opacity to 50%. The image has become more contrasty, but much too red. I change this in Hue/Saturation. I set the hue to +45 and the saturation to -45. I click on the mask icon and paint over the hair and clothes with black paint so that my change only affects the skin. I put the layers in a folder and call it "Contrast".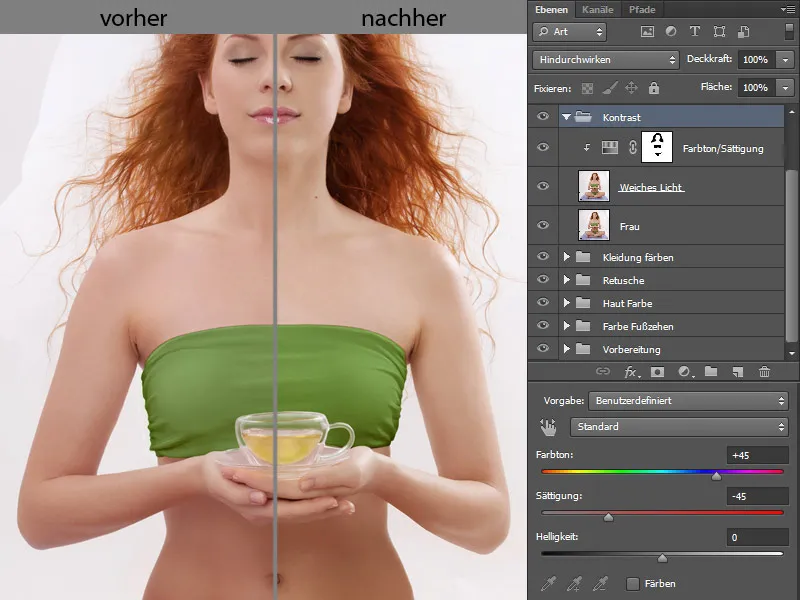
Step 16: Crop
Again, use the keyboard shortcut Ctrl+Shift+Alt+E to copy all the layers to a new one. I create a white layer under this layer. I go back to the layer with the woman, select the quick selection tool and go over the woman. If I have selected too much, I can always change my selection by clicking on + or - until I have selected everything.
When I have selected all the areas, I click on Enhance Edge.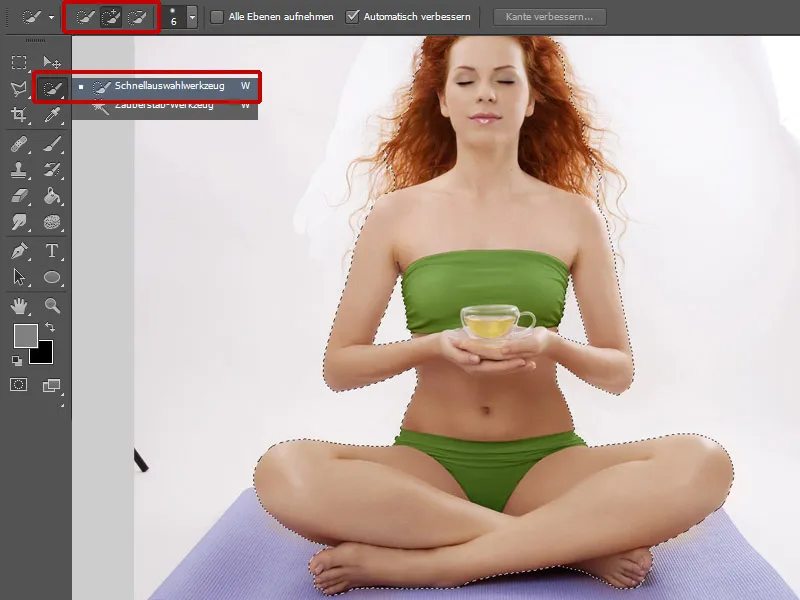
A window opens where I can correct my selection. I go over the hairs with the radius-improve tool. It is important that as many hairs as possible are retained. For the edge detection, I select a radius of 3 Px for Smartradius. I set Shift edge to +35 % and confirm my changes with OK. I paint on the mask in the areas where it was not cropped so well, e.g. the toes, until I get a good result. I put the layers in a folder and call it "Crop".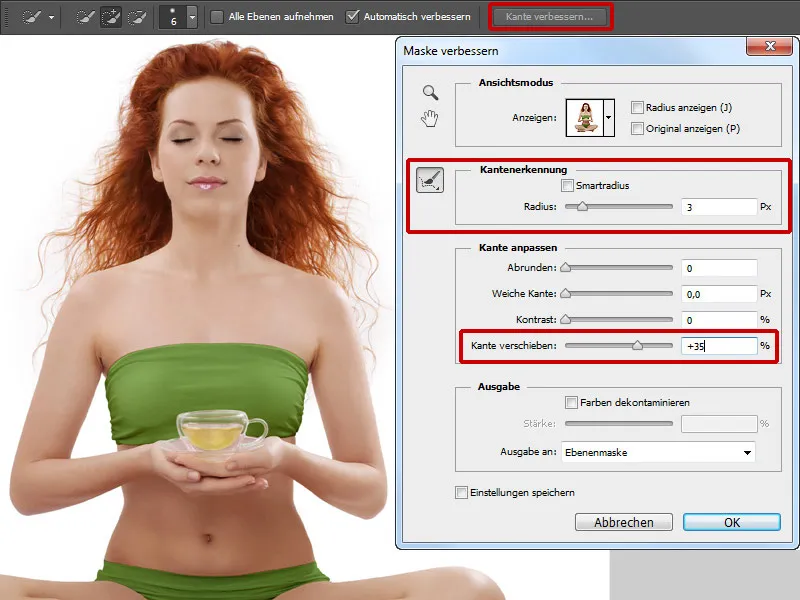
Step 17: Teacup
The teacup in the picture is an important element and needs to be presented accordingly. The first thing I'm going to do is change the color of the tea. I click on the mask symbol and carefully paint over the contents of the cup with a soft brush, click on the mask symbol again and reverse my selection. Now my tea is selected. I go to Gradation curves and drag the curve in the mid tones downwards. In Color Balance, I change the color a little.
Now I create a new layer in Color Dodge mode , pick up the color of the tea with the pipette and paint with a soft brush with low opacity and flow in the middle of the cup and a little on the edge. I use the pipette to pick up the color that suits me at any given moment. This gives the teacup more luminosity. Now I create a new layer and give the cup an additional outline to give it even more expression. I do this with a slightly hard brush tip with rounded corners.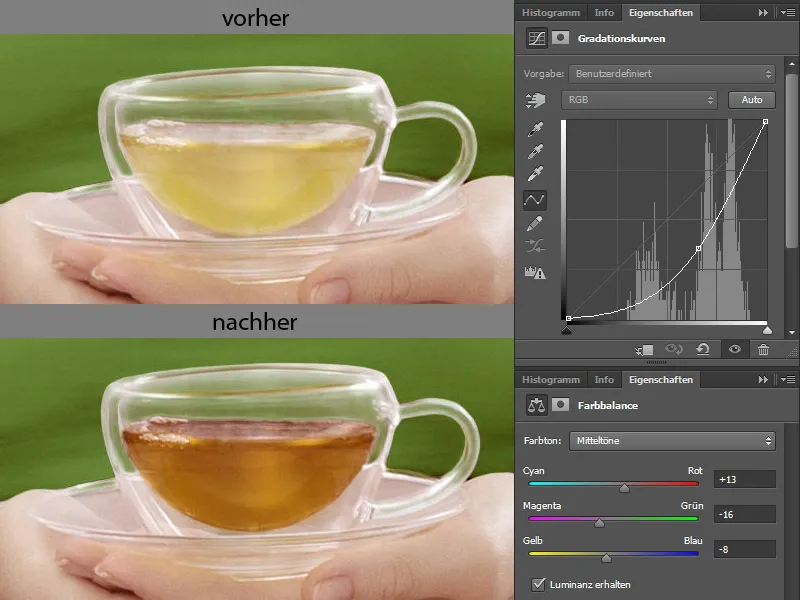
I put the layer in a folder and name it "Teacup".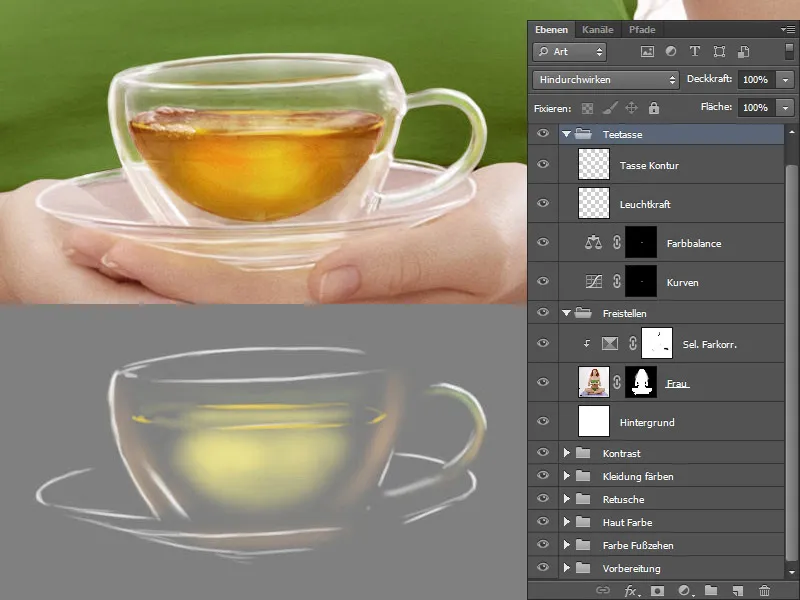
Step 18: Face
Painting eyelashes and eyebrows
I create a new layer and call it "Eyelashes, eyebrows". In the brush settings, I check the shape properties box and set the size jitter slider to approx. 22%. I paint the eyelashes and eyebrows with a small brush size and low opacity and flow. I use the pipette to apply the color to the areas where I am painting.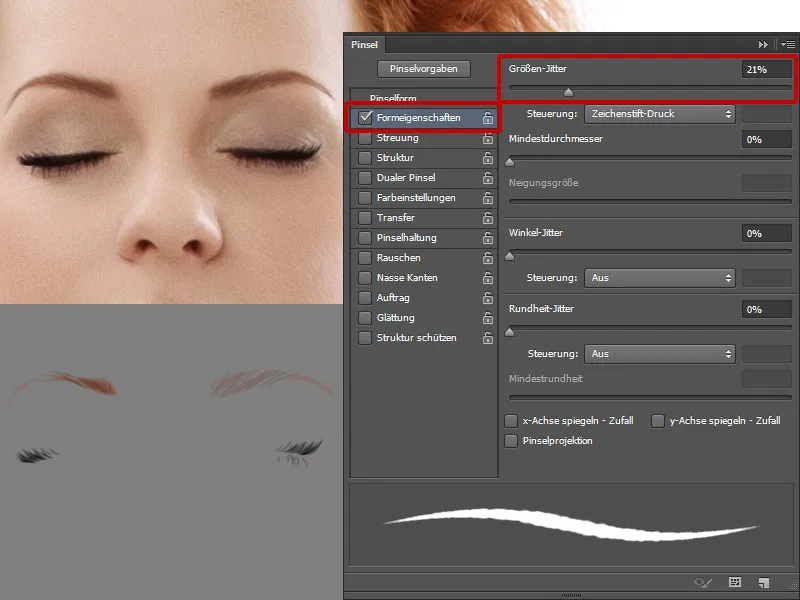
Lips
I don't like the lower lip, I'm going to replace it. I look for a suitable picture where I like the lips. I use the lasso to select the lower lip and insert it into my picture. I adjust the shape by transforming it. I duplicate the layer with the lower lip and use the keyboard shortcut Ctrl+T to flip the layer vertically. I call the layer "upper lip" and mask it out with a black mask. Using a white brush with low opacity and flow, I paint the glossy areas. This gives the lips more volume.
I click on the mask icon and paint over the lips and cheeks to add some color to the cheeks and change the lip color a little. I click on the mask again to load my selection, then I invert it and go into color balance.
I create a new layer in Soft Light mode and fill the layer with 50% gray. Using a soft brush with low opacity and flow (approx. 10%), I even out the pigment spots, make the eyelids a little more expressive and give the nose a little more contour.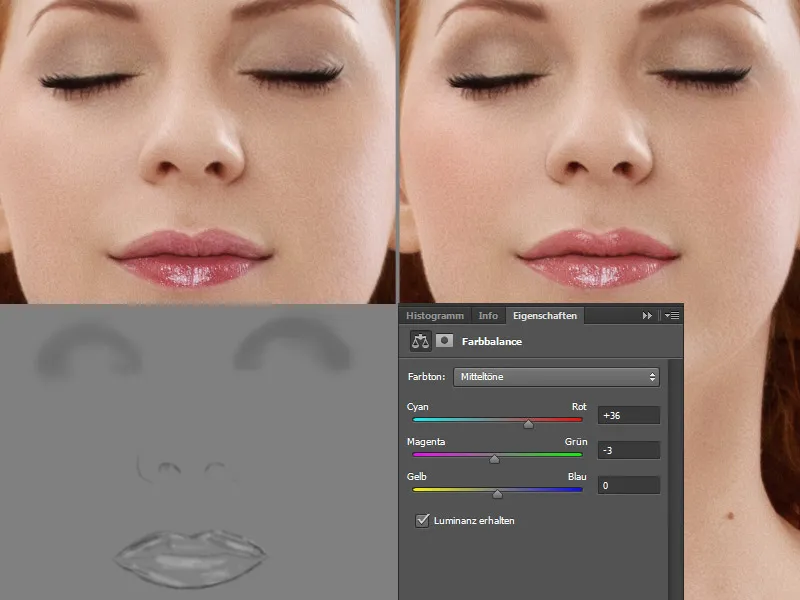
Freckles
As a final step, I paint in a few freckles. I do this on a new layer. I use a brush with lots of large and small dots. The color of the freckles is a warm red-brown tone.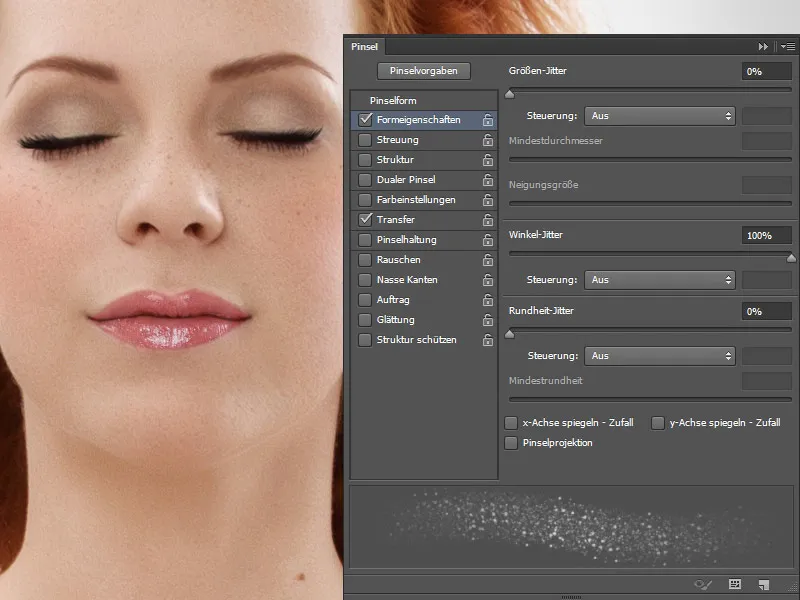
Here is my layer palette: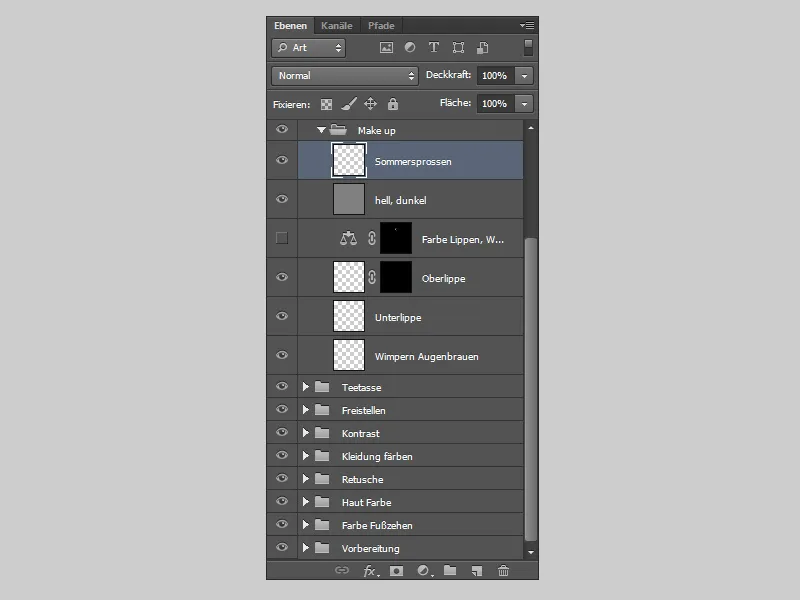
And this is what it will look like at the end of the edit:.webp?tutkfid=78112)


