An embroidery pattern effect gives your typography a handmade, textile look and is ideal for creative designs that radiate warmth and individuality. With Photoshop, you can easily create this effect by combining textures, layer styles and special brushes. In this tutorial, I'll show you step by step how to turn typography into a realistic embroidery pattern - perfect for invitations, posters or social media graphics. Let's get started and turn your font into an artistic embroidery design!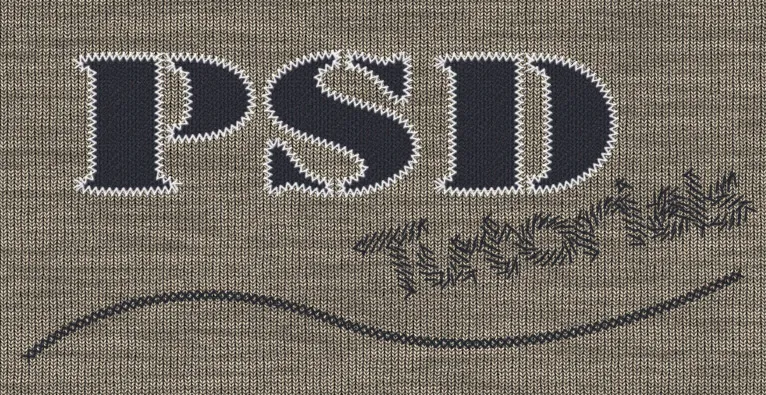
Step 1: Background texture
My document has the size 800 x 600 pixels.
In my example, I choose a textile background texture that I took from our texture pack from TutKit.com.
The texture is attached to this tutorial as working material.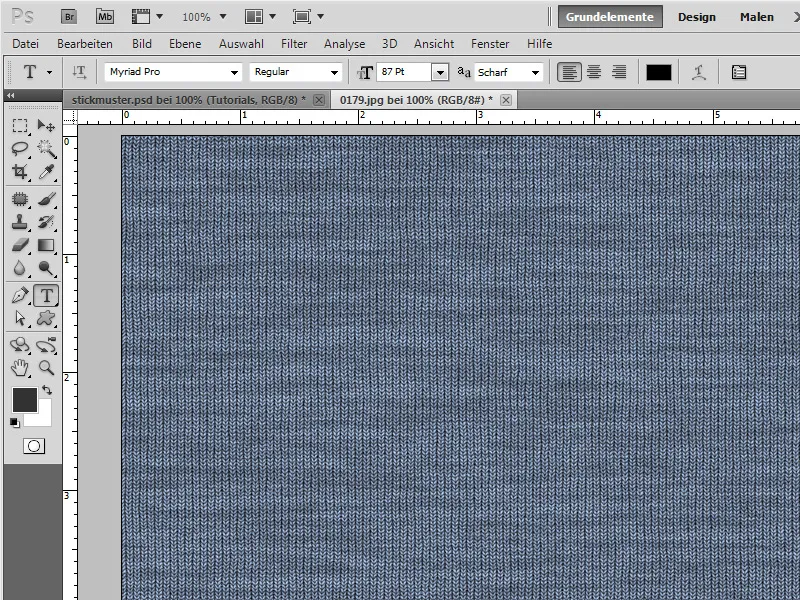
To give the fabric texture a yellow hue, I create a Hue/Saturation adjustment layer with the values
- Hue: -180
- Saturation: -42
- Brightness: +14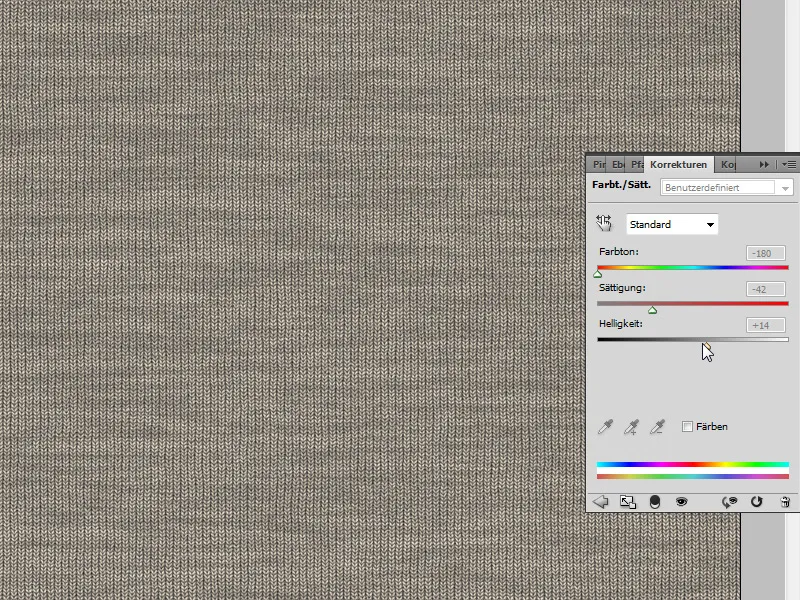
Step 2: Placing text
I write the letters PSD in black in my document using a 200-point Expanded Army.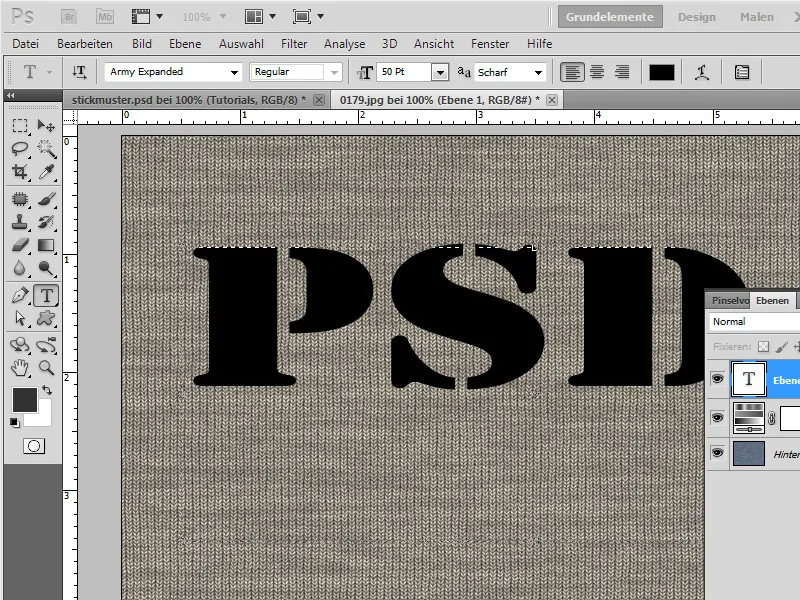
Step 3: Select text and create selection as working path
I select the letters by pressing Ctrl and clicking on the layer thumbnail of my text layer. Now I select the Paths panel and click on the Create working path from selection icon.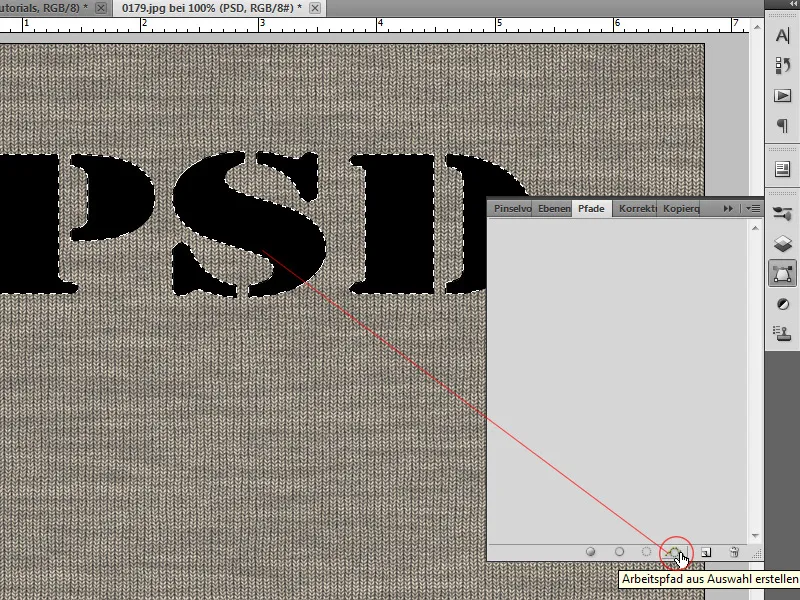
Step 4: The selection is now a working path
Now I can fill my work path outline with a brush. It is necessary that my brush tool is activated and that I have a suitable embroidery design brush in my repertoire as a brush preset.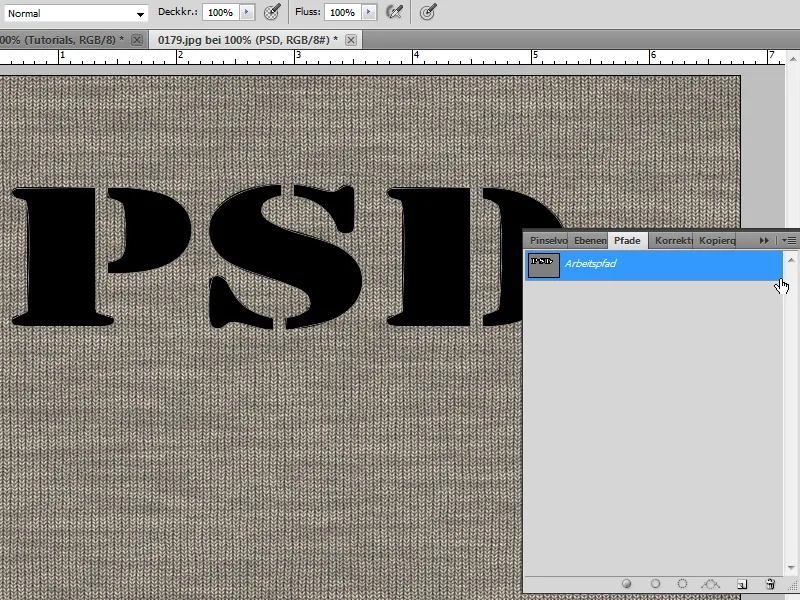
Step 5: Set the embroidery pattern as a brush preset
I create a new document with the shortcut Ctrl+N. The new document has the size 50x50.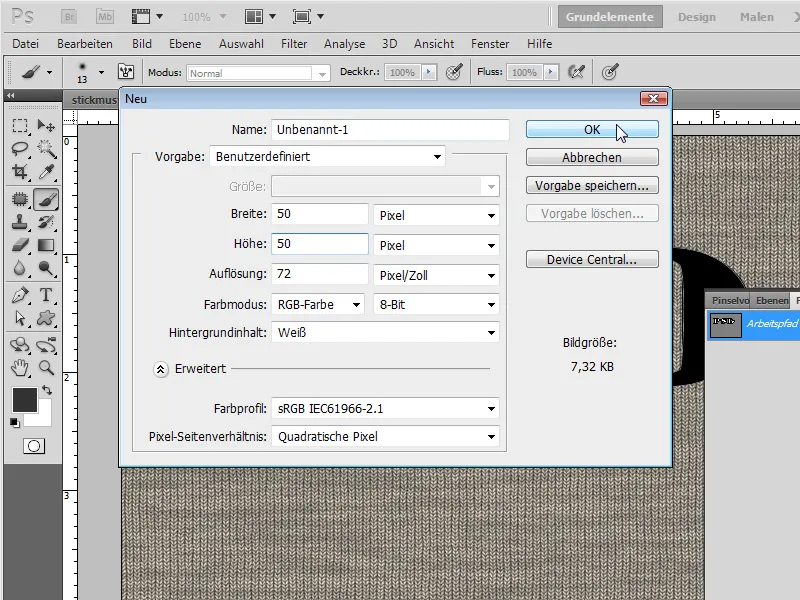
I create a new layer with Ctrl+Shift+Alt+N. I can hide the background layer so that the background is transparent.
I zoom to approx. 500 percent in order to draw the brush template properly in the document. I choose a round hard brush and simply draw a "V" in my new document. Important: When drawing, please make sure that the "V" does not touch the edge. Otherwise you will end up with hard, unsightly edges when brushing later.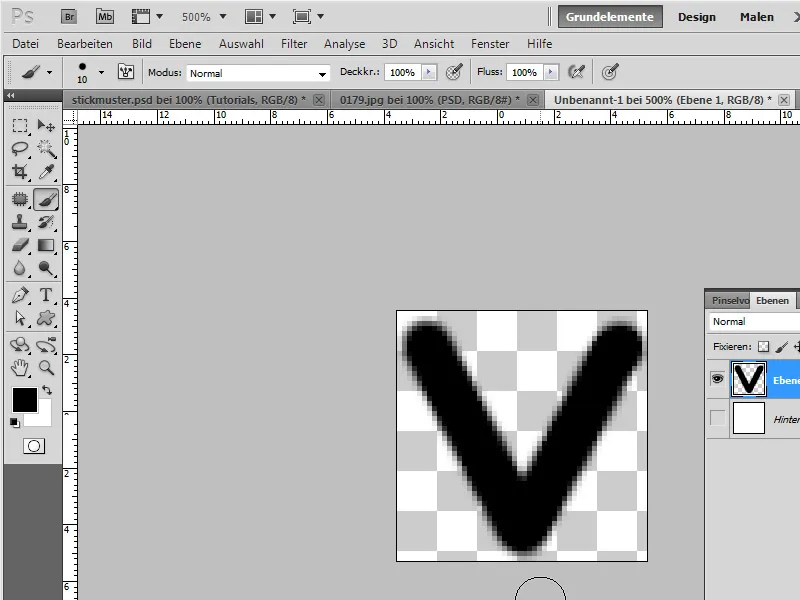
I can then select the V by pressing Ctrl and clicking on the layer thumbnail of my V layer and save it as a new brush tip via the Edit>Set Brush Preset menu.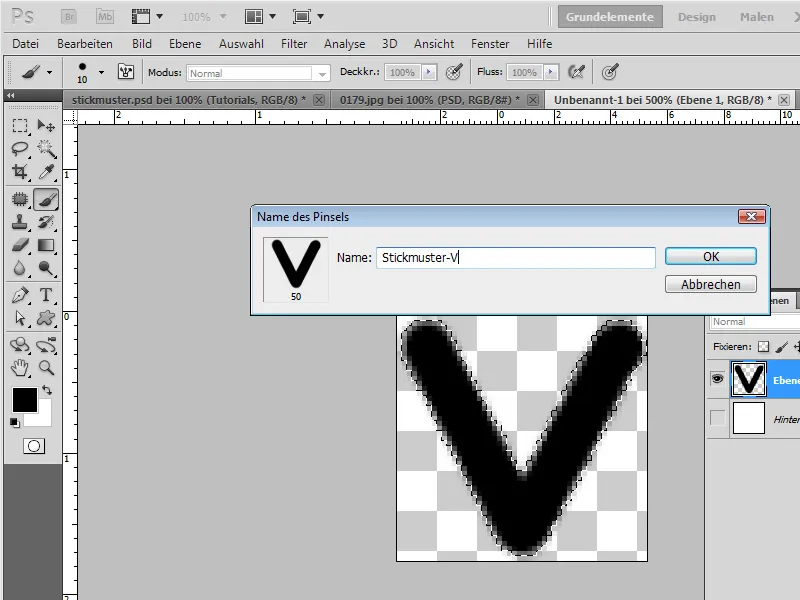
Step 6: Brush settings in the brush panel
Back to the original document. I open the brush control panel with the shortcut F5. The brush tool B is activated. I now find my previously defined brush tip in the presets.
I select a size of 12 pixels with a distance of 84 percent.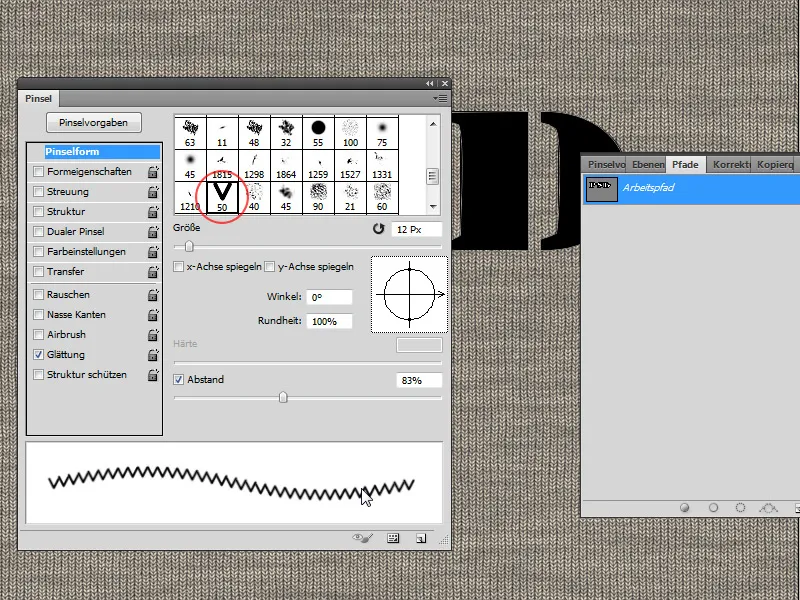
In the shape properties, I set Angle jitter under Control: Direction. This setting ensures that the continuation of the brush application is also displayed correctly for curves and corners.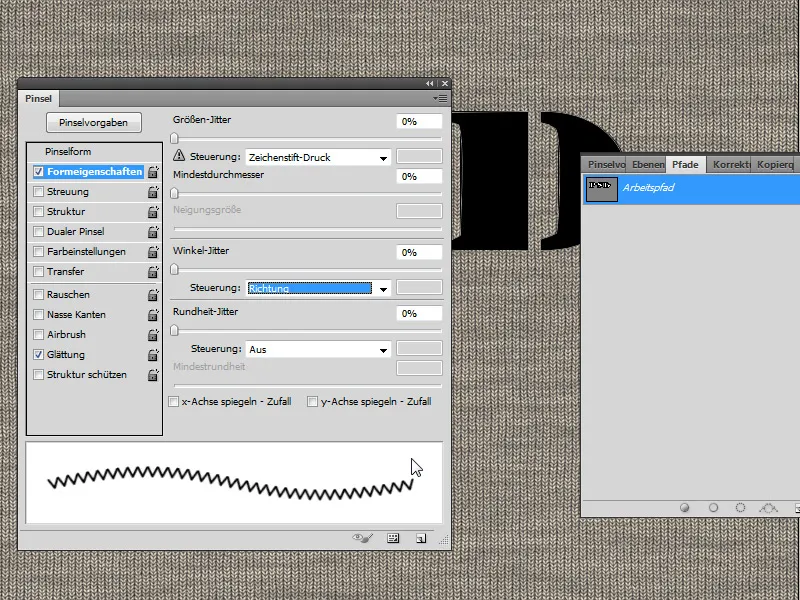
Step 7: Fill path contour with brush
I create a new layer with the shortcut Ctrl+Shift+Alt+N. The foreground color is a light grey (90 percent brightness).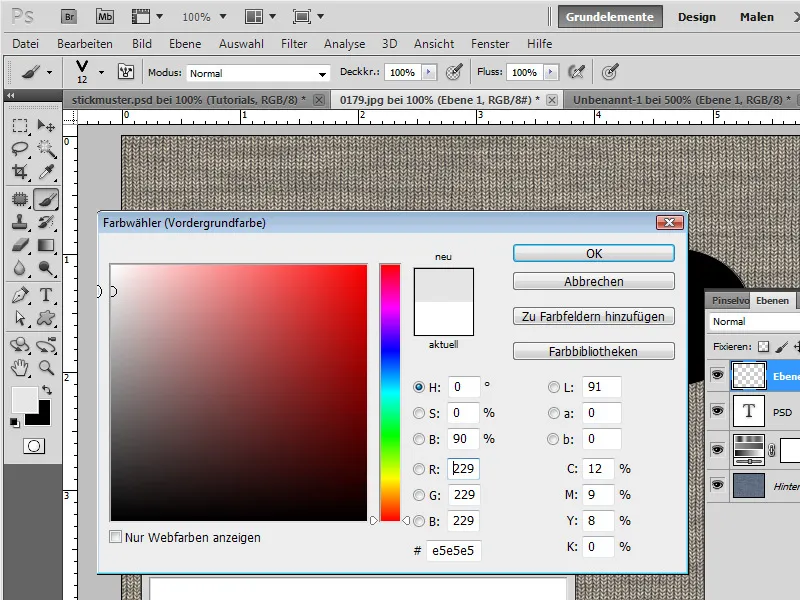
The newly created layer is activated. I call up my Paths panel and select the Fill path outline with brush icon.
And now my text has an embroidered outline.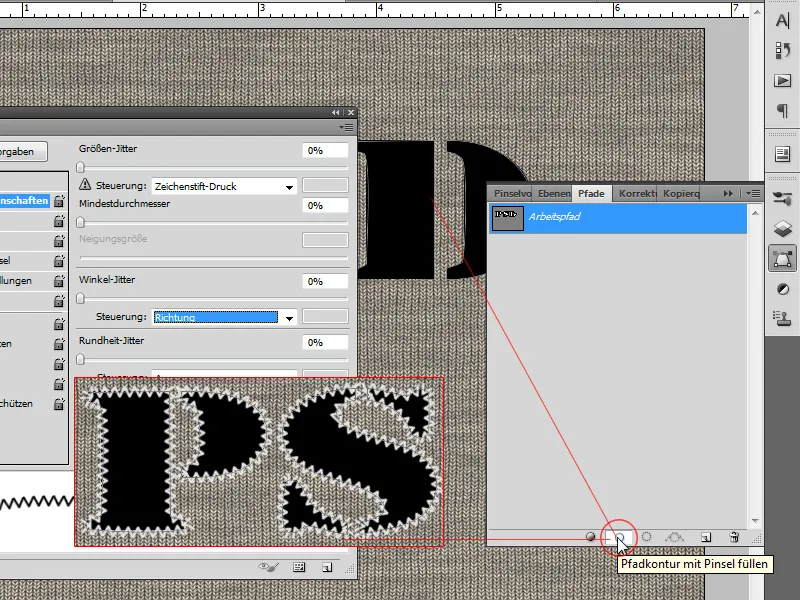
Step 8: Fine-tuning the embroidery design
To make the embroidery pattern look neat, I adjust the look a little in the layer's fill options.
Drop shadow:
- Opacity: 30 percent
- Distance: 1 pixel - Trapping: 0 - Size: 0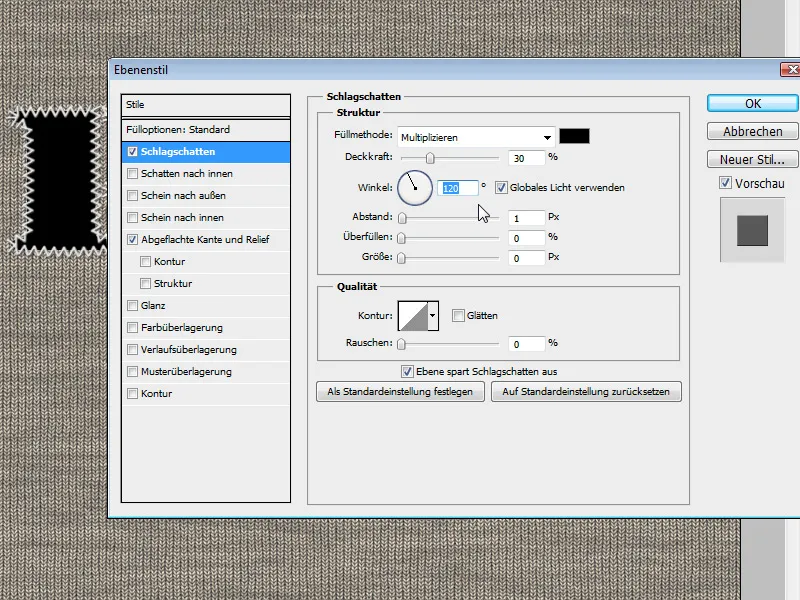
Flattened edge and relief:
- Style: Flattened edge inside
- Technique: Round off
- Depth: 100 percent
- Size: 0
- Blur: 0
- Shading: Standard settings, 75 percent for both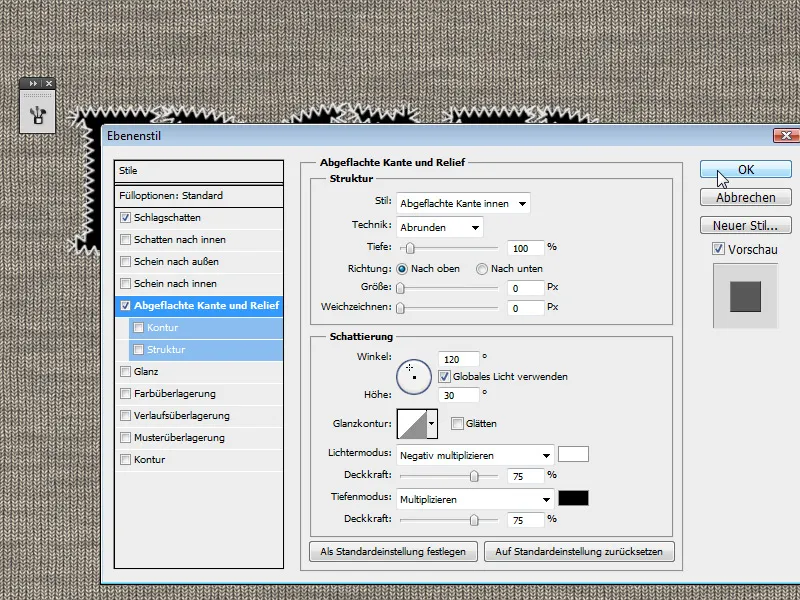
Now the embroidered outline also has a slight drop shadow so that it looks a little more three-dimensional.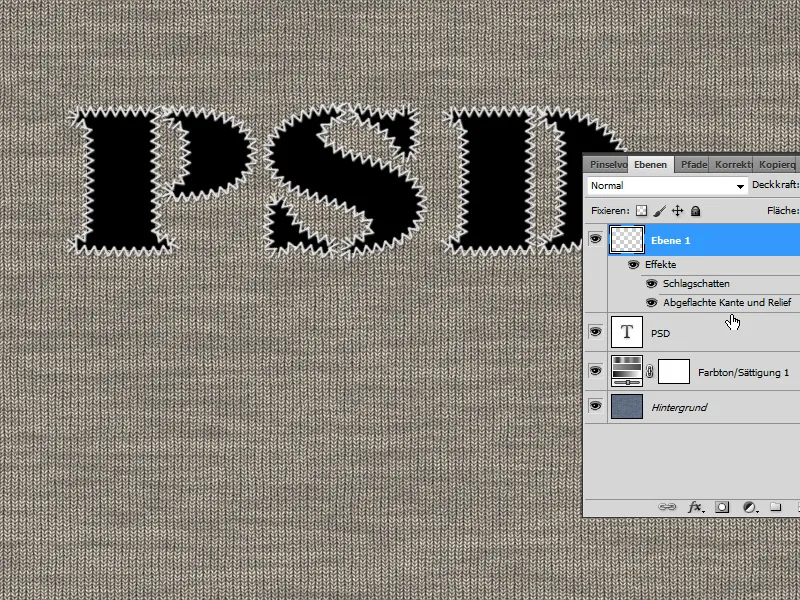
Step 9: Create a denim texture for the inside of the letter
First of all: A jeans texture is already available as a template in Photoshop. I call up the fill options for my text layer and select Pattern overlay. I call up pattern 2 in the submenu.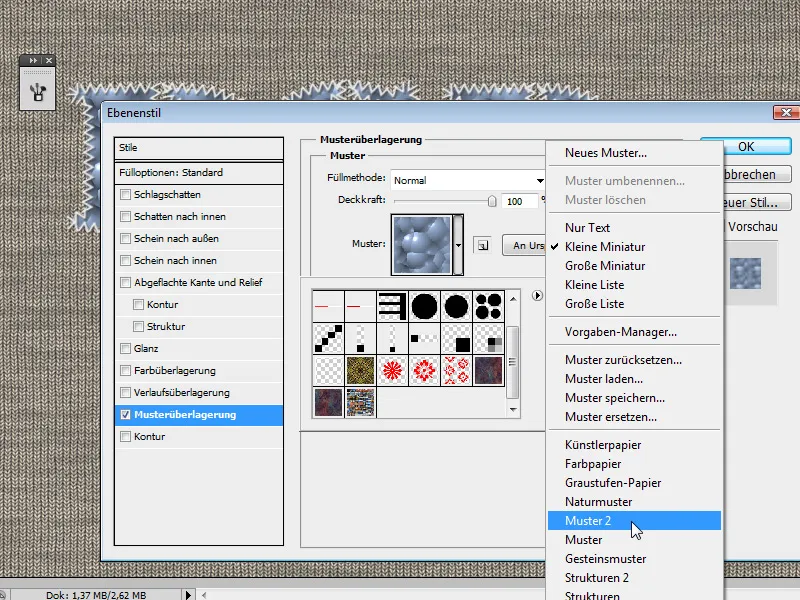
There I find a ready-made jeans texture.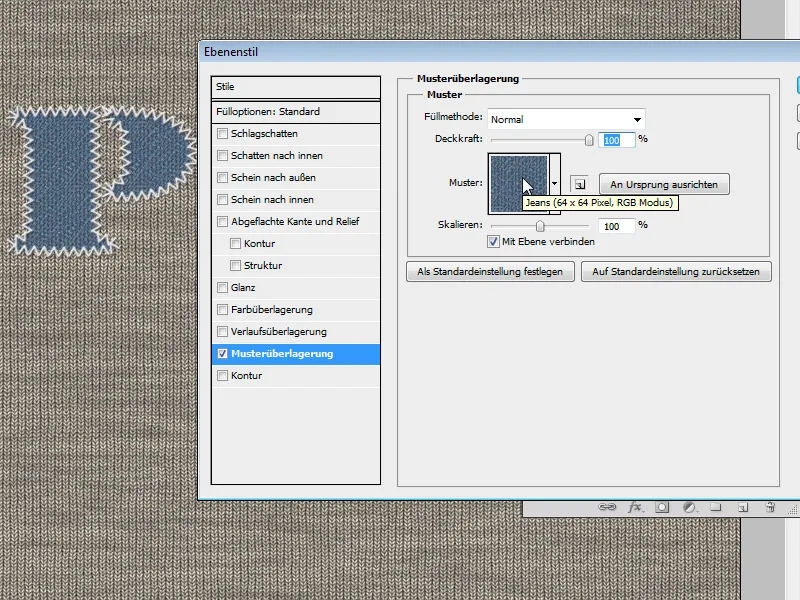
To have a little more freedom in fine-tuning the texture look, I can also create the jeans texture myself very easily. This is because the Photoshop pattern template is extremely small (64x64px) - albeit tileable - and can only be changed acceptably in appearance in a roundabout way.
I create a new file with the shortcut Ctrl+N. The size of the document is 800x800px. I fill the background layer with a medium blue (3c5695).
Then I create a new layer with the shortcut Ctrl+Shift+N . In the dialog box that opens, I select Soft light under Mode and activate the checkbox for a 50% grey. In the color picker, I set the standard colors with the shortcut D.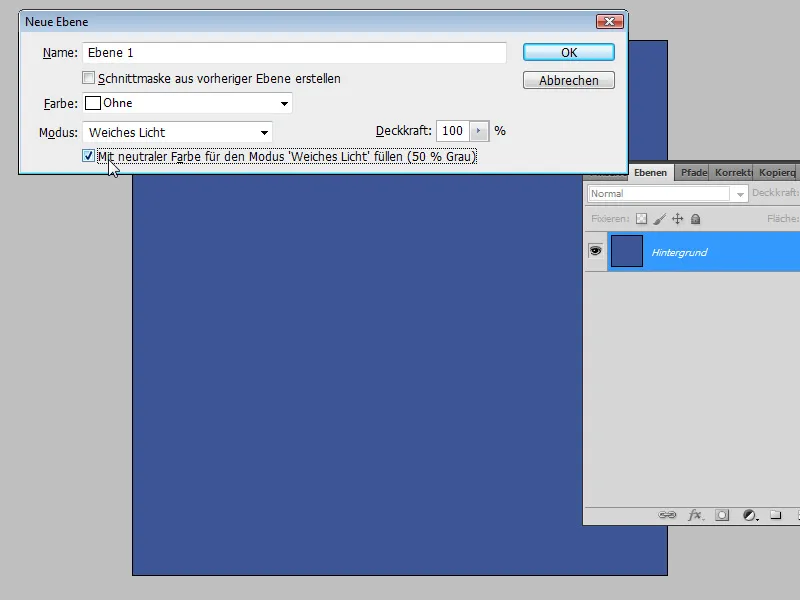
I select the rasterization effect drawing filter.
- Size: 1
- Contrast: 0
- Pattern type: Line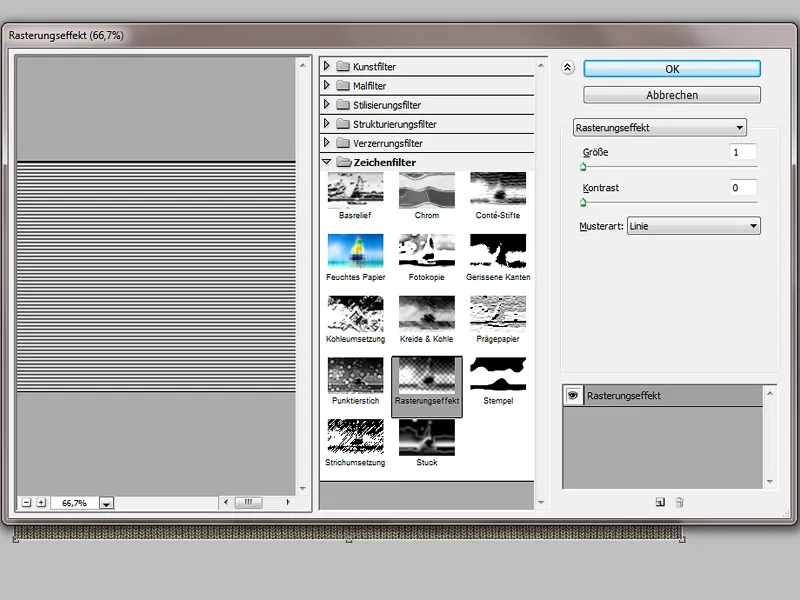
I can now convert this layer into a smart object so that I can vary the subsequent filters very easily as smart filters.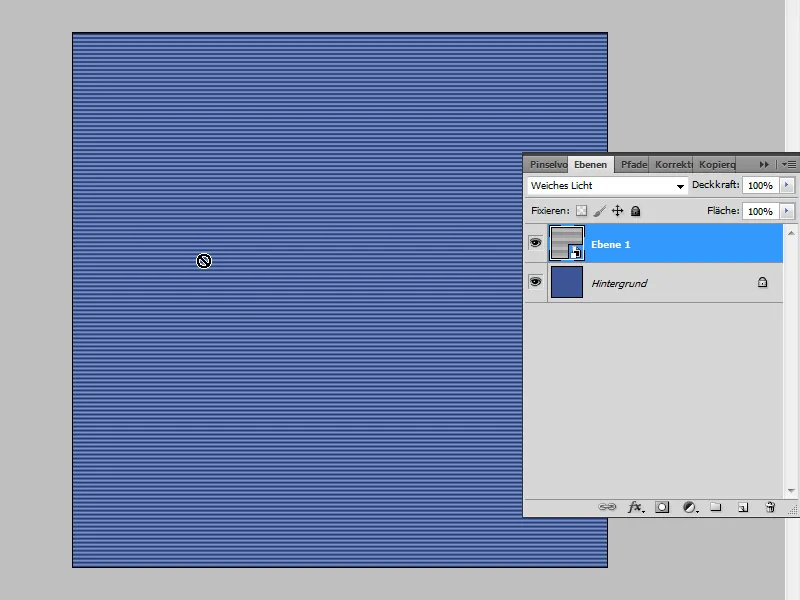
The first smart filter I apply is the Mezzotint coarsening filter with the Small dot selection.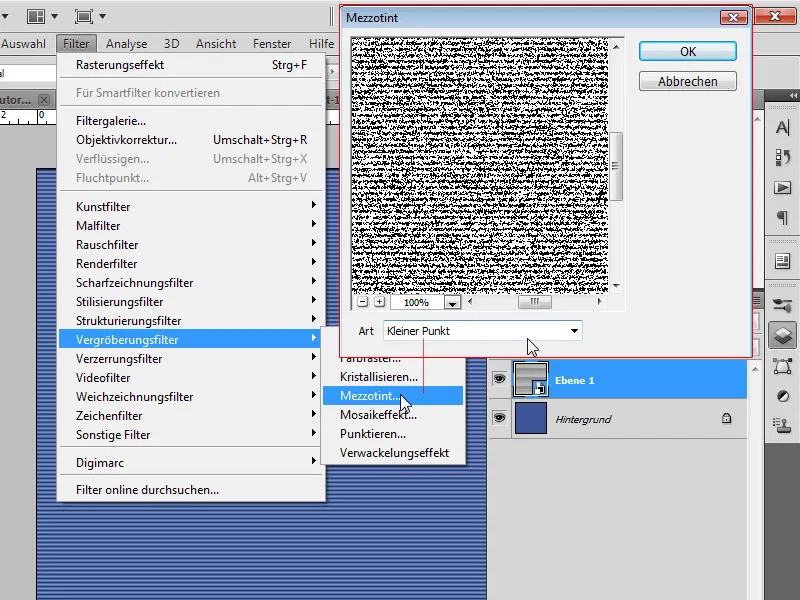
The next smart filter is the Gaussian blur filter. I set this to a radius of 0.8 to 1 pixel.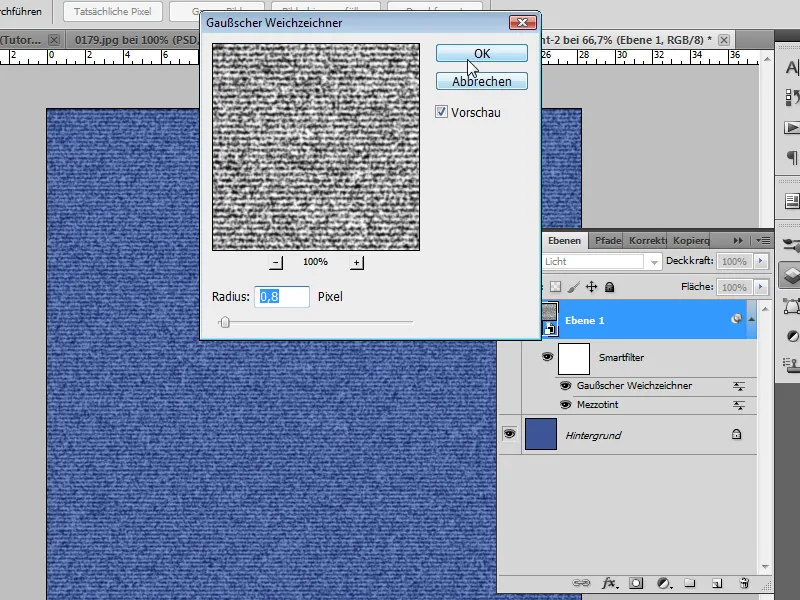
I duplicate the layer with the shortcut Ctrl+J and set the duplicate to Multiply layer mode. I transform my layer using the shortcut Ctrl+T. I enter a value of -45 degrees for rotation in the menu bar and then enlarge my layer using the side and corner points so that the entire document is filled again.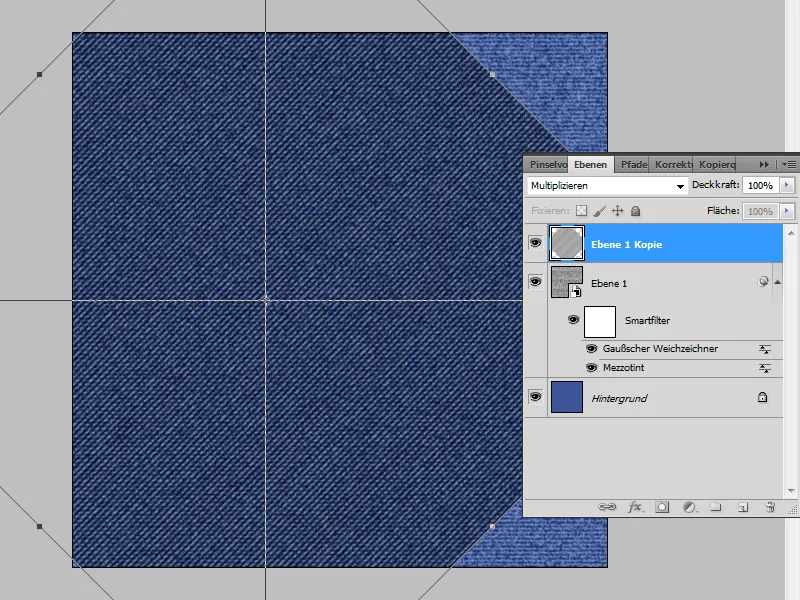
My jeans texture is finished, which also looks a bit like carpeting. I can now define my fabric texture as a pattern via the Edit menu.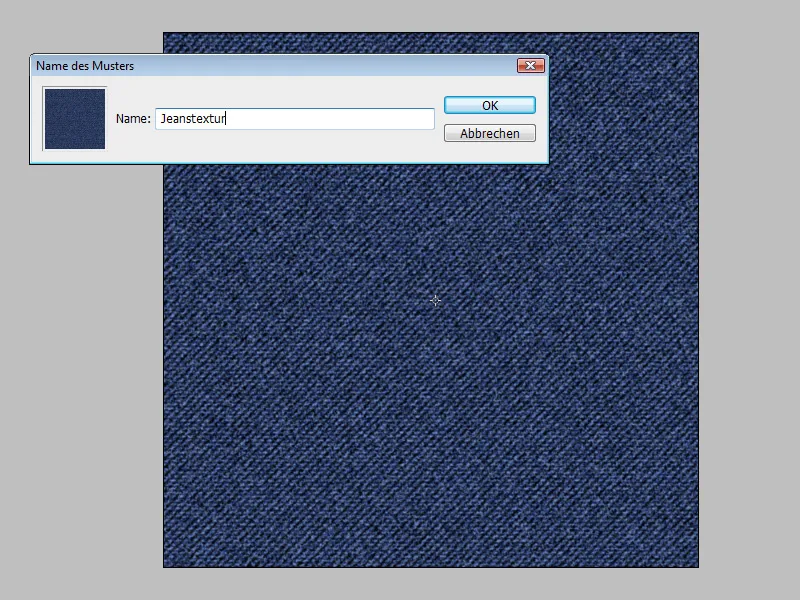
In the fill options in the Pattern overlay tab of my text layer, I now select my previously defined pattern. I scale the pattern to a value of approx. 60-65 percent with an opacity of approx. 60 percent.
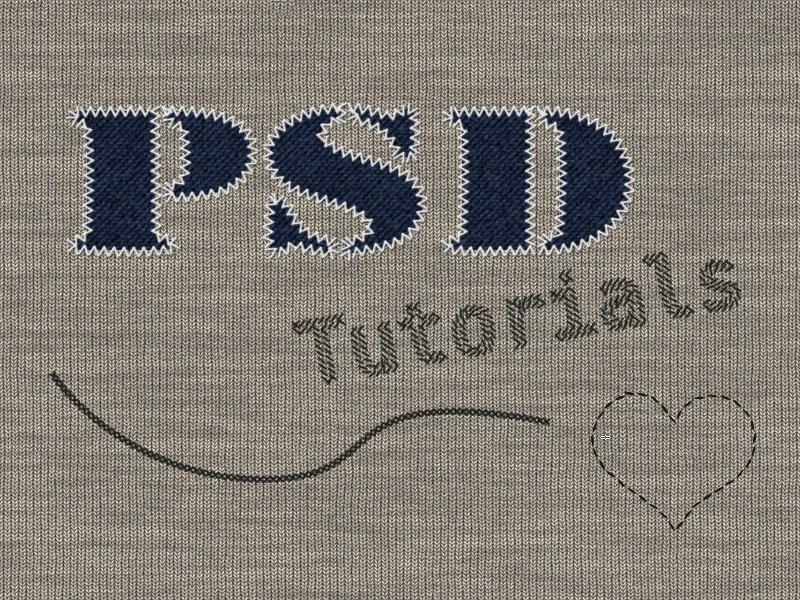
My embroidered typo effect is finished.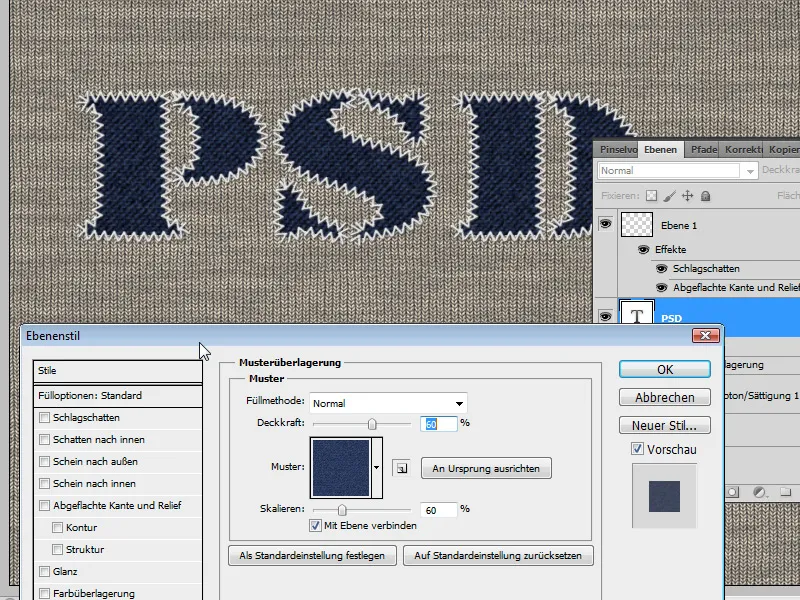
Variations
I can create different embroidery styles using this procedure with the brush template I have created. I can also create a simple stitch as an embroidery pattern effect by simply defining a diagonal line as the brush template.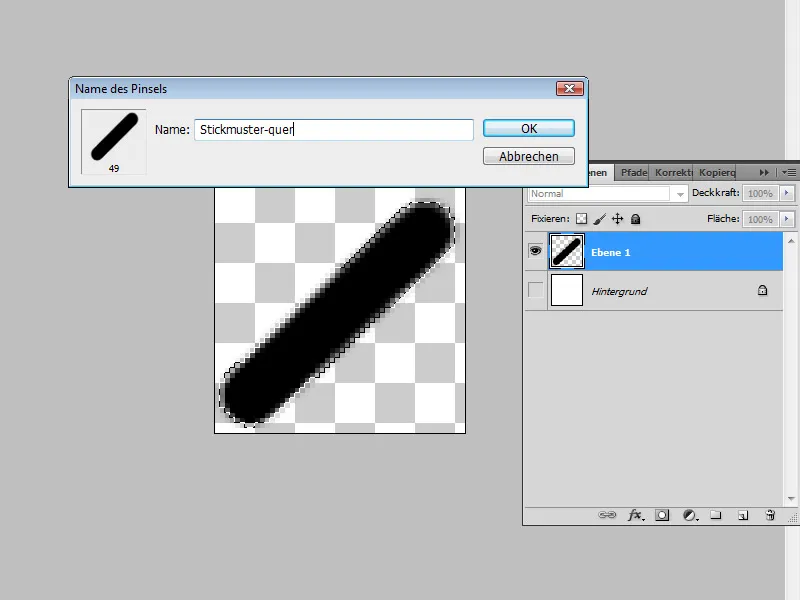
I can then use this for text - even without an inner fill.
I make a few fine adjustments again in the brush control panel (size 8 pixels with a spacing of 81 percent) and write the word "Tutorials" in a different font. Now I use the technique described above to fill my text as a path outline with the diagonal brush preset.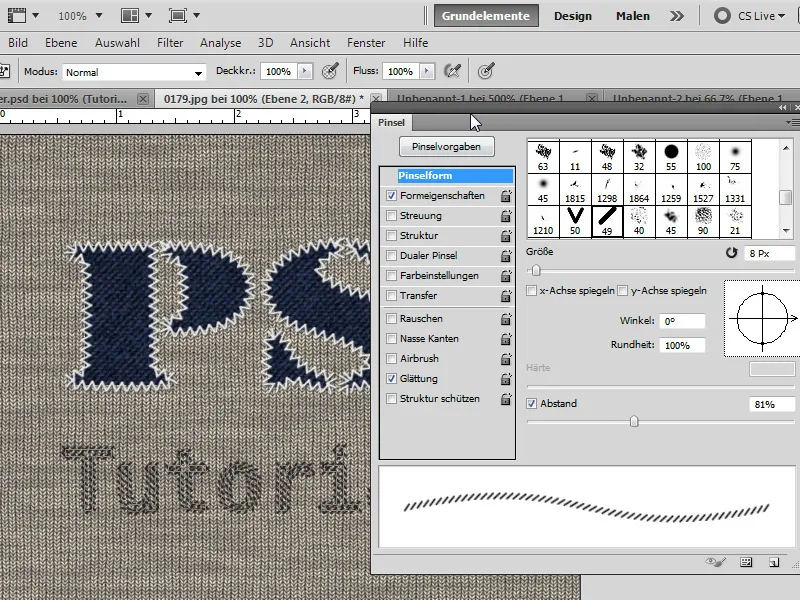
I can also simply apply a path outline twice to simulate a cross stitch. In this example, I have drawn a path with the pen tool. First, I apply the path outline as in the previous step. And secondly, I fill the path again with a brush outline when this brush tip is mirrored on the x-axis. And now I have a cross-stitch look. Alternatively, I can simply create an X as a brush template and simulate the cross-stitch in the same way.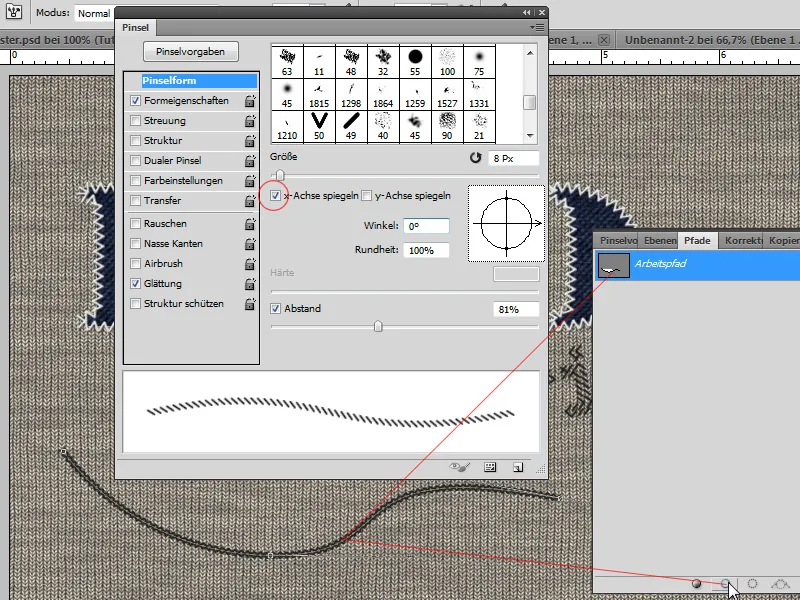
I can also create a straight brush that I can use as an embroidery design. To do this, I don't even need to create a new preset, but simply adapt an existing round, hard brush preset in the brush control panel.
In the brush control panel I set a
- size of 11 pixels
- a roundness of 37 percent
- with a spacing of 333 percent,
so that there are small gaps between the brush applications.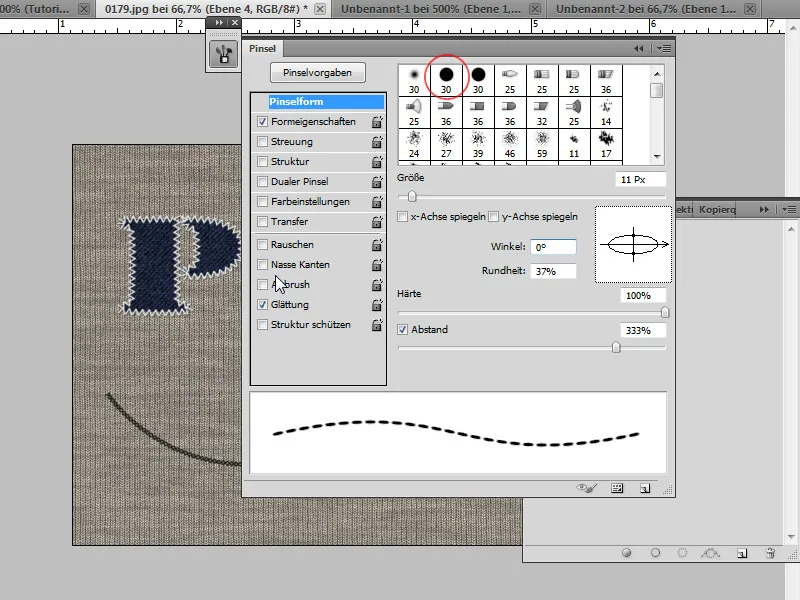
The angle jitter scatter remains set to direction. To ensure that the embroidery strokes do not appear too even, I set an angle jitter of 3 percent and a roundness jitter of 25 percent. Now I have an embroidery pattern that is not too exact, but quite realistic.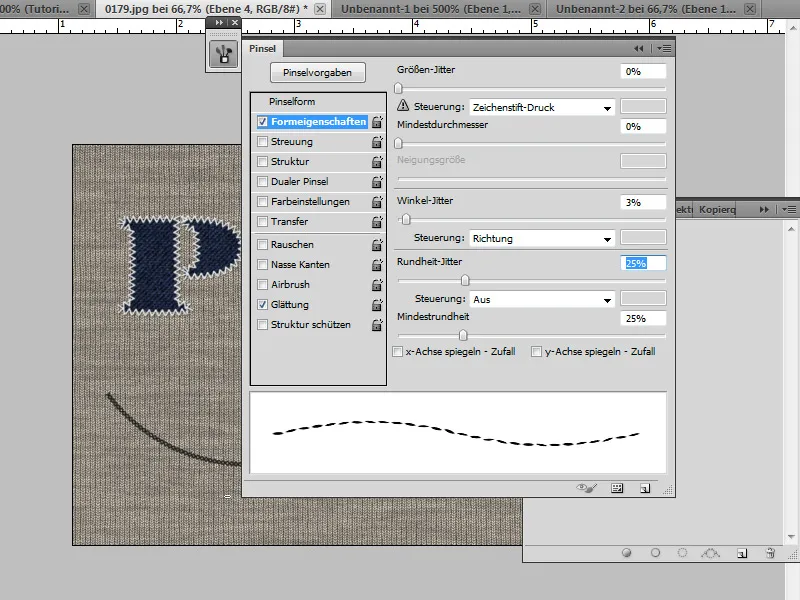
In my example, this time I drew a heart using the custom shape tool, which I selected and created as a working path. The path outline was then filled with the prepared brush tip.