In today's digital age, it is important to have a well-structured and maintained contact list. Mailchimp offers excellent tools to manage and organize your contacts. In this tutorial, I will show you how to manually add contacts to an Audience in Mailchimp, so you can maintain control over your subscribers.
Key takeaways
Adding contacts to an Audience in Mailchimp is a simple process that can be done by uploading files or manually entering email addresses. You can also tag contacts to clearly define their roles or status within your Audience.
Step-by-step guide
1. Select Audience
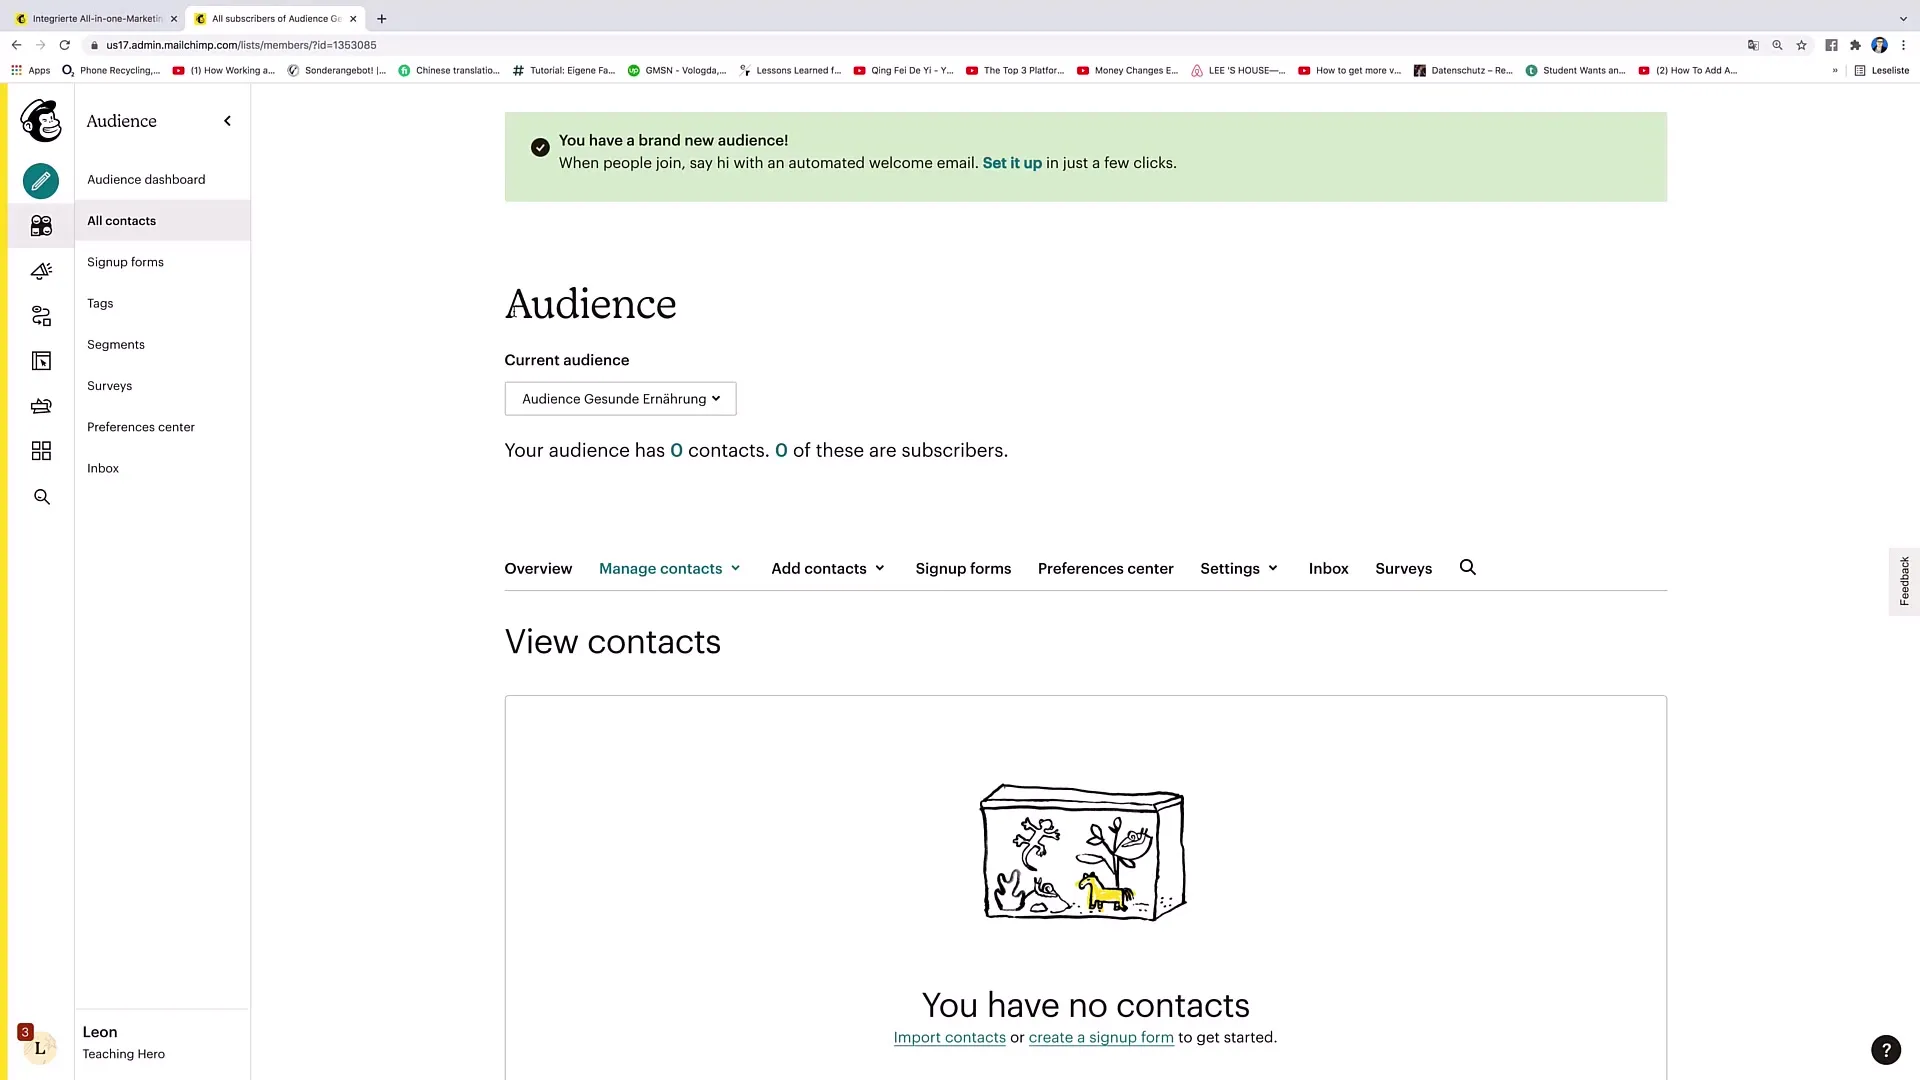
First, you need to select the Audience to which you want to add contacts. You will see the currently selected Audience displayed at the top of the screen, allowing you to switch between different Audiences at any time.

2. Import Contacts
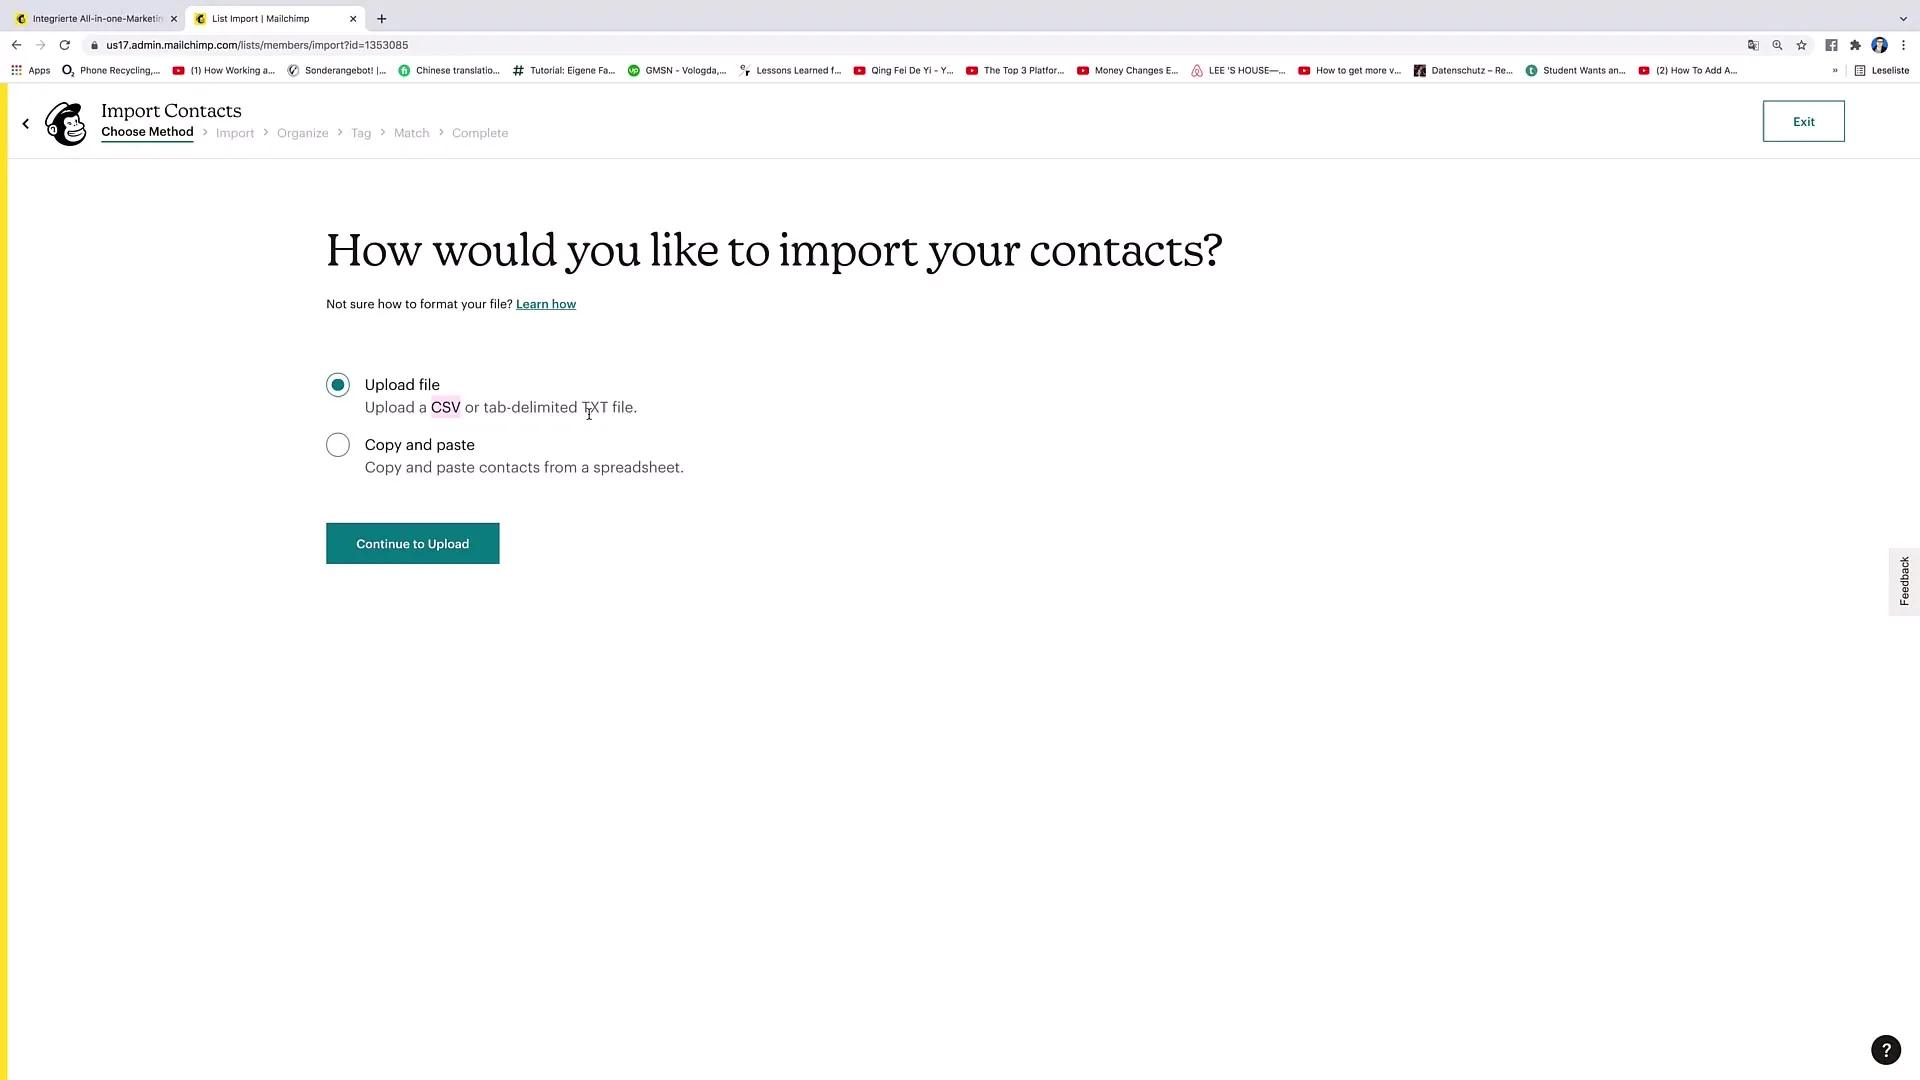
If you have selected your Audience and there are no contacts, you will be prompted to add contacts. To add a new contact, click on the "Import contacts" option. Here, you have two options: you can upload a file or enter contacts directly.
3. Upload File or Enter Contacts
If you choose the file upload option, you can upload a CSV or TXT file. For manual import, click on "CopyPaste". Here you can simply enter the contact's email address. Then click on "continue to organize".

4. Define Audience and Status
After entering the email address, you need to select the Audience to which this contact should be added. Make sure to choose the right status for the contact:
- Subscribed: If the person wants to receive your emails.
- Unsubscribed: If the person previously subscribed but no longer wishes to do so.
- Non-Subscribe: If you simply want to add the person without permission to send emails.
- Clean: An email address to which you do not want to send anything.
These options are important to respect the contact's consent and ensure that your communication remains efficient.
5. Update Existing Contacts
If the contact already exists, you can enable the option "Update any existing contacts" to ensure that all information is kept up to date. This is useful if, for example, the contact has a new email address or their personal data has been updated.
6. Enter Data and Assign Tag
Now you have the option to add additional information to the contact, such as name and address. You can also assign a tag to the contact. Tags are useful for storing additional information, such as whether someone is a customer or a potential customer. This organization helps you address contacts more effectively later on.
7. Complete Import
After entering all the information, click on "finalize import" and then on "complete import". Finally, review your entries to ensure everything is correct.
8. Check Audience
After a successful import, you can go back to your Audience to check the contacts. You will see that the Audience now has a new subscriber, and you can adjust or update all data if necessary.
Summary
With these steps, you can effectively add contacts to your desired Audience in Mailchimp. Remember to choose the right settings for each person's status and use tags as needed to organize your subscribers effectively.
Frequently Asked Questions
How do I manually add contacts?You can manually add contacts by opening a new contact form and entering the information directly or using the "Import contacts" function.
Can I import contacts from a file?Yes, you can upload CSV or TXT files to automatically import contacts.
What happens if I add an existing contact?If the contact already exists and you activate the "Update any existing contacts" option, the existing information will be updated with the new data.
How do I use tags in Mailchimp?Tags help you categorize contacts so you can access specific groups based on their status or interaction with your emails.
How do I check my Audience after importing?You can access the Audience at any time to review the added contacts and ensure that everything was imported correctly.


