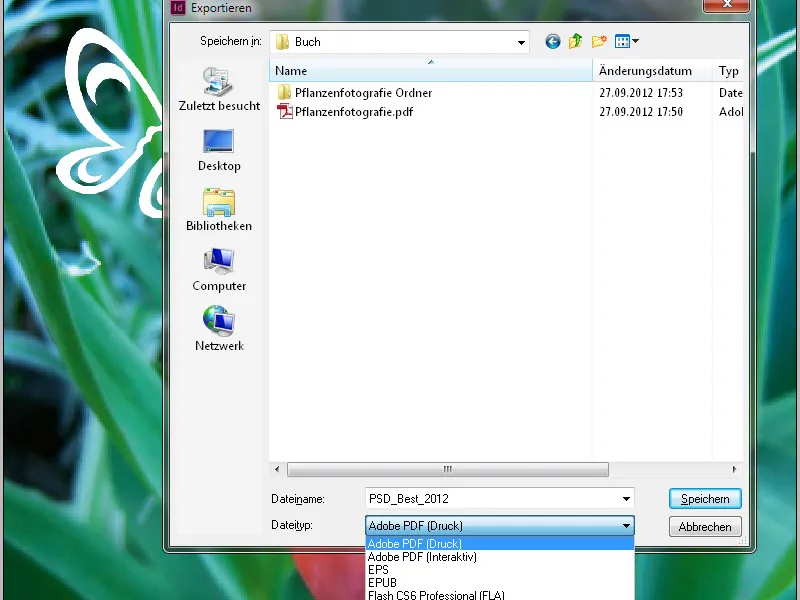
The export of a printable PDF file is explained below using the Adobe InDesign layout application as an example. You can open the export dialog via the File menu or more quickly with the shortcut Ctrl+E. In addition to the name and target folder, make sure that PDF is set as the file type for printing, as the elements of interactive PDF documents cannot be interpreted by the imagesetter of a print shop, not to mention the resolution, which is only relevant for the monitor.
After clicking on Save, the PDF export dialog opens. The settings to be made here are of decisive importance for the output result. Different settings are required for different purposes. To avoid having to adapt the many options to the desired output purpose (e.g. for screen or print output) each time, Adobe provides different settings in the form of profiles. These can be found in the drop-down menu of the PDF preset line.
Fortunately, there are also two for print output.
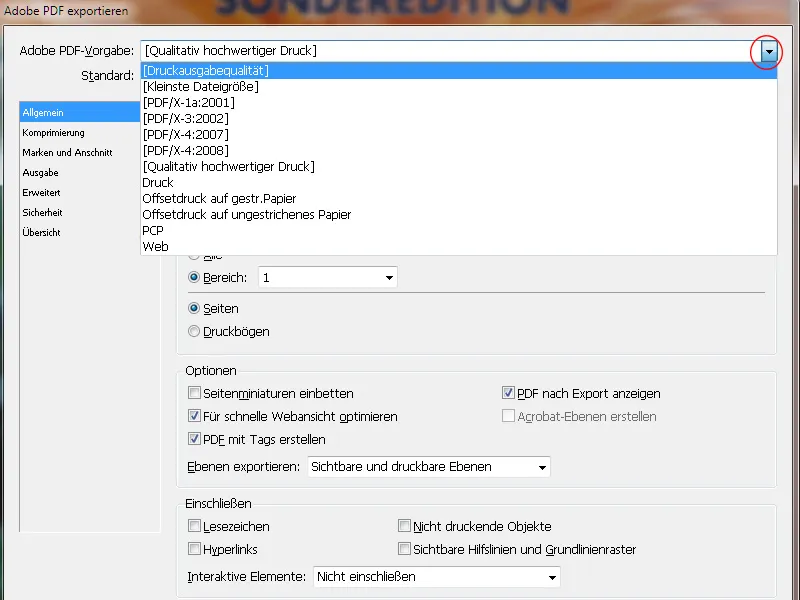
Selecting one of these export profiles is a good start, but still leaves something to be desired for our requirements, which is why the settings are further adjusted and then saved under a new name as an individual profile for output in offset printing for later use.
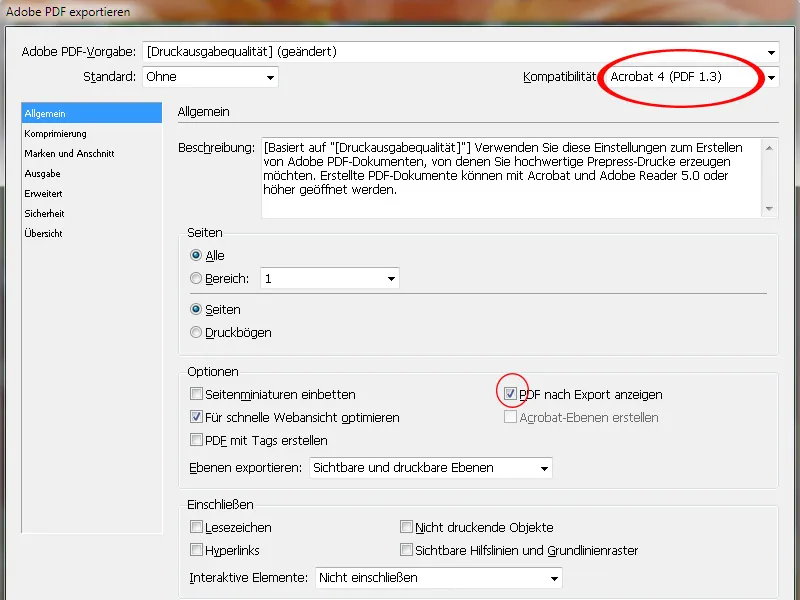
First, change the setting in the Compatibility field to Acrobat 4 (PDF 1.3). The reason for this is that this Acrobat version does not yet recognize transparencies. And the software of the imagesetter in the print shop, which converts the file into raster data using the PostScript page description language also developed by Adobe, does not recognize transparencies either. Therefore, these must also be reduced during output. This will only change once the successor to PostScript, the Adobe PDF Print Engine (APPE), has been introduced across the board in print shops.
(However, you can also ask your print shop about this and then, if necessary, set the compatibility to version 1.4). And as beautiful as the file looks on the screen, the moment of truth always comes at the imagesetter. Caution is also advised when using so-called distiller settings, which some print shops make available to their customers as a file. These are actually intended for converting PostScript to PDF files, where the transparencies have already been reduced when the PostScript files were created.
However, when exporting the layout file directly to a PDF file, the transparencies are retained from version 1.4 onwards. It is therefore always better to create your own PDF export settings.
In the Description field, you can enter a few important keywords for later assignment of the settings you have made. In the options on the General tab, you can display the file after the export and make sure that the visible and printable layers are included. Nothing must be activated in the Include area, not even interactive elements.
The standard for data exchange (the X stands for Exchange) can be set to PDF/X 1a (CMYK and spot colors are supported here) or, for media-neutral production with RGB data, PDF/X 3 (other color spaces such as RGB and Lab are also supported here), preferably after consultation with the print shop.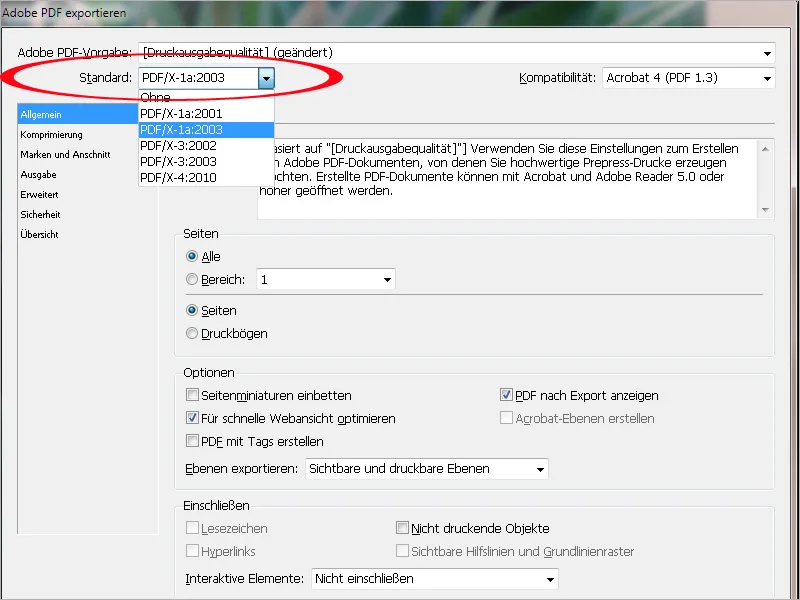
On the Compression tab, the settings of the profile for the print output quality for an output in 70 raster (standard in offset printing) can be adopted with a small adjustment, i.e. a compression to 300 ppi of images with a resolution of more than 350 ppi (more is not necessary and only enlarges the file) or 1200 ppi for line drawings with a resolution above 1800 ppi.
As a quick look at the links paletteshows, this can very quickly occur simply by fitting images into a smaller image frame in the layout. The resolution multiplies accordingly, as do the file size and the processing times at the imagesetter. For this reason, the image data should also be cropped to the frame by ticking the checkbox.
Compression should be carried out automatically using JPEG with maximum image quality.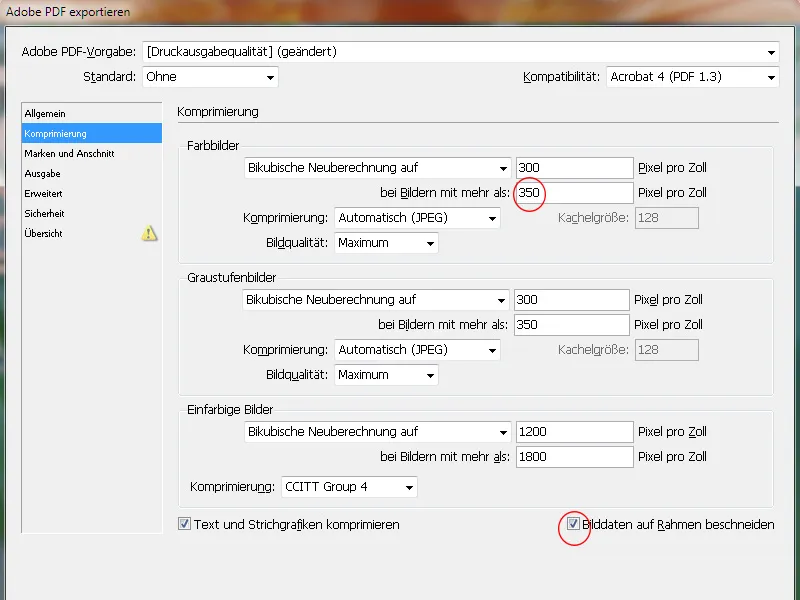
On the Marks and Bleed tab, only the document's bleed settings (usually 3 mm) should be used.
The pages of the document are automatically positioned on the print sheet using the print shop's imposition software according to the logic of the page sequence, taking into account any additional bleed for brochures, and the required crop and register marks and color control strips are applied there. Marks already created in the PDF are irritating and will only get in the way later.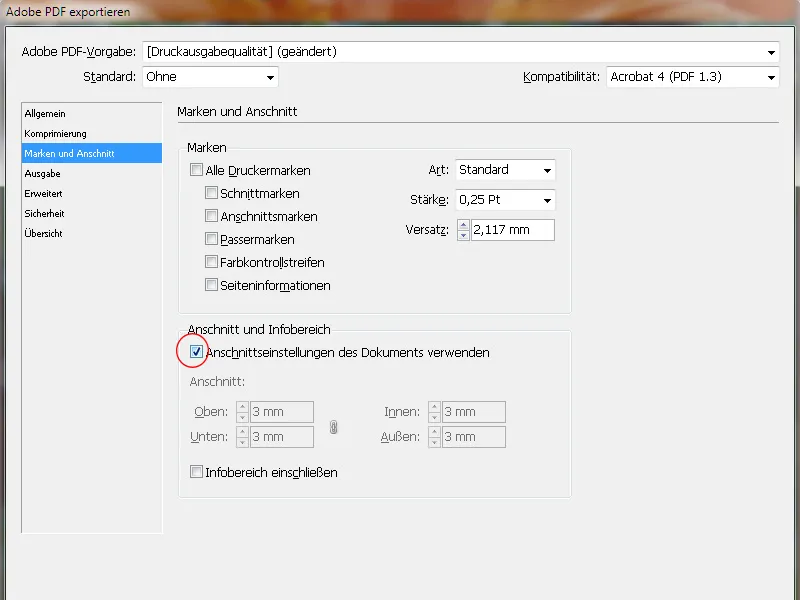
On the Output tab, the Convert to target profile (retain values) entry must be selected under Color conversion. This means that RGB images are converted to the target color space (CMYK), but not CMYK images, which retain their native values.
Logically, the target is initially the CMYK color space, but the exact profile depends on the substrate. For coated (picture printing) paper it would be ISO Coated v2 (ECI) - for newspaper printing it would be a completely different one.
This setting is very important and should be clarified with the print shop beforehand to be on the safe side.
Finally, the profile selected as the target is automatically embedded as the output intent.
One last look at the Ink Manager should convince you that only the color channels intended for printing are actually output.
Since InDesign CS6, it is also possible to export a file for monochrome printing. To do this, select e.g. Dot Gain 15% as the target profile. The PDF file no longer needs to be converted to a grayscale PDF using sophisticated tricks.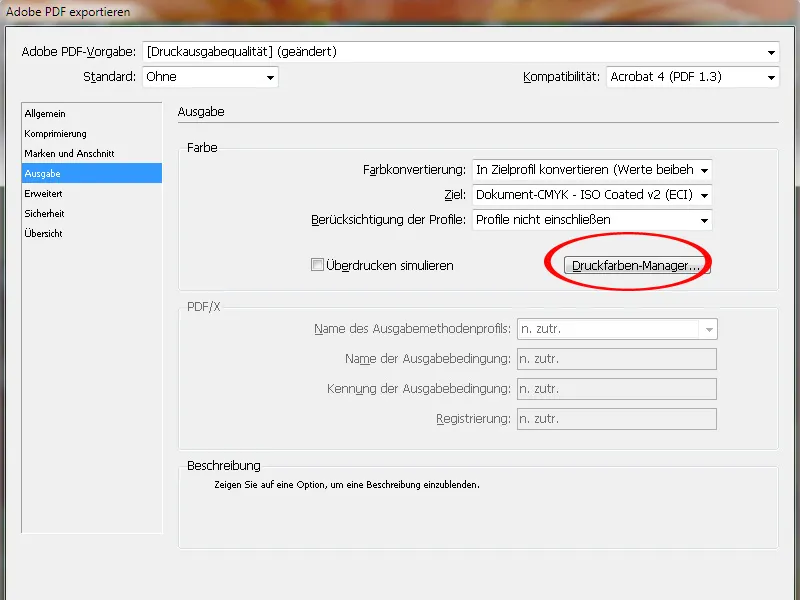
On the Advanced tab, the transparency reduction is first set to High resolution. This converts the formerly transparent objects into a combination of vector and image data with sufficient quality.
A tick in the checkbox below this ensures that deviating settings on the print sheets of the InDesign document (can be set differently for the print sheets in the InDesign page palette) are ignored.
It is also important to embed the fonts in the PDF document. The default value of 100% suggests a misleading message:
It does not embed 100% of the fonts used, but only if 100% of all the characters present in the fonts used in total have also been used in the document. As this is very rare, this means that only the characters used in the document are embedded.
This makes it more difficult to make small text corrections in the PDF file if the required character is not present in the document.
Therefore, edit the value to 20%. In this way, only the characters used are embedded in small, simple documents and the complete font is embedded in more complex documents.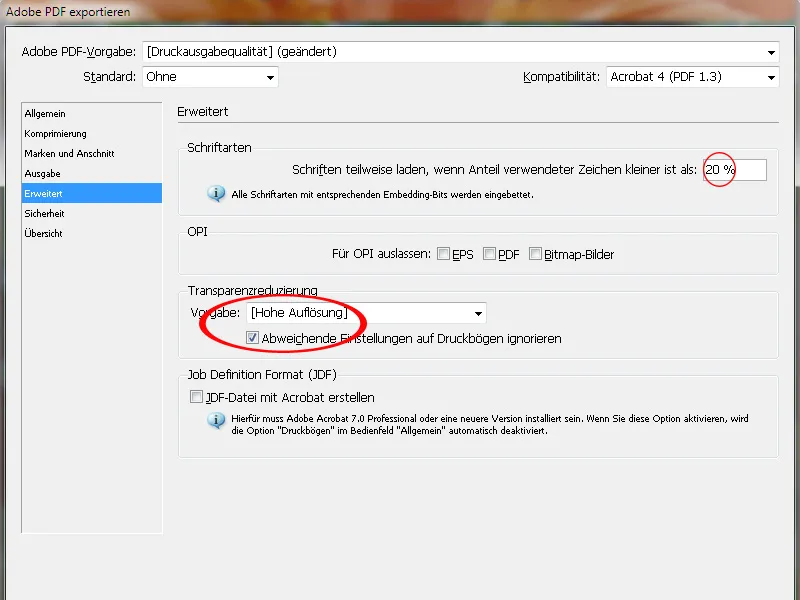
No passwords may be assigned on the Security tab, as the workflow in the imagesetter would otherwise be aborted at this point.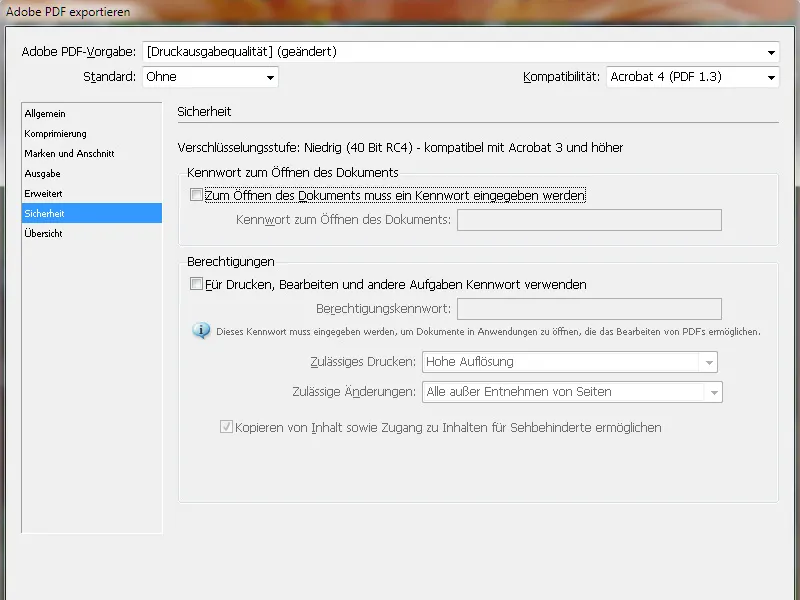
Finally, save these settings for later use under a catchy profile name and click on Export.
InDesign will now start the conversion, which, depending on the size of the document, the resolution of the images and your computer capacity, will give you time to look out of the window, go to the coffee machine or call your mom.
The only small indication that InDesign is doing what it should is a small icon in the menu bar, which only appears during this export process: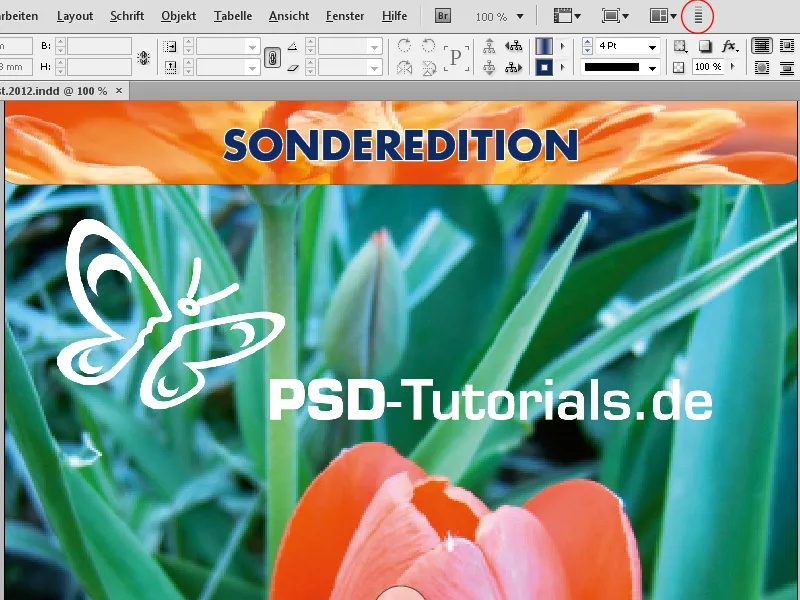
But then the result of all the previous effort opens - the PDF file.
Acrobat XI now offers a number of test profiles for analyzing the generated document to determine its suitability for output on the platesetter.
However, the bleed in the PDF file should be checked beforehand. In order to see the exact course of the bleed, it must be displayed. To do this, open the preferences in Acrobat (Ctrl+K) and tick the Show object, final format and bleed frame checkbox on the Page display tab in the Page content and information section.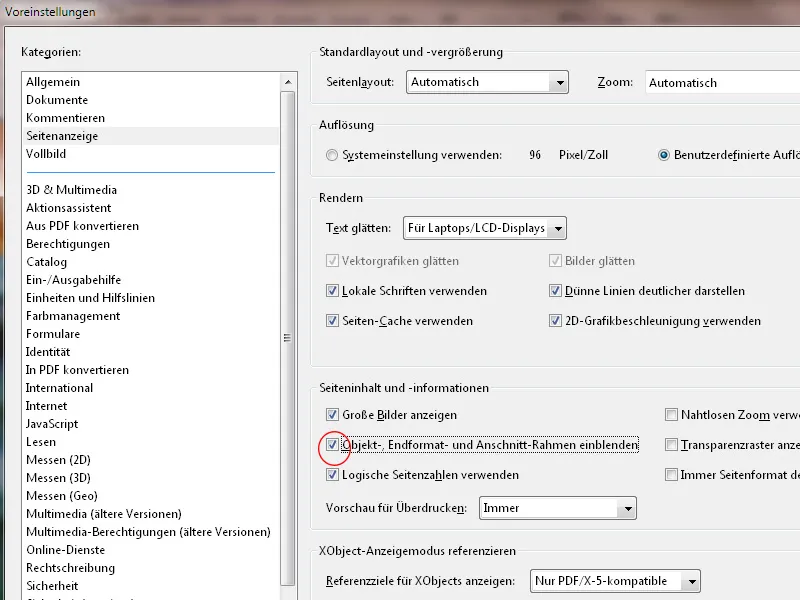
Now you can see exactly whether cropped elements protrude far enough into the bleed.