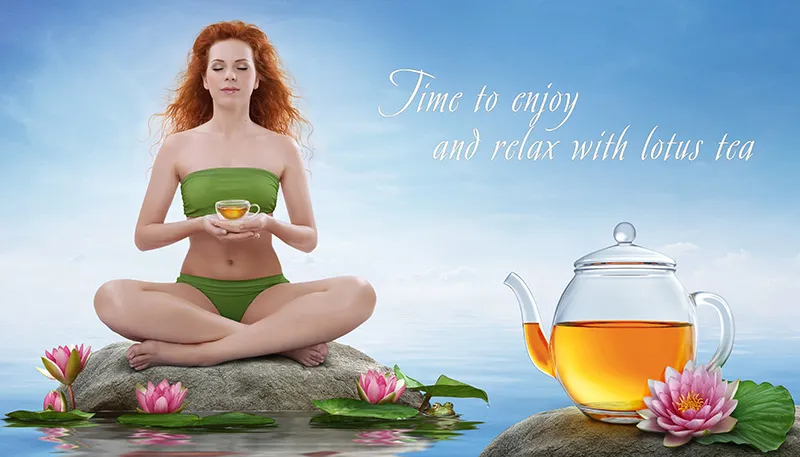
Step 1: Inserting the stone
As I explained in Part 01 - Brainstorming, I will place my main element teapot with the lotus flower at the bottom right.
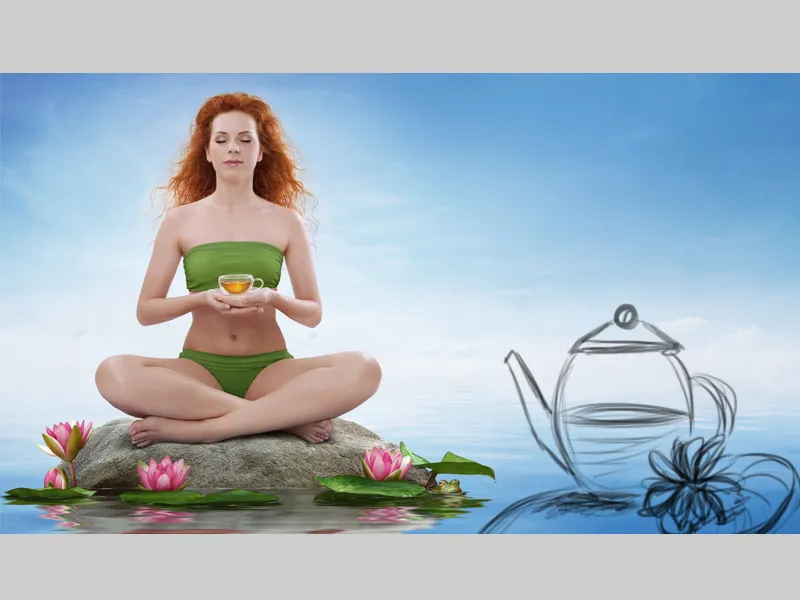
As a first step, I will place the stone by duplicating the "Stone" folder and selecting Merge Group. Now the layers are reduced to one. I move this layer to the top and name it "Stone", which I place at the bottom right of my image. Now I'll create a new, empty layer with a clipping mask, name it "Shadow" and set the layer to Multiply mode. I will paint shadows on the layer. Using a soft brush with low opacity and a flow of about 20%, I paint some shadow in the lower area. I pick up the color of the shadow from the stone with the eyedropper tool.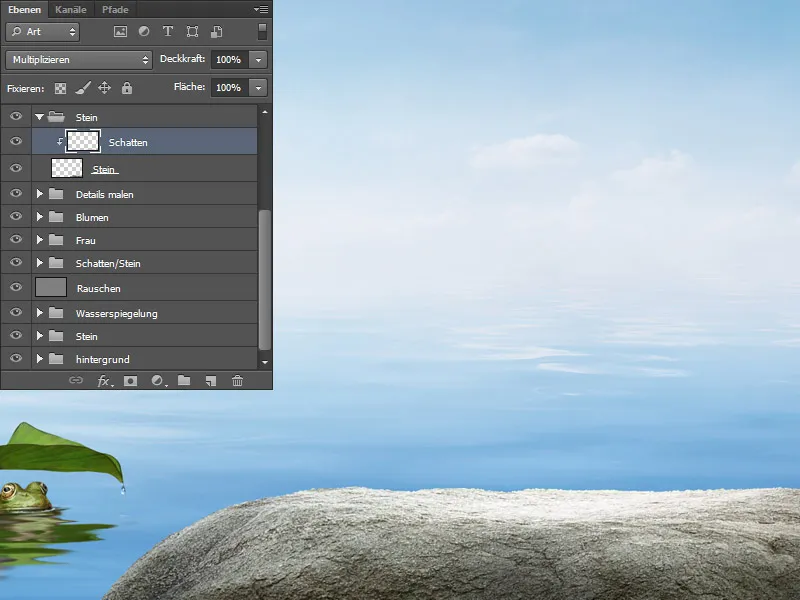
Step 2: 3D object teapot
The teapot was modeled and rendered according to my sketch in the 3D program MODO. An HDRI environment map of the surroundings was created for the rendering. This means that a spherical environment map was created from my image to illuminate the scene. The objects take on the light of the surroundings and this leads to realistic results. I then cropped the finished teapot.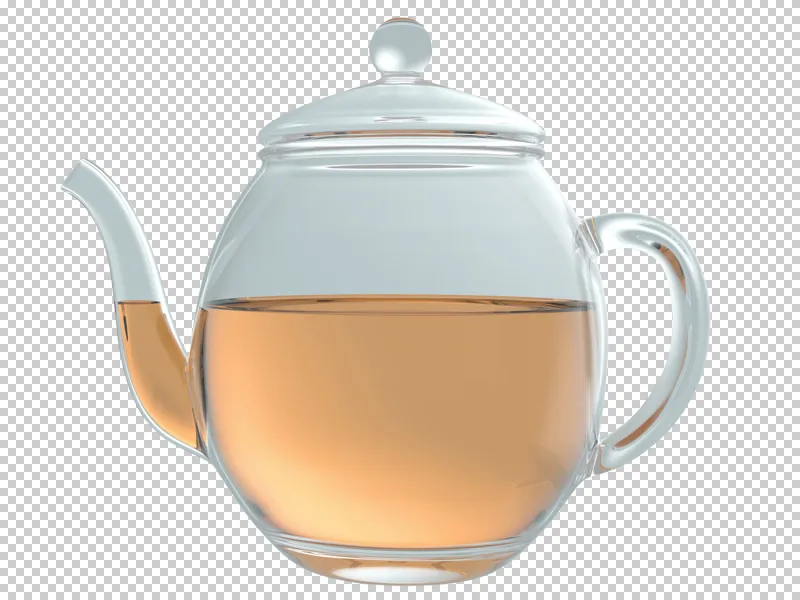
Step 3: Inserting the teapot
Now I place the teapot on the stone. I will change the following:
- The teapot has too many reflections that need to be removed; I have marked the areas in red.
- Adjust some color
- Add more contrast
- Add more luminosity
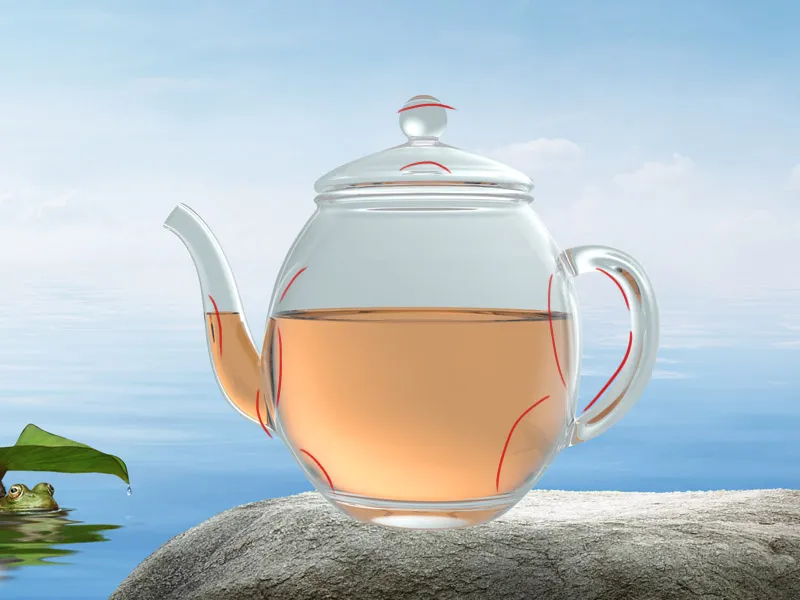
Step 4: Retouch the teapot
I call the layer with the teapot "Teapot". The first thing I'm going to do is correct the greenish tint using Selective Color Correction. To ensure that the changes only affect the teapot and not the whole image, I activate a clipping mask. I change the color to the cyan tones. Then I create a new layer with a clipping mask and call the layer "clean". I'll remove the distracting elements on the layer, or rather paint over them. I choose a soft brush and paint over the areas I don't like; I keep picking up the color with the eyedropper tool.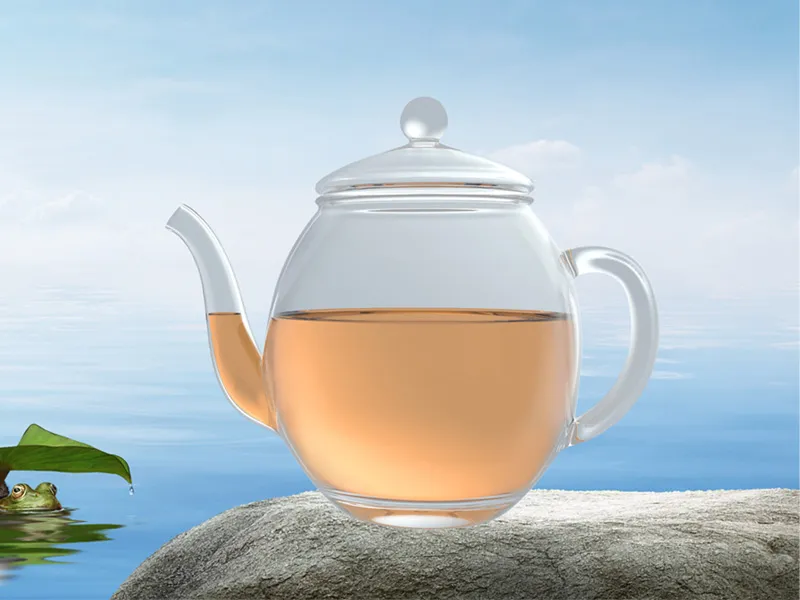
The layer overview: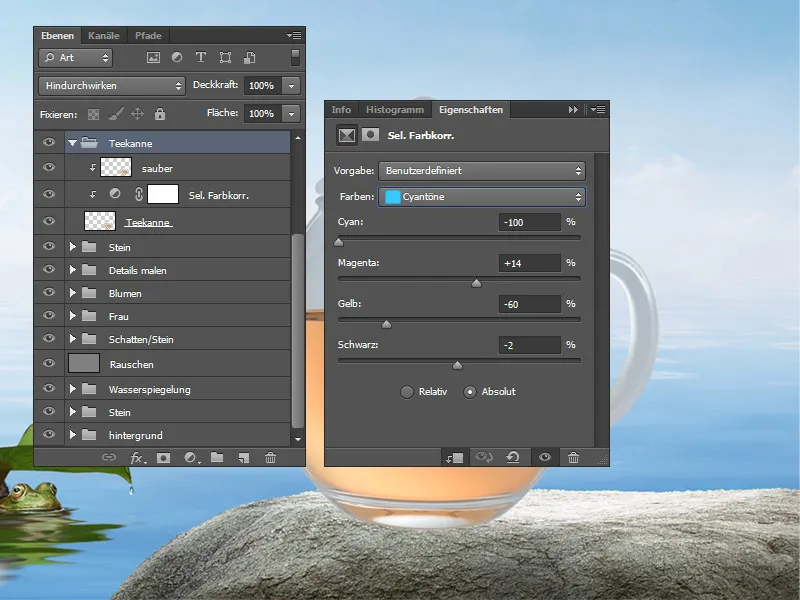
Step 5: Giving the teapot more contrast
The teapot looks very low-contrast compared to the rest of the picture. There are many ways to correct this, I will show you one of them. I will merge the layer with the teapot into a new layer and duplicate the layer twice. I will assign a blending mode to each layer. To the first layer, I'll assign the Color Burn blend mode with 100% opacity. The teapot now looks more contrasty, but also darker.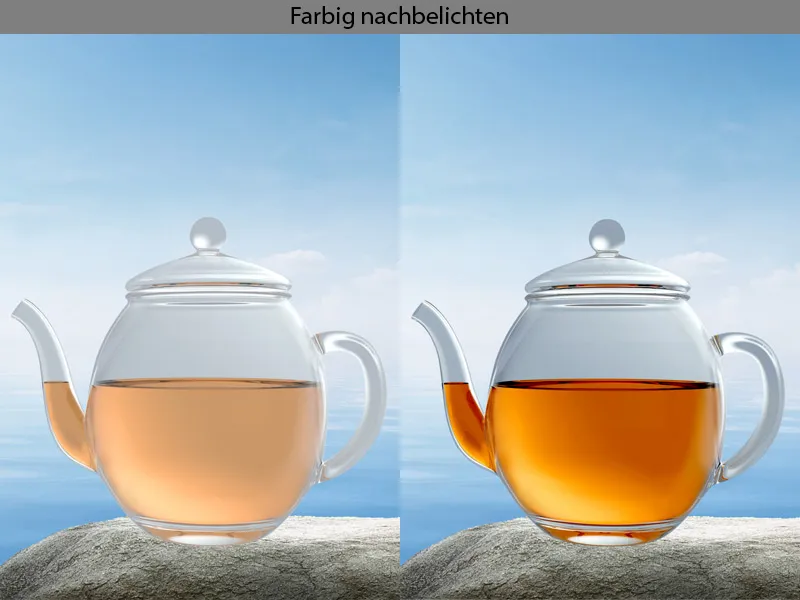
To the second layer, I assign the blending mode Overlay with 100% opacity. I create a white mask for the layer and go over the edges with a black foreground color so that they are not so lightened.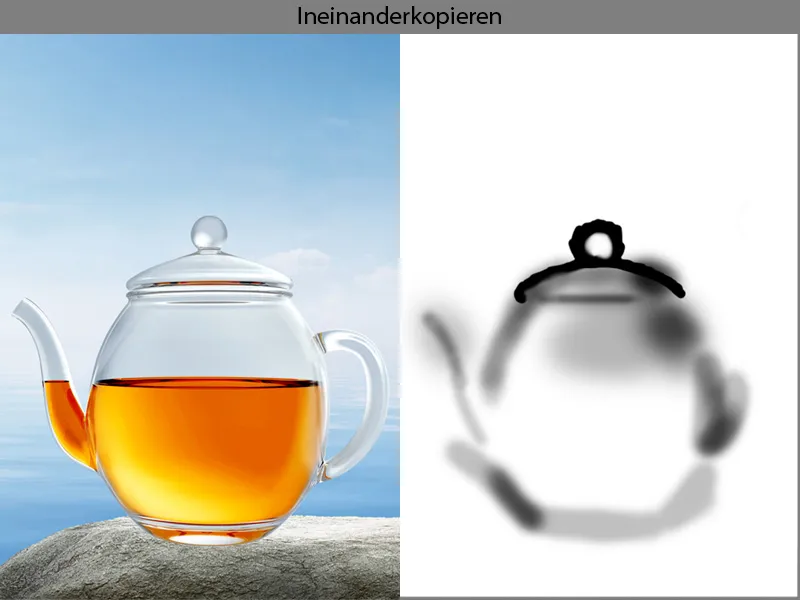
I assign the third layer the Multiply Negative blend mode with 30% opacity. I also create a white mask for the layer and go over the edges with a black foreground color. I want to lighten the center of the teapot.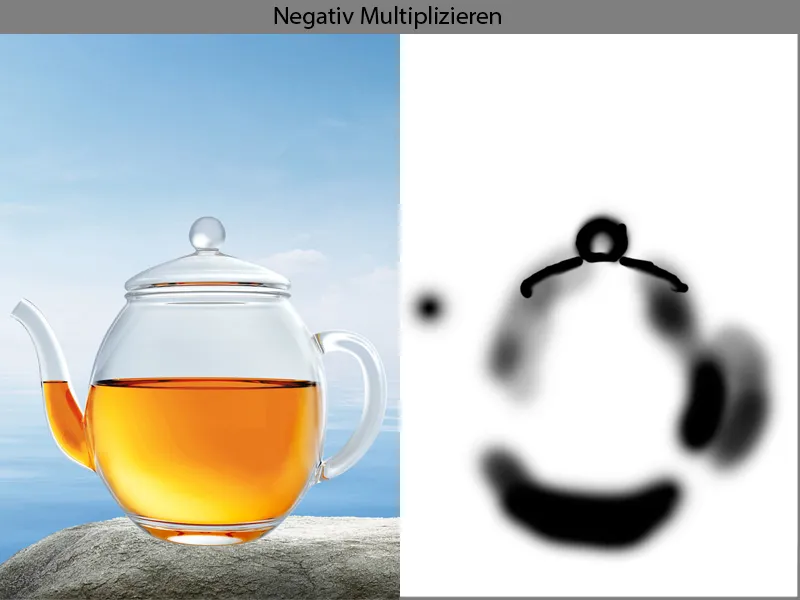
And this is what my result looks like: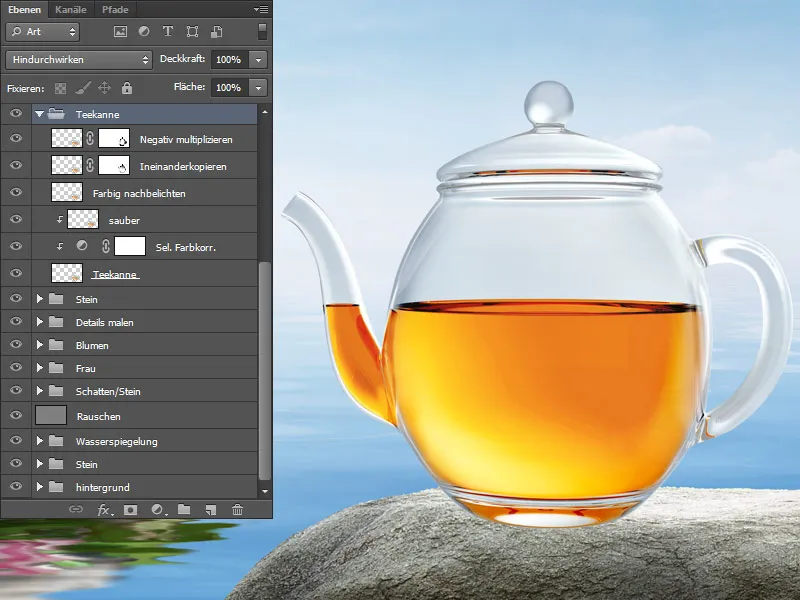
Step 6: Color and outline
Now I combine all my layers of the teapot into a new one and call it "Teapot_End". I will adjust the color of the teapot to the blue surroundings. I'll do this using color balance; I'll add more cyan and blue to the midtones. Don't forget to activate the clipping mask. I mask out my correction with a black mask and paint over the glass surfaces with a white foreground color.
Now I'll give the teapot a little more contour.
I create a new layer with a clipping mask in Multiply mode. Using a soft brush with low opacity and flow at around 10-15%, I carefully go over the edges. I take the color from the sky. I don't like the teal surface because the transitions are not so smooth. I create a new layer and call it "smudge finger", select the smudge finger tool and smudge the transitions. It's important to always blur in the direction of movement! I combine all the layers into one folder and call it "Teapot".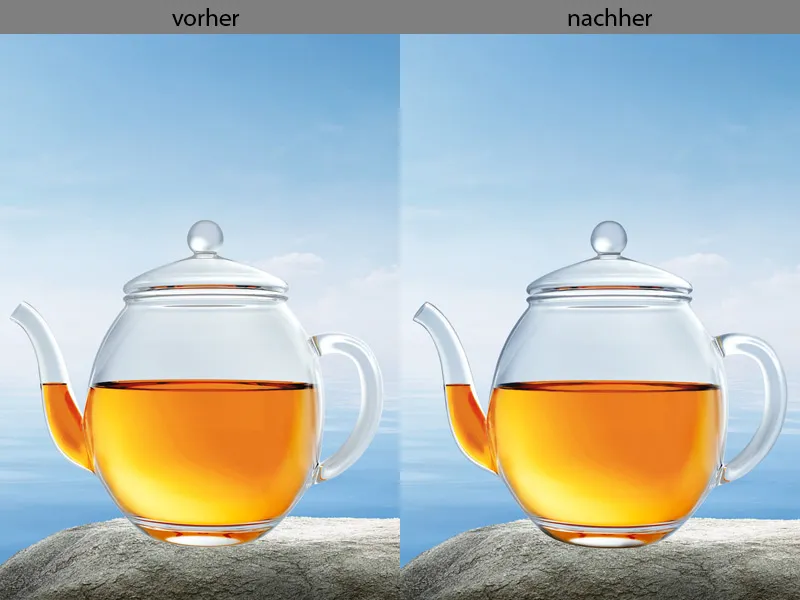
The layer overview: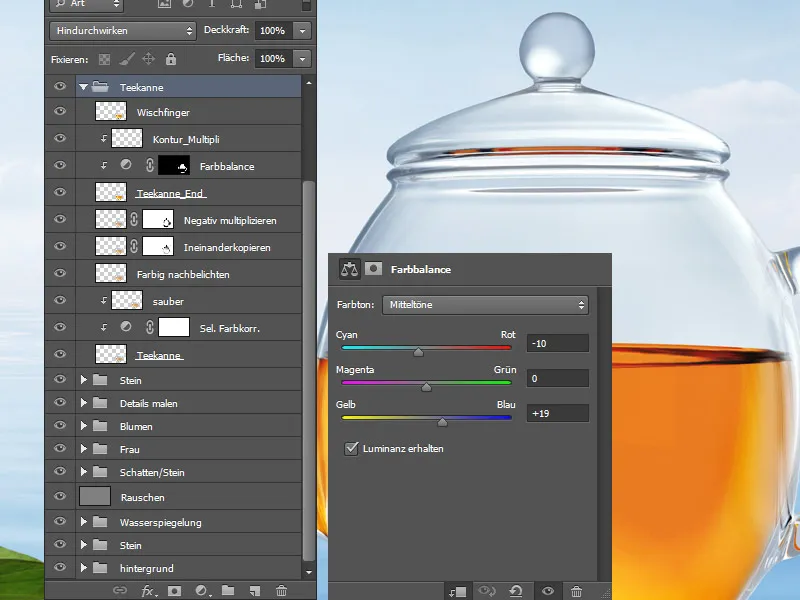
Step 7: Painting shadows under the teapot
I combine all the layers of the teapot into a new layer, call it "Teapot" and put it in a new folder, which I call "Teapot_End". I create three new layers under this layer. I assign the Multiply blend mode to the bottom layer and, using a soft brush with low opacity and a flow of about 10-15%, I paint a shadow to the left of the teapot. The color of the shadow is a warm yellow-orange tone. The closer to the teapot, the more intense and darker the color.
I assign the Linear light blend mode to the next layer. The light comes through the teapot and is reflected on the stone, and I paint these luminous reflections with the same brush. I take the color from the teapot, a rich yellow. I paint the light reflections closer to the teapot.
I assign the Multiply blend mode to the last shadow layer and use the same brush to paint a slightly harder shadow in a brown tone under the teapot. I paint on the layer with the same brush , a little closer to the teapot.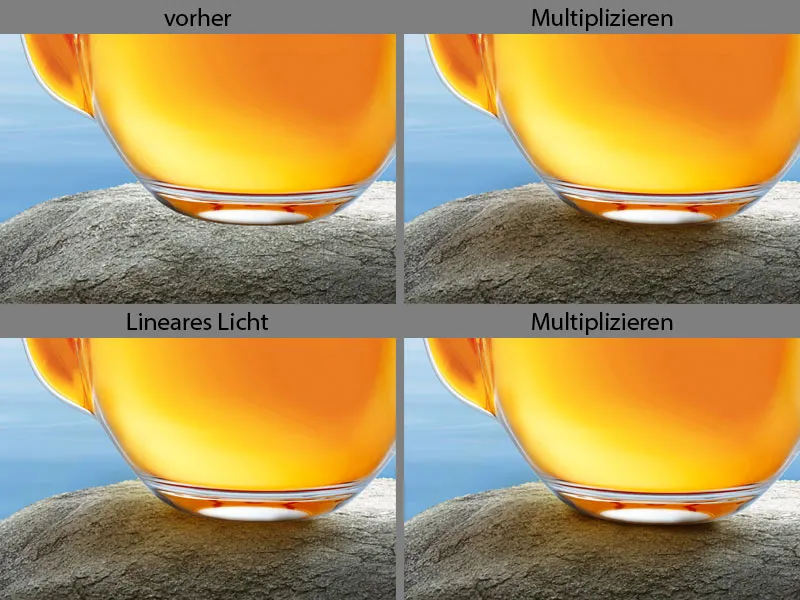
The layer overview: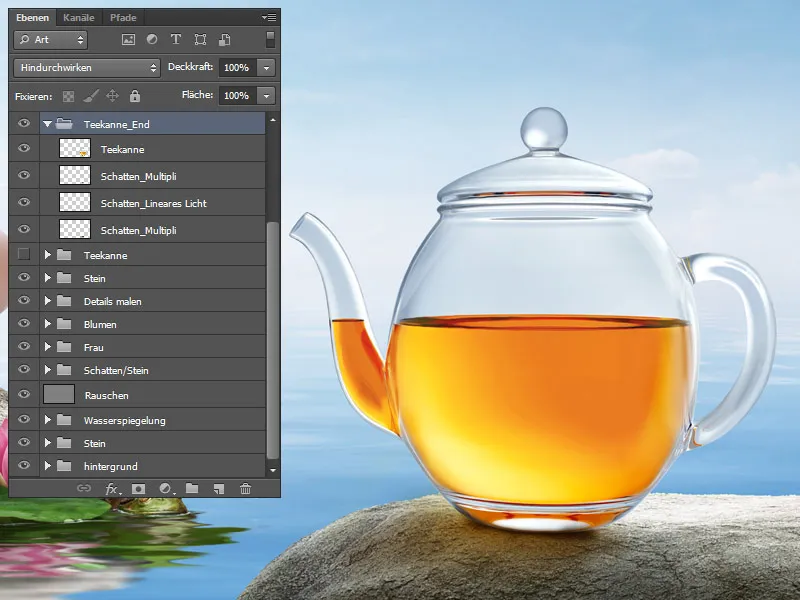
Step 8: Adding the lotus and leaf and painting the shadow
I place the lotus flower and the leaf to the right of the teapot. I call the layer with the leaf "Leaf" and put it in a folder, which I also call "Leaf". I call the lotus flower "Lotus" and also put it in a folder that I call "Lotus". Now I'm going to paint shadows under the lotus flower and the leaf. I go to the "Leaf" folder and create a new layer under the "Leaf" layer, which I call "Shadow". I assign the Multiply blend mode to this layer.
Using a soft brush with low opacity and flow at approx. 10-15%, I paint shadows; the closer to the leaf, the darker the shadows become. The color of the shadows is a dark green. It is very important to use the color of the object for the shadows!
Now I do the same in the "Lotus" folder. I create a new layer under the "Lotus" layer in Multiply mode. And with the same brush I paint the shadow under the Blum. The color of the shadow is a light shade of pink.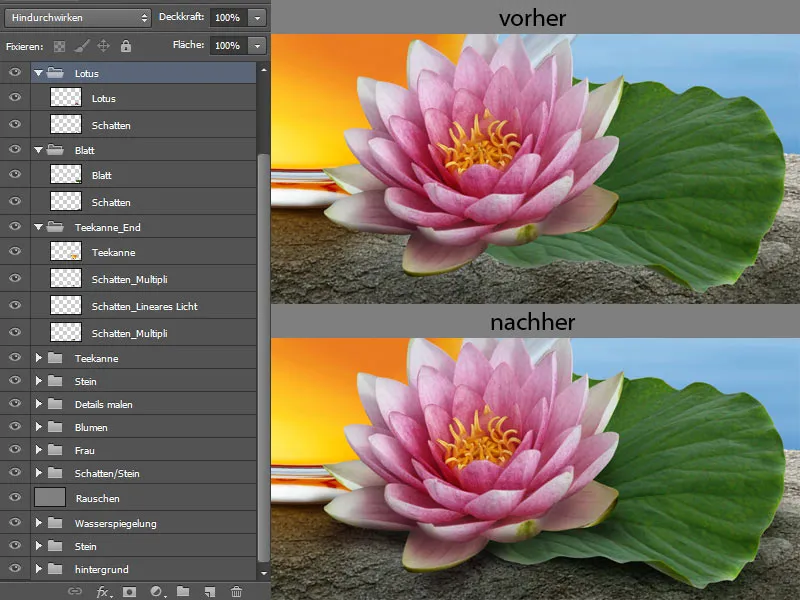
Step 9: Mirroring the lotus flower
Now I duplicate the lotus flower and put this layer in the "Teapot_End" folder. I call the layer "Reflection". I can transform the Blum using the keyboard shortcut Ctrl+T and select the Deform option. I transform the Blum so that the leaves are touching. When I am happy with the result, I confirm the entry with OK.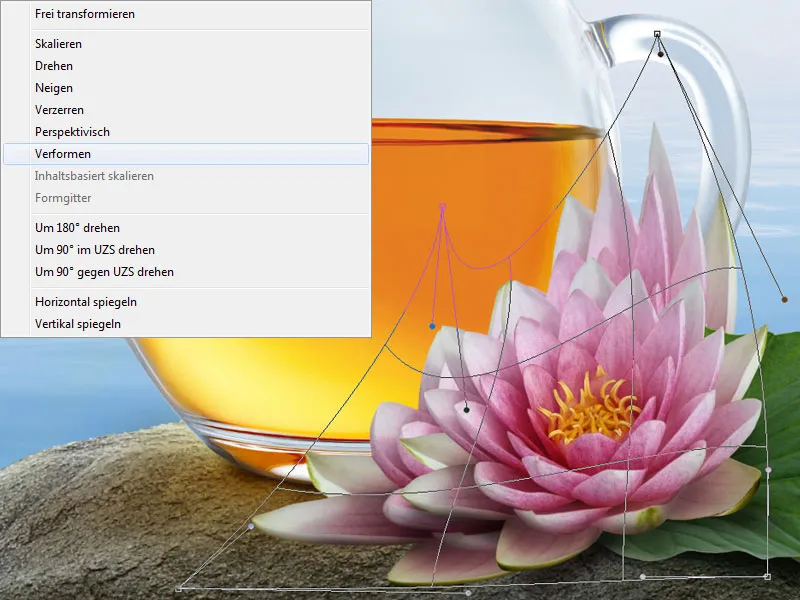
I assign a clipping mask to the layer and use the eraser tool to erase everything except the reflection. Using a smudge finger tool, I blur the structure a little and assign the layer the Color Burn blend mode with 100% opacity.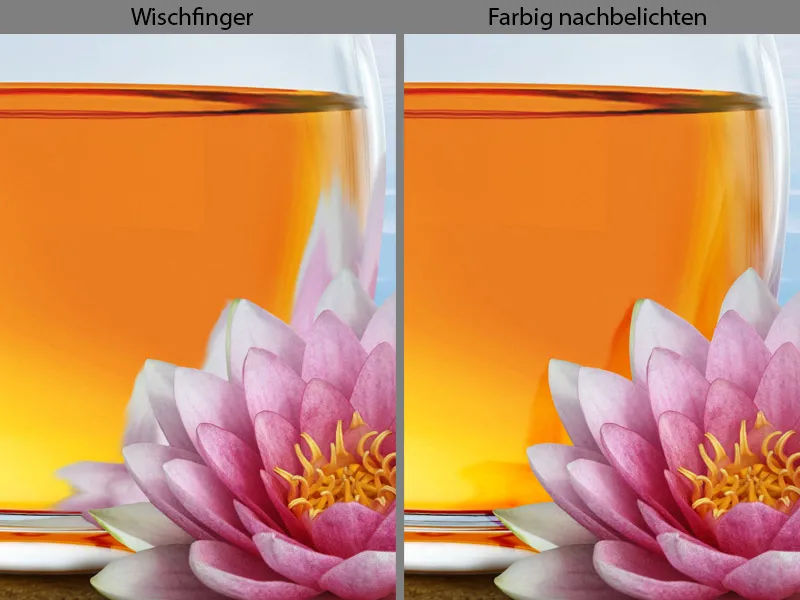
Step 10: Painting color reflections
Now I will paint the color reflections on the teapot handle step by step. The more color tones you have, the more realistic the result will look.
Above the layer with the reflection, I create a new, empty layer with a clipping mask in Multiply mode. There is a green leaf under the teapot handle and the green color is reflected onto the handle. I choose a brush tip to paint with a medium opacity and a flow of about 50%. I paint over the handle with light strokes in the direction of flow. I pick up the paint from the sheet and try to pick up different shades of color each time with the pipette.
Using the layer in Multiply mode, I create a new, empty layer with a clipping mask in Normal mode. I will paint the color reflections from the lotus flower on the layer with the same brush. I take the color from the Blum.
On the next layer with a clipping mask and in Color Dodge mode, I will paint slightly lighter color reflections with the same brush.
As a final step, I will paint shadows from the lotus flower on the teapot. To do this, I'll create the last clipping mask in Multiply mode. And using the same brush with an opacity and flow of approx. 10-15%, I paint shadows under the leaves. I pick up the color from the teapot with the pipette.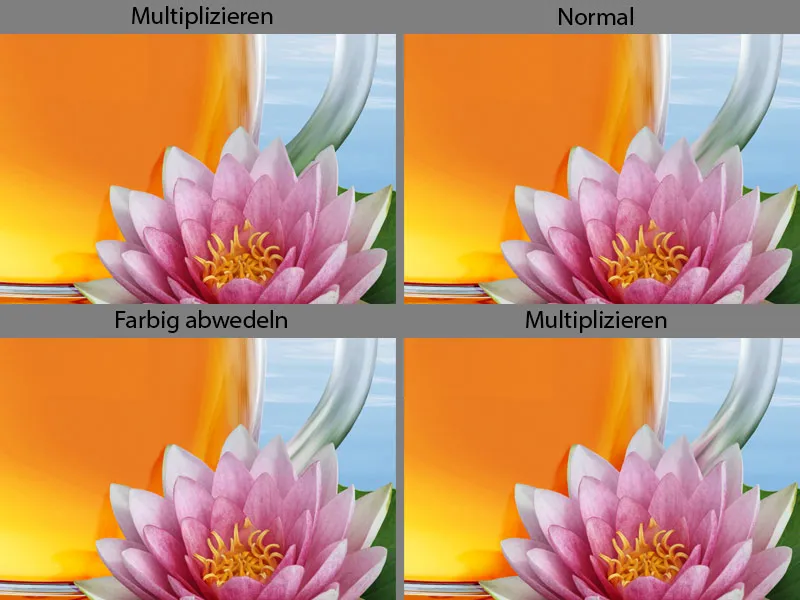
This is the layer overview again: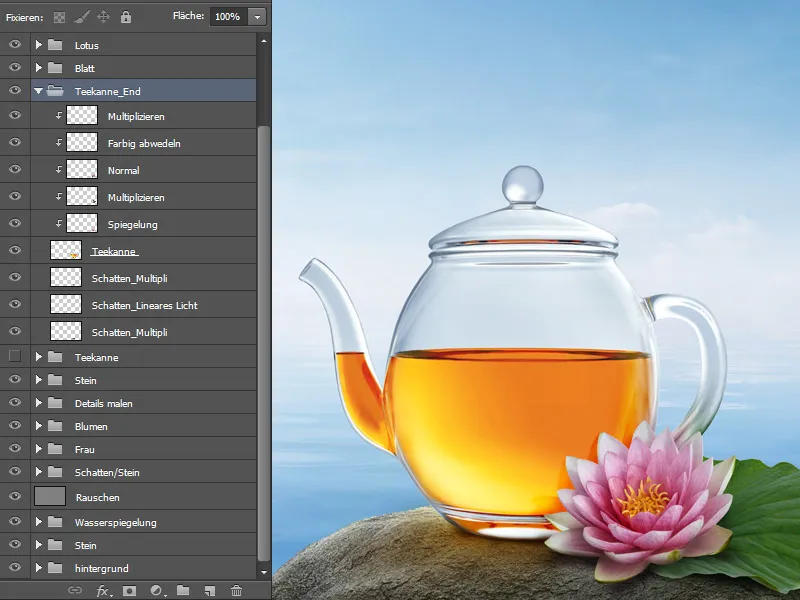
Step 11: Adding a reflection of the stone
In the "Stone" folder, I select the spot with the lasso tool and duplicate it on a new layer. I move the layer to the "Teapot_End" folder, name it "Floor" and create a clipping mask. Now I will transform the stone floor a little and select the Deform option. Then I confirm the entry with OK.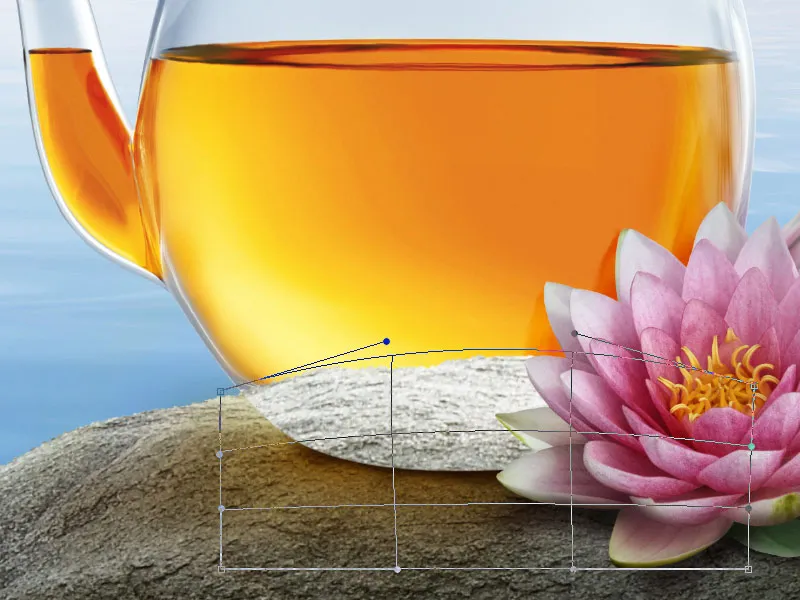
Using the smudge finger tool, I smudge the stone structure with slight wavy movements in the running direction. When I'm happy with the result, I assign the Multiply blend mode with 100% opacity to the layer.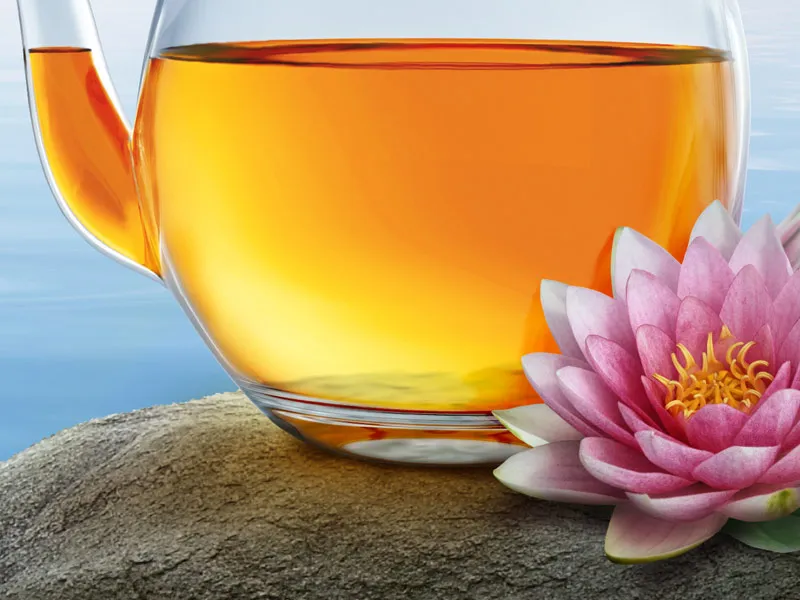
Step 12: Adding noise
As a final step in editing the teapot, I'll add some noise to make it fit in with the rest of the image. I create a new layer, fill it with 50% gray in Soft Light mode and assign it a clipping mask. I go to Filter>Noise Filter>Insert Noise.
I set the strength to approx. 5%, select Gaussian normal distribution and Monochromatic. The noise strength always depends on the size of the image and the desired effect.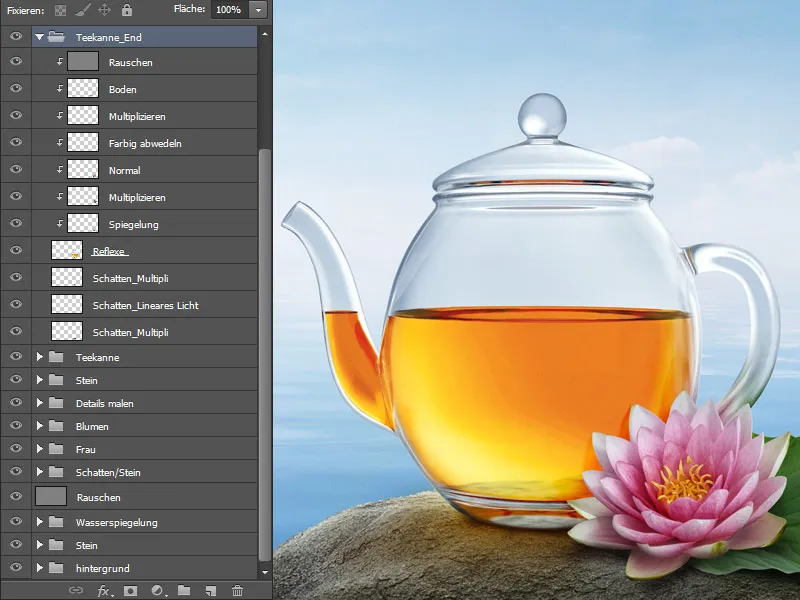
Step 13: Editing the leaf
Now I will edit the green sheet a little. In the "Leaf" folder, I will create a new, empty layer above the "Leaf" layer with a clipping mask in the Interlace mode. Using the eyedropper tool, I pick up the color from the leaf and paint in the middle of the leaf with a large brush with low opacity and a flow of approx. 30%. This gives the leaf more luminosity.
The next step is to paint over the edges to give the leaf more thickness. I create a new, empty layer with a clipping mask in Normal mode and name it "Border". Then I choose a brush to paint with, apply a dark green with the eyedropper tool and paint the edges.
I want the sheet to look a bit more three-dimensional, to have more thickness. To do this, I create a new, empty layer with a clipping mask in Multiply Negative mode. I use the same brush for this that I used for the edges. I pick up the color from the sheet with the pipette tool. And with light strokes I paint over the light areas on the leaf.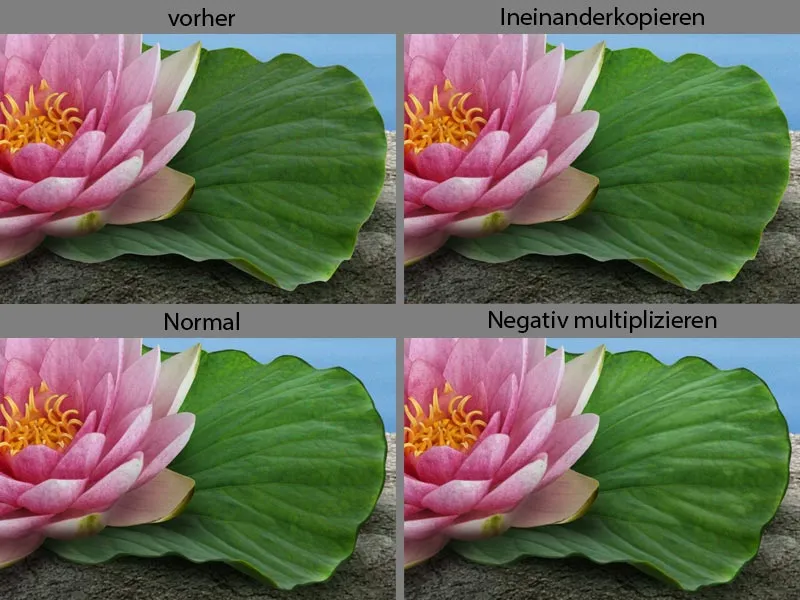
This is the layer overview again: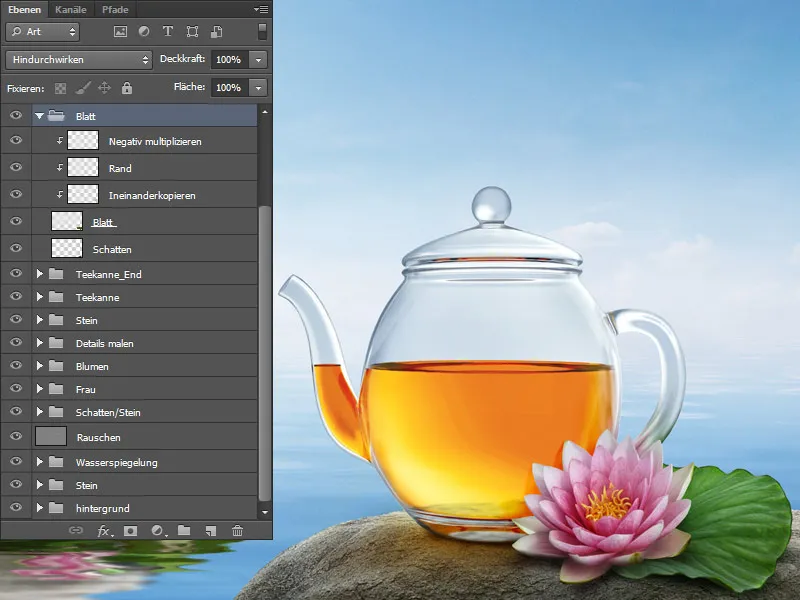
Step 14: The font
The last step is to add the text to my advertising poster. As this is an Asian tea, the font should also be Asian. The font I found best was Avalon Medium in the color white. I give the font a slight outline by double-clicking on the layer. A window opens where I have many options. I go to Contour, where I can enter the contour size, intensity and color. Then I confirm my changes with OK.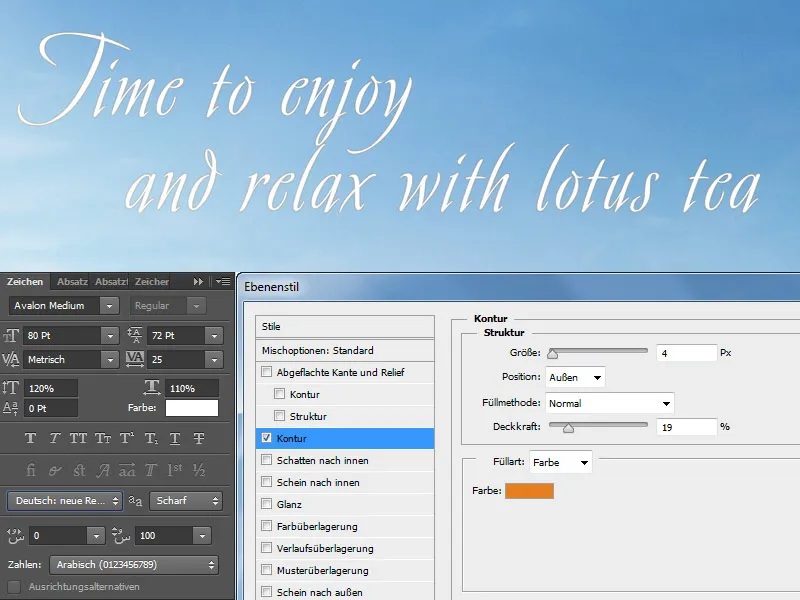
This is what the result looks like: