You have already gained initial experience with MS Visio and now want to learn how to effectively connect Shapes with each other. This function is especially helpful for creating diagrams that present complex information clearly and structured. In this guide, I will show you how to master the connection of Shapes, what options are available to you, and how you can customize the connections according to your preferences.
Key Takeaways
- You can automatically connect Shapes using the Auto-Connector.
- There are various ways to manually establish connections.
- You can format and customize the connecting lines to achieve better overview and readability.
Step-by-Step Guide
Selecting and Connecting Shapes
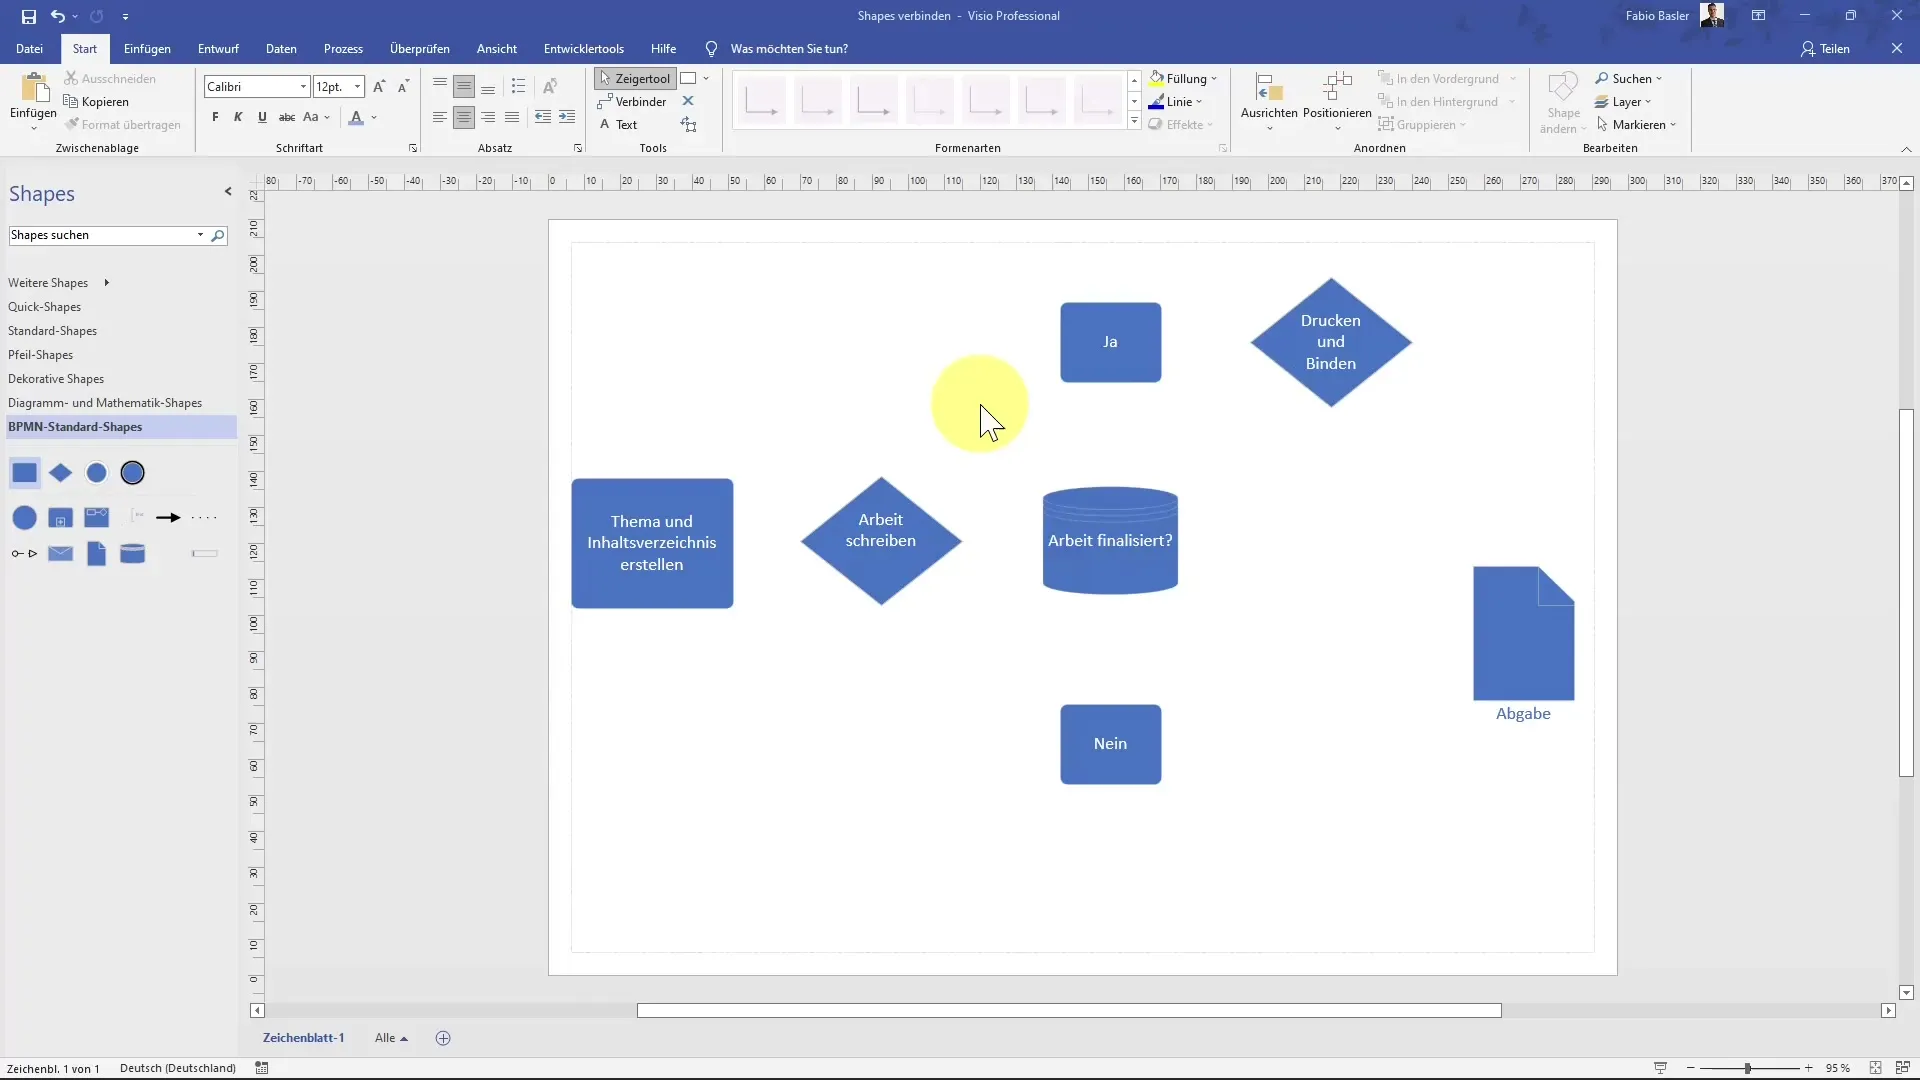
To connect Shapes in your drawing canvas, you first need the corresponding Shapes. I have already positioned some Shapes for you that represent the process of a master's thesis. You have to imagine that the first Shape is "Creating the topic and table of contents," while the second Shape represents "Writing the thesis."
To establish a connection between these two Shapes, hover the cursor over the blue arrows displayed on the edges of the Shapes.

By clicking on one of these arrows, the connection between the first and second Shape is created. This is a simple process that helps you visually link the individual steps of the master's thesis.
Activating Auto-Connector
If you are wondering how the Auto-Connector works, here is the answer: With the Auto-Connector, you can automatically connect Shapes with each other. To activate this function, go to the search bar and type "Auto connect."
After activating the function, you will see that the blue arrows on the edges of the Shapes change, making automatic connection easier.
Adding Connectors
Another way to connect Shapes is to use the Insert tab or the Home tab. You also have the option to use the shortcut Ctrl + 3 to activate the connector. This allows you to establish new connections between the Shapes without constantly switching between menus.
Creating Connection between Shapes
Once the connector is activated, you can connect the "Writing the thesis" Shape and the "Finalizing the thesis" Shape. When you click on the respective arrow, the connection is created directly.
Integrating New Shapes
If you want to add a new Shape - for example, a confidentiality note - to your drawing canvas, simply position it near the existing Shapes. You can then drag the new Shape into an existing connecting line. This intuitively integrates the new Shape into the process.
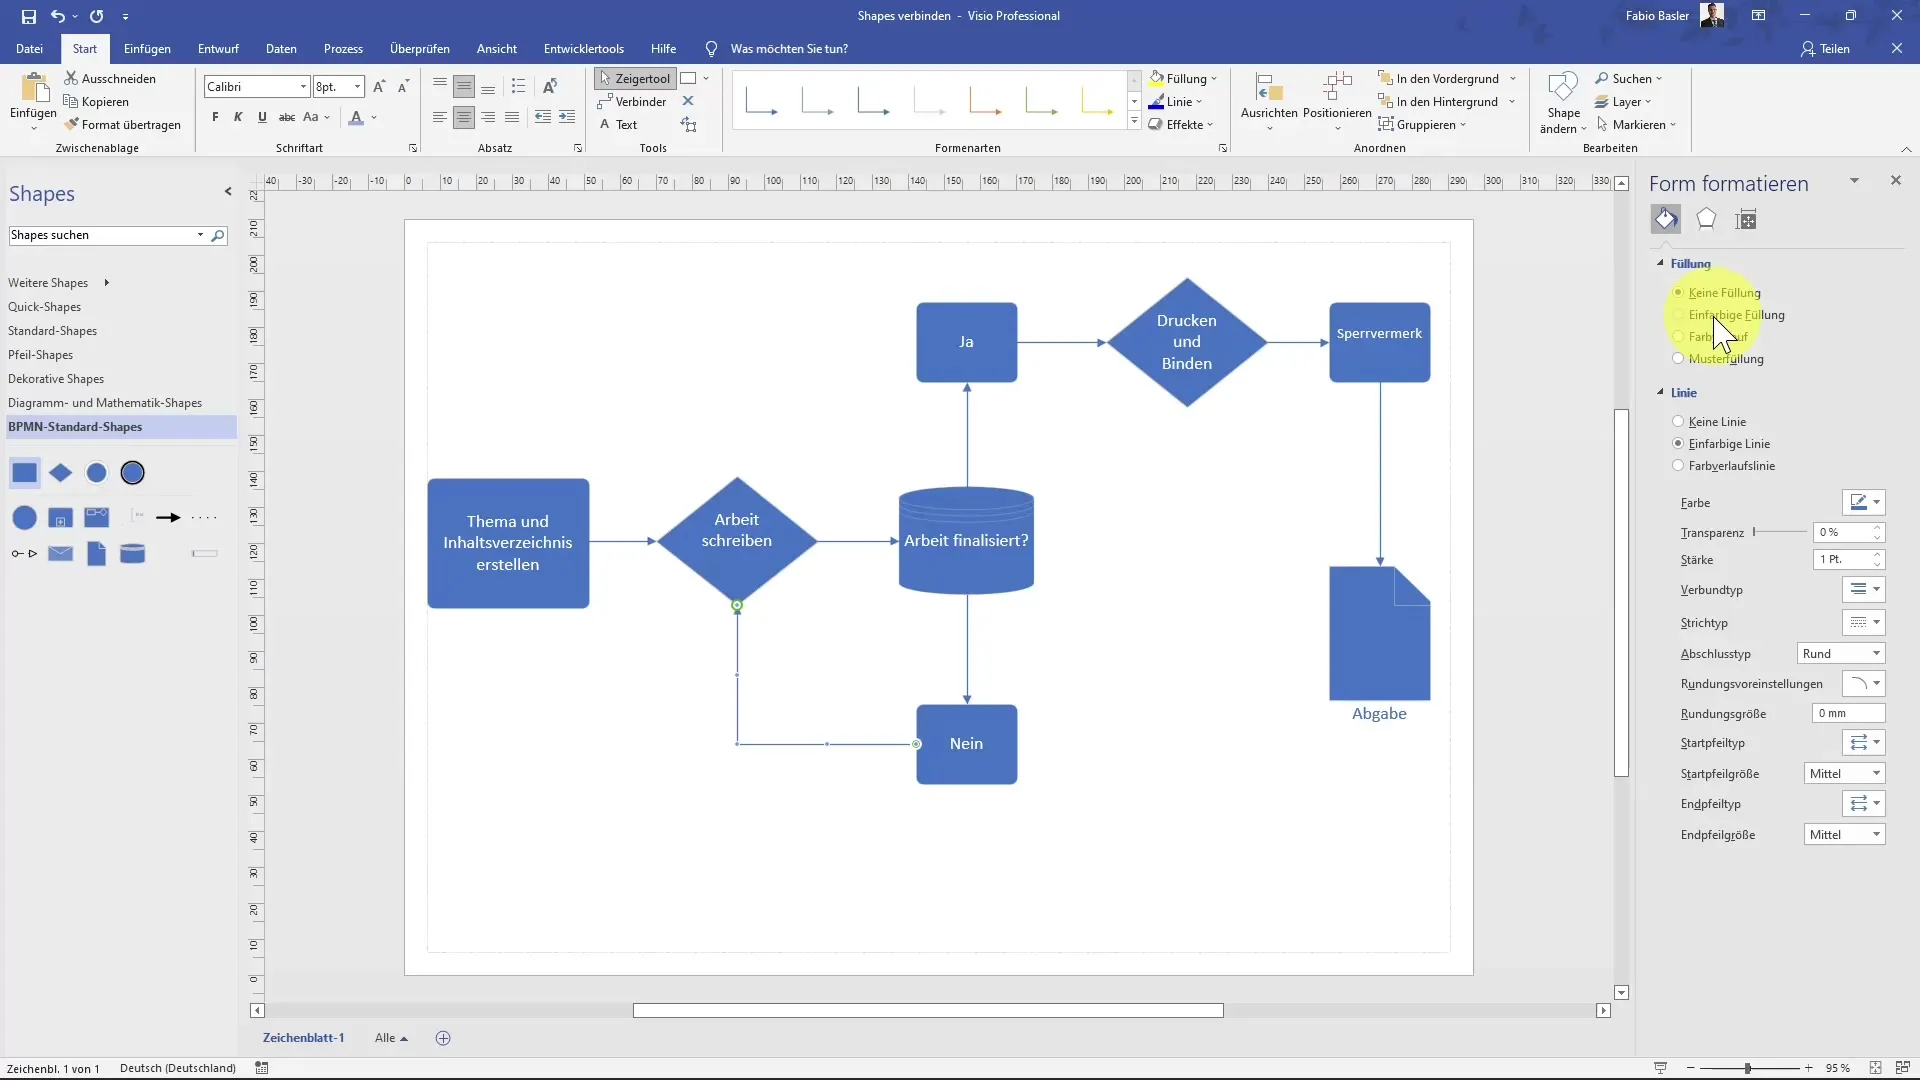
Now you will see that the confidentiality note appears between the "Printing and Binding" step and "Submission."
Formatting Connecting Lines
To further format the connecting lines, right-click on the connecting line. This will open a menu where you can choose the type of connector: orthogonal, straight, or curved.
These adjustments ensure that your diagram is both functional and aesthetically pleasing.
Adjusting Colors and Fills
The fill of the Shapes also plays an important role in readability. You can select different colors for the Shapes to make the diagram clearer. To do this, click on the Shape and select the "Format Shape" option, where you can access various filling options and colors.

Served in an appealing orange tone or in a neutral grey, you can decide what works best for your diagram.
Adjusting Line Styles and Formatting
Finally, you can also adjust the intersections and line styles of the connecting lines. There are several templates and options to configure dashed lines or other styles. By adjusting these settings, both the comprehensibility and visual appeal of your diagram improve.
Summary
In this guide, you have learned how to connect shapes in MS Visio. We explored the different options, including using the Auto-Connector and creating manual connections. Additionally, we explained how to format and customize the connection lines to create an appealing and functional diagram.
Frequently Asked Questions
How can I automatically connect the shapes?By activating the Auto-Connector in the search bar.
Which shortcuts can I use to make connections?Use Ctrl + 3 and Ctrl+ 1 to switch between different tools.
How can I integrate new shapes into an existing diagram?Position the new shape near the existing one and drag it onto the connection line.


